We’ll have a look at how to view known vulnerabilities in your Maven or Gradle projects, how to get more information about the known vulnerabilities in a specific dependency and how to remediate these vulnerabilities inside IntelliJ IDEA Ultimate if a new version with a fix is available.
In this tutorial, we’re going to take a look at managing dependencies in IntelliJ IDEA. We’ll look at different ways to add dependencies to your project, and how to add, upgrade and remove dependencies using Package Search.
Add dependencies
There are several ways to add new dependencies to your project.
From the build file using copy-paste
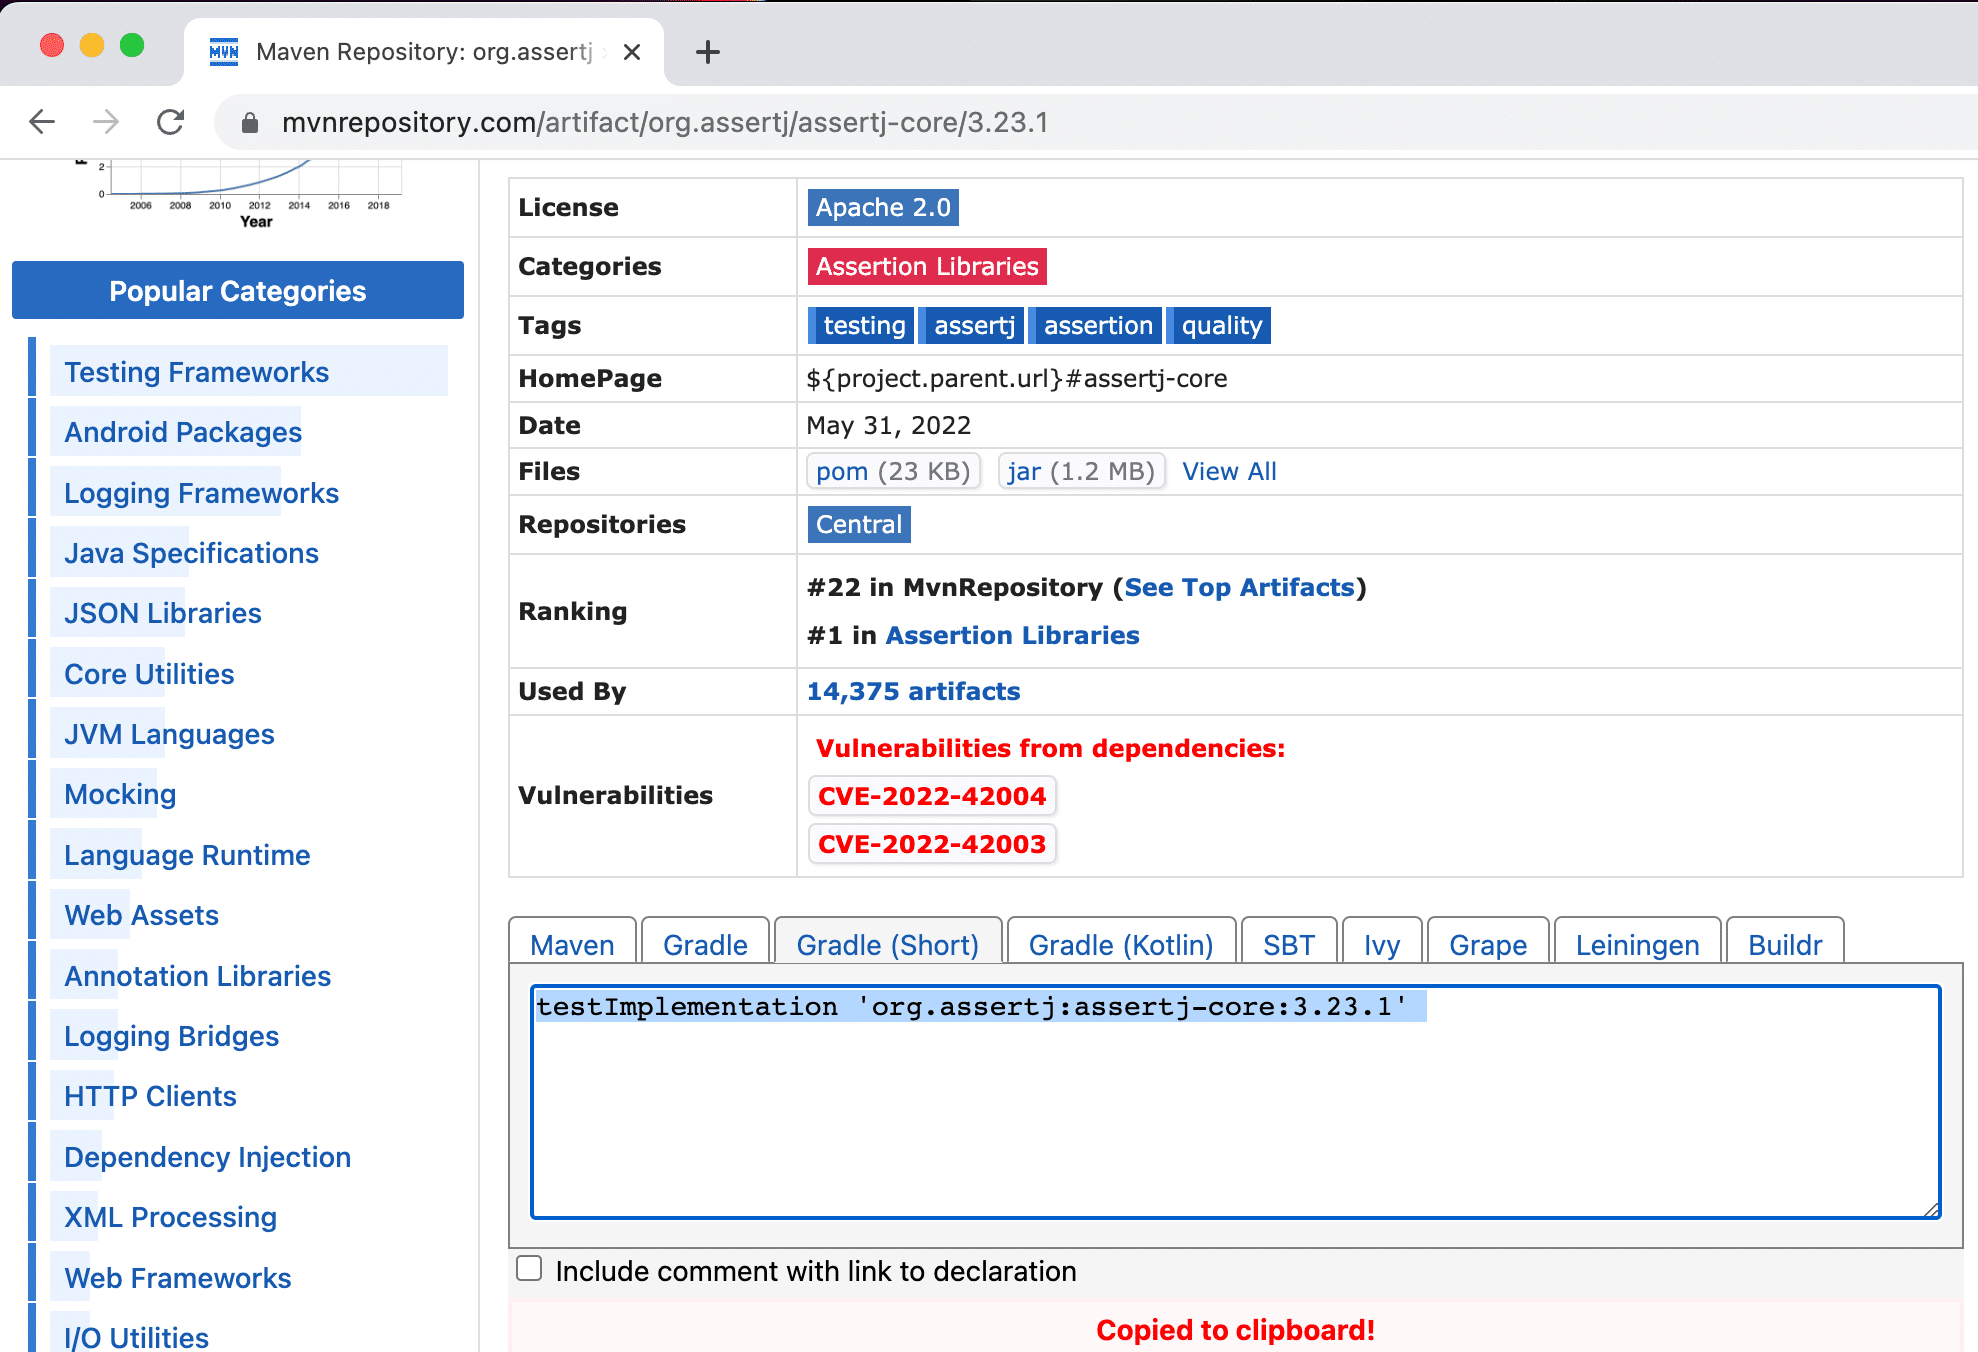
You have probably copied a dependency from Maven Repository (or another website) and pasted into your build file.
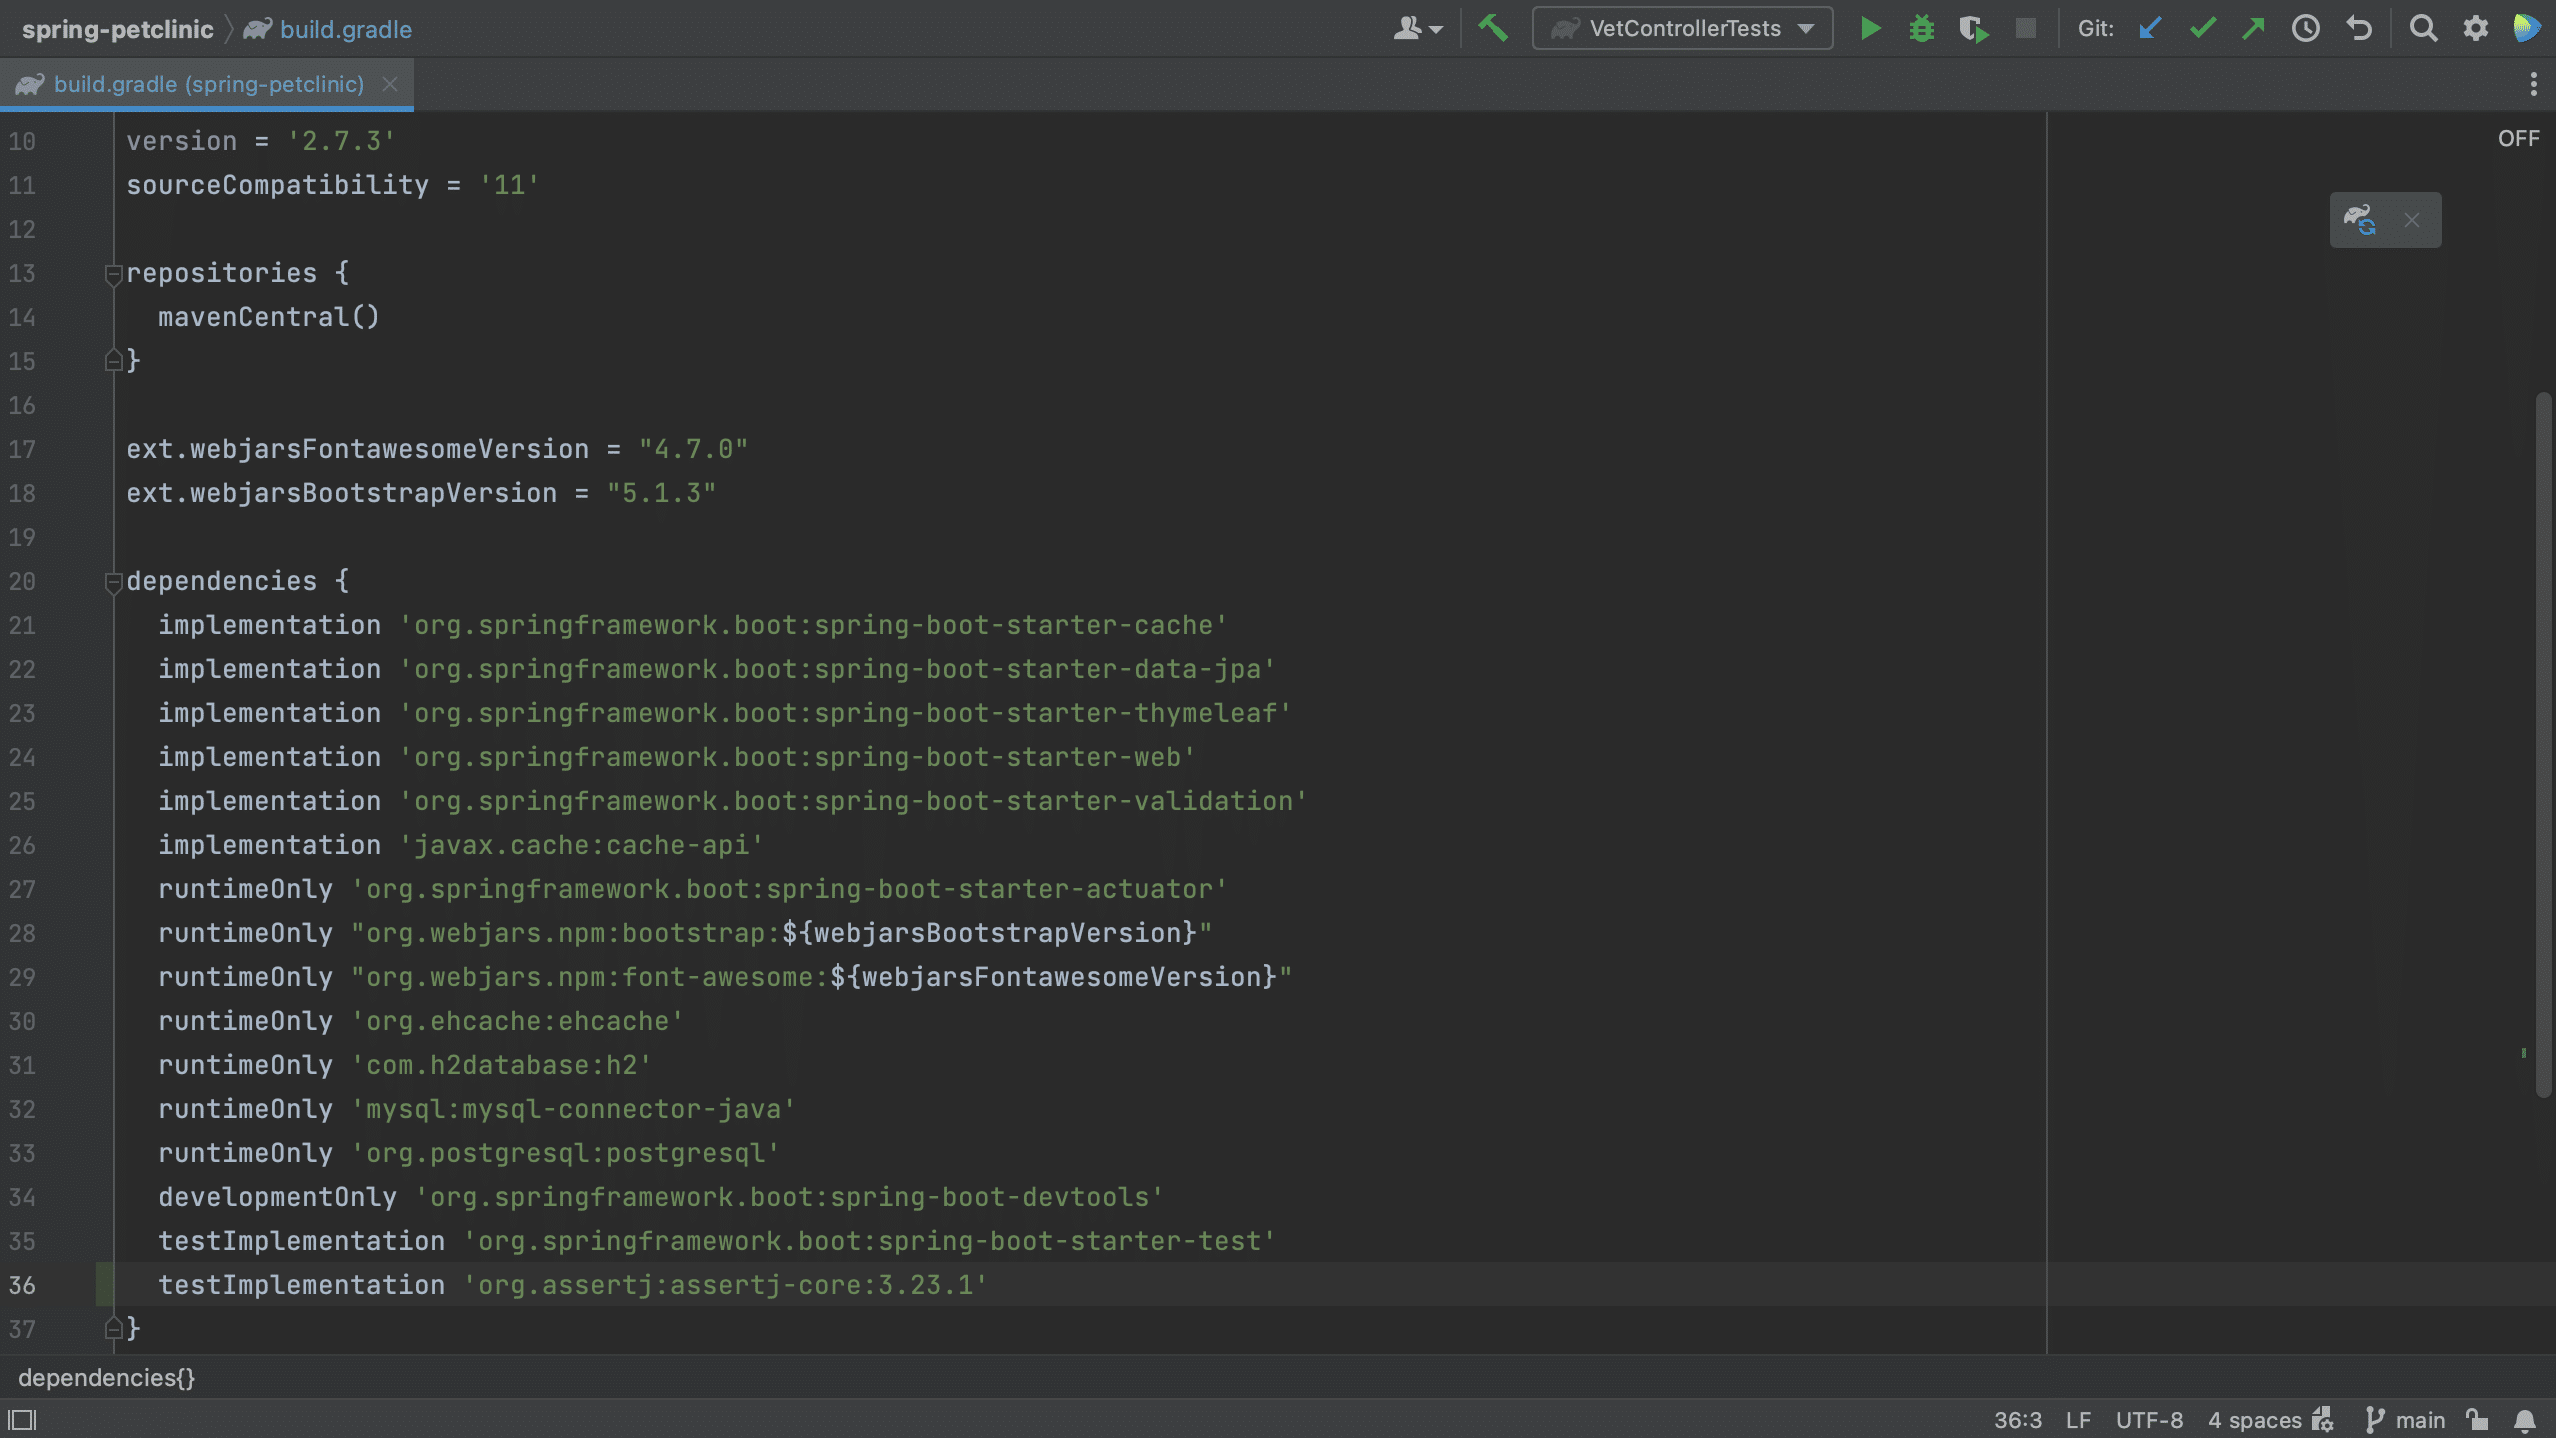
For example, we can copy the Gradle format for this dependency and paste it into our build.gradle file.
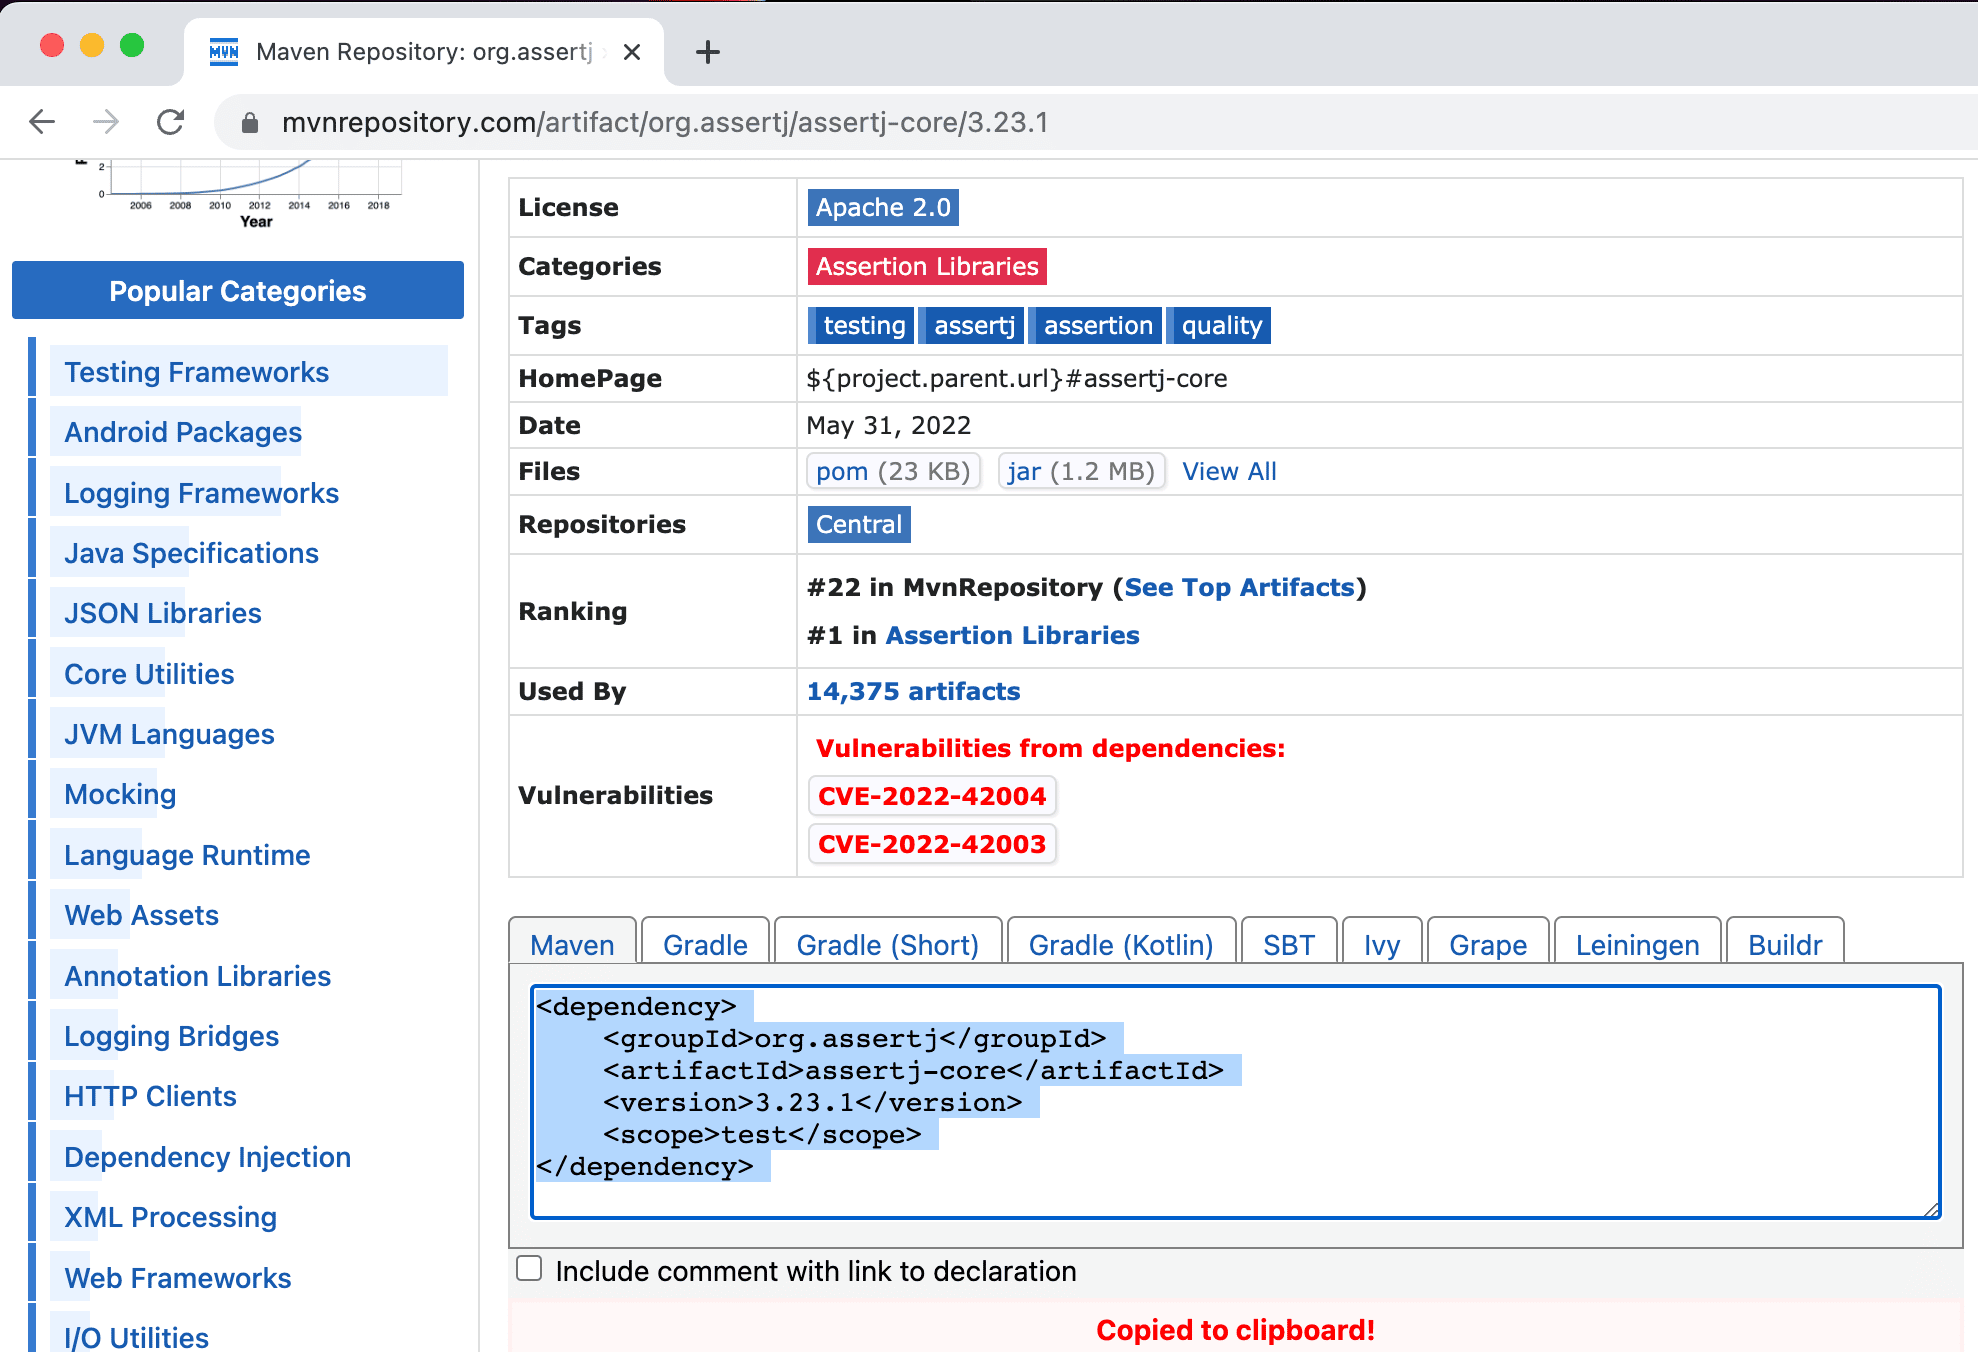
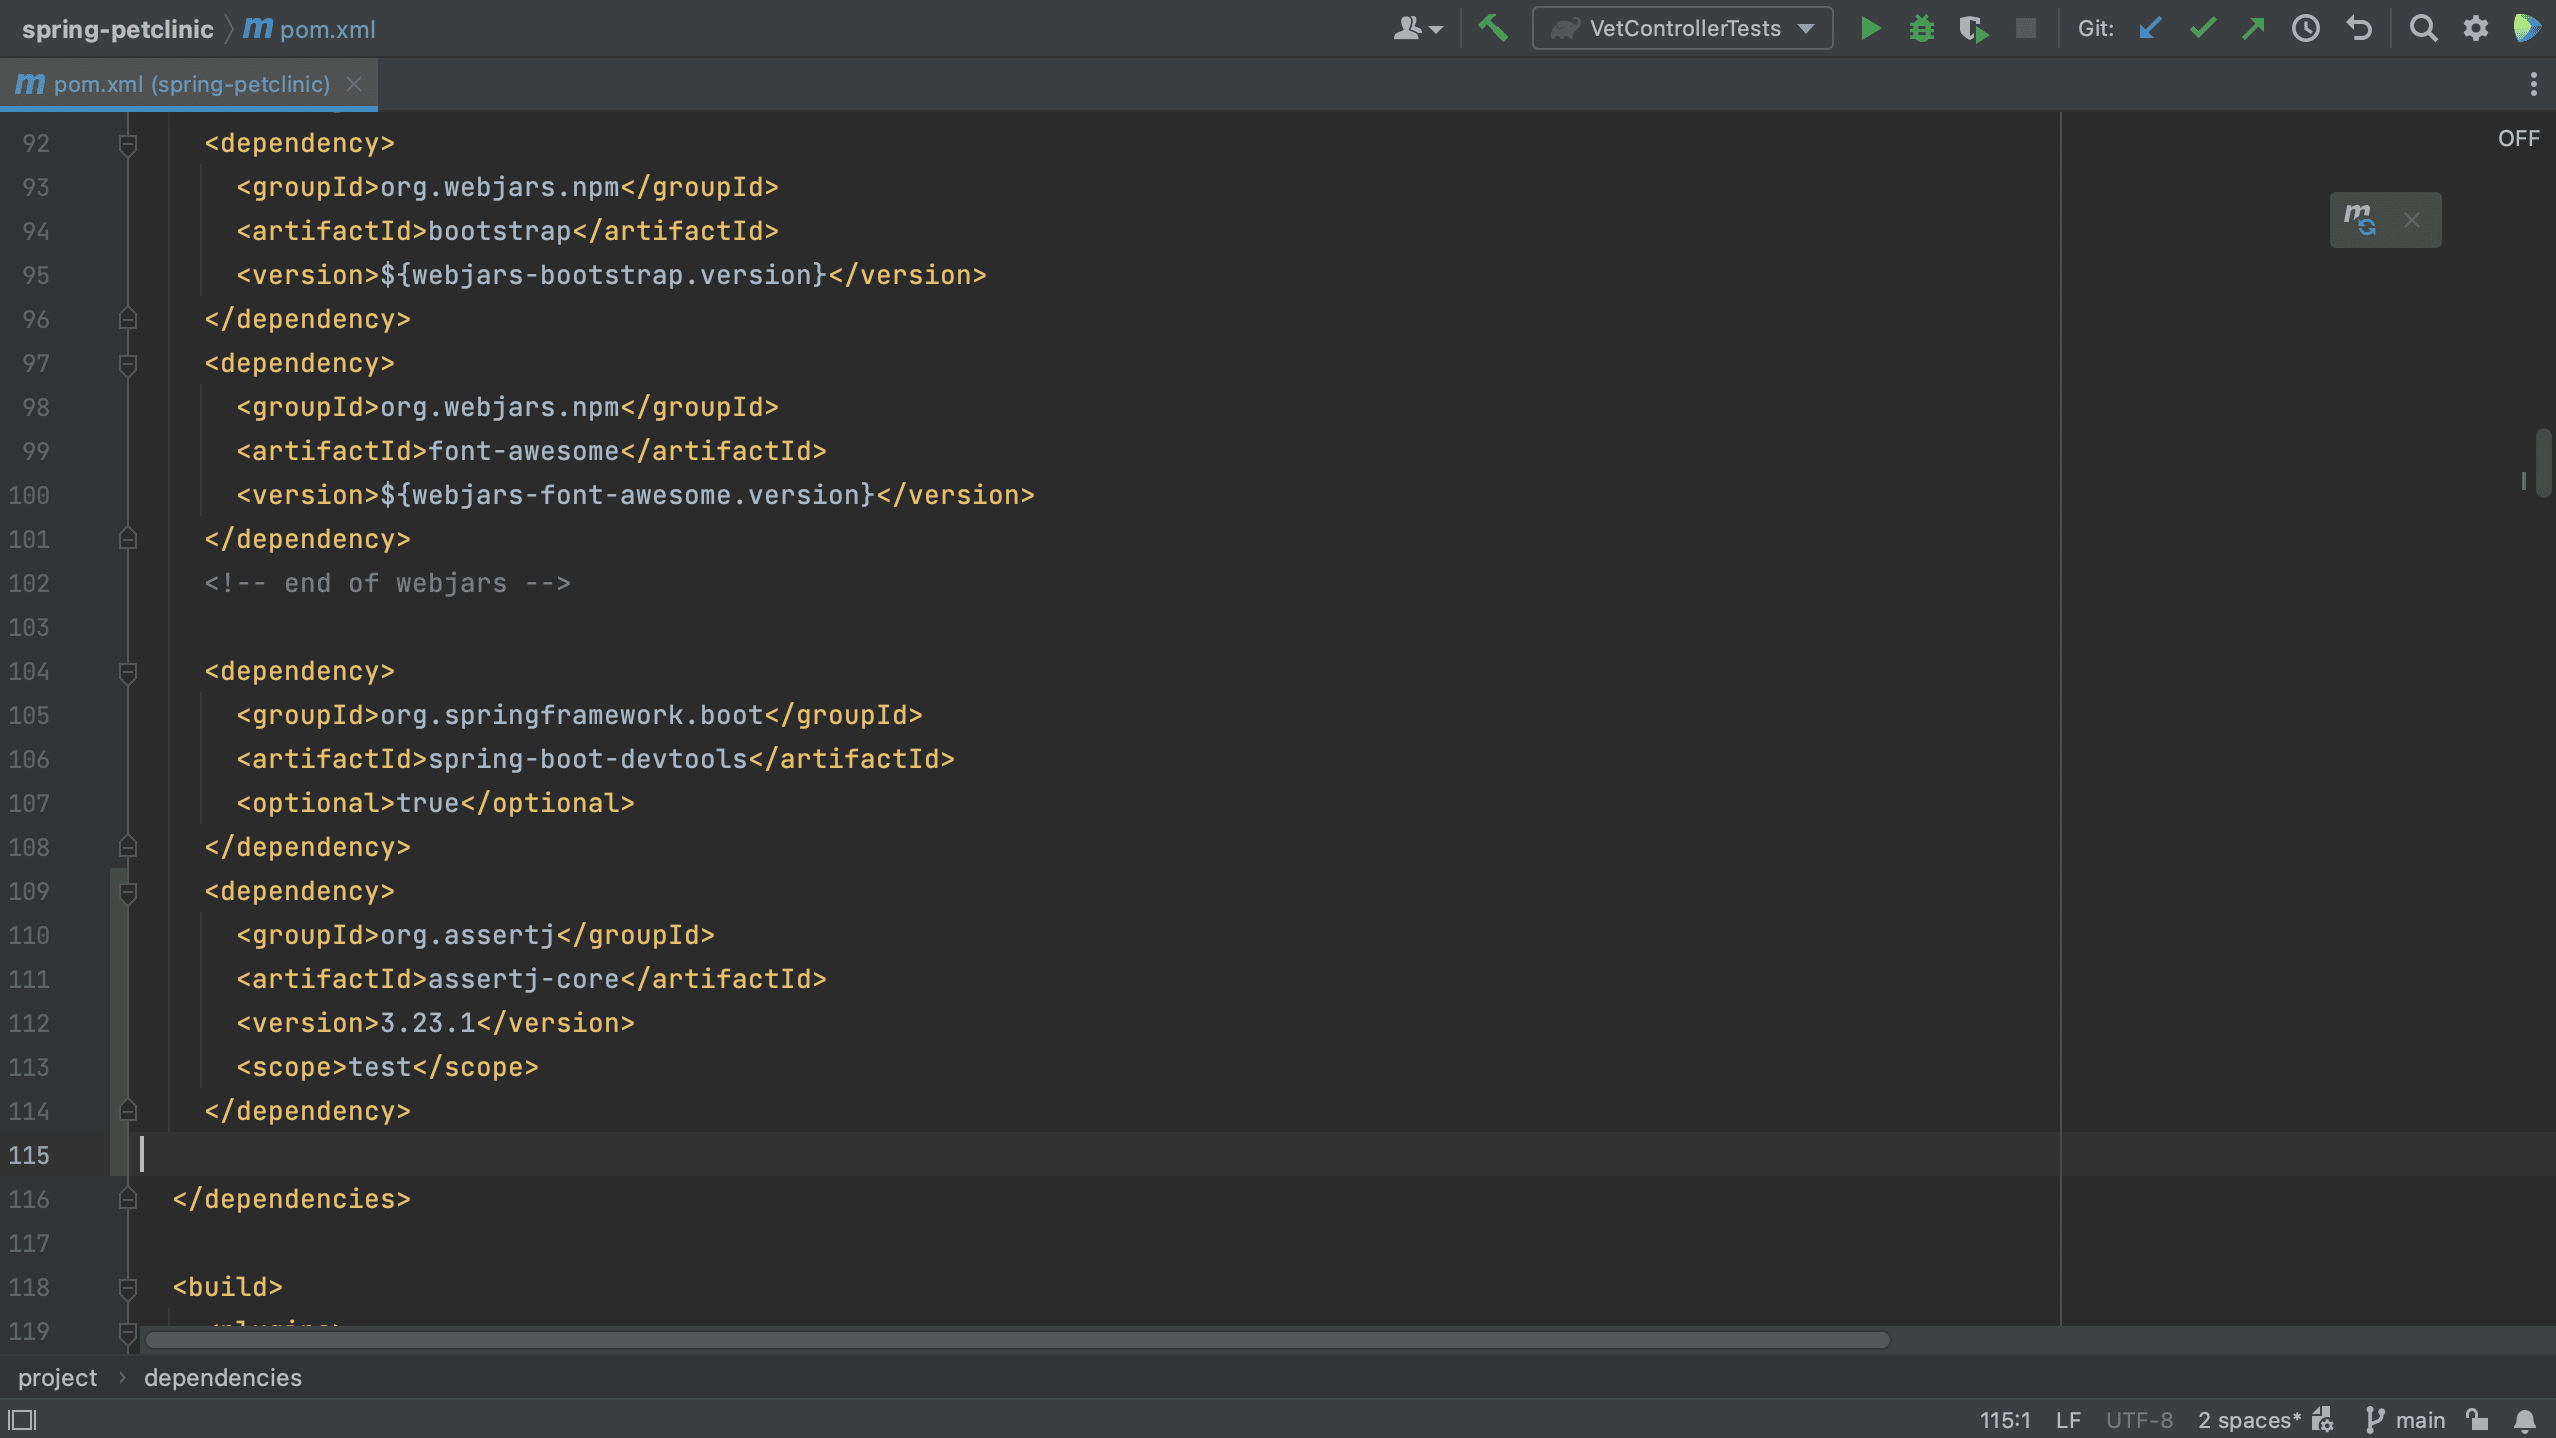
Or, if we are using Maven, we can copy the Maven xml format into our pom.xml.
Did you know that if you copy-paste a Maven XML dependency into your build.gradle file, IntelliJ IDEA automatically turns it into the correct format for Gradle?
From the build file using code completion
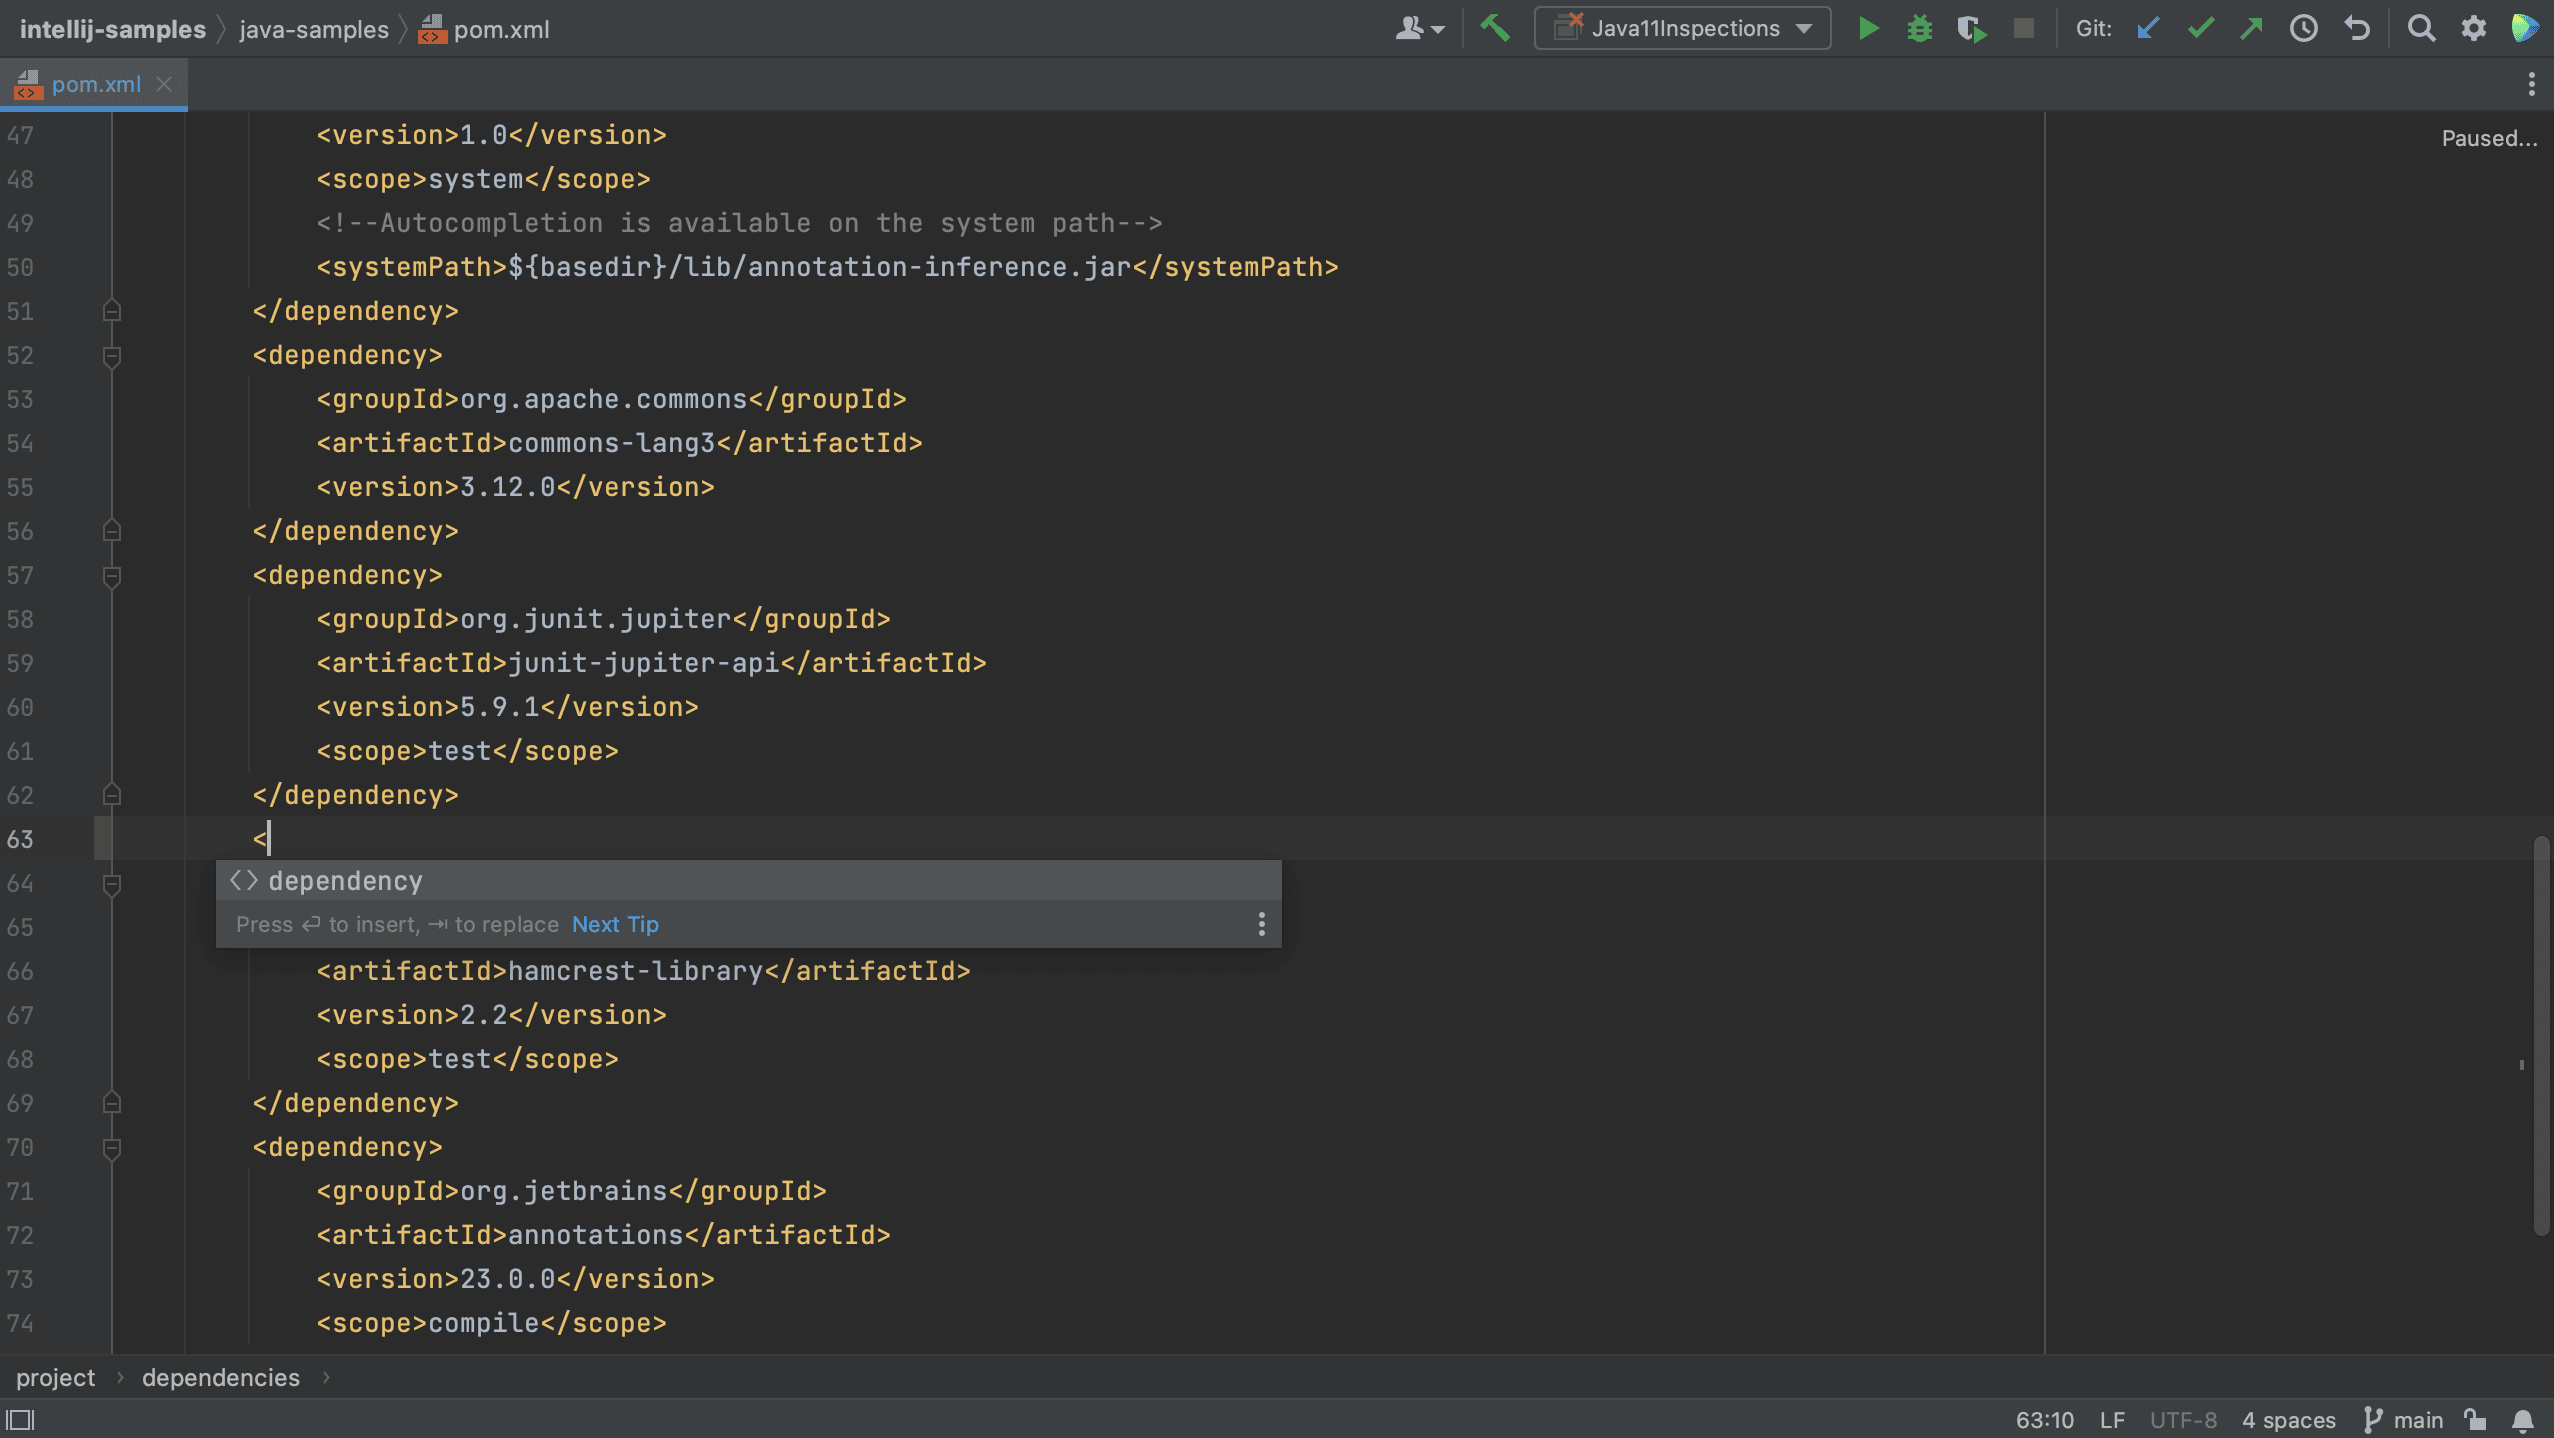
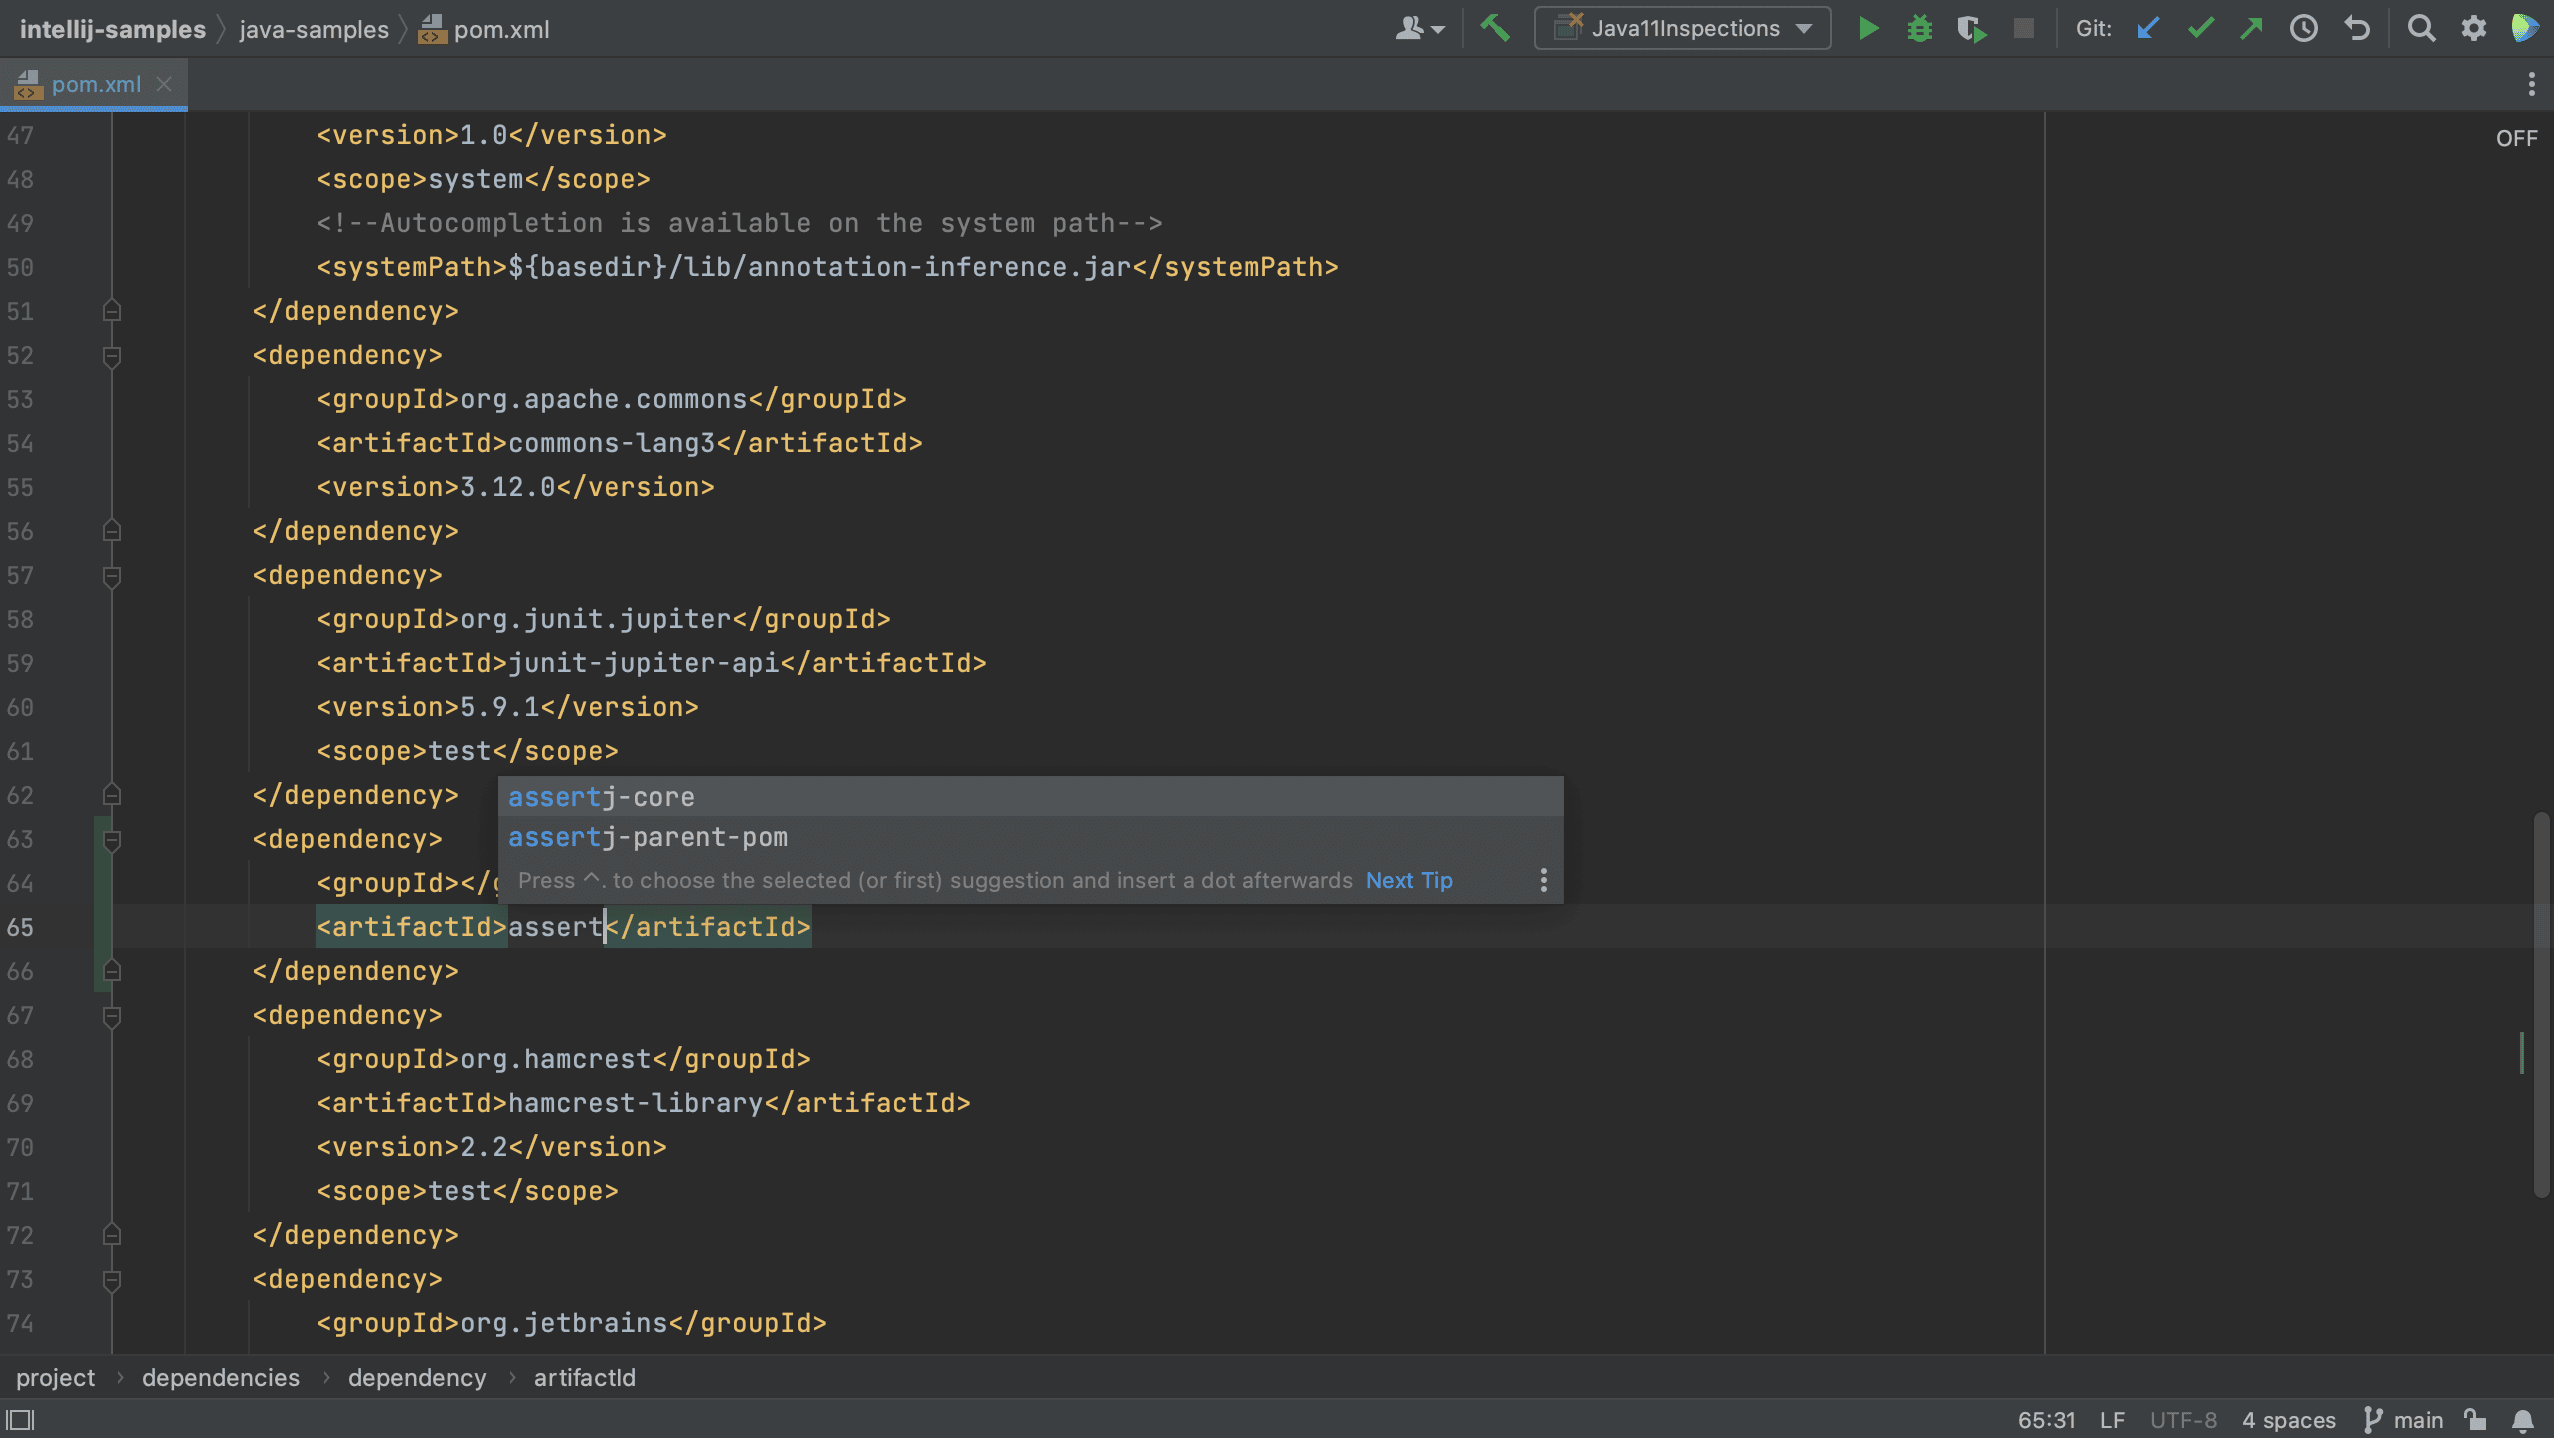
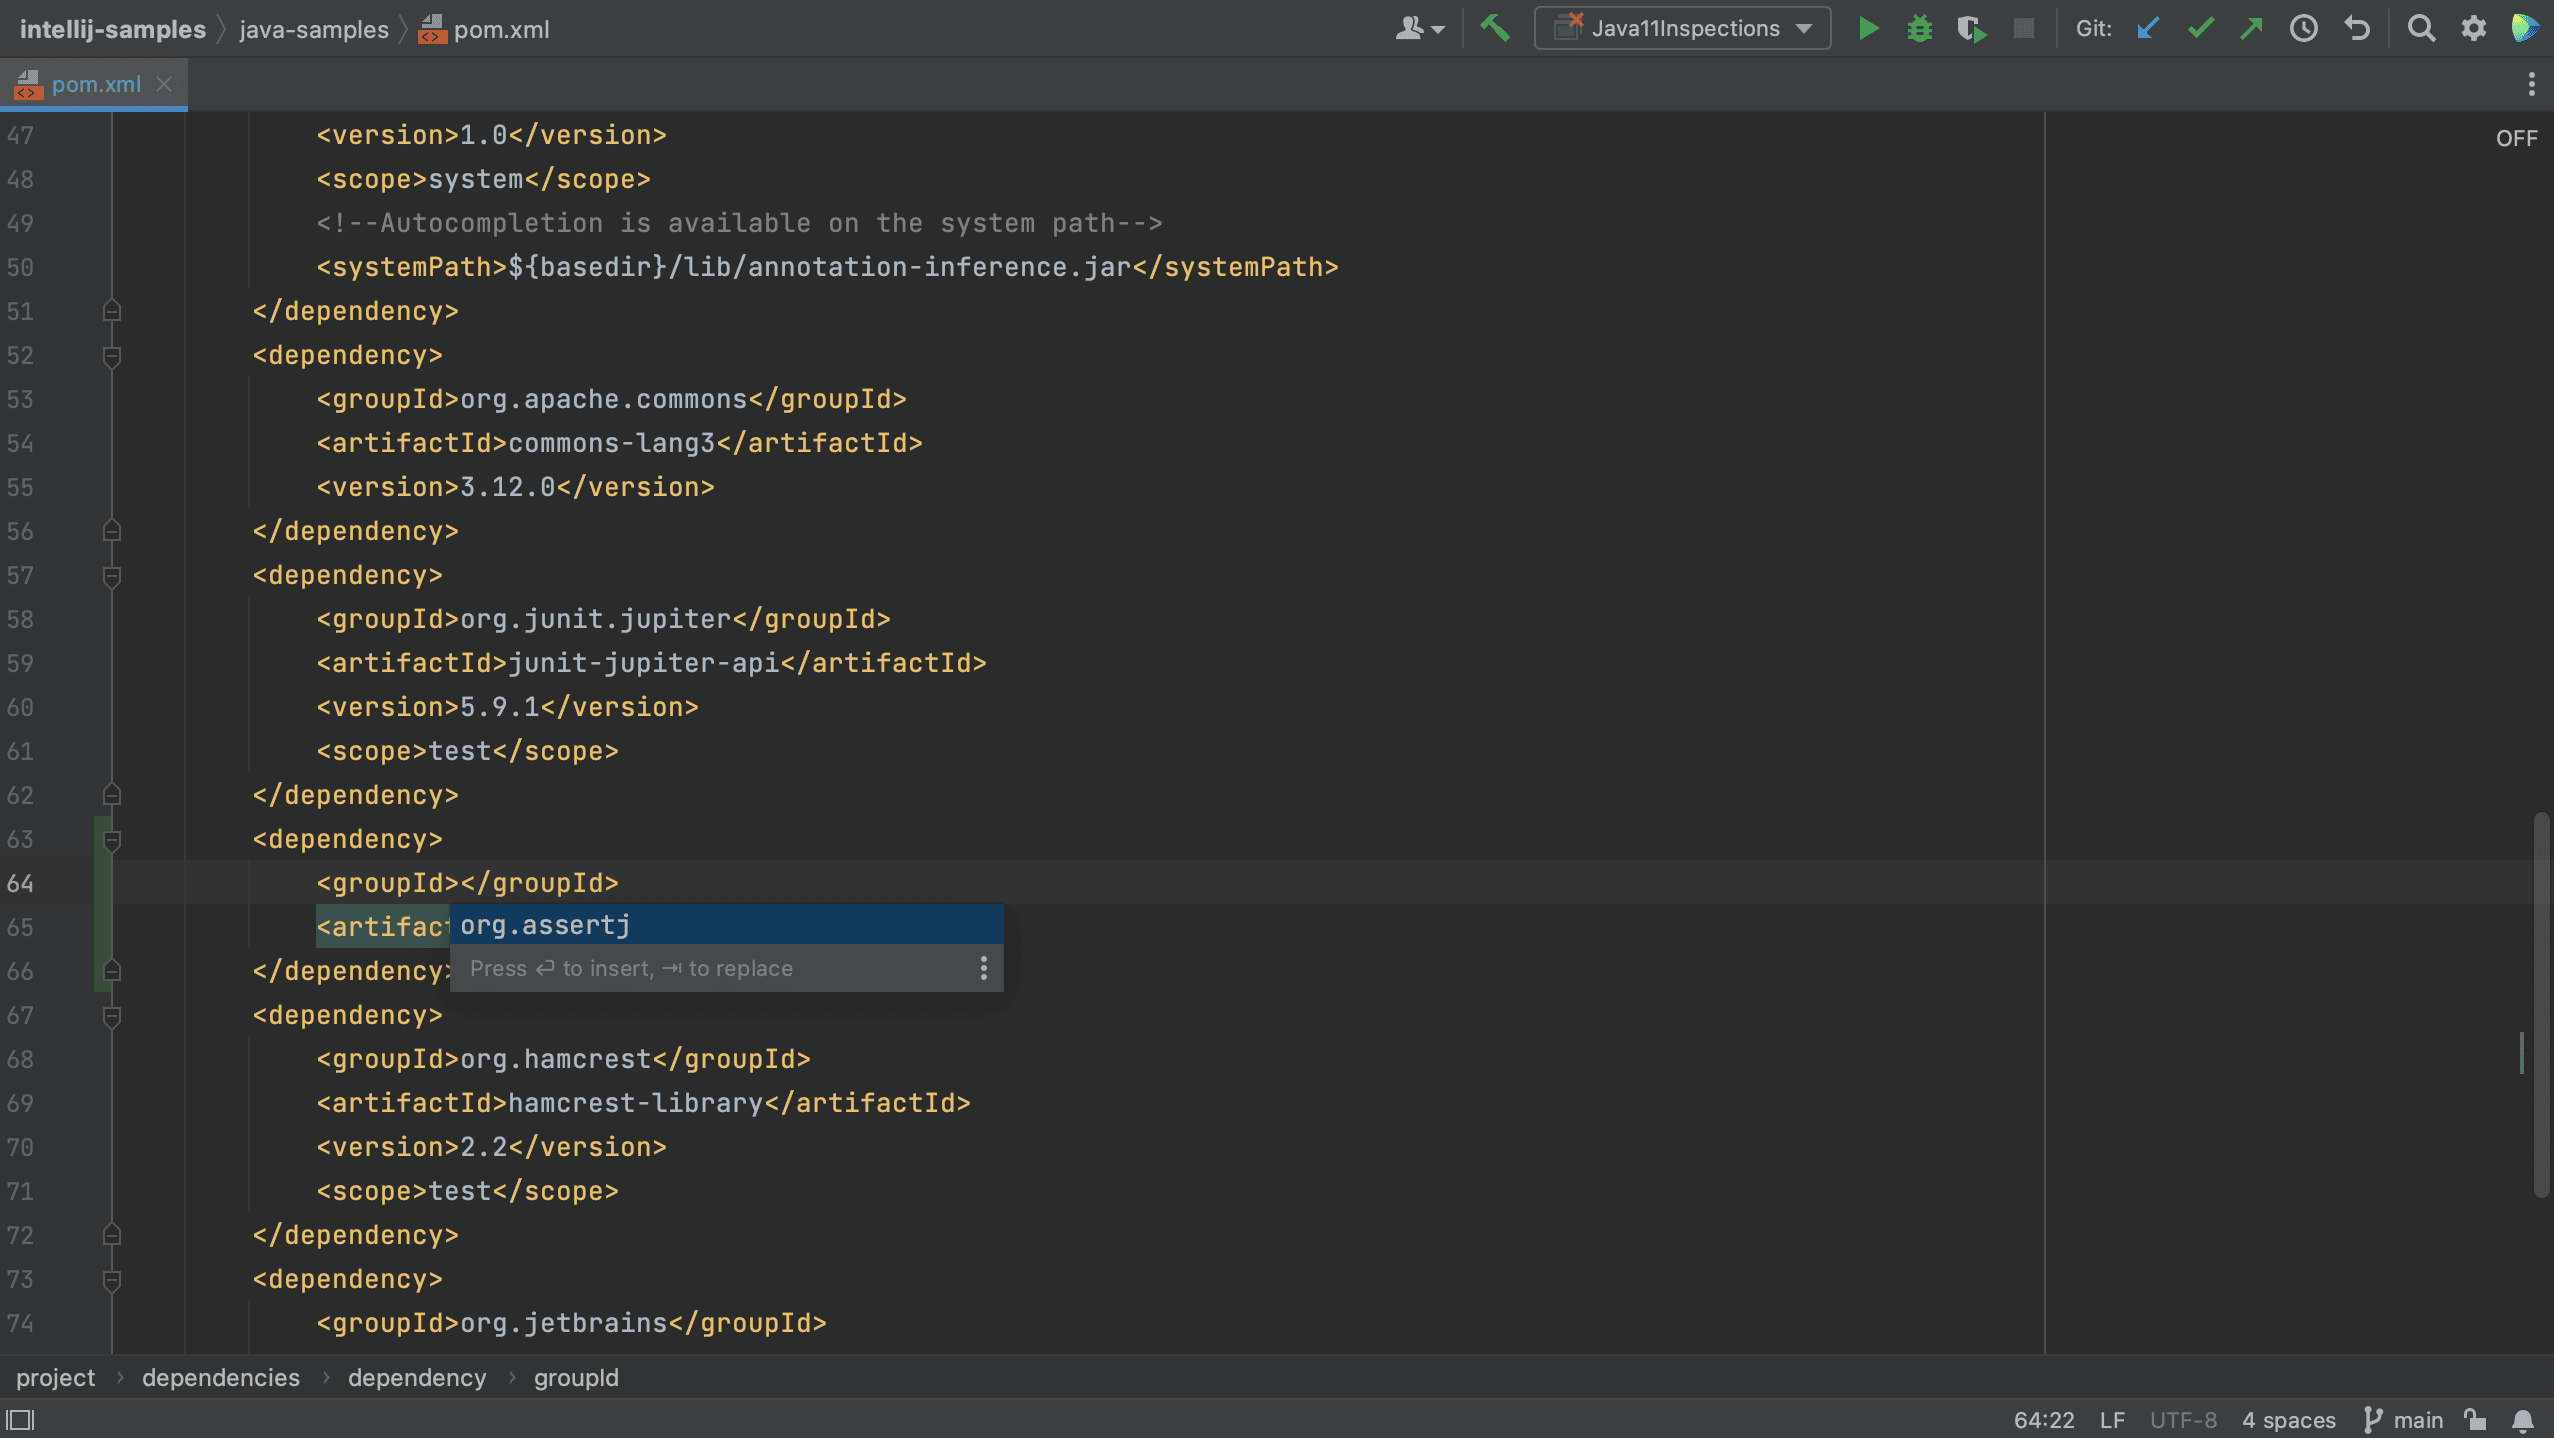
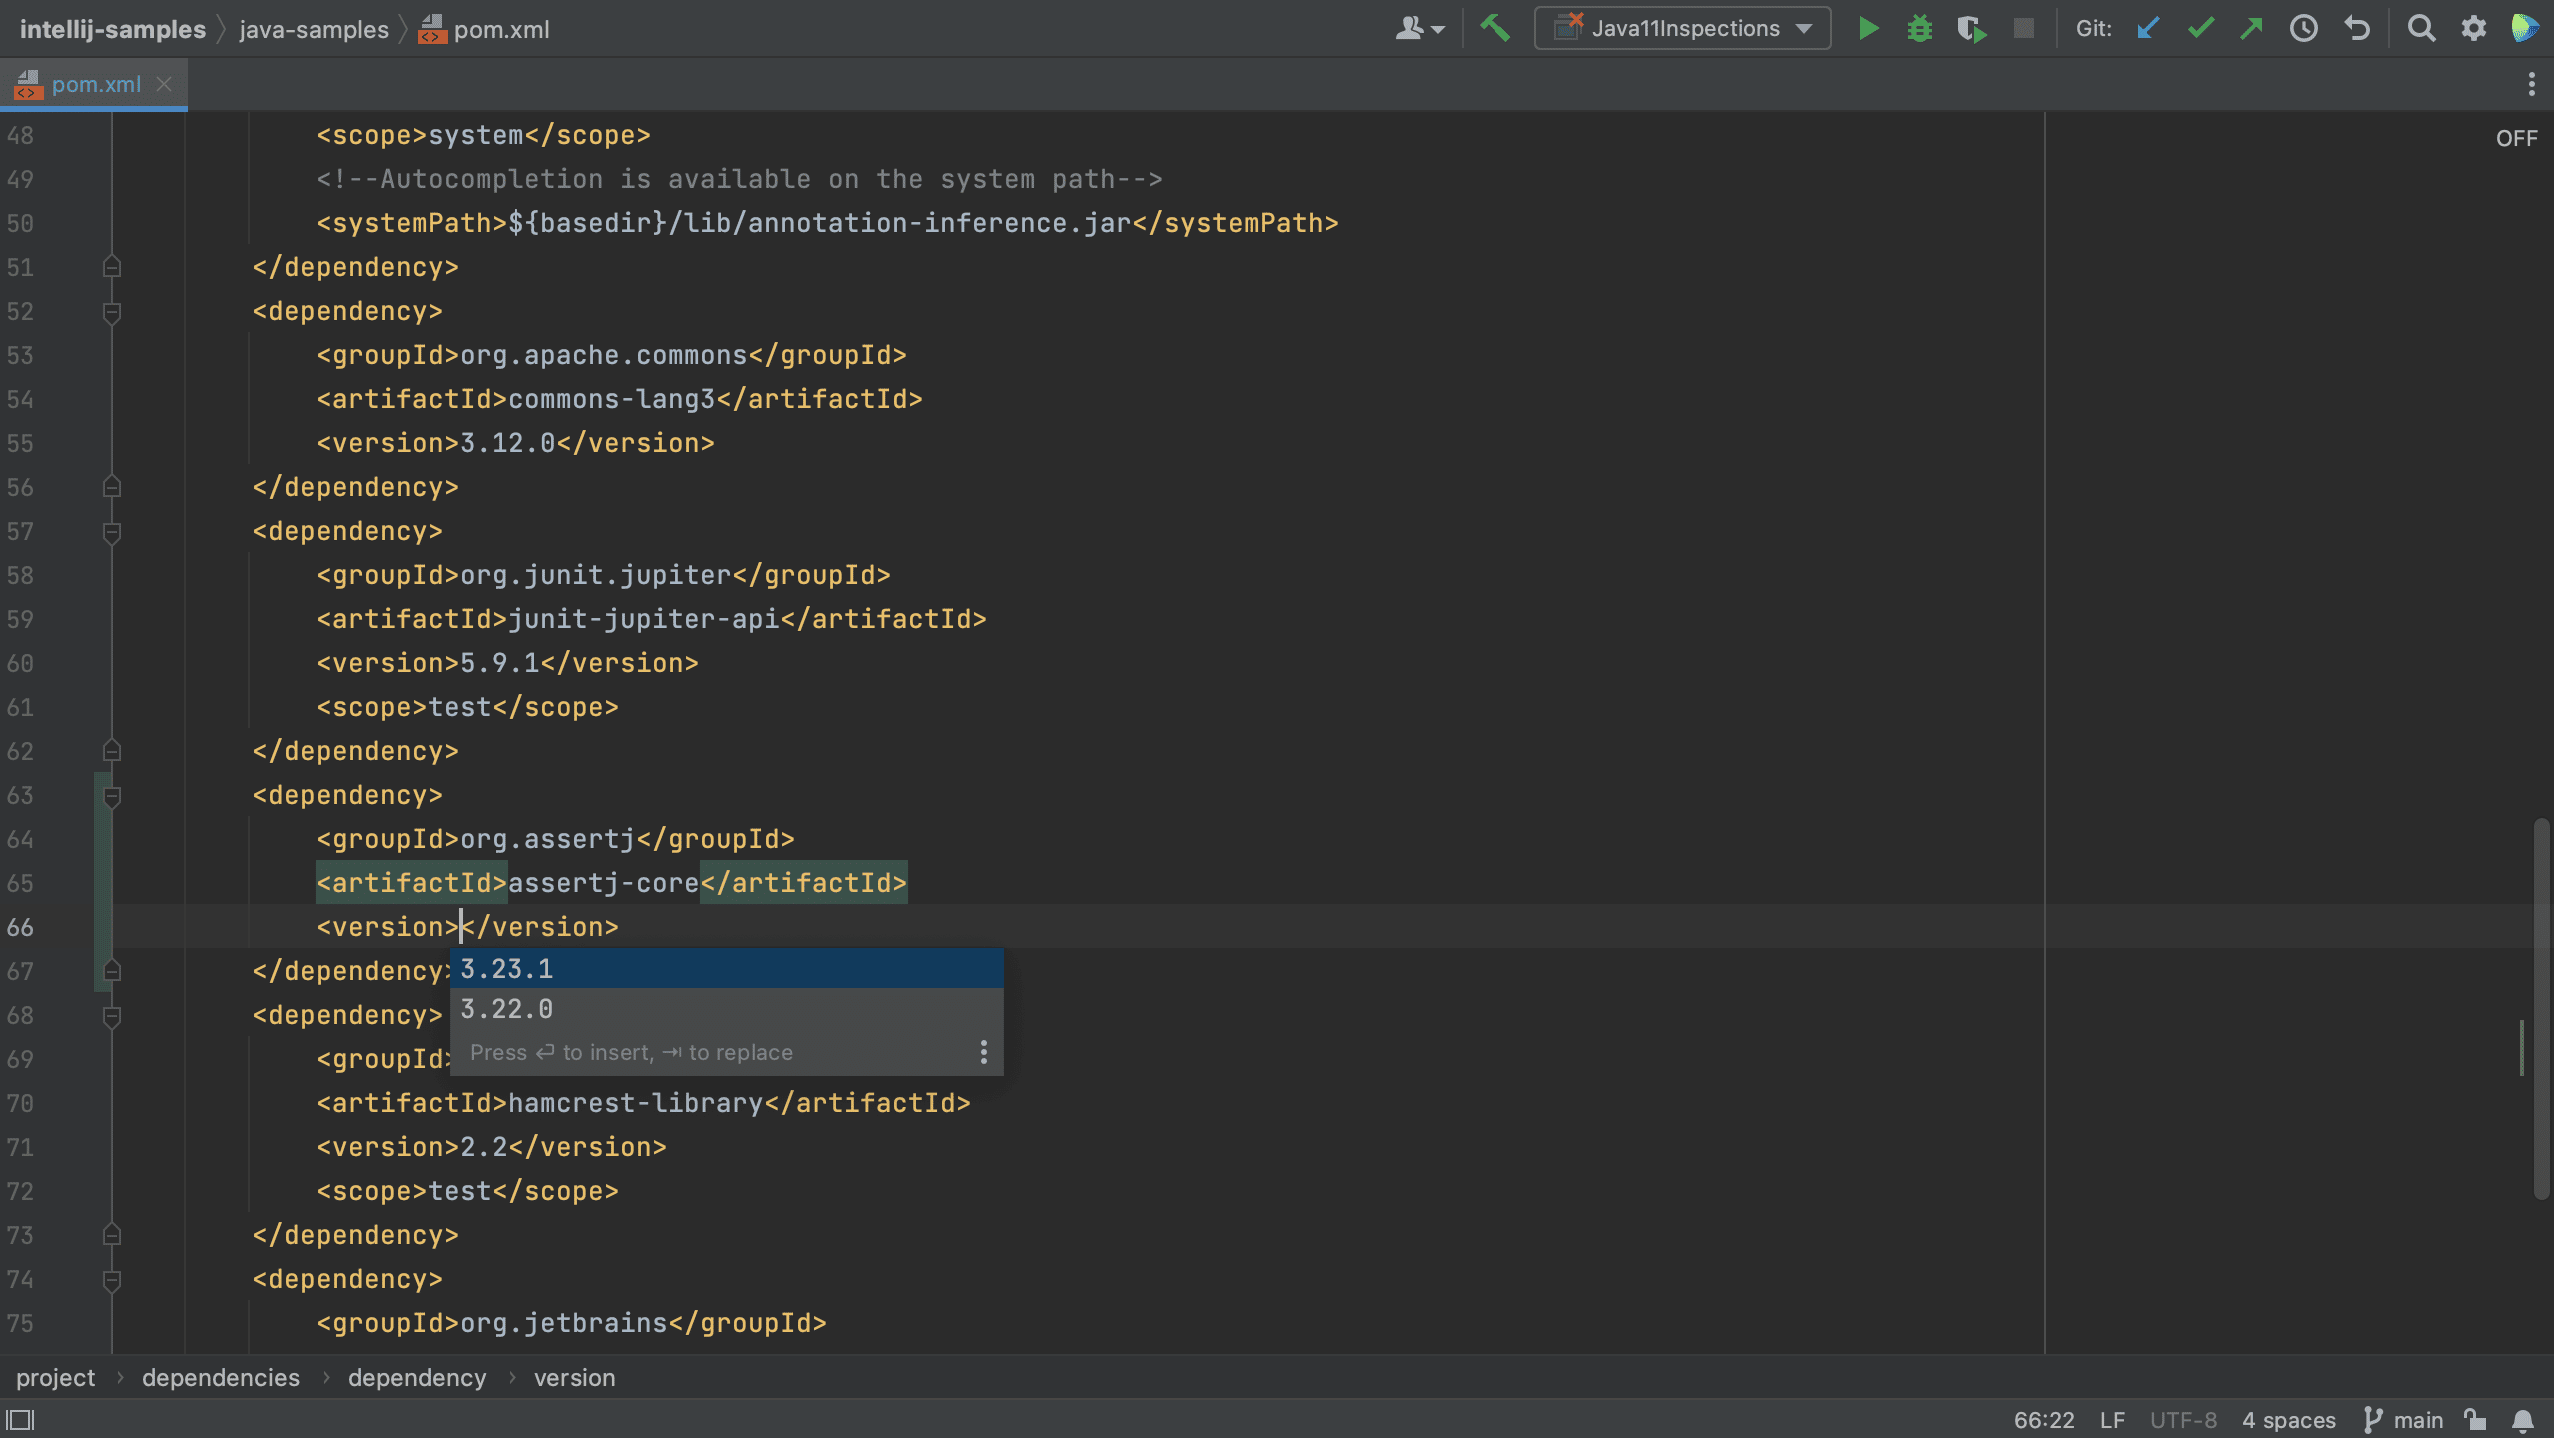
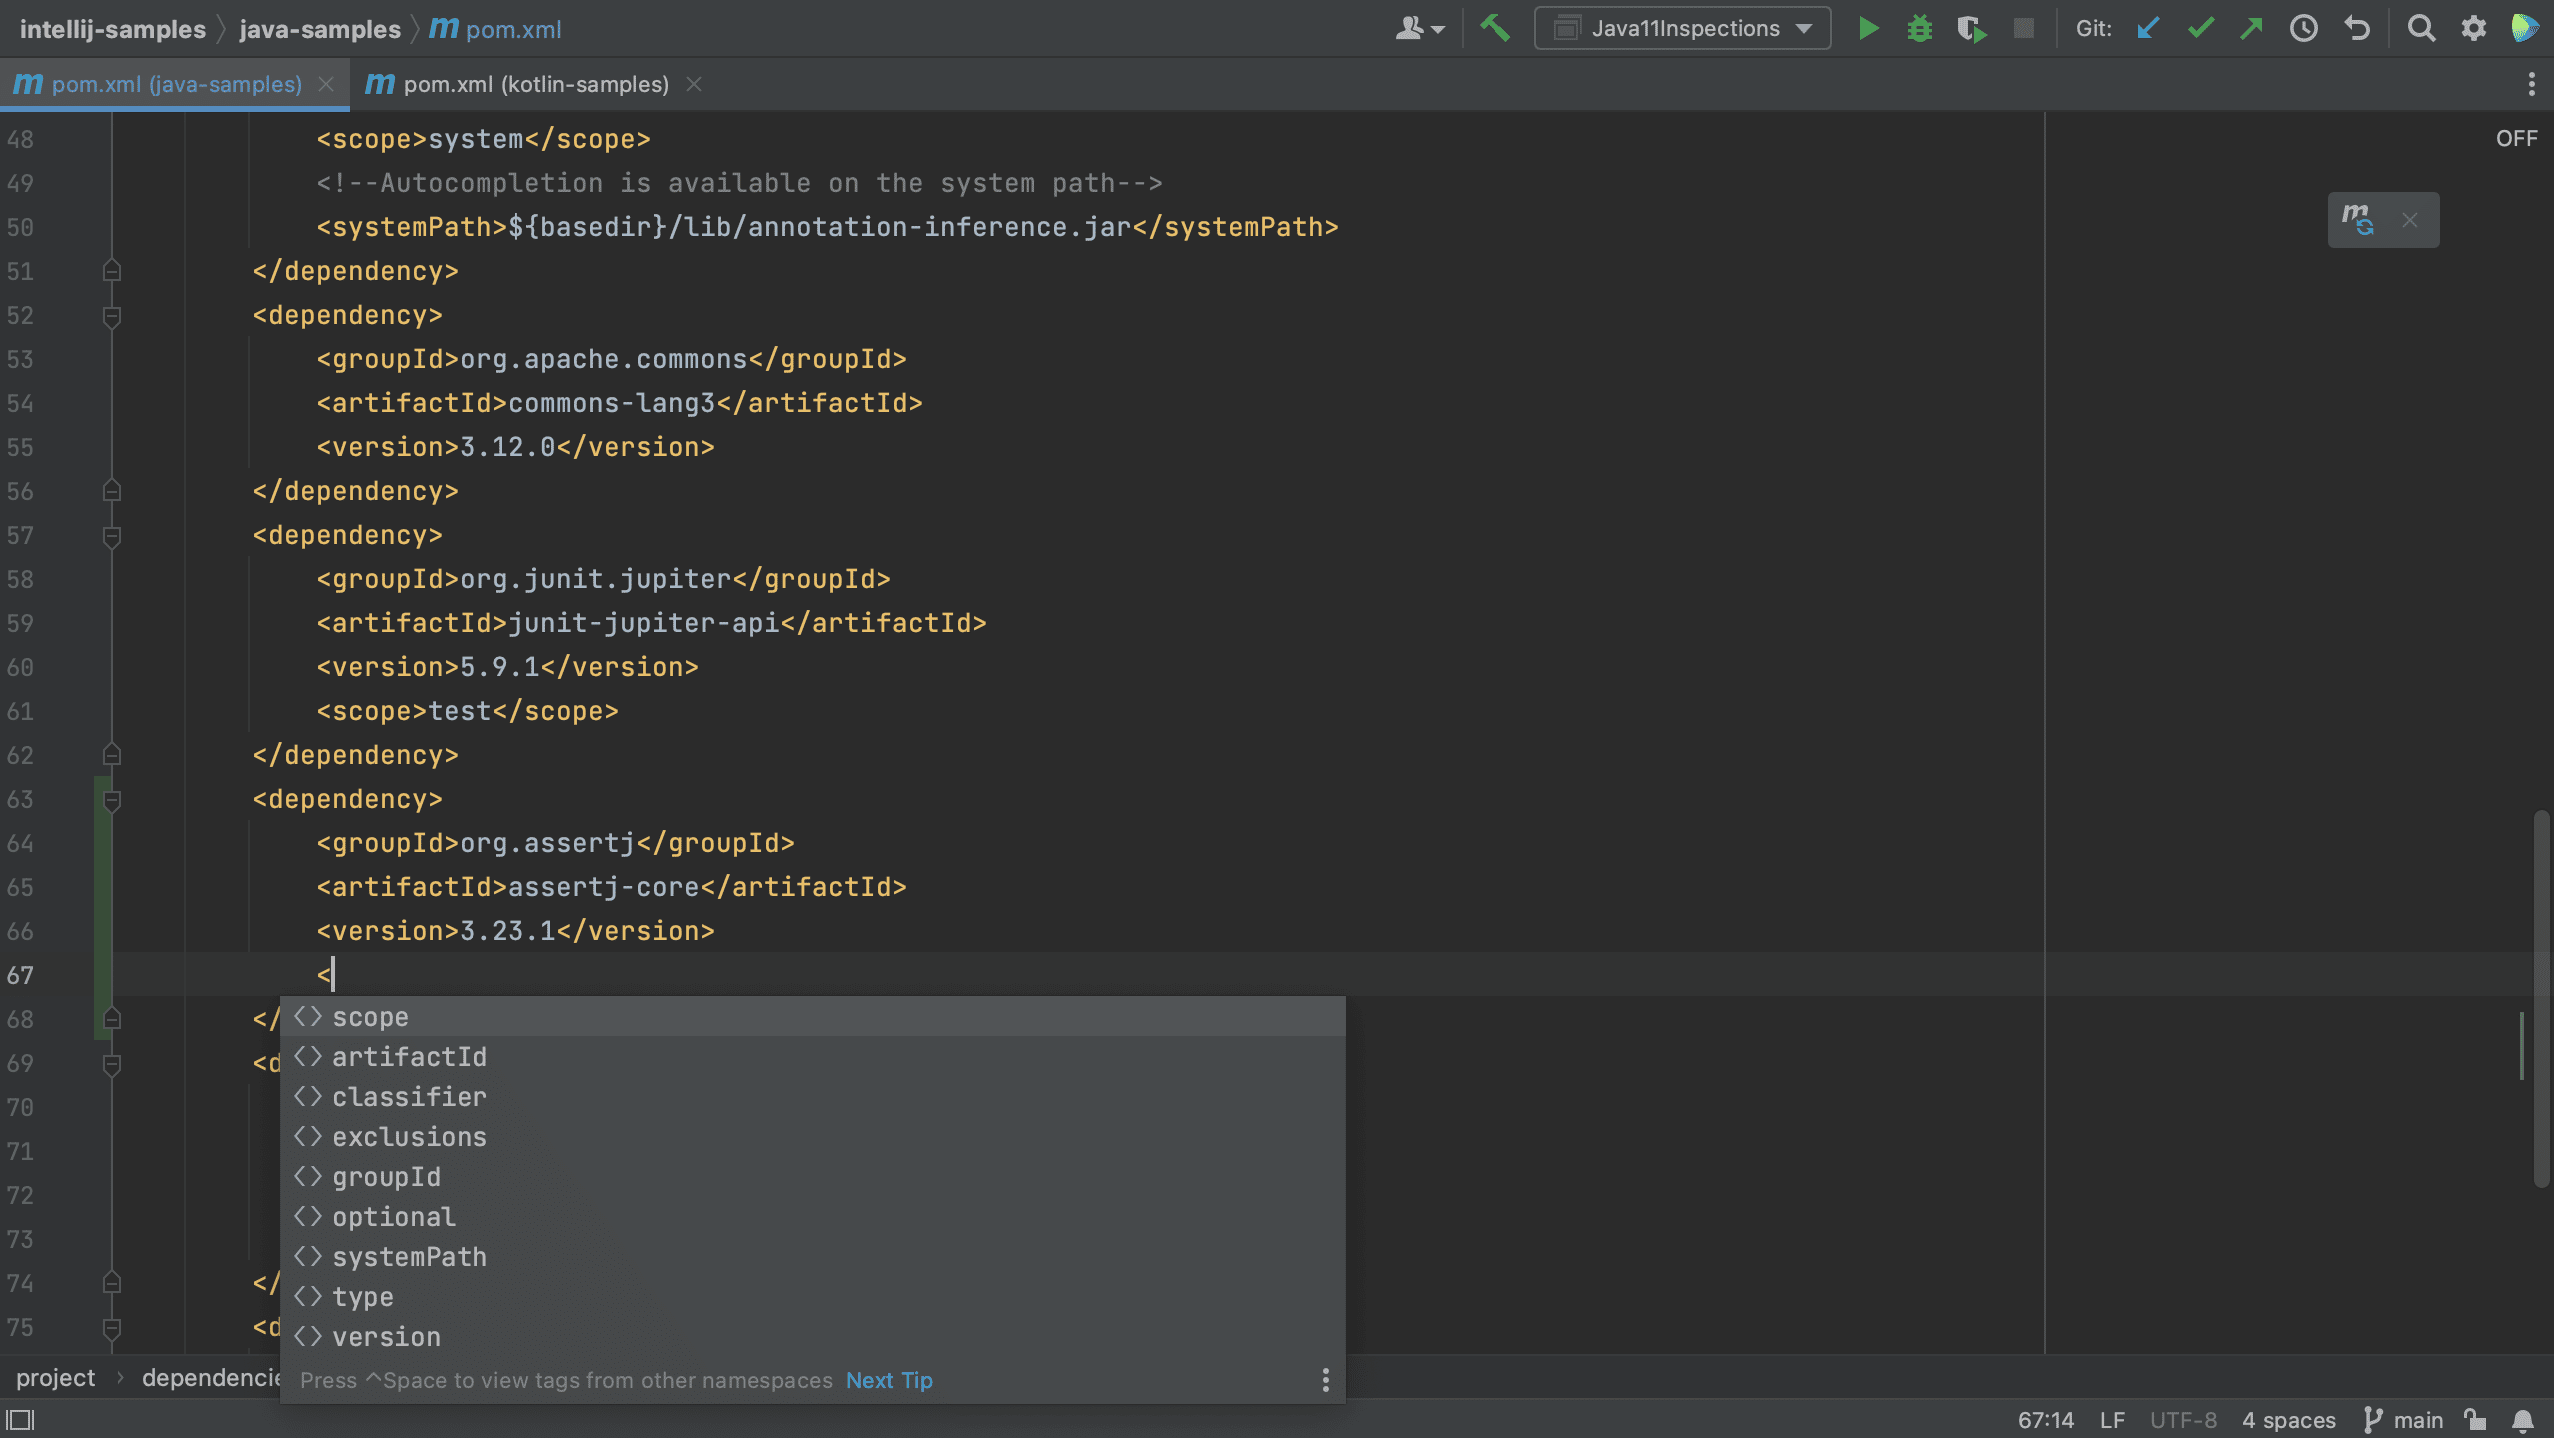
We can also add dependencies to our build file using code completion. For example, let’s add a new dependency to our pom.xml.
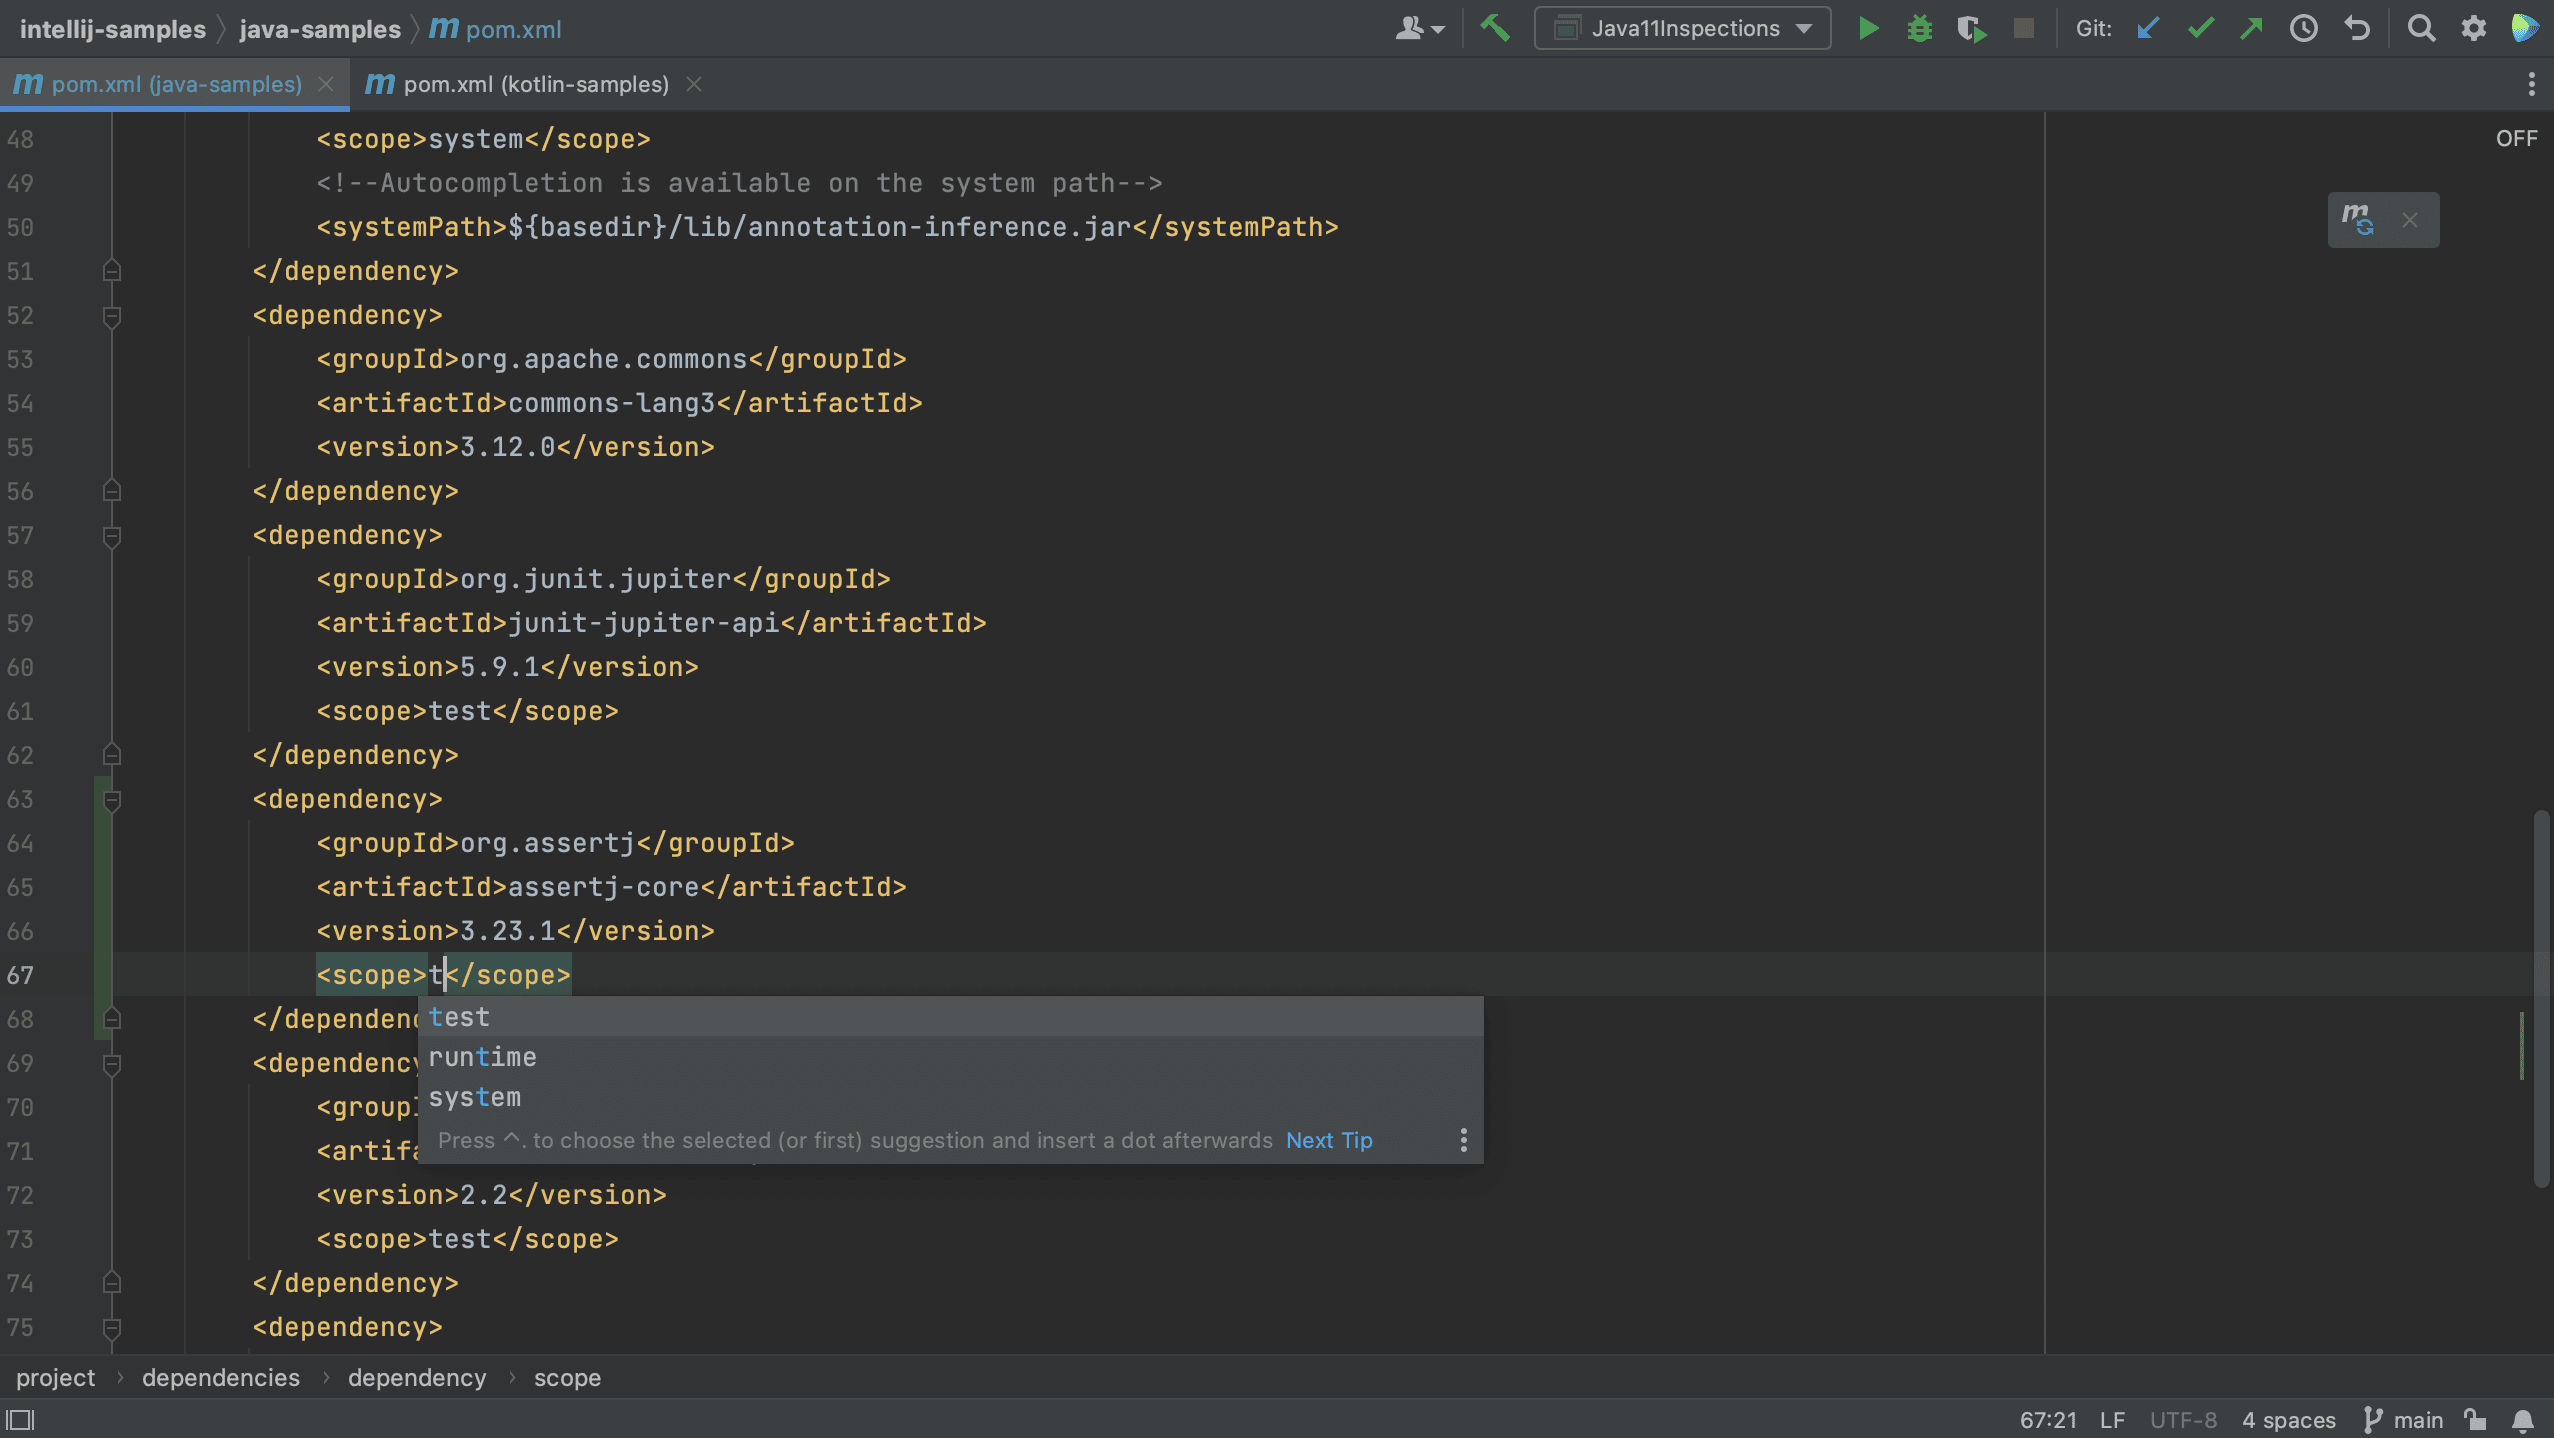
We see that IntelliJ IDEA autocompletes the dependency xml, and we can search for the dependency we want, in this example AssertJ. If needed, the version number will also be added. Since this is a test dependency, we need to add the test scope, still using code completion.
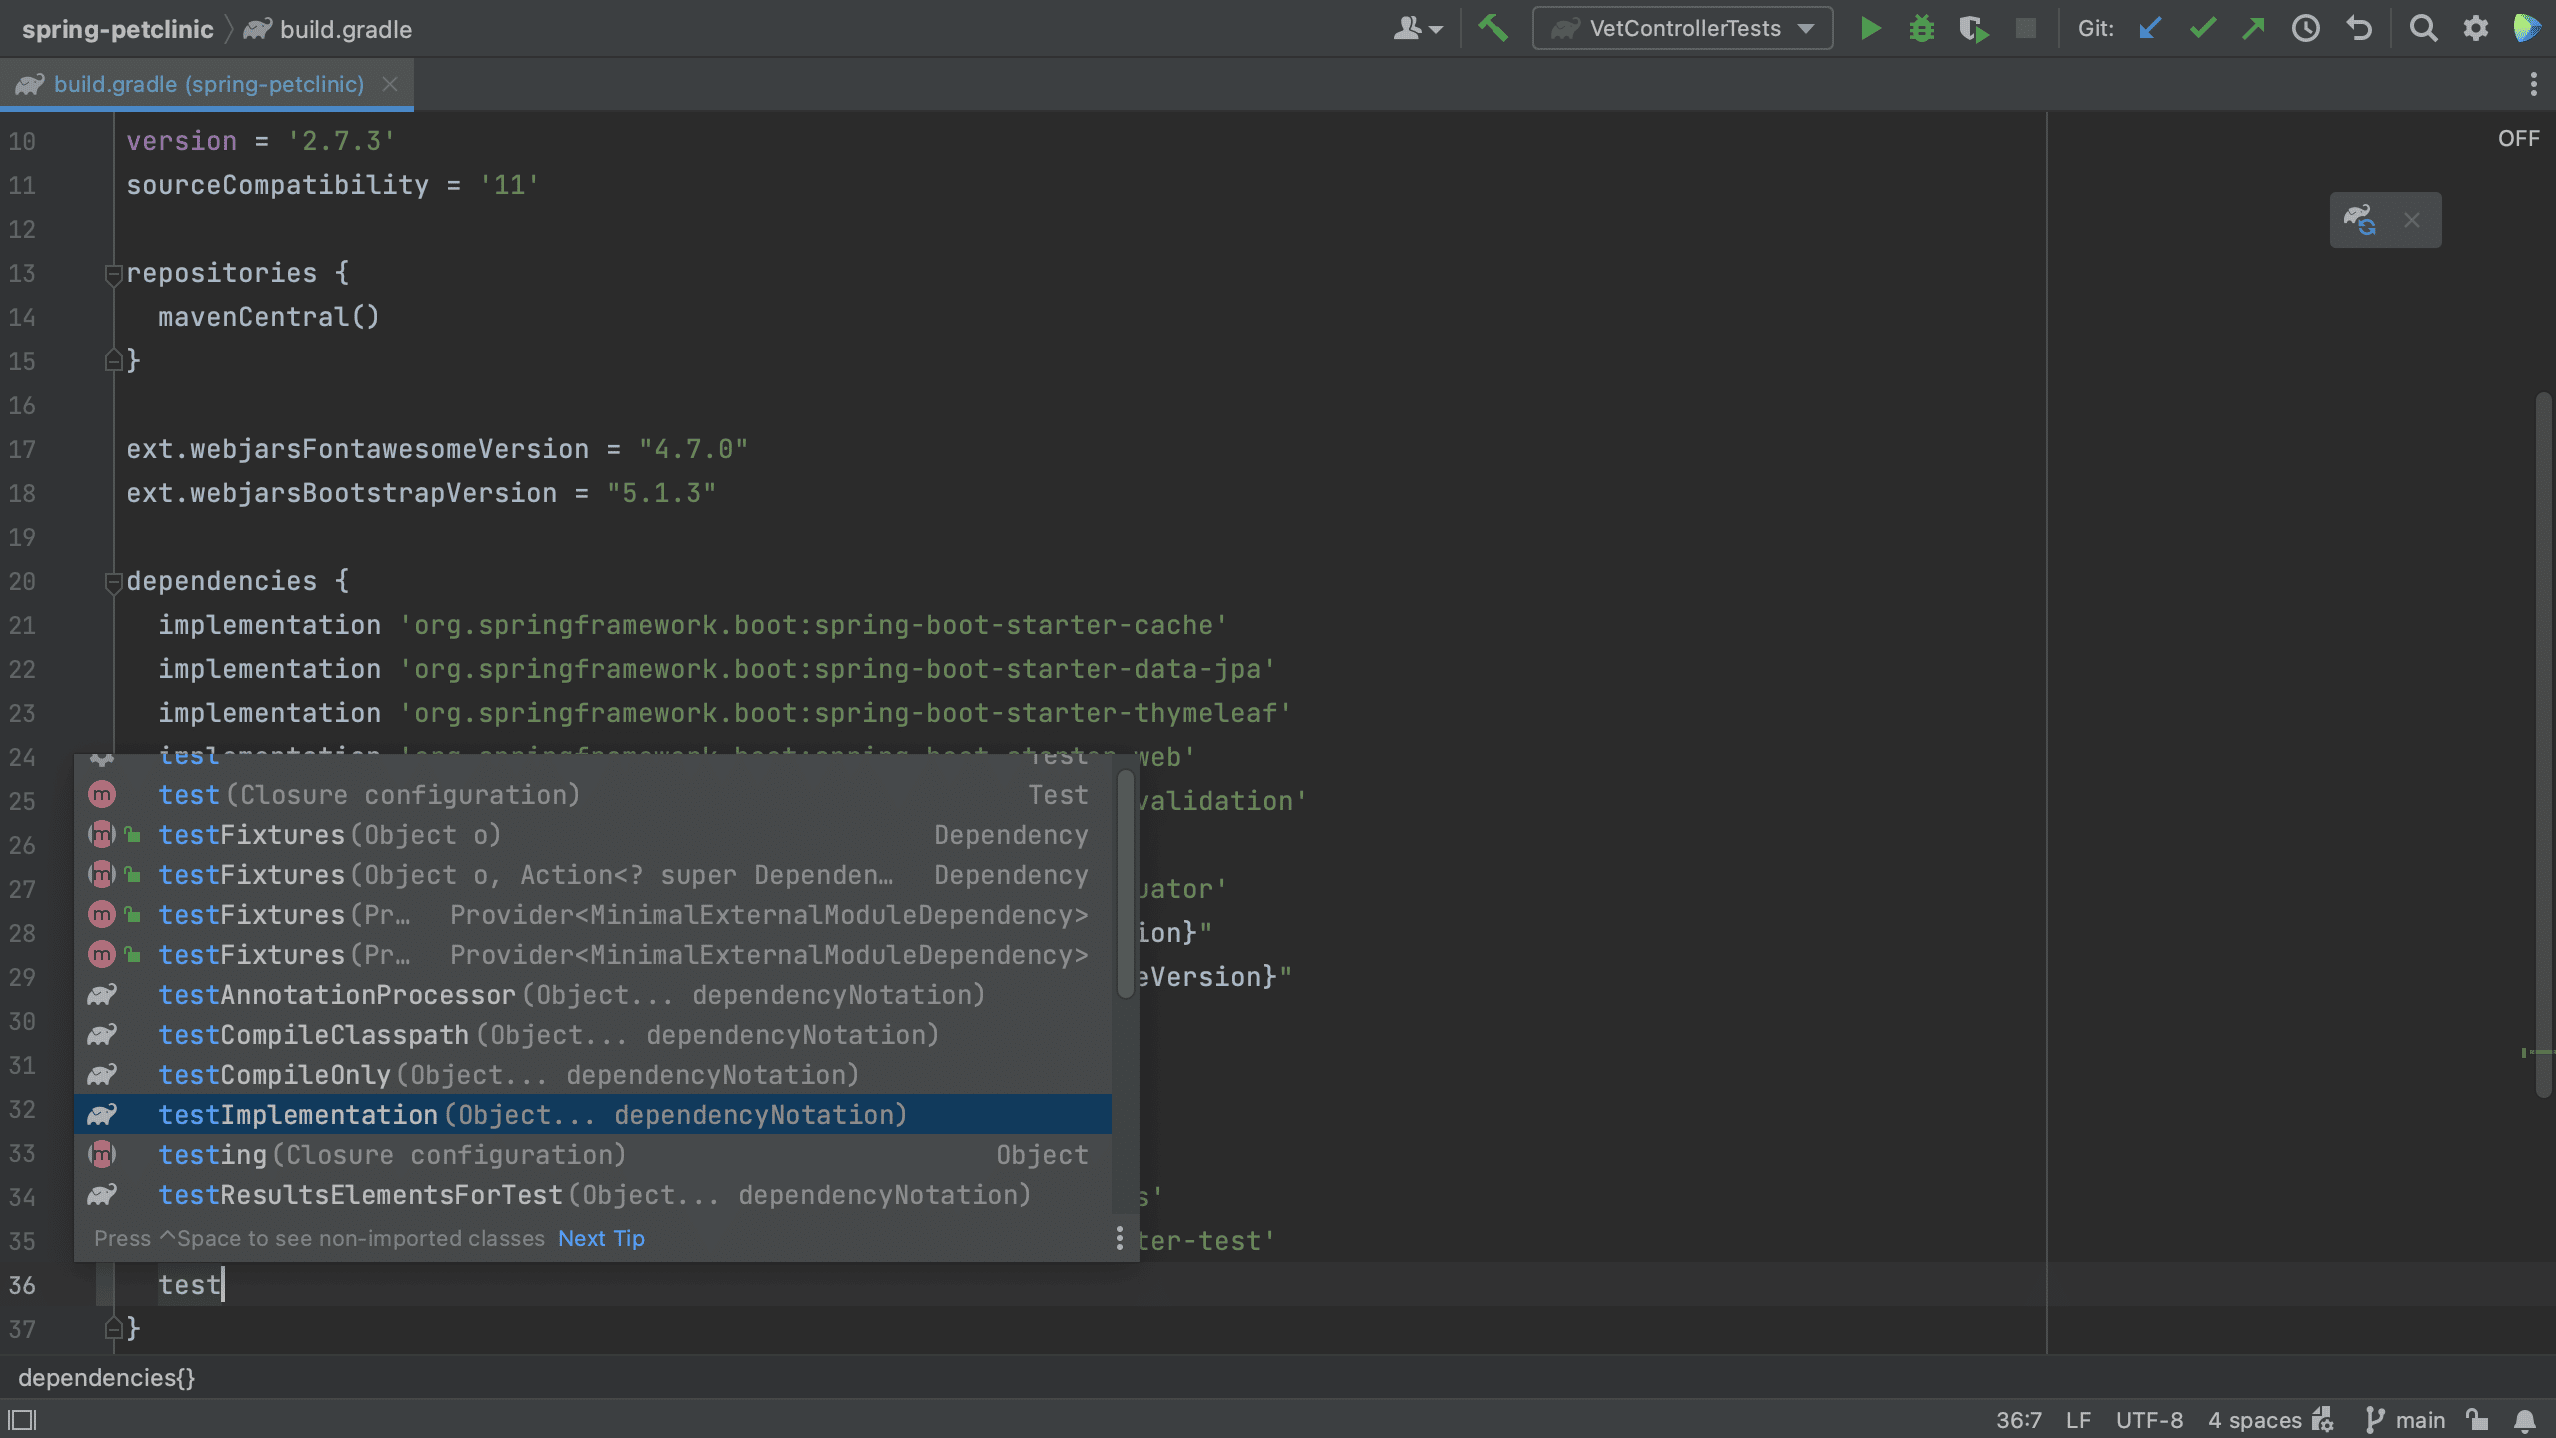
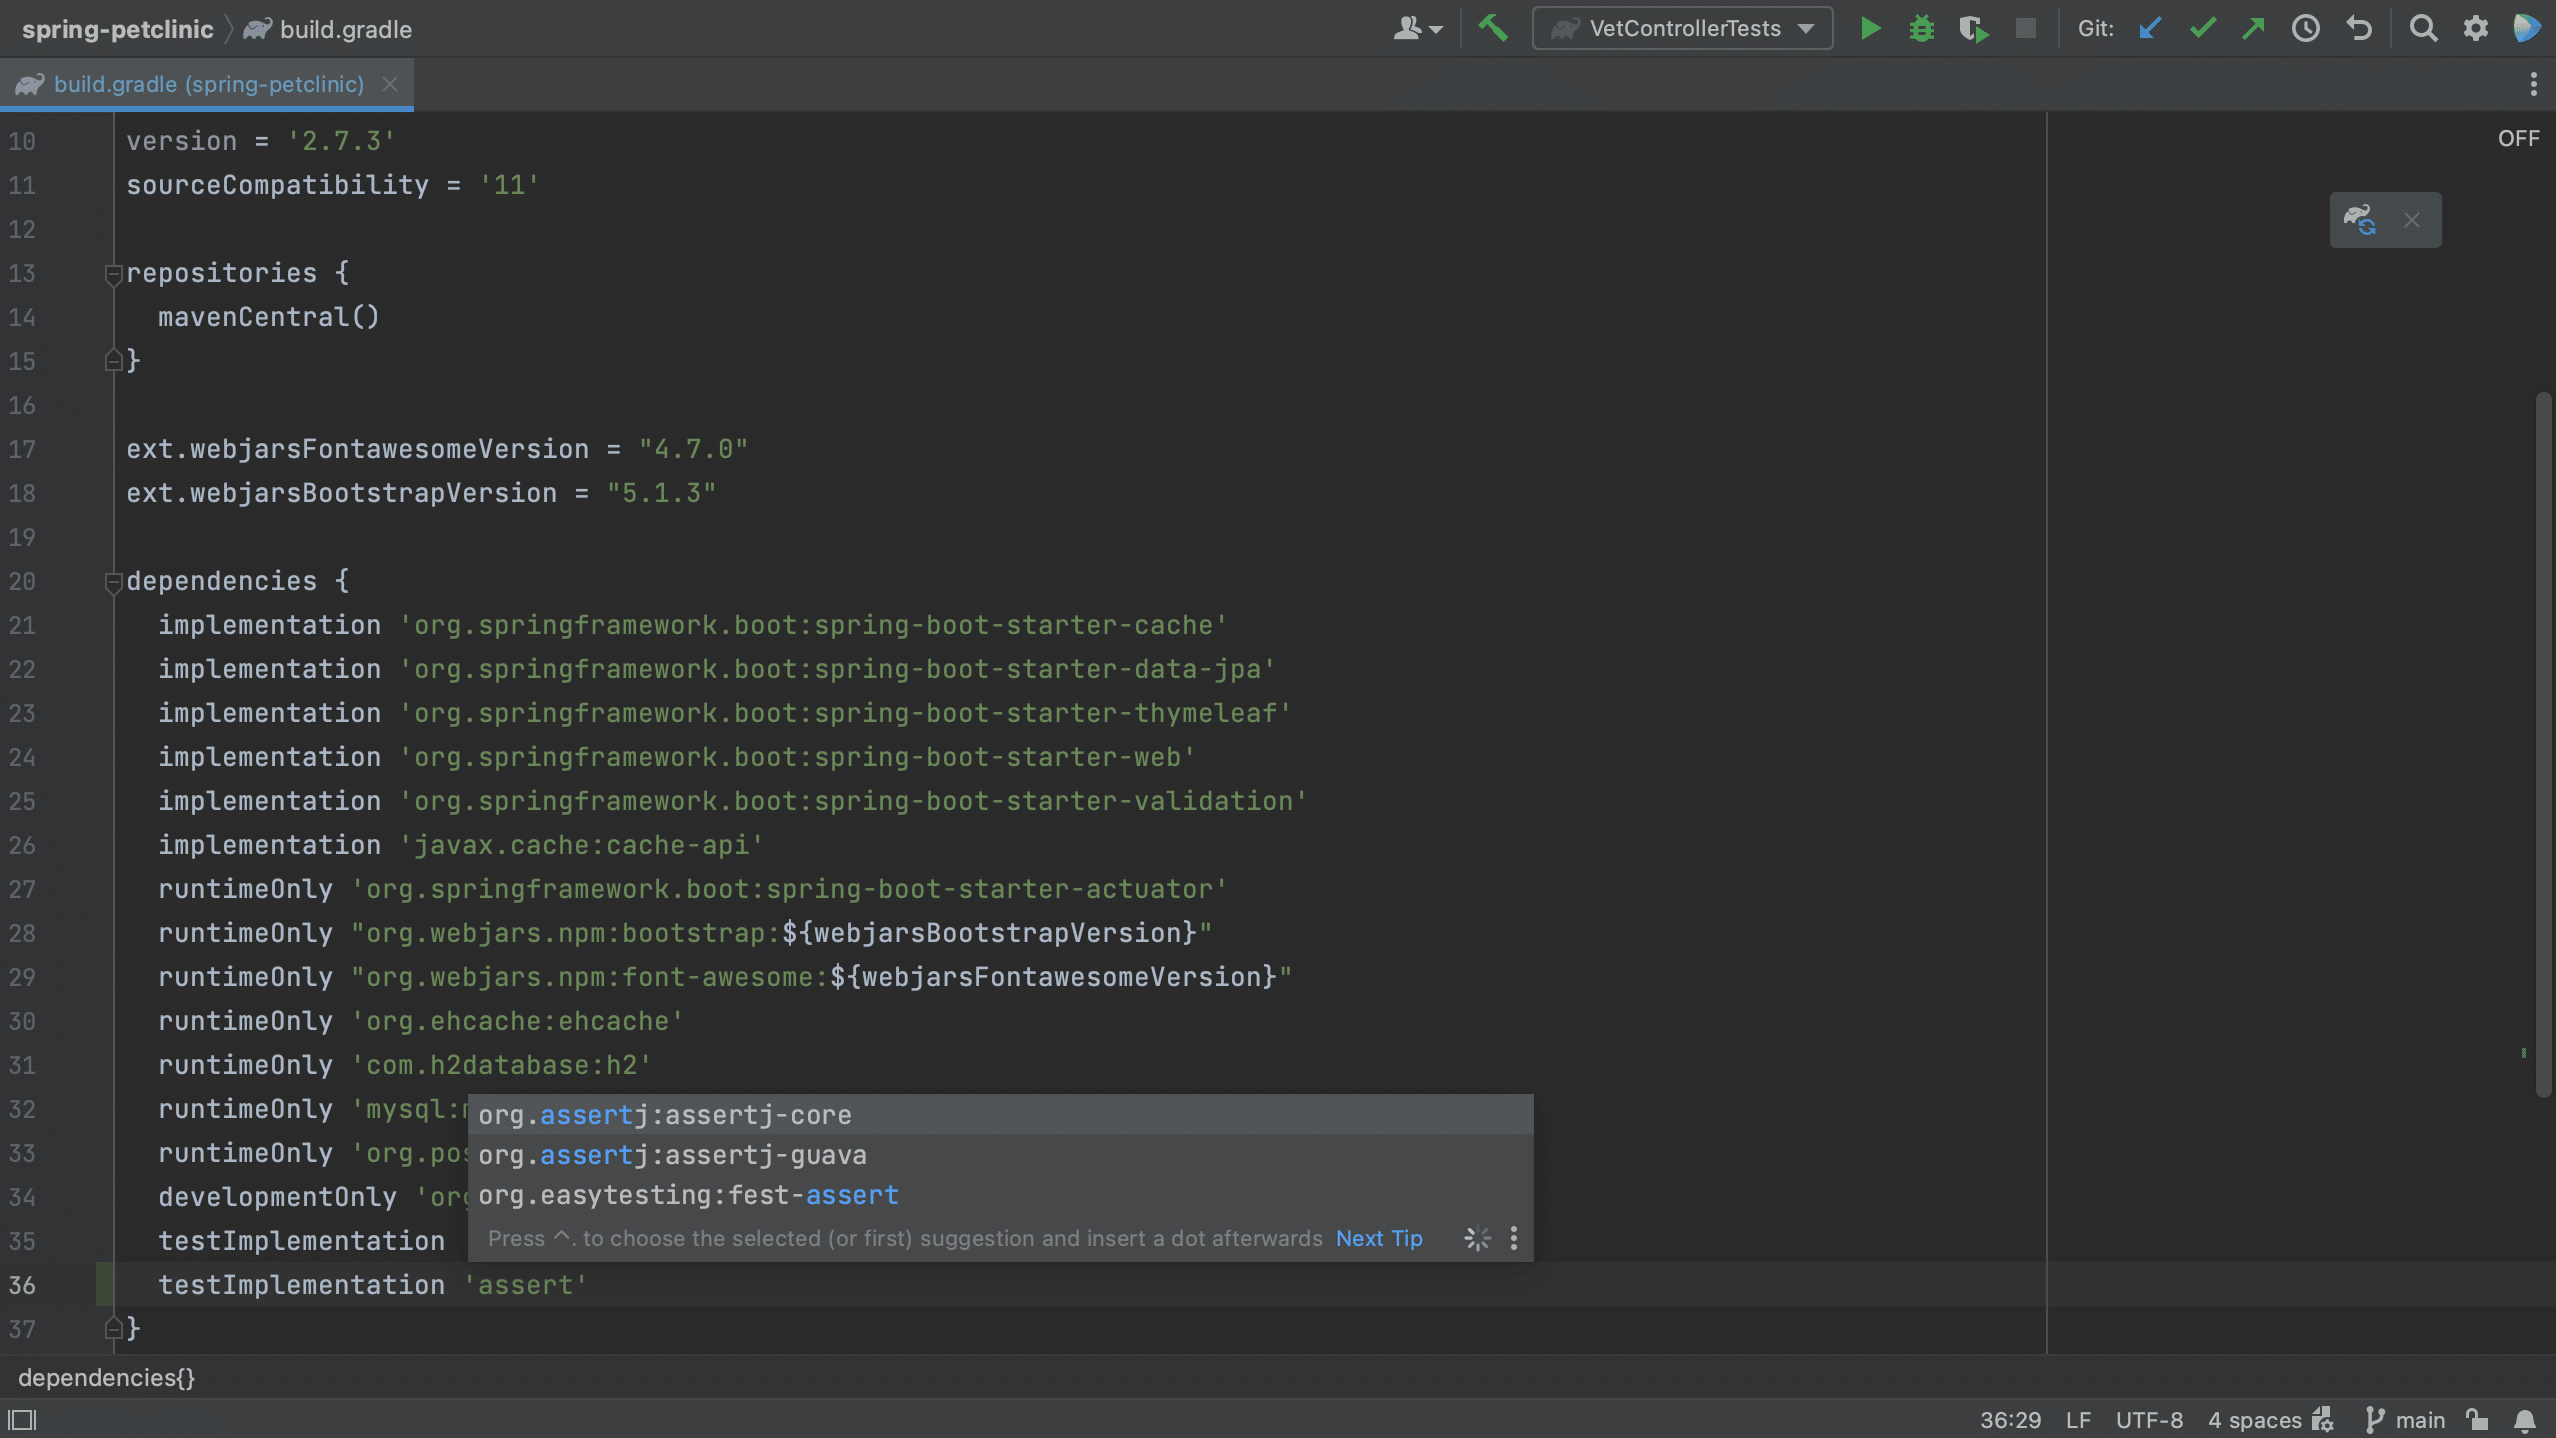
Code completion works in Gradle too, as you can see below.
From the build file using code generation
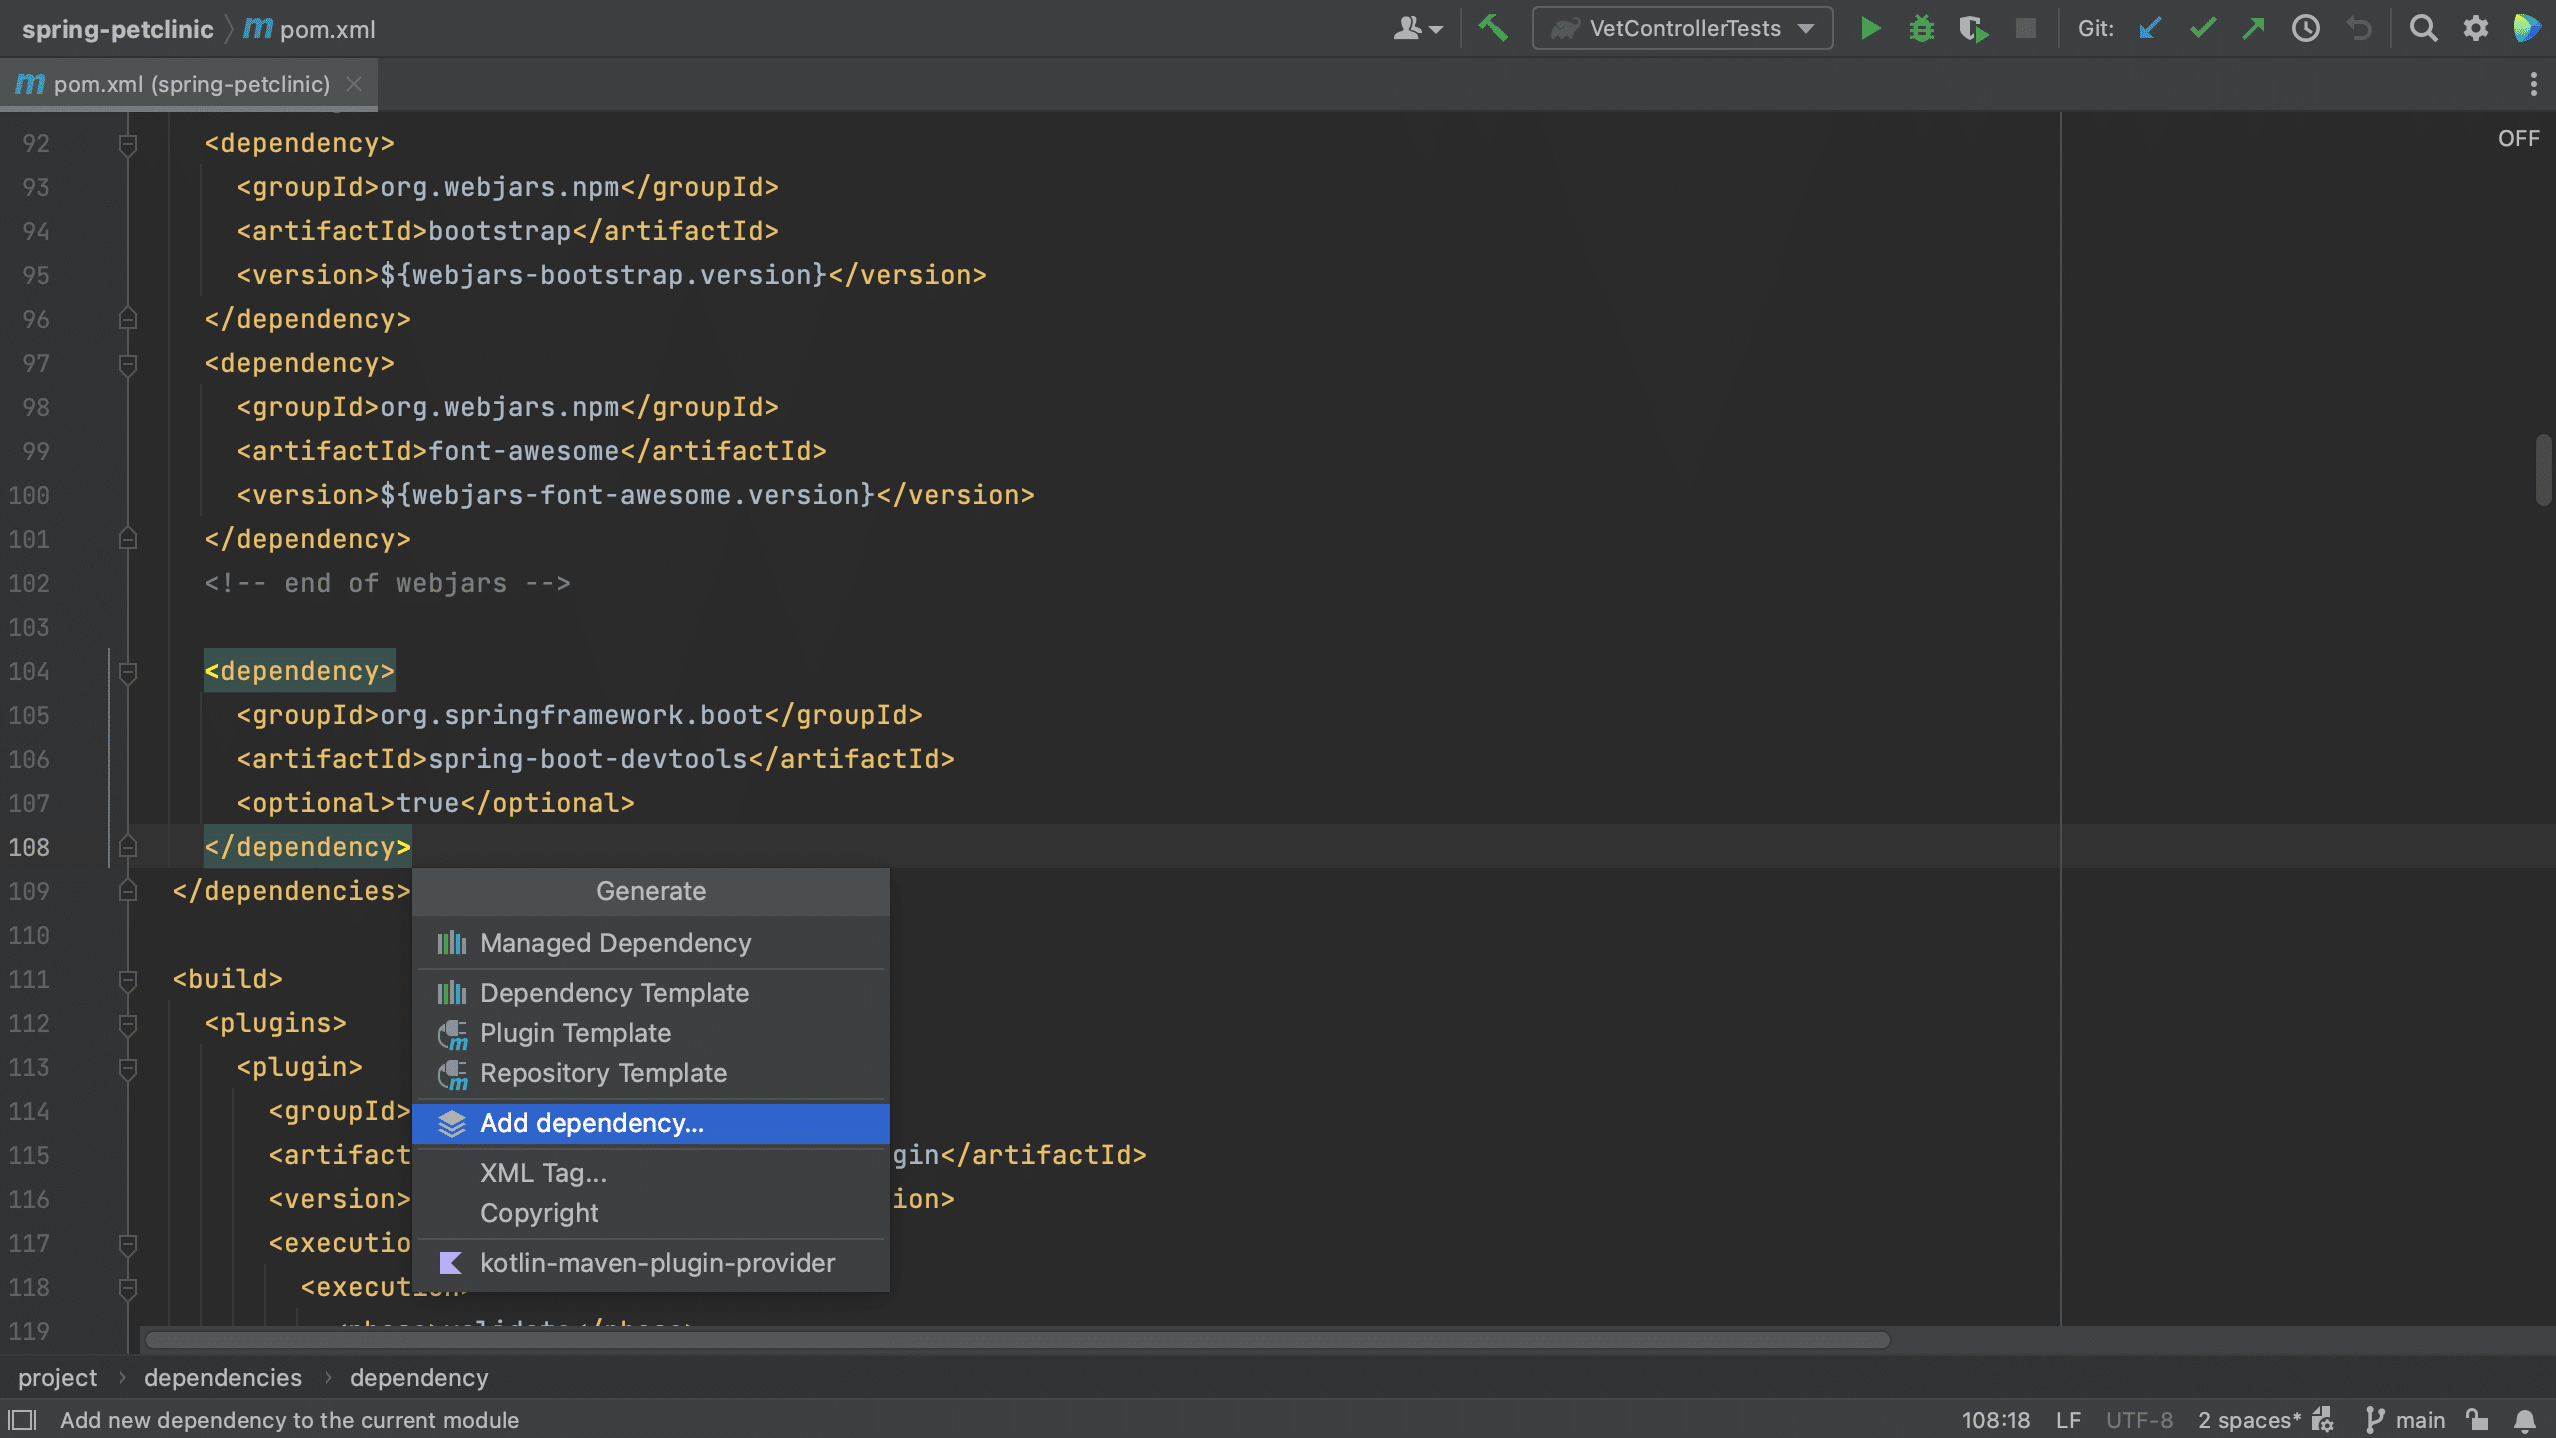
We can also use code generation from the build file to add dependencies. In the build file, the pom.xml in a Maven project, invoke Package Search using ⌘N (on macOS) or Alt+Insert (on Windows & Linux) and in the menu that opens, select Add dependency. This will open the Dependencies tool window.
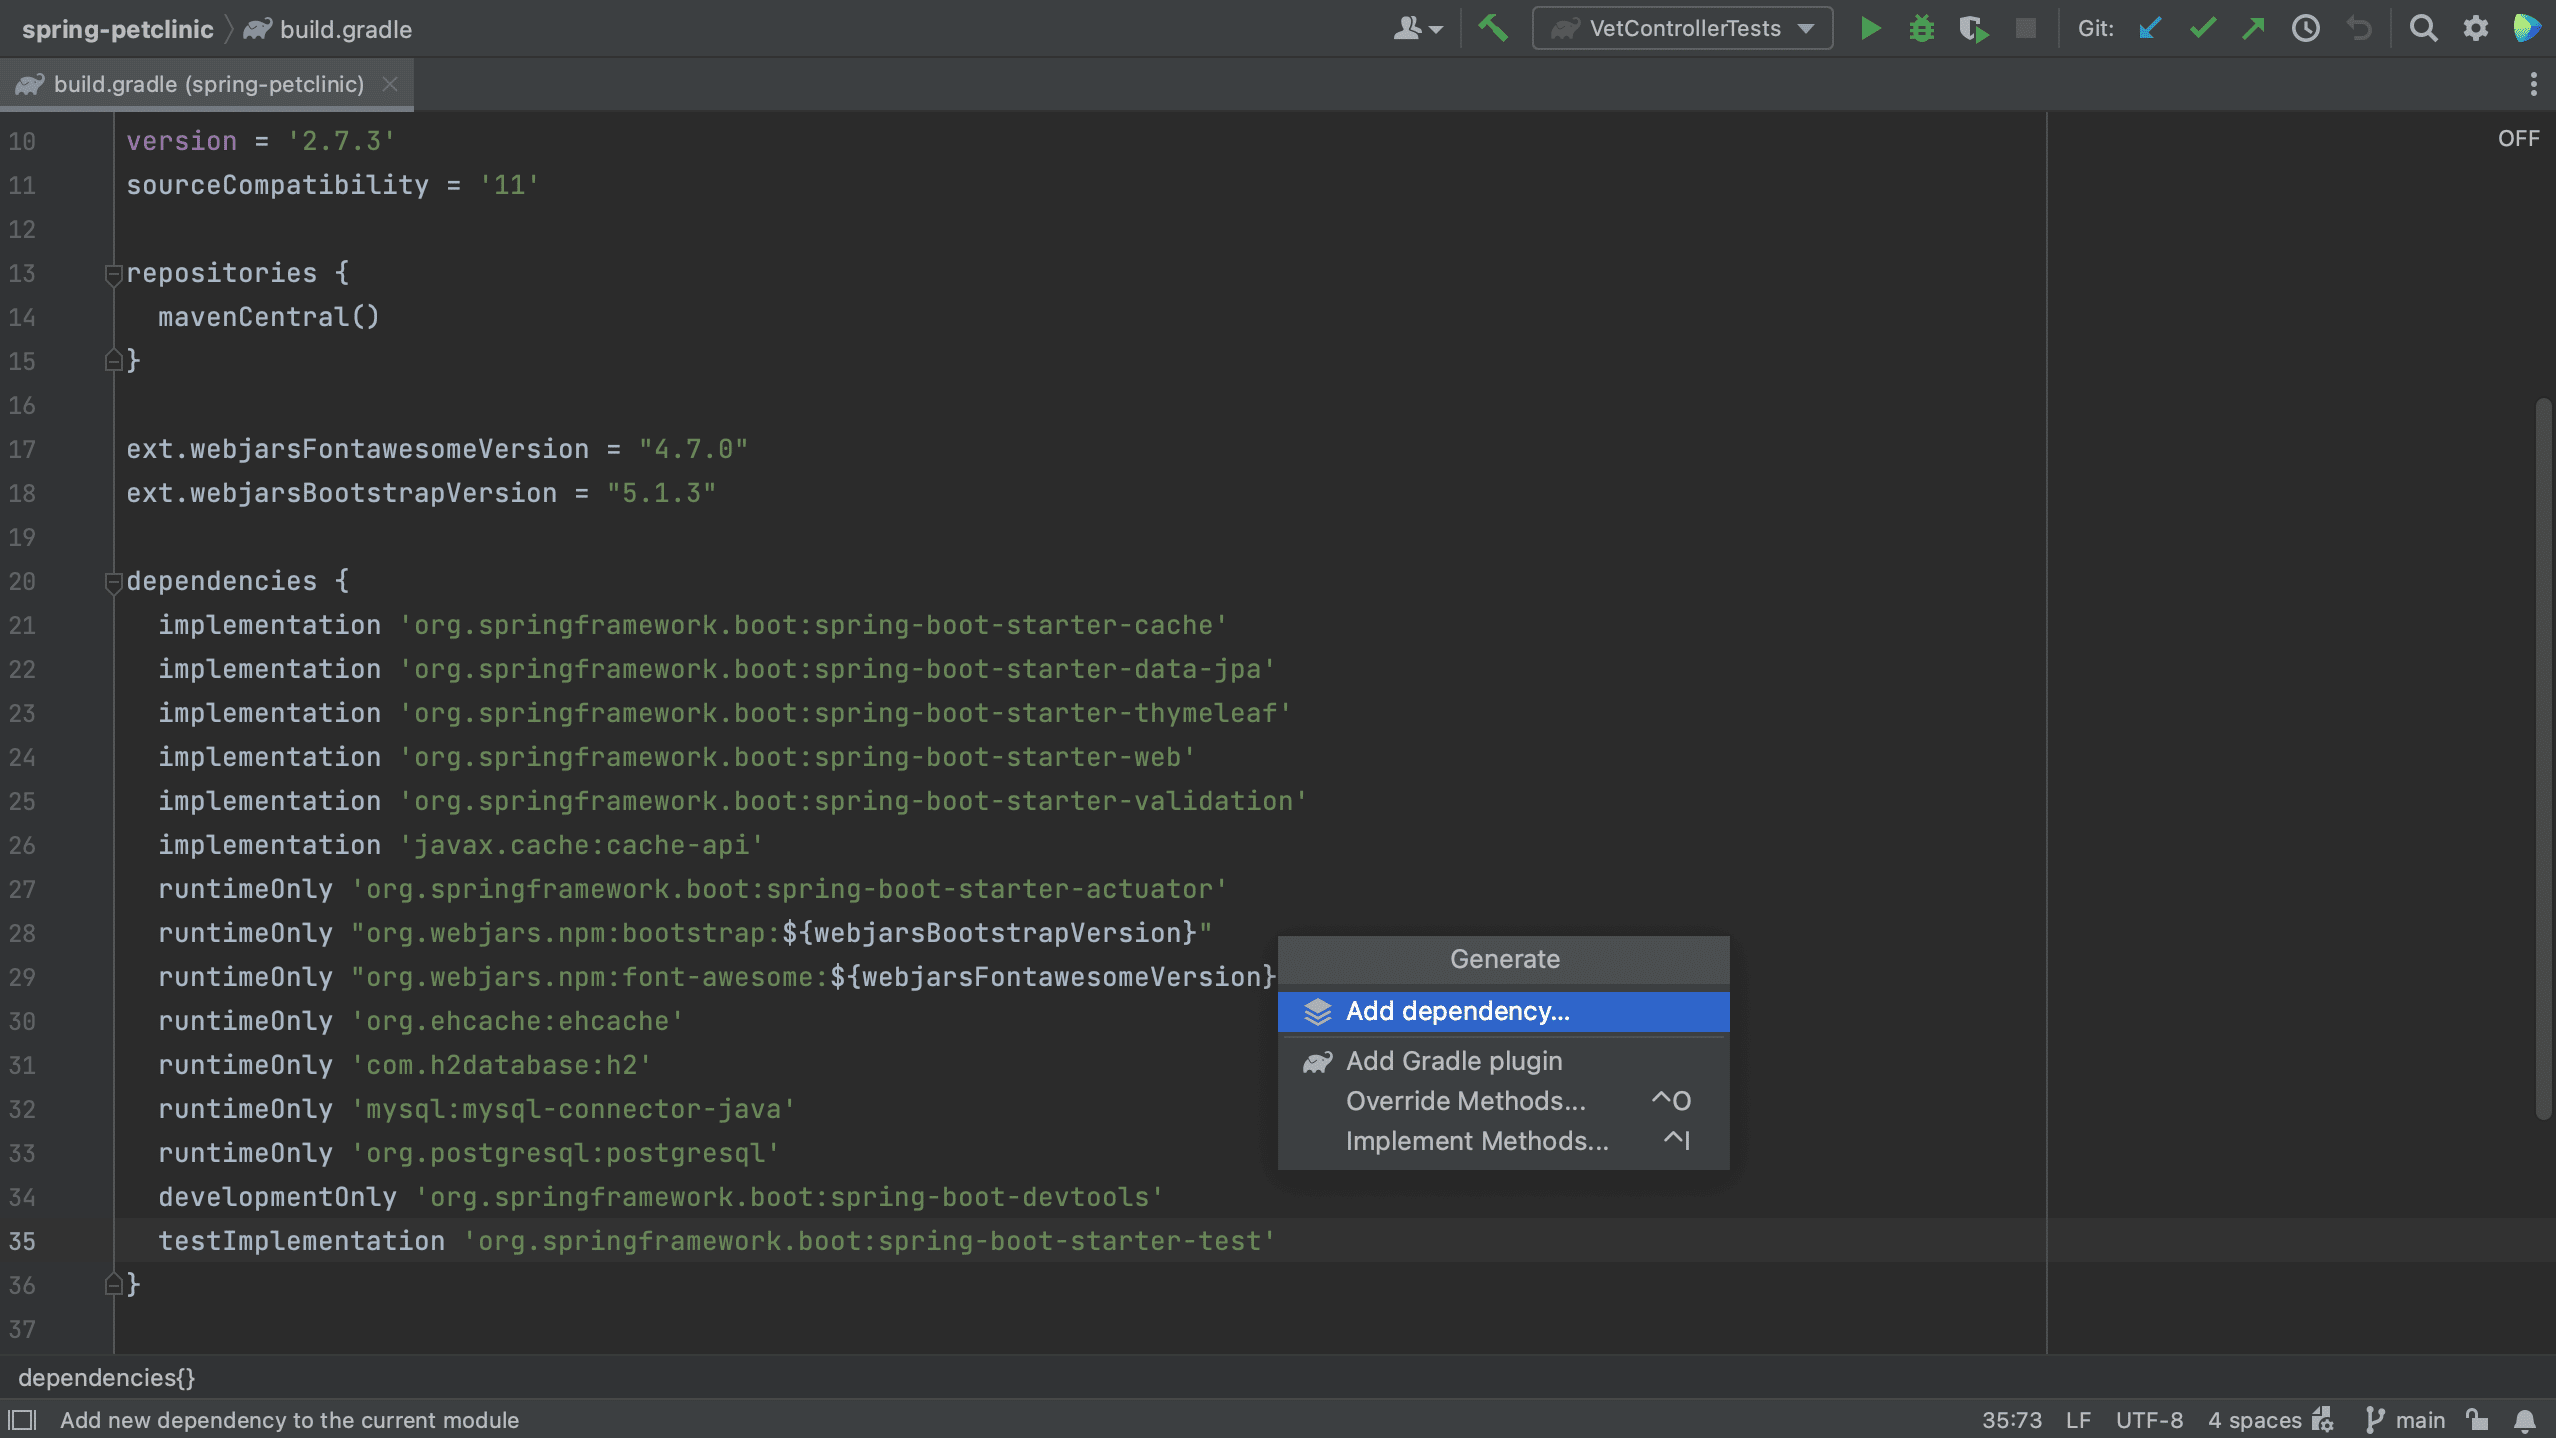
Note that if we are using Gradle, we can do the same in our build.gradle file.
From the Dependencies tool window
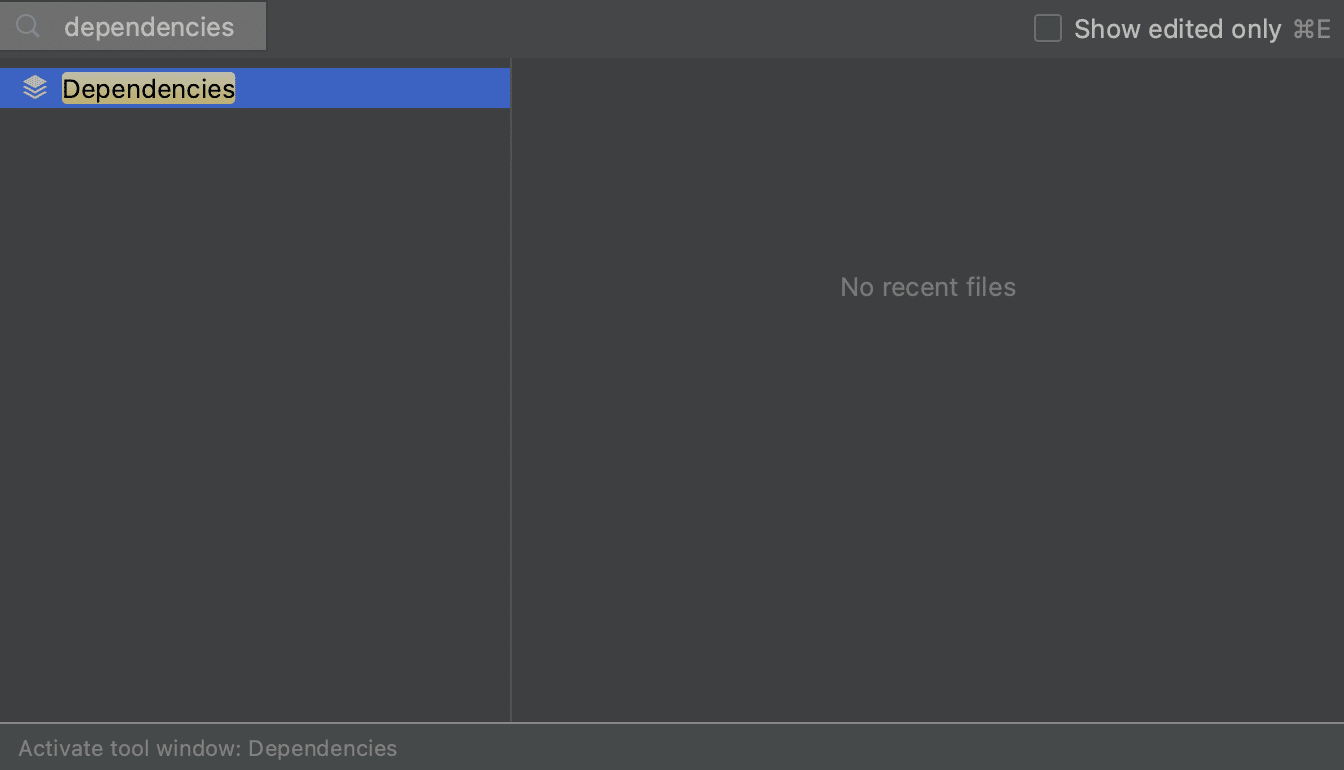
Alternatively, we can open the Dependencies tool window directly. There is no shortcut to open the Dependencies tool window, so we can either use Recent Files, ⌘E (on Mac) or Ctrl+E (on Windows/Linux), and type in “dependencies” to open the Dependencies tool window.
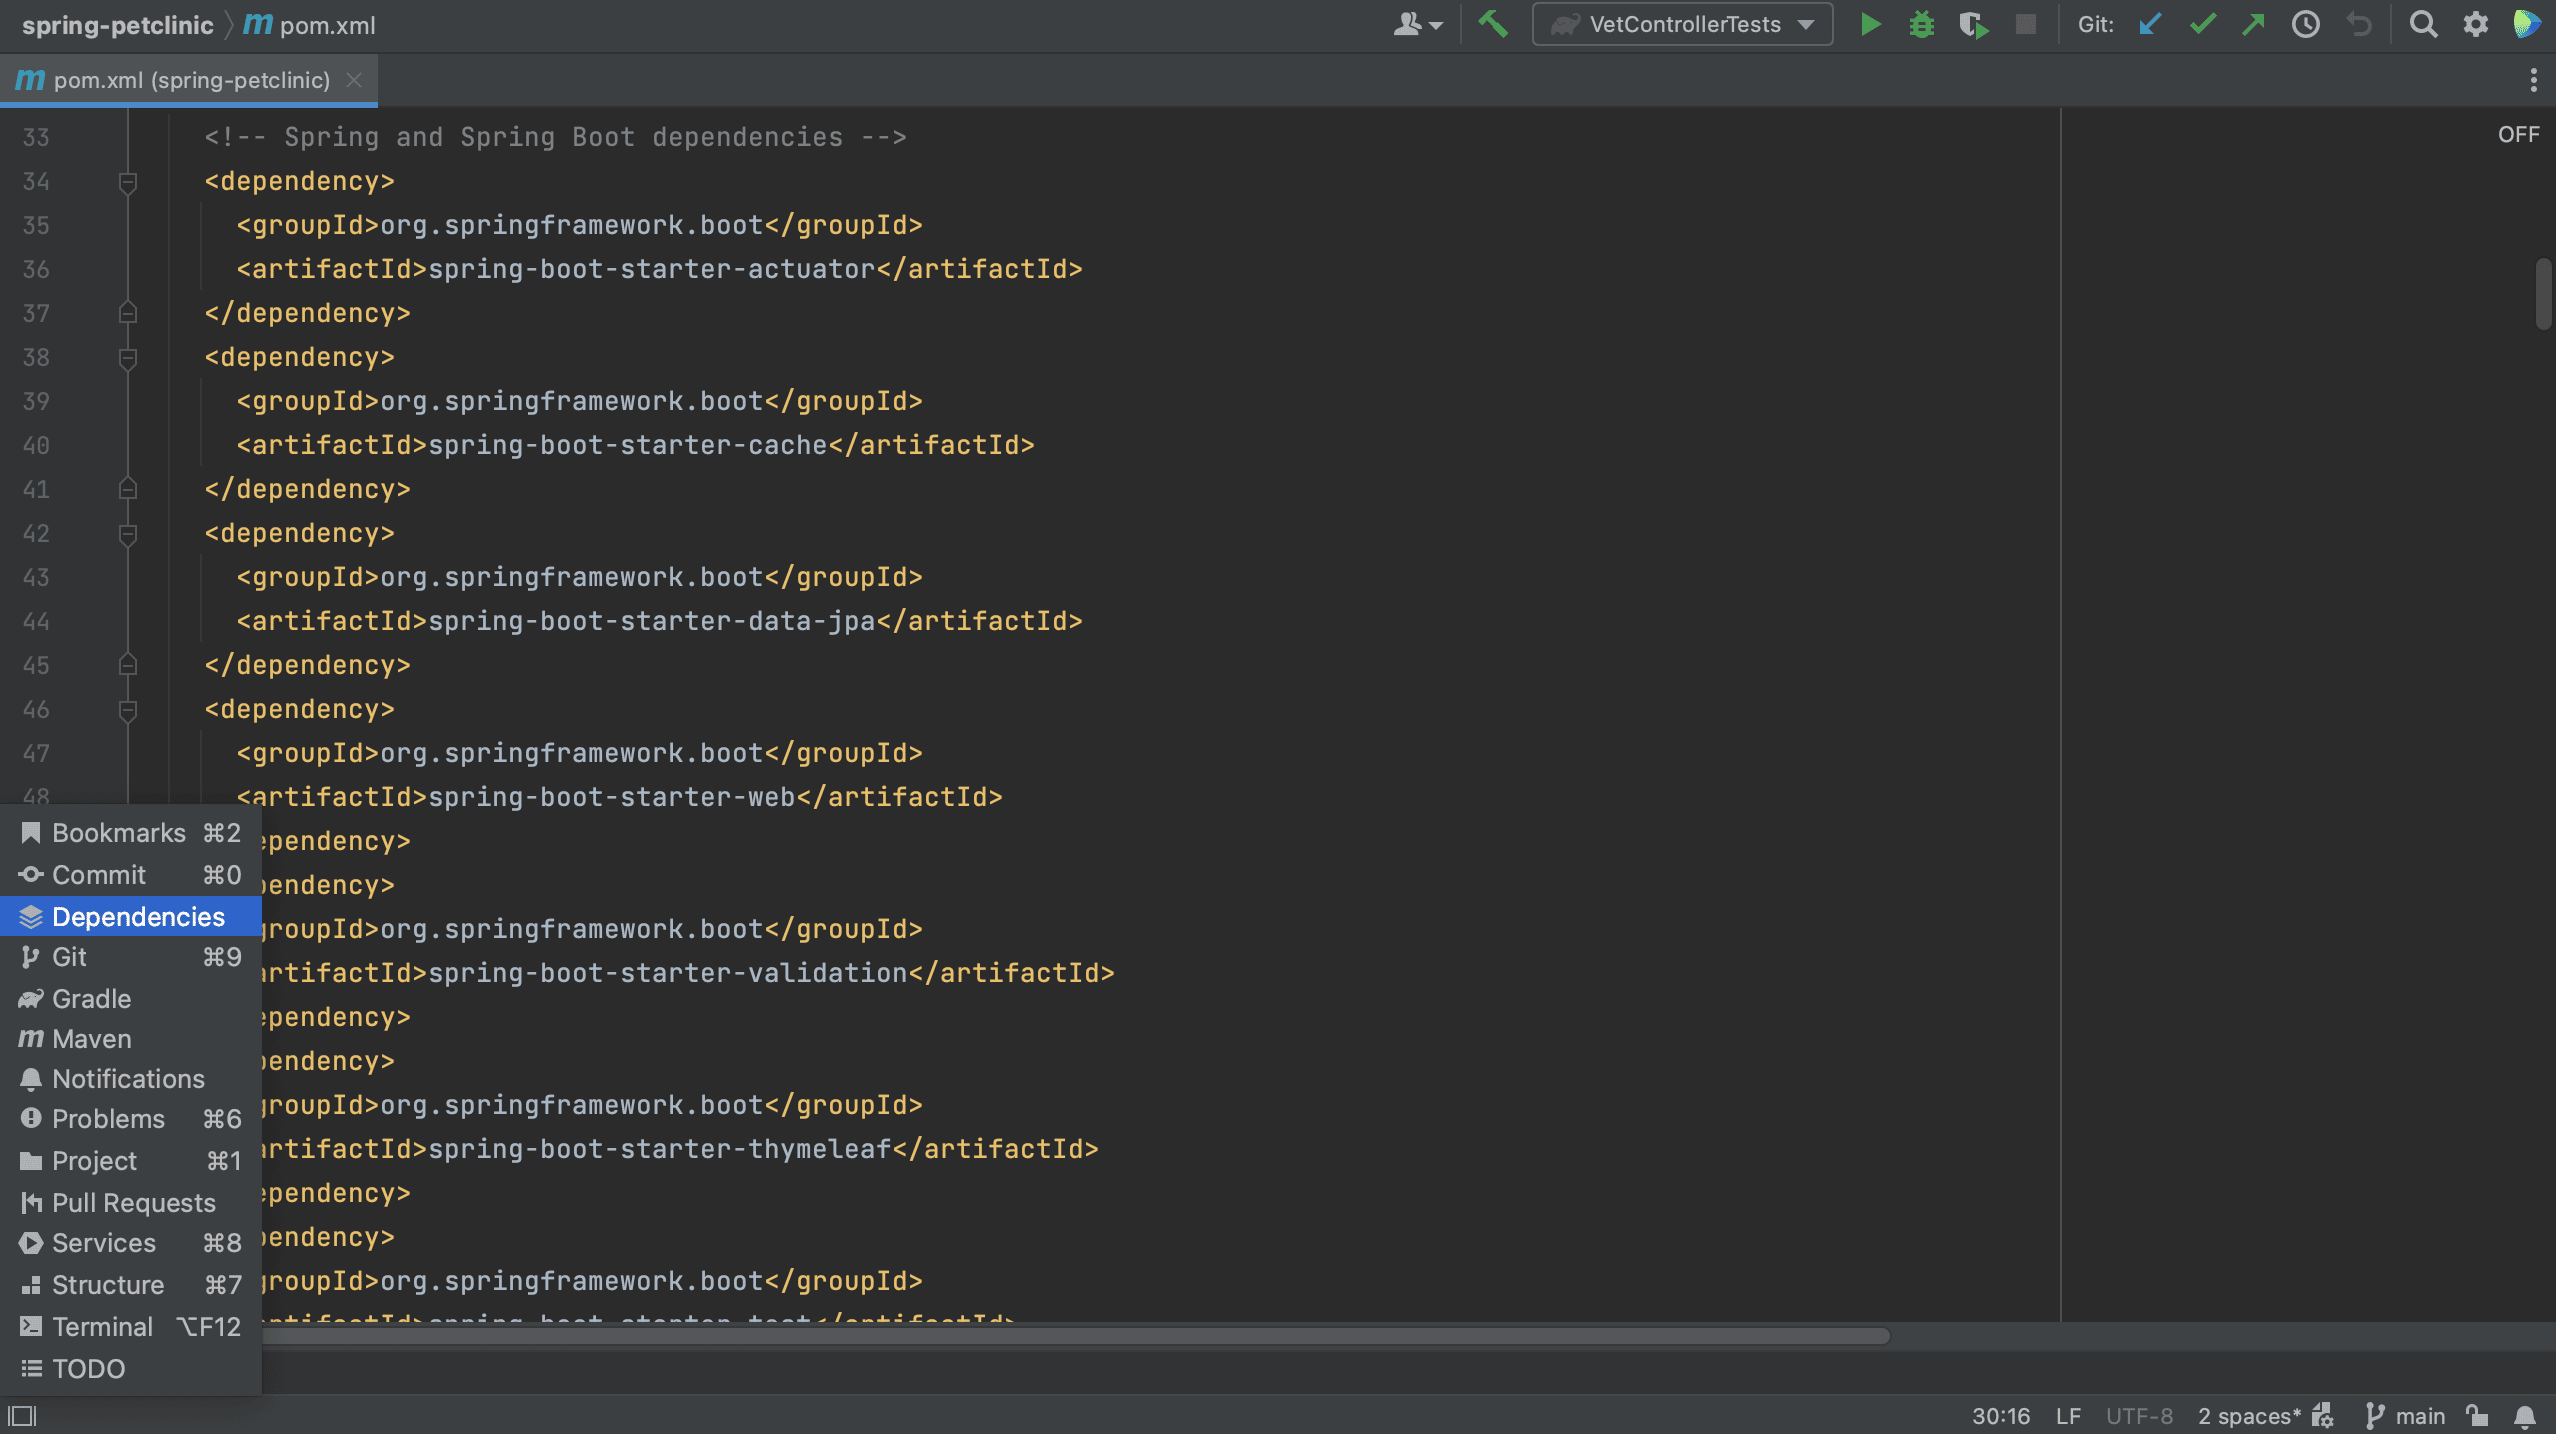
Alternatively, we can open it by clicking Quick Launch in the bottom-left and selecting Dependencies.
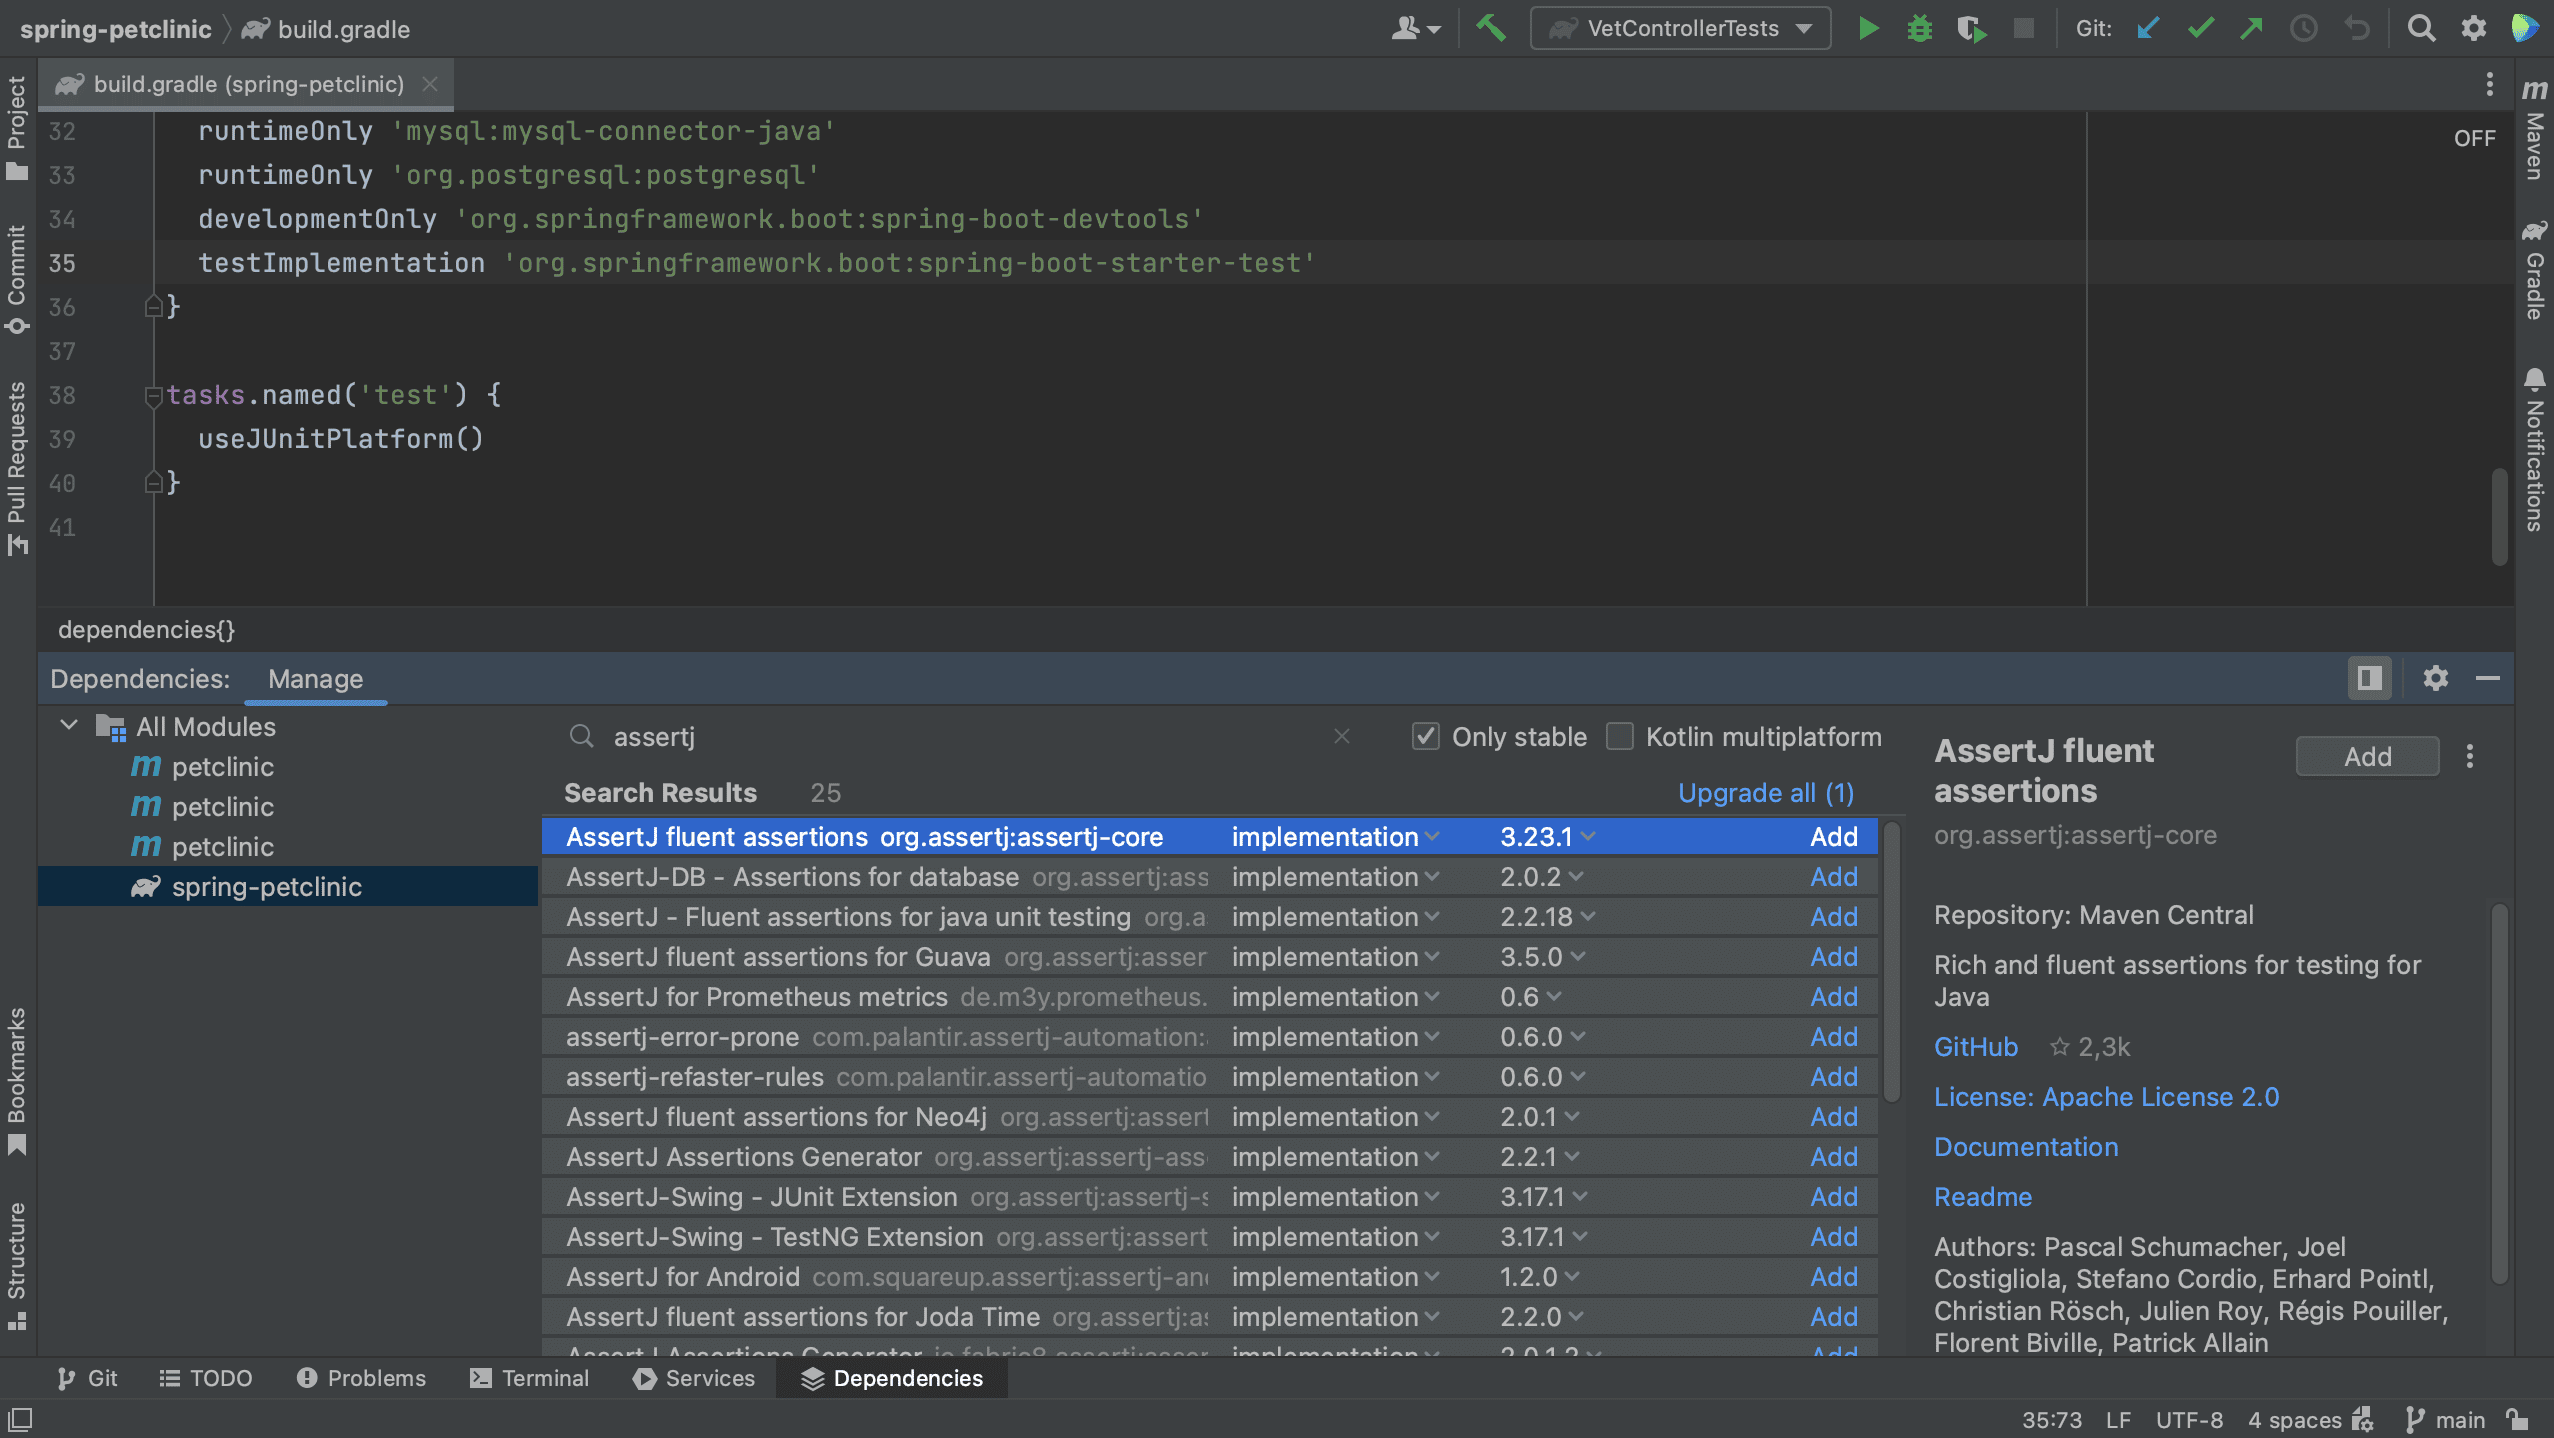
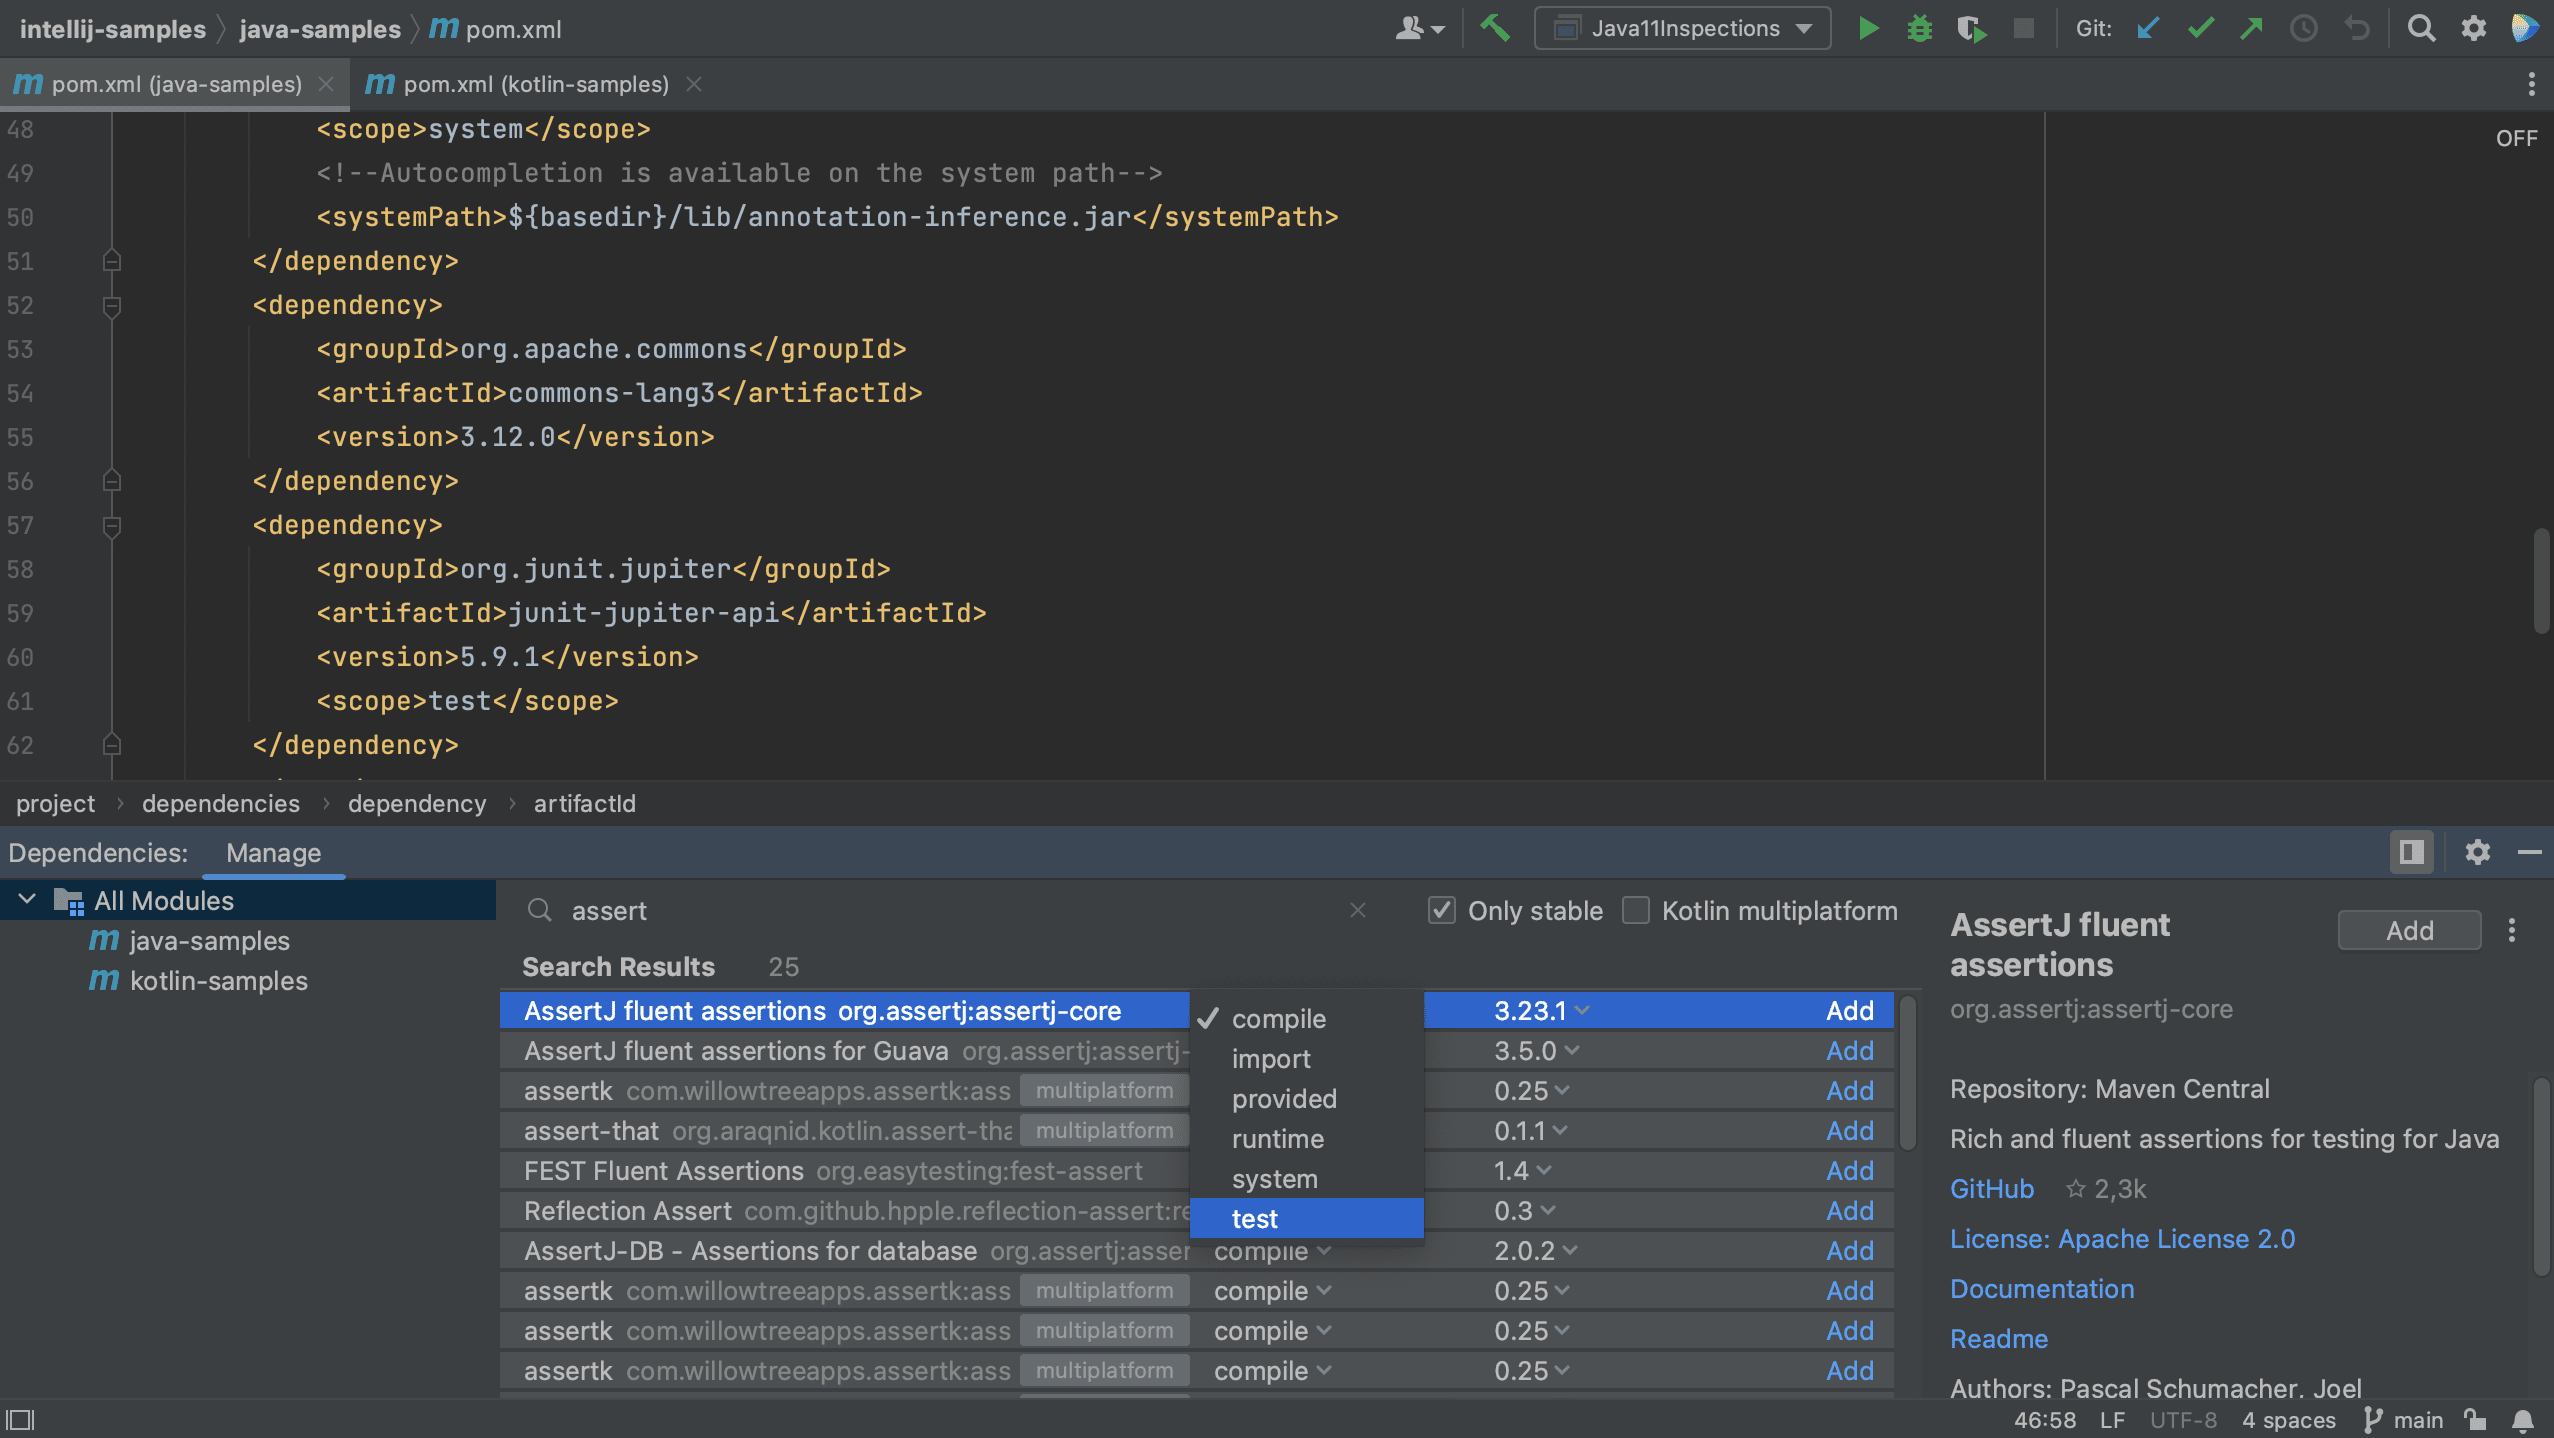
In the Dependencies tool window, we can search for a dependency. For example, let’s search for AssertJ.
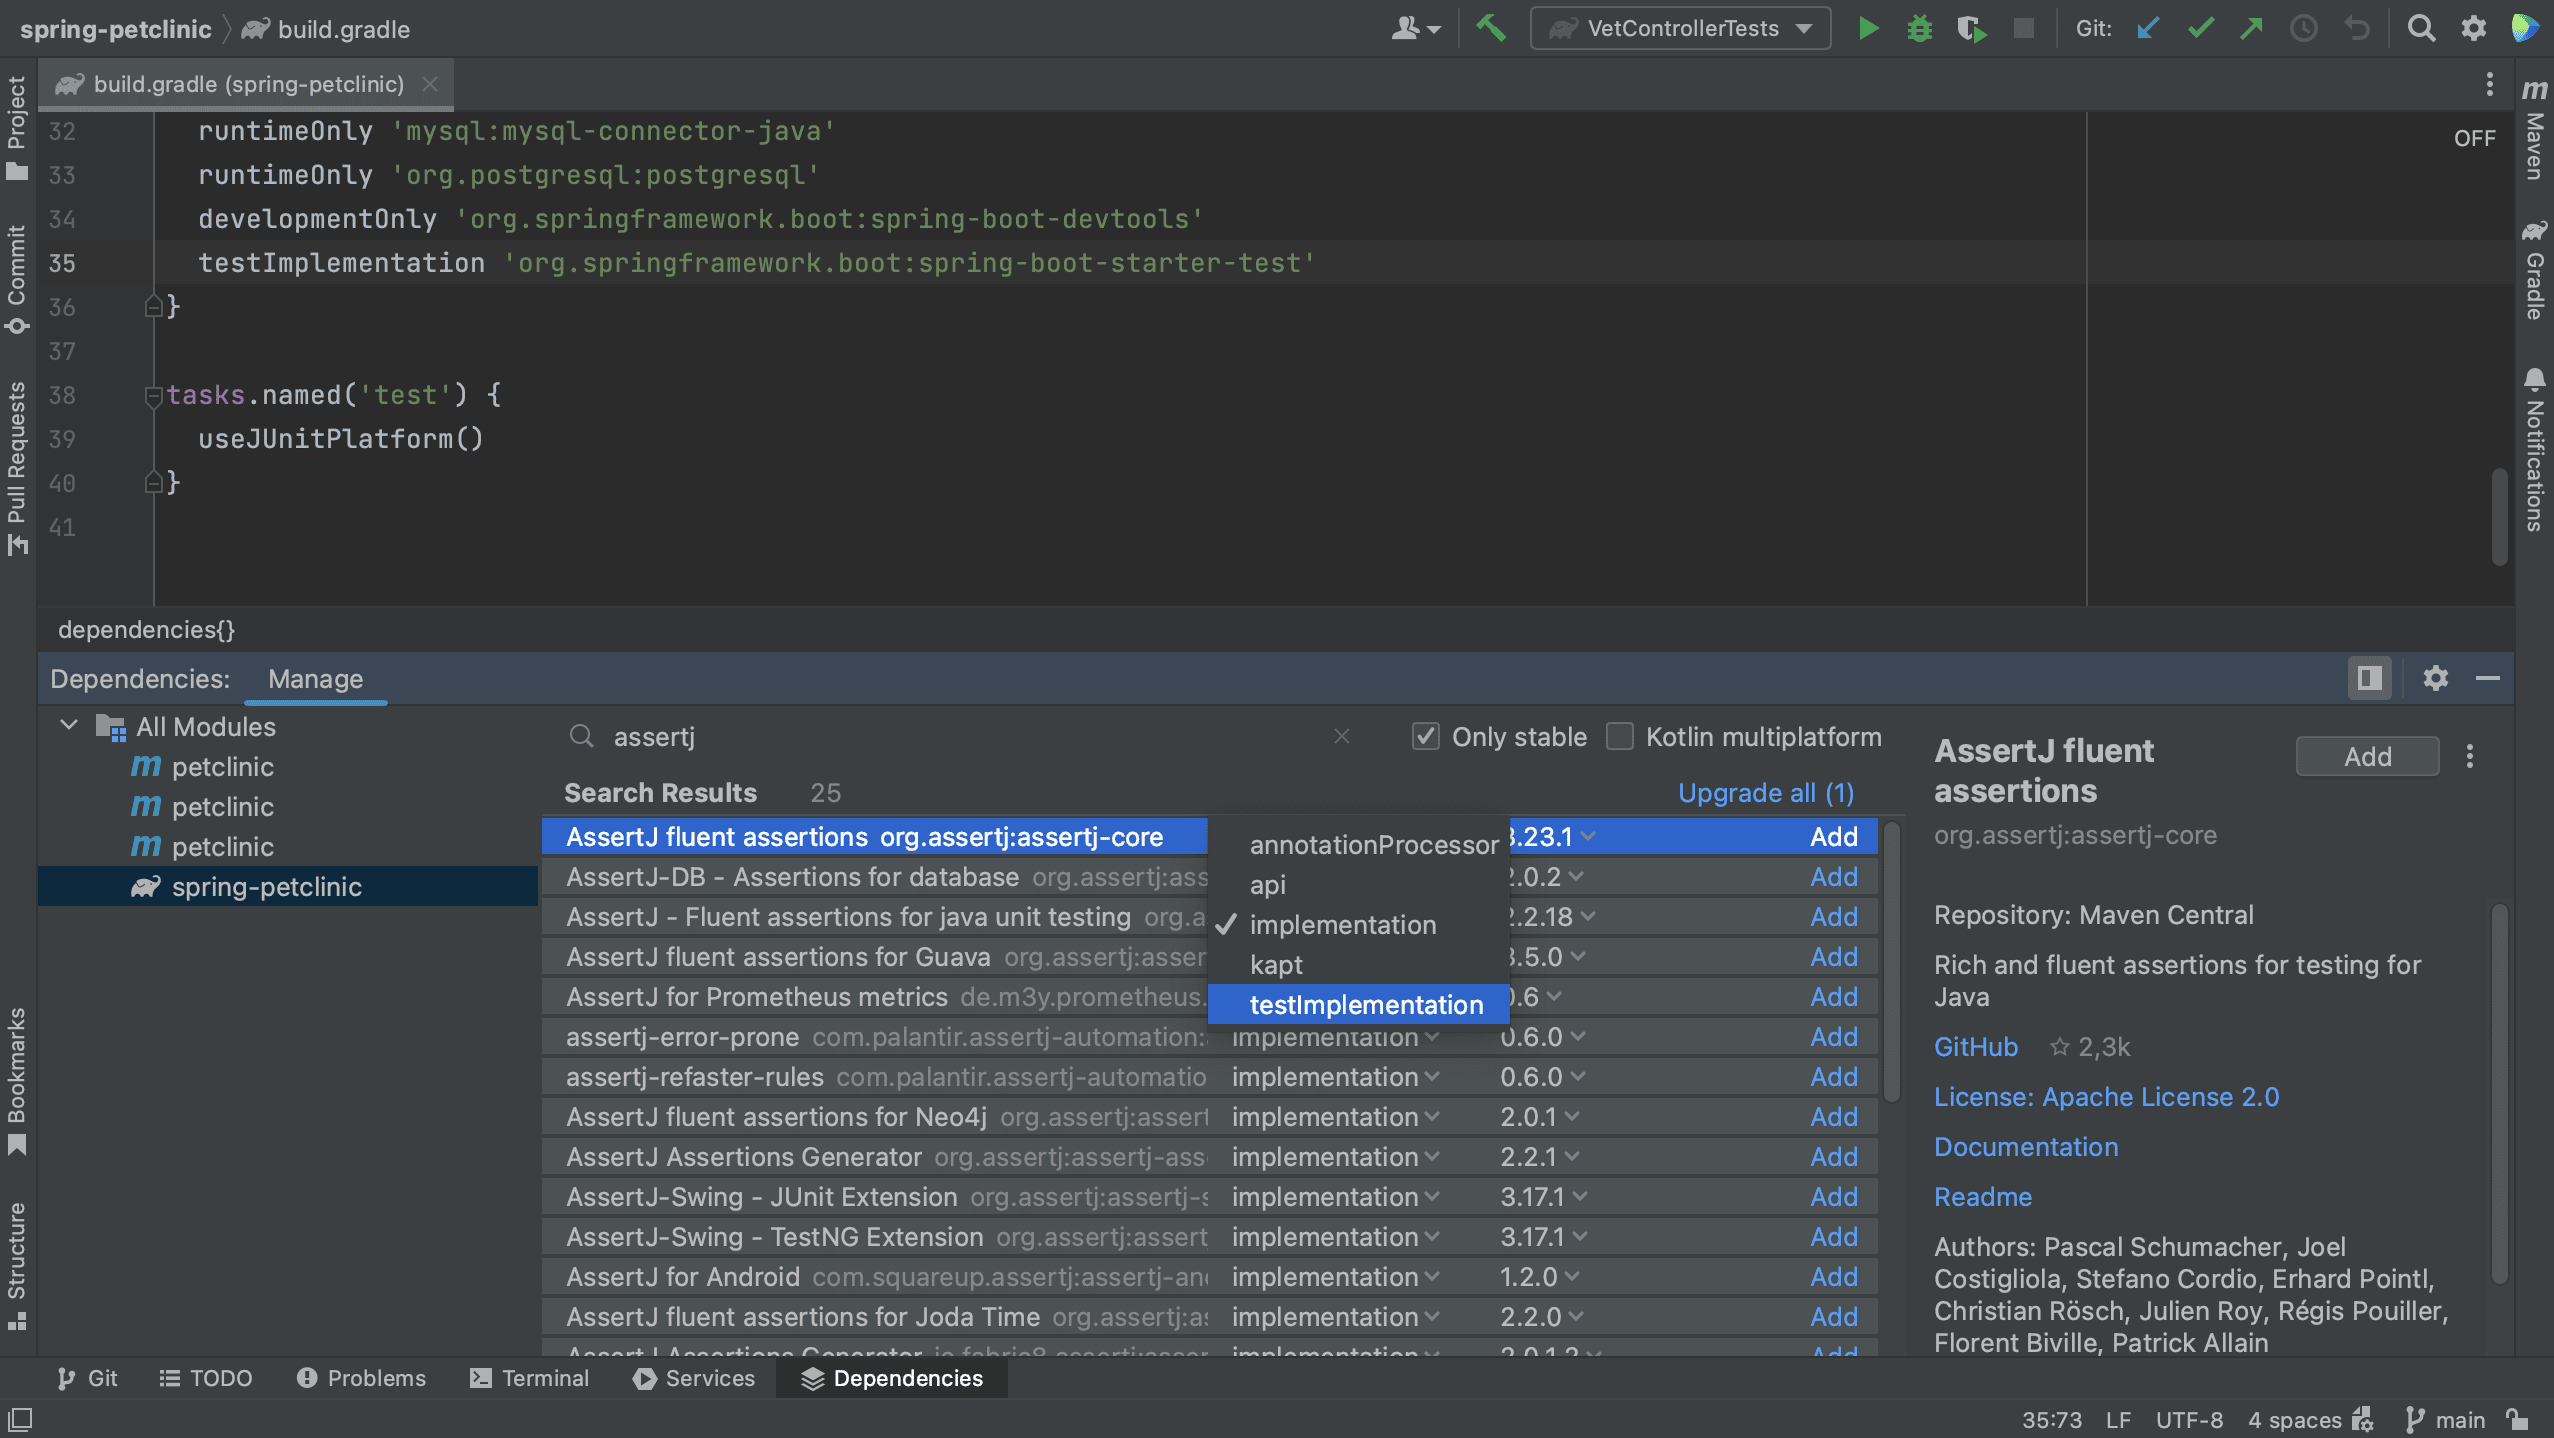
Note that we can select a scope for this dependency. The names of the scopes are based on the build tool with which you are working. Since this is a test dependency, and we are using Gradle in this project, we can set the scope to testImplementation.
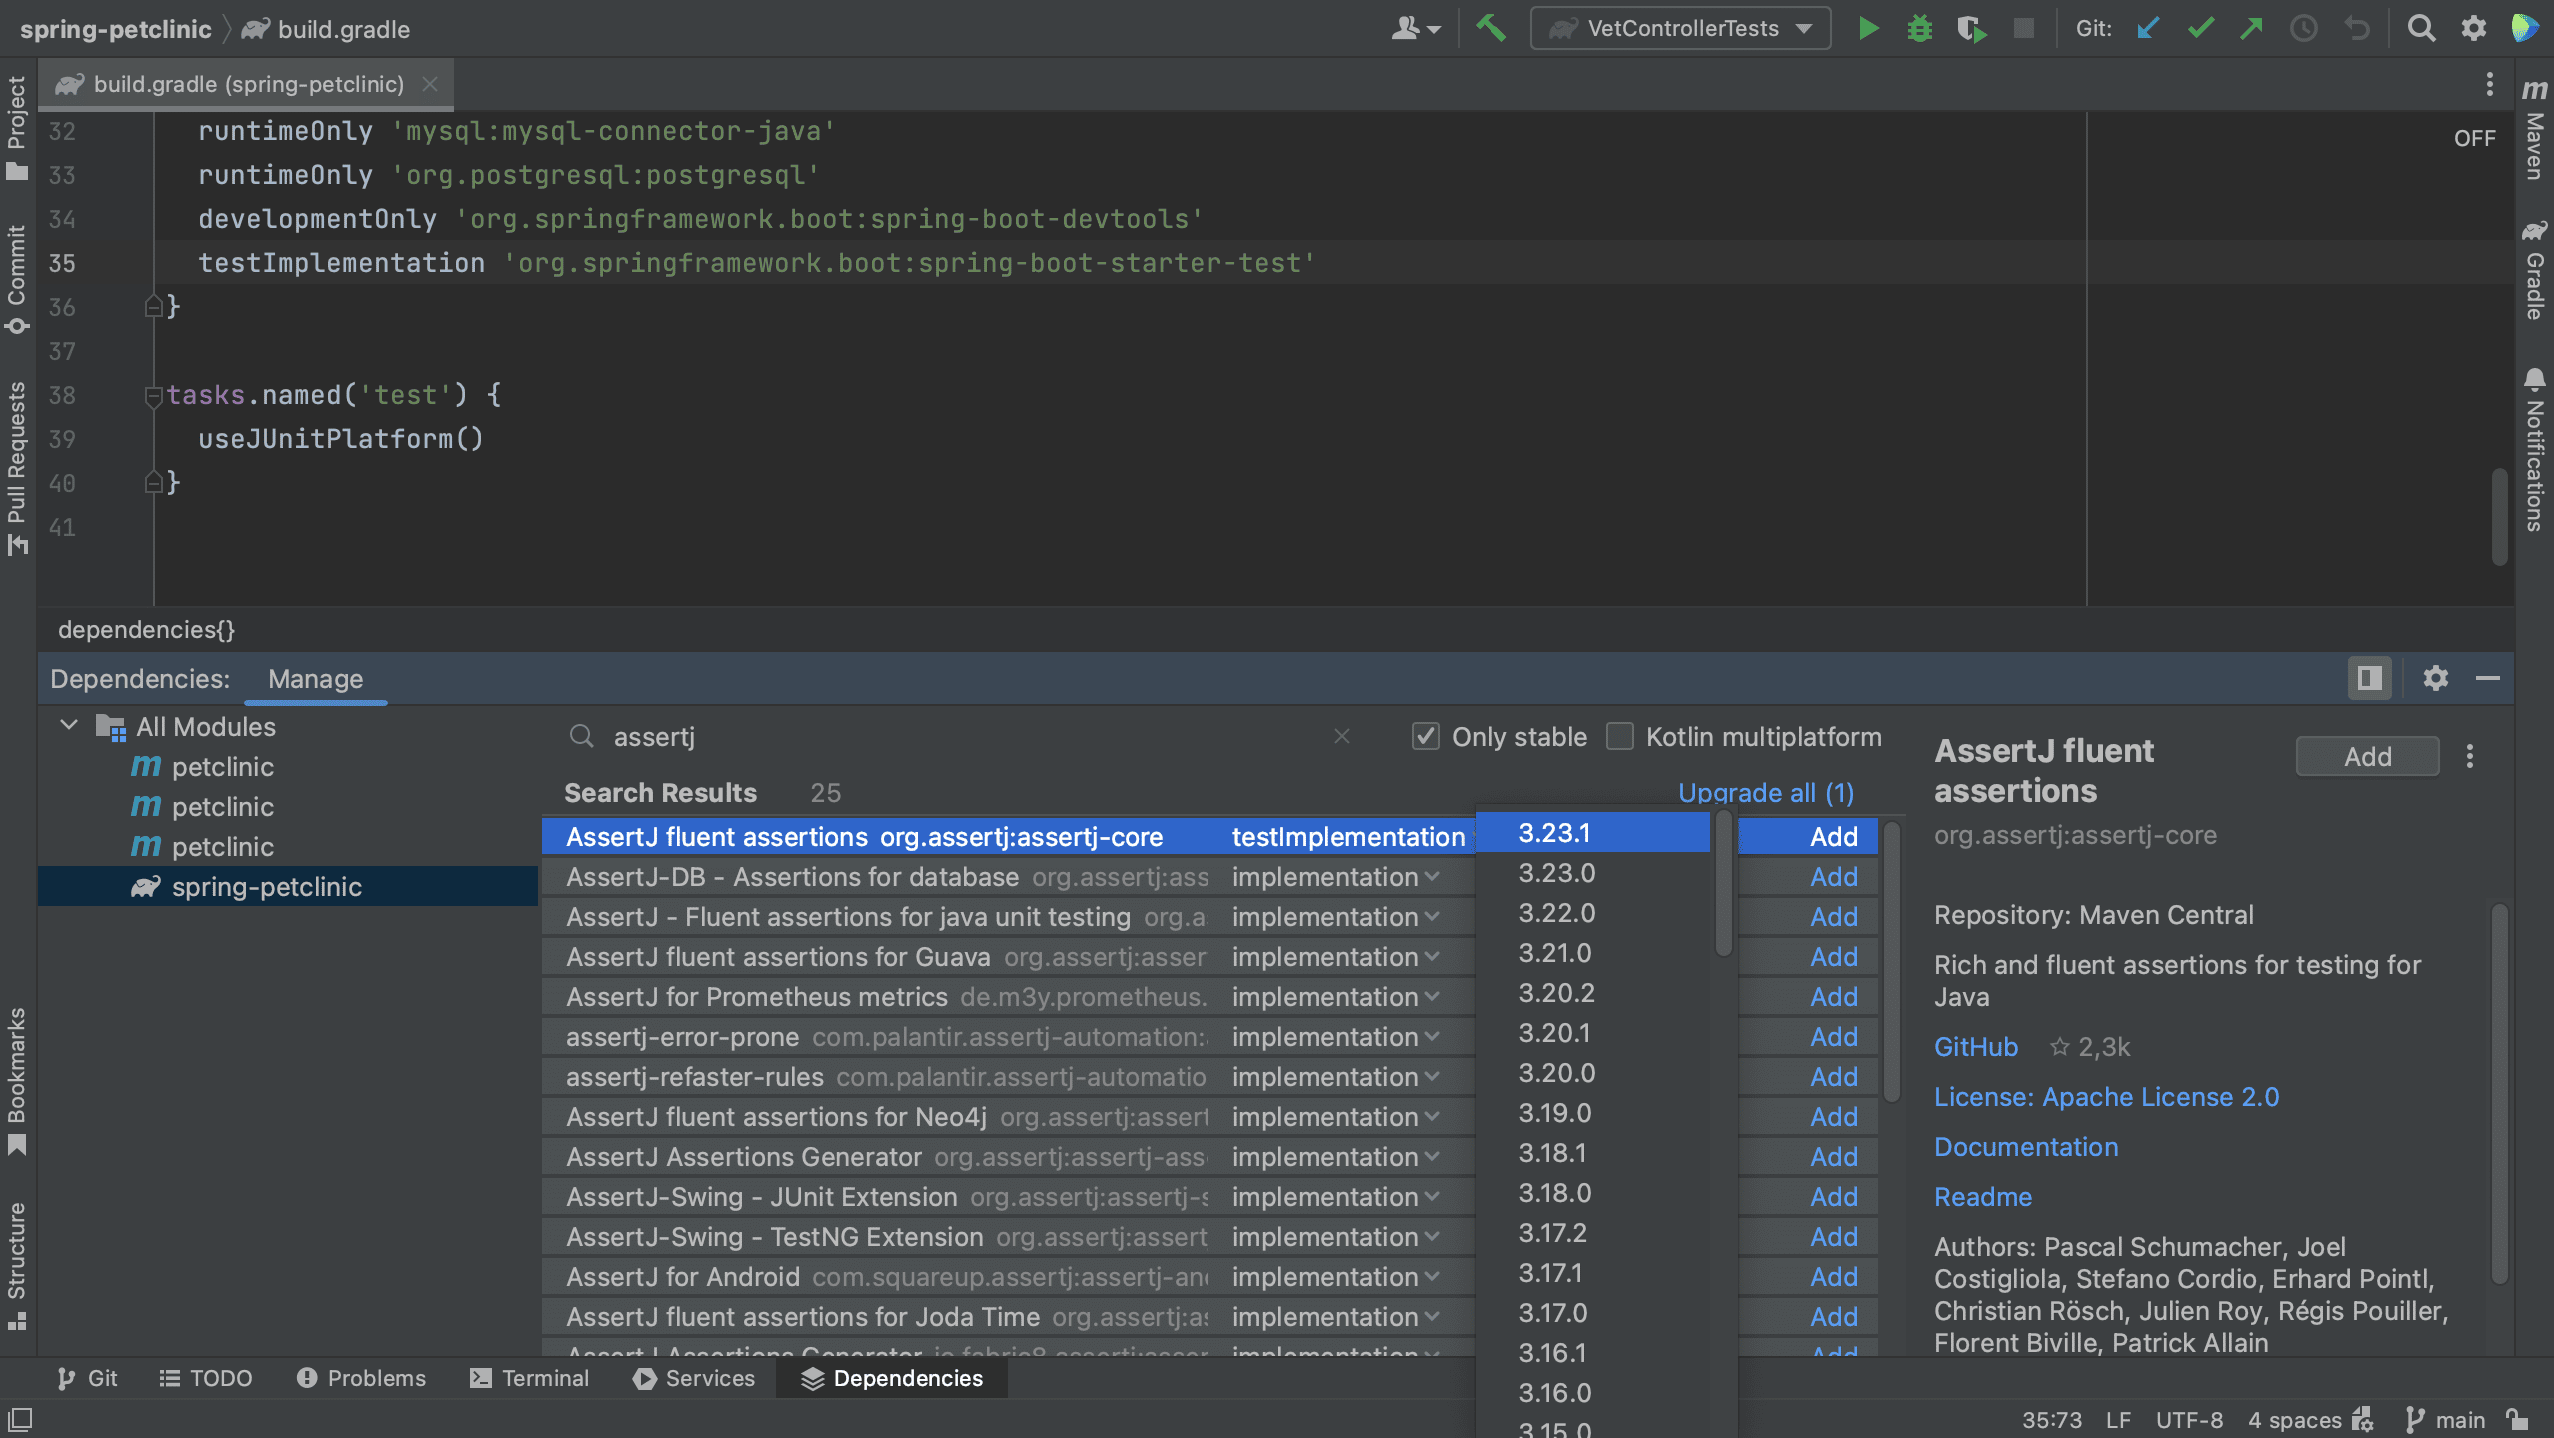
We can also select the version we want to use.
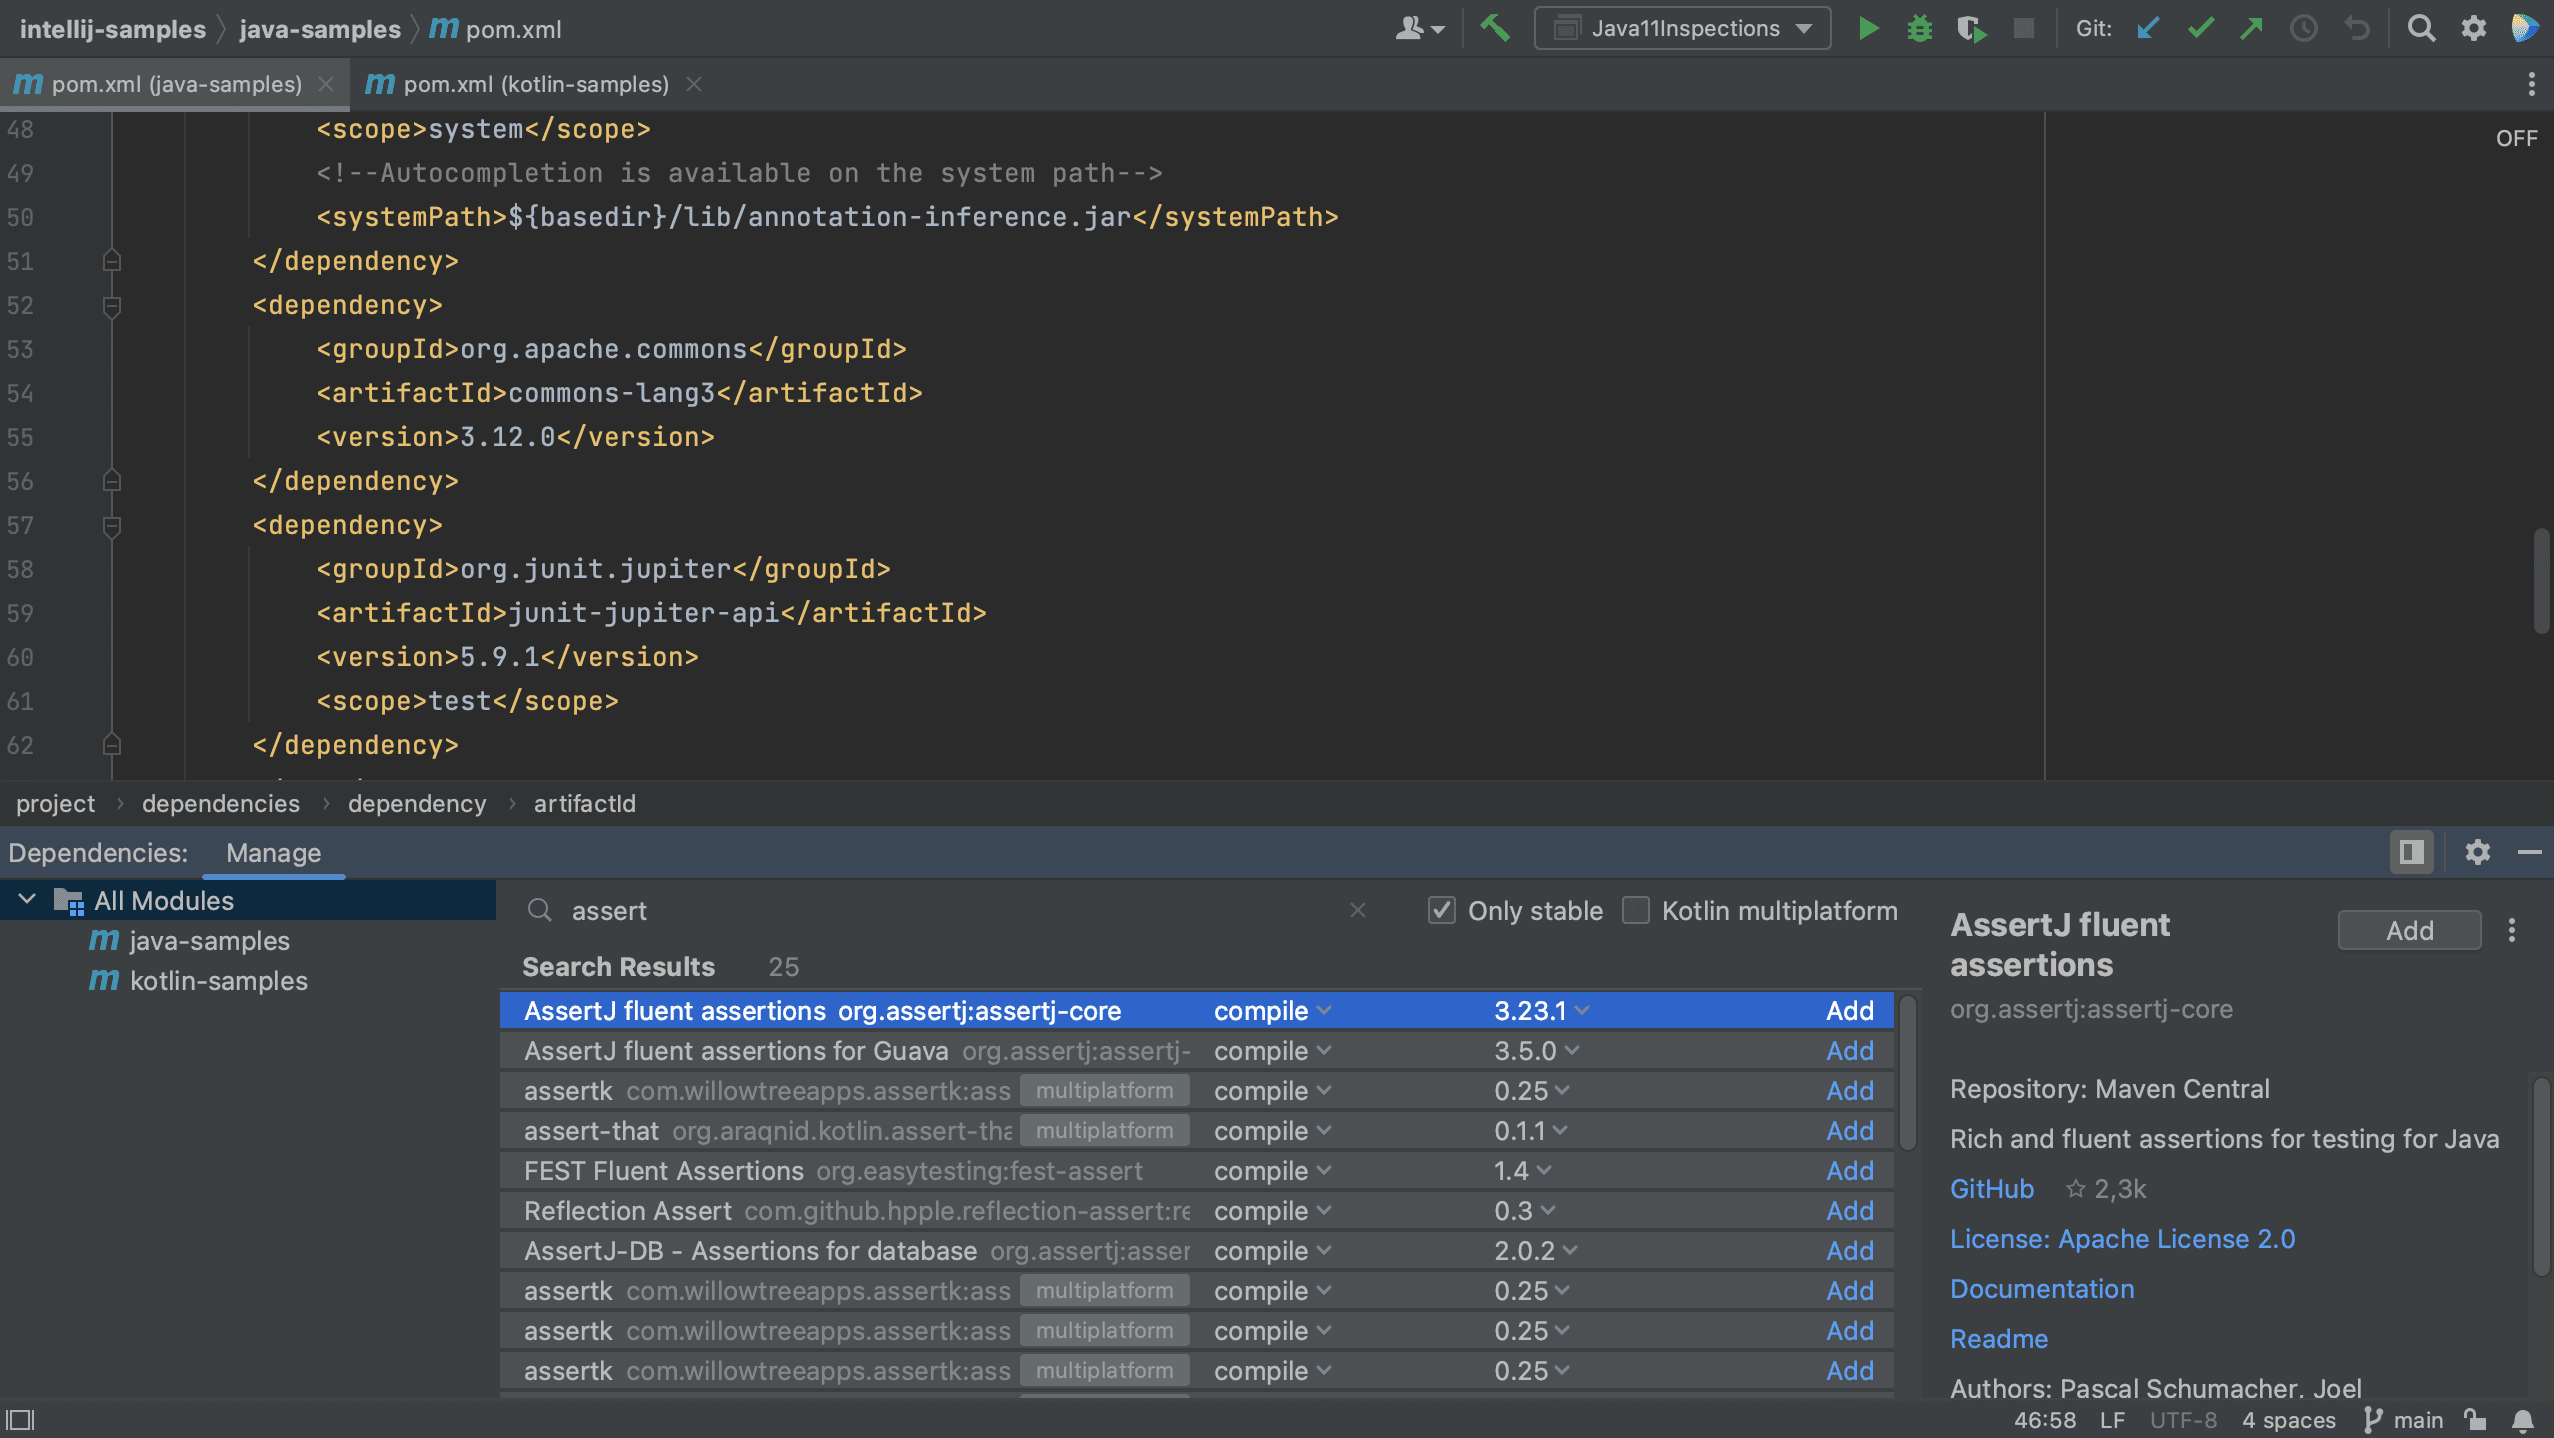
We can do the same in Maven.
Note that the names of scopes for Maven are different from Gradle. In Maven, we can set the scope for a test dependency to test.
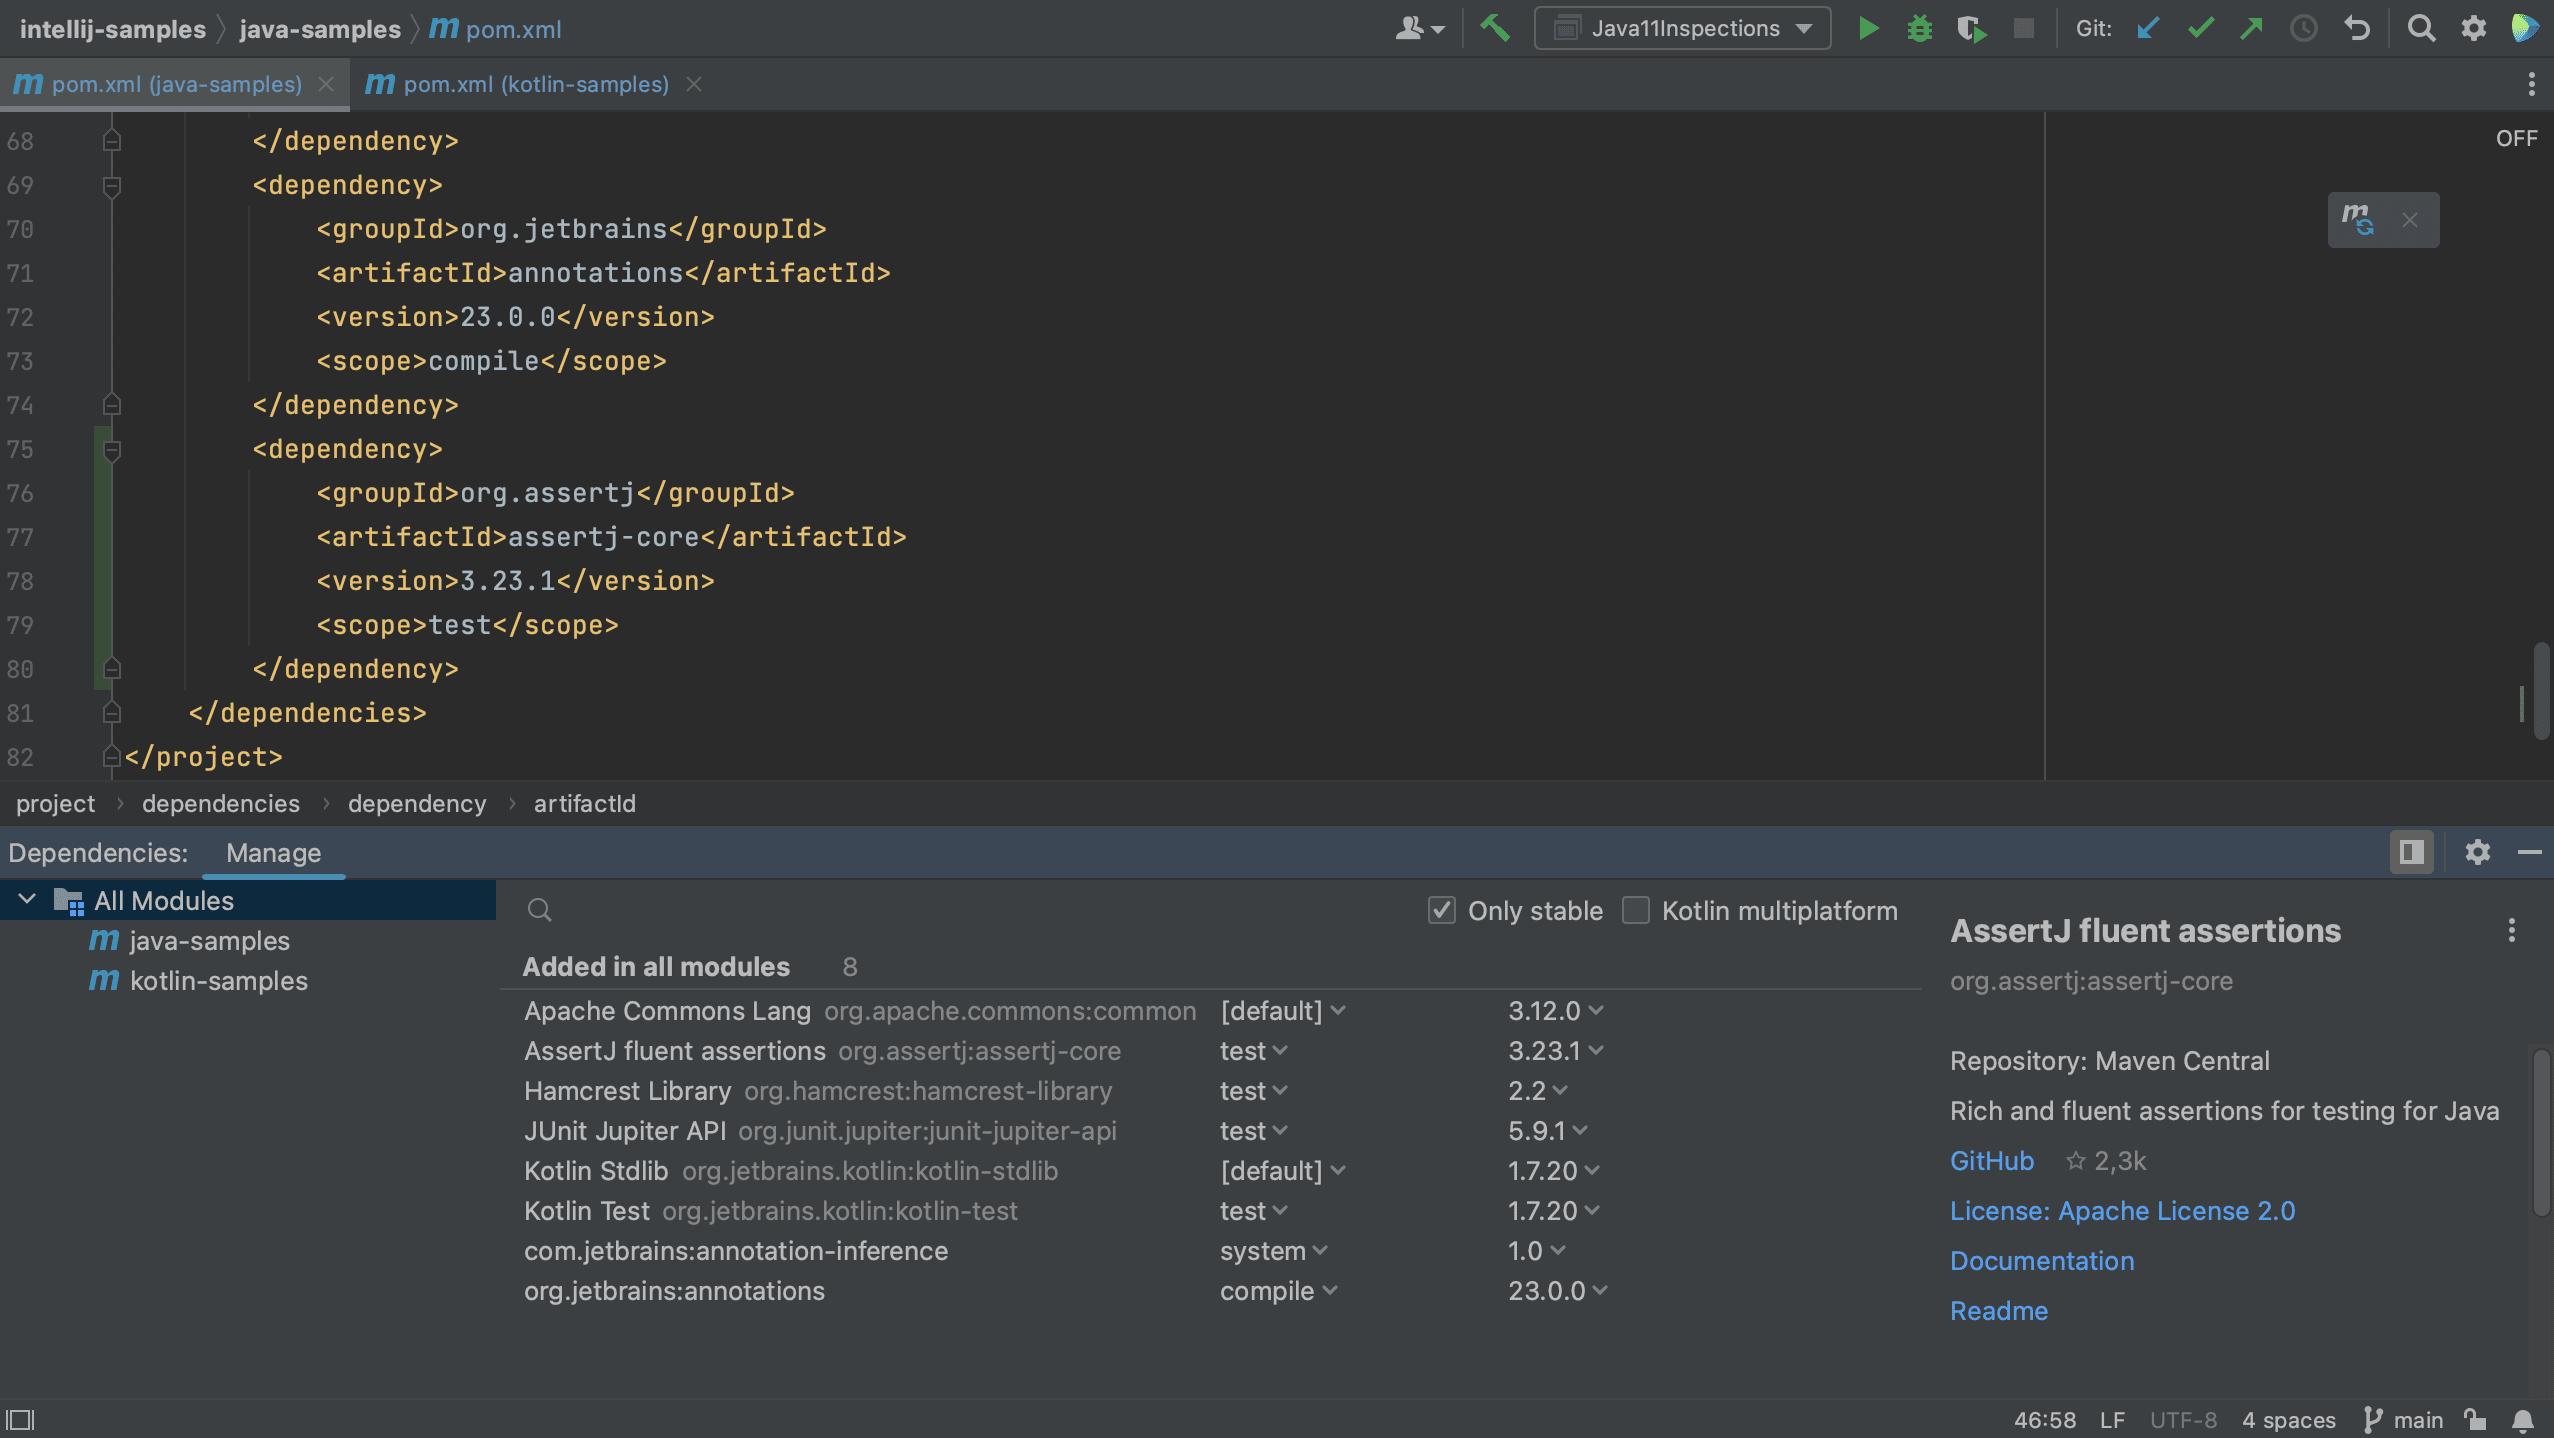
When we click Add, we see that the dependency is added to the build file.
If the version number is shown in red, that means IntelliJ IDEA hasn’t downloaded this library before. Click Load Maven Changes so IntelliJ IDEA will update its dependencies based on the changes to the pom.xml or build.gradle file.
Go back to the Dependencies tool window and clear the search box by clicking the x on the right-hand side. You’ll see the project’s dependencies are updated with your new dependency.
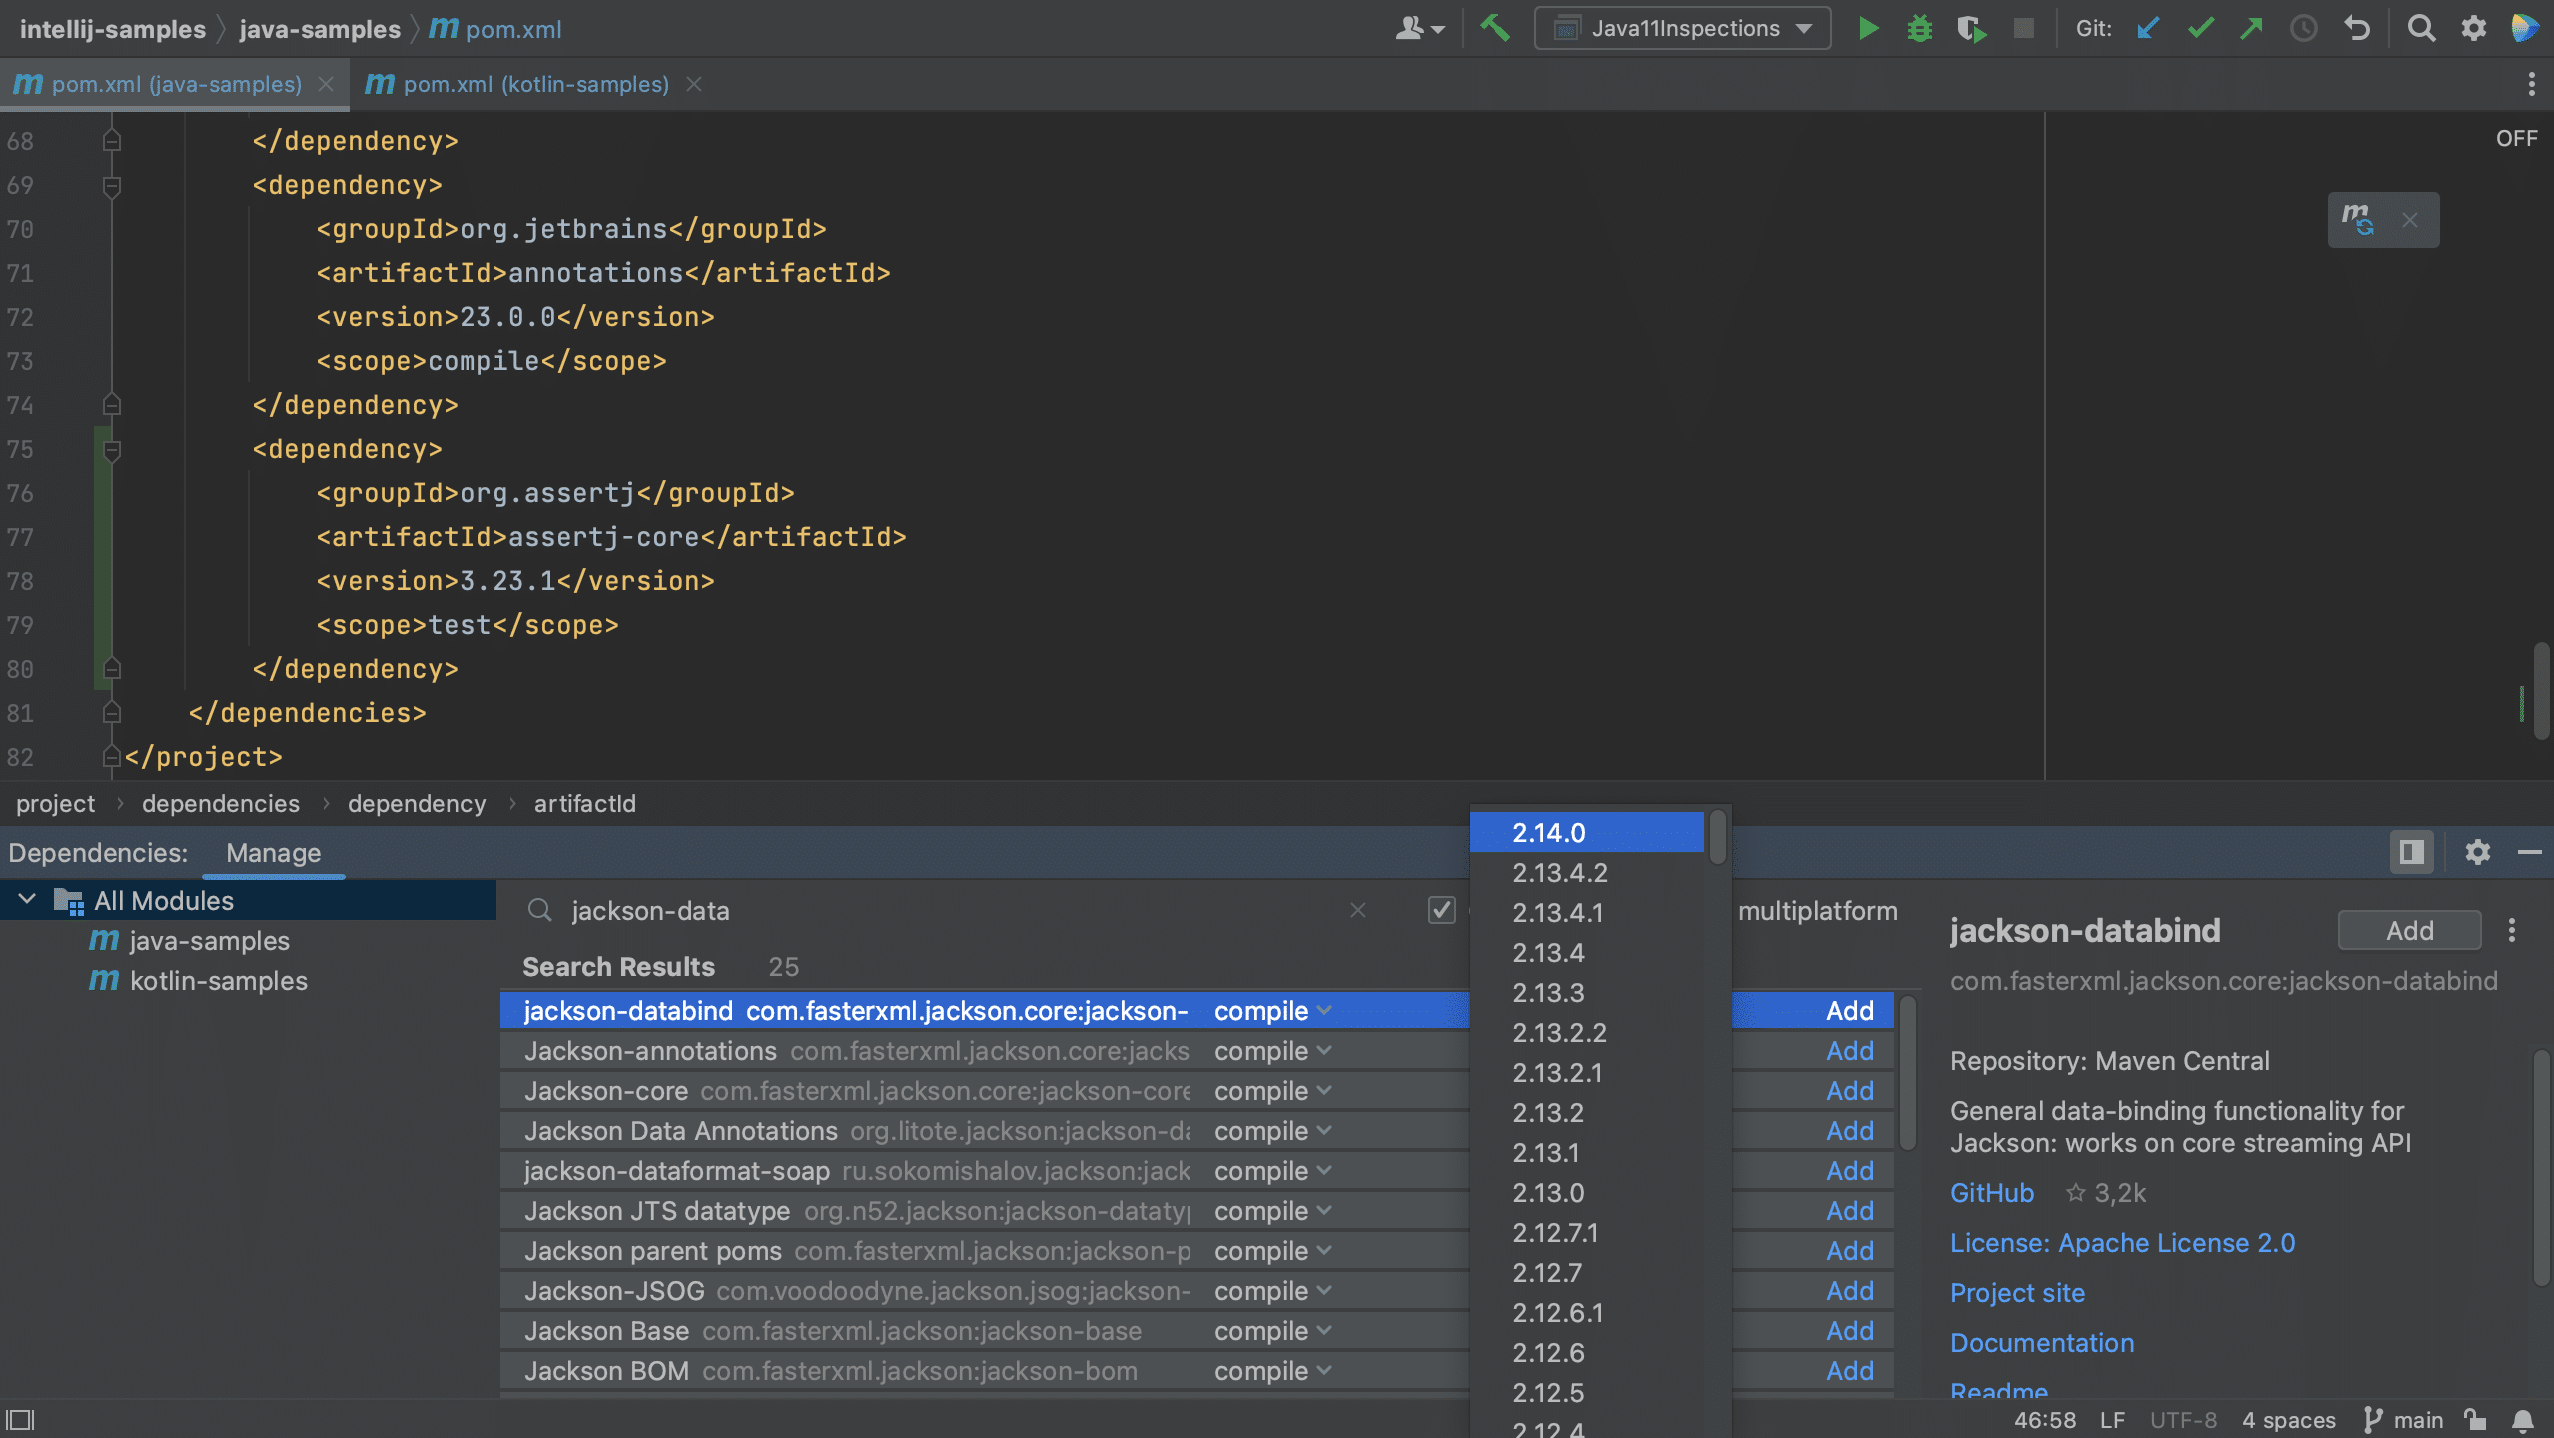
Next, let’s look for jackson-databind. We see that there are several versions available. Since we have selected Only stable, only stable versions are shown in the list.
If we uncheck this option, we see that the list of versions also includes the release candidates.
For production code, we probably want to use stable versions, so let’s select the Only stable checkbox again. With this option enabled, IntelliJ IDEA will exclude any dependencies that have no stable versions, and hide them from the list. Now we can select the latest stable version and add this to our project. Let’s also Load Maven Changes again.
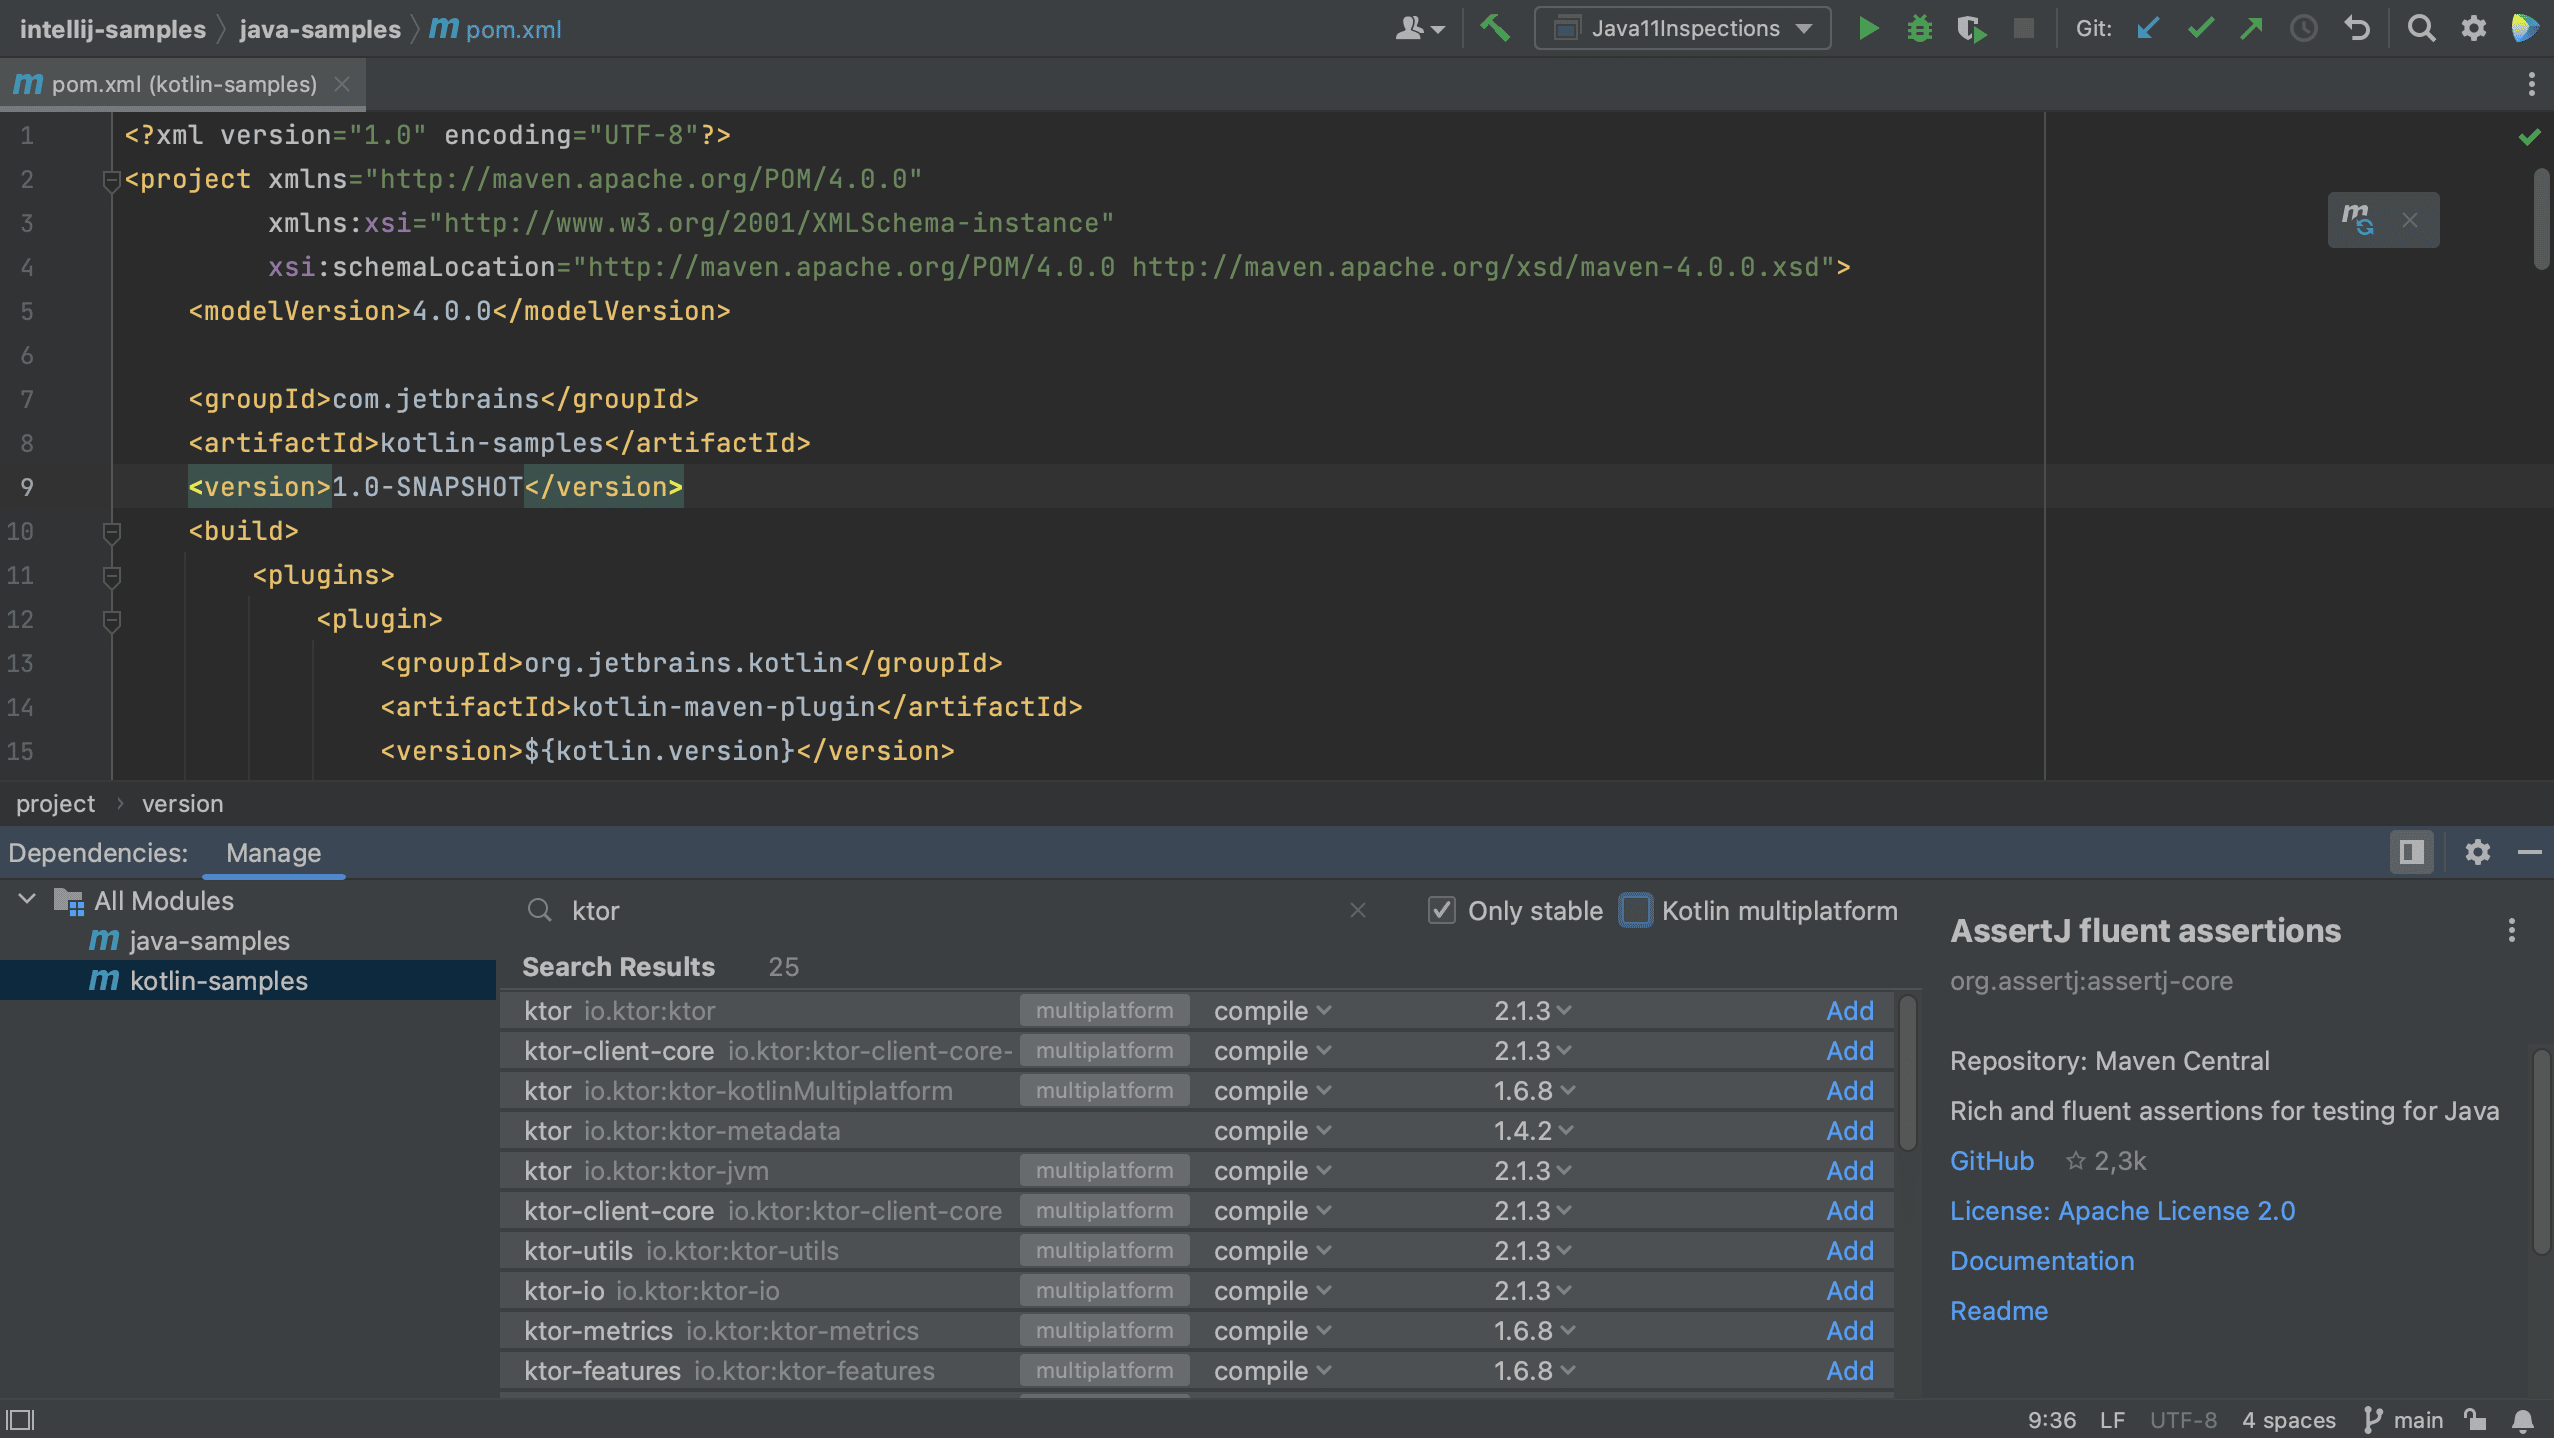
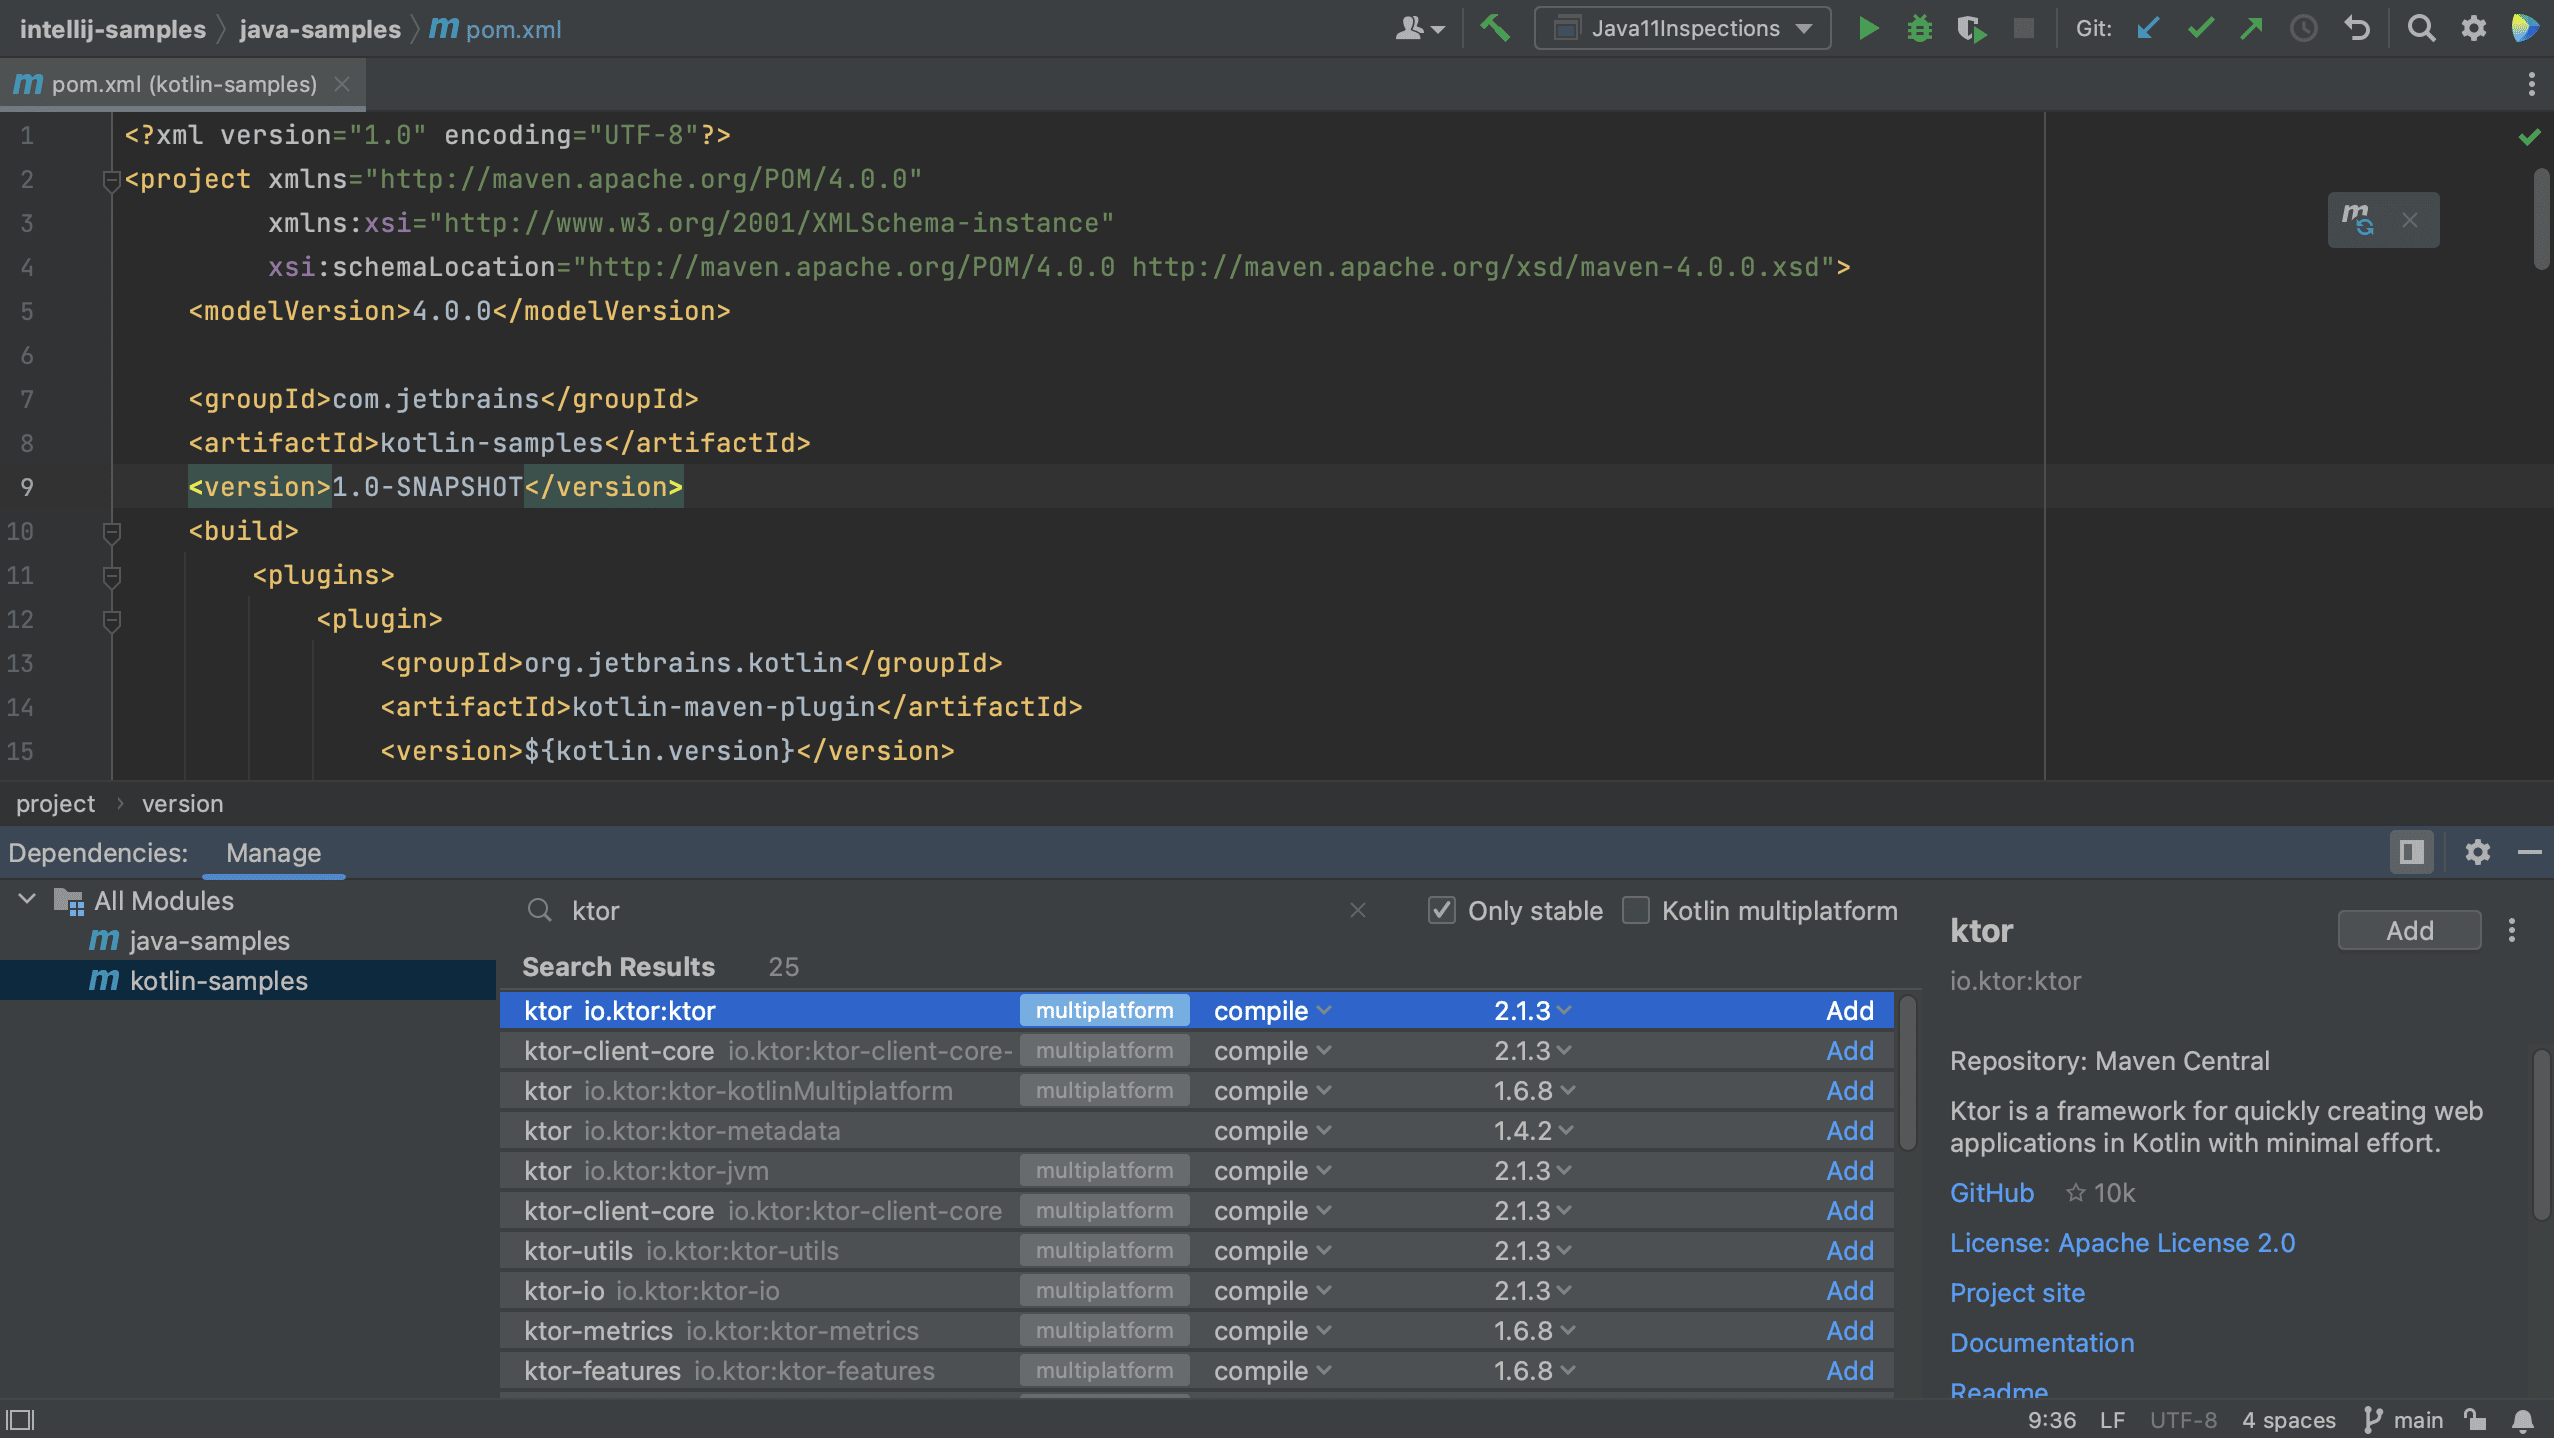
Finally, let’s also add a new dependency to the Kotlin module. Let’s switch to the Kotlin module and open the pom.xml for this module. Open the Dependencies Tool Window and search for Ktor.
Notice that some dependencies are marked as Multiplatform.
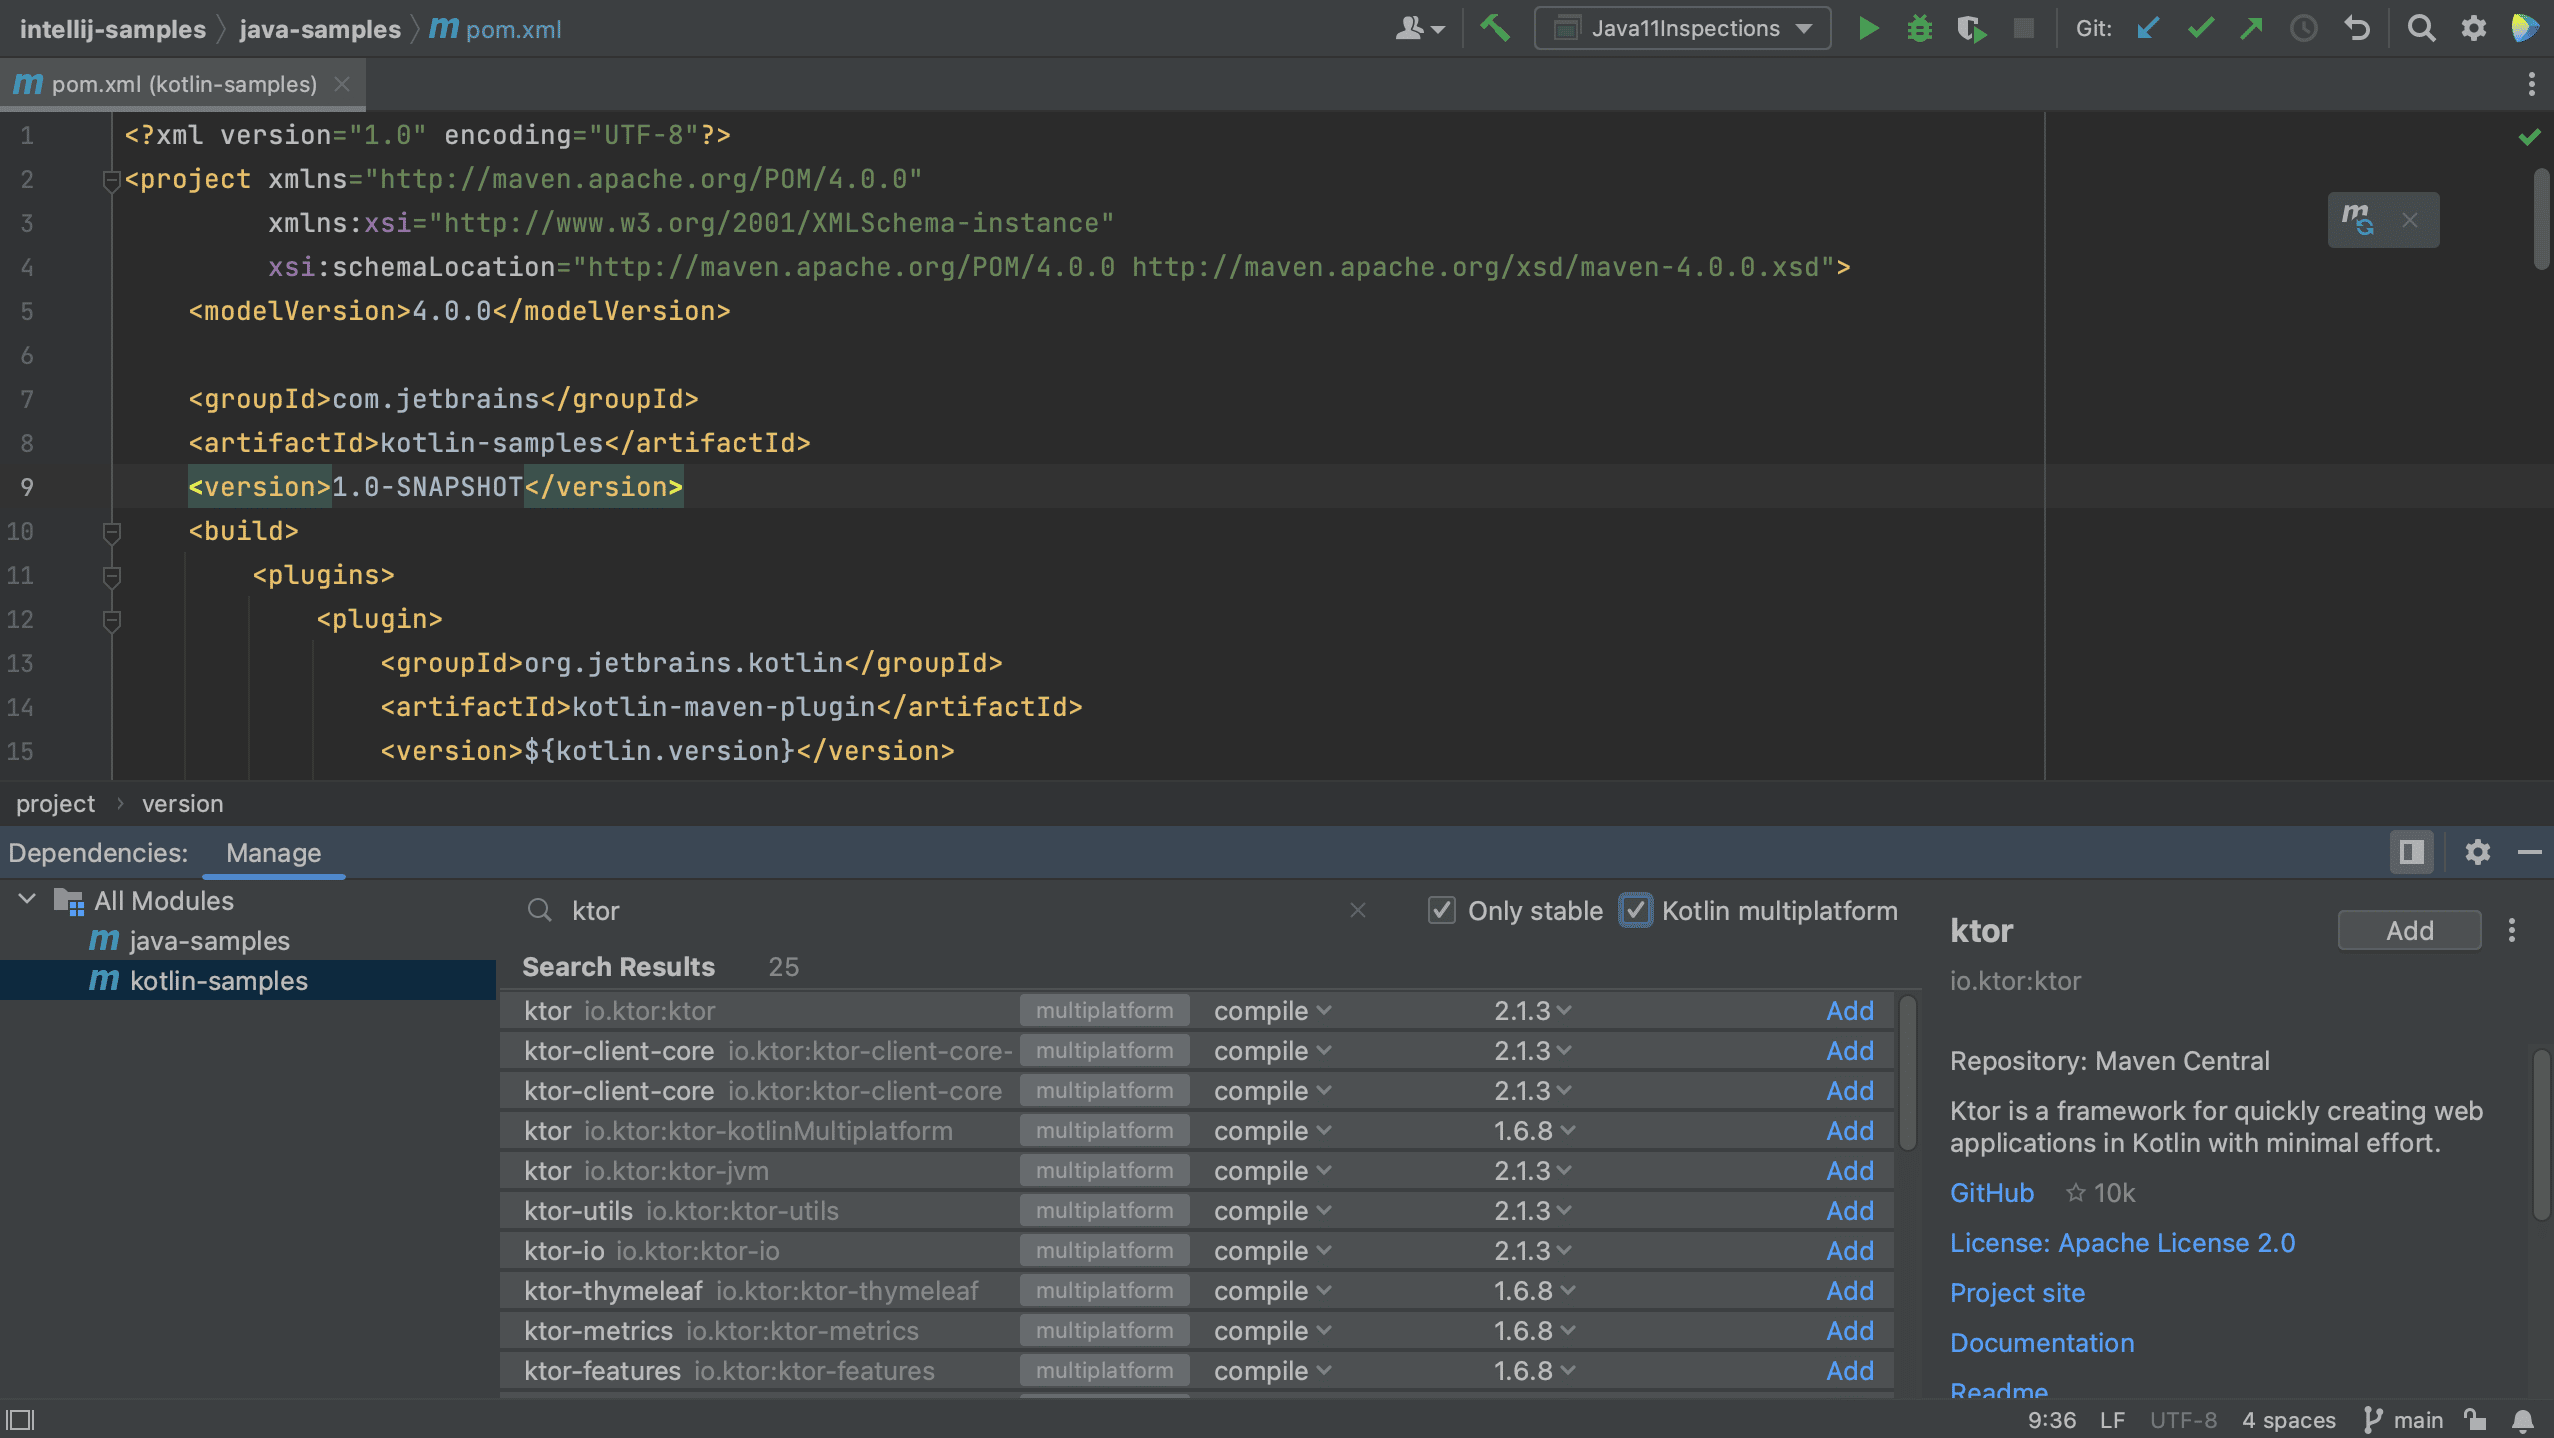
If we want to see only Kotlin multiplatform dependencies, we can select the Kotlin multiplatform checkbox, as shown below.
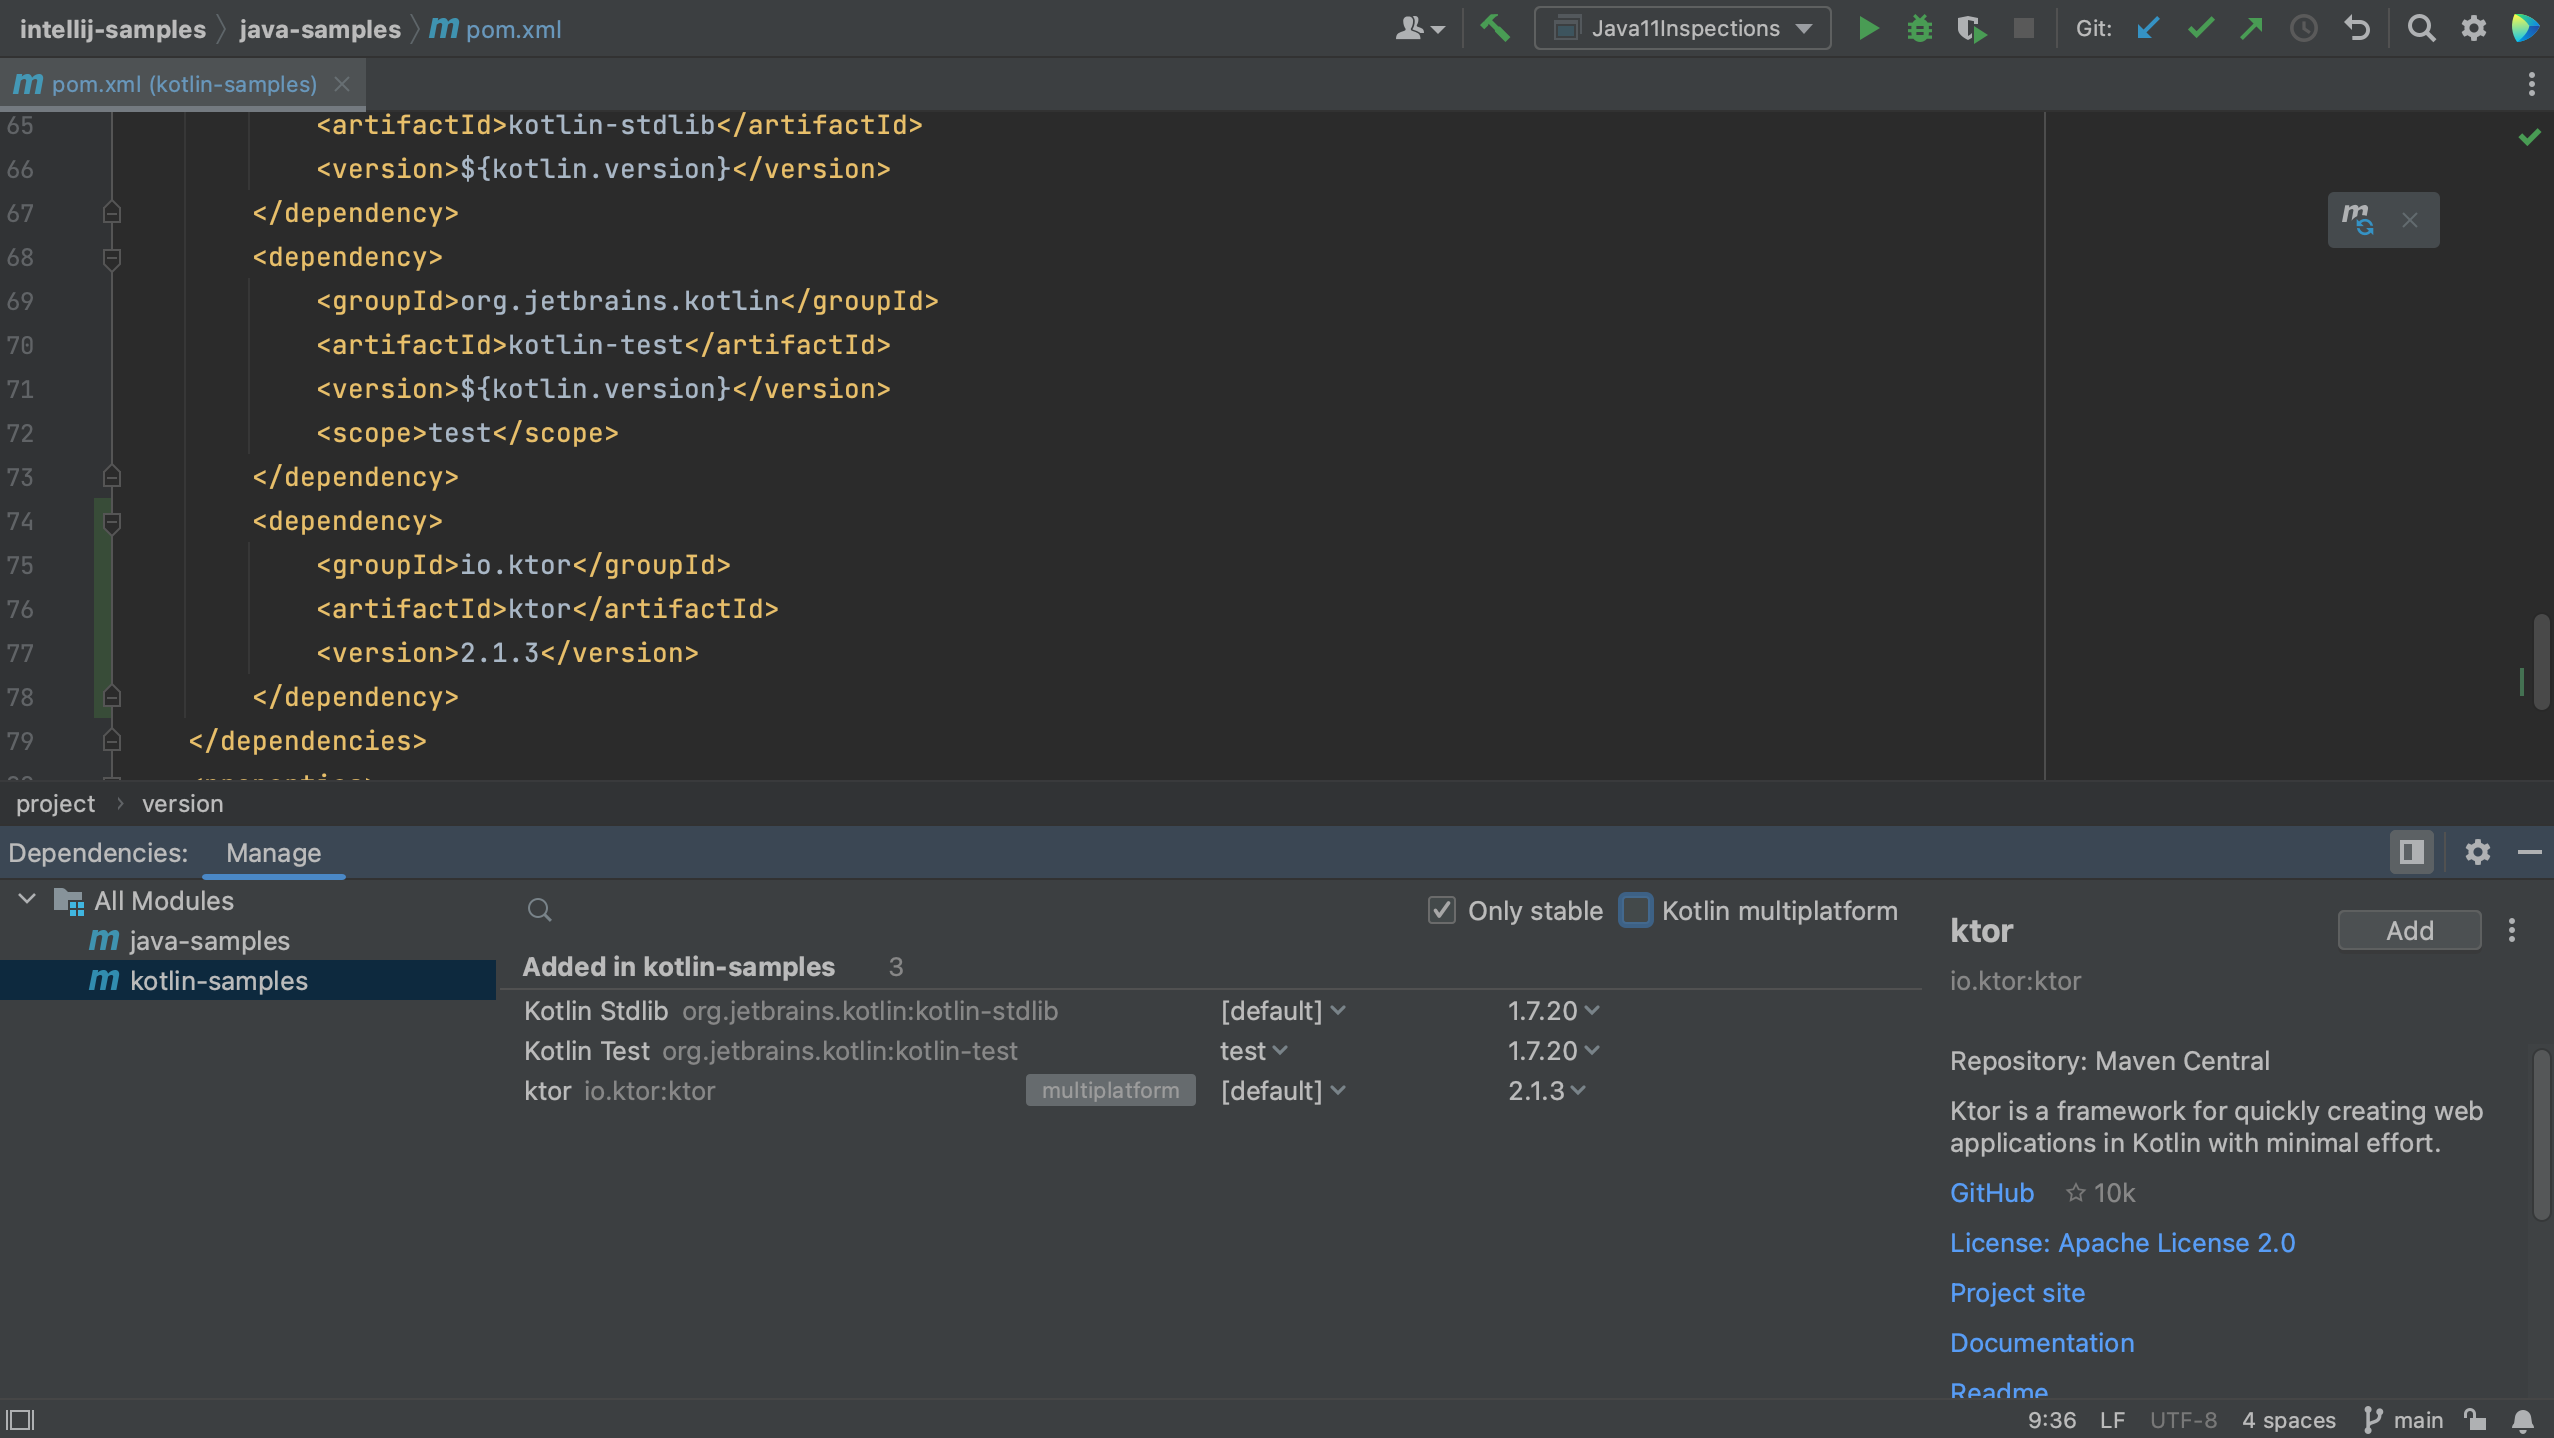
When we click Add to the right of the Ktor dependency, we see that Ktor is added to the list of dependencies and to the pom.xml for the Kotlin module.
Upgrade dependencies
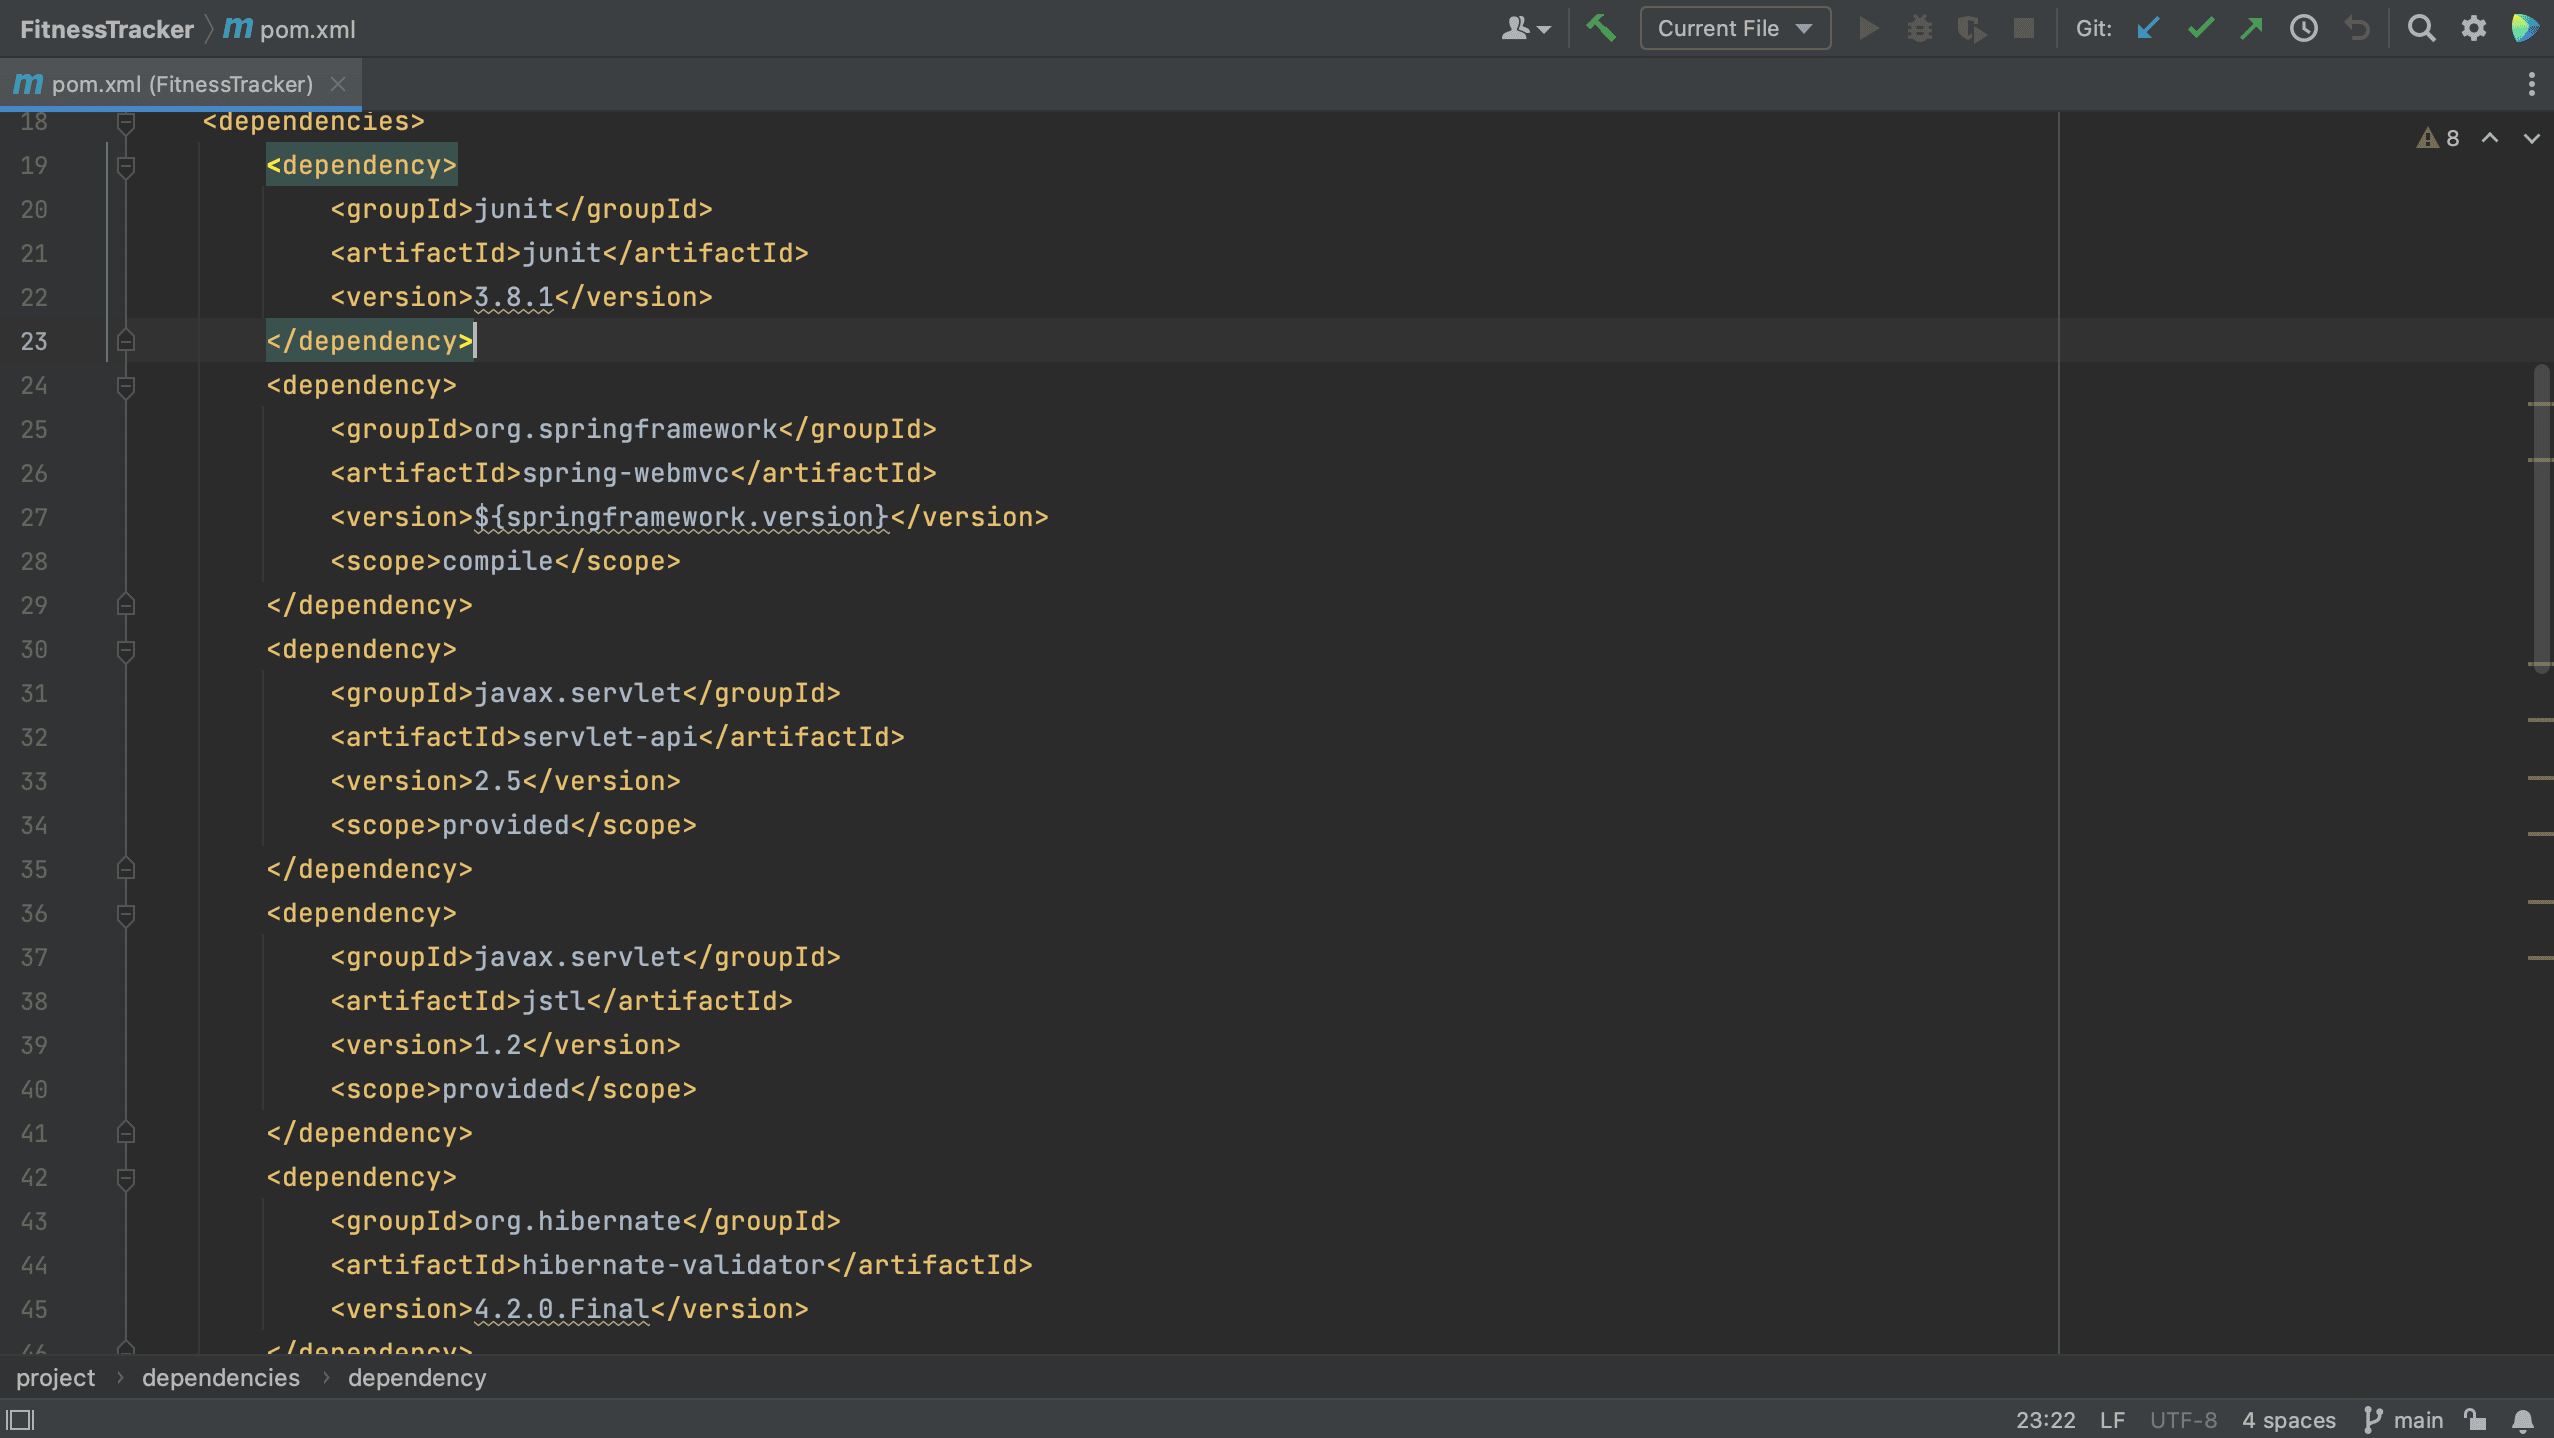
We will also need to keep our dependencies up to date. To show you how IntelliJ IDEA can help, we are using this extremely outdated project as an example. In the pom.xml below, we see that several dependencies are marked with squiggly lines underneath them.
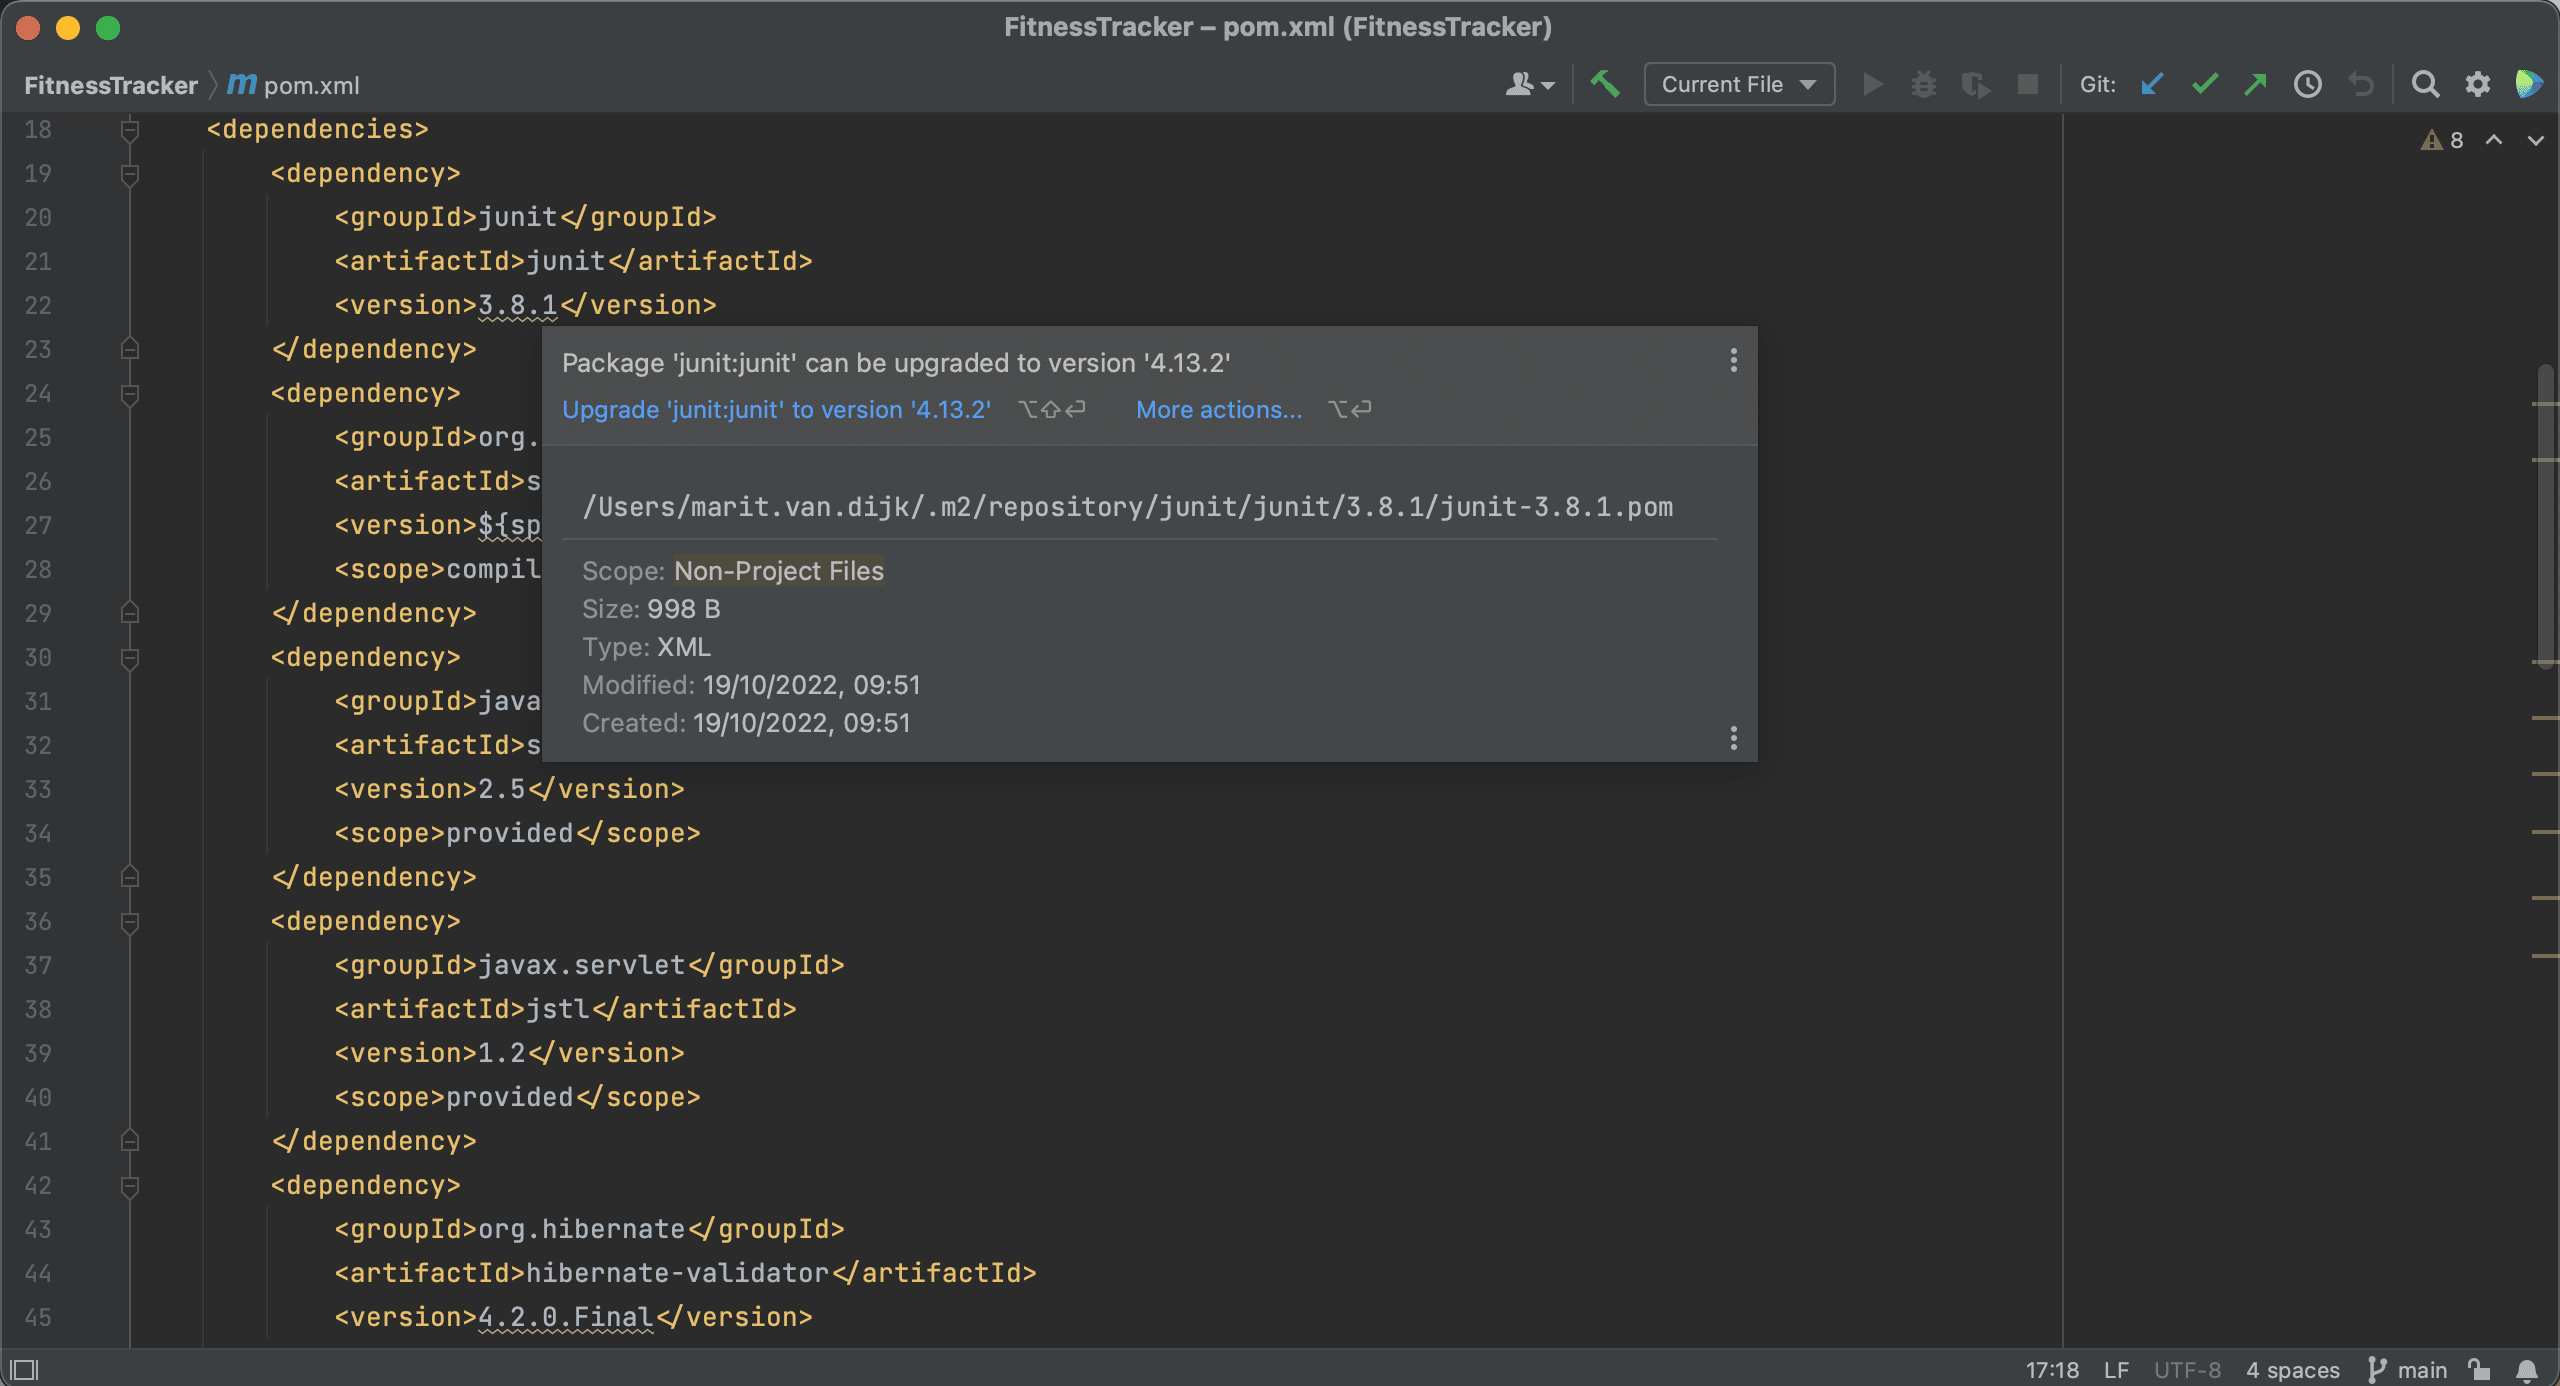
IntelliJ IDEA will show the suggestion to upgrade when we hover over the dependency, and we can click the suggestion to upgrade the dependencies.
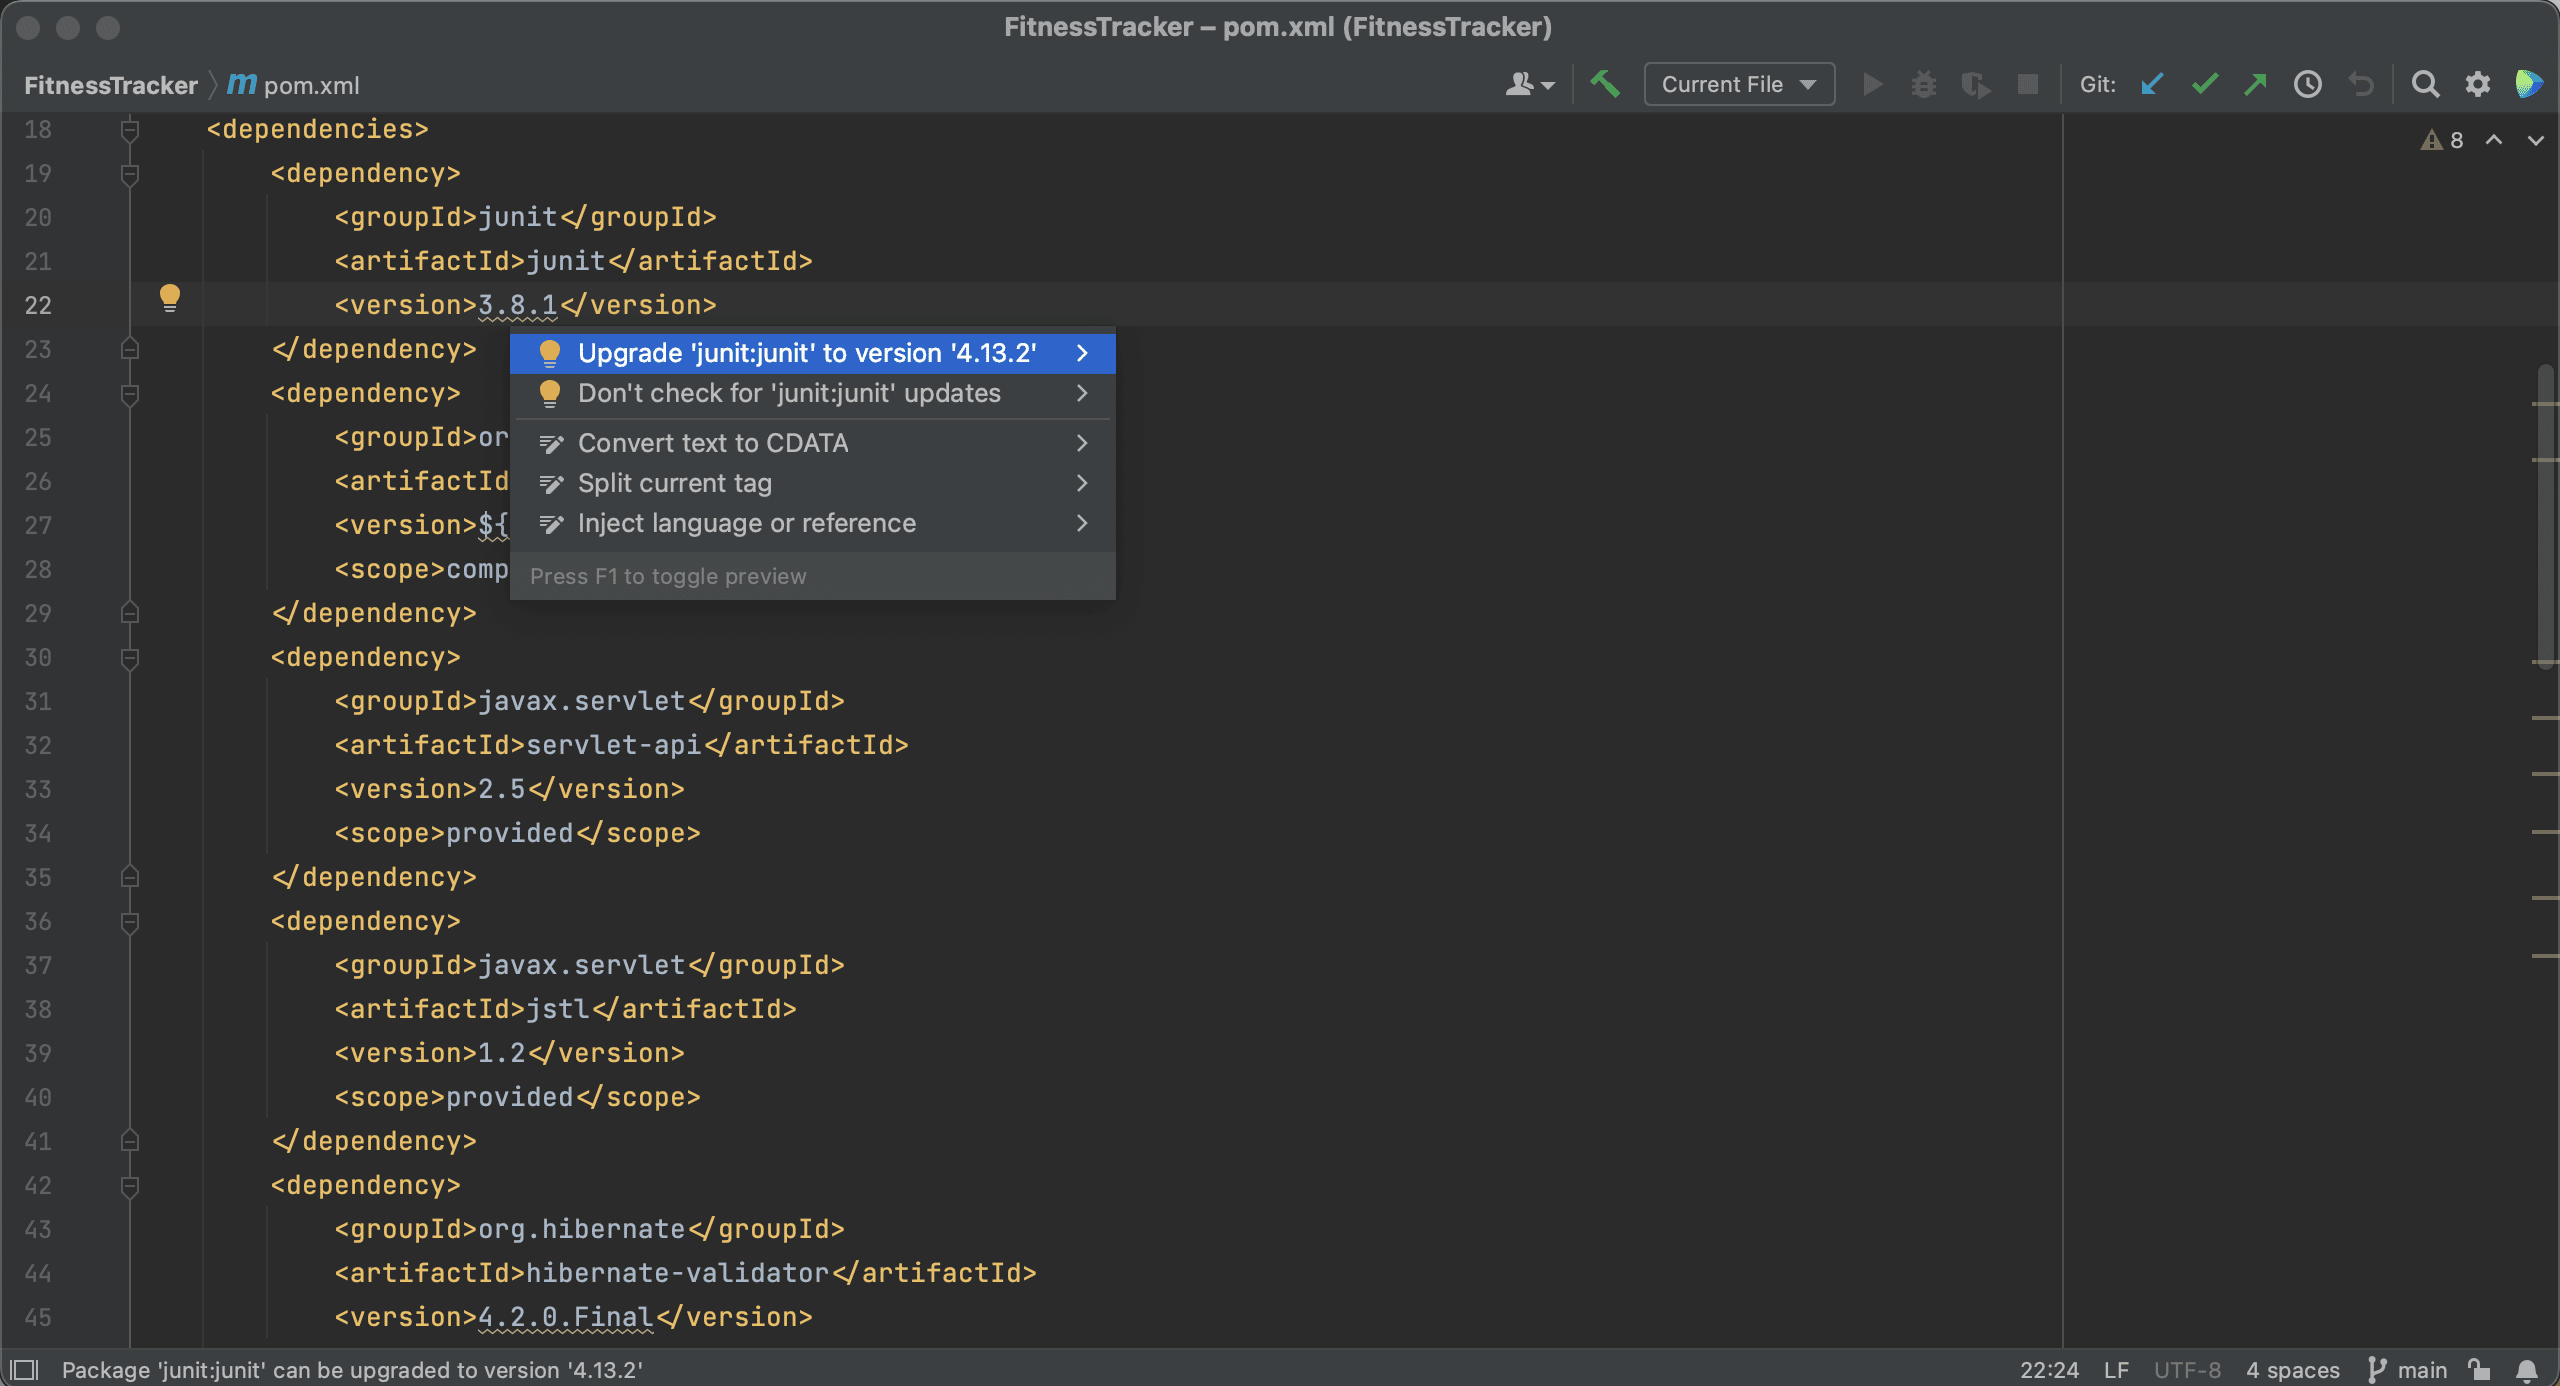
Alternatively, we can use Context Actions ⌥⏎ (on macOS) or Alt+Enter (on Windows & Linux) to upgrade these dependencies.
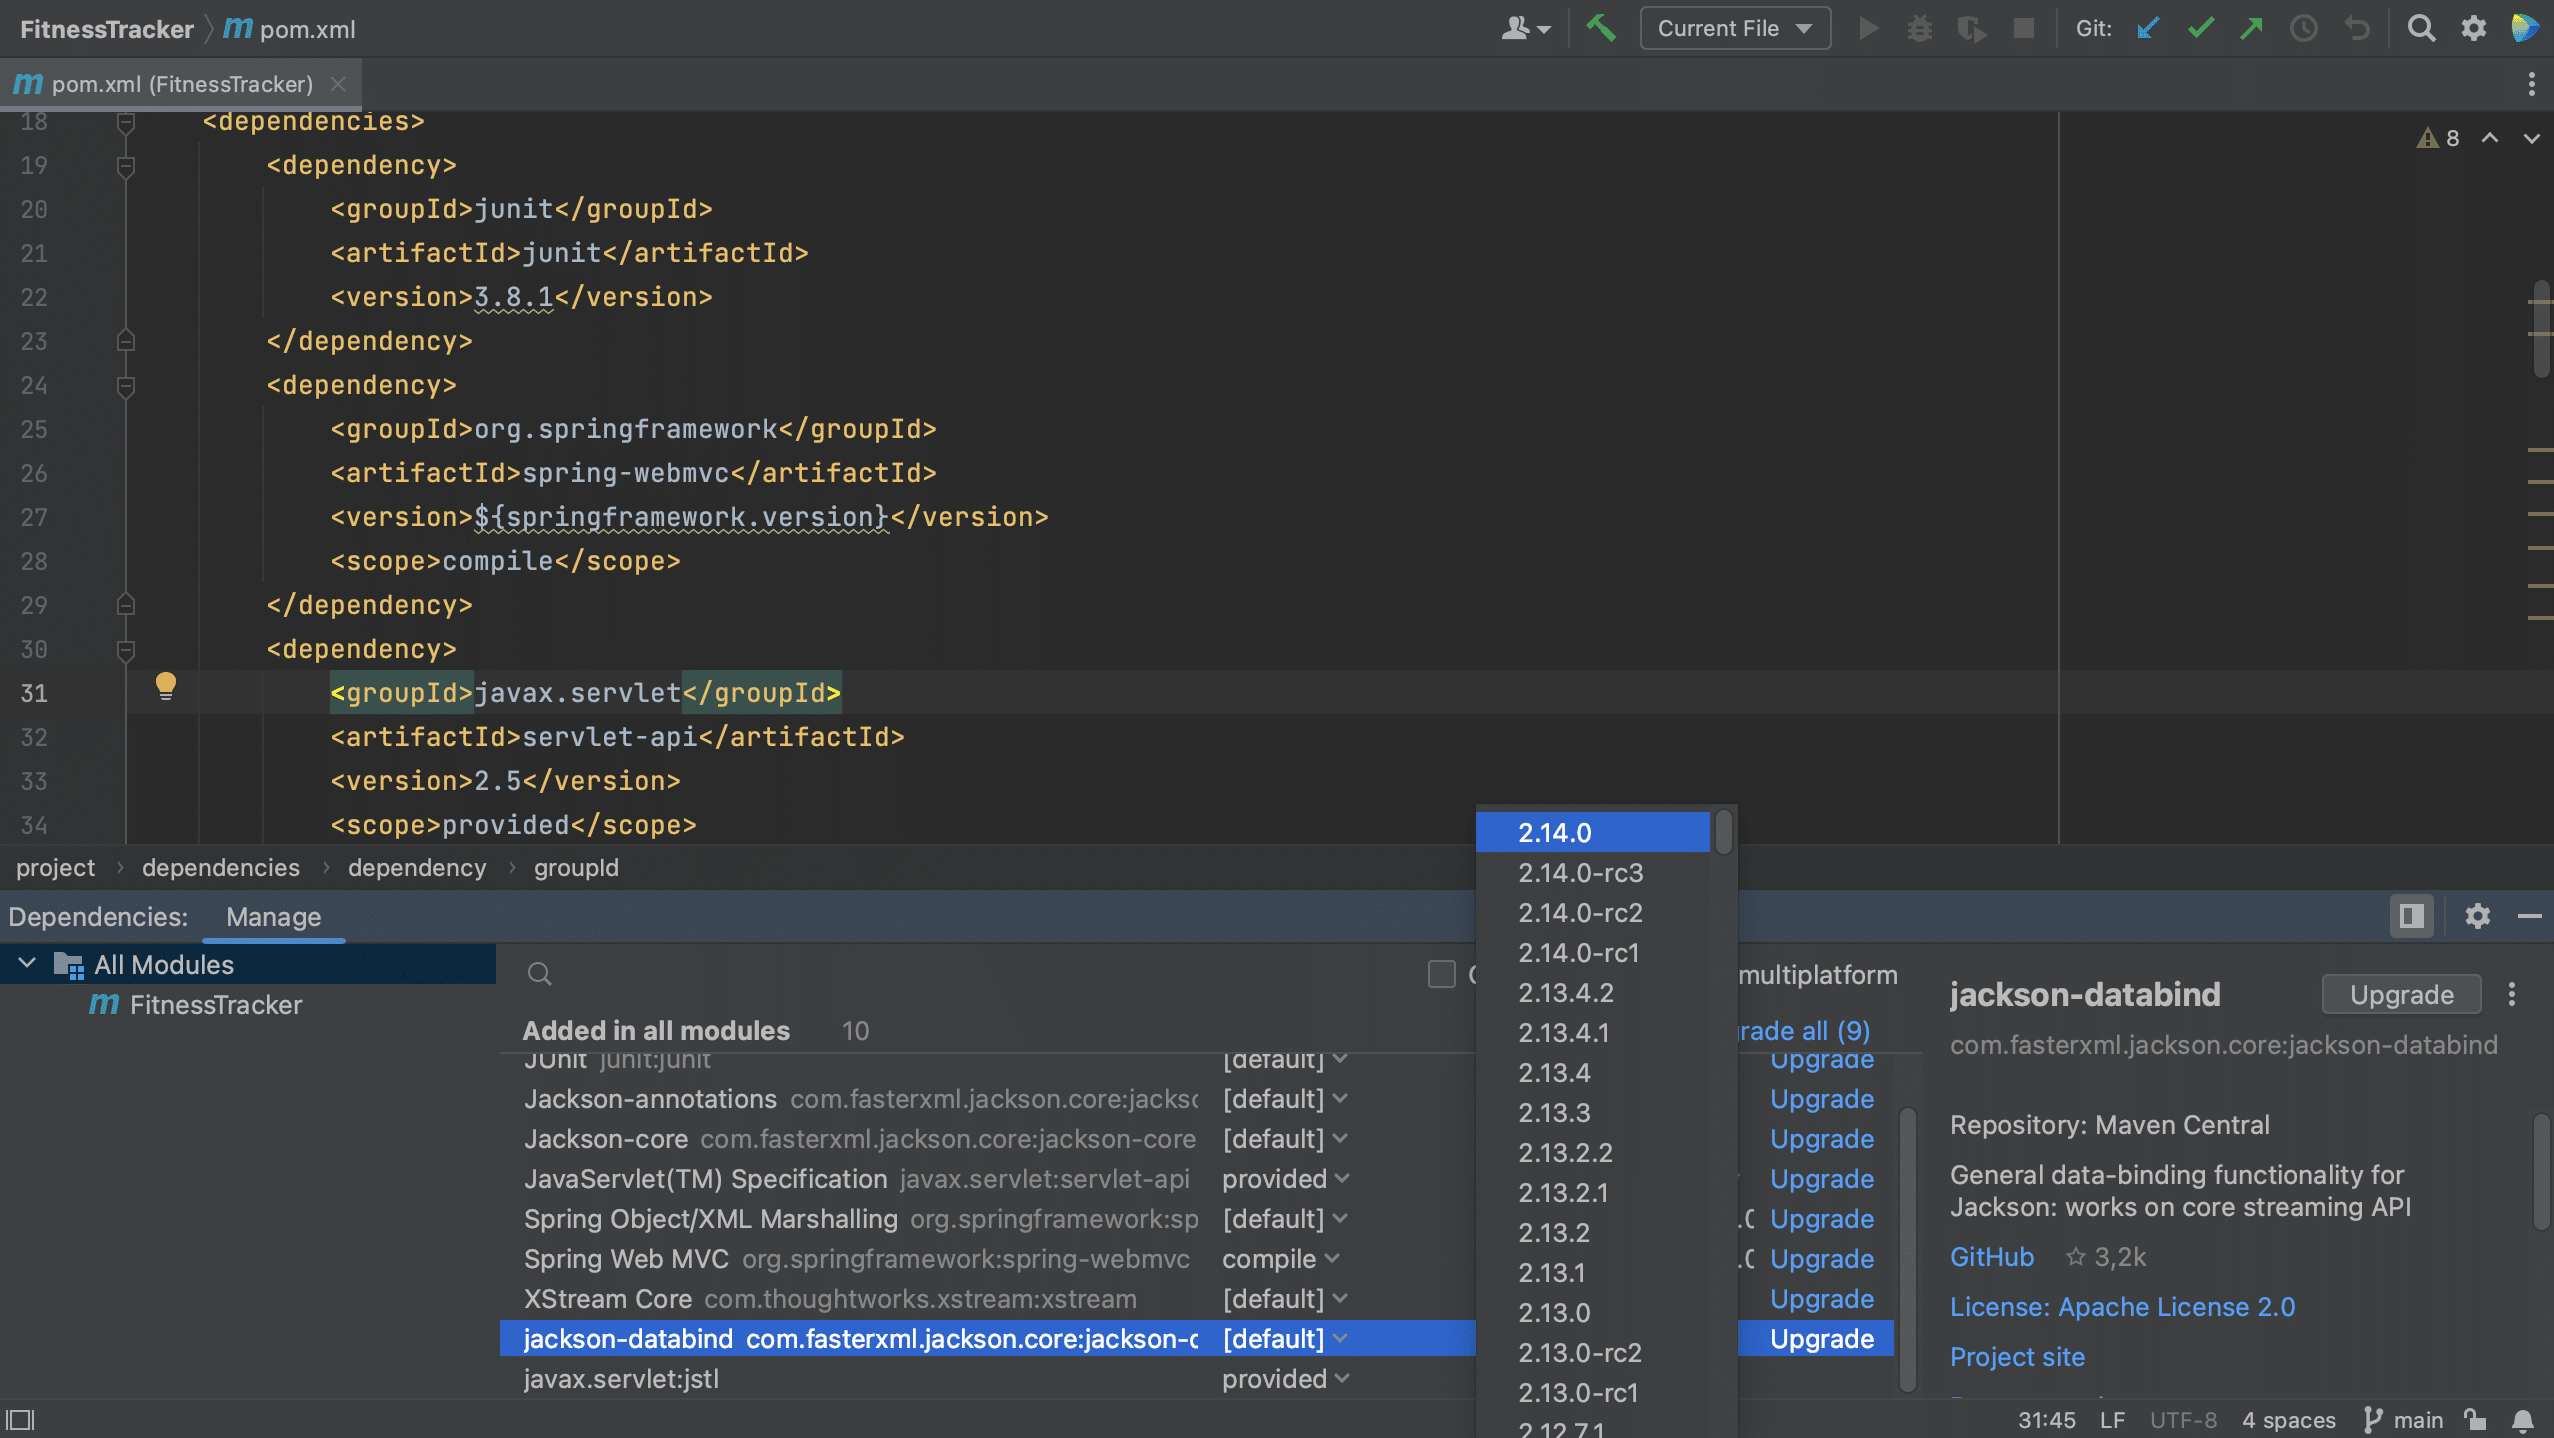
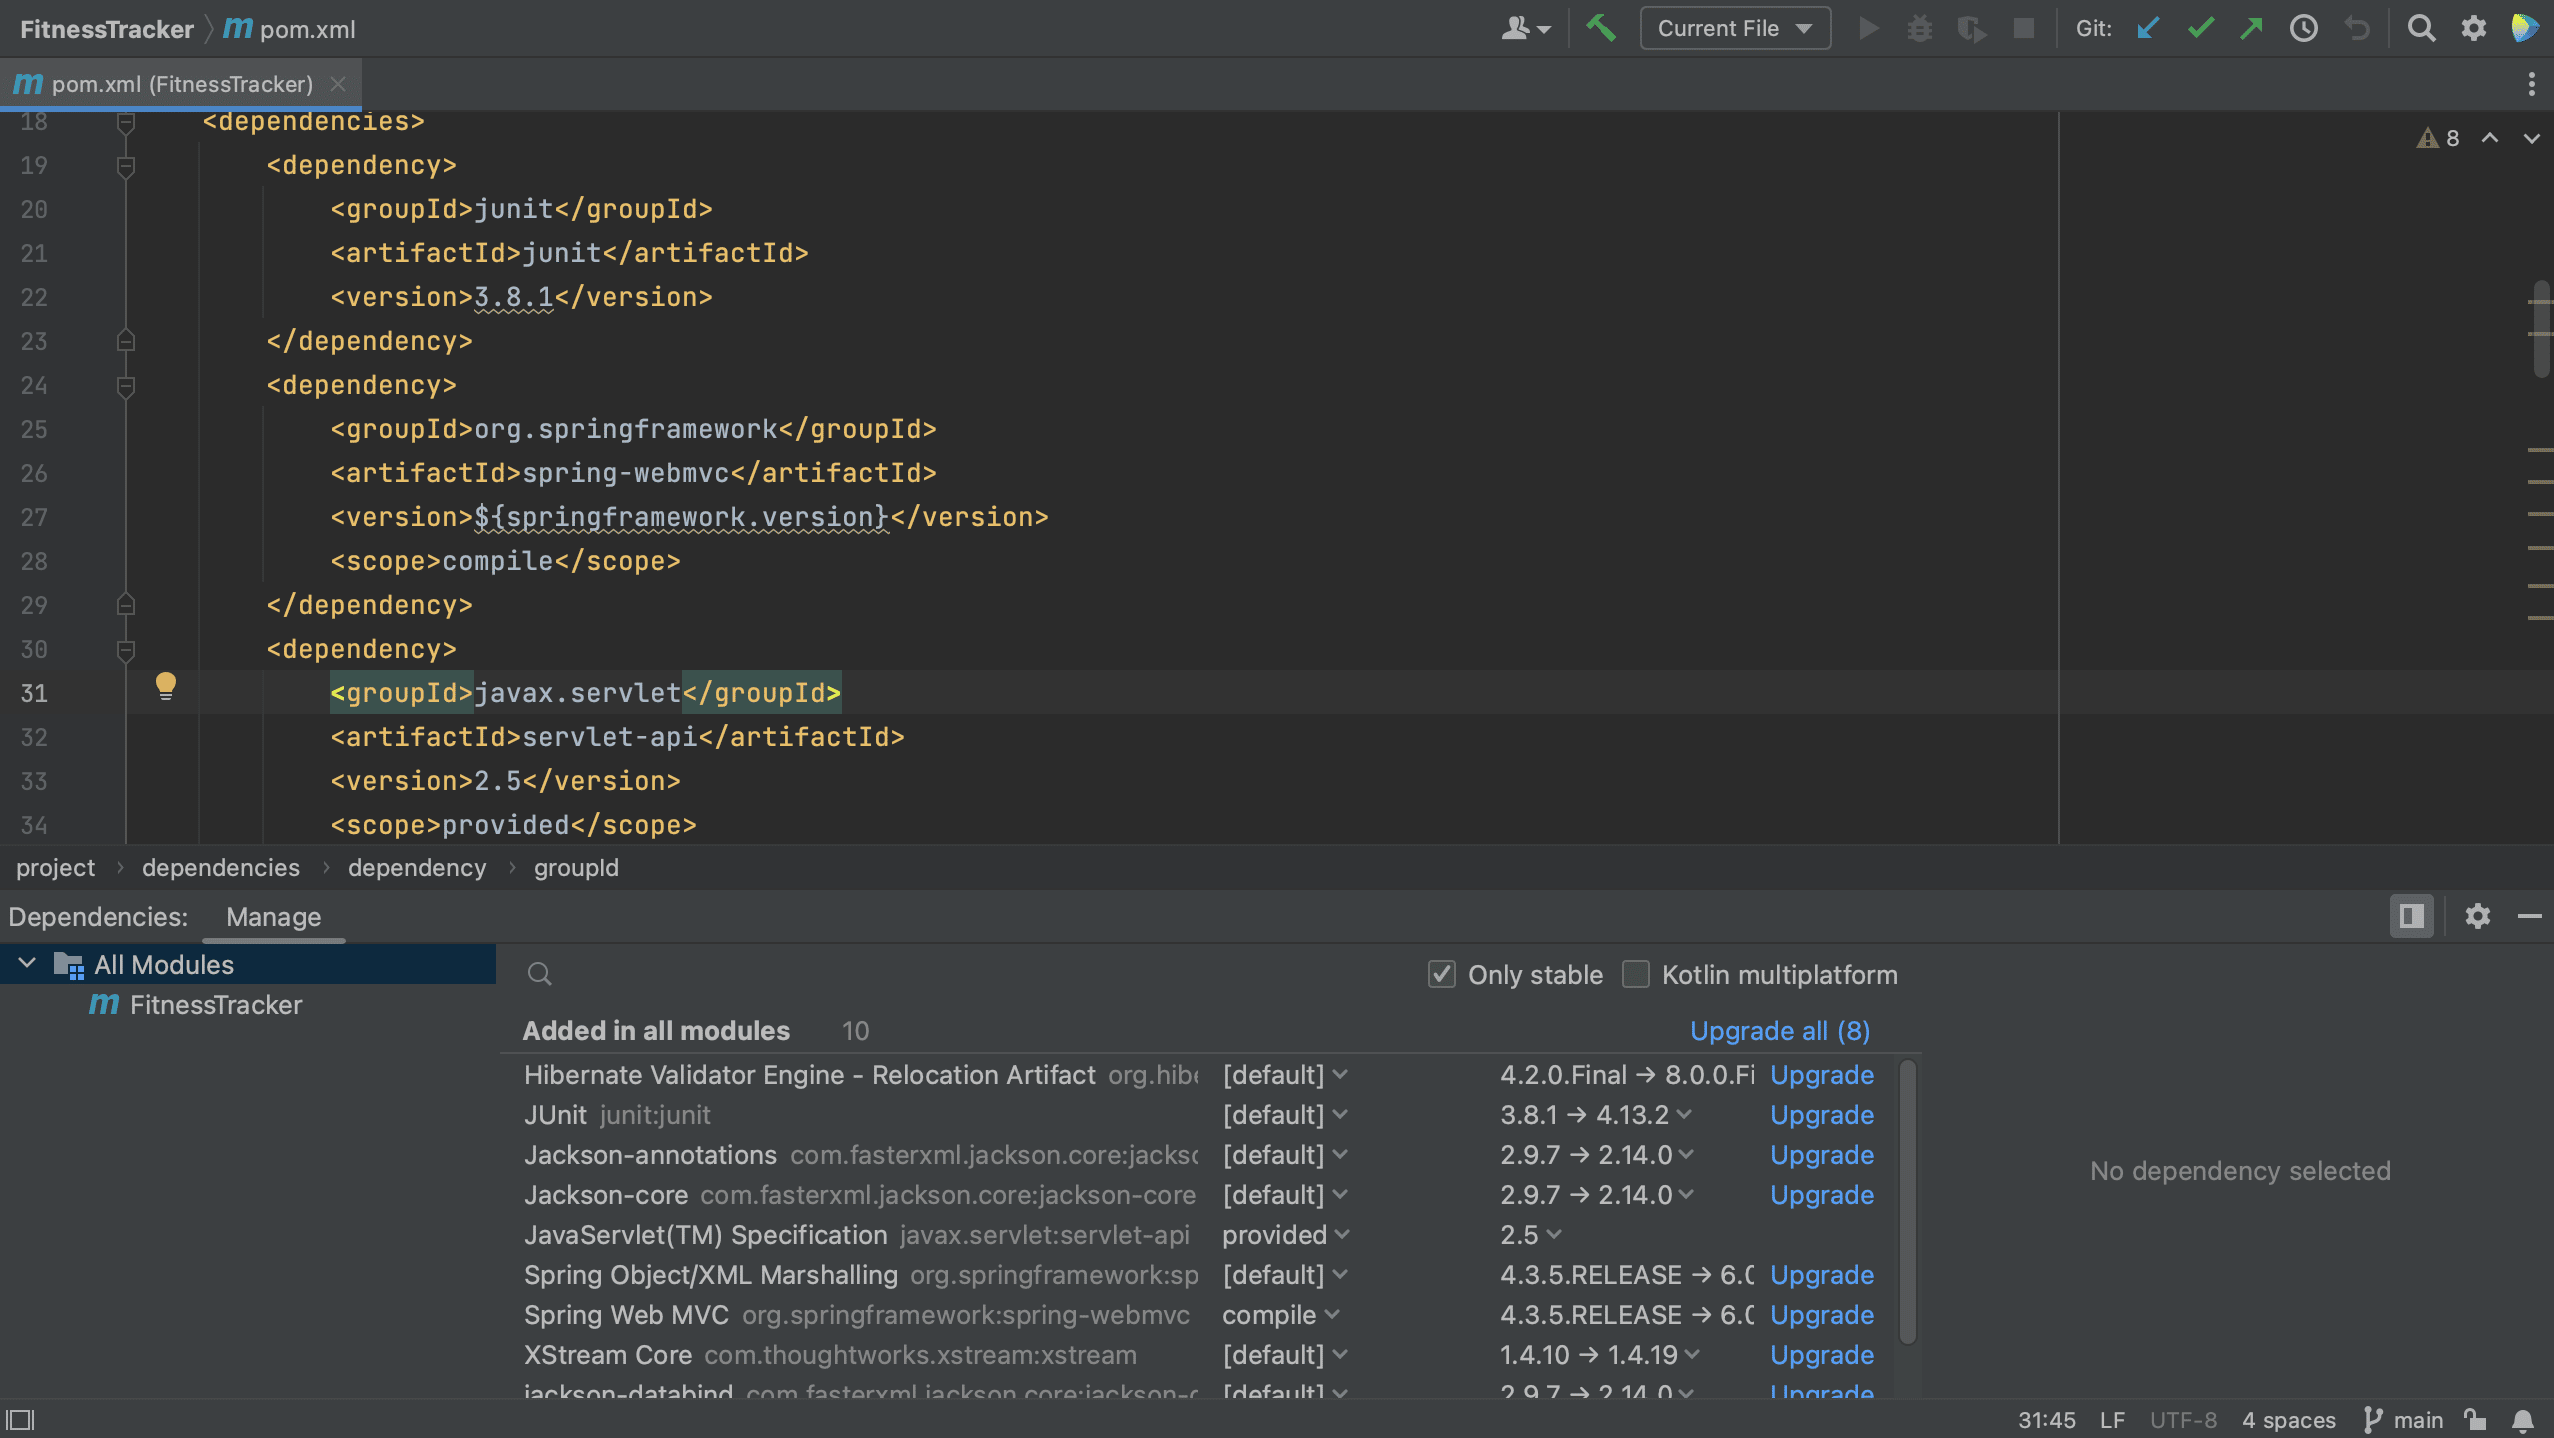
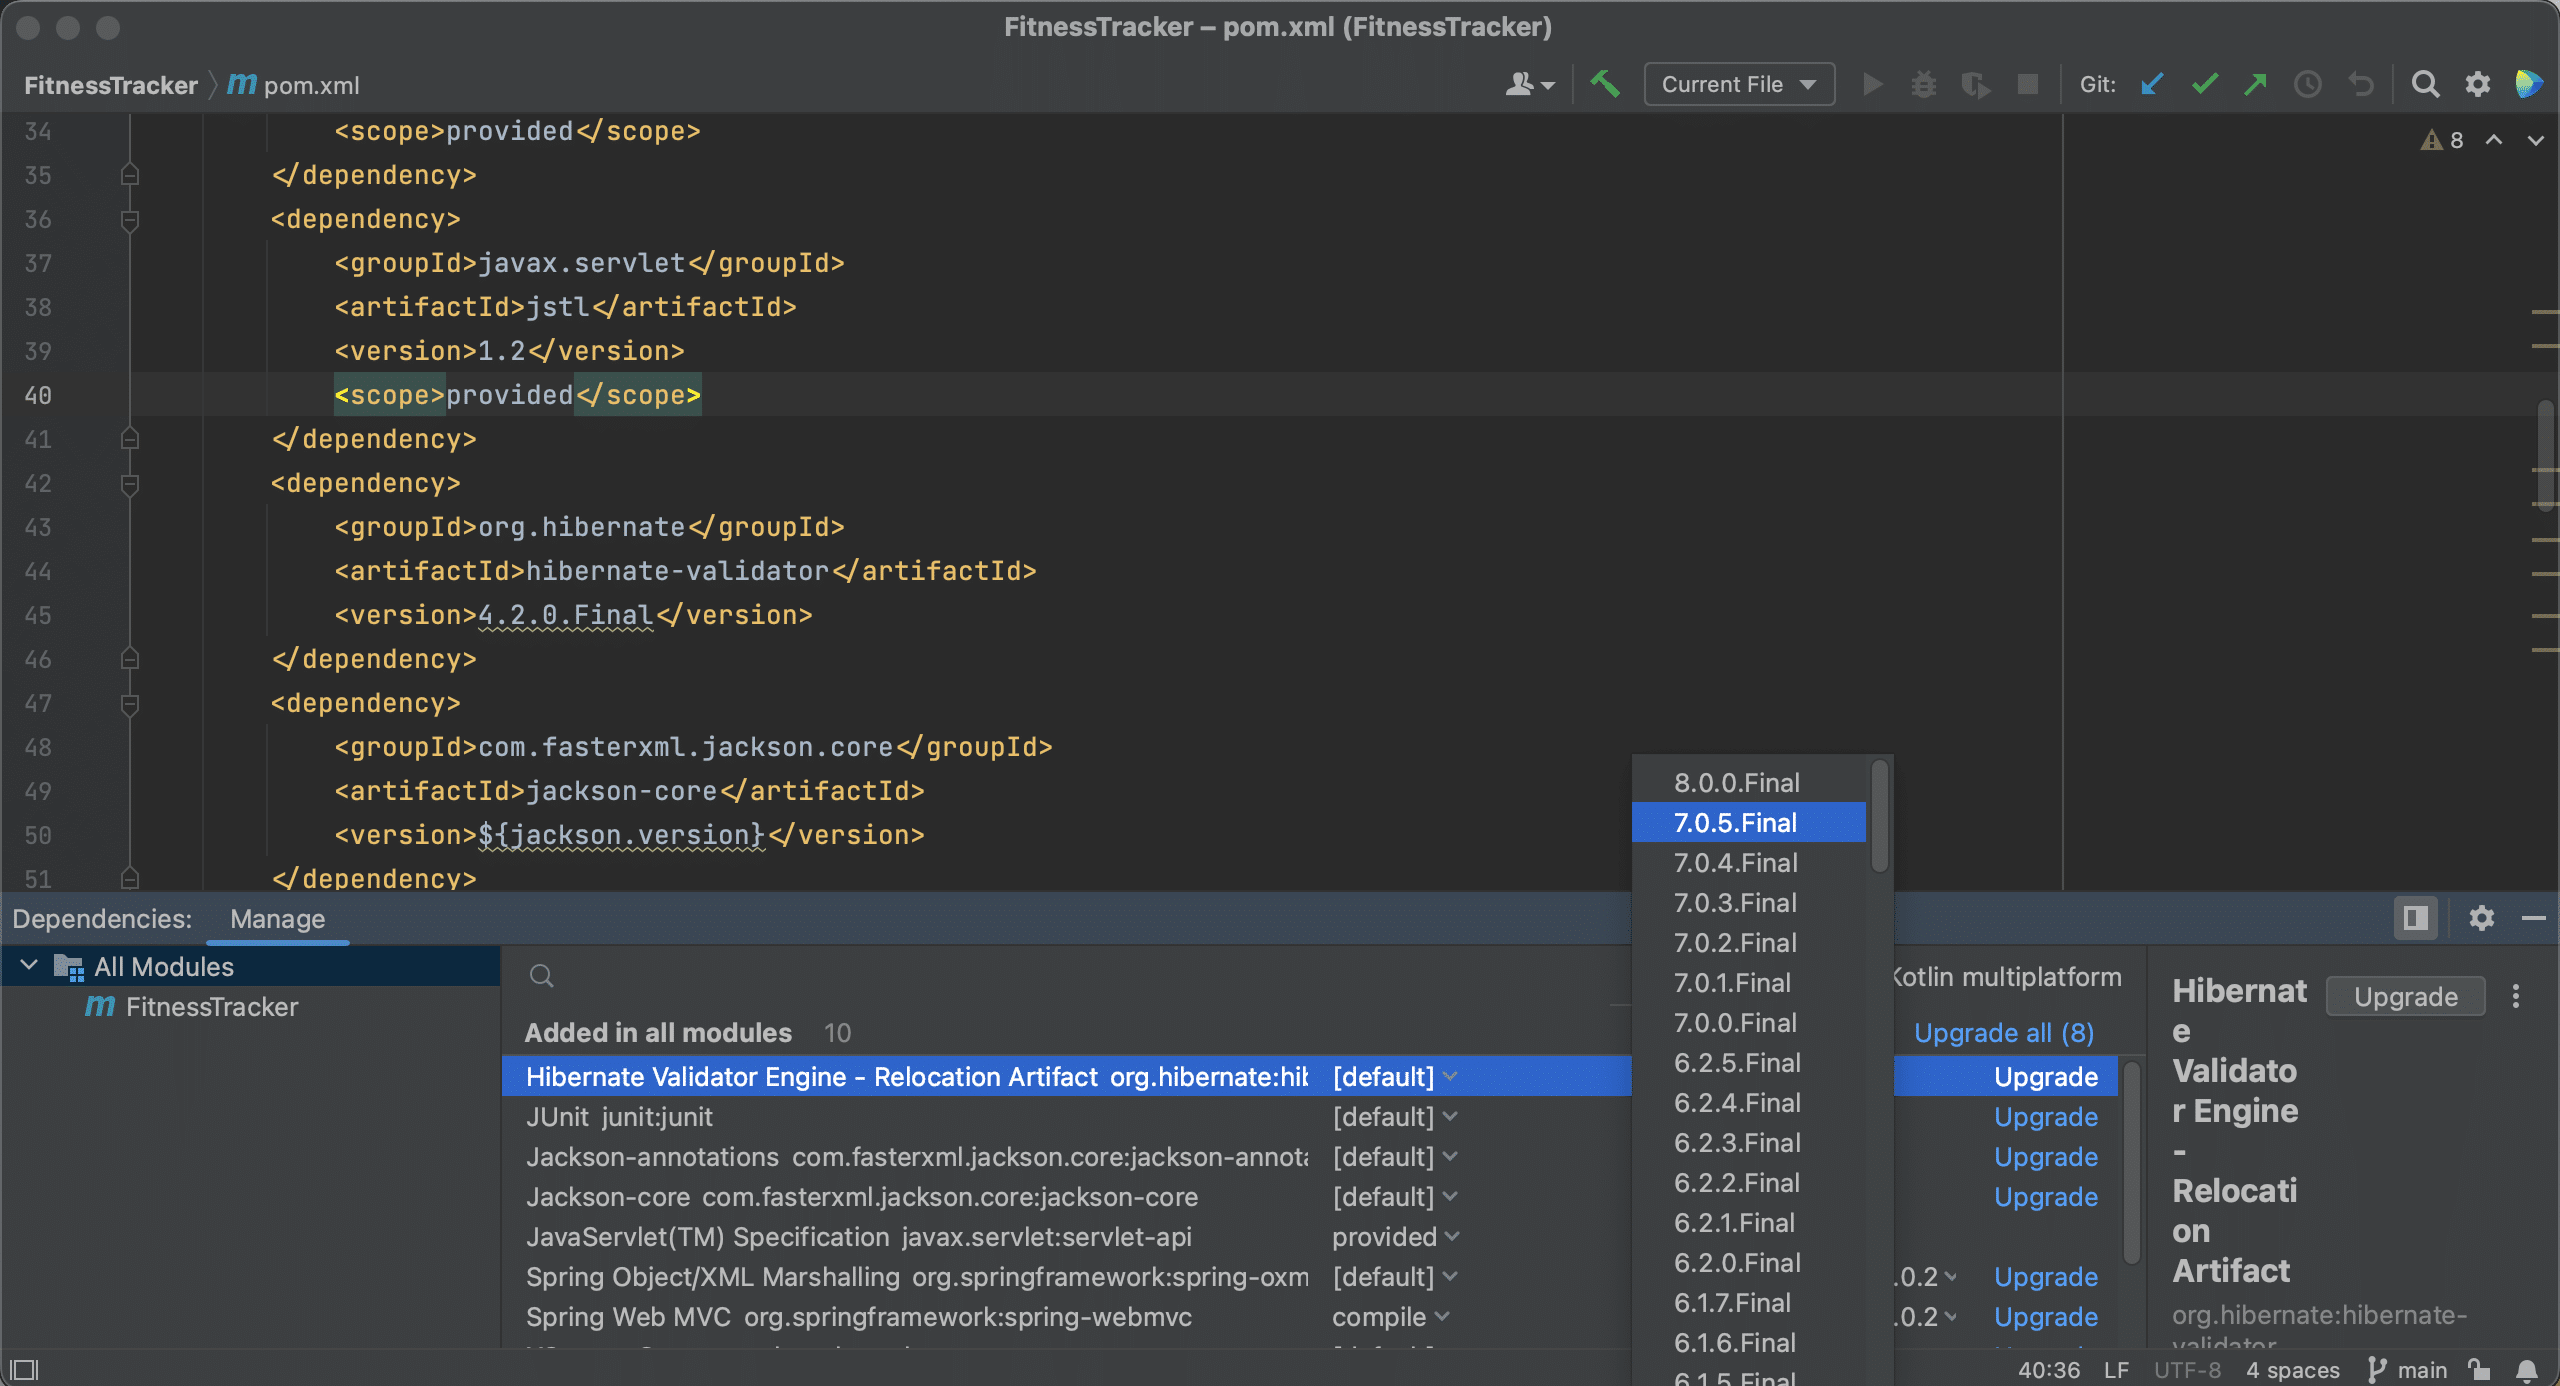
We can also upgrade our dependencies using the Dependencies tool window. The Dependencies tool window will tell us if there’s a newer version of a dependency, as we can see here.
We can choose the version to upgrade to by clicking on the version number in the list. Note that we don’t have to use the latest version.
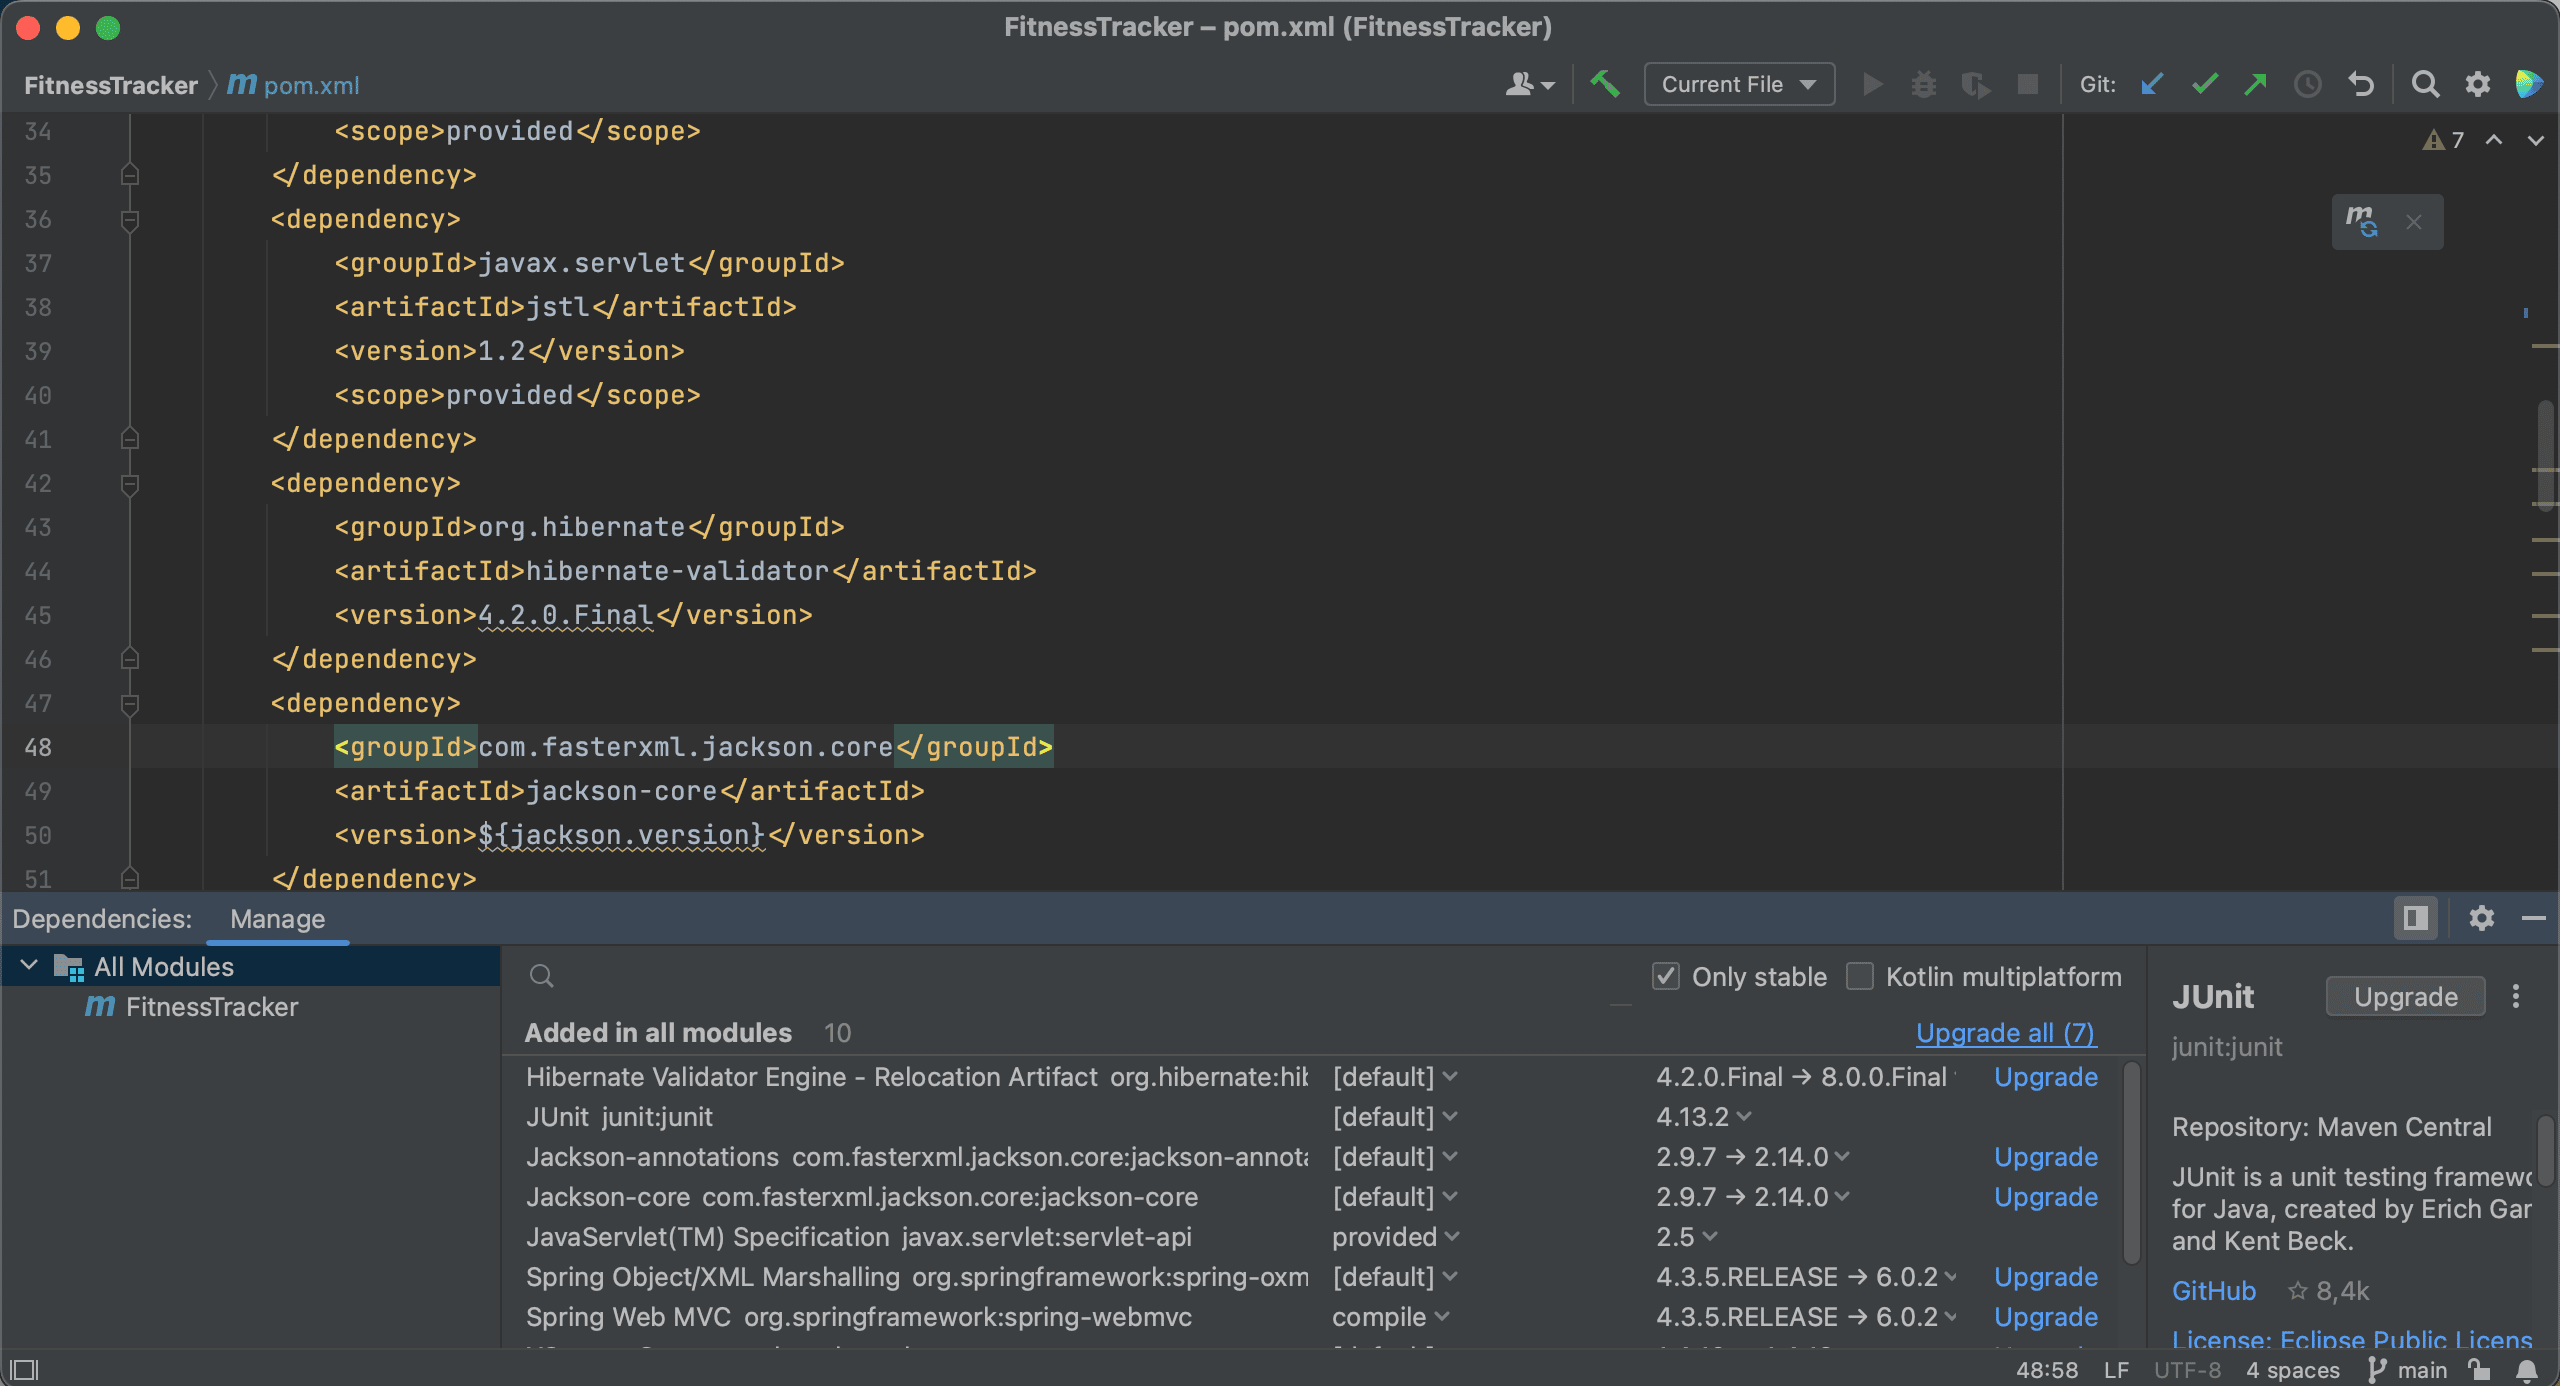
We can also automatically upgrade a dependency to the latest version by clicking Upgrade for that particular dependency.
Or, we can even upgrade all our dependencies at once, by clicking the Upgrade all link.
Remove dependencies
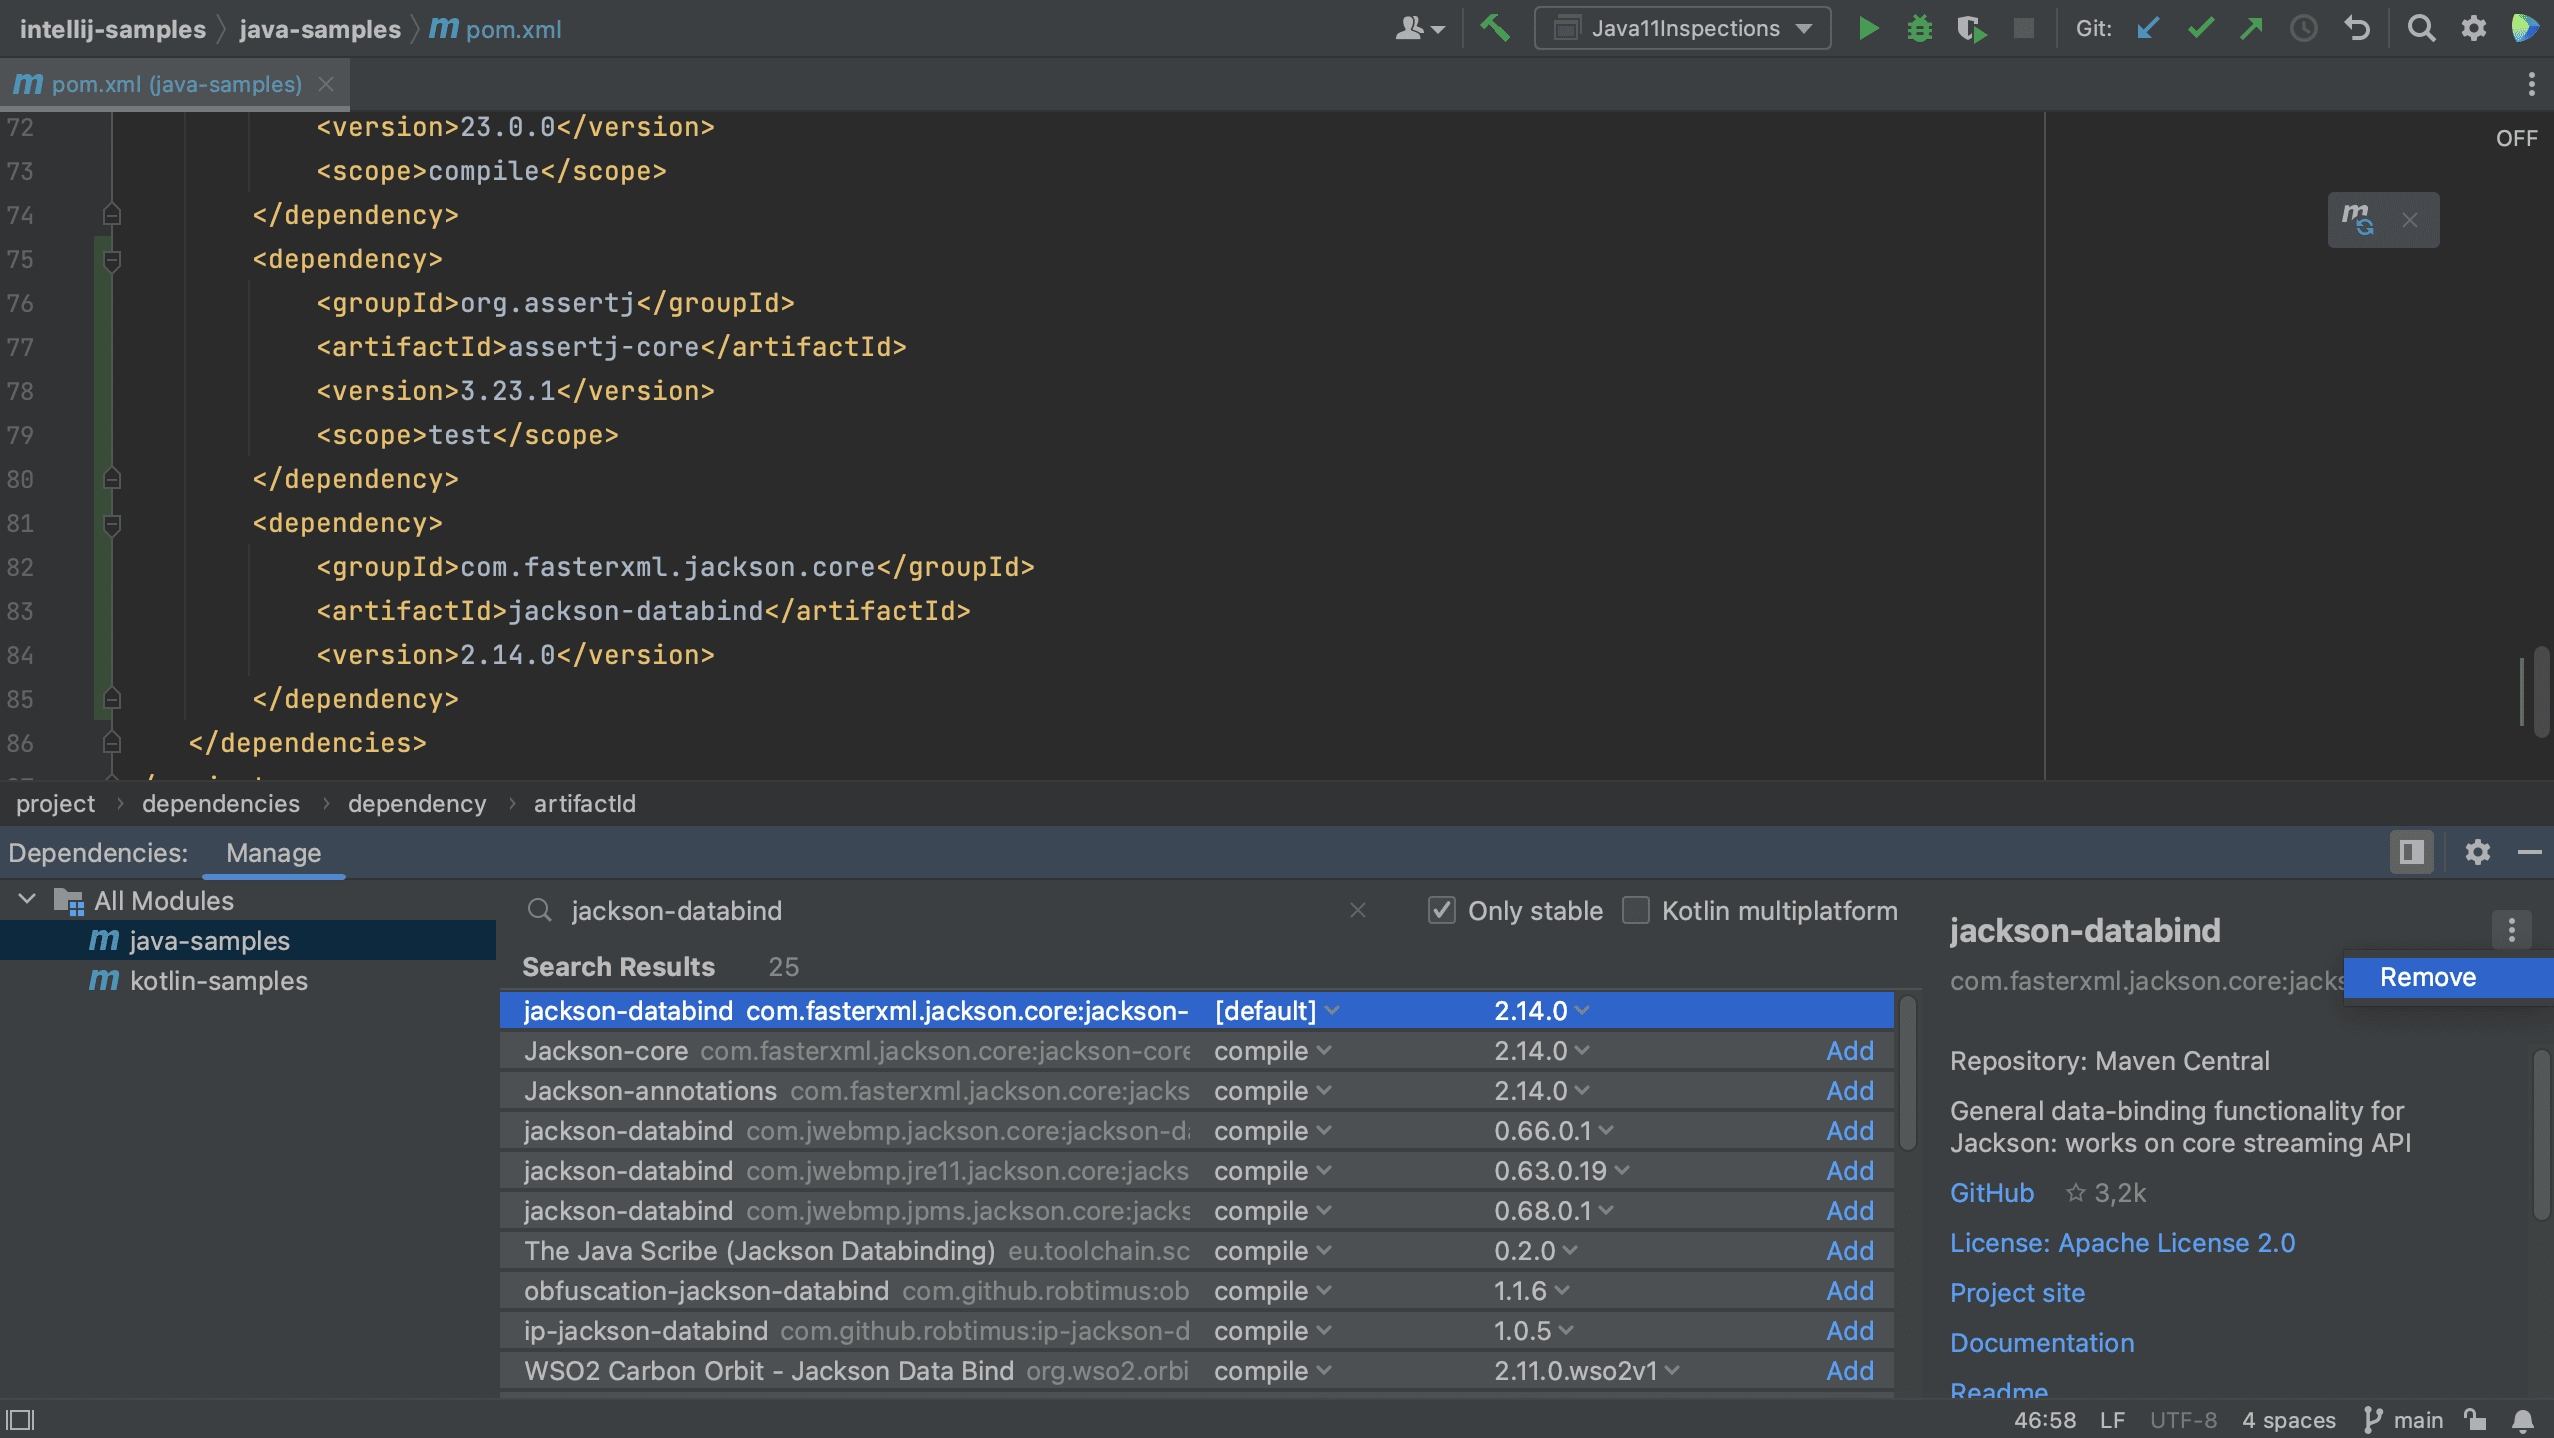
Finally, we can remove dependencies we no longer need. In the Dependencies tool window, let’s remove jackson-databind from the Java module. We select the dependency we want to remove (jackson-databind) and in the Dependency details pane on the right, click the More button (three dots) and select Remove.
We will see that the dependency is removed from the pom.xml and the dependency list. To remove a dependency from the whole project, select All Modules on the left.
Summary and Shortcuts
Now we know the different ways in which we can view our project’s dependencies in IntelliJ IDEA, and the different focus for each view.
IntelliJ IDEA Shortcuts Used
Here are the IntelliJ IDEA shortcuts that we used.
In this screencast, we’re going to take a look at managing dependencies in IntelliJ IDEA. We’ll look at different ways to add dependencies to your project, and how to add, update and remove dependencies using Package Search.
Used to determine whether a user is included in an A / B or Multivariate test.
18 months
_ga
ID used to identify users
2 years
_gali
Used by Google Analytics to determine which links on a page are being clicked
30 seconds
_ga_
ID used to identify users
2 years
_gid
ID used to identify users for 24 hours after last activity
24 hours
_gat
Used to monitor number of Google Analytics server requests when using Google Tag Manager
1 minute
_gac_
Contains information related to marketing campaigns of the user. These are shared with Google AdWords / Google Ads when the Google Ads and Google Analytics accounts are linked together.
90 days
__utma
ID used to identify users and sessions
2 years after last activity
__utmt
Used to monitor number of Google Analytics server requests
10 minutes
__utmb
Used to distinguish new sessions and visits. This cookie is set when the GA.js javascript library is loaded and there is no existing __utmb cookie. The cookie is updated every time data is sent to the Google Analytics server.
30 minutes after last activity
__utmc
Used only with old Urchin versions of Google Analytics and not with GA.js. Was used to distinguish between new sessions and visits at the end of a session.
End of session (browser)
__utmz
Contains information about the traffic source or campaign that directed user to the website. The cookie is set when the GA.js javascript is loaded and updated when data is sent to the Google Anaytics server
6 months after last activity
__utmv
Contains custom information set by the web developer via the _setCustomVar method in Google Analytics. This cookie is updated every time new data is sent to the Google Analytics server.