
In this screencast, we’re going to take a look at managing dependencies in IntelliJ IDEA. We’ll look at different ways to add dependencies to your project, and how to add, update and remove dependencies using Package Search.
Tag: Maven
Viewing dependencies in IntelliJ IDEA
In this blogpost we’re going to take a look at different ways to view your external dependencies in IntelliJ IDEA.
Introduction
If you’re working on a real-world application, your project will probably use external libraries and frameworks. Occasionally, you might want to see which dependencies your project uses, for various reasons.
There are several ways to view dependencies in IntelliJ IDEA. Each view has a different focus.
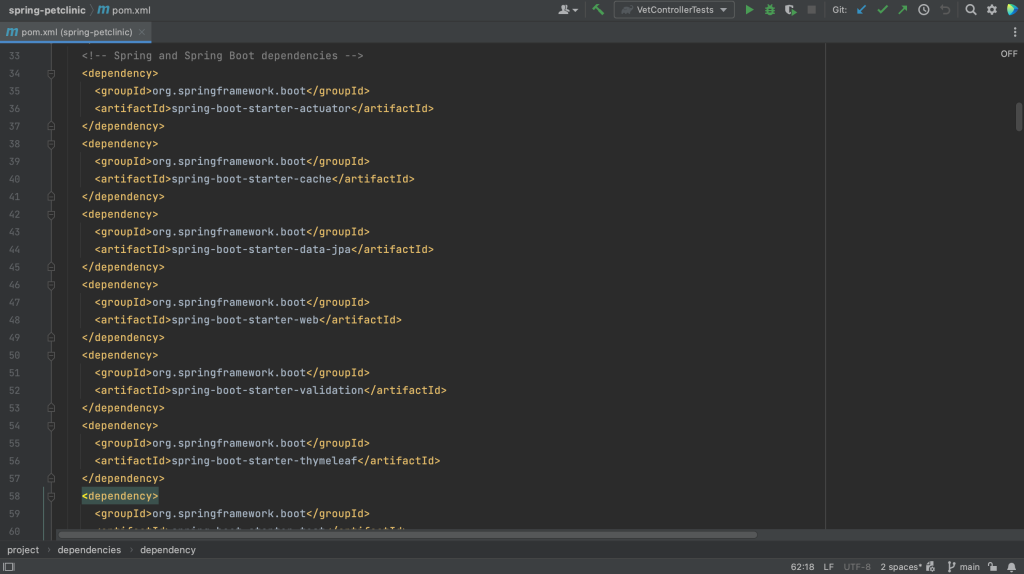
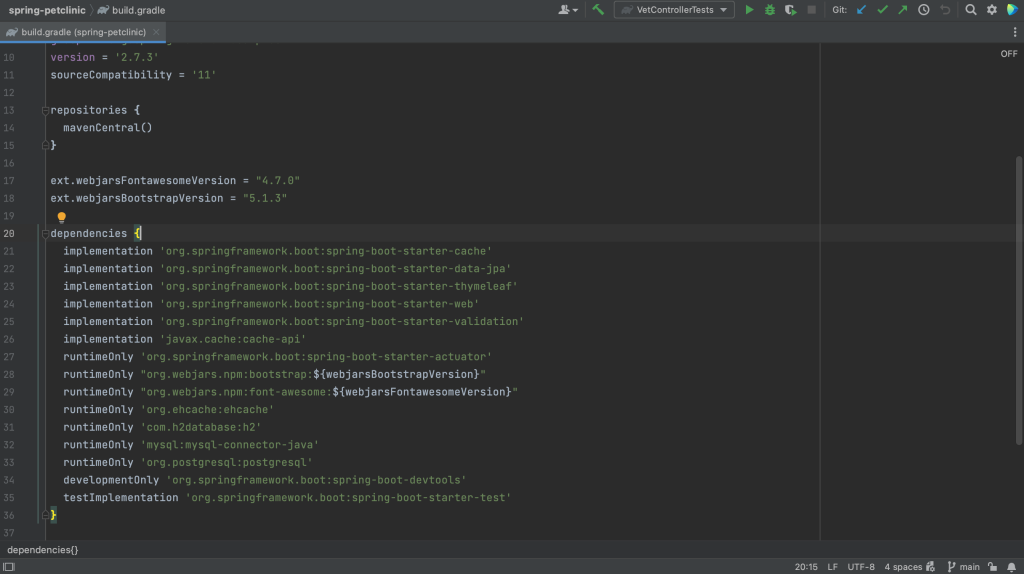
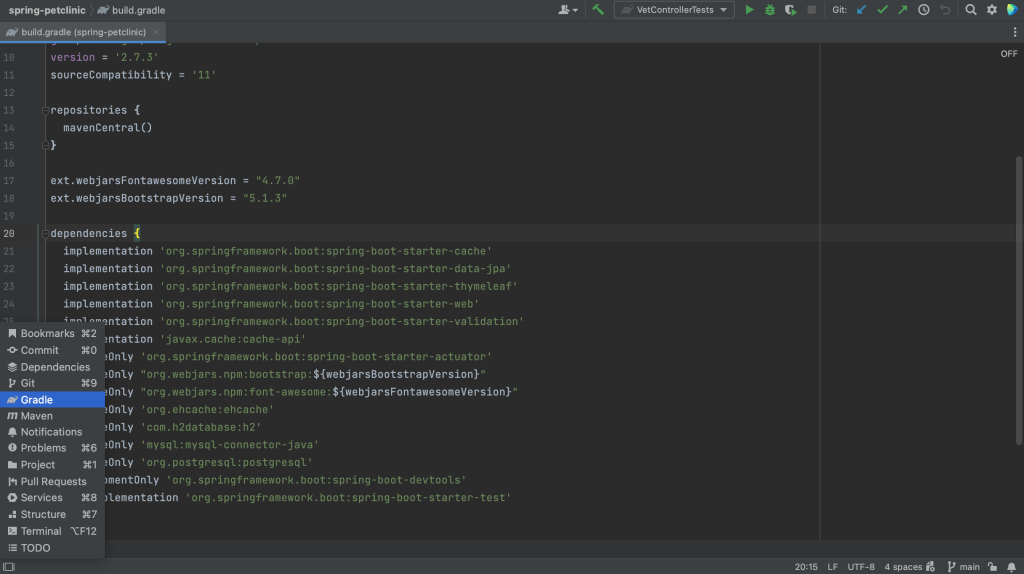
Dependency management config file
You can find direct dependencies in the dependency management config file. Direct dependencies are the dependencies that your project depends on directly. They are declared in the dependency management config file.
One example is this pom.xml in a Maven project.
Another example is the build.gradle in a Gradle project.
Note that the dependency management config file includes only declared dependencies and not their transitive dependencies (or the dependencies that these declared dependencies depend on).
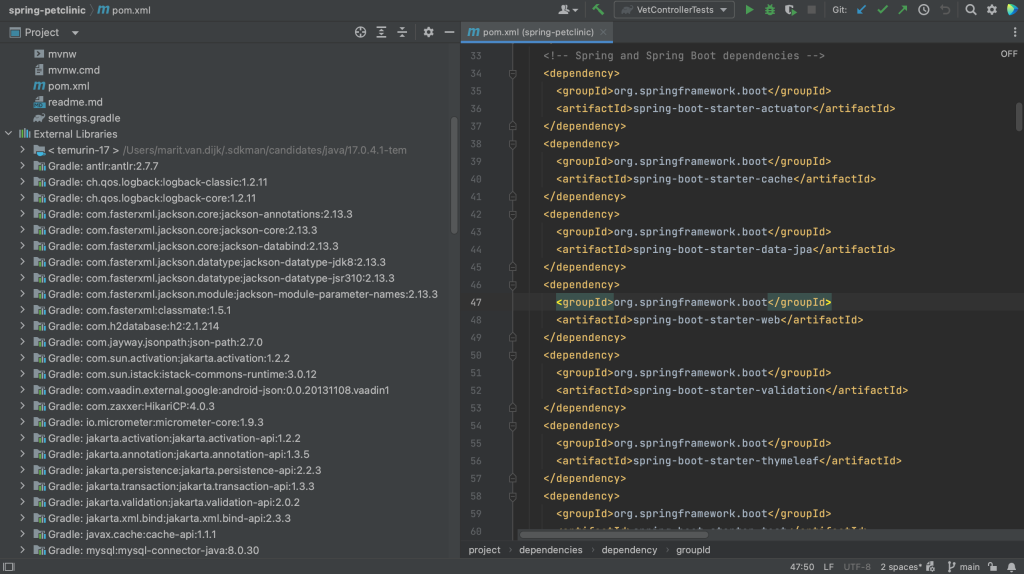
Project tool window
In the Project tool window, ⌘1 (on Mac) or Alt+1 (on Windows/Linux), under External Libraries we can see all the JAR files needed by our application, including the transitive dependencies. However, we cannot tell the difference between direct dependencies and transitive dependencies. One declared dependency might bring in multiple JAR files.
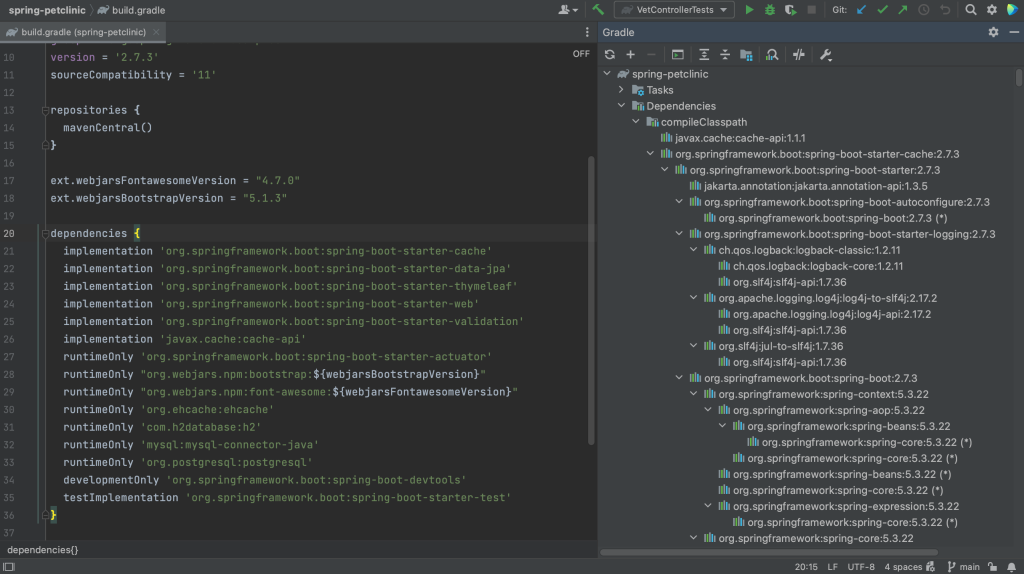
Build tool window
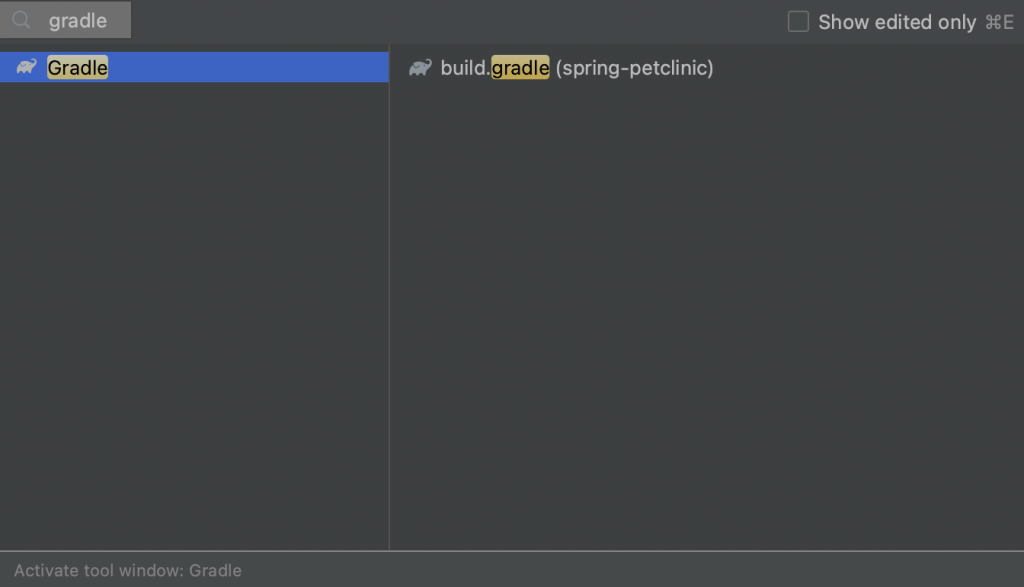
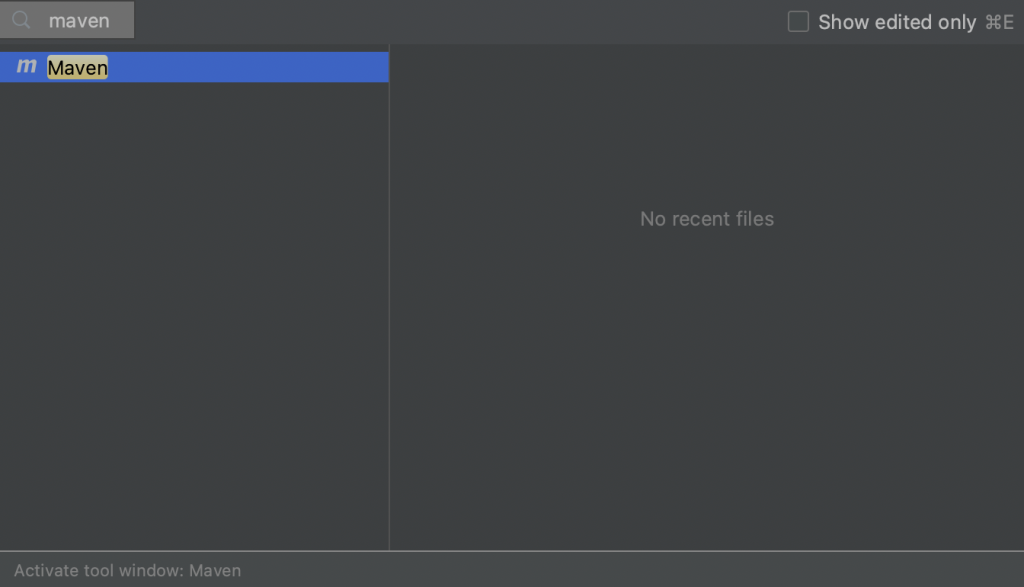
To see direct dependencies and their transitive dependencies, we can look in the Build tool window. There is no shortcut to open the Build tool window. We can open it by clicking Quick Launch in the bottom-left and selecting Gradle, or Maven depending on what we’re using.
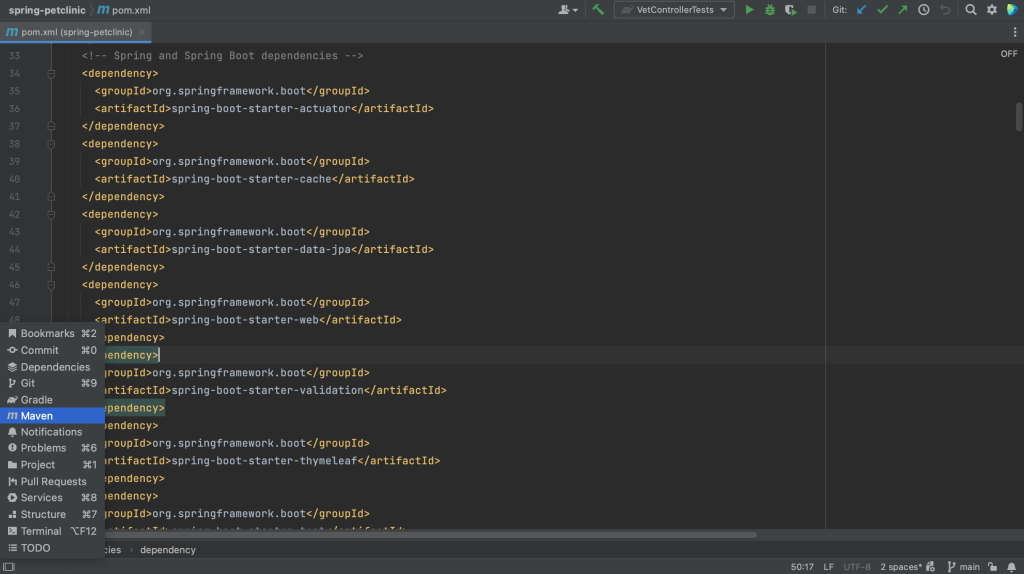
Alternatively, we can open it by using Recent Files, ⌘E (on Mac) or Ctrl+E (on Windows/Linux), and typing “gradle” or “maven”, or the name of your build system.
The Build tool window shows you each IntelliJ IDEA module separately, and each module’s “Dependencies” folder shows you all your dependencies in a hierarchical structure. We can expand our dependencies to see their transitive dependencies.
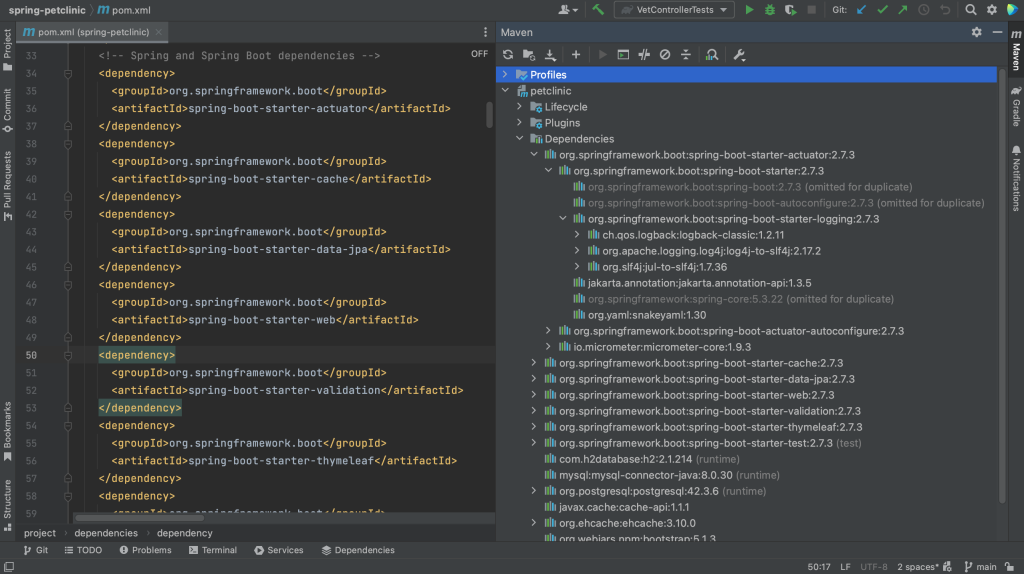
Dependency tool window
Finally, we can view and manage dependencies in the Dependencies tool window. The Dependencies tool window becomes available when the current project has at least one supported module. All types of dependencies are supported for Maven. For Gradle only a top level dependencies { } block is supported in the build script.
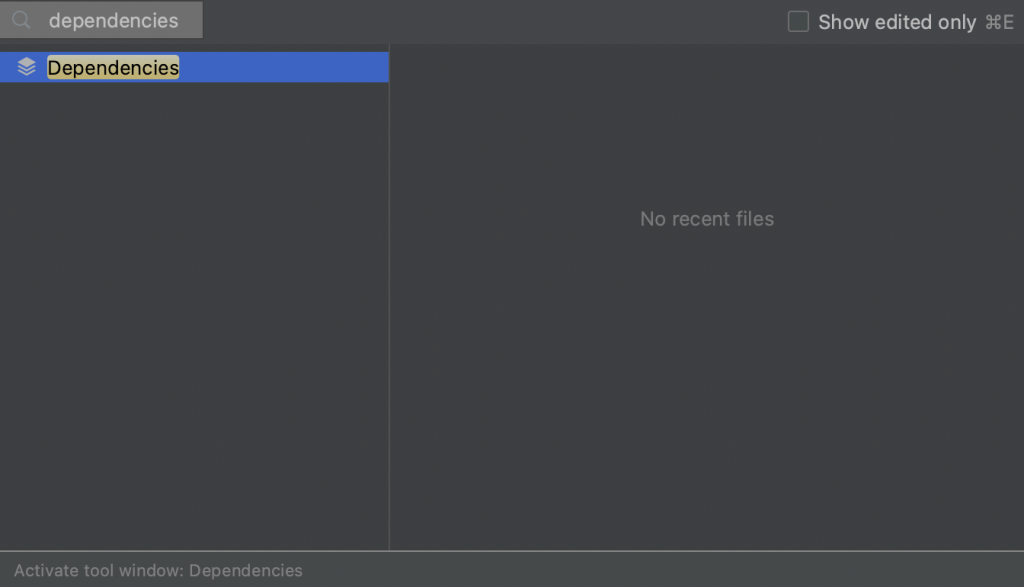
Since there is no shortcut to open the Dependencies tool window directly either, we can again use Recent Files, ⌘E (on Mac) or Ctrl+E (on Windows/Linux), and type in “dependencies” to open the Dependencies tool window.
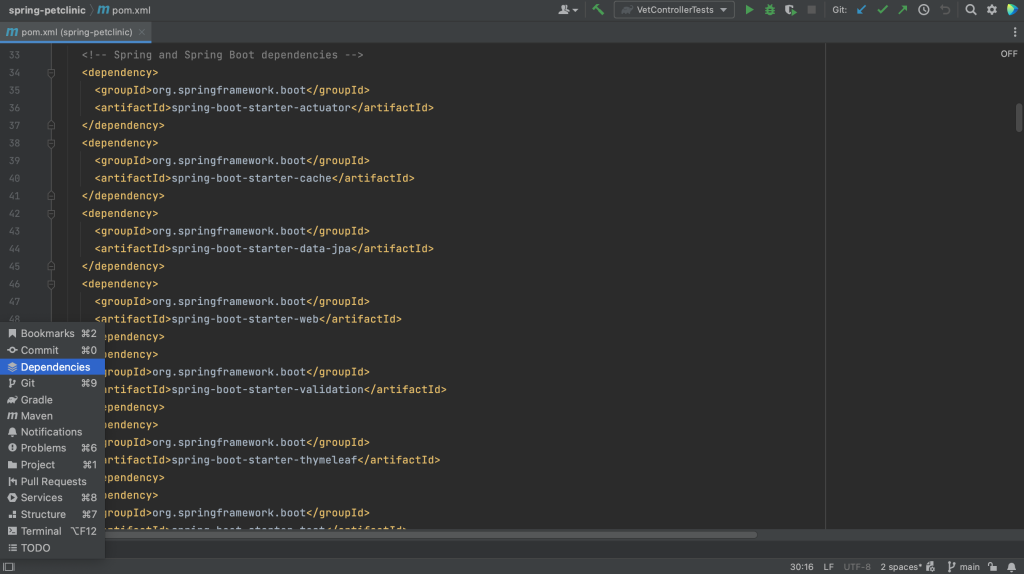
Alternatively, we can open it by clicking Quick Launch in the bottom-left and selecting Dependencies.
Here we can see our project’s direct dependencies. Select “All Modules” to see the dependencies for all modules, or select an indivual module to see the dependencies for that specific module. The Dependencies tool window shows direct dependencies, and not their transitive dependencies.
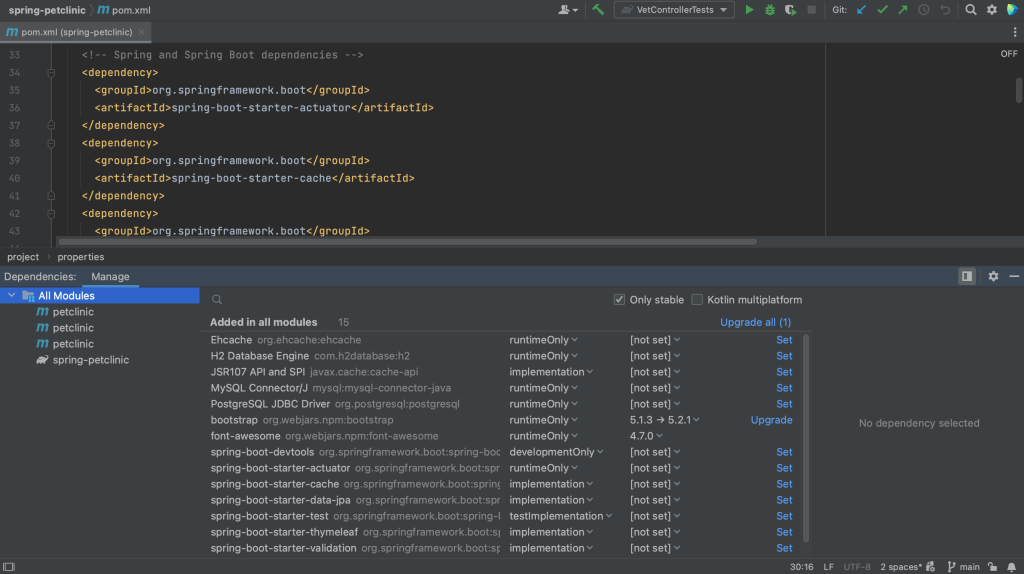
We can see details about a selected dependency in the dependency details pane.
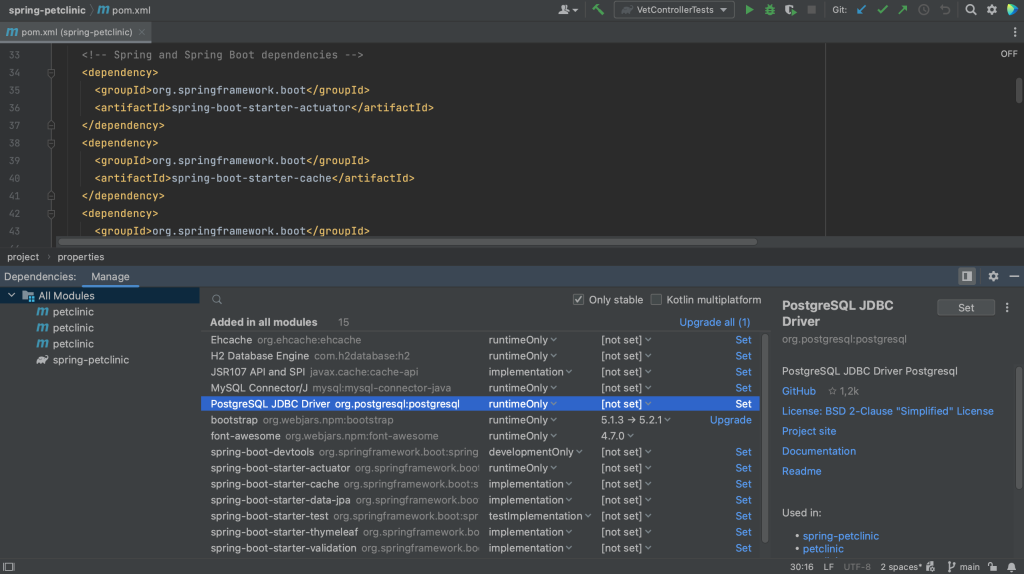
The dependency details pane displays the information about the selected dependency, such as:
- Repository or repositories where it’s available, for example Maven Central
- A description if it is available
- GitHub information if the dependency sources are hosted on GitHub
- The licence under which an open source library is available
- A link to the project website, documentation and readme
- List of usages in the current module.
- Authors if available
- Supported Kotlin or Multiplatform platforms if it is a Kotlin Multiplatform dependency
Summary and Shortcuts
Now we know the different ways in which we can view our project’s dependencies in IntelliJ IDEA, and the different focus for each view.
IntelliJ IDEA Shortcuts Used
Here are the IntelliJ IDEA shortcuts that we used.
| Name | macOS Shortcut | Windows / Linux Shortcut |
|---|---|---|
| Open / Close Project Tool Window | ⌘1 | Alt+1 |
| Recent Files | ⌘E | Control+E |
Related Links
IntelliJ IDEA: Viewing Dependencies
If you’re working on a real-world application, your project will probably use external libraries and frameworks. Occasionally, you might want to see which dependencies your project uses, for various reasons. There are several ways to view dependencies in IntelliJ IDEA. Each view has a different focus.
Related Links
Keeping dependencies up to date with Maven
This article was also published on Medium.
In this blog post, we will look at some standard Maven commands that can help us manage our dependencies and keep them up to date. These are useful to see both direct and transitive dependencies used in the project, look for version updates of dependencies and plugins, and look for unused dependencies that may be removed. All of these can be useful to keep our dependencies up to date.
Pre-requisites
For the examples in this post, we are using the following tools and versions:
- IntelliJ IDEA Community Edition 2022.2.1 – which you can get here
- Example project from GitHub (Note: this is an outdated & unmaintained project, which makes it useful to show how to find outdated dependencies)
- Maven 3.8.6 (optional, see note below) – Install Maven
Note: Maven wrapper
The project we are using in this example includes a Maven wrapper. If the project you are working on does not have a Maven wrapper, you will need to have Maven installed on your local machine. To add Maven wrapper to your project, run the following command in your terminal: mvn wrapper:wrapper and commit the result. Now anyone who uses the project can use the Maven wrapper without having to install Maven locally, and using the same Maven version.
Using Maven to display dependency updates
We can use Maven to check if there are updates available for the dependencies we are using in our project. Run the following command in your terminal: ./mvnw versions:display-dependency-updates.
This will display a list of dependencies for which newer versions have been found.
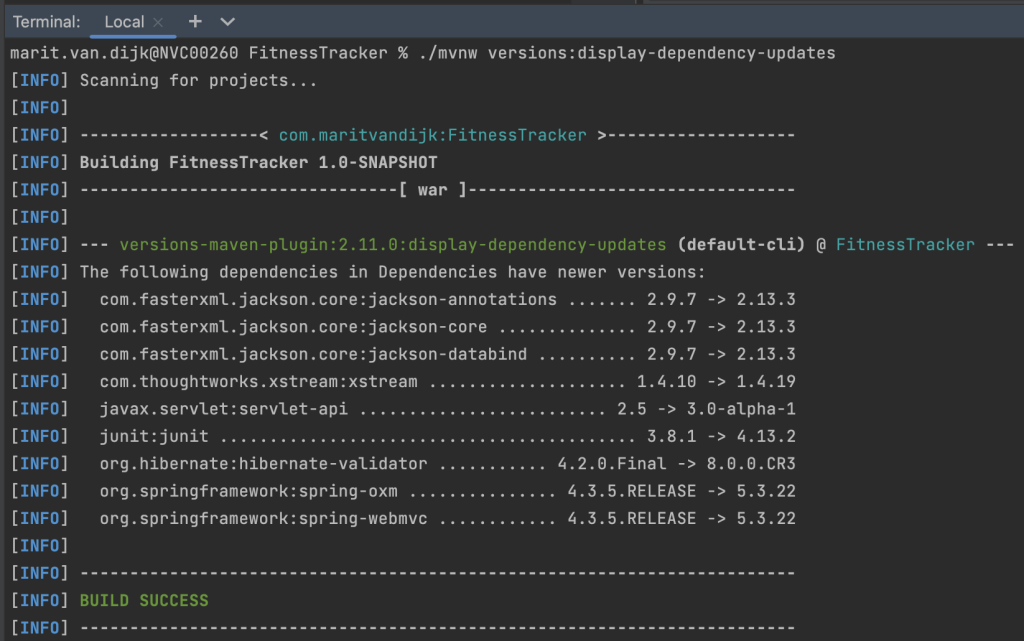
As you can see, there are quite a few dependencies that need to be updated in this project. The reason is that this is an old project that was created from a tutorial years ago and not maintained since. The upside is that it is a great project to use as an example for finding outdated dependencies.
Using Maven to display plugin updates
The same is possible for plugins. Check which plugins can be updated by running the following command in your terminal: ./mvnw versions:display-version-updates.
On the example project, this provides the following result:
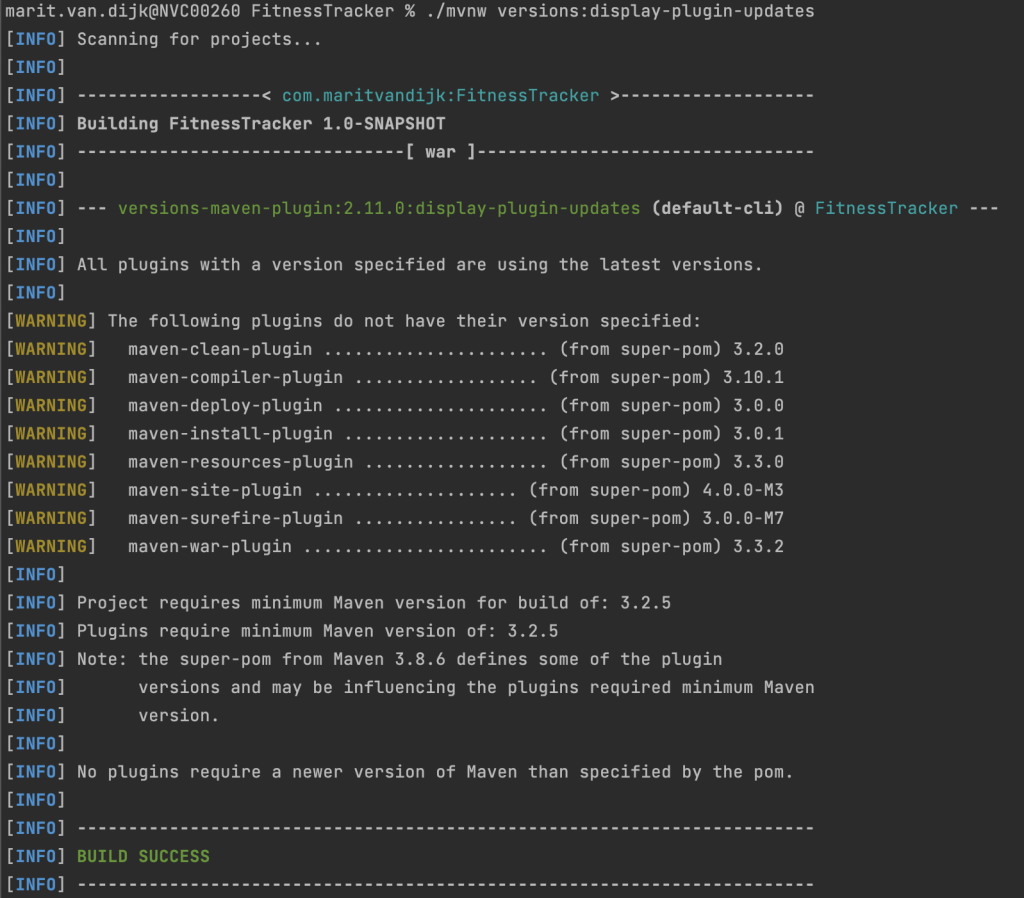
This project doesn’t really use a lot of plugins. Your actual projects might, so I wanted to include this command here.
Overview of dependencies: dependency-tree
To see all the dependencies you are using in your project, run the following command in your terminal: ./mvnw dependency:tree. This will return a list of the dependencies declared in this project, and their transitive dependencies:
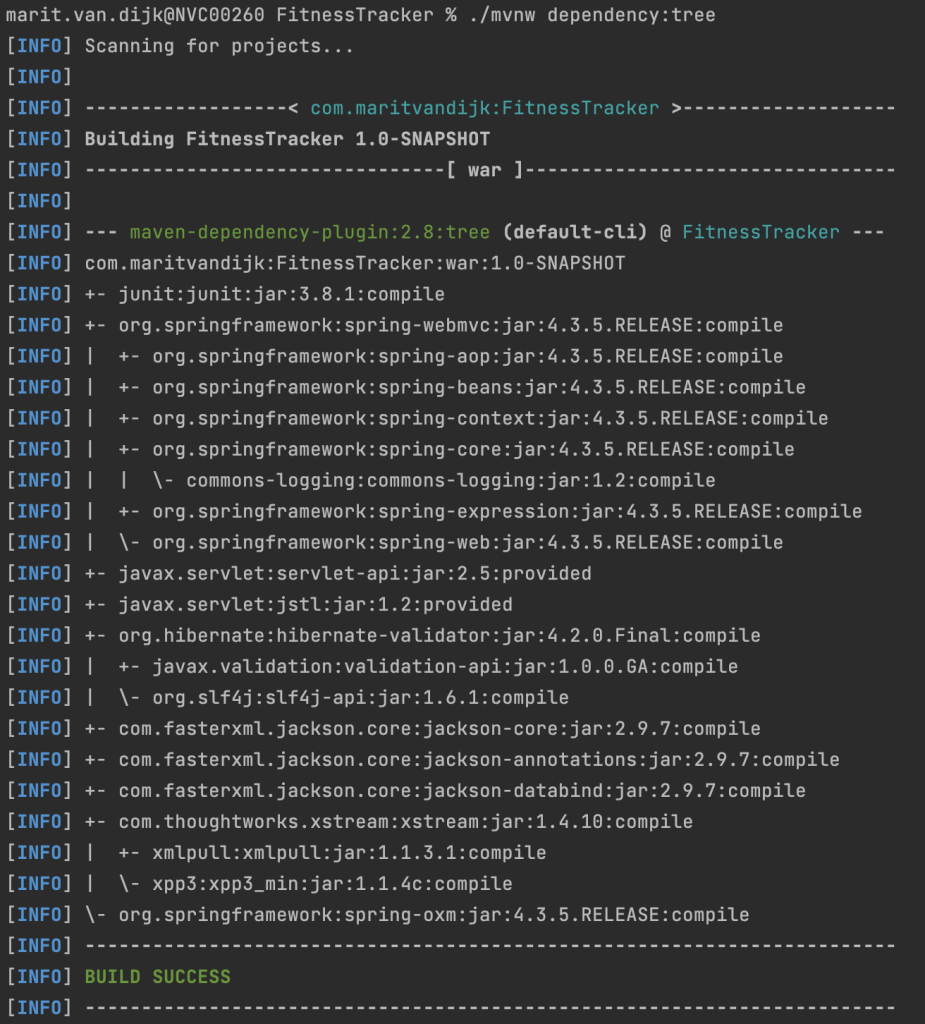
Of course, you can also find the declared dependencies in your pom.xml, but it’s good to have an idea of which transitive dependencies they bring in.
Filtering the dependency tree
The dependency tree for this example project is rather small, like the project itself. Your actual projects at work might be much bigger. If needed, you can filter the dependency tree.
To check where a specific dependency is coming from, use the following command: ./mvnw dependency:tree -Dincludes=<groupId>:<artifactId> containing the groupId and artifactId of the dependency you are looking for.
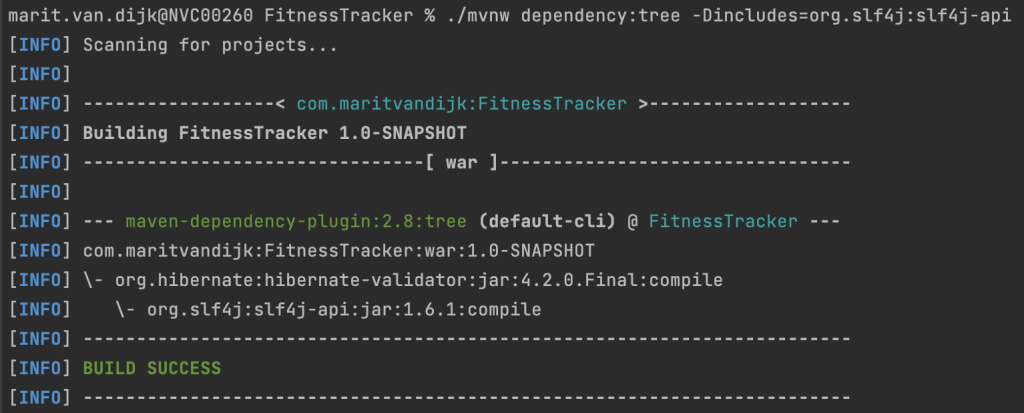
For example, if we would like to see where this project is getting the slf4j dependency, we would run ./mvnw dependency:tree -Dincludes=org.slf4j:slf4j-api. We see that we get this transitive dependency through Hibernate:
For more information on filtering the dependency tree, see the Maven documentation.
Effective pom
The effective pom is the POM that results from the application of interpolation, inheritance and active profiles. To generate the effective POM, run the following command in your terminal: ./mvnw help:effective-pom.
When running this command on the the example project, the result will be fairly small, because it is a relatively small project. For a large project, the effective pom will be much bigger. If needed, you can write the effective POM into a log file using the following command: ./mvnw help:effective-pom --log-file log.txt.
Use Maven to find unused dependencies
We can also use Maven to find unused dependencies. Run ./mvnw dependency:analyze on the example project gives us the following results:
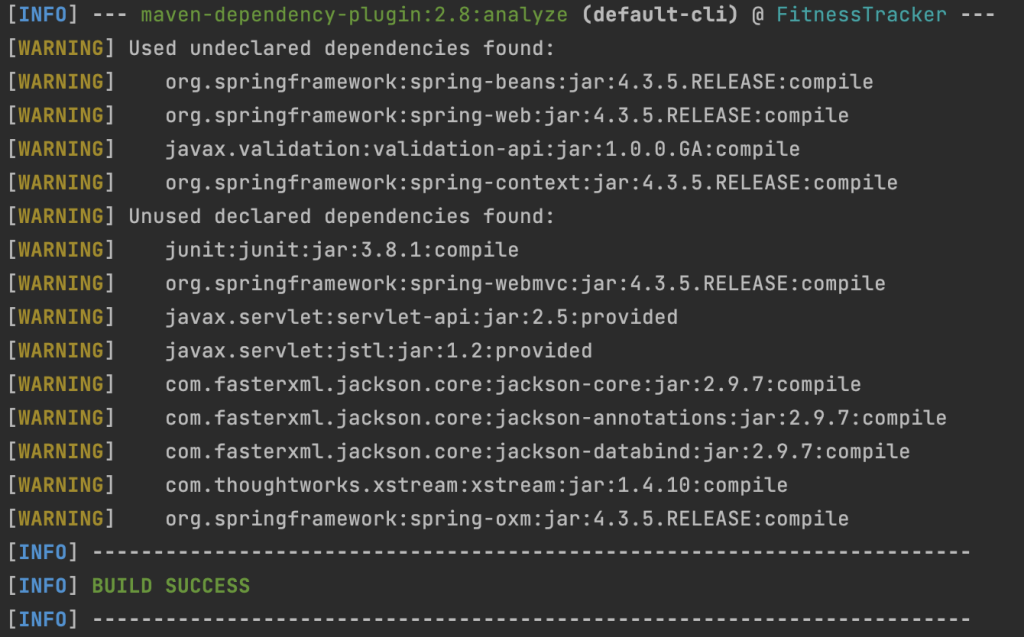
We see that we have “Used undeclared” dependencies, like org.springframework:spring-beans.
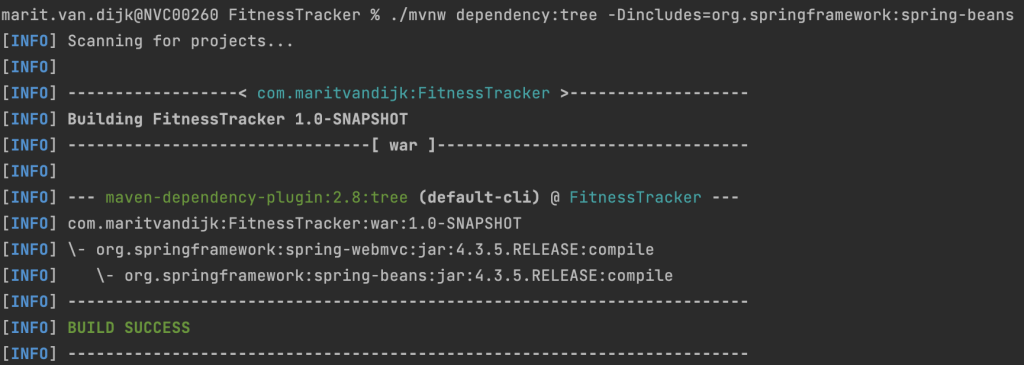
If we search for that dependency, by filtering the dependency tree for that particular dependency using ./mvnw dependency:tree -Dincludes=org.springframework:spring-beans we see that it is a transitive dependency from Spring-webmvc:
We also see some “Unused declared” dependencies. If these are dependencies you truly don’t need, it might be a good idea to remove them from your pom.xml. (Note: In this example, JUnit is unused because the tutorial this project is based on didn’t include any tests. If that is the case for your project, consider adding tests instead of removing this dependency!)
Conclusion
Maven offers several ways to help us keep our dependencies up to date. Using the commands above can help us to keep the dependencies we need up to date, and to remove the dependencies we no longer need.