
This article was published on Foojay.io on August 25, 2022.
This tutorial will cover how to clean up your Git commit history with Git interactive rebase, both via the IntelliJ IDEA UI and from the command line.
Git interactive rebase allows you to change individual commits, squash commits together, drop commits or change the order of the commits.
This allows you to clean up your Git commit history to make it linear and meaningful, which can make it easier to understand the history of the project in the future.
Open the Git window in IntelliJ IDEA using ⌘+9 on Mac (or Alt+9 on Windows & Linux). In the Git log window we can see the commits that were made to the project.
We will use a Git demo project available on GitHub. This example uses TDD (Test Driven Development) to add a new feature.
In TDD, we start by adding a failing test, writing the minimum of code we need to get that test to pass and finally do some refactoring.
Even though we made the necessary changes in multiple commits, we don’t need to keep all these individual commits for future reference.
Using Git interactive rebase in the UI
We can use Git Interactive Rebase in IntelliJ IDEA as follows:
In the Git history, identify the commit from where you want to clean up your history. That will be the oldest commit in the series of commits you want to clean up; in this example, the first failing test that we added.
Right-click on the commit from where you want to clean up your history and select “Interactively Rebase from Here…“.
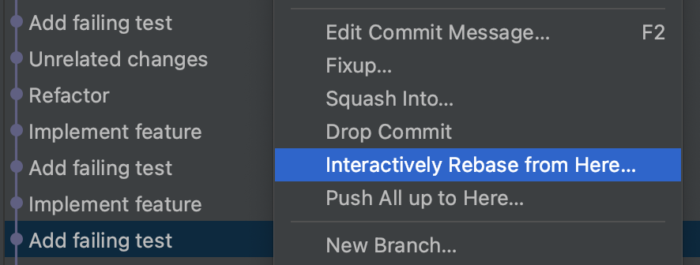
This will open the “Rebasing Commits” popup window with a list of the commits that were done on top of the selected commit.

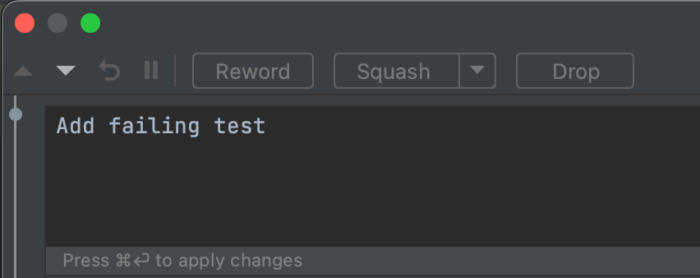
Notice there are several options at the top of this popup, that become active when we select one or more of the commits:
- Reword allows us to change the commit message of a specific commit.
- The Squash button is actually a dropdown that allows us to choose between Squash and Fixup. Both options will combine the changes made in the selected commits into one commit. If we select squash, by default the individual commit messages will be combined. If we select fixup, the commit message of the fixup commit will be discarded. You can select fixup while in the “Rebasing Commits” popup with ⌥+F on Mac (or Alt+F on Windows & Linux)
- Drop allows us to drop one or more commits.
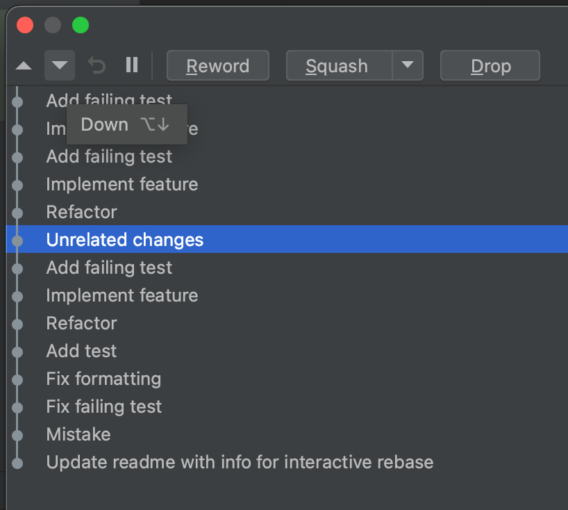
Changing the order of the commits
Let’s say we want to change the order of the commits; we want to keep the unrelated change, but separately from the changes for the new feature. We can select this commit and use the up and down buttons on the top left to change where in the order this commit will be.
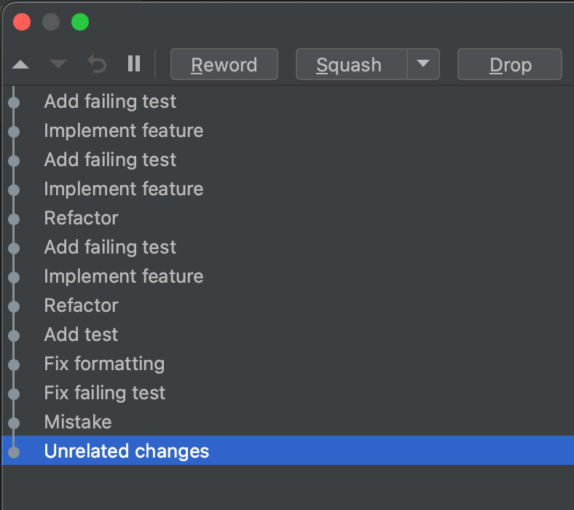
Once we’re sure about the order, select “Start Rebasing“. We see in the Git log that the order of the commits has changed.
Combining multiple commits into one commit
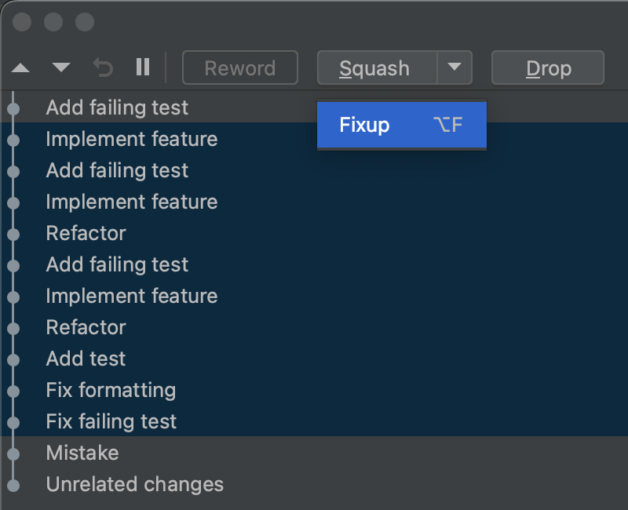
Next, we want to combine multiple commits where we added the tests and implemented the new feature. Let’s reopen the “Rebasing Commits” window and select those commits.
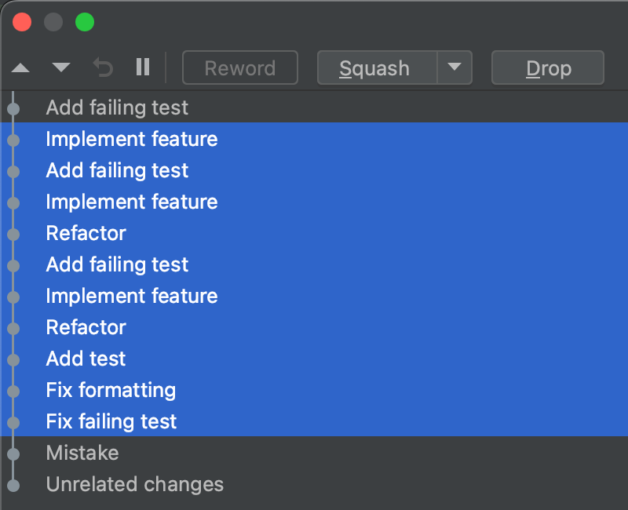
Now, because we want to combine those commits into one commit with one commit message we select “Fixup“, and then select “Start Rebasing“.
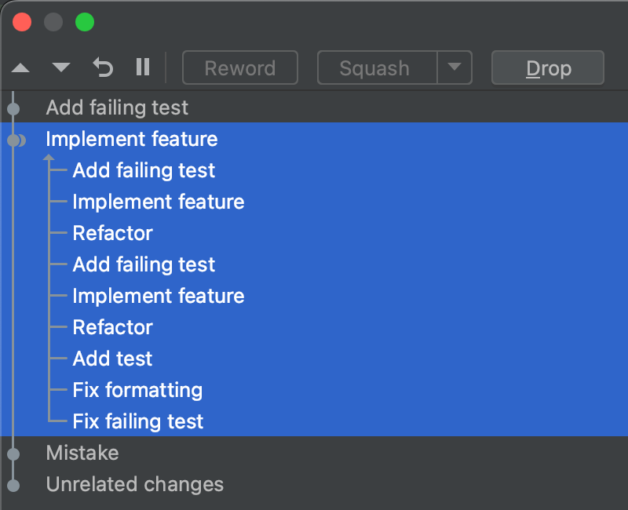
In the Git log, we can see that multiple individual commits are now combined into one commit with one commit message.
Drop a commit
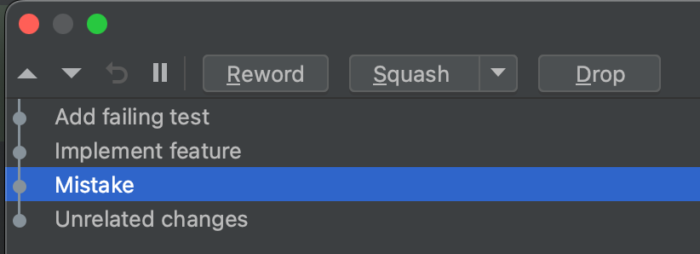
Finally, we want to drop the commit with a mistake that we made. Let’s reopen the “Rebasing Commits” window, select the mistaken commit, select “Drop” and select “Start Rebasing“.
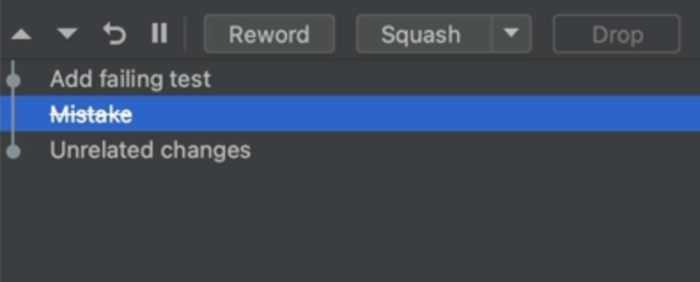
We see in the Git log that the commit is dropped.
Rename a commit
Now that we have cleaned up our commit history, we might want to rename the commit where we added the new feature. We have several options to do so.
We can do so using Git interactive rebase, in the “Rebasing Commits” popup, by selecting the commit you want to rename and clicking the “Reword” button at the top of the popup. This will open a small editor pane where you can reword the commit message for this commit, apply the change to the message and select “Start Rebasing“.
You can also edit the commit message directly in the Git log window. Right-click the commit you want to rename and select “Edit Commit Message” or press F2 on macOS, Windows or Linux.

This will open a “Edit Commit Message” popup, where you can edit the commit message and click “Ok” (or “Cancel“) when you are done.

See which Git commands were executed
To see which Git commands IntelliJ IDEA performed, open the “Console” tab in the Git window.
Using Git interactive rebase from the command line
Let’s take a look at how to use Git interactive rebase from the command line.
In the Git history, identify the commit just before the commit from where you want to clean up your history. In this example, that will be the last commit before we started adding the new feature.
Find the commit hash for this commit in the “Commit Details” to the right of the Git history in the Git window and copy this commit hash. (Spoiler: the commit hash in this example is 34bb0f99.)

Open the Terminal window, using ⌥F12 on Mac (or Alt+F12 on Windows & Linux) and type git rebase -i 34bb0f99 (where 34bb0f99 is the commit hash we copied above).

This will open an editor in the terminal with the list of commits that were done on top of the selected commit. Each line in this file is an individual commit.
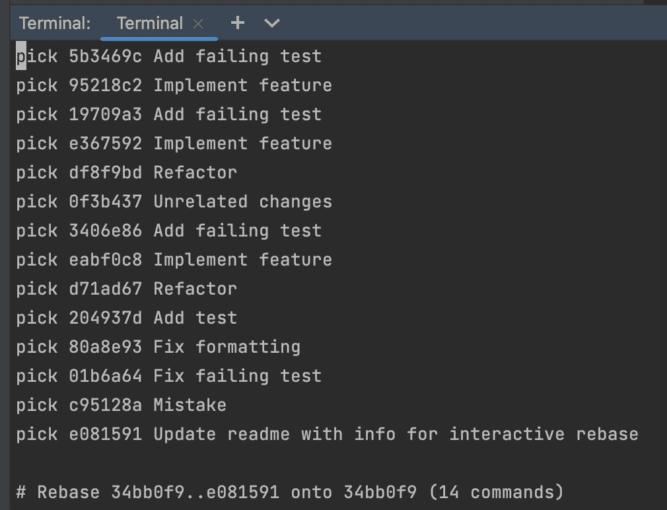
By default, Git will use whatever you have set as your default text editor. If you haven’t set one, it will fall back to the vi editor, which is what we will use in this tutorial.
Changing the order of the commits
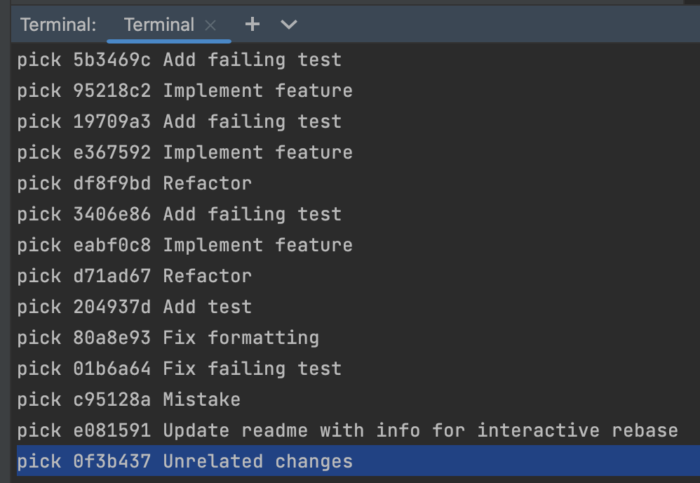
Let’s say we want to change the order of the commits; we want to keep the unrelated change, but separately from the changes for the new feature. We can do so by changing the order of the lines (individual commits) to reflect the order we want.
In the editor in the terminal, switch to edit mode by pressing I to be able to edit this file.
We can change the order of the lines by removing the commit we want to move from the list and inserting it in the place where we want it.
In vi, we can do so as follows:
- Place the cursor anywhere on the line you want to move (in this example the commit “Unrelated changes”) and remove this line by typing
dd. - Move the cursor to the line where you want to reinsert this commit (in this example, the end of the file) and type
p. - Note: you do not need to switch to edit mode to do so.
Once we’re sure about the order, we need to save the file. Press esc to exit edit mode and type :wq to save the file.
Note: If you made changes to the file that you do not want to save, type :q! to force quit.
The interactive rebase will be applied. We see in the Git log that the order of the commits has changed.
Combining multiple commits into one commit
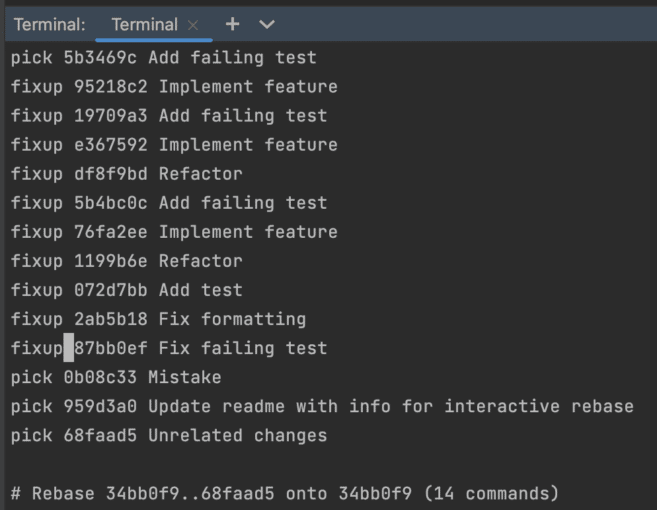
Next, we want to combine multiple commits where we added the tests and implemented the new feature. In the terminal, type git rebase -i 34bb0f99 to start rebasing. If you have already run this command, you can press the up arrow ↑ in the terminal to show the last used command(s).
This will again open an editor in the terminal with the list of commits.
Switch to edit mode in the editor in the terminal. In vi, you can do so by pressing I.
For each of the commits we want to combine, replace “pick” with “fixup”.
Note that we use “fixup” because we want to use one commit message for the combination of the commits. Alternatively, we could use “squash” to combine the individual commit messages into the new commit message.
Once we have correctly edited all the commits we want to combine, save the file.
In vi, press esc to exit edit mode and type :wq to save the file.
The interactive rebase will be applied. In the Git log, we can see that multiple individual commits are now combined into one commit with one commit message.
Drop a commit
Finally, we want to drop the commit with a mistake that we made. In the terminal, type git rebase -i 34bb0f99 to start rebasing.
To drop a commit, remove that commit from the list of commits. In this example, we will remove the commit “Mistake”.
In vi, we can remove a line by placing the cursor anywhere on the line we want to remove and typing dd. Alternatively, we can switch to edit mode by pressing I and removing the line manually. Press escto exit edit mode.

Save the file by typing :wq and the interactive rebase will be applied. We see in the Git log that the commit is dropped.
Summary
Now we know how to use git interactive rebase either from the IntelliJ IDEA UI or from the command line. Give them a try and use whichever way you prefer.
IntelliJ IDEA Shortcuts Used
Here are the IntelliJ IDEA shortcuts that we used.
| Name | macOS Shortcut | Windows / Linux Shortcut |
|---|---|---|
| Open the Git Tool Window | ⌘9 | Alt+9 |
| Open the Commit Window | ⌘0 | Alt+0 |
| Open the Terminal | ⌥F12 | Alt+F12 |
| Select Fixup (in the “Rebasing Commits” popup) | ⌥F12 | Alt+F |
| Edit commit message (in the Git Log) | F2 | F2 |
Git commands Used
Here are the Git commands that we used.
| Name | terminal command |
|---|---|
| Git interactively rebase from a specific commit with commit hash, for example 11aa23bc | git rebase -i 11aa23bc |
| Use this commit | pick |
| Fixup this commit (add changes to previous commit under the same commit message) | fixup |
| Squash this commit (add changes to previous commit and combine commit messages) | squash |
vi Shortcuts Used
Here are the shortcuts that we used.
| Name | Shortcut |
|---|---|
| Open interactive (edit) mode | I |
| Exit interactive (edit) mode | esc |
| Remove line (note: not in edit mode) | dd |
| Reinsert line (note: not in edit mode) | p |
| Write and quit | :wq |
| Force quit | :q! |