In the first episode of IntelliJ IDEA Tech Talks, I talk to Moritz Halbritter from the Spring team about JSpecify.
We talk about what JSpecify is, and Moritz shows us how to add JSpecify to a codebase. We had a lot of fun recording this episode; I hope you will enjoy the recording!
Description
Null pointer exceptions have been called the billion dollar mistake. They are a common source of bugs and frustration. JSpecify aims to fix that, and with Spring Boot 4 and Spring Framework 7 now fully on board, it’s time to take a closer look. In this episode, Moritz Halbritter from the Spring team walks us through what this means for your Spring projects and how to adopt JSpecify in practice. Using a live demo, we migrate an existing Spring Boot application, tackling problems along the way. See how to use JSpecify for the contract, IntelliJ IDEA for the developer experience, Spring for the framework, and NullAway for the build guarantee. Whether you’re maintaining a large codebase or publishing a library, this episode gives you the tools to start eliminating null pointer exceptions in your applications.
In this screencast, we’re going to take a look at managing dependencies in IntelliJ IDEA. We’ll look at different ways to add dependencies to your project, and how to add, update and remove dependencies using Package Search.
In this blogpost we’re going to take a look at different ways to view your external dependencies in IntelliJ IDEA.
Introduction
If you’re working on a real-world application, your project will probably use external libraries and frameworks. Occasionally, you might want to see which dependencies your project uses, for various reasons.
There are several ways to view dependencies in IntelliJ IDEA. Each view has a different focus.
Dependency management config file
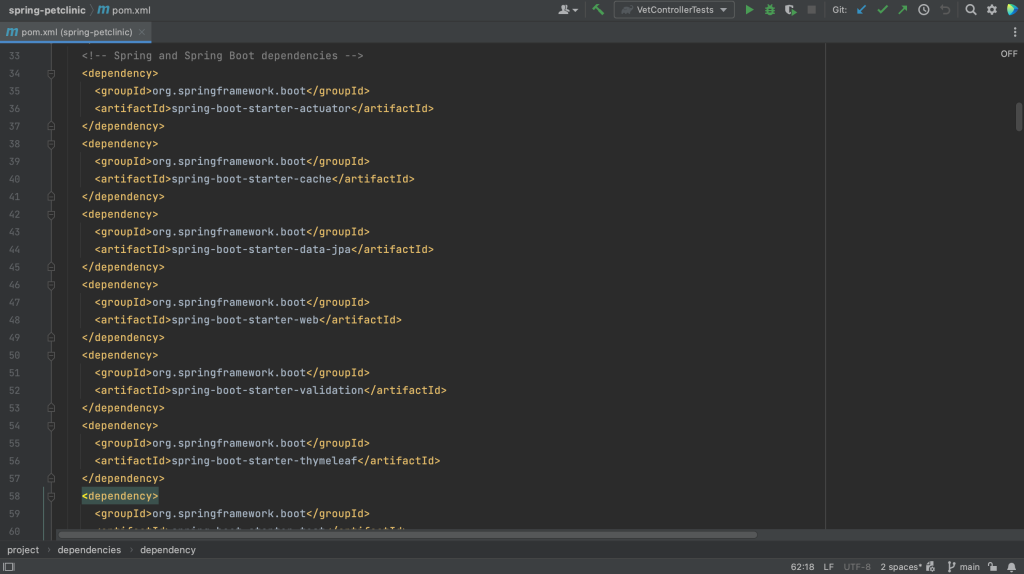
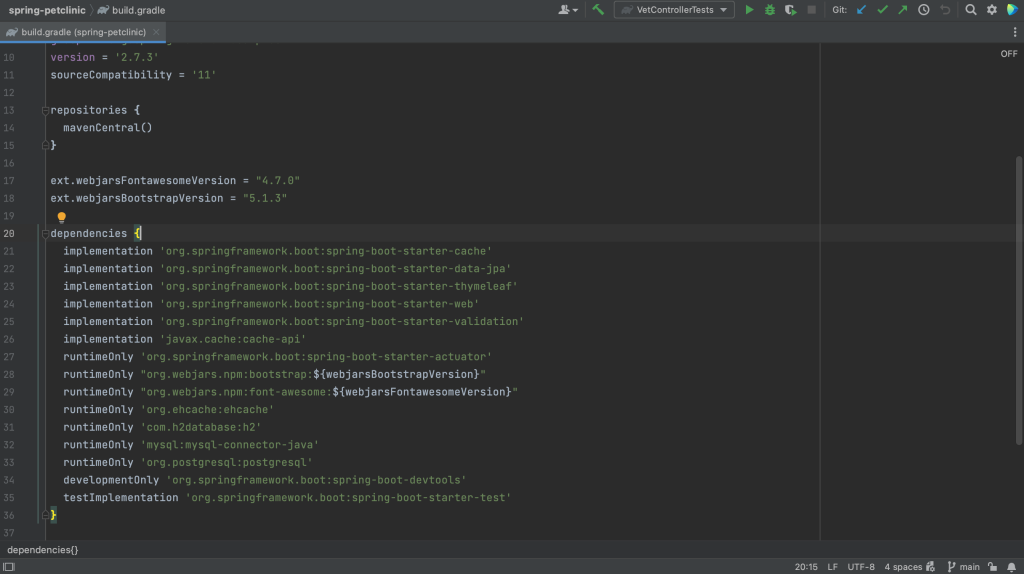
You can find direct dependencies in the dependency management config file. Direct dependencies are the dependencies that your project depends on directly. They are declared in the dependency management config file.
One example is this pom.xml in a Maven project.
Maven pom.xml file
Another example is the build.gradle in a Gradle project.
Gradle build.gradle file
Note that the dependency management config file includes only declared dependencies and not their transitive dependencies (or the dependencies that these declared dependencies depend on).
Project tool window
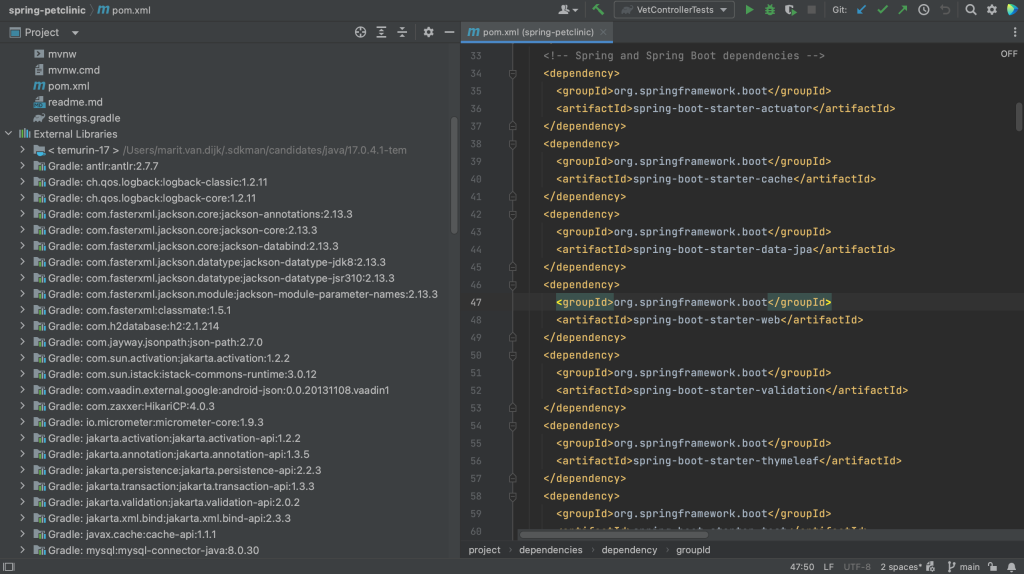
In the Project tool window, ⌘1 (on Mac) or Alt+1 (on Windows/Linux), under External Libraries we can see all the JAR files needed by our application, including the transitive dependencies. However, we cannot tell the difference between direct dependencies and transitive dependencies. One declared dependency might bring in multiple JAR files.
Project tool window
Build tool window
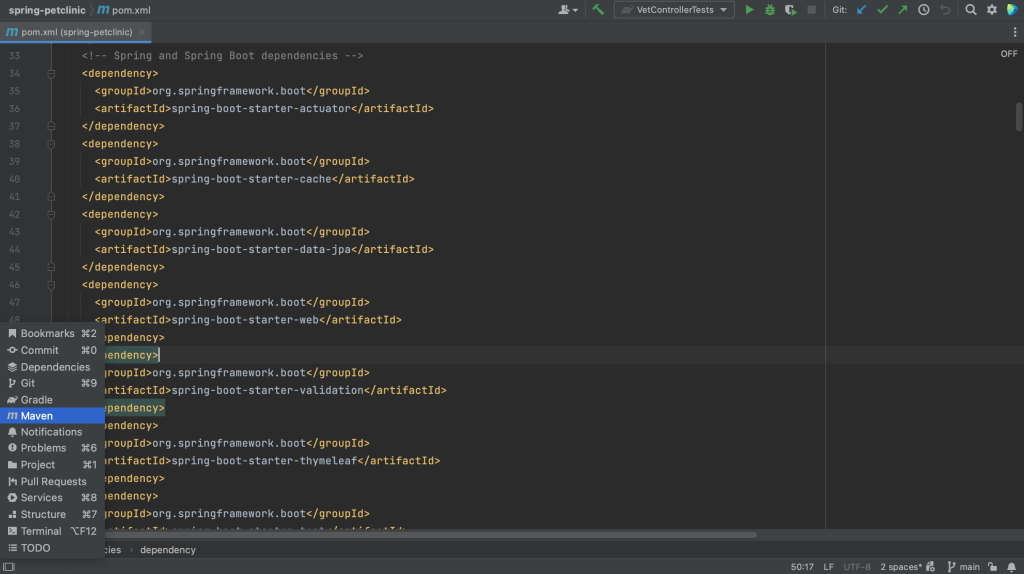
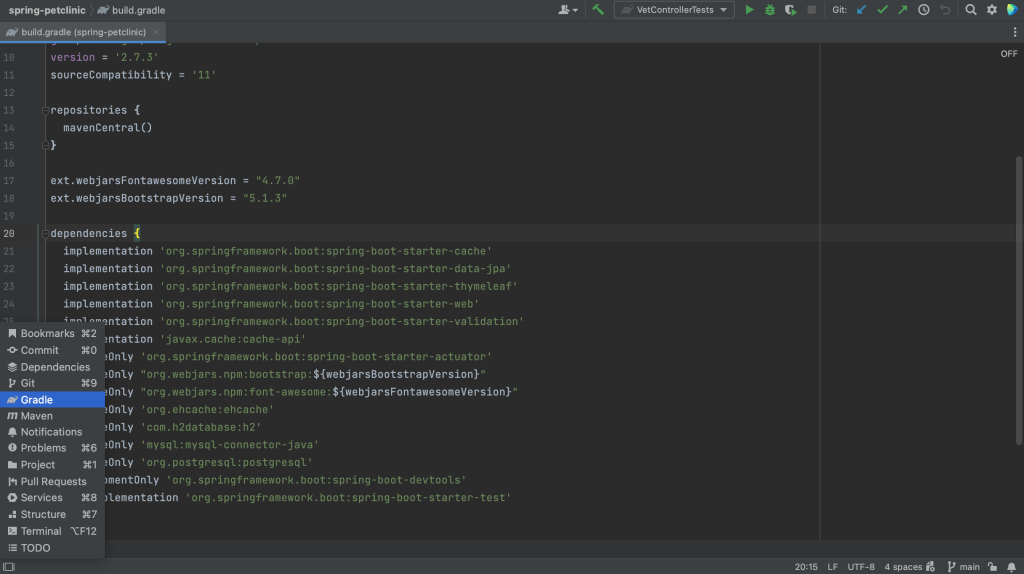
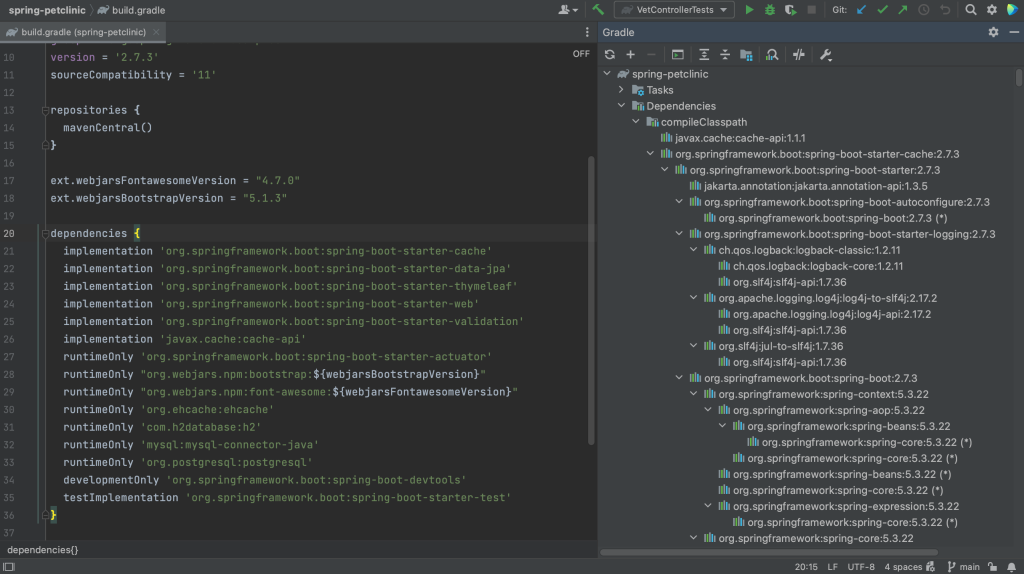
To see direct dependencies and their transitive dependencies, we can look in the Build tool window. There is no shortcut to open the Build tool window. We can open it by clicking Quick Launch in the bottom-left and selecting Gradle, or Maven depending on what we’re using.
Open the Maven Build Tool Window in the Quick Launch menuOpen the Gradle Build Tool Window in the Quick Launch menu
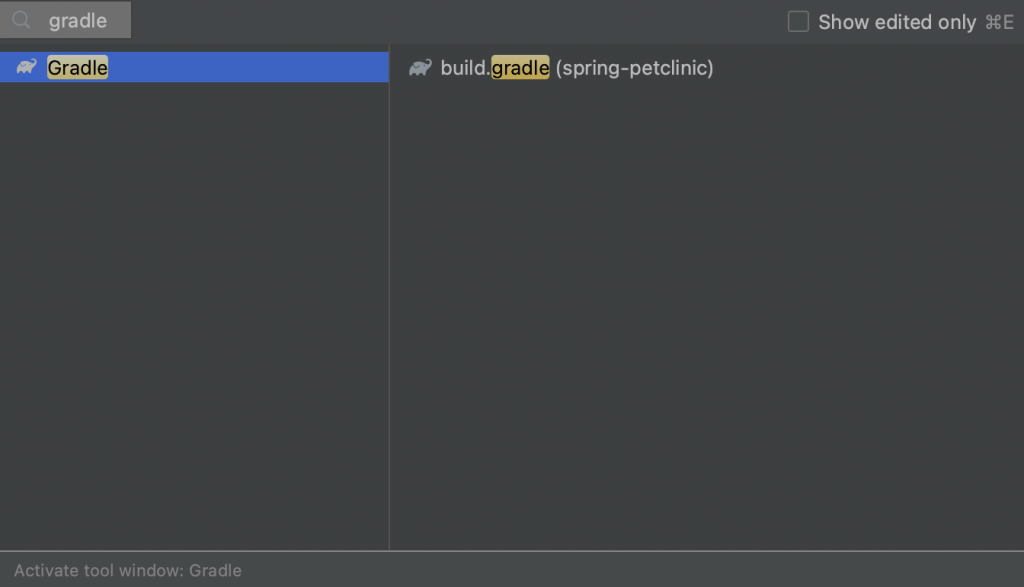
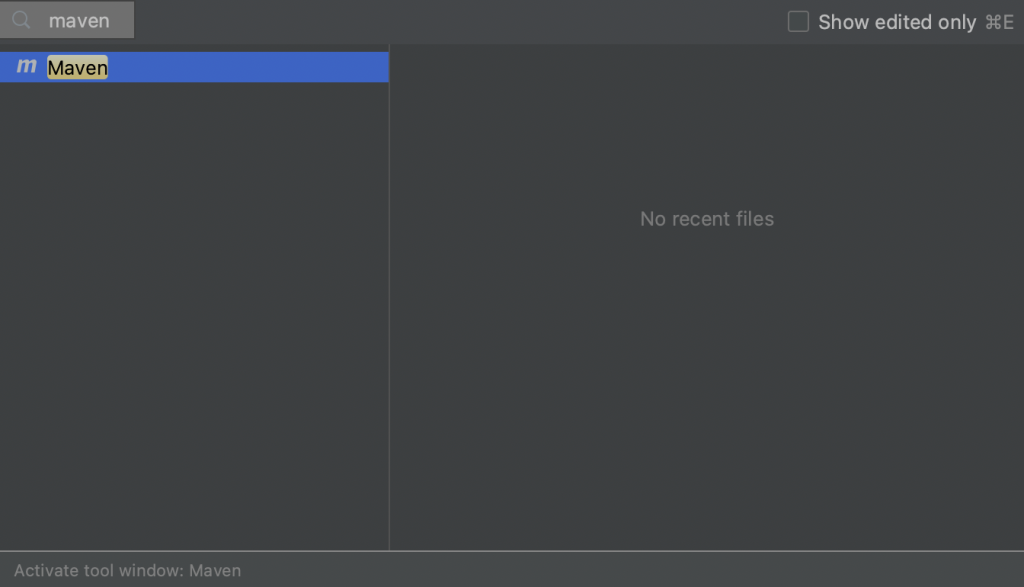
Alternatively, we can open it by using Recent Files, ⌘E (on Mac) or Ctrl+E (on Windows/Linux), and typing “gradle” or “maven”, or the name of your build system.
Open the Gradle Build Tool Window using the Recent Files popup
Open the Maven Build Tool Window using the Recent Files popup
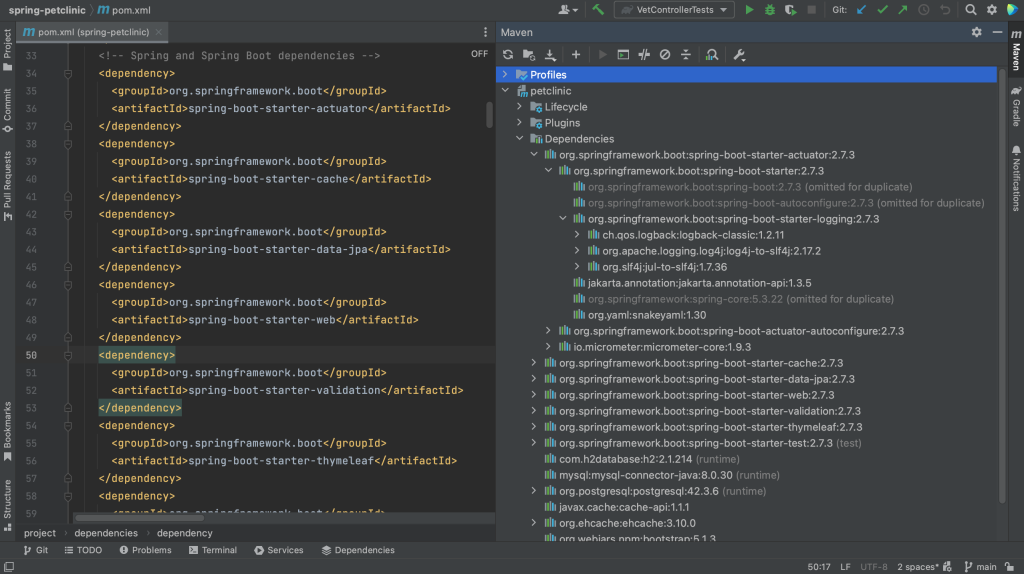
The Build tool window shows you each IntelliJ IDEA module separately, and each module’s “Dependencies” folder shows you all your dependencies in a hierarchical structure. We can expand our dependencies to see their transitive dependencies.
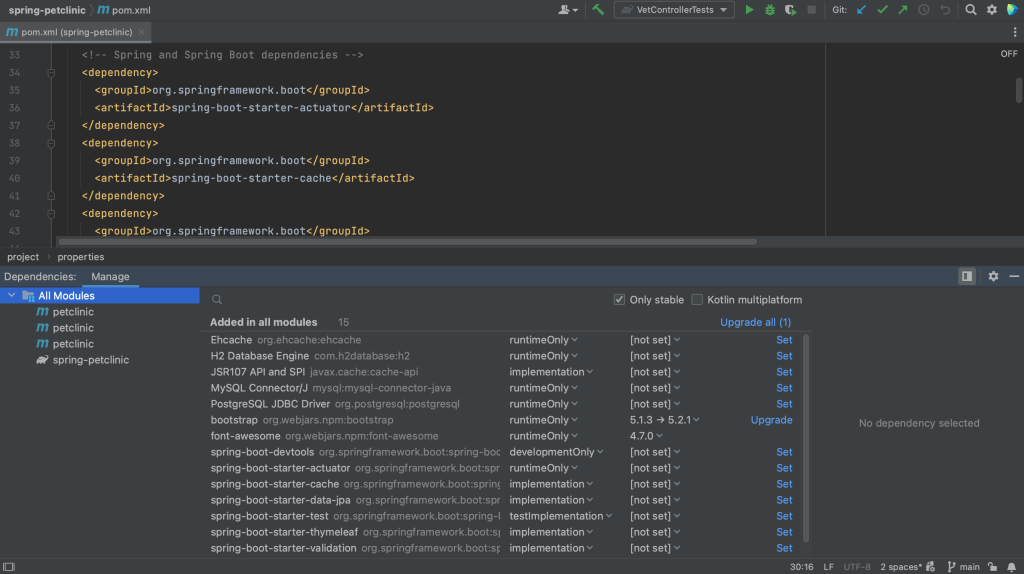
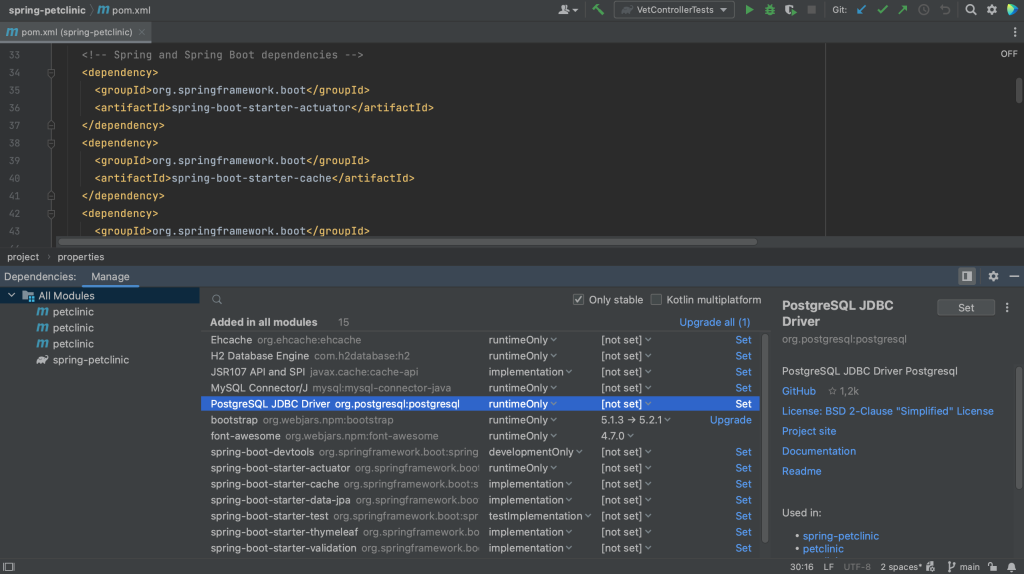
Finally, we can view and manage dependencies in the Dependencies tool window. The Dependencies tool window becomes available when the current project has at least one supported module. All types of dependencies are supported for Maven. For Gradle only a top level dependencies { } block is supported in the build script.
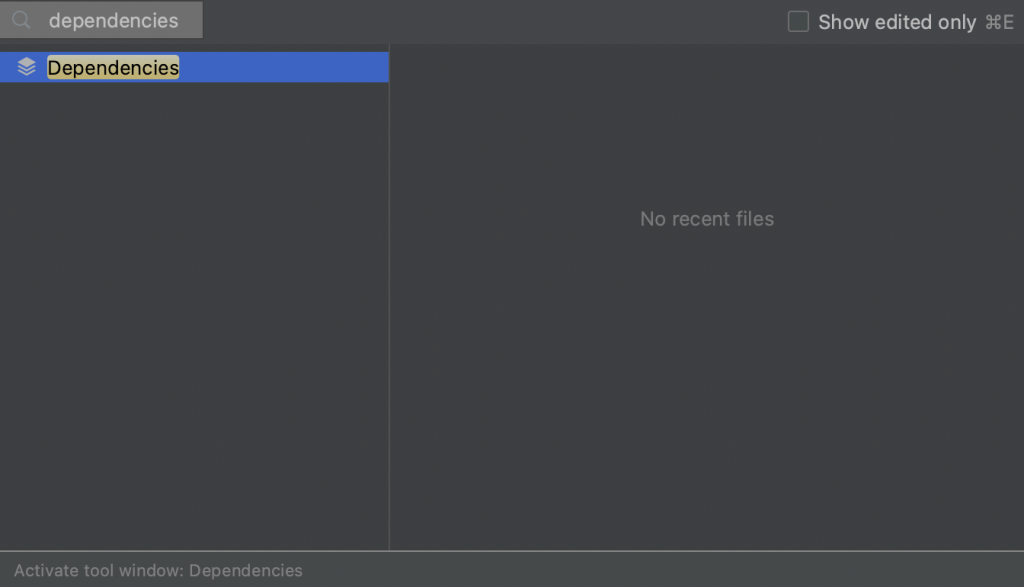
Since there is no shortcut to open the Dependencies tool window directly either, we can again use Recent Files, ⌘E (on Mac) or Ctrl+E (on Windows/Linux), and type in “dependencies” to open the Dependencies tool window.
Open the Dependencies Tool Window using the Recent Files popup
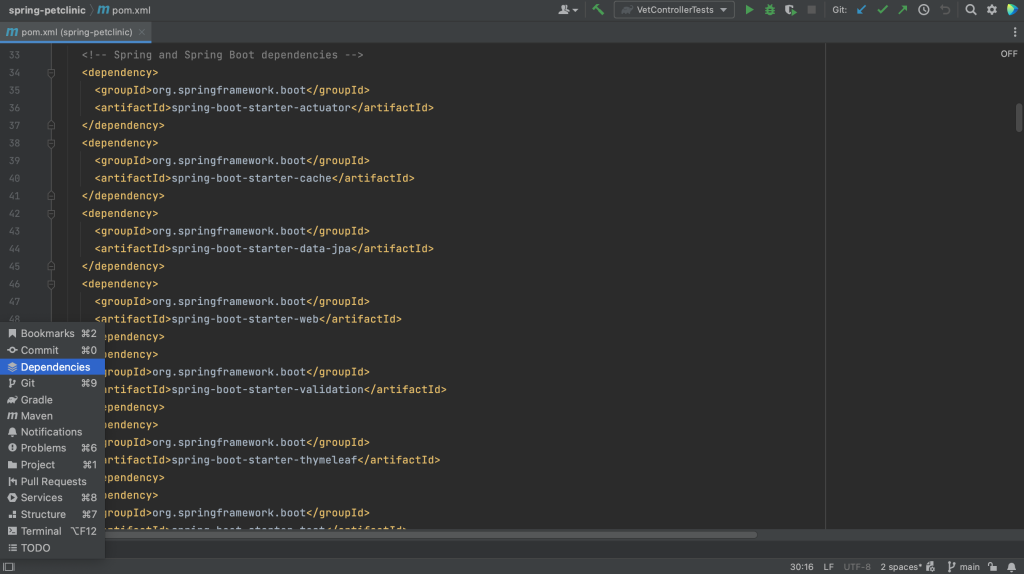
Alternatively, we can open it by clicking Quick Launch in the bottom-left and selecting Dependencies.
Open the Dependencies Tool Window in the Quick Launch menu
Here we can see our project’s direct dependencies. Select “All Modules” to see the dependencies for all modules, or select an indivual module to see the dependencies for that specific module. The Dependencies tool window shows direct dependencies, and not their transitive dependencies.
Dependencies Tool Window
We can see details about a selected dependency in the dependency details pane.
Dependency Details Pane
The dependency details pane displays the information about the selected dependency, such as:
Repository or repositories where it’s available, for example Maven Central
A description if it is available
GitHub information if the dependency sources are hosted on GitHub
The licence under which an open source library is available
A link to the project website, documentation and readme
List of usages in the current module.
Authors if available
Supported Kotlin or Multiplatform platforms if it is a Kotlin Multiplatform dependency
Summary and Shortcuts
Now we know the different ways in which we can view our project’s dependencies in IntelliJ IDEA, and the different focus for each view.
IntelliJ IDEA Shortcuts Used
Here are the IntelliJ IDEA shortcuts that we used.
If you’re working on a real-world application, your project will probably use external libraries and frameworks. Occasionally, you might want to see which dependencies your project uses, for various reasons. There are several ways to view dependencies in IntelliJ IDEA. Each view has a different focus.
Used to determine whether a user is included in an A / B or Multivariate test.
18 months
_ga
ID used to identify users
2 years
_gali
Used by Google Analytics to determine which links on a page are being clicked
30 seconds
_ga_
ID used to identify users
2 years
_gid
ID used to identify users for 24 hours after last activity
24 hours
_gat
Used to monitor number of Google Analytics server requests when using Google Tag Manager
1 minute
_gac_
Contains information related to marketing campaigns of the user. These are shared with Google AdWords / Google Ads when the Google Ads and Google Analytics accounts are linked together.
90 days
__utma
ID used to identify users and sessions
2 years after last activity
__utmt
Used to monitor number of Google Analytics server requests
10 minutes
__utmb
Used to distinguish new sessions and visits. This cookie is set when the GA.js javascript library is loaded and there is no existing __utmb cookie. The cookie is updated every time data is sent to the Google Analytics server.
30 minutes after last activity
__utmc
Used only with old Urchin versions of Google Analytics and not with GA.js. Was used to distinguish between new sessions and visits at the end of a session.
End of session (browser)
__utmz
Contains information about the traffic source or campaign that directed user to the website. The cookie is set when the GA.js javascript is loaded and updated when data is sent to the Google Anaytics server
6 months after last activity
__utmv
Contains custom information set by the web developer via the _setCustomVar method in Google Analytics. This cookie is updated every time new data is sent to the Google Analytics server.