Overview of IntelliJ IDEA 2023

IntelliJ IDEA is designed to help developers like us stay in the flow while we’re working. Like all IDEs, it has a lot of functionality available, but it’s designed to get out of your way to let you focus on the code.

Take a look at this overview of IntelliJ IDEA.

Introduction

  • Find Action: ⌘ ⇧ A (on macOS) / Ctrl+Shift+A (on Windows/Linux)
  • Feature Trainer
  • Hide all windows: ⌘ ⇧ F12 (on macOS) / Shift+Command+F12 (on Windows/Linux)
  • Project tool window: ⌘1 (on macOS) / Alt+1 (on Windows/Linux)
  • Quick Switch Scheme: ^`(on macOS) / Ctrl+` (on Windows/Linux)
  • IDE viewing modes
  • Preferences: ⌘, (on macOS) / Ctrl+Alt+S (on Windows/Linux)

Coding assistance

  • Code completion
  • Complete Current Statement: ⌘ ⇧ ⏎ (on macOS) / Shift+Ctrl+Enter (on Windows/Linux)
  • Show Context Actions: ⌥ ⏎ (on macOS) / Alt+Enter (on Windows/Linux)
  • Intention actions
  • Navigate to next highlighted error: F2
  • Navigate to previous highlighted error: Shift F2
  • Generate code: ⌘ N (on macOS) / Alt + Insert (on Windows/Linux)
  • Live templates

Refactoring

  • Rename: Shift F6
  • Extend selection: ⌥ Up (on macOS) / Ctrl+W (on Windows/Linux)
  • Extract variable: ⌘ ⌥ V on macOS) / Ctrl+Alt+V (on Windows/Linux)
  • Postfix completion
  • Reformat code: ⌘ ⌥ L (on macOS) / Ctrl+Alt+L (on Windows/Linux)
  • Move statement up: ⇧⌘ Up (on macOS) / Ctrl+Shift+Up (on Windows/Linux)
  • Surround with: ⌘ ⌥ T (on macOS) / Ctrl+Alt+T (on Windows/Linux)
  • SmartType Completion: ^ ⇧ Space  (on macOS) / Shift+Ctrl+Space (on Windows/Linux)
  • Inline: ⌘ ⌥ N (on macOS) / Ctrl+Alt+N (on Windows/Linux)
  • Extract method: ⌘ ⌥ M on macOS) / Ctrl+Alt+M (on Windows/Linux)

Testing & Debugging

Navigation

  • Navigate backwards: ⌘ [ (on macOS) / Ctrl+Alt+Left (on Windows/Linux)
  • Navigate forwards: ⌘ ] (on macOS) / Ctrl+Alt+Right (on Windows/Linux)
  • Find usages / declaration: ⌘ B (on macOS) / Ctrl+B (on Windows/Linux)
  • Recent Files: ⌘E (on macOS) / Ctrl+E (on Windows/Linux)
  • Recent locations: ⇧⌘E (on macOS) / Ctrl+Shift+E (on Windows/Linux)
  • Search everywhere: ⇧⇧ (on macOS) / Shift Shift (on Windows/Linux)
  • Find in files: ⇧⌘F (on macOS) / Ctrl+Shift+F (on Windows/Linux)

Reading Code

  • Folding -> Expand: ⌘ + (on macOS) / Ctrl+ + (on Windows/Linux)
  • Folding -> Collapse: ⌘ – (on macOS) / Ctrl+ – (on Windows/Linux)
  • Folding -> Expand All : ⇧ ⌘ + (on macOS) / Ctrl+Shift+ + (on Windows/Linux)
  • Folding -> Collapse All: ⇧ ⌘ + (on macOS) / Ctrl+Shift+ – (on Windows/Linux)
  • File Structure: ⌘ F12 (macOS) / Ctrl+F12 (Windows/Linux) – Twice to expand list
  • Quick documentation: F1 (macOS) / Ctrl+Q (Windows/Linux)
  • Toggle Rendered View:  ^ ⌥ Q (macOS) / Ctrl+Alt+Q (Windows/Linux)

Version Control support (Git)

  • Commit: ⌘ 0 (macOS) / Alt+0 (Windows/Linux)
  • Jump to last tool window: F12
  • Show diff: ⌘ D (macOS) / Ctrl+D (Windows/Linux)
  • Commit Anyway and Push: ⌥ ⌘ K (on macOS) / Ctrl+Alt+K (on Windows/Linux)
  • Git tool window: ⌘9 (on macOS) / Alt+9 (on Windows/Linux)
  • Terminal: ⌥ F12 (on macOS) / Alt+F12 (on Windows/Linux)
  • Git integration

Language and technology support

Integrated tools support

Contributing to open source software; creating a pull request

In this tutorial, we are going to take a look at contributing to Open Source Software, specifically how to do a pull request (PR). We will look at forking and cloning the project, making the changes, committing and pushing these changes, creating the pull request, the review and hopefully merge of your PR. The same process may apply when making contributions to a project at work that you don’t own. In this example, the project is on GitHub. Other Git code repositories may use a similar process.

There are many reasons to contribute to open source projects, and different ways to find an issue to work on, from fixing a bug that is bothering you, to simply wanting to help out, or even just to gain more experience and learn something new. If you’re fixing something that is currently bothering you, you will have a specific issue and project to work on. If not, you could consider contributing to a project you like to use, or finding an issue that is suitable for someone new to contributing to open source and/or the project. There are also many different things you can contribute. Code is one, but projects also need testing and other things. For more information on what you can contribute and how to find something to contribute, please have a look at this video.

For this blog post, let’s assume we’ve found a project we want to work on, and an issue we want to fix.

Getting the project

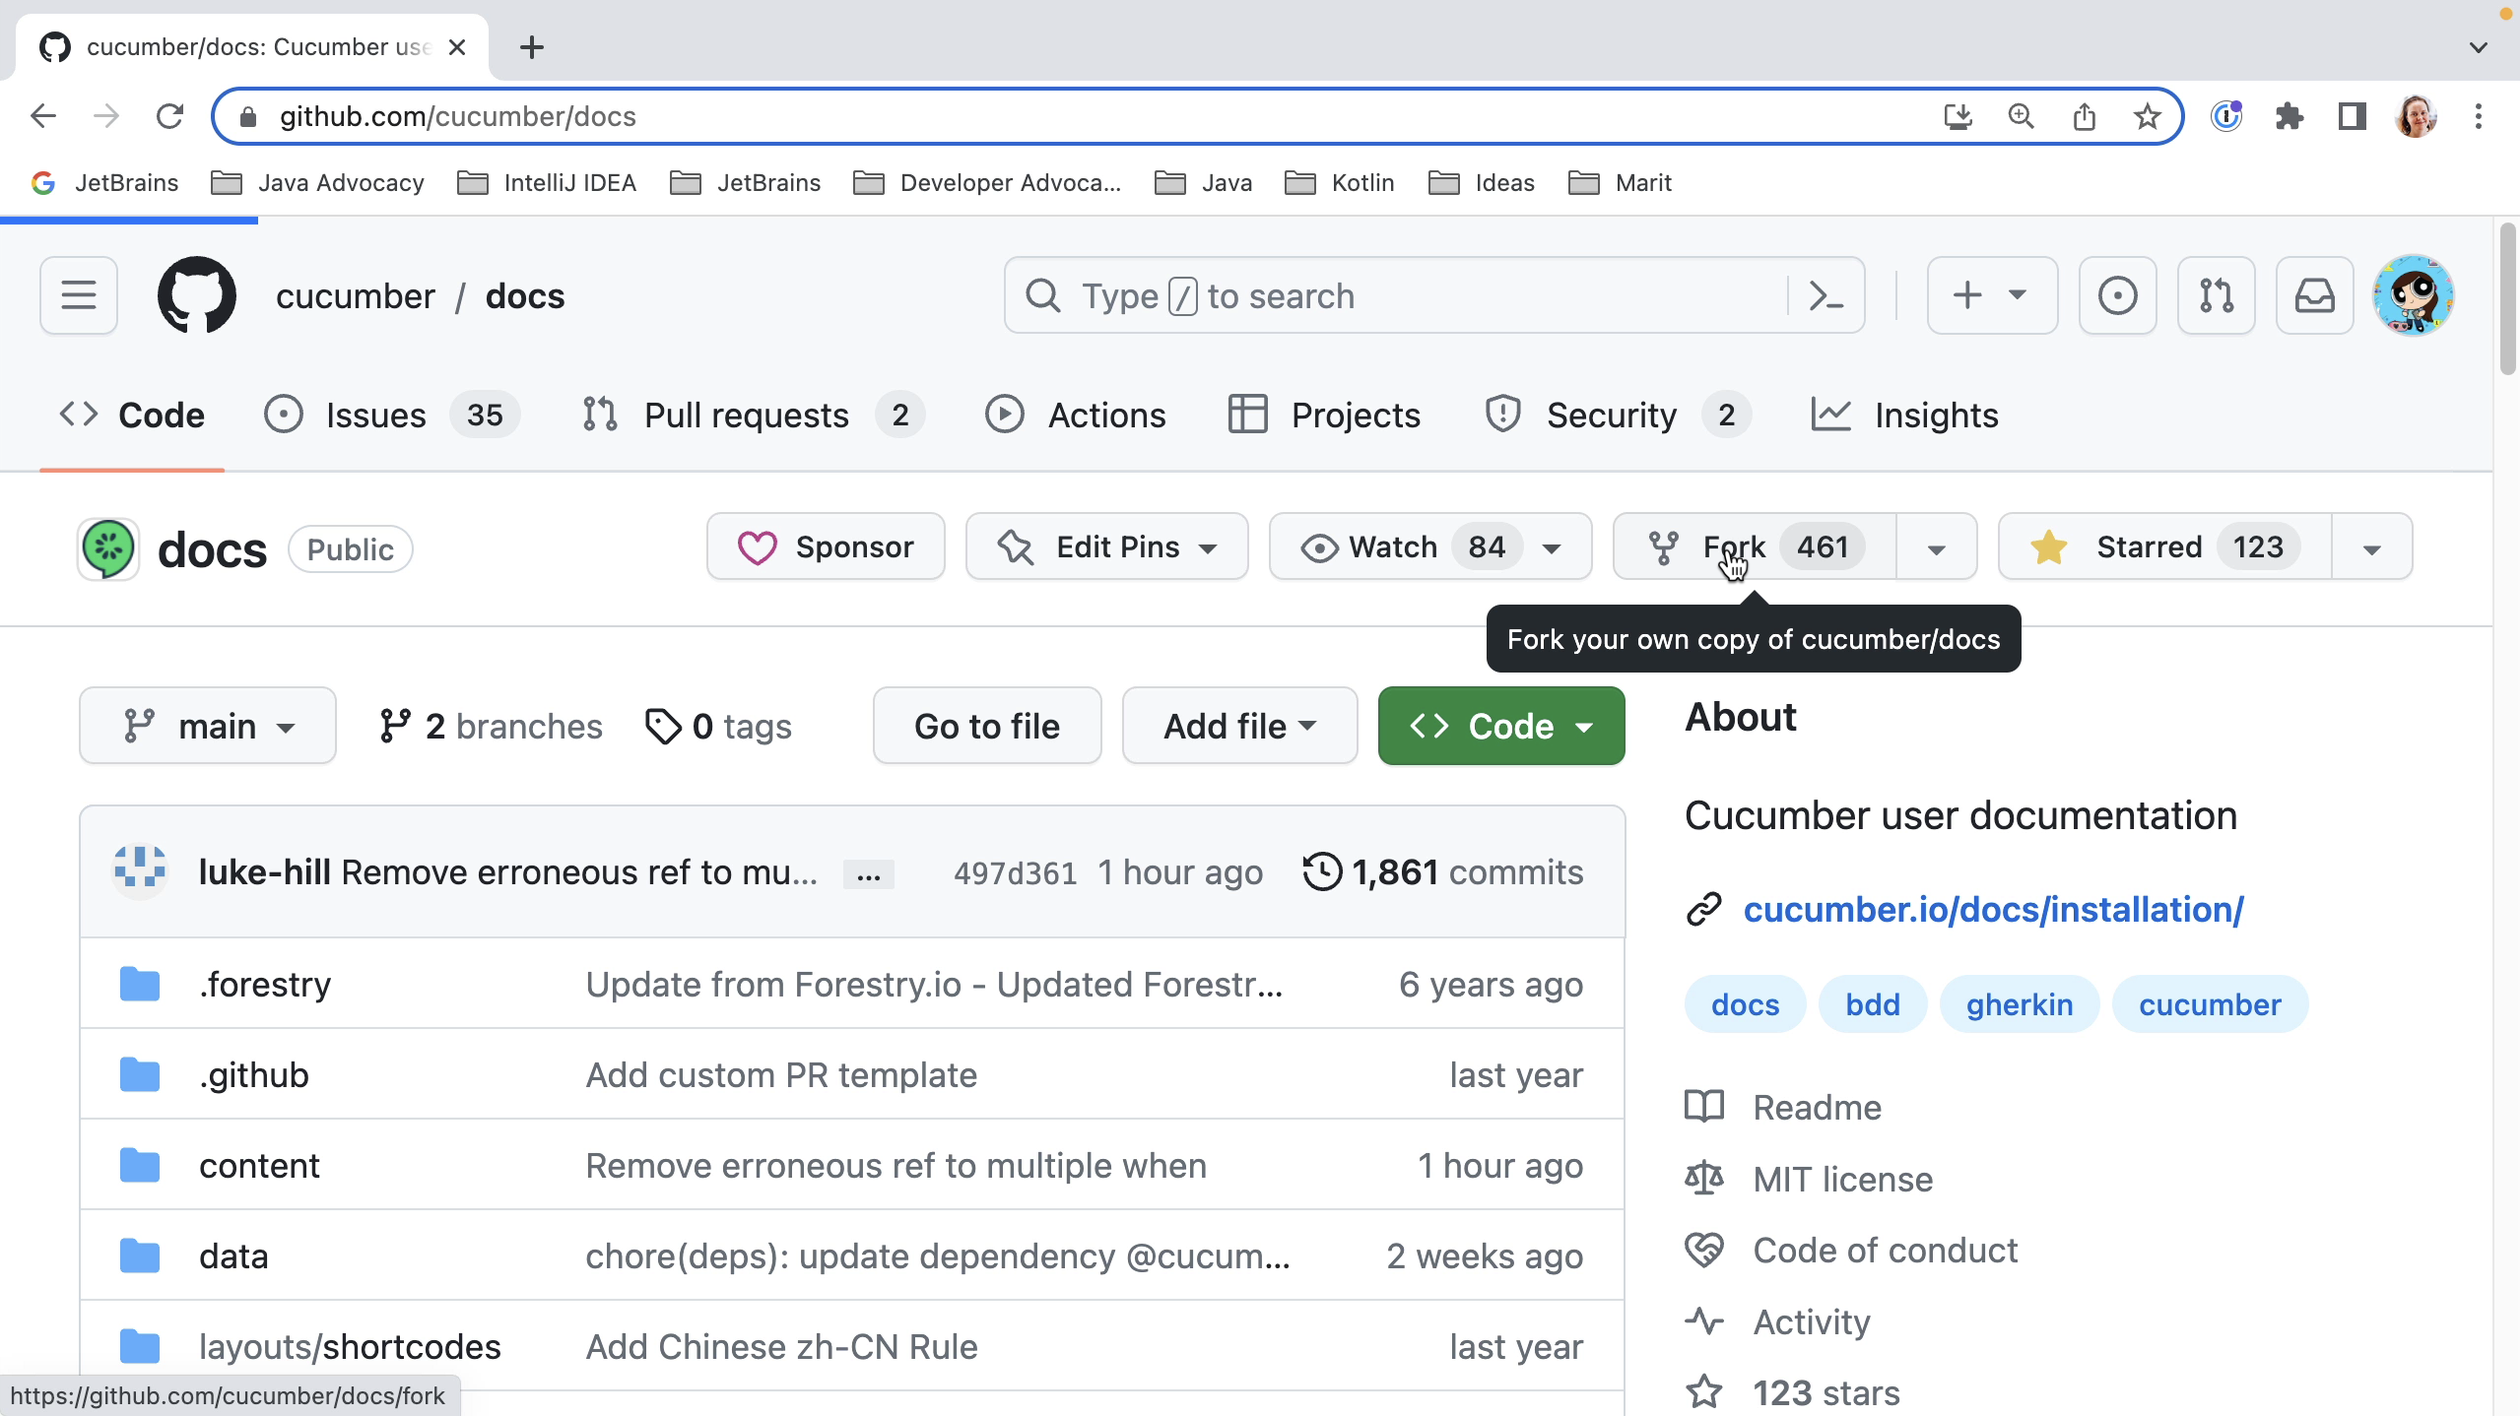
When making your first contribution, you won’t have access to push to the open source project directly. So, the first thing we will need to do is fork this project to our own profile. This means we create a copy of the original project on our profile.

Fork project

Fork

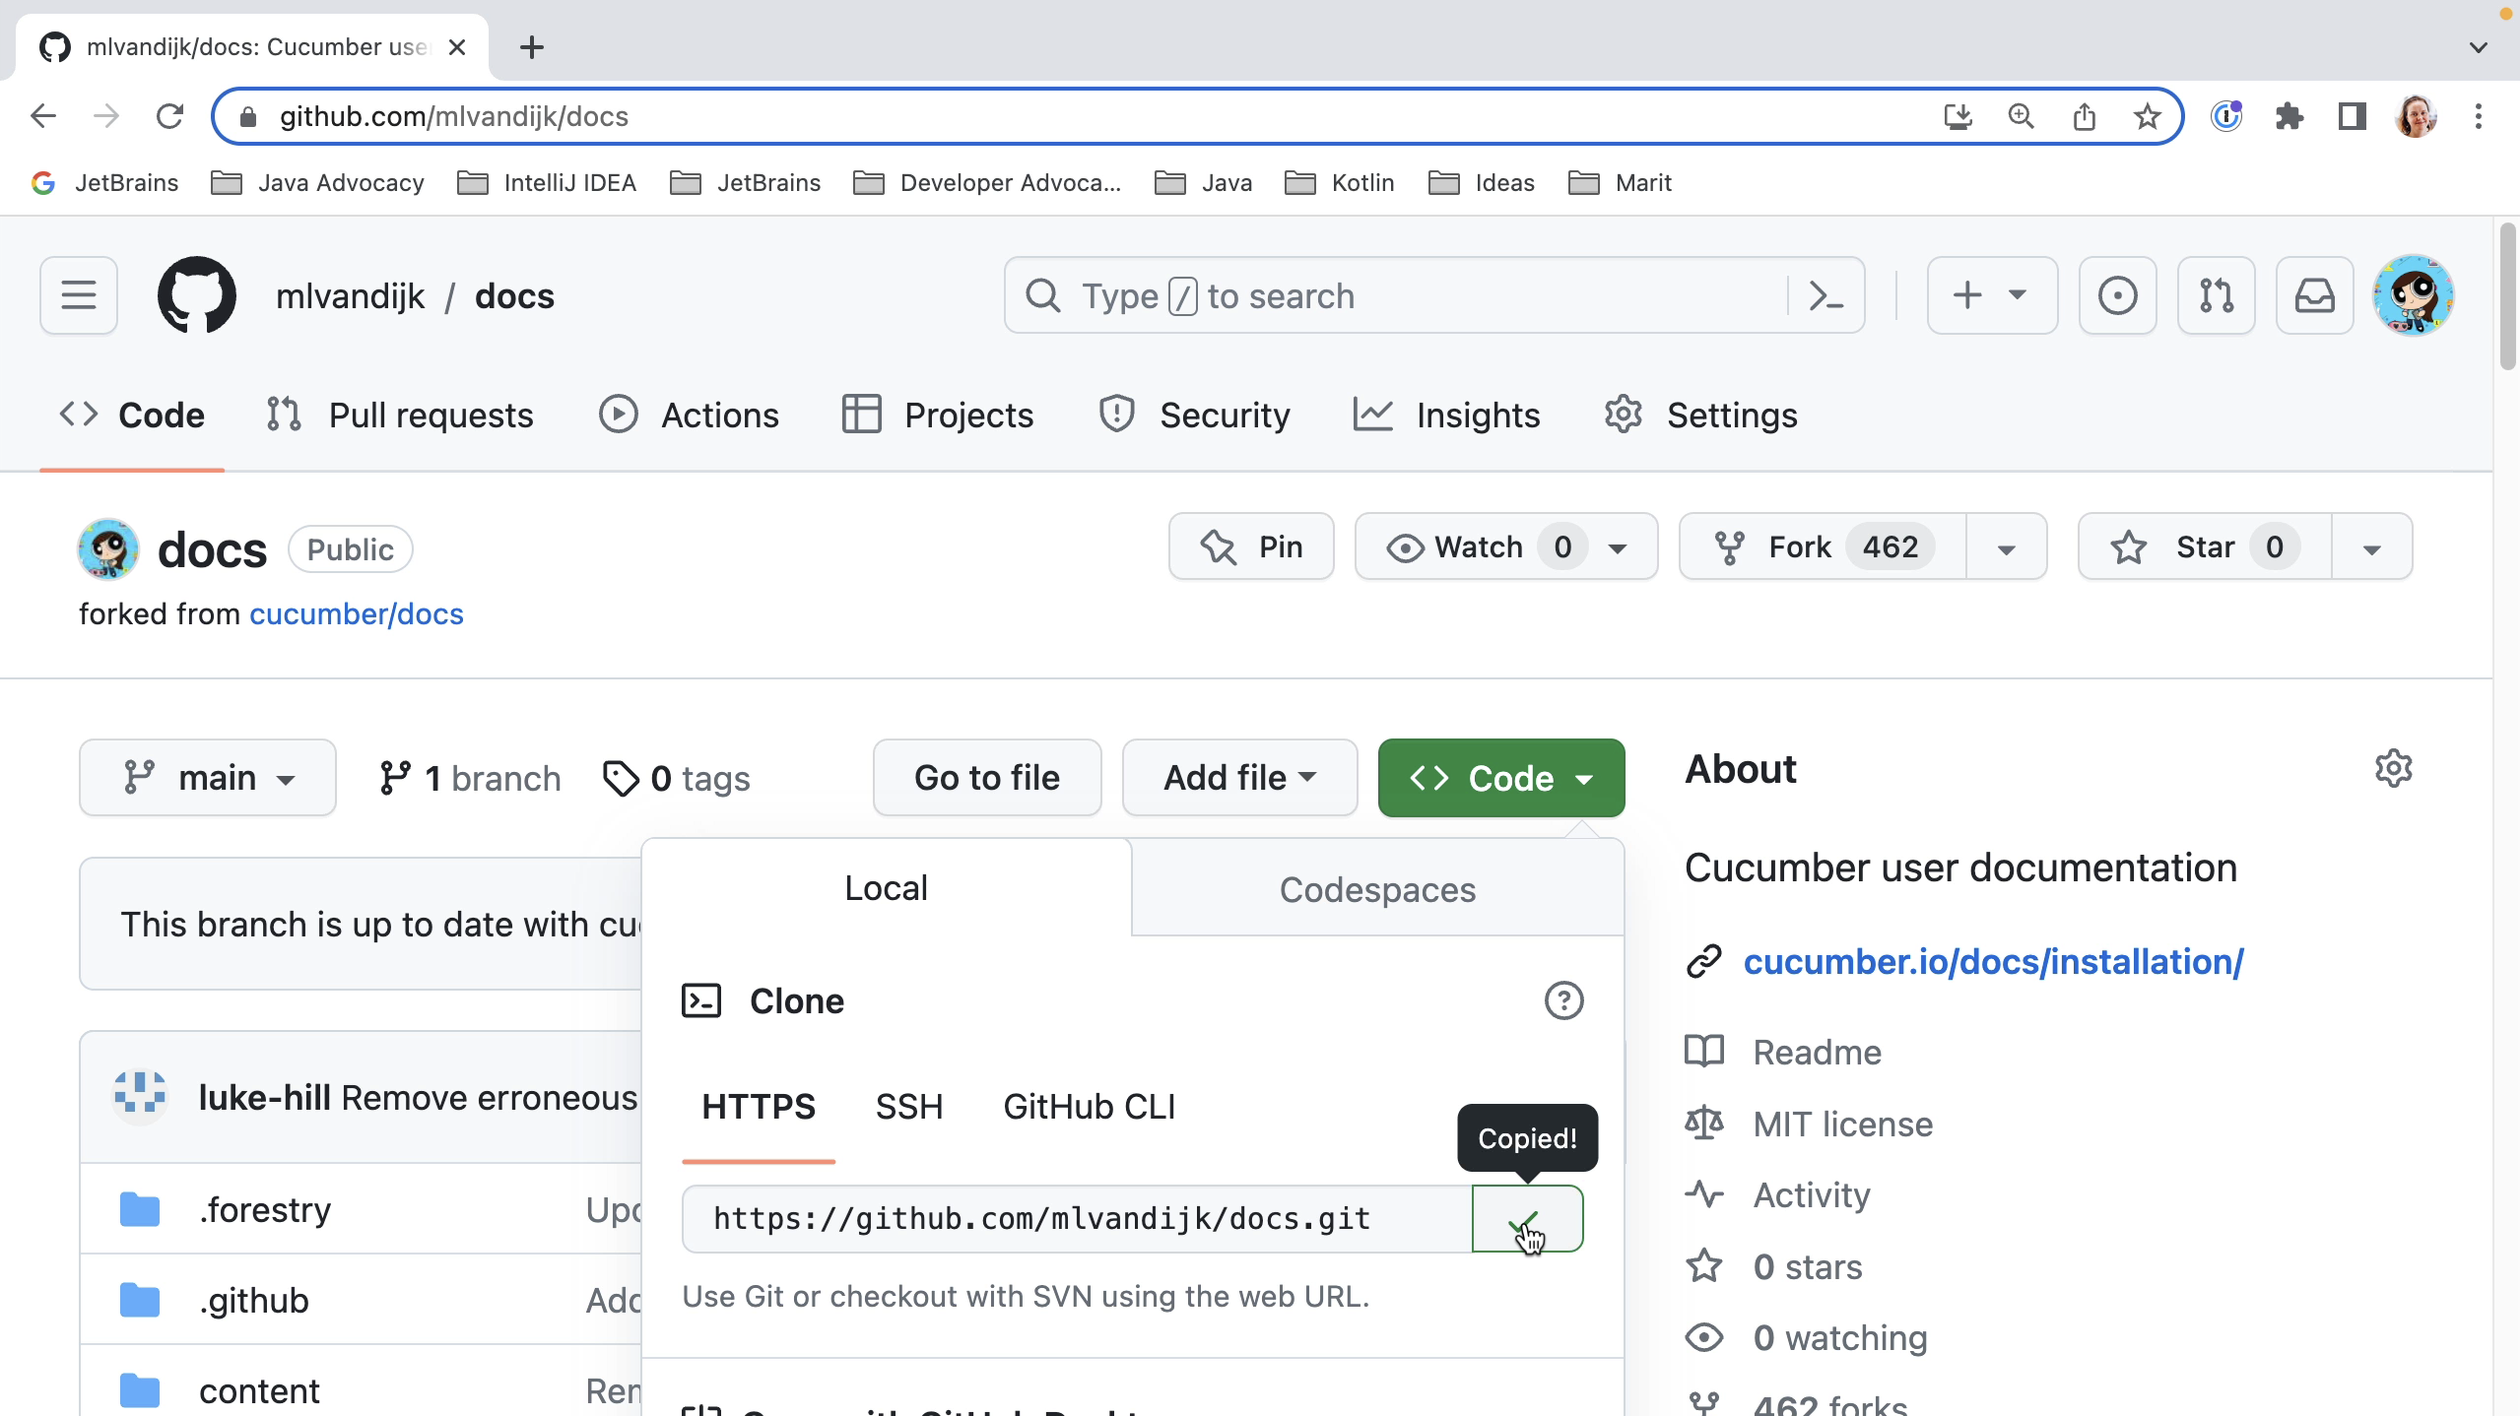
We then need to clone this project to our local machine. We see that we have several options to get the code. Let’s use HTTPS as that can be the simplest option. When we click the clipboard icon, the URL will be copied to our clipboard.

Clone

Copied

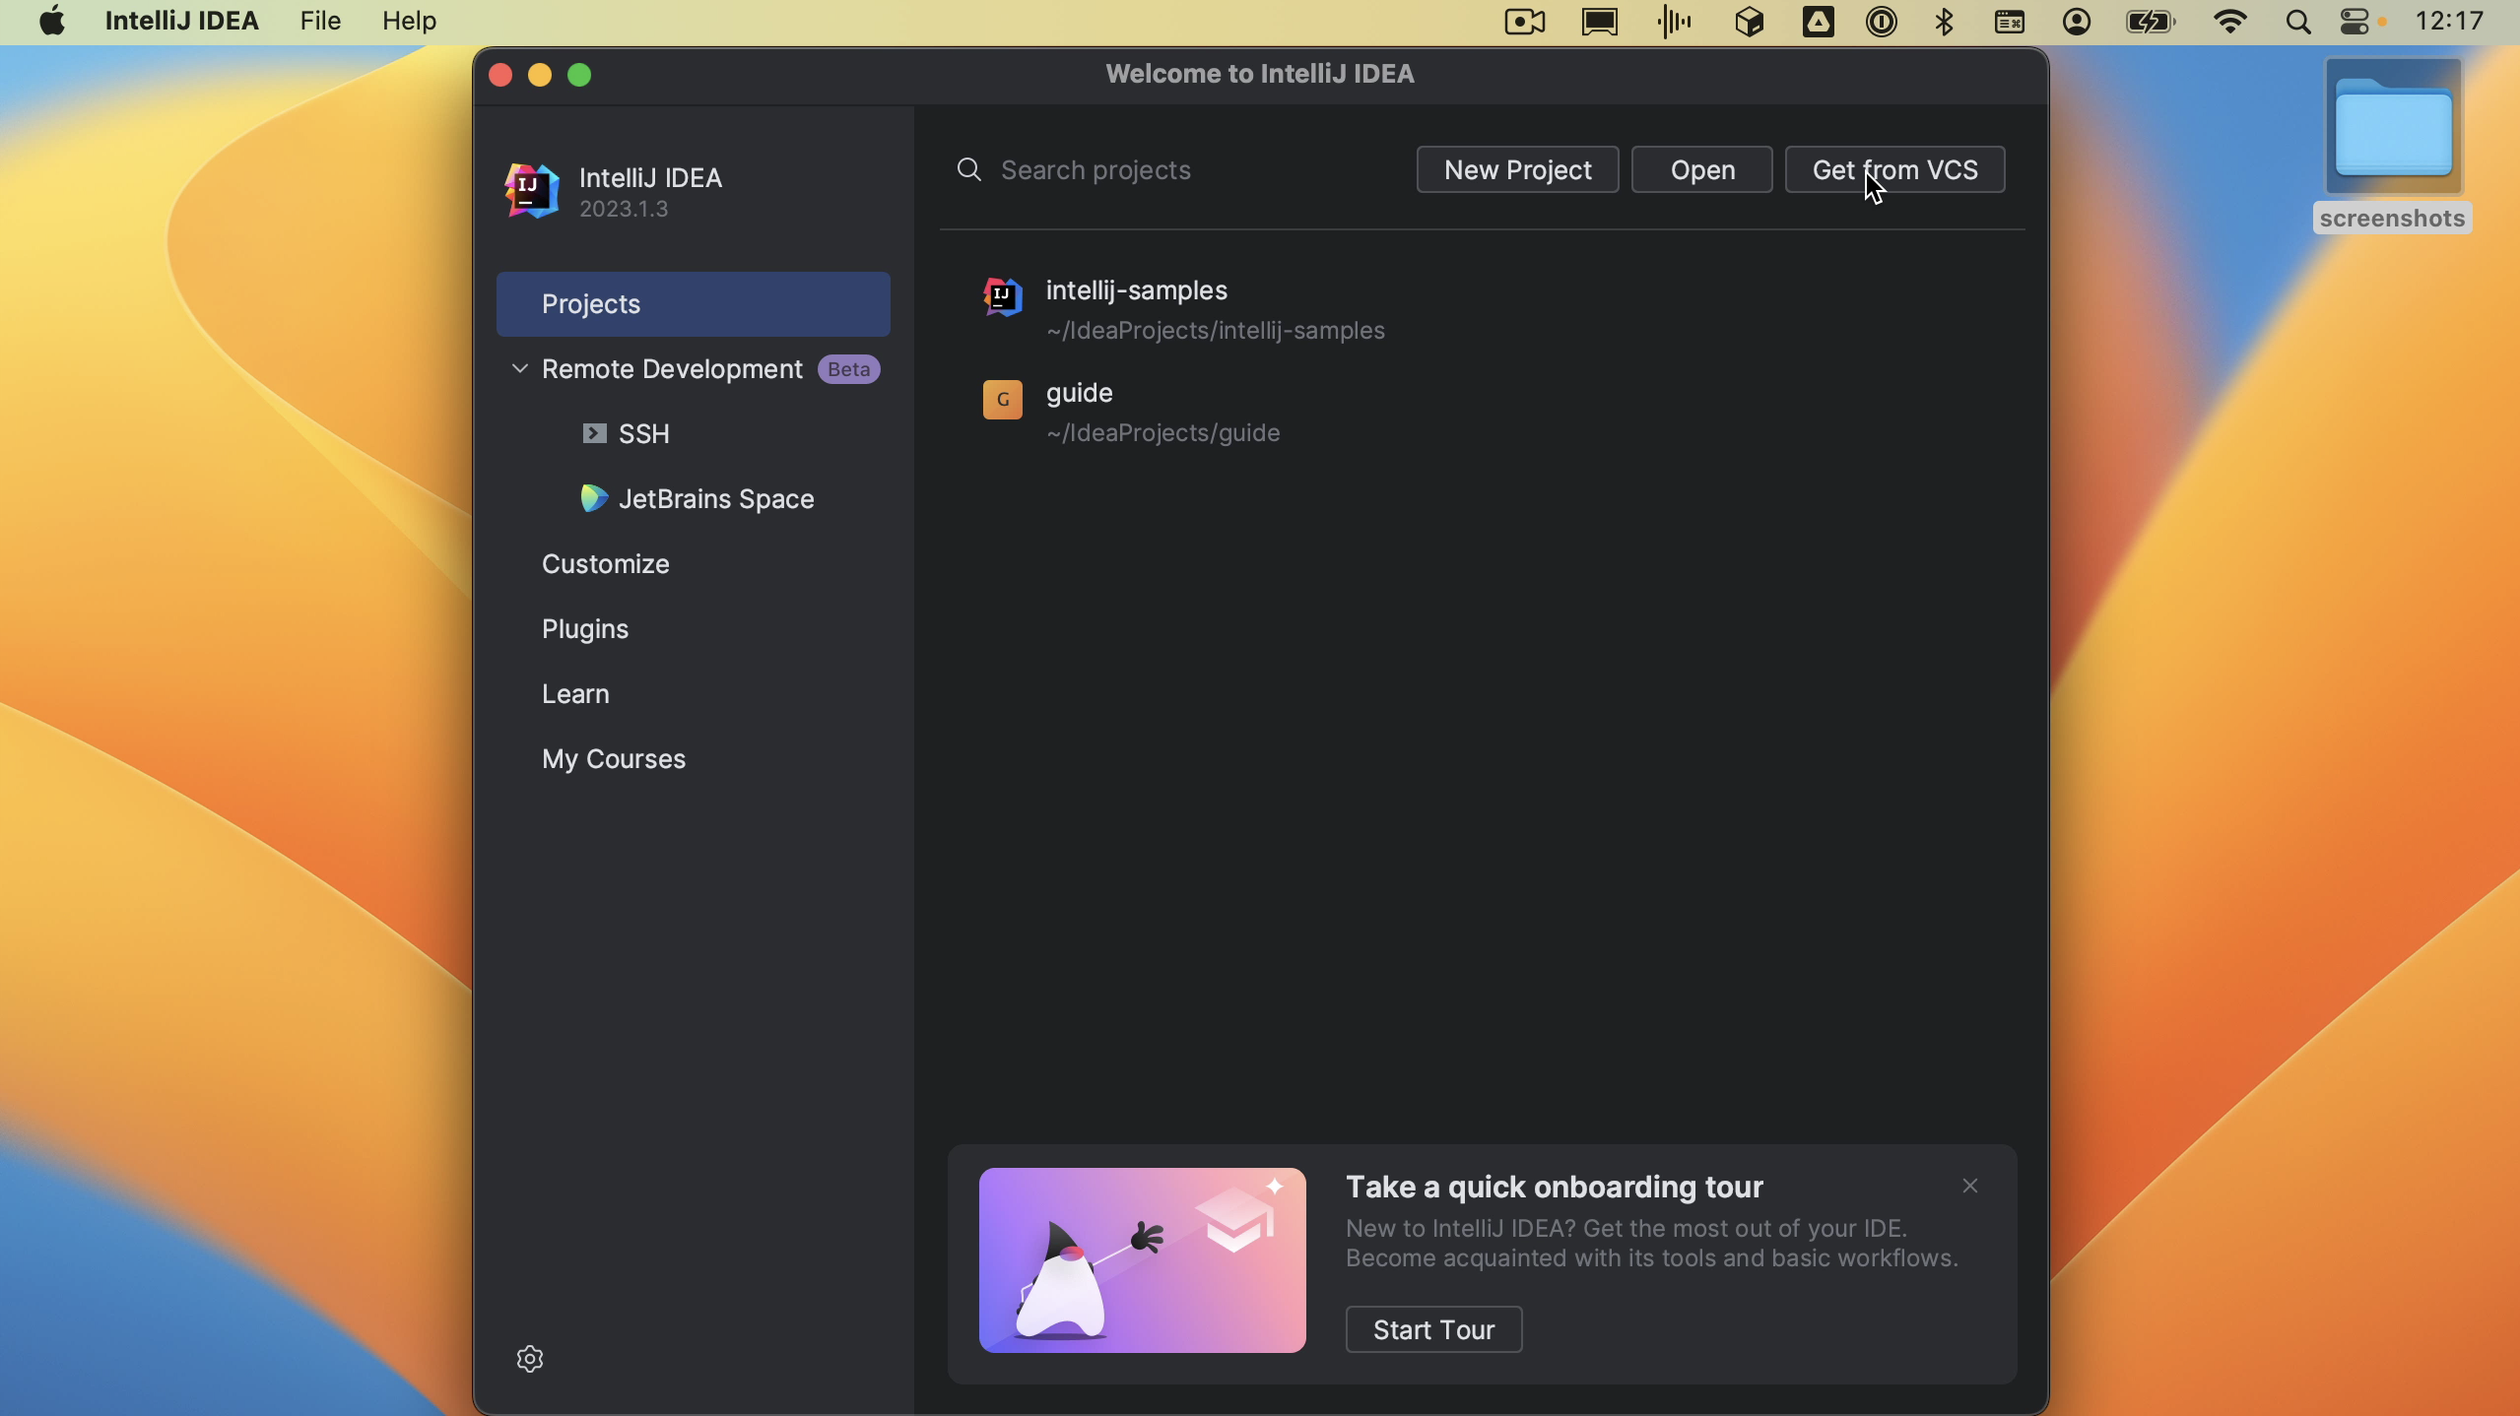
When we open IntelliJ IDEA and don’t already have a project open, we’ll see the Welcome screen. Here we have the option to Get from VCS (version control system).

Welcome screen

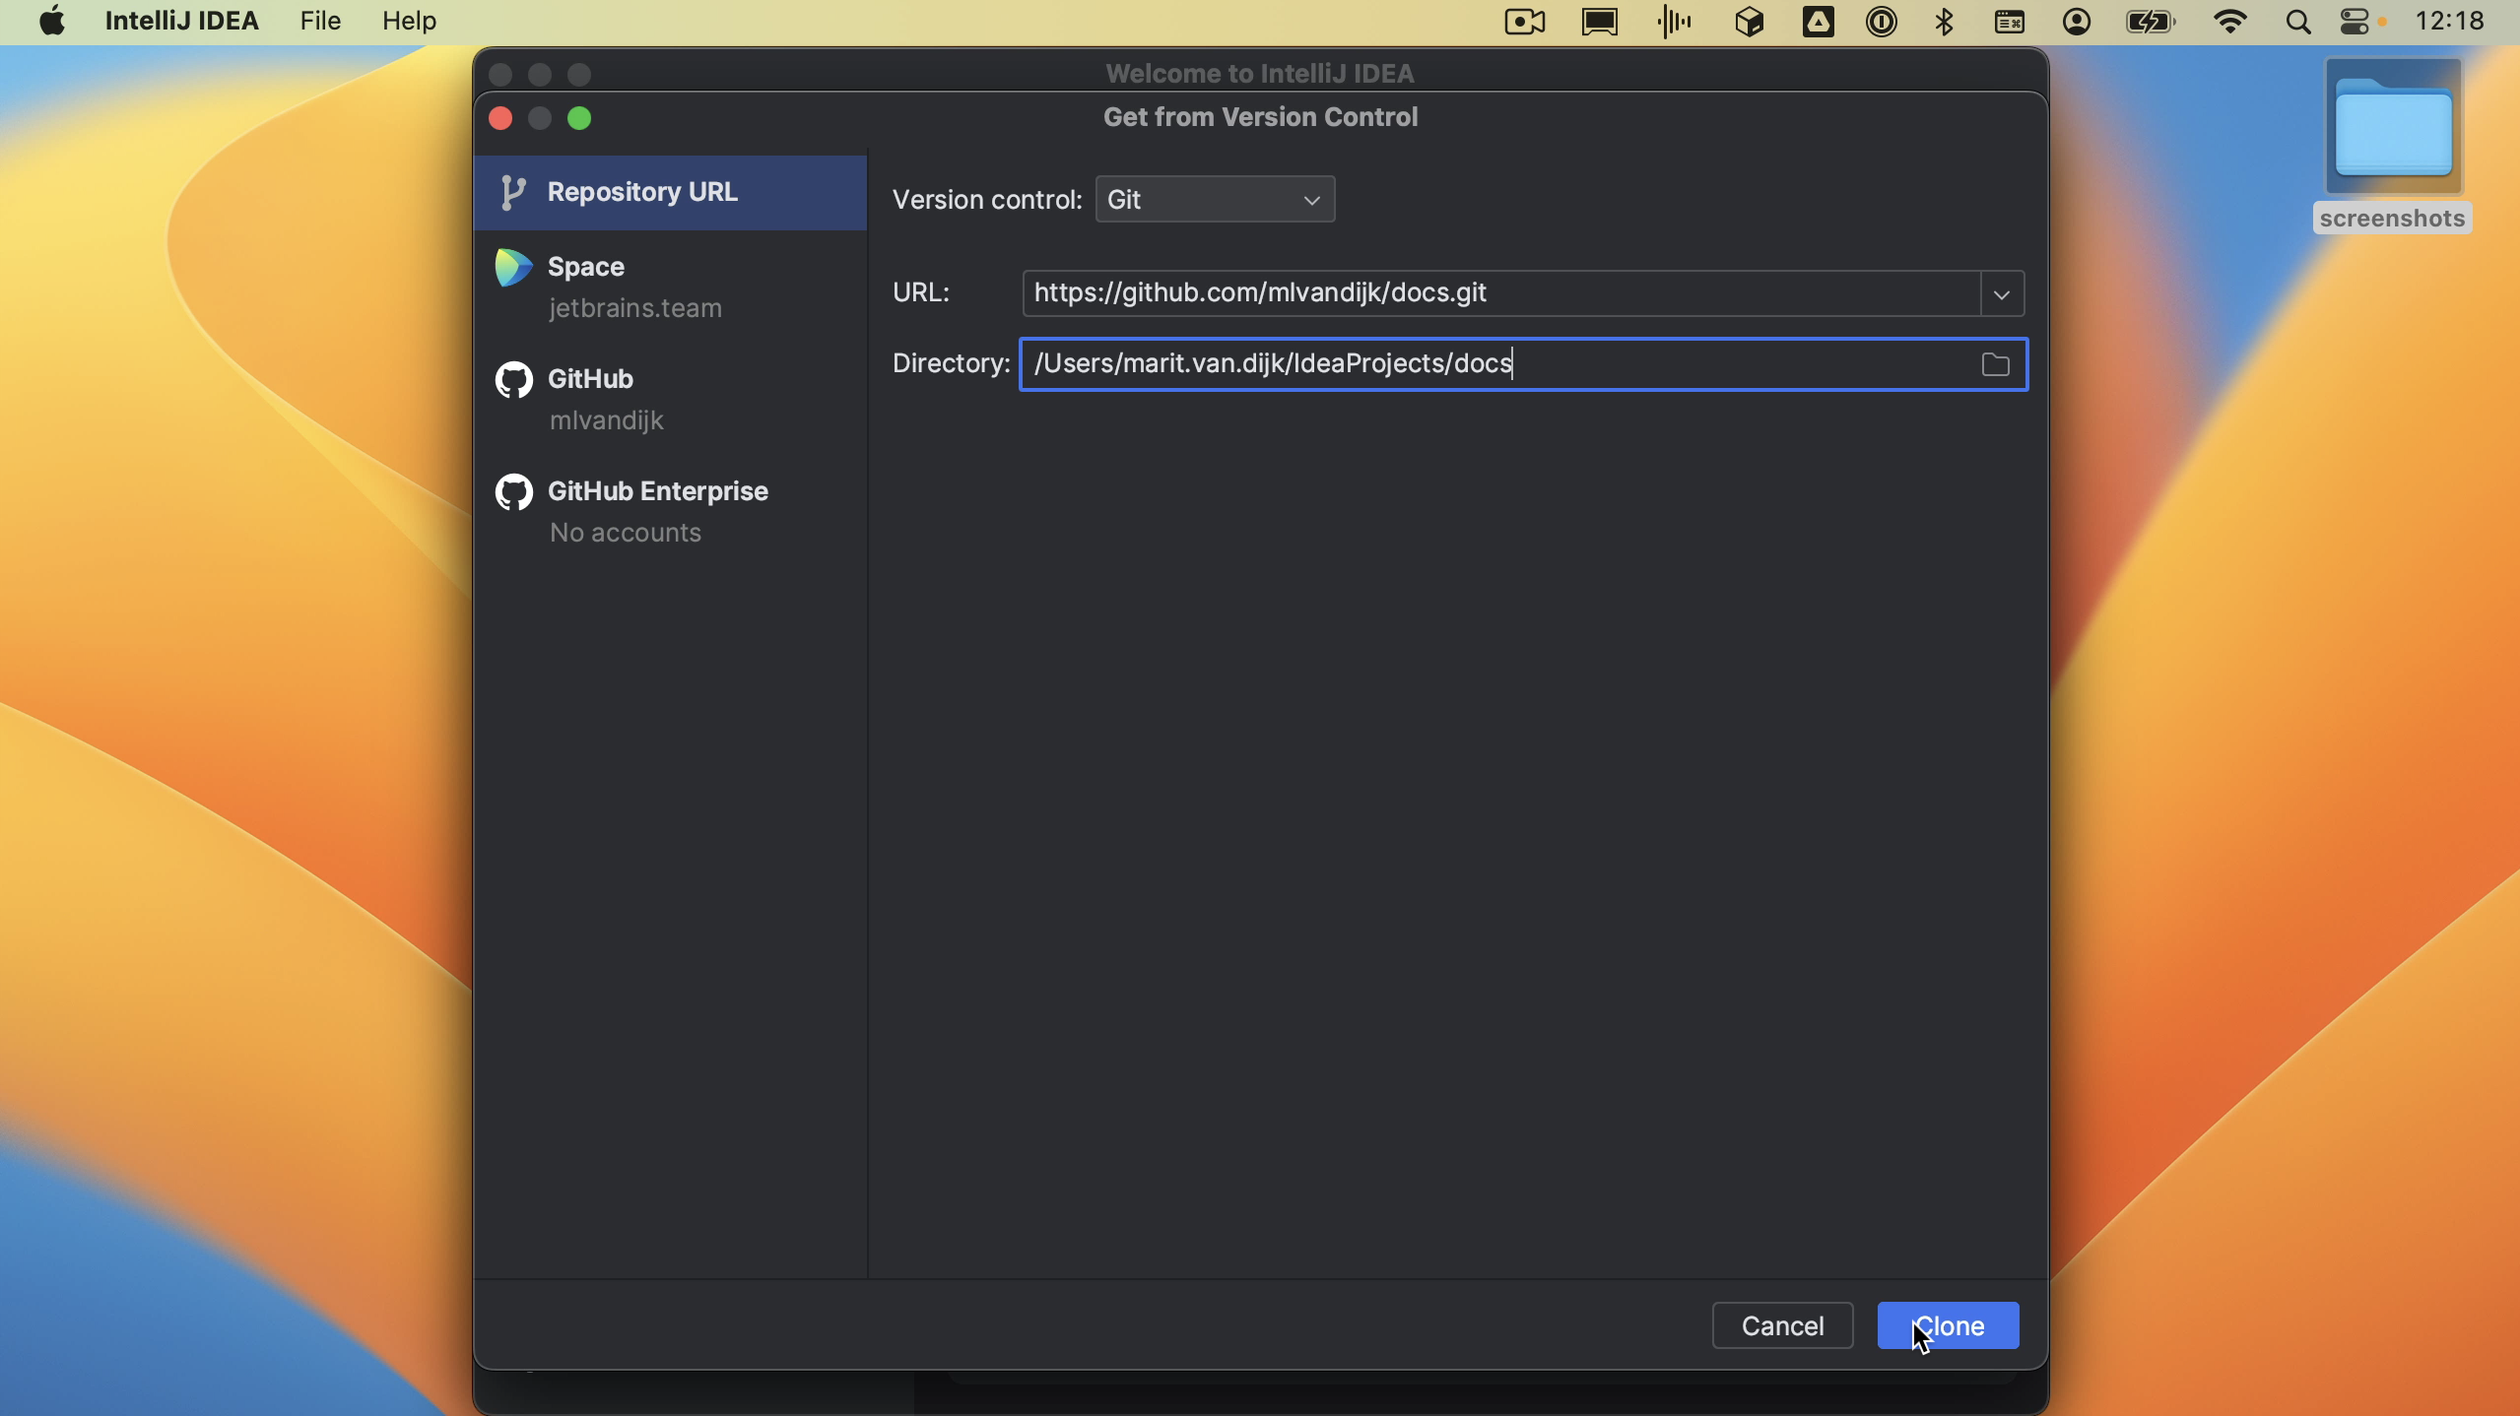
When we click the button, the Get from Version Control dialog opens. We can paste the URL we just copied. We can select where we want to store this project on our computer; let’s stick with the default. When we select Clone, IntelliJ IDEA will clone the GitHub repository to the selected directory.

Clone project

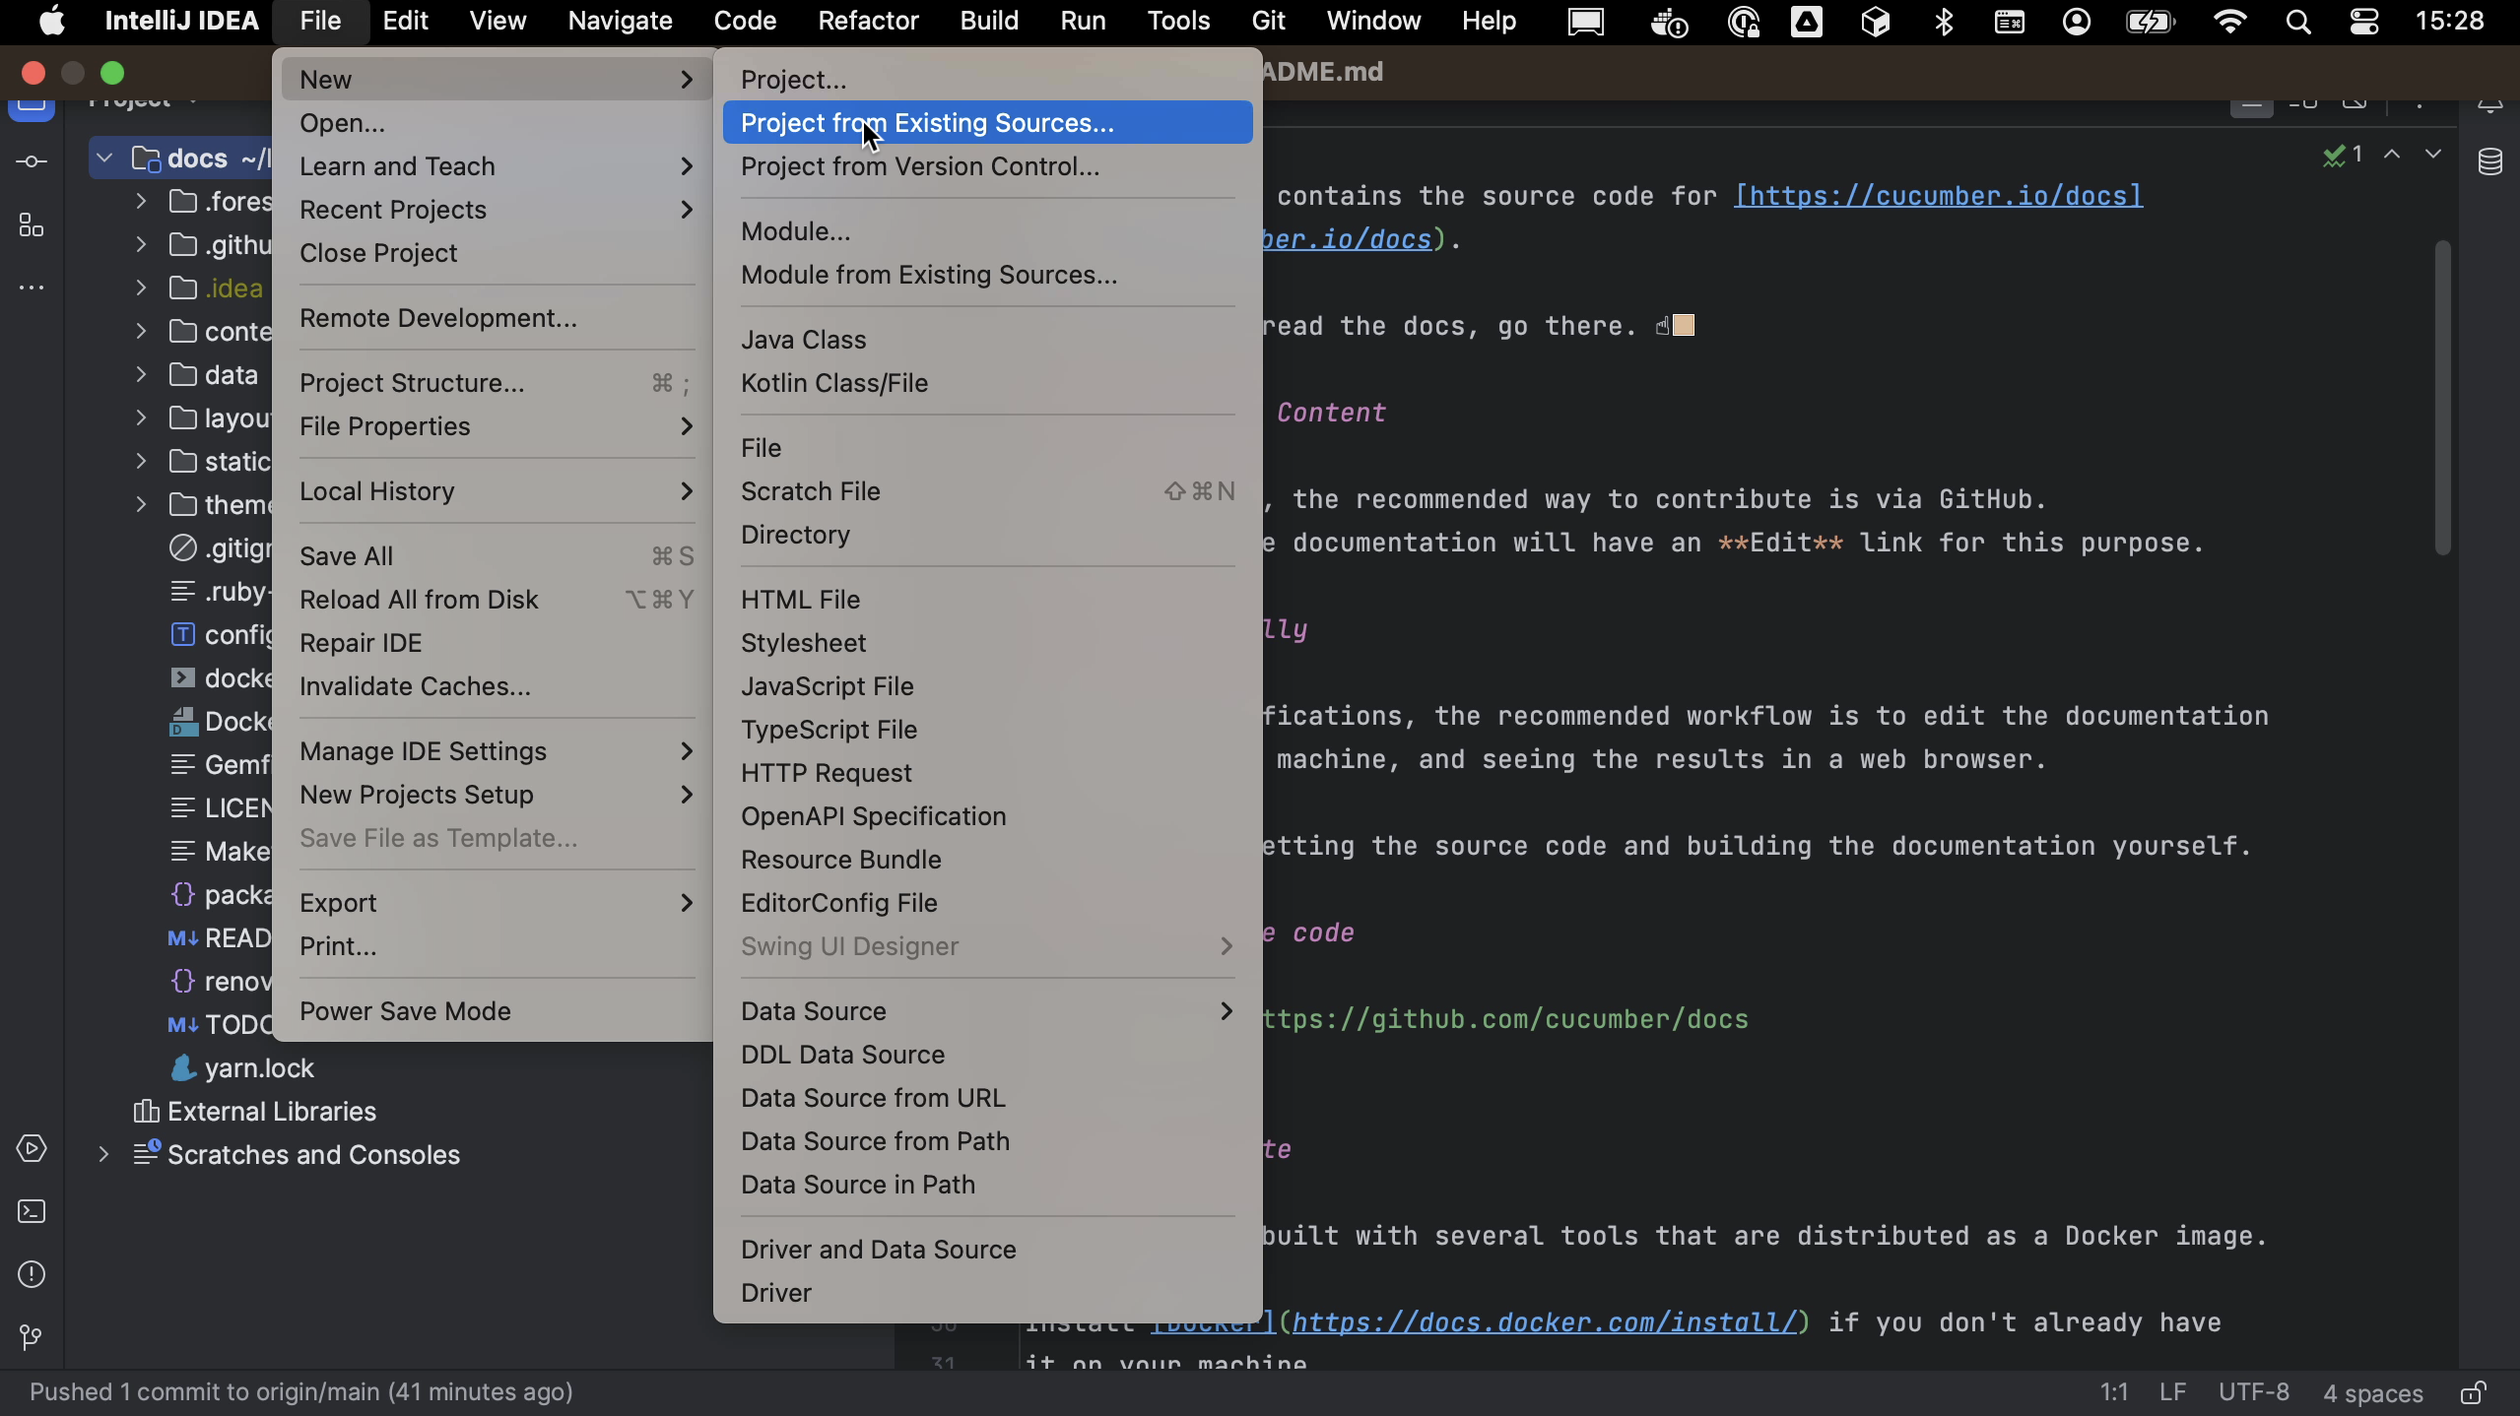
If we already have a project open, we can open the Get from Version Control dialog by going to File > New > Project from version control.

New Project from version control menu

IntelliJ IDEA will open the project on our machine.

Making and committing our changes

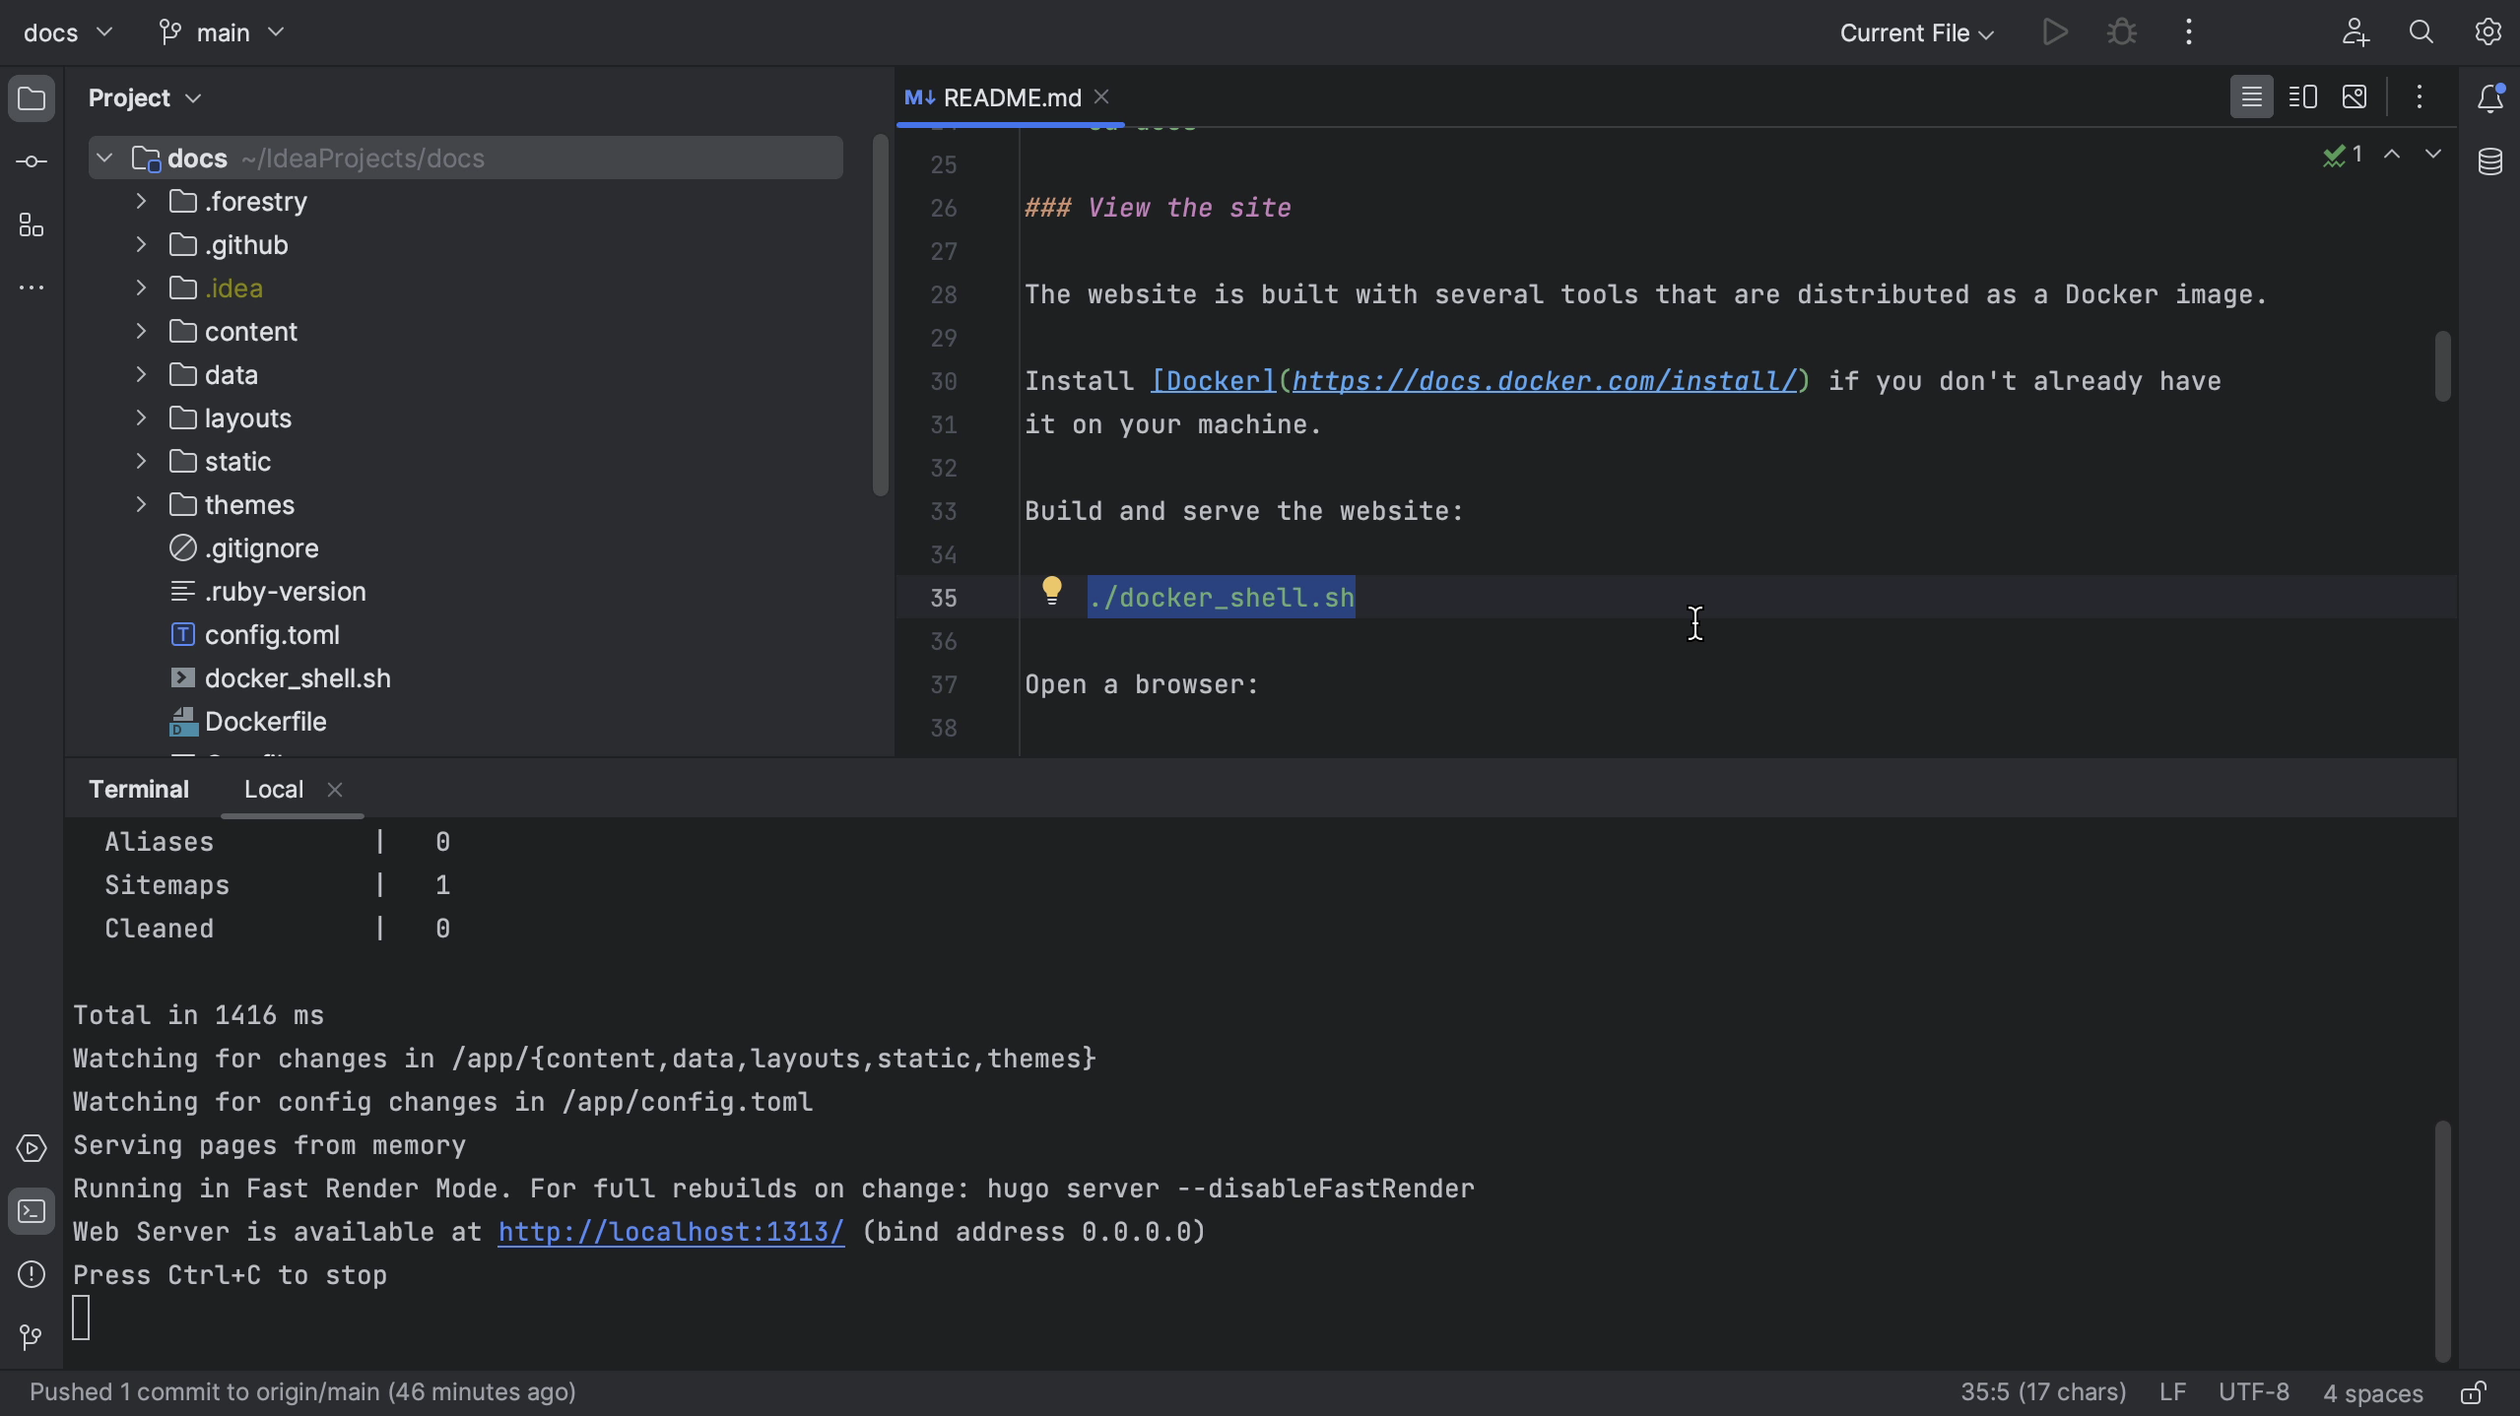
Before making any changes, we’ll want to make sure that we can build the project. Hopefully, how to build the project will be described in the README, as it is for this example. Let’s open the terminal and build the project as described. In this example, we need Docker, which is already installed and running.

Build the project

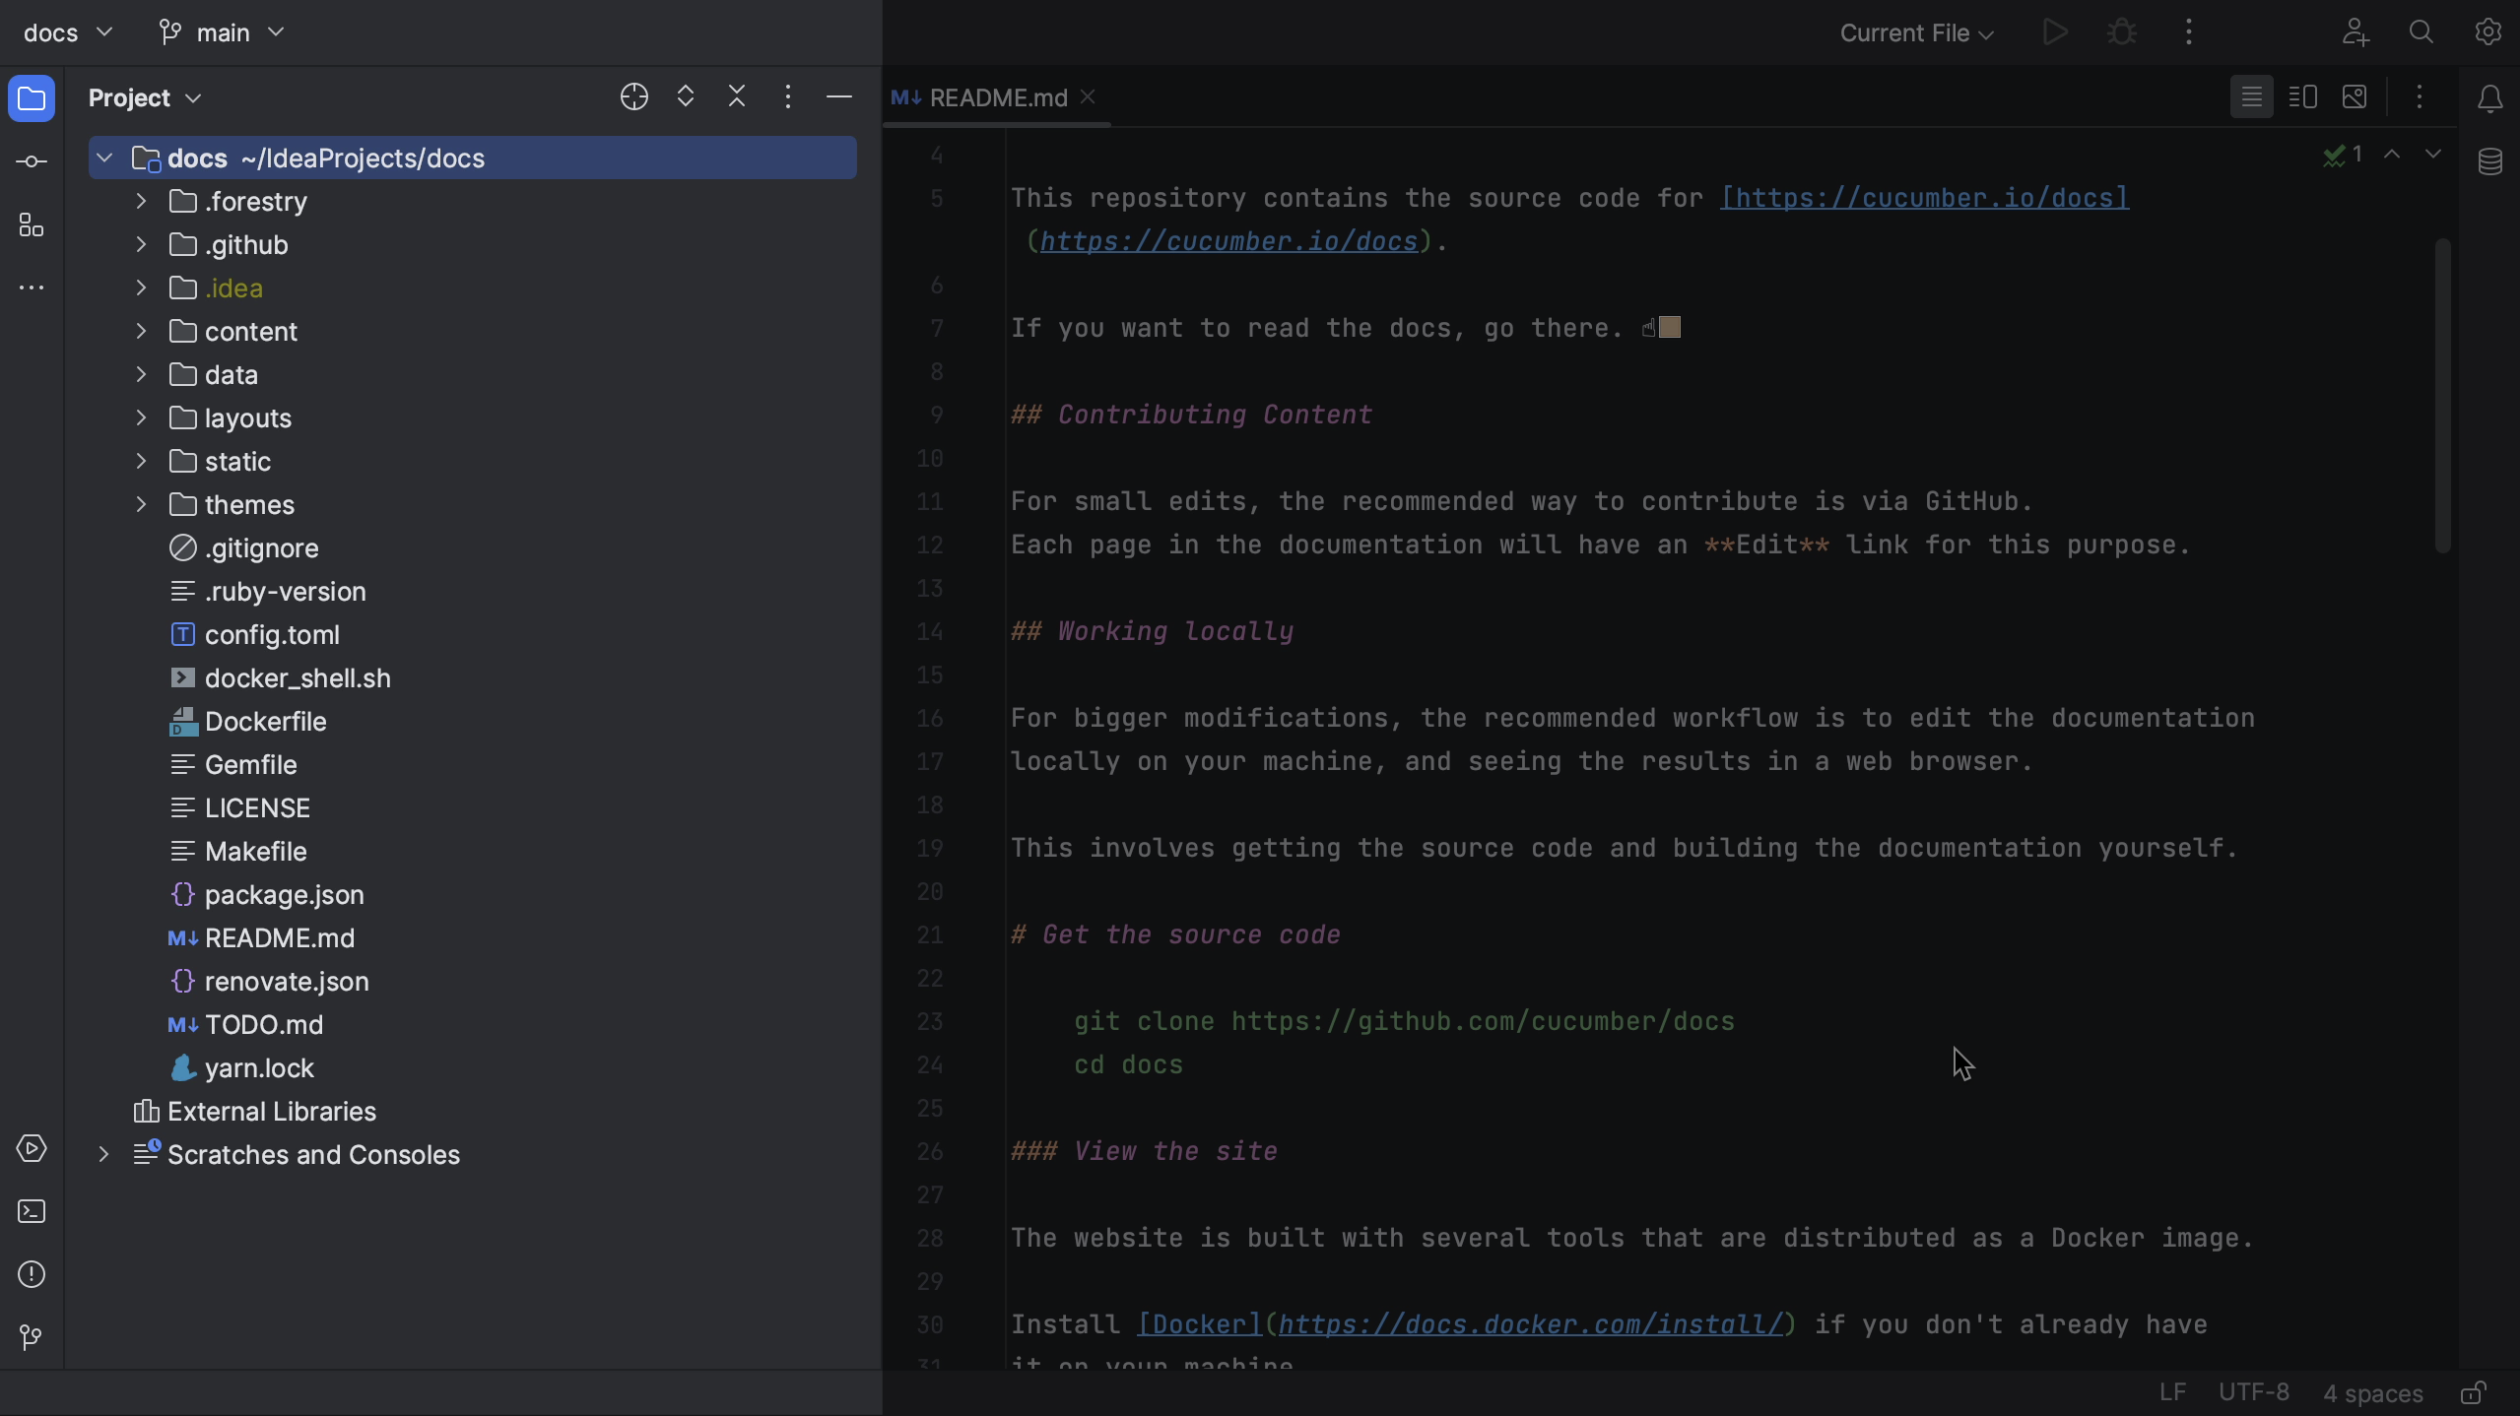
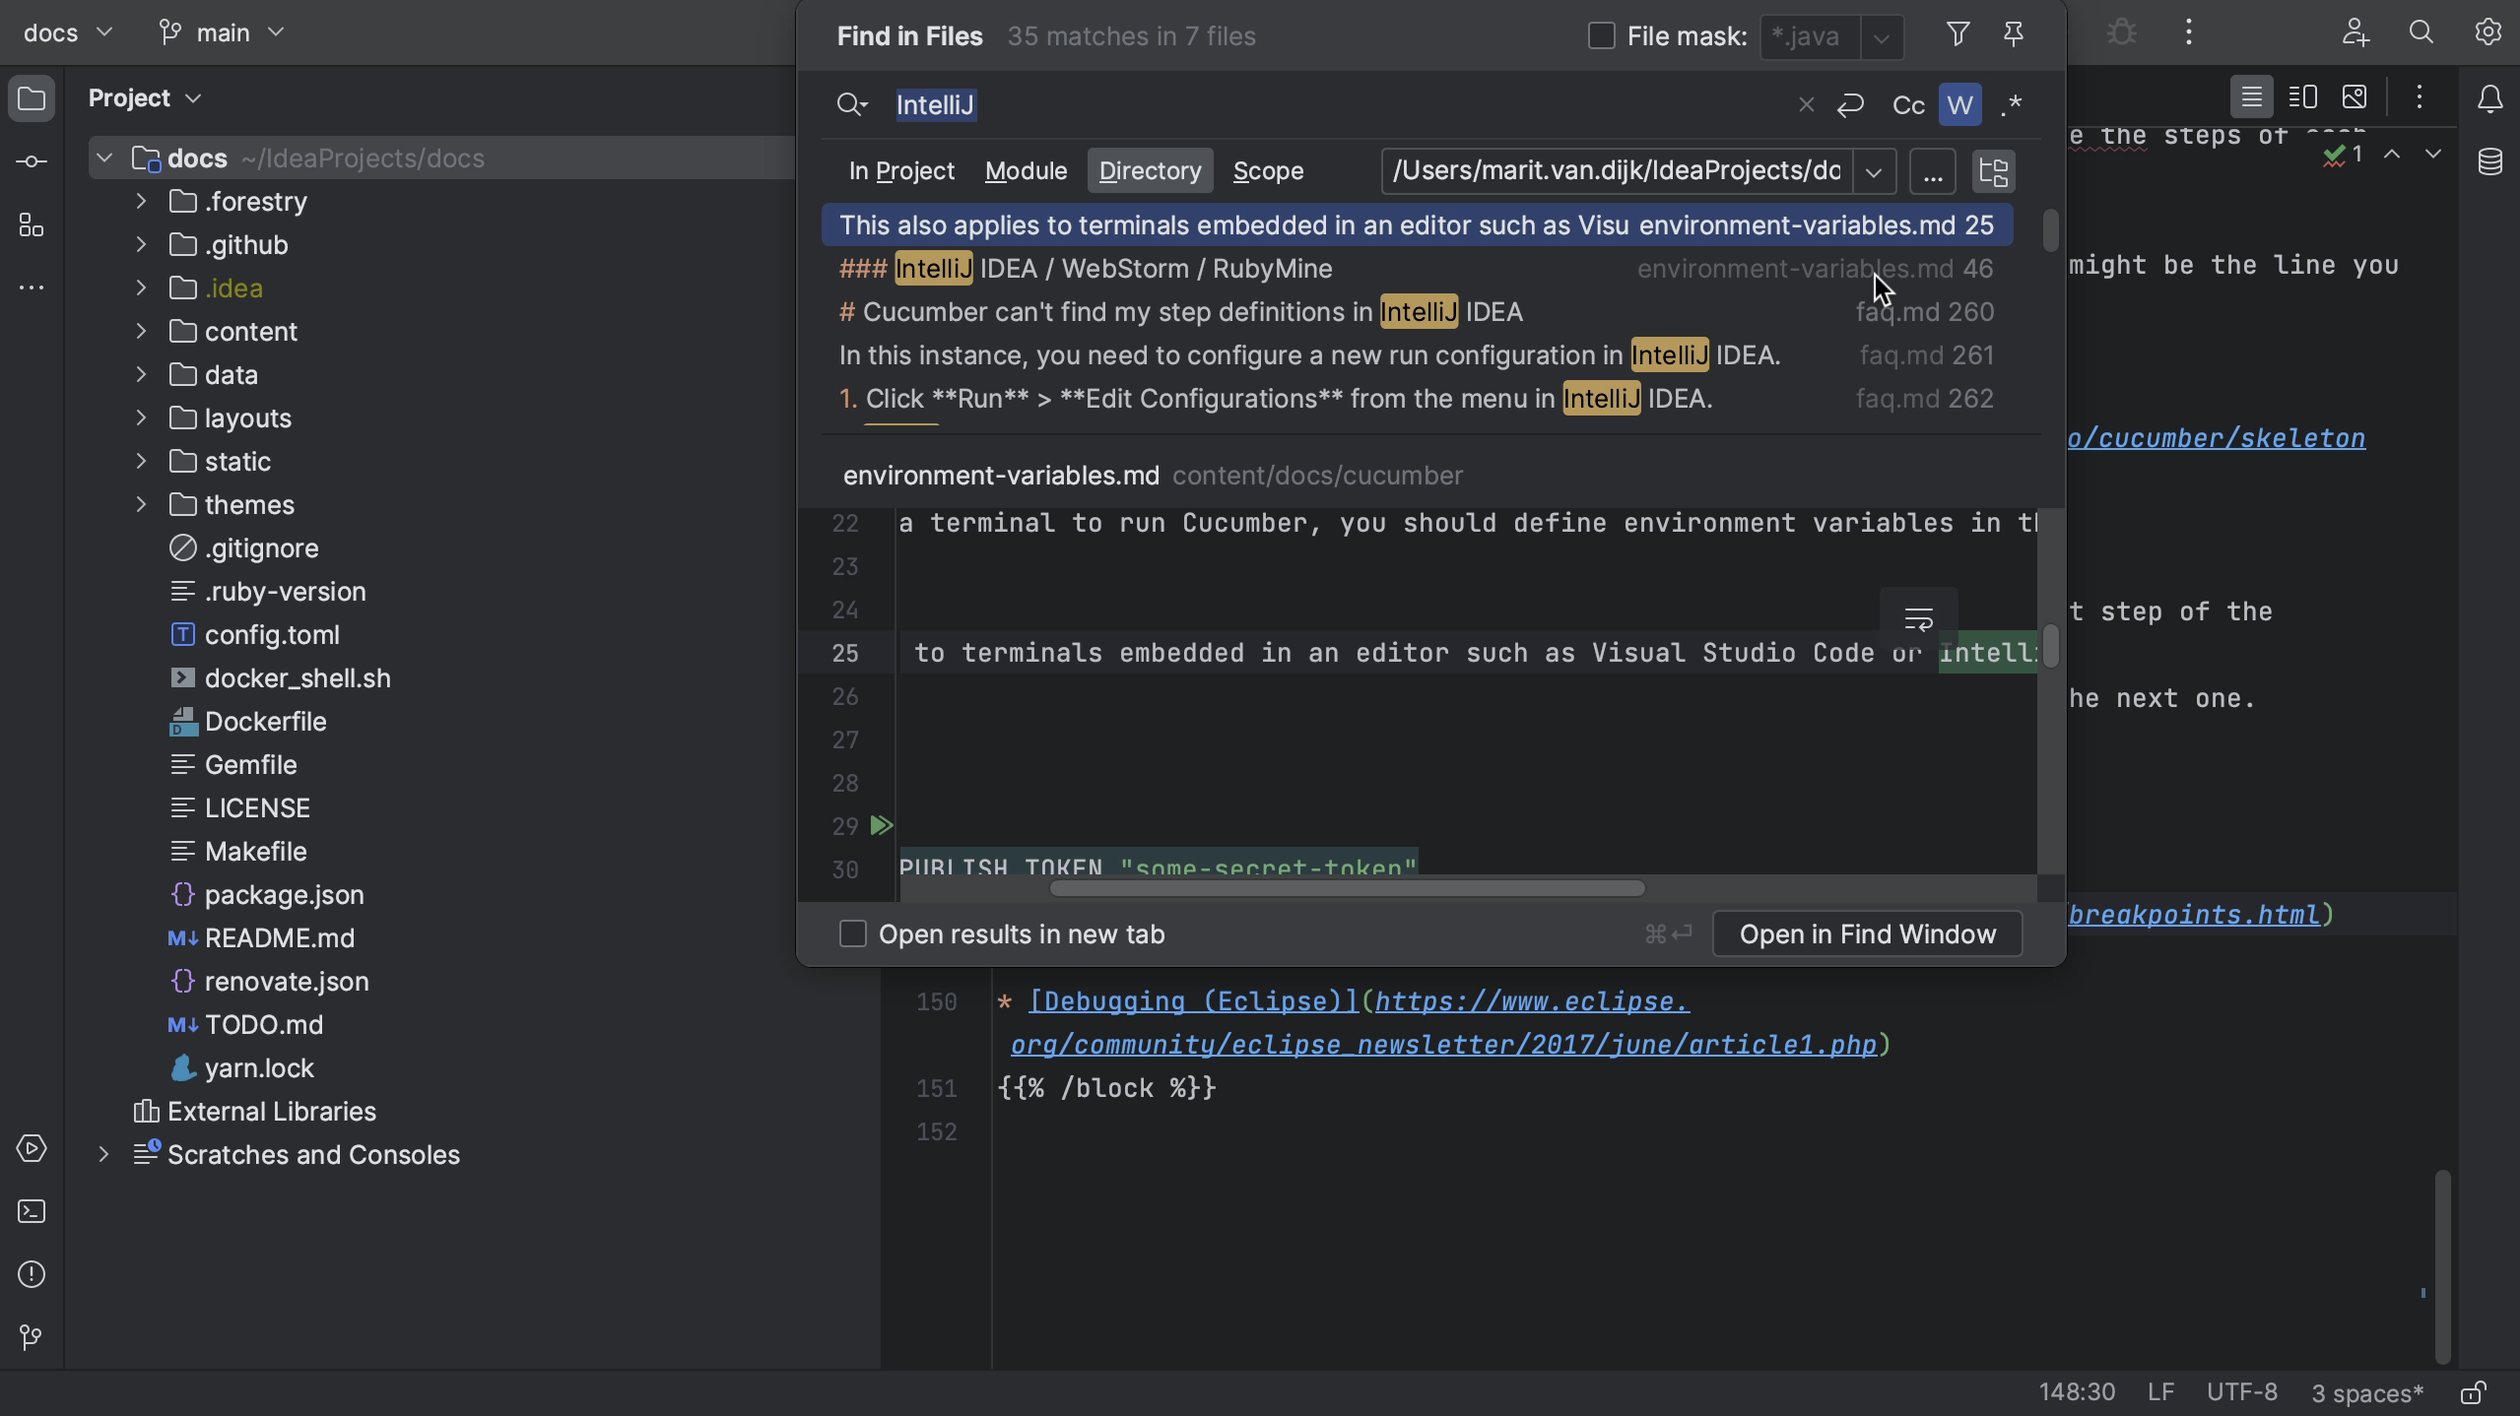
Now that we know we can build the project, we can start making changes. First, we need to look for the right place to make the change. We might navigate the project in the Project tool window (⌘1 on macOS, or Alt+1 on Windows/Linux), or look for a specific file or code snippet using Find in Files (⌘⇧F on macOS, or Ctrl+Shift+F on Windows/Linux).

Project tool window

Find in files

We might want to create a specific branch for our changes.

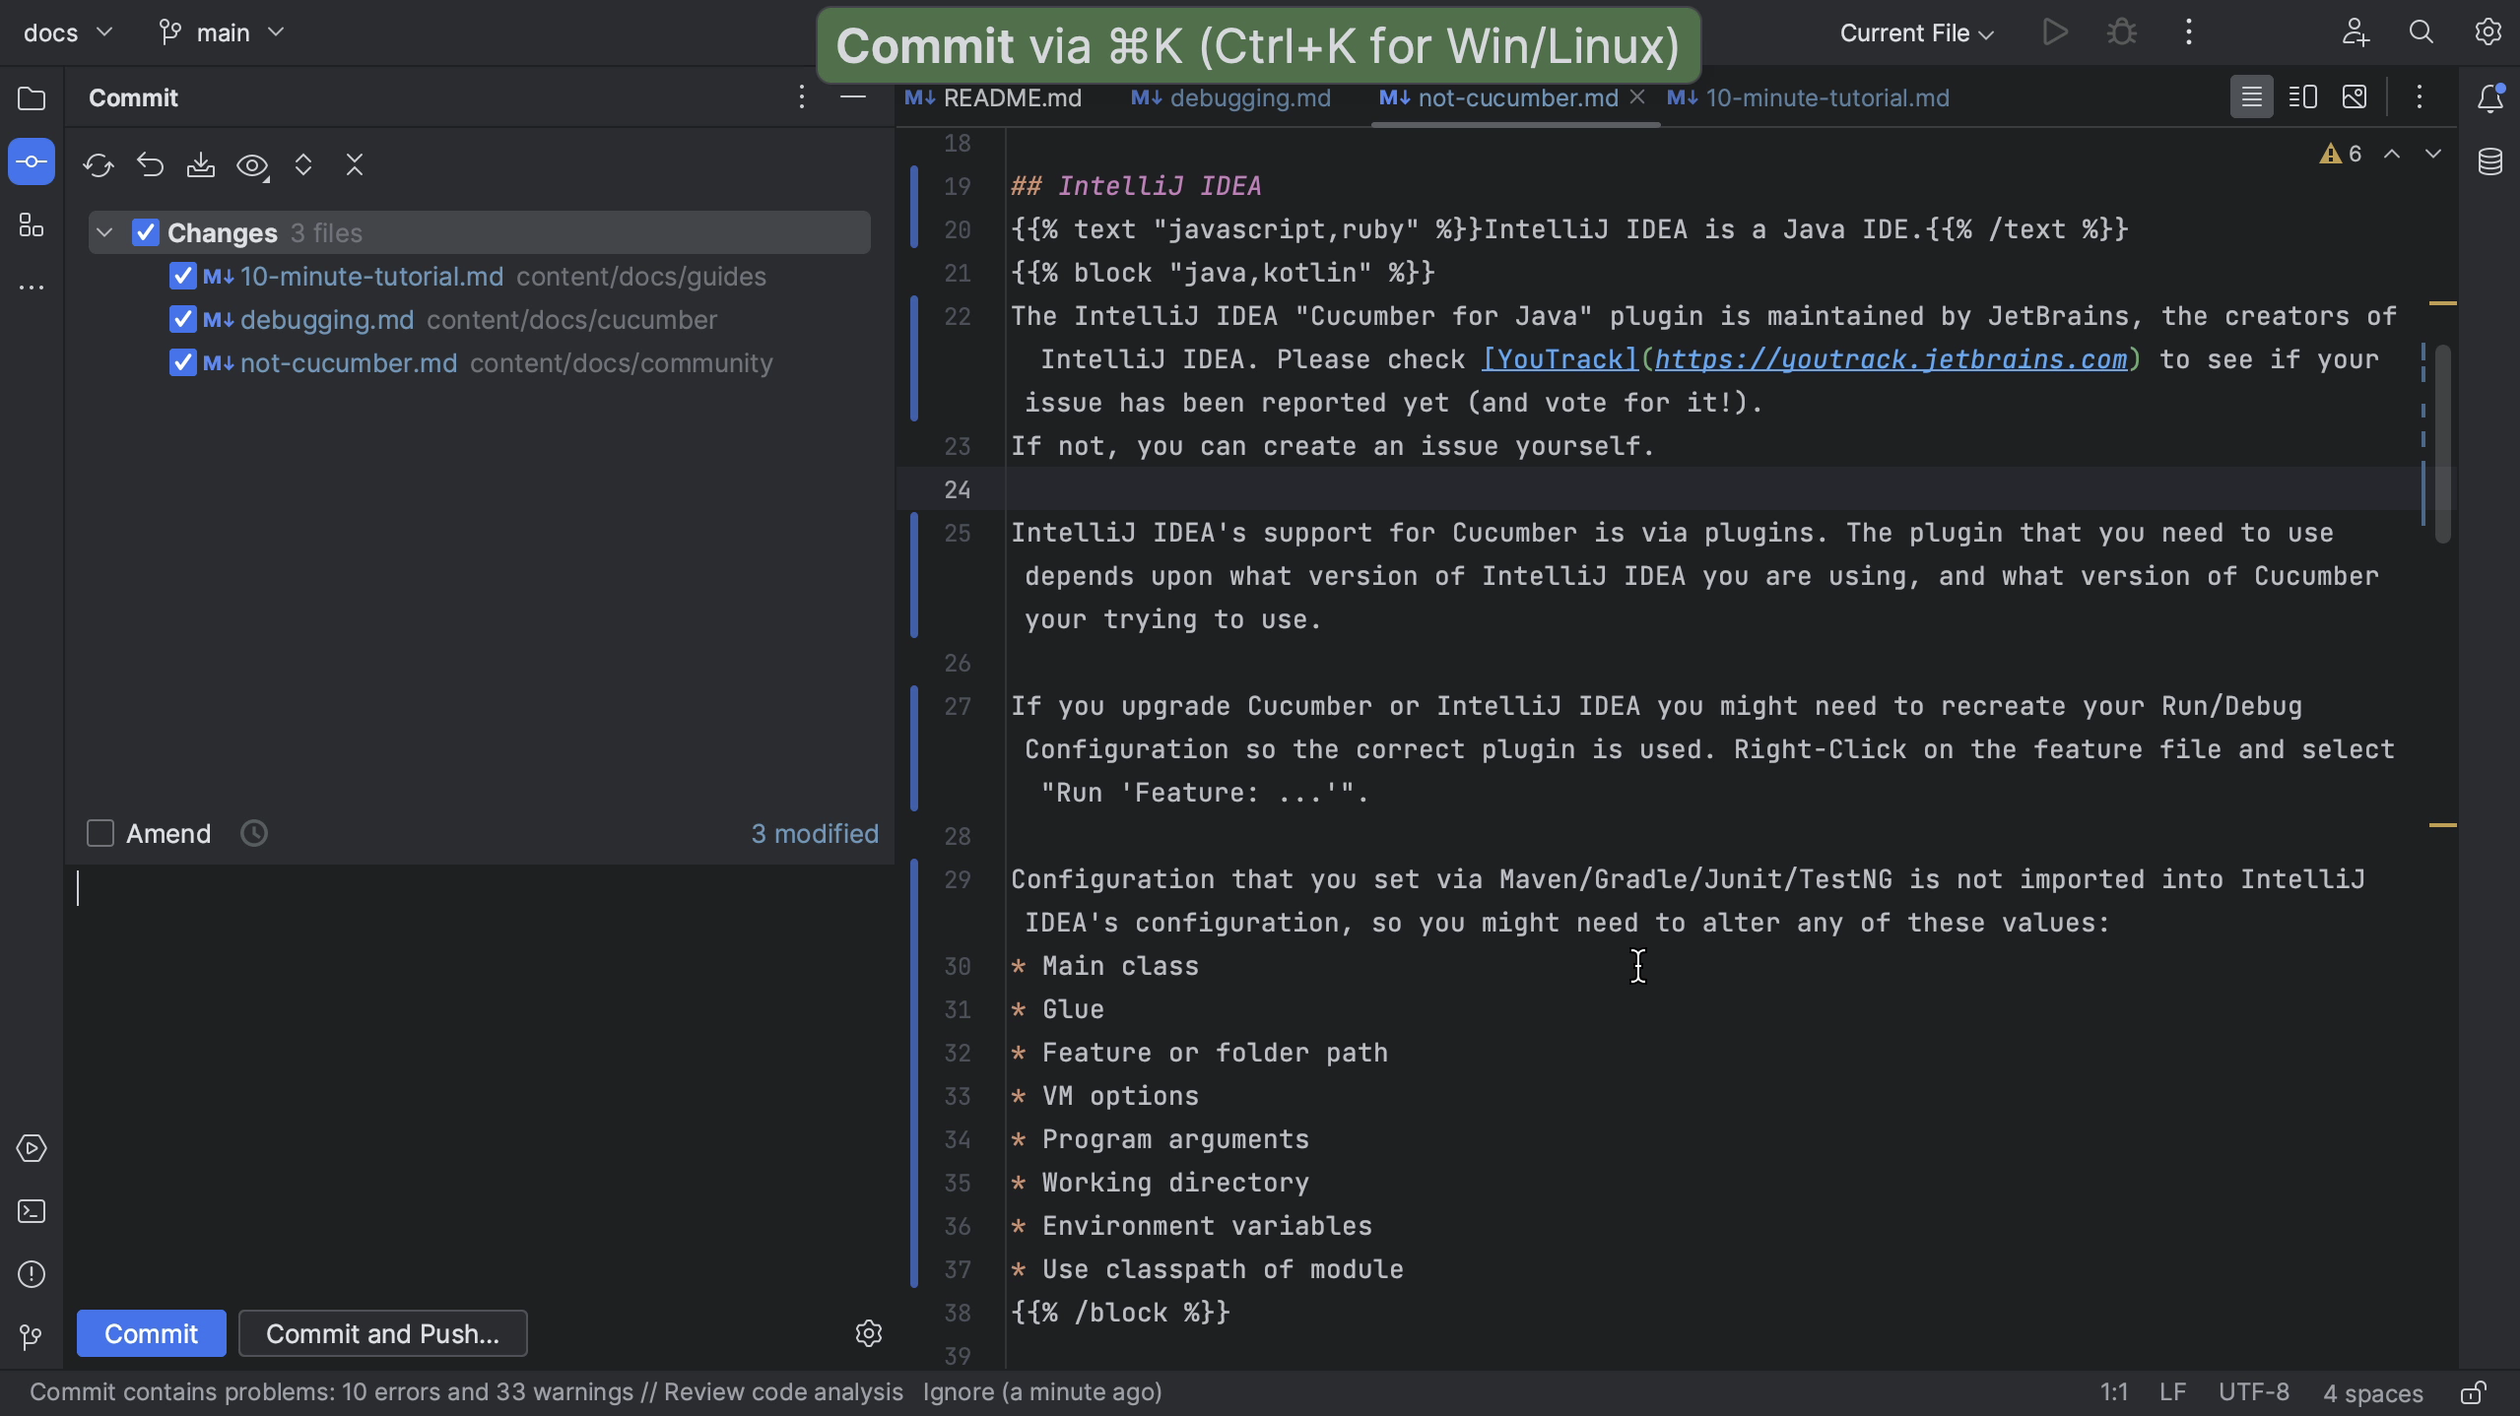
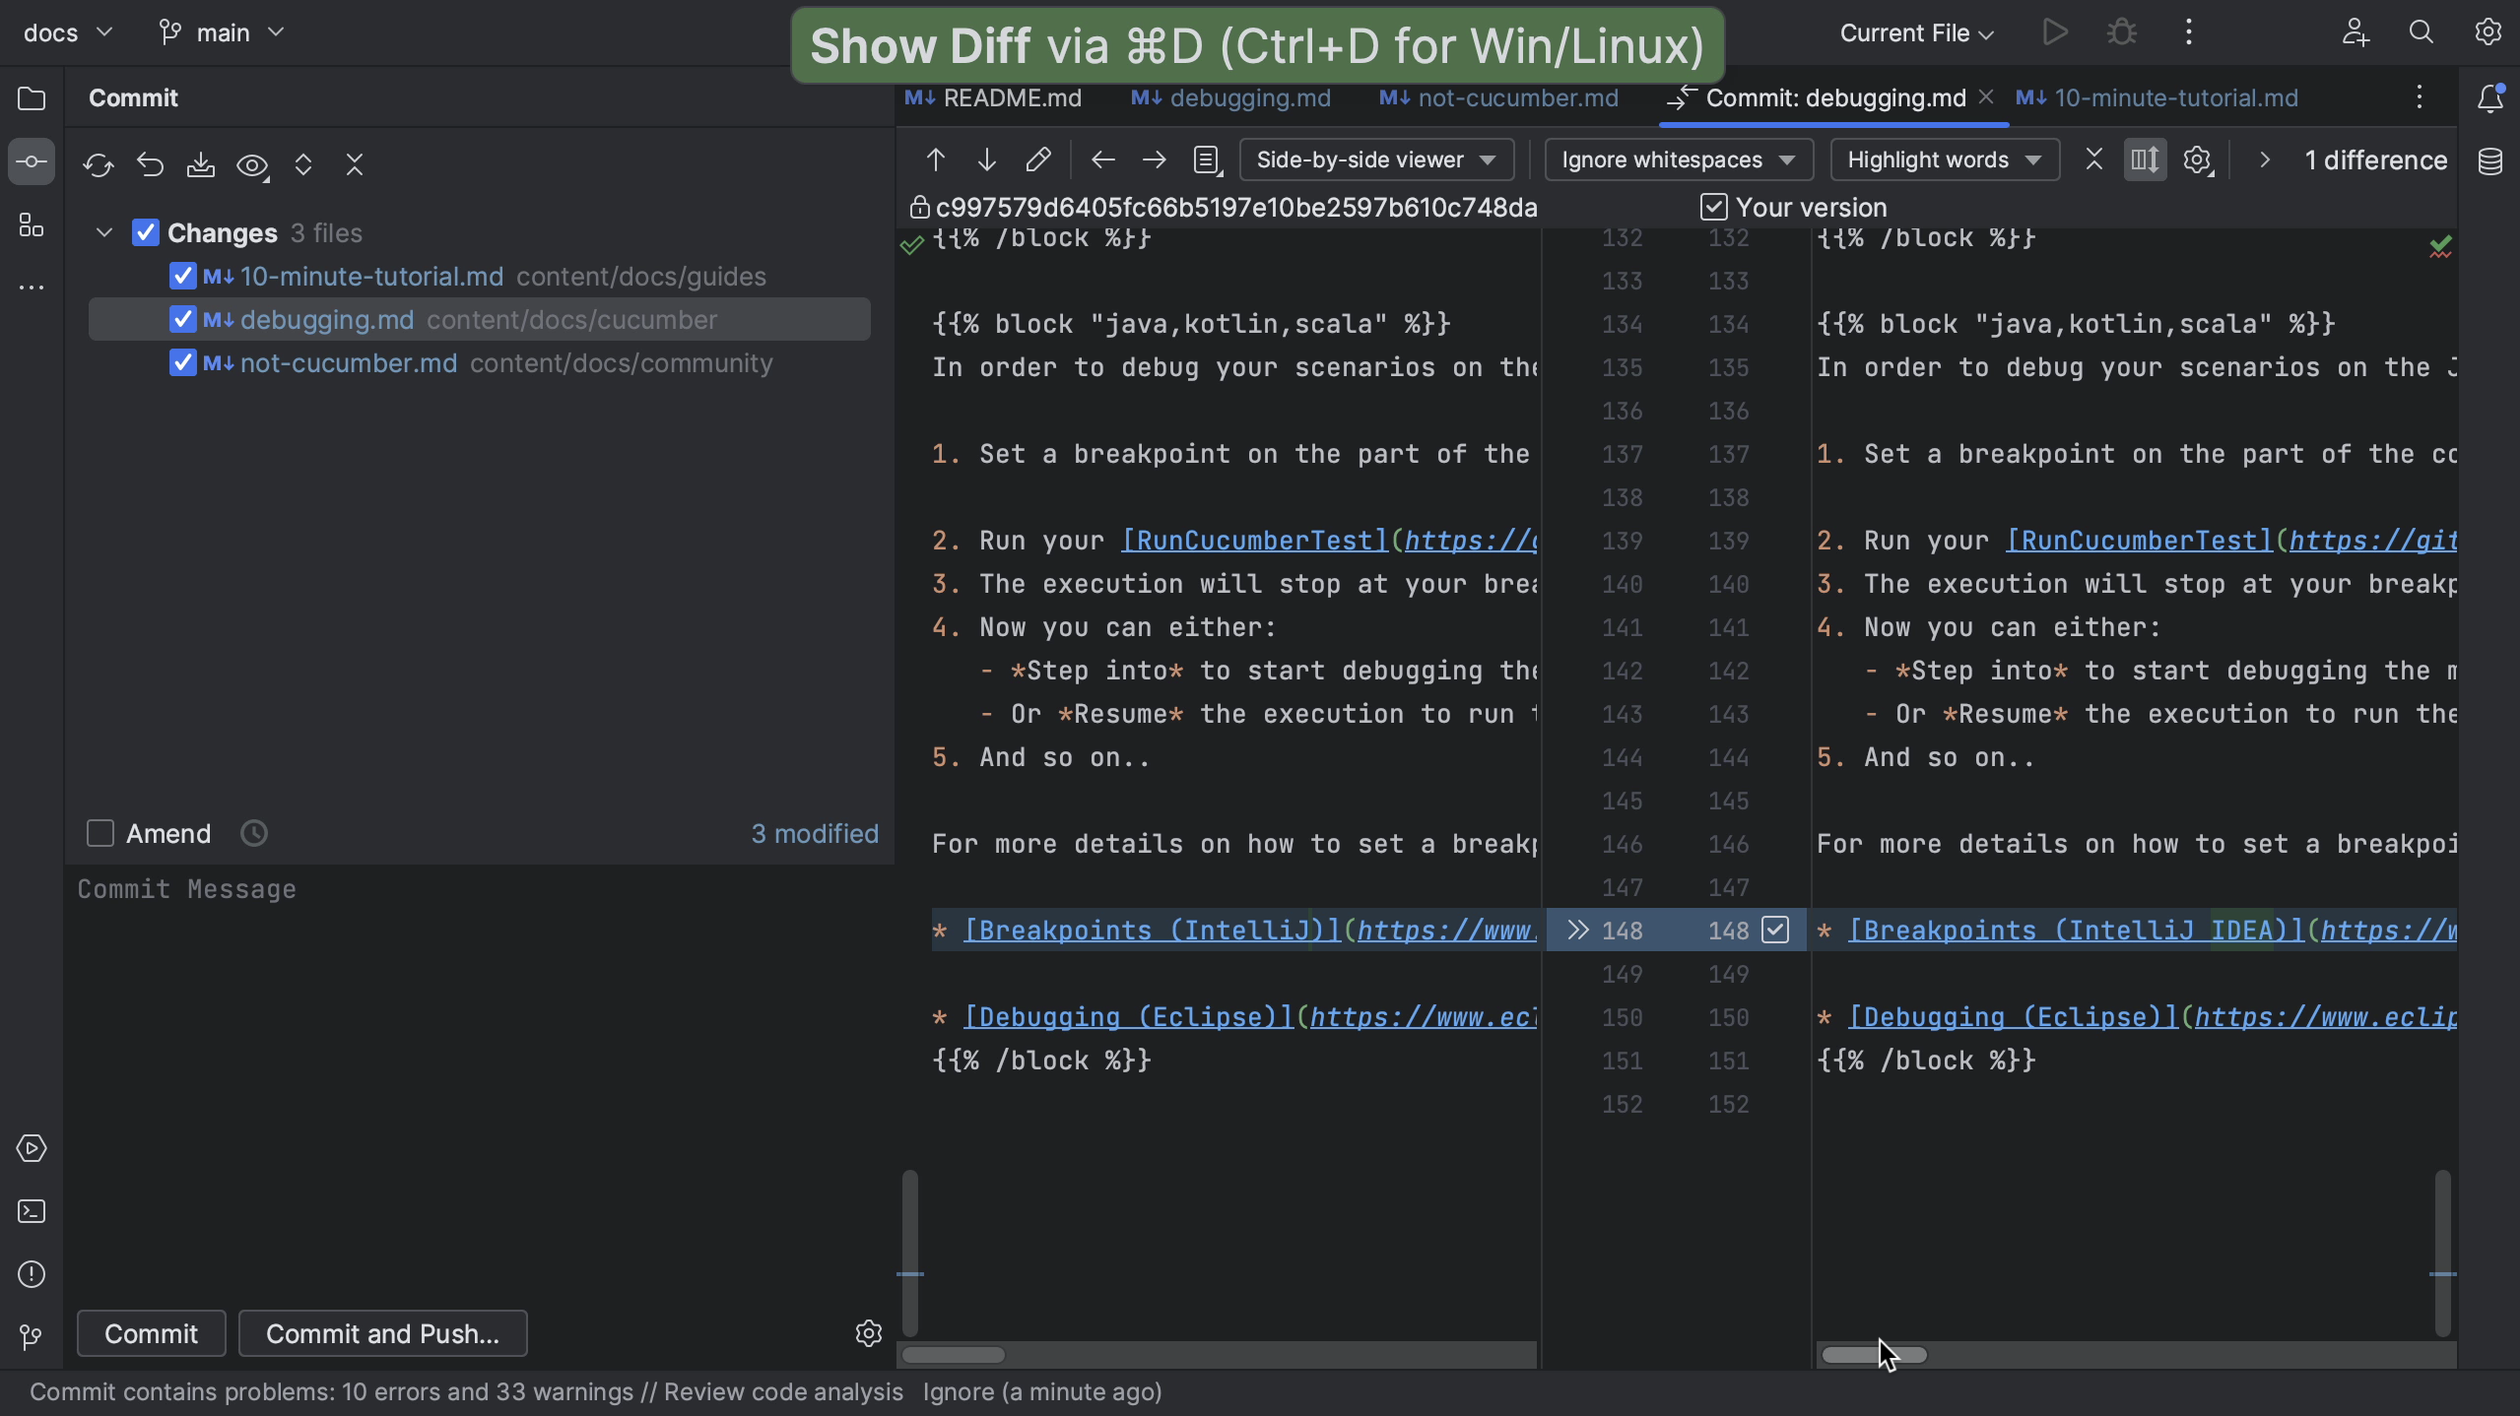
Once we are done making our changes and the project still builds, we can commit our changes (⌘K on macOS, or Ctrl+K on Windows/Linux). We can check our changes in the Commit tool window (⌘1 on macOS, or Alt+1 on Windows/Linux) to see if these are the right files and use Show Diff (⌘D on macOS, or Ctrl+D on Windows/Linux) to see if the changes are correct.

Commit changes

Check the differences

If we don’t have access to the original project, we need to push our code to our fork.

Push

Creating the pull request

Once we are happy with our changes, we can create a pull request.

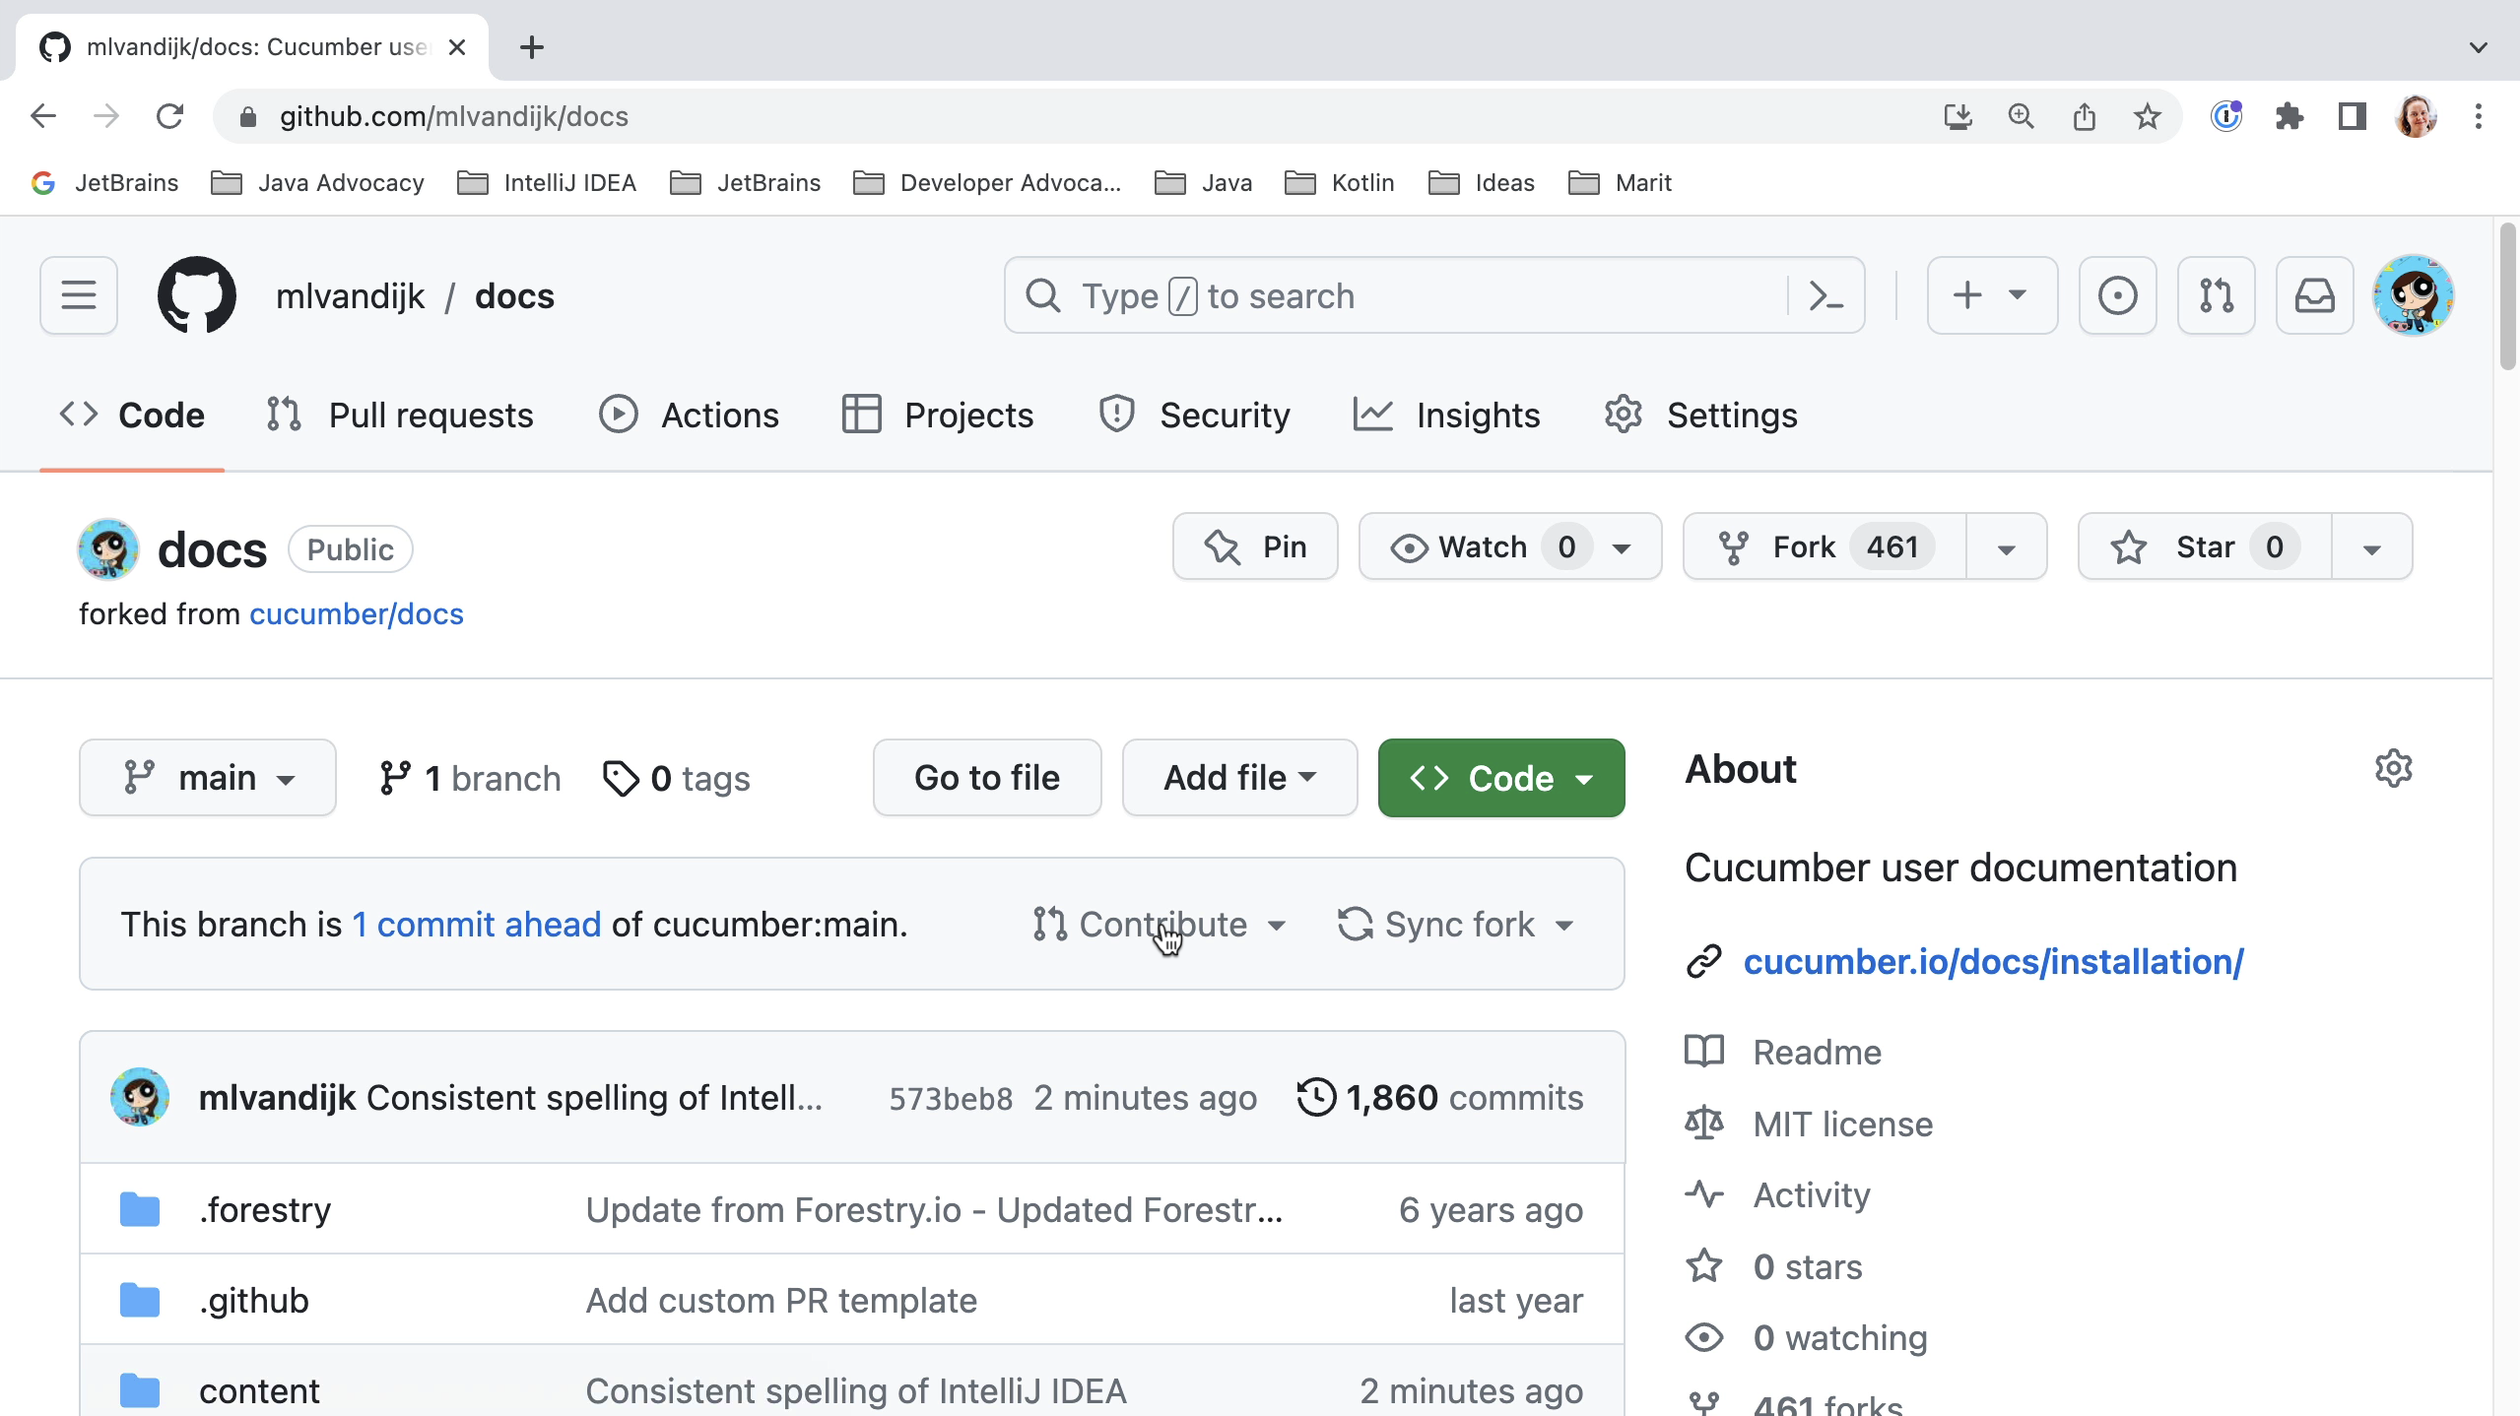
We go back to our GitHub profile and create a pull request from there. After we have pushed our changes, we can see that our fork is 1 commit ahead. We can start creating our pull request by clicking Contribute.

Contribute

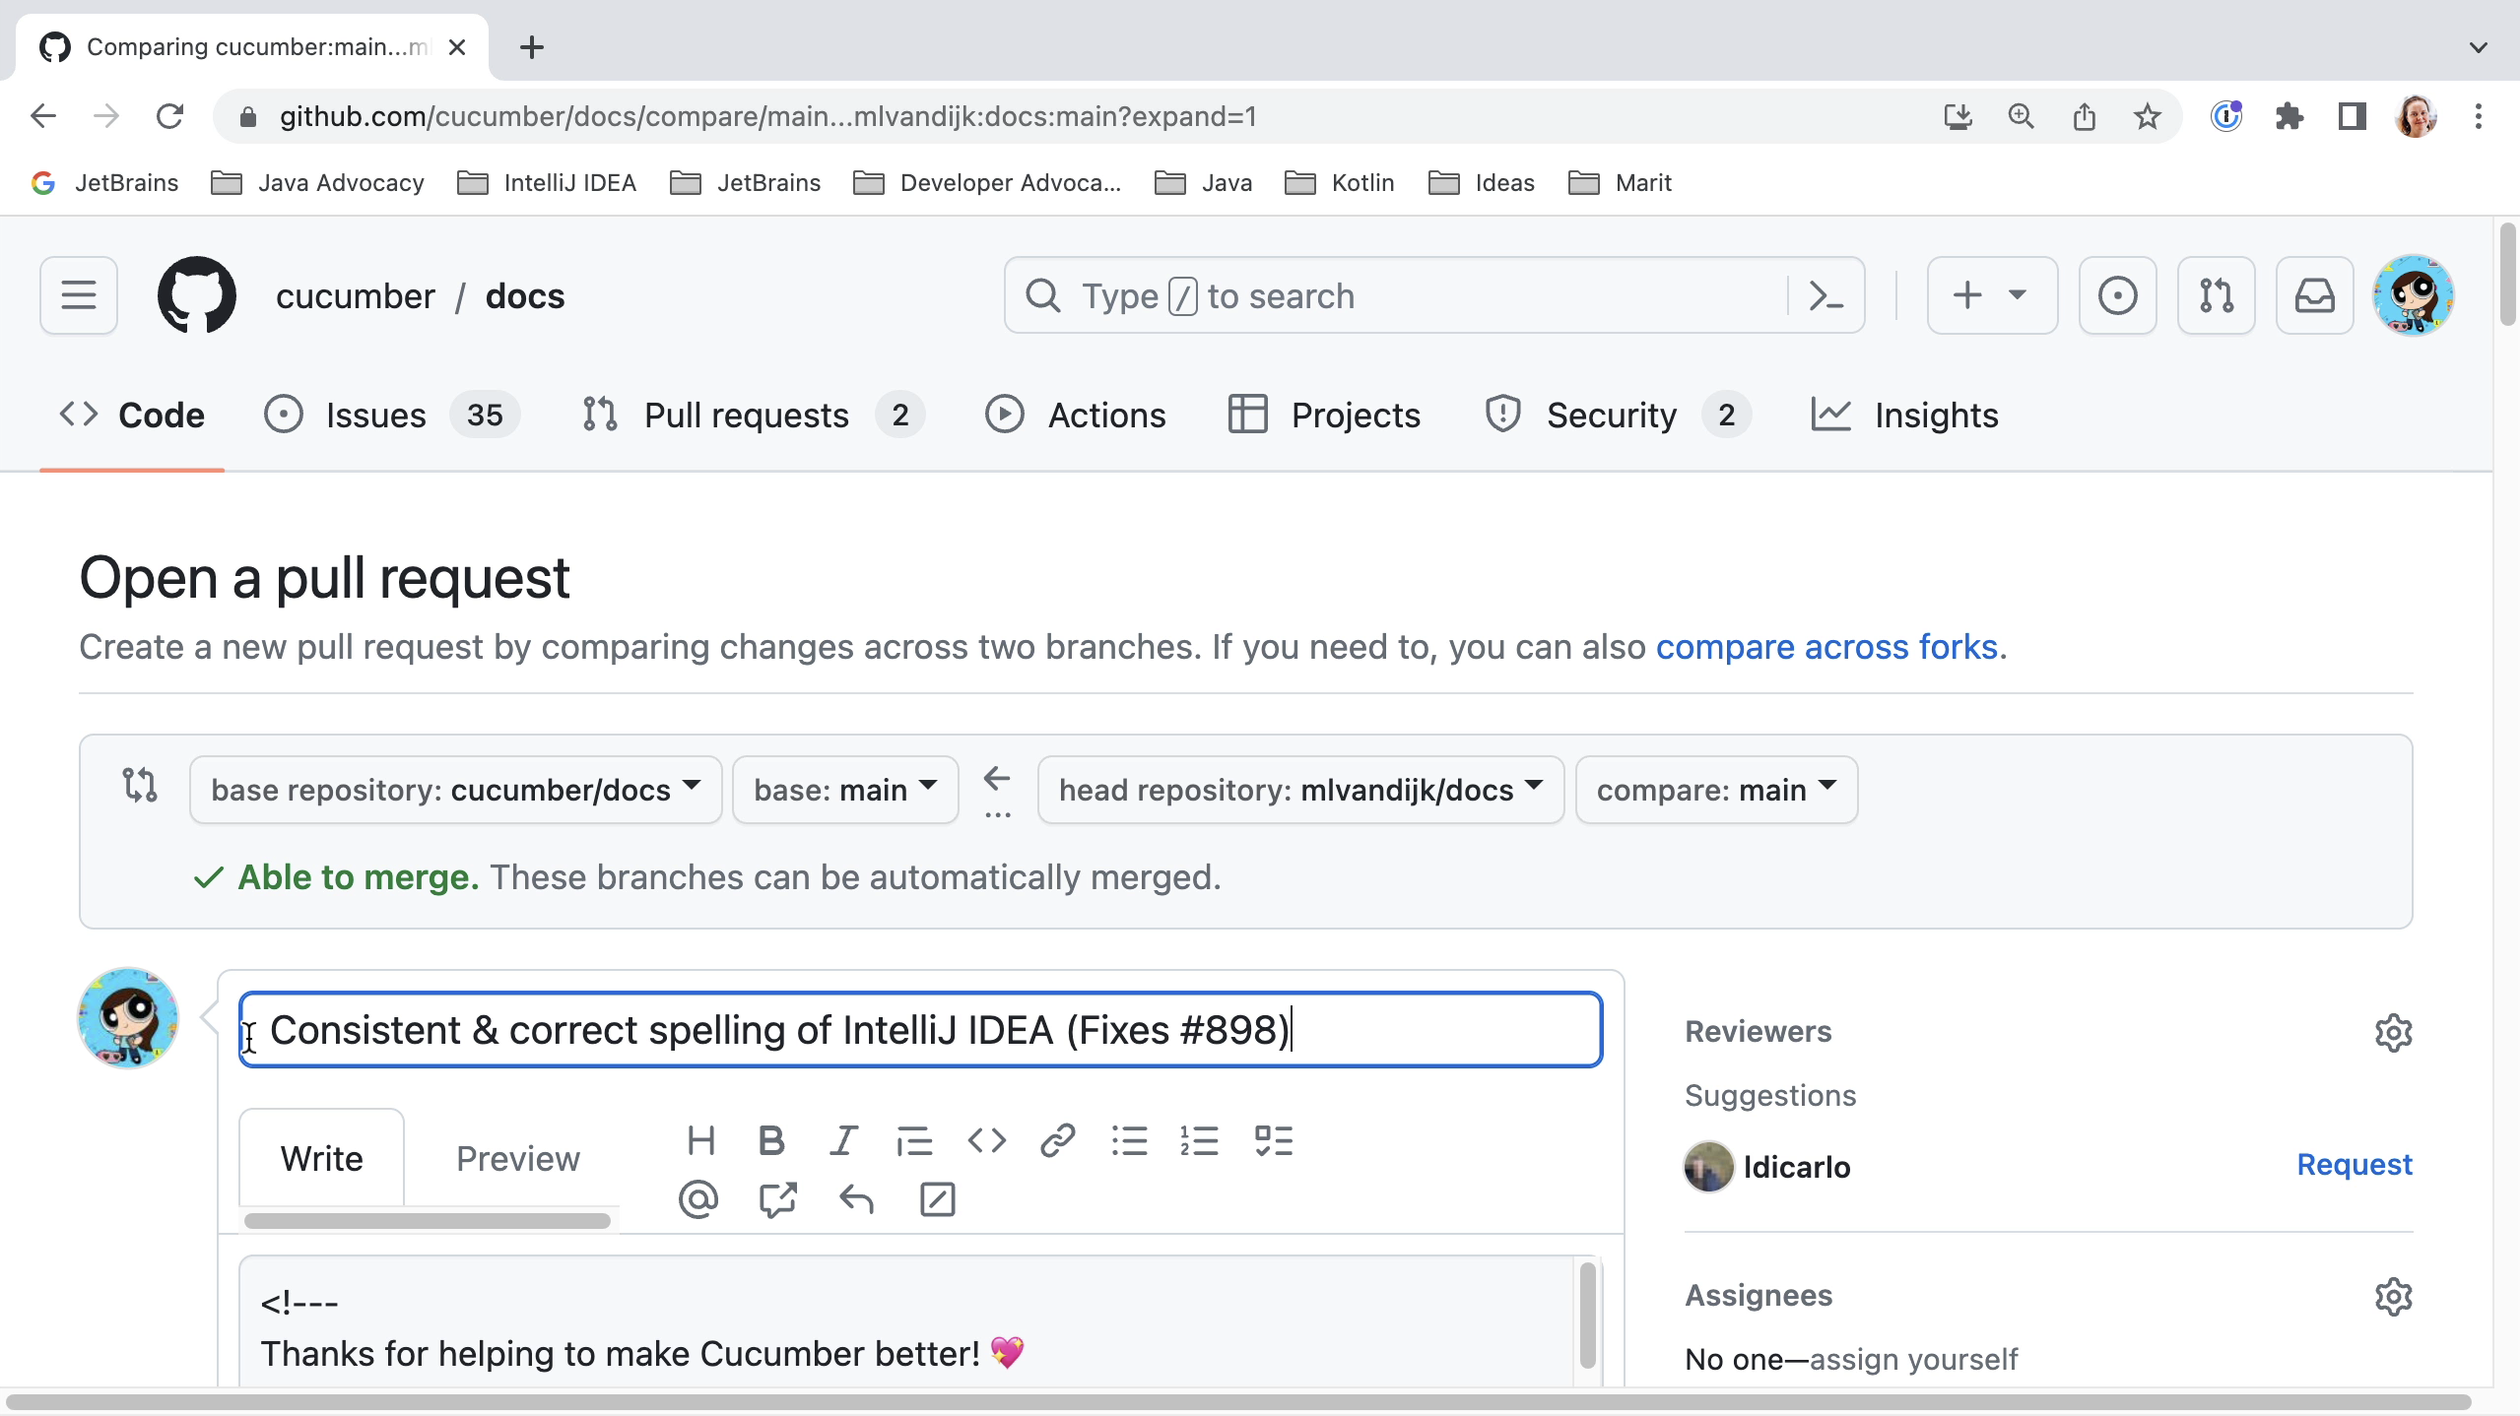
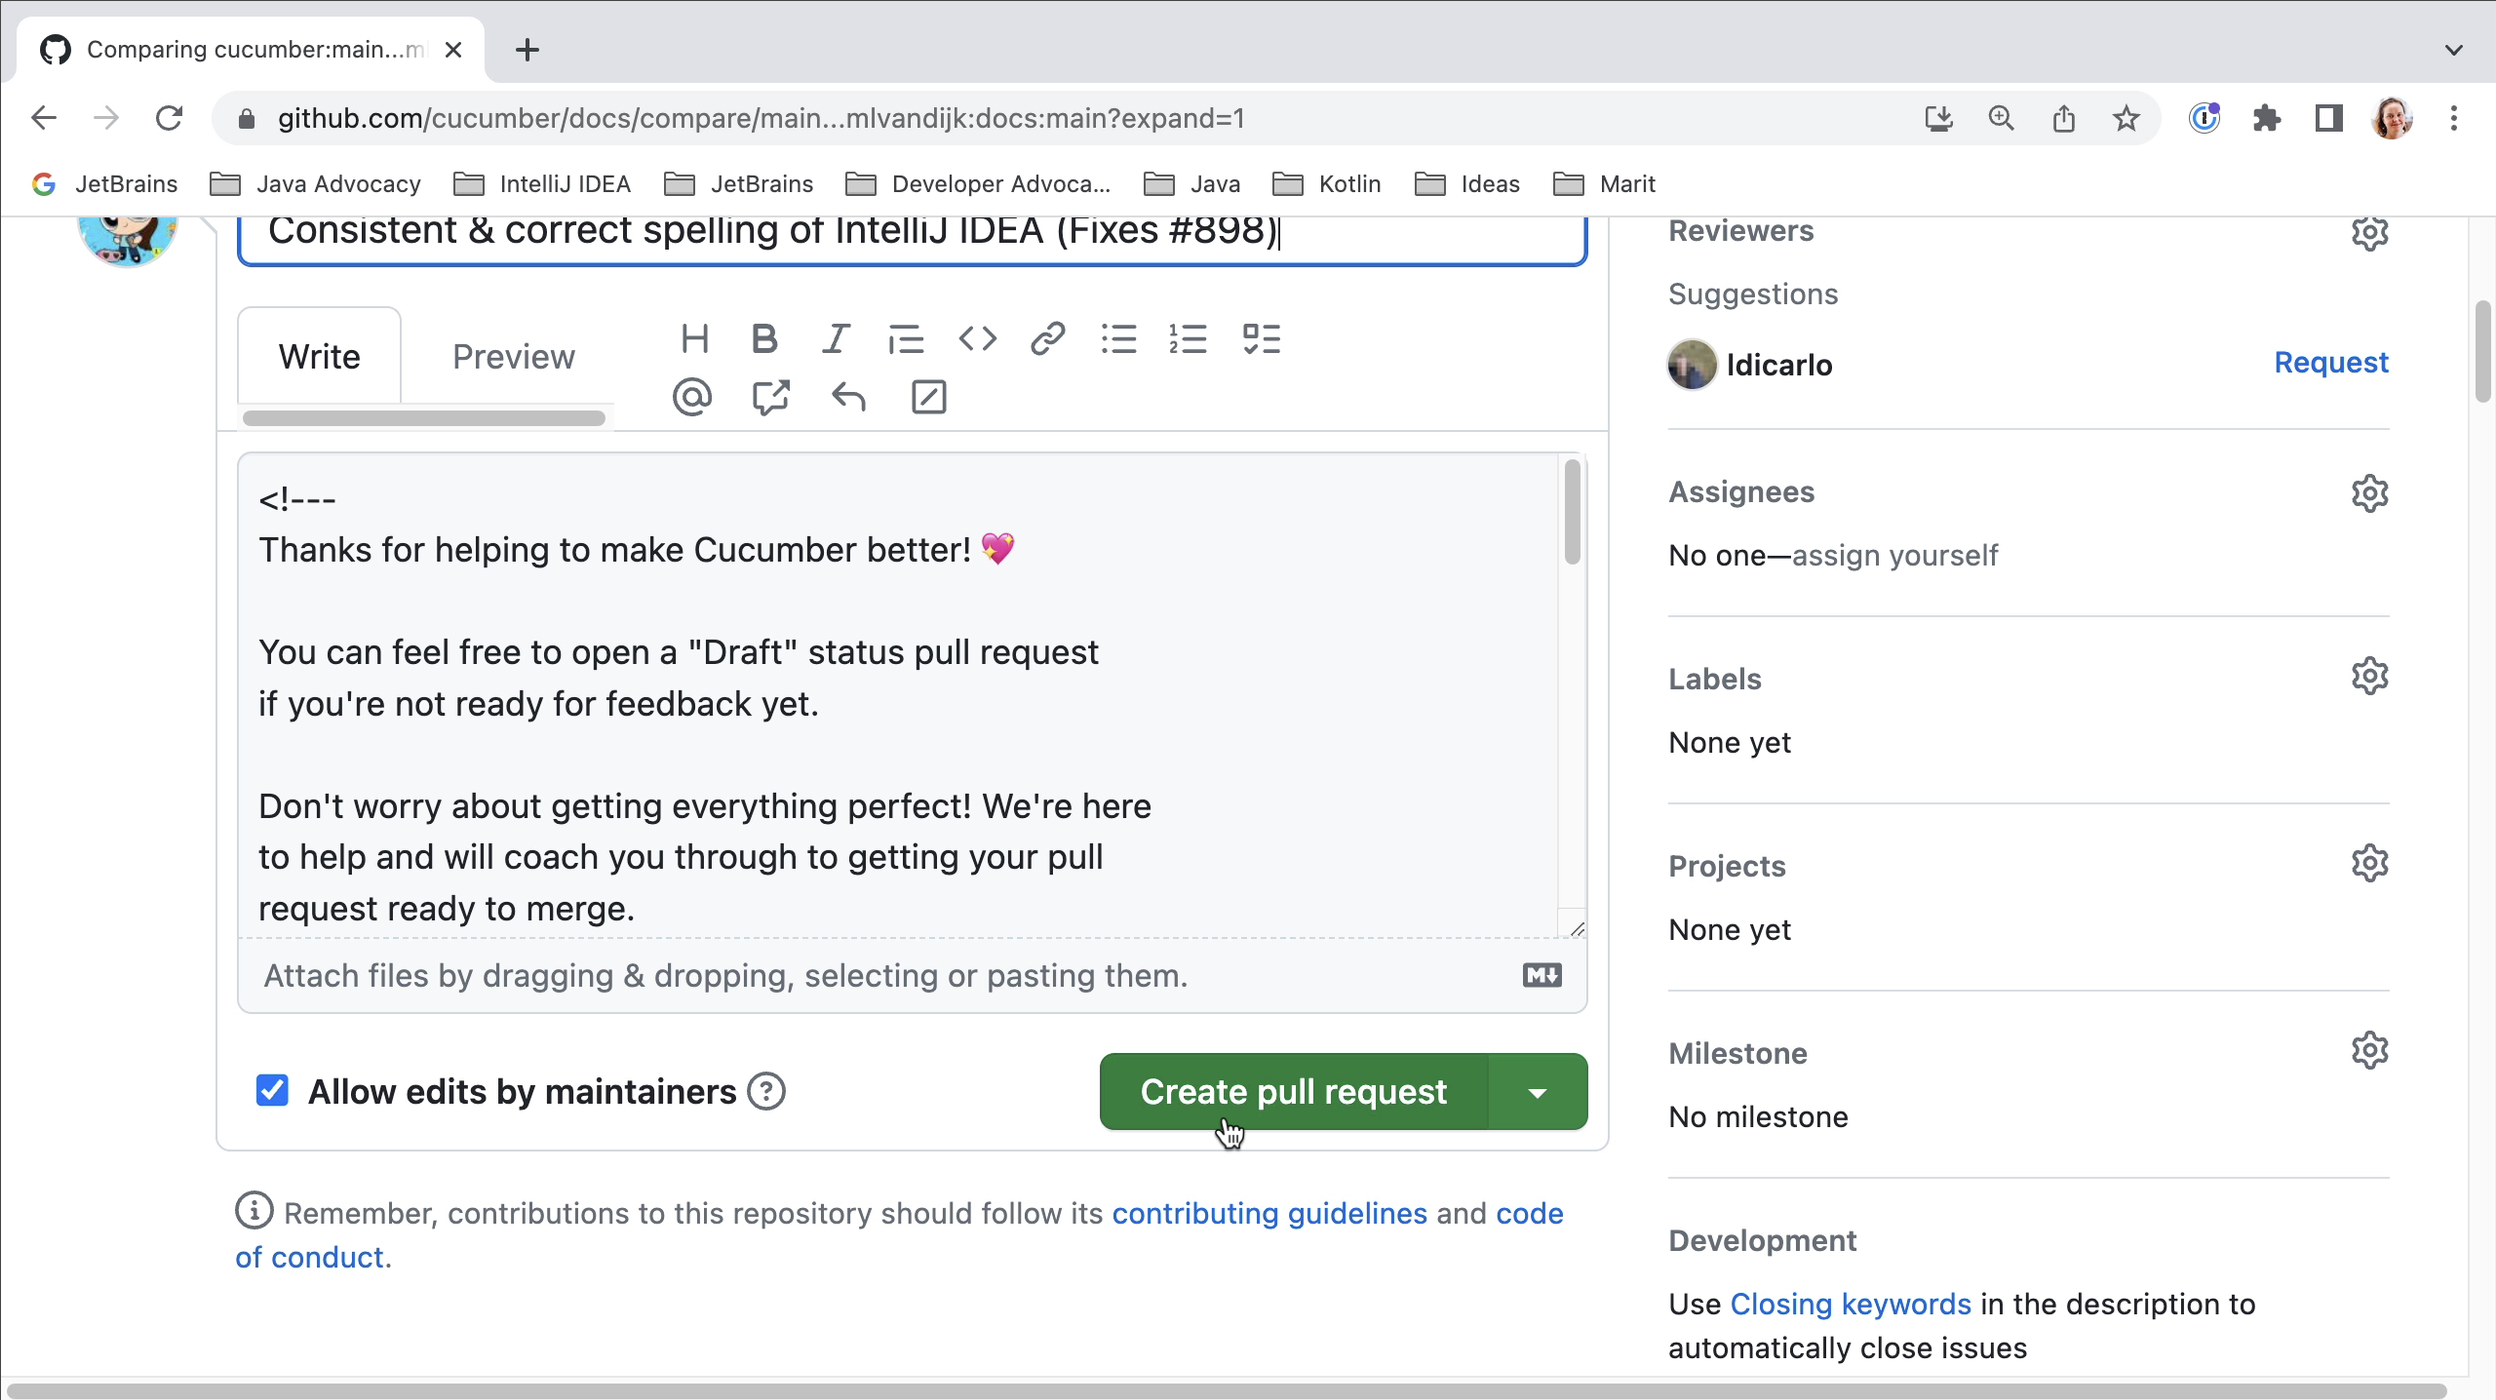
We need to provide a title and description for our pull request. Make sure the title is a good description of the changes you want to contribute. If your PR fixes an issue, you can add “fixed #x” (where x is the issue number) to the title; this will automatically close the linked issue when the PR is merged. Once you are happy with the title and description, click the button Create pull request to open your pull request.

Open the pull request

Create pull request

Negotiating the review process

Now the waiting starts. On an active project, hopefully your PR will be reviewed soon. Your PR might get comments from reviewers that you need to fix. For complex changes, this might take several iterations. For smaller changes, hopefully it won’t. Before doing a lot of work on an issue you might want to check that your contribution is wanted and your solution is what they are looking for. Don’t be discouraged by review comments. Keep in mind that the maintainers will have to maintain your solution in the future and they want to make sure that it fits their project.

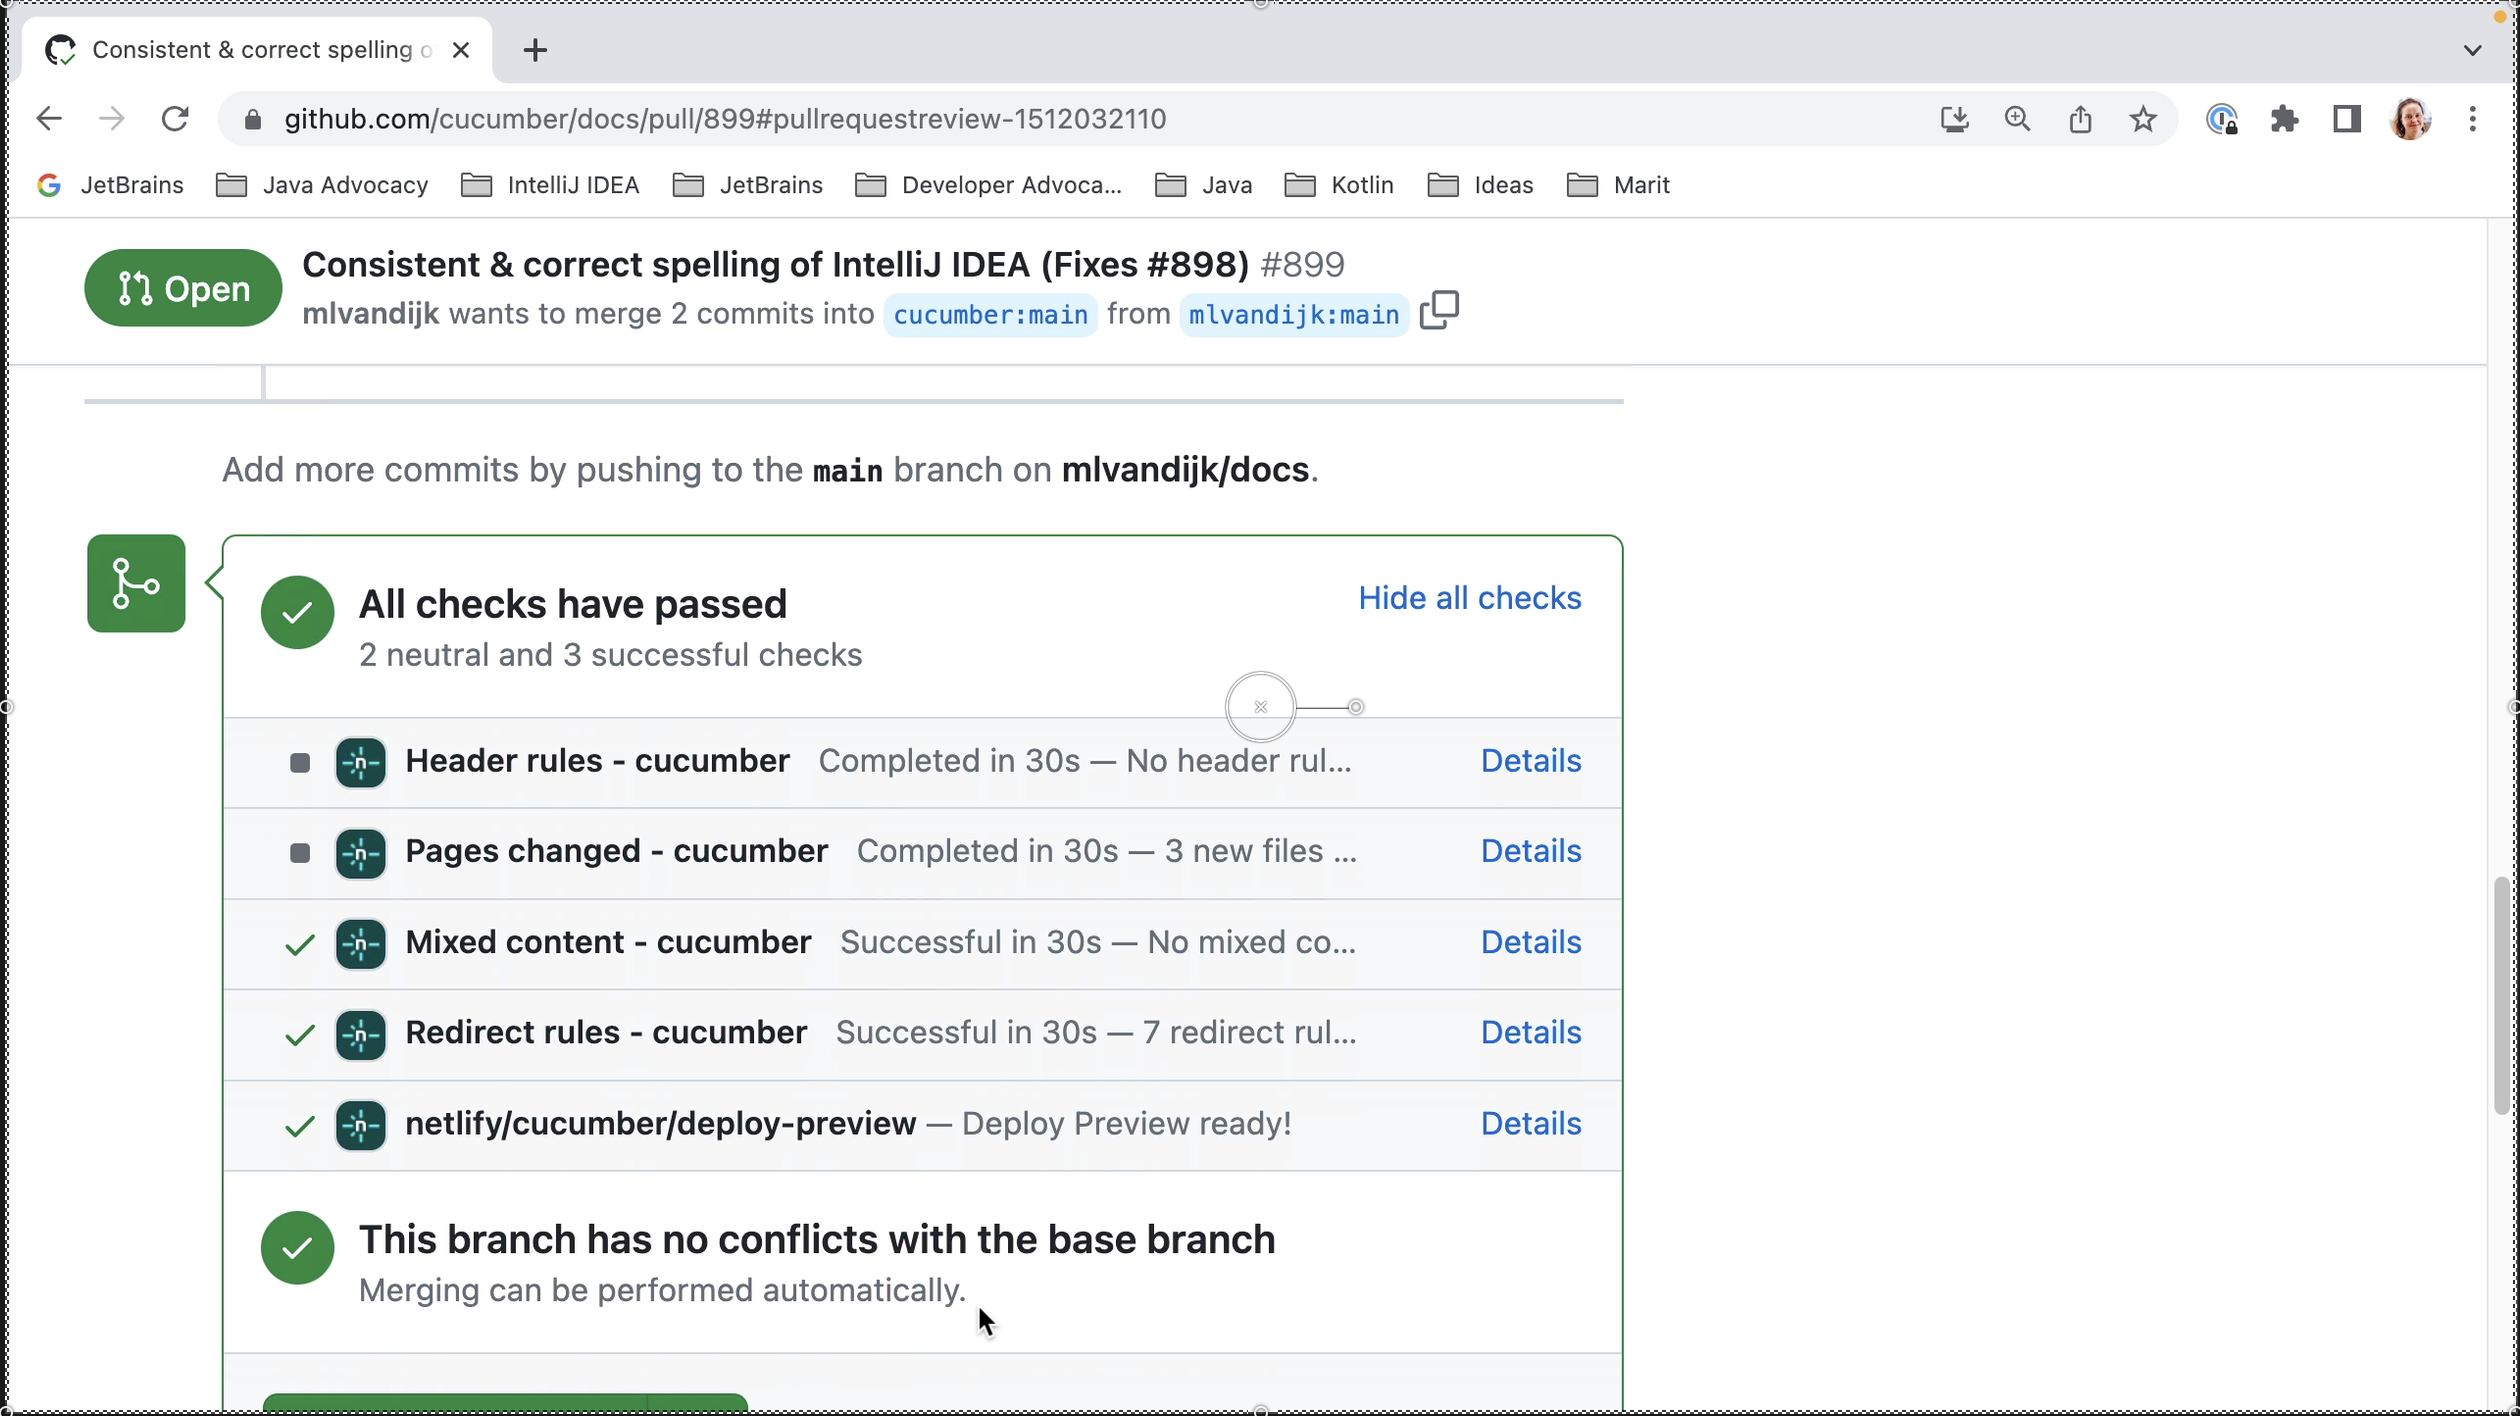
As you can see, reviewers can comment on your PR, approve the PR or request changes which must be addressed before merging. A project might have other checks set up that need to pass before merging. You might want to check that these checks pass and that there are no conflicts with the main branch.

Review

Checks

Summary and shortcuts

In this blog post, we’ve seen how to do an open source pull request. For more information on what you can contribute and how to find something to contribute, please have a look at this video.

IntelliJ IDEA Shortcuts Used

Here are the IntelliJ IDEA shortcuts that we used.

Name macOS Shortcut Windows / Linux Shortcut
Open / Close Project Tool Window ⌘1 Alt+1
Find in Files ⌘⇧F Ctrl+Shift+F
Commit changes ⌘K Ctrl+K
Commit tool window ⌘1 Alt+1
Show diff ⌘D Ctrl+D

Related Links

Contributing to open source software: Creating a pull request

In this screencast, we’re going to take a look at Contributing to Open Source Software, specifically how to create a pull request.

Links