
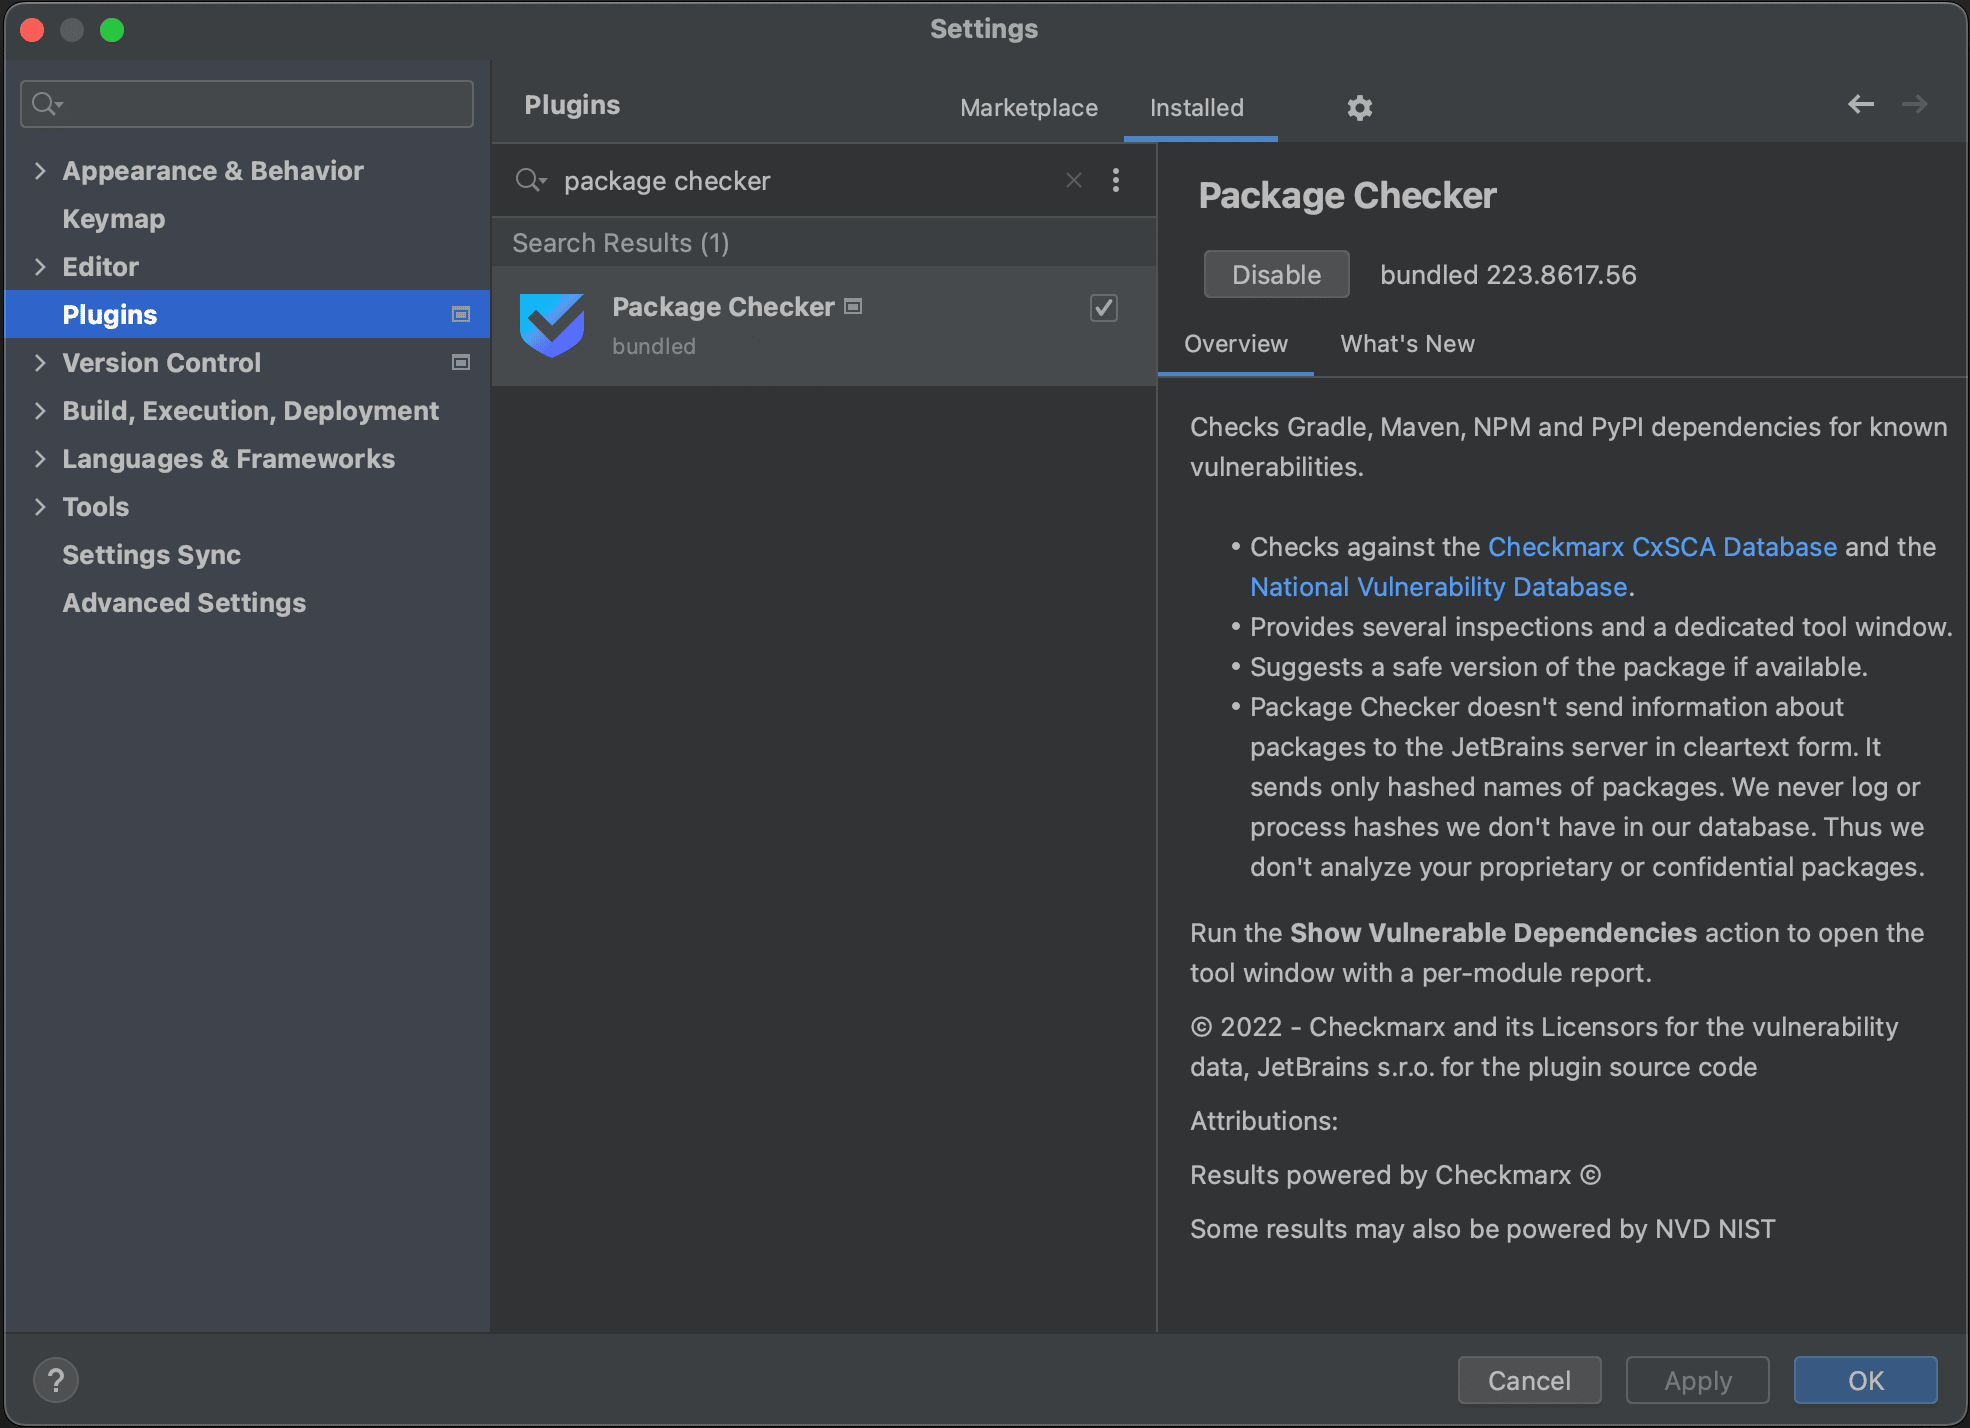
In this blogpost, we’re going to take a look at the Package Checker plugin, that’s bundled with IntelliJ IDEA Ultimate. We’ll have a look at how to view known vulnerabilities in your Maven or Gradle projects, how to get more information about the known vulnerabilities in a specific dependency and how to remediate these vulnerabilities inside IntelliJ IDEA Ultimate if a new version with a fix is available.

There are several ways to view known vulnerabilities for the dependencies to your project.
View vulnerable dependencies in Maven projects
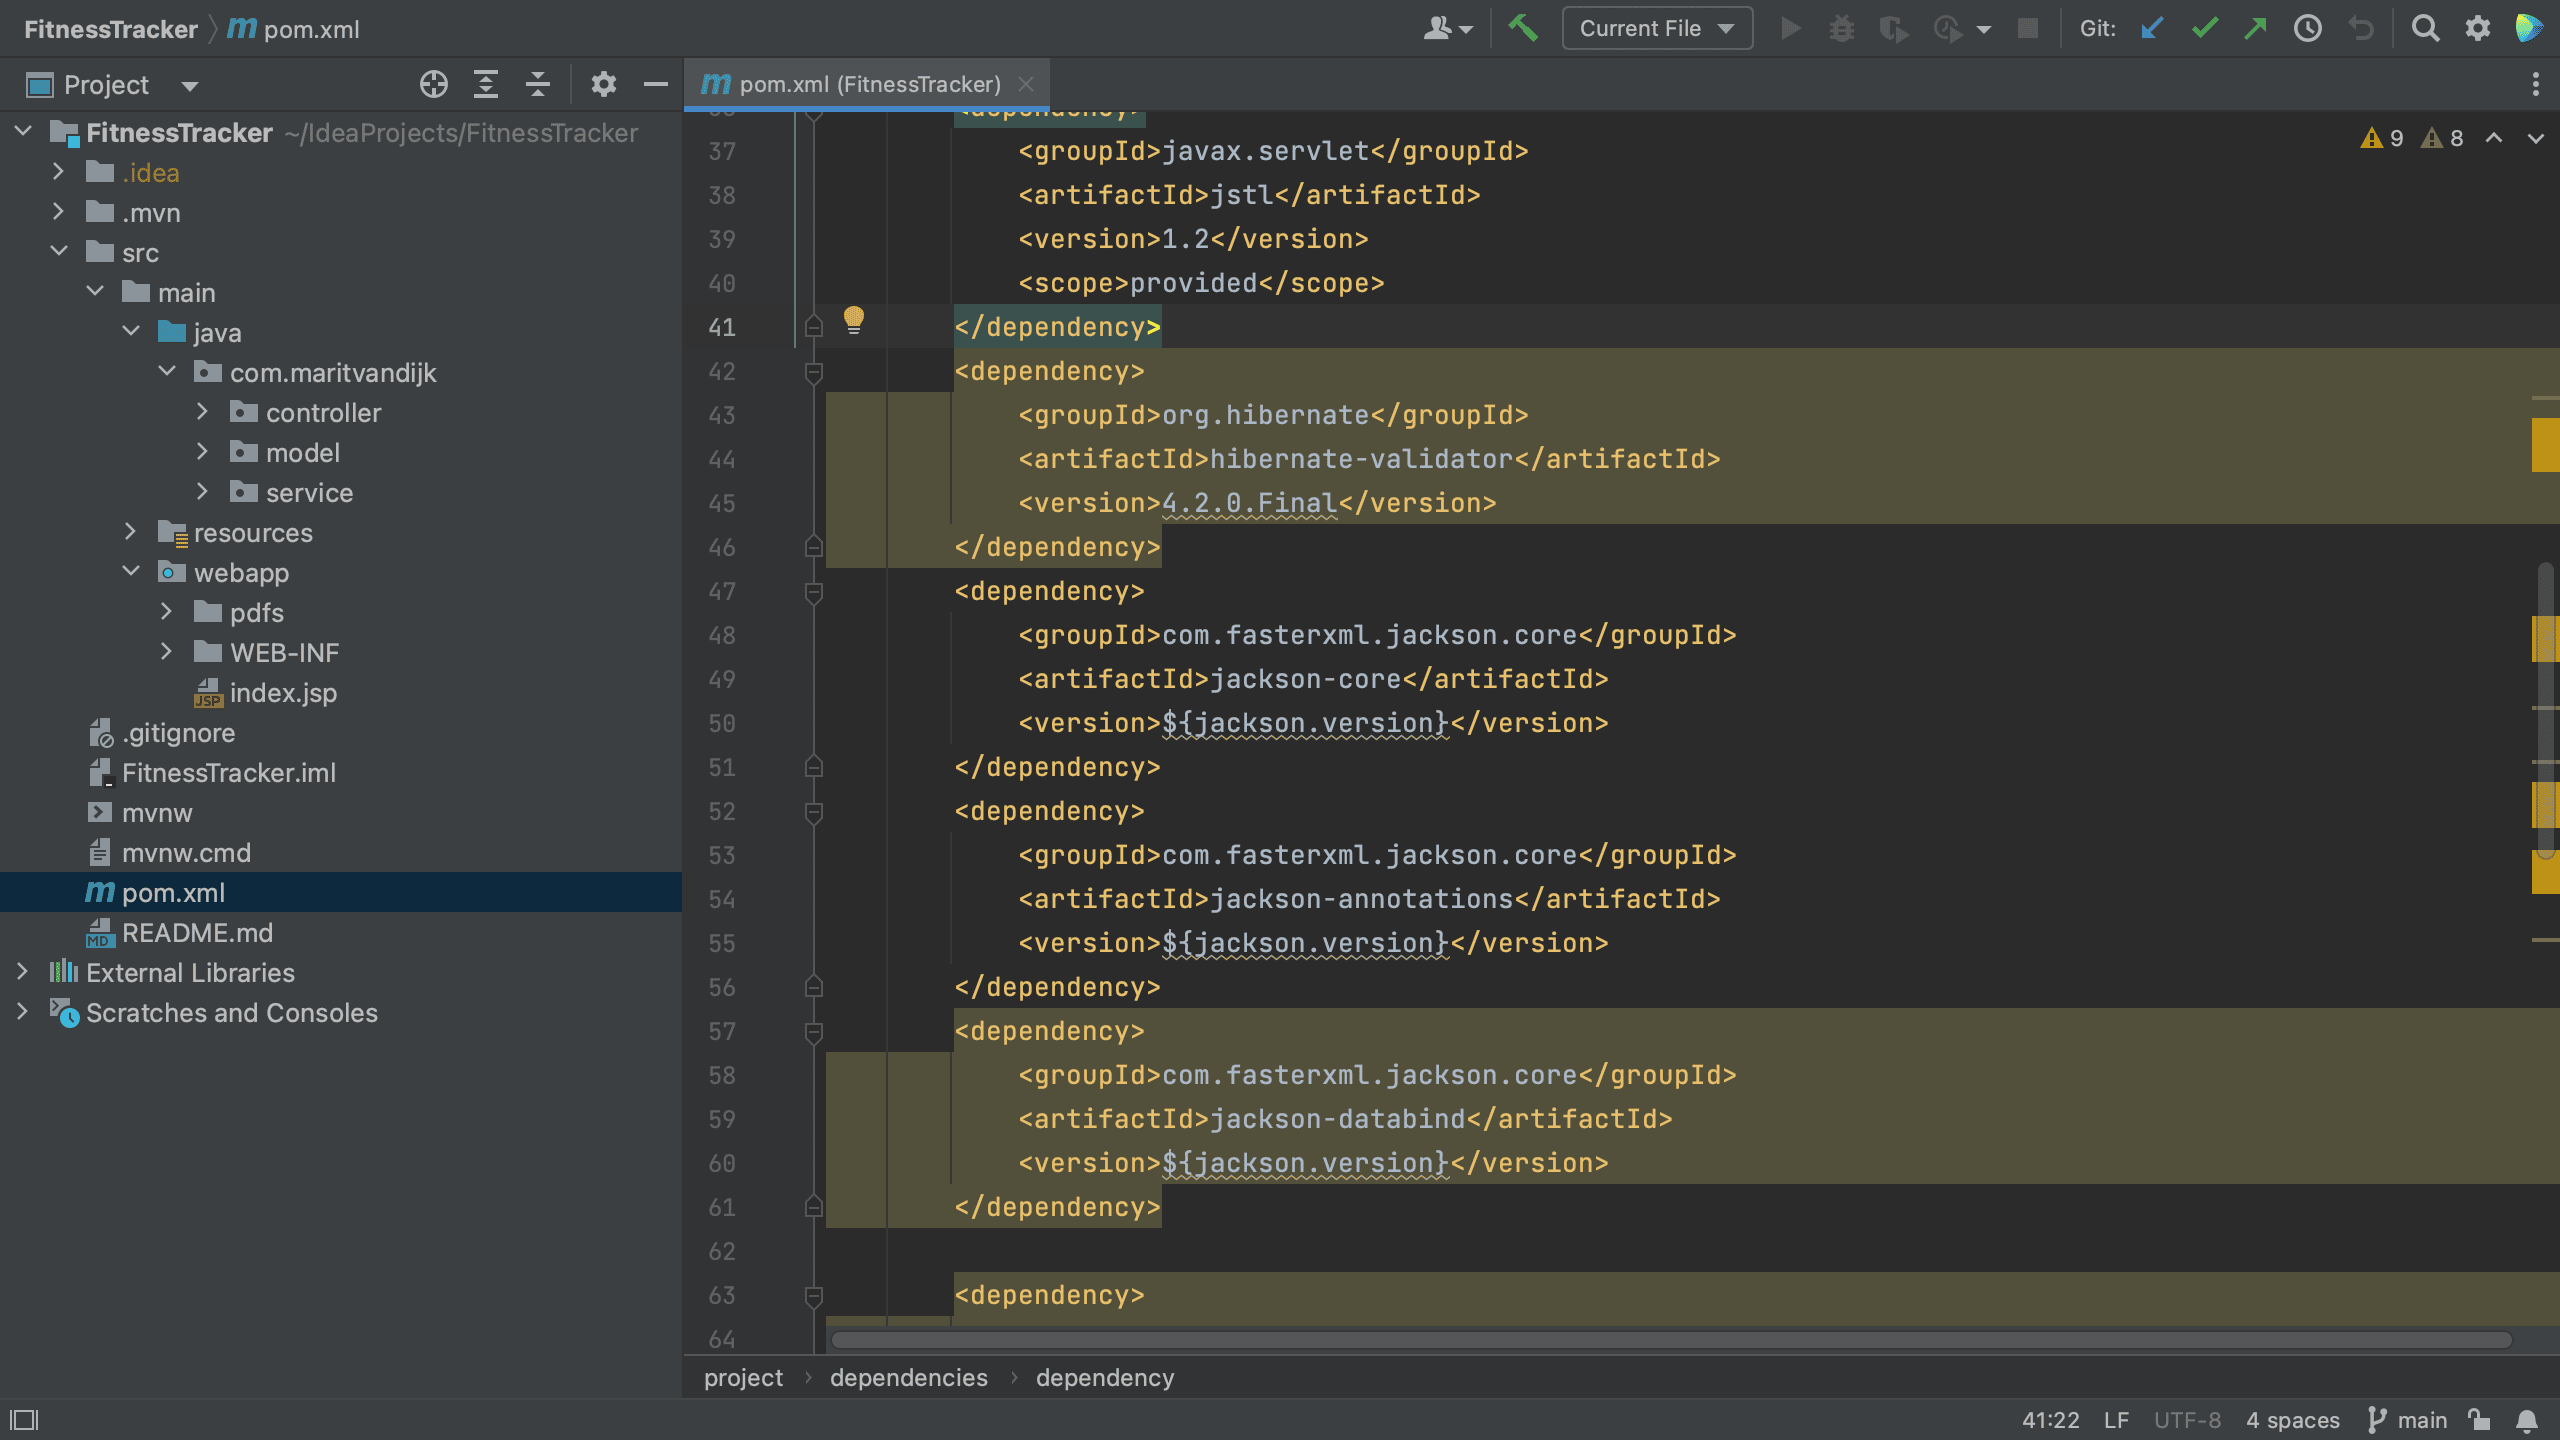
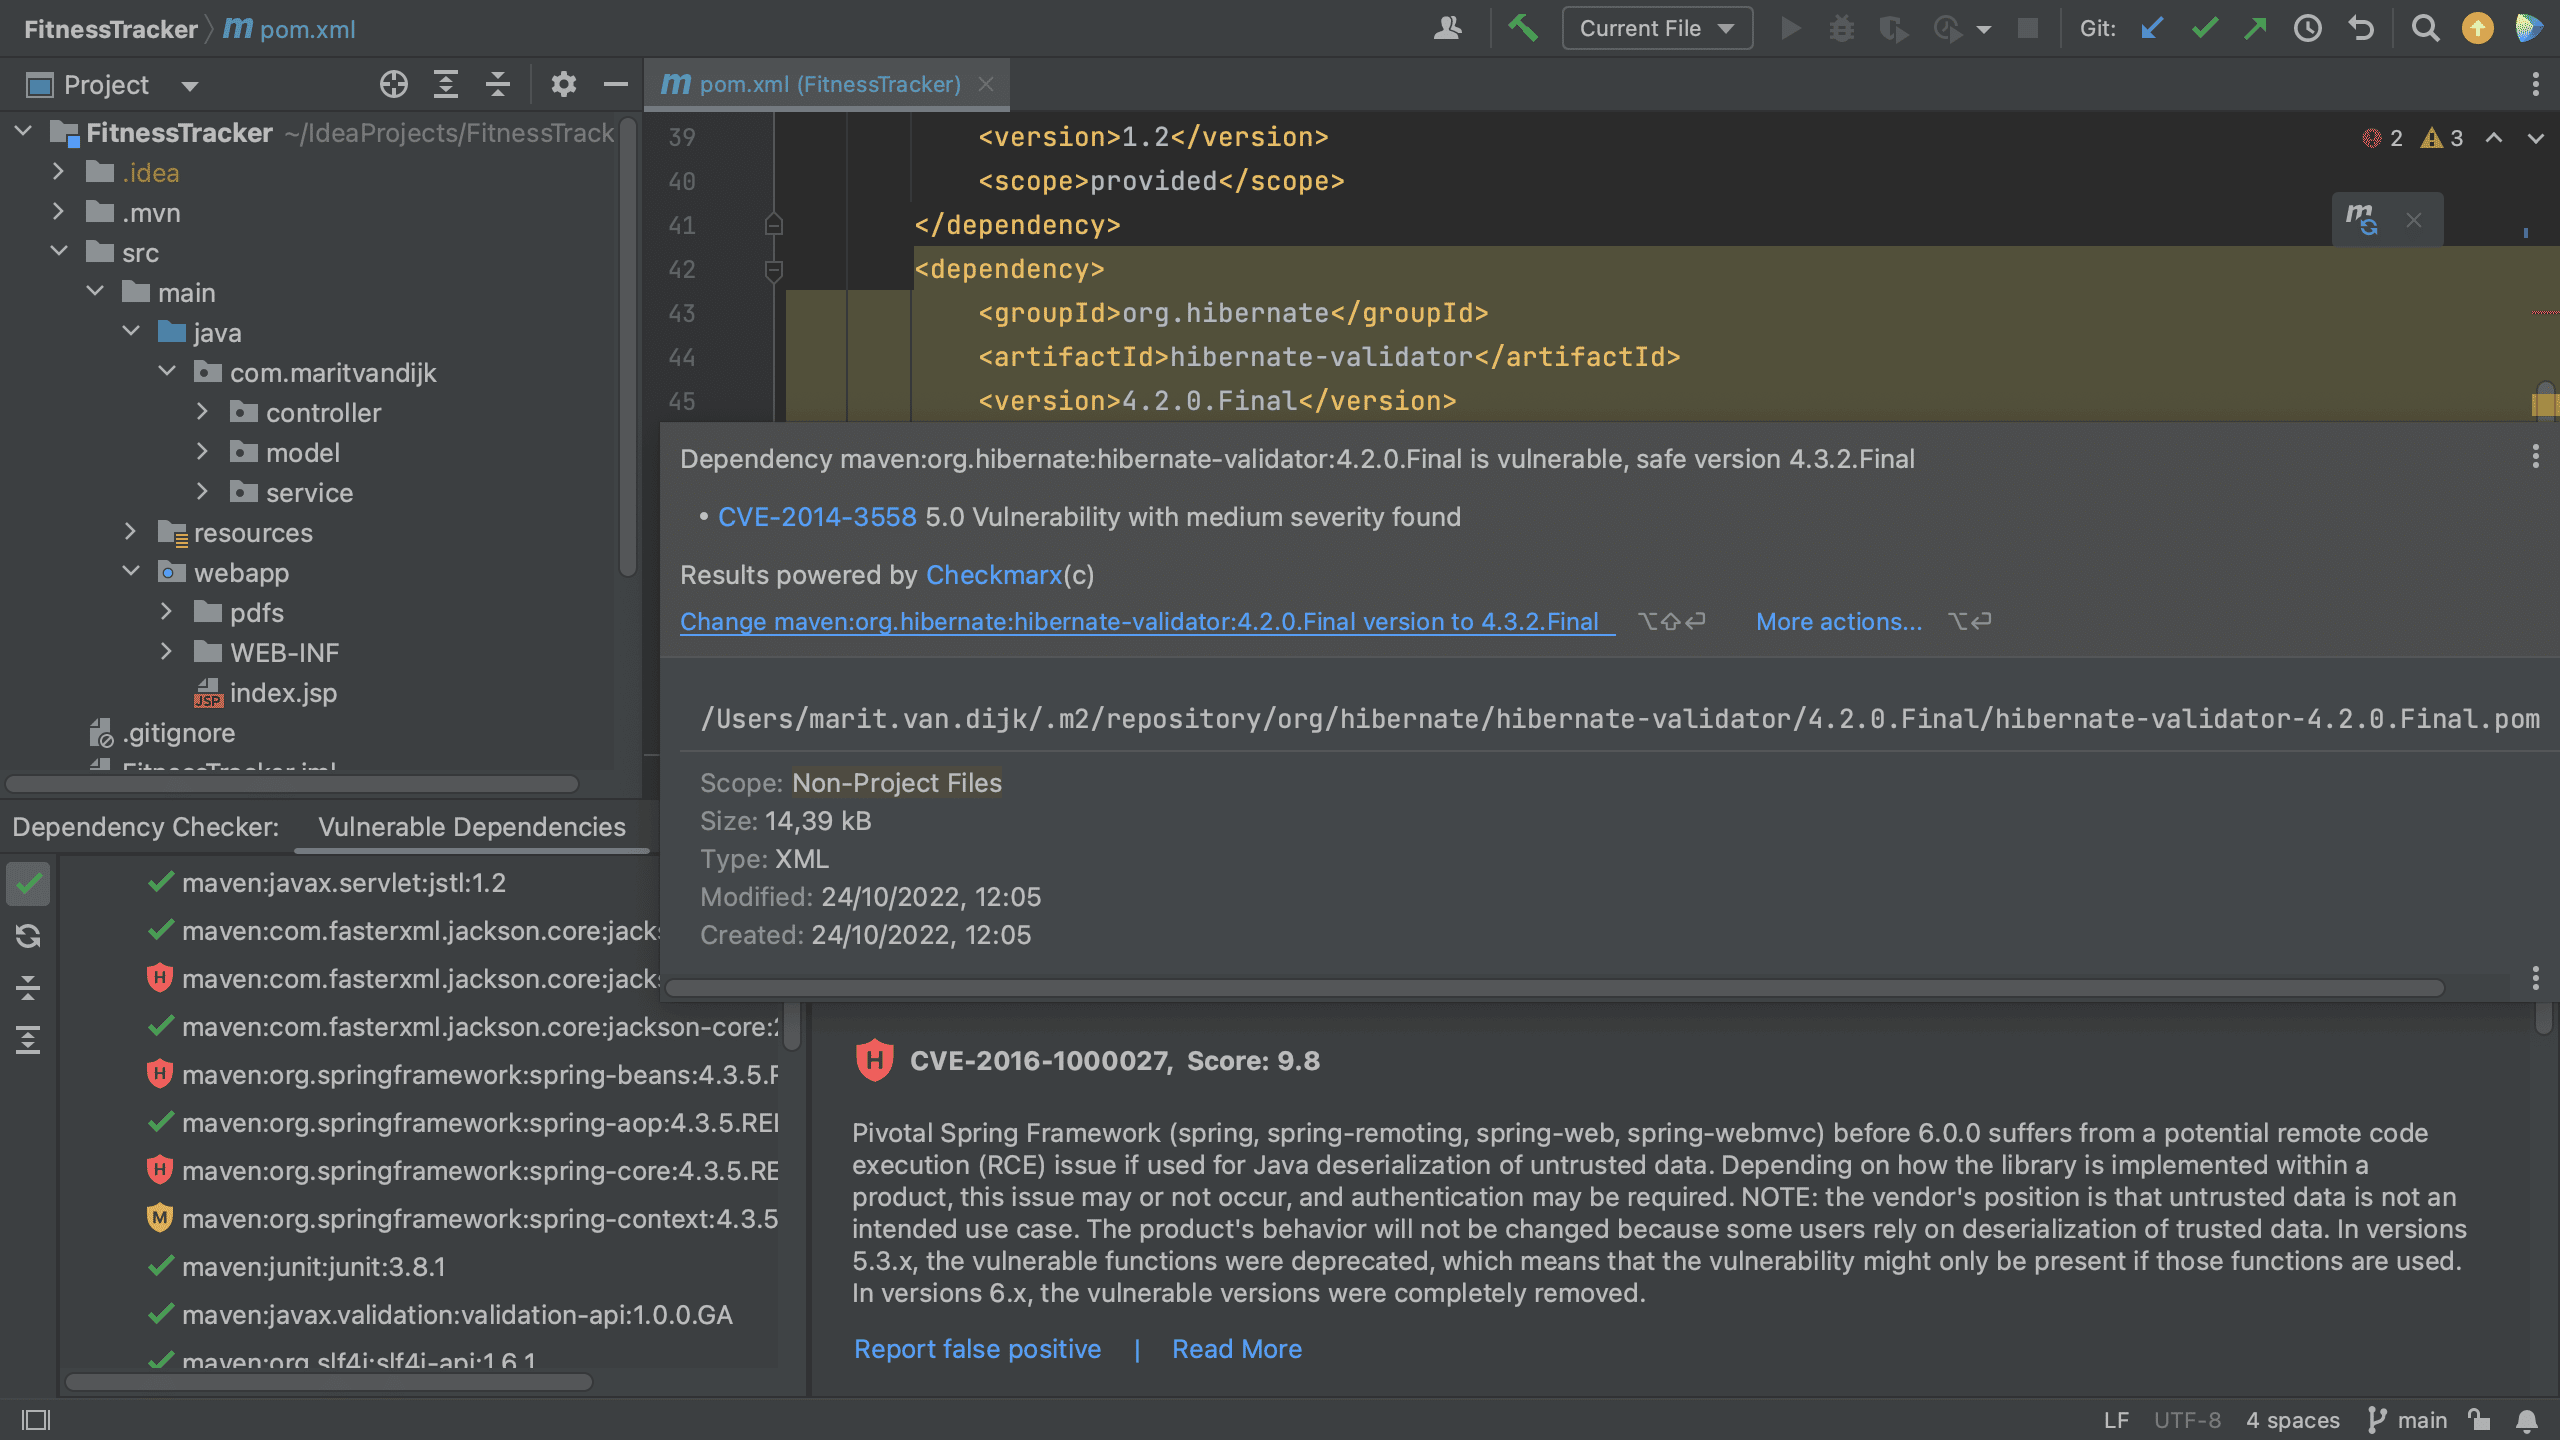
In a Maven project, all of your project’s dependencies are declared in the pom.xml. When we open the pom.xml file for a project which contains vulnerable dependencies, we see that several dependencies are highlighted.

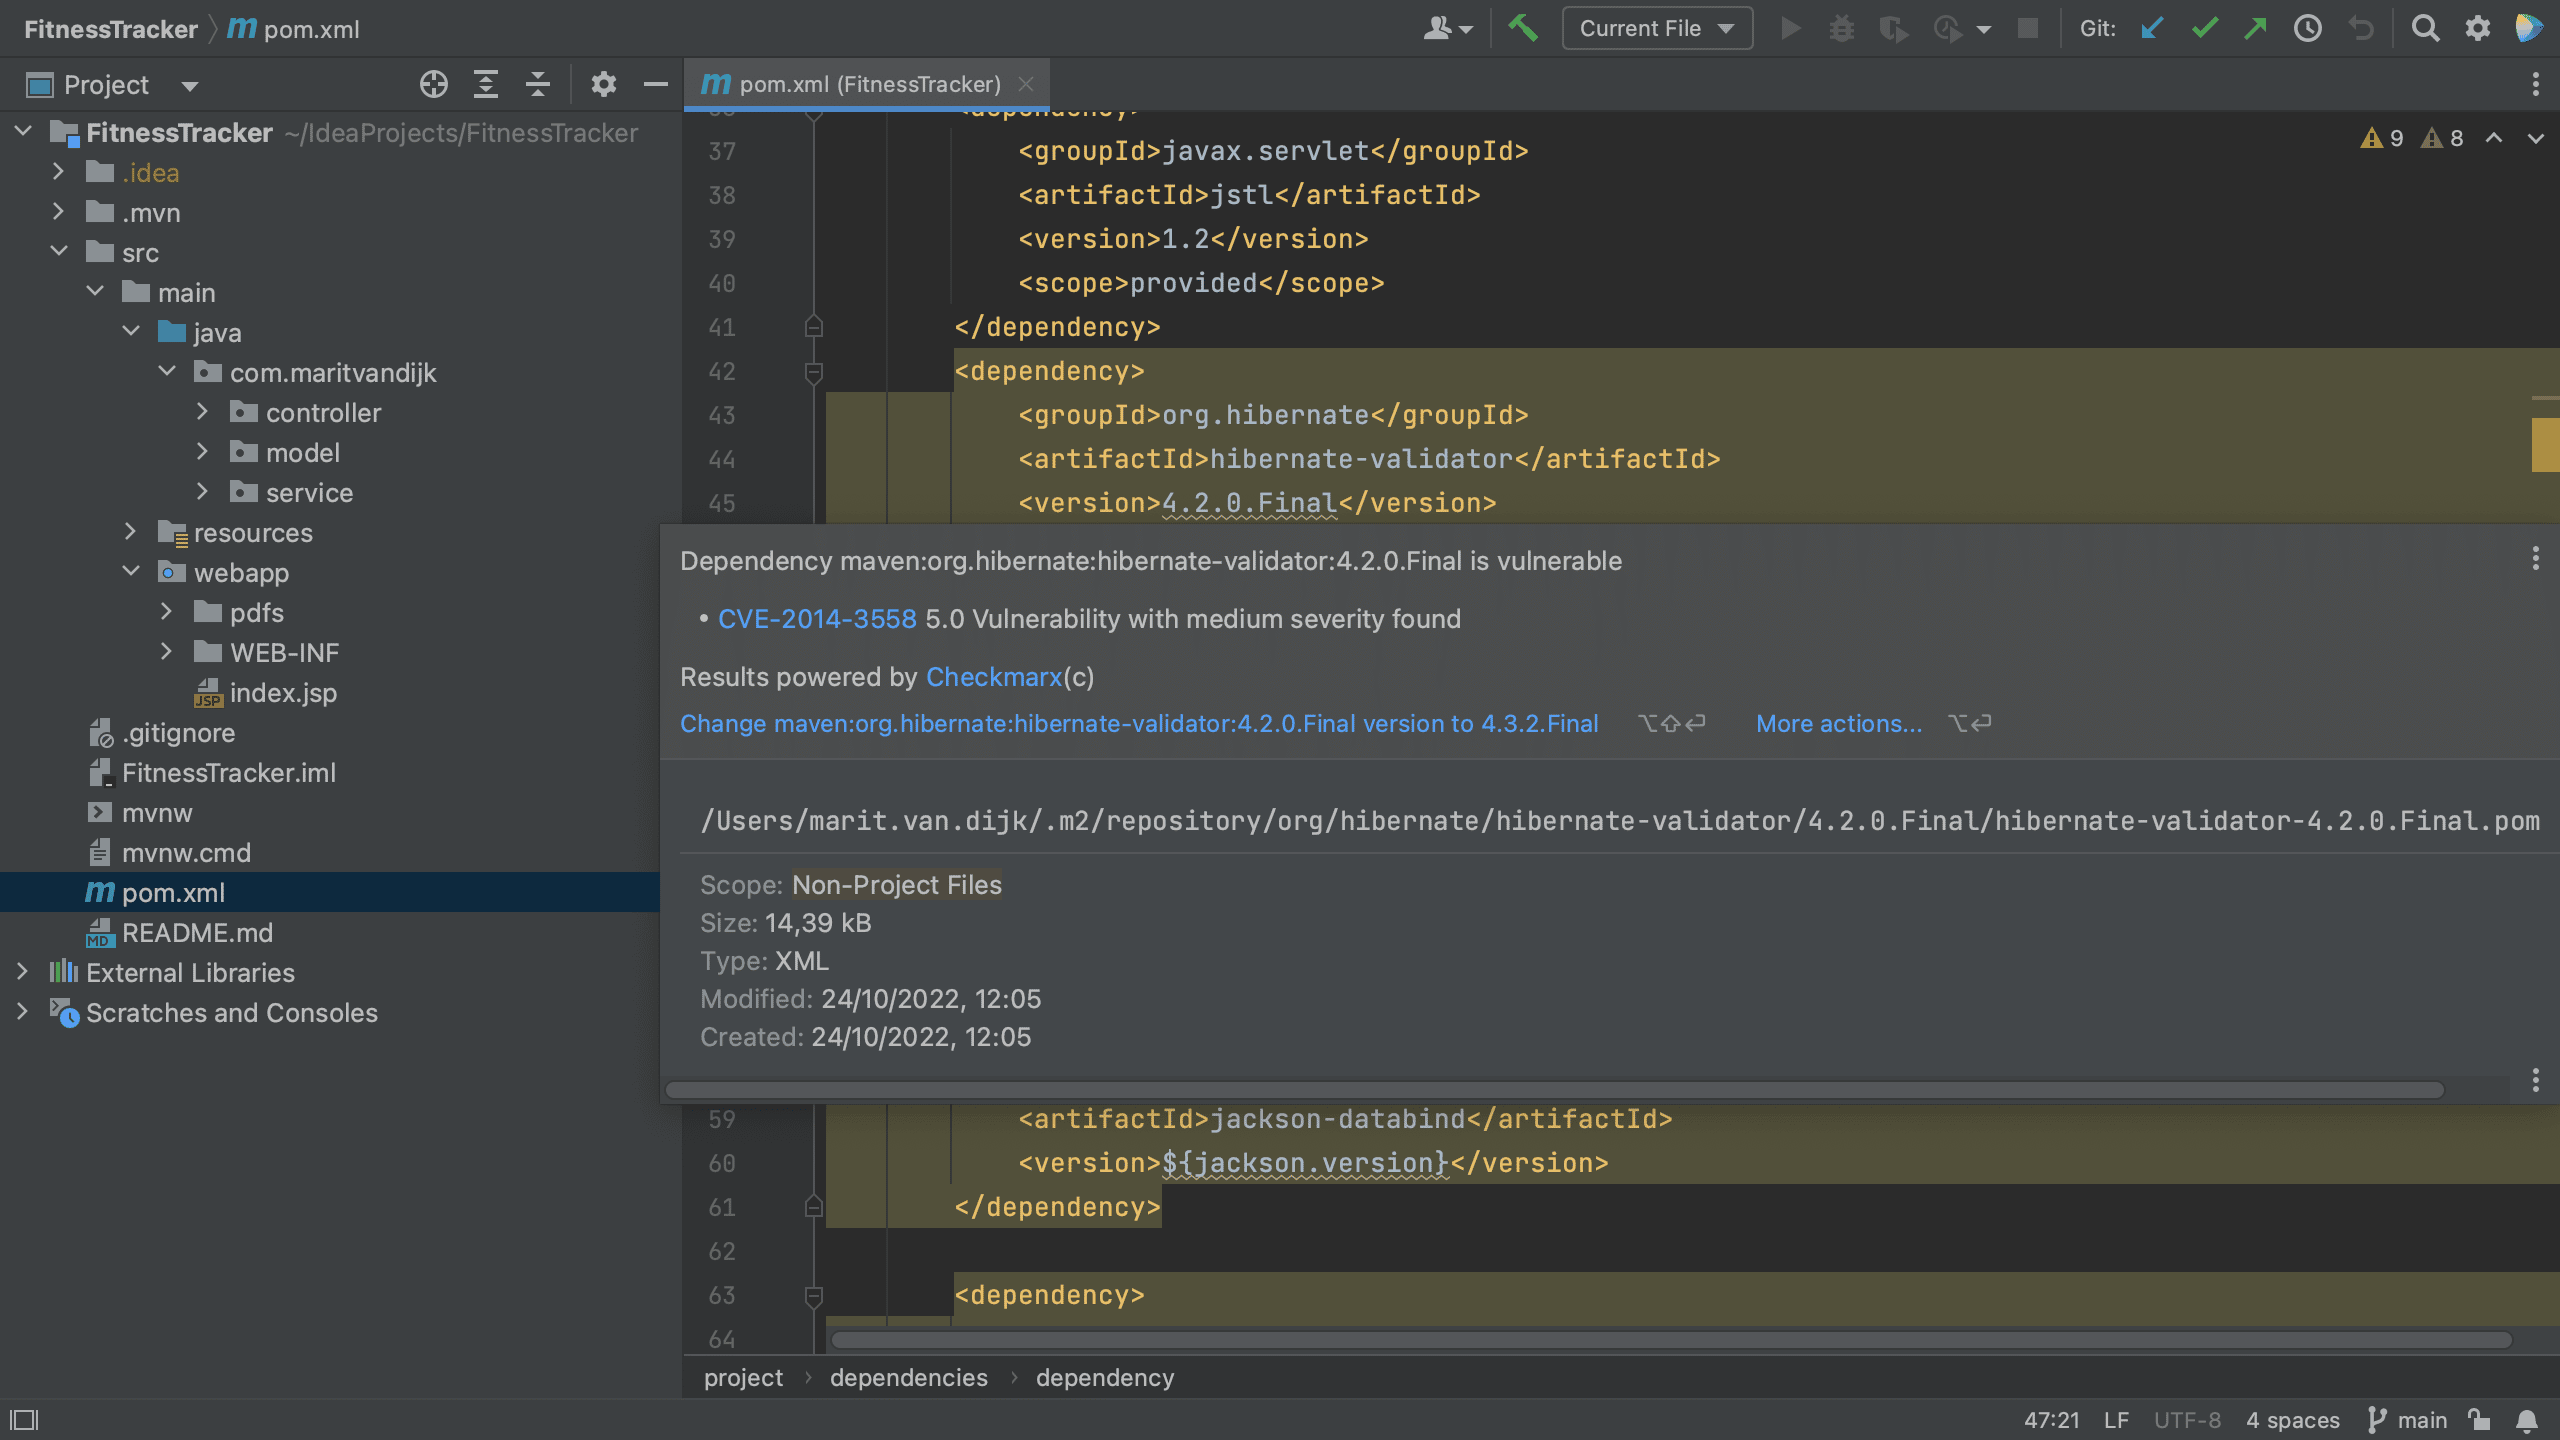
The Package Checker plugin highlights vulnerable dependencies and when we hover over the highlighted dependency, IntelliJ IDEA Ultimate shows all the vulnerabilities that were identified in this particular dependency. When we click on link for the CVE for a particular vulnerability, we’re redirected to the Checkmarx Advisory to learn more about this specific vulnerability.

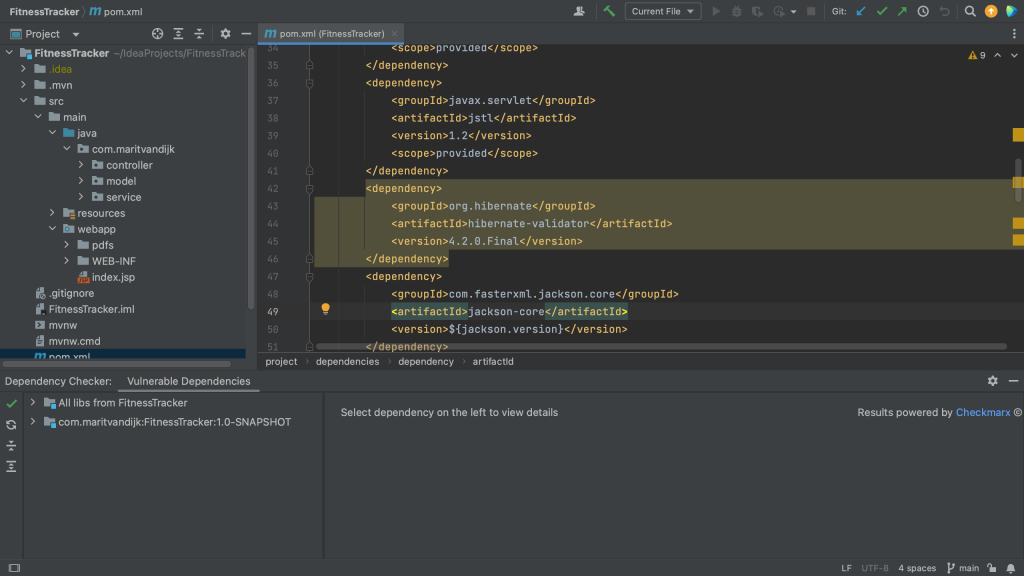
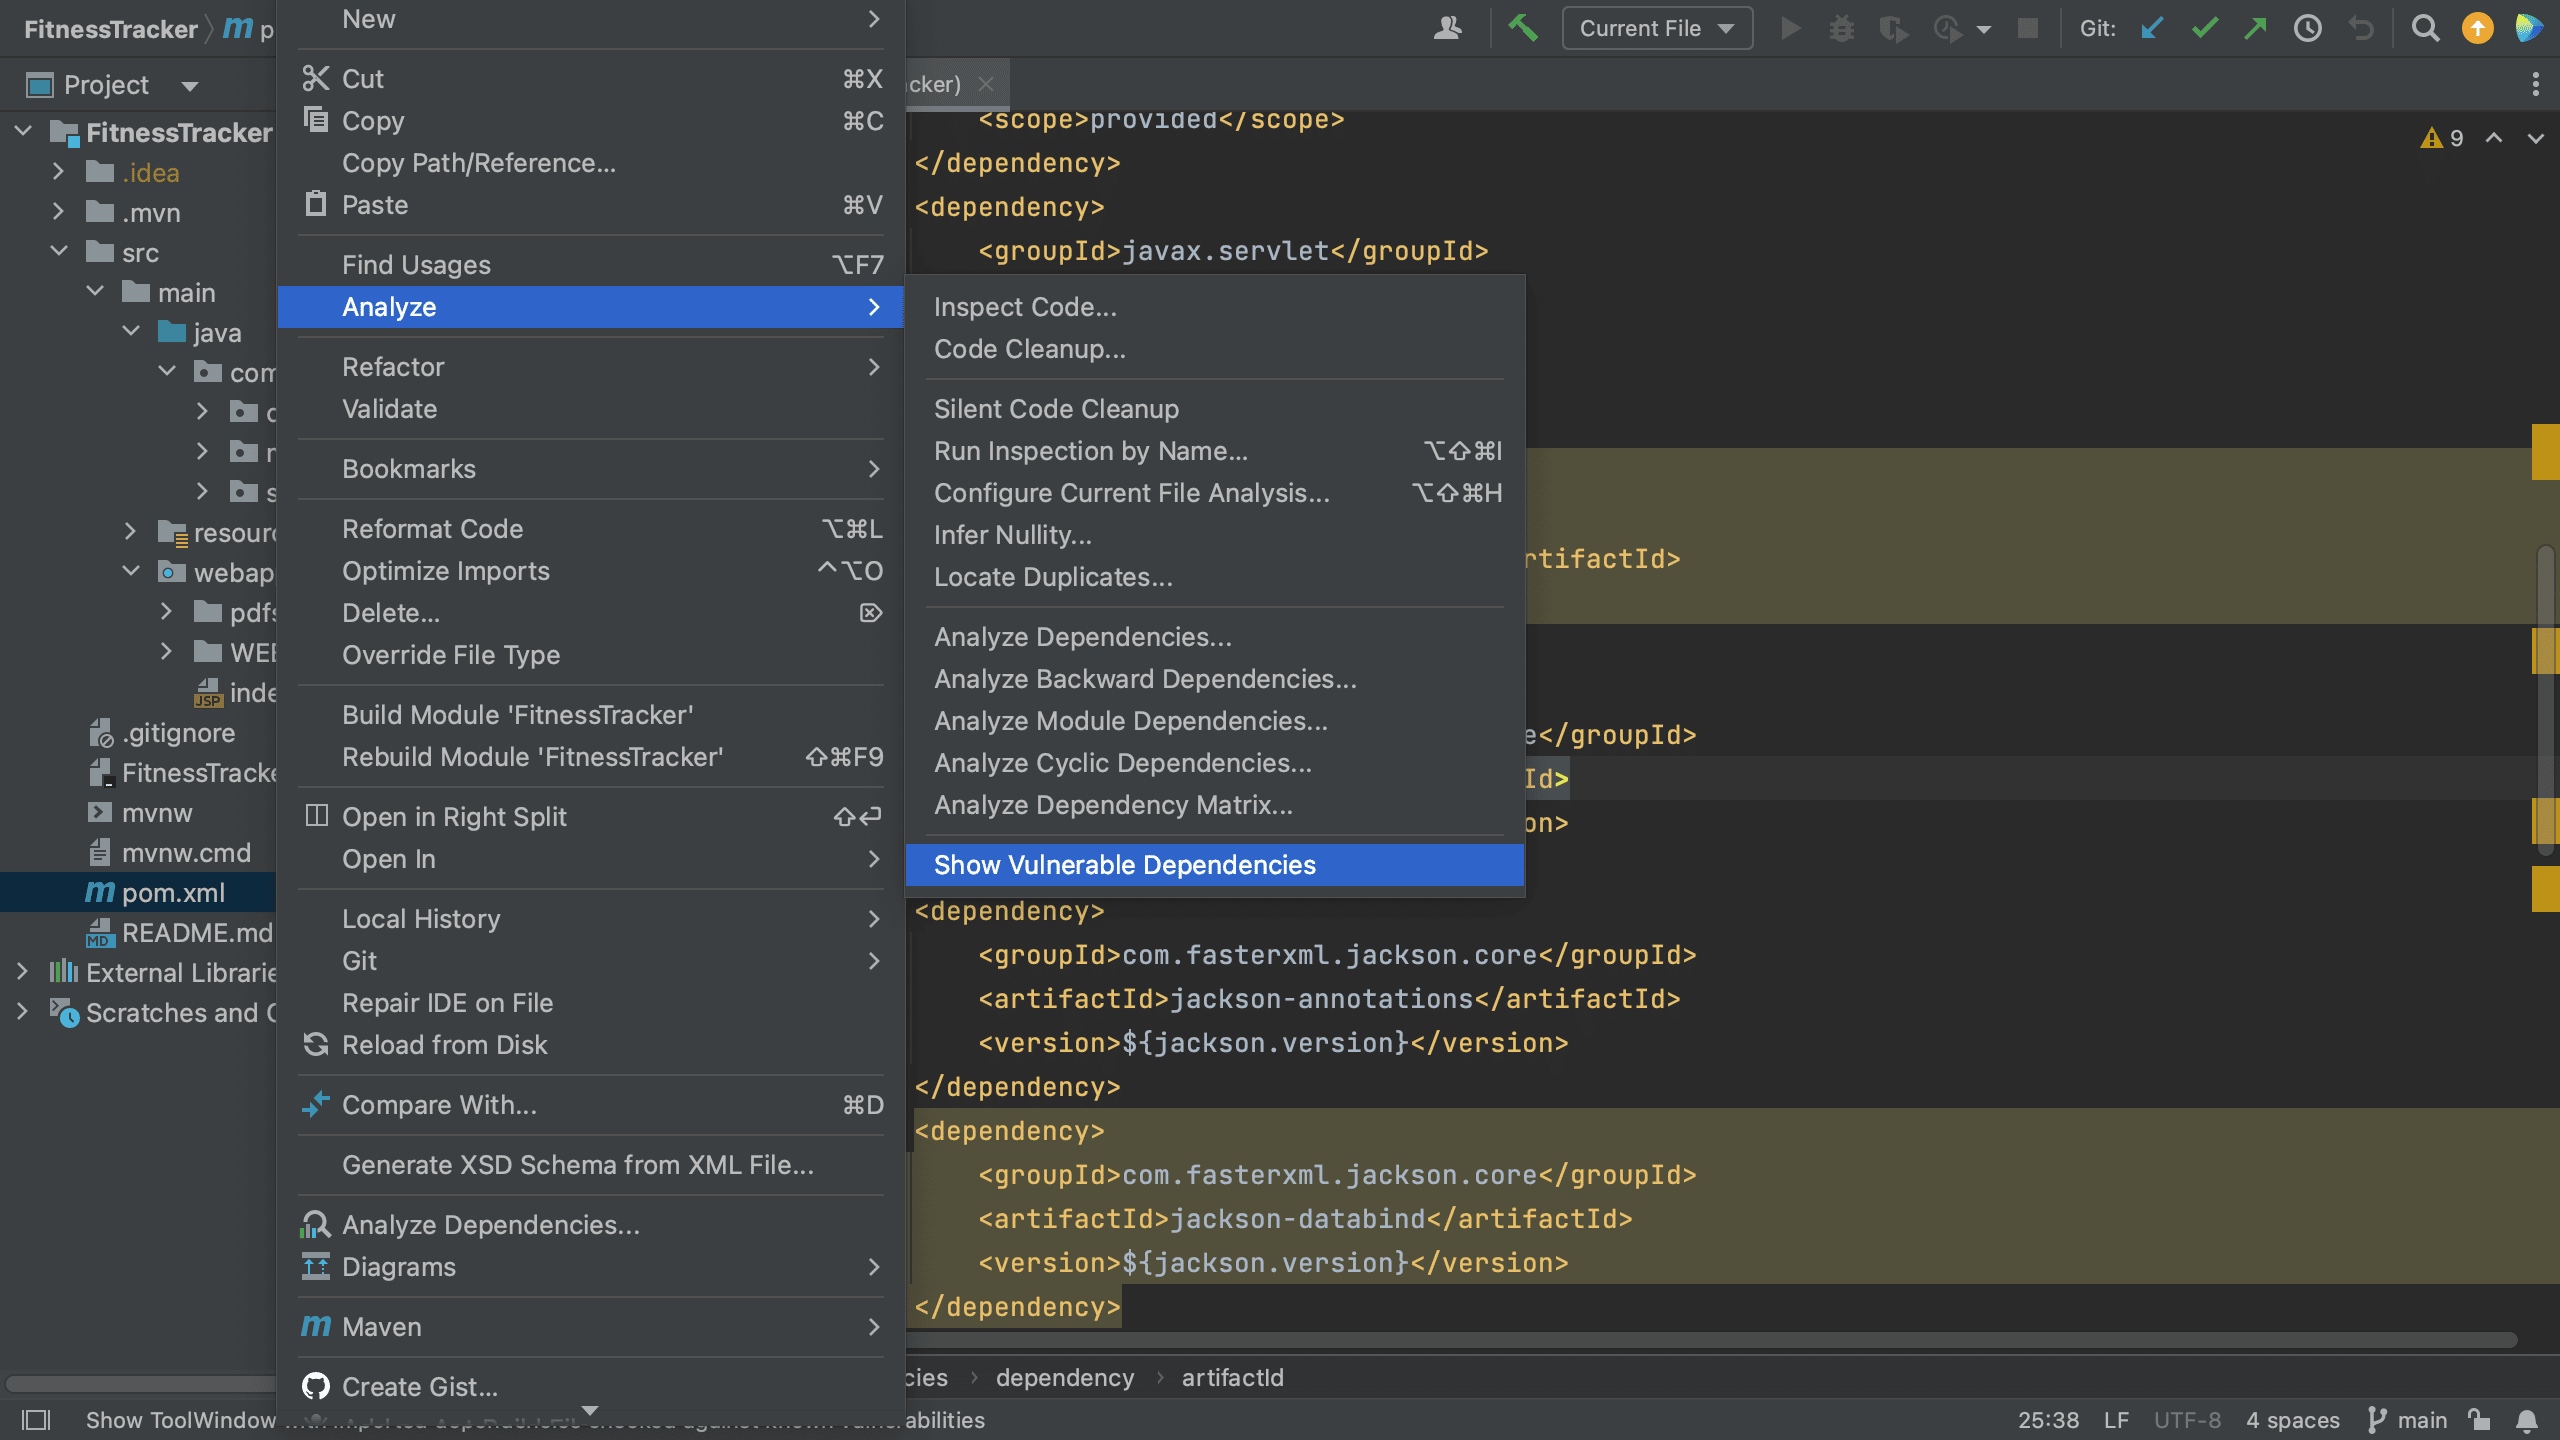
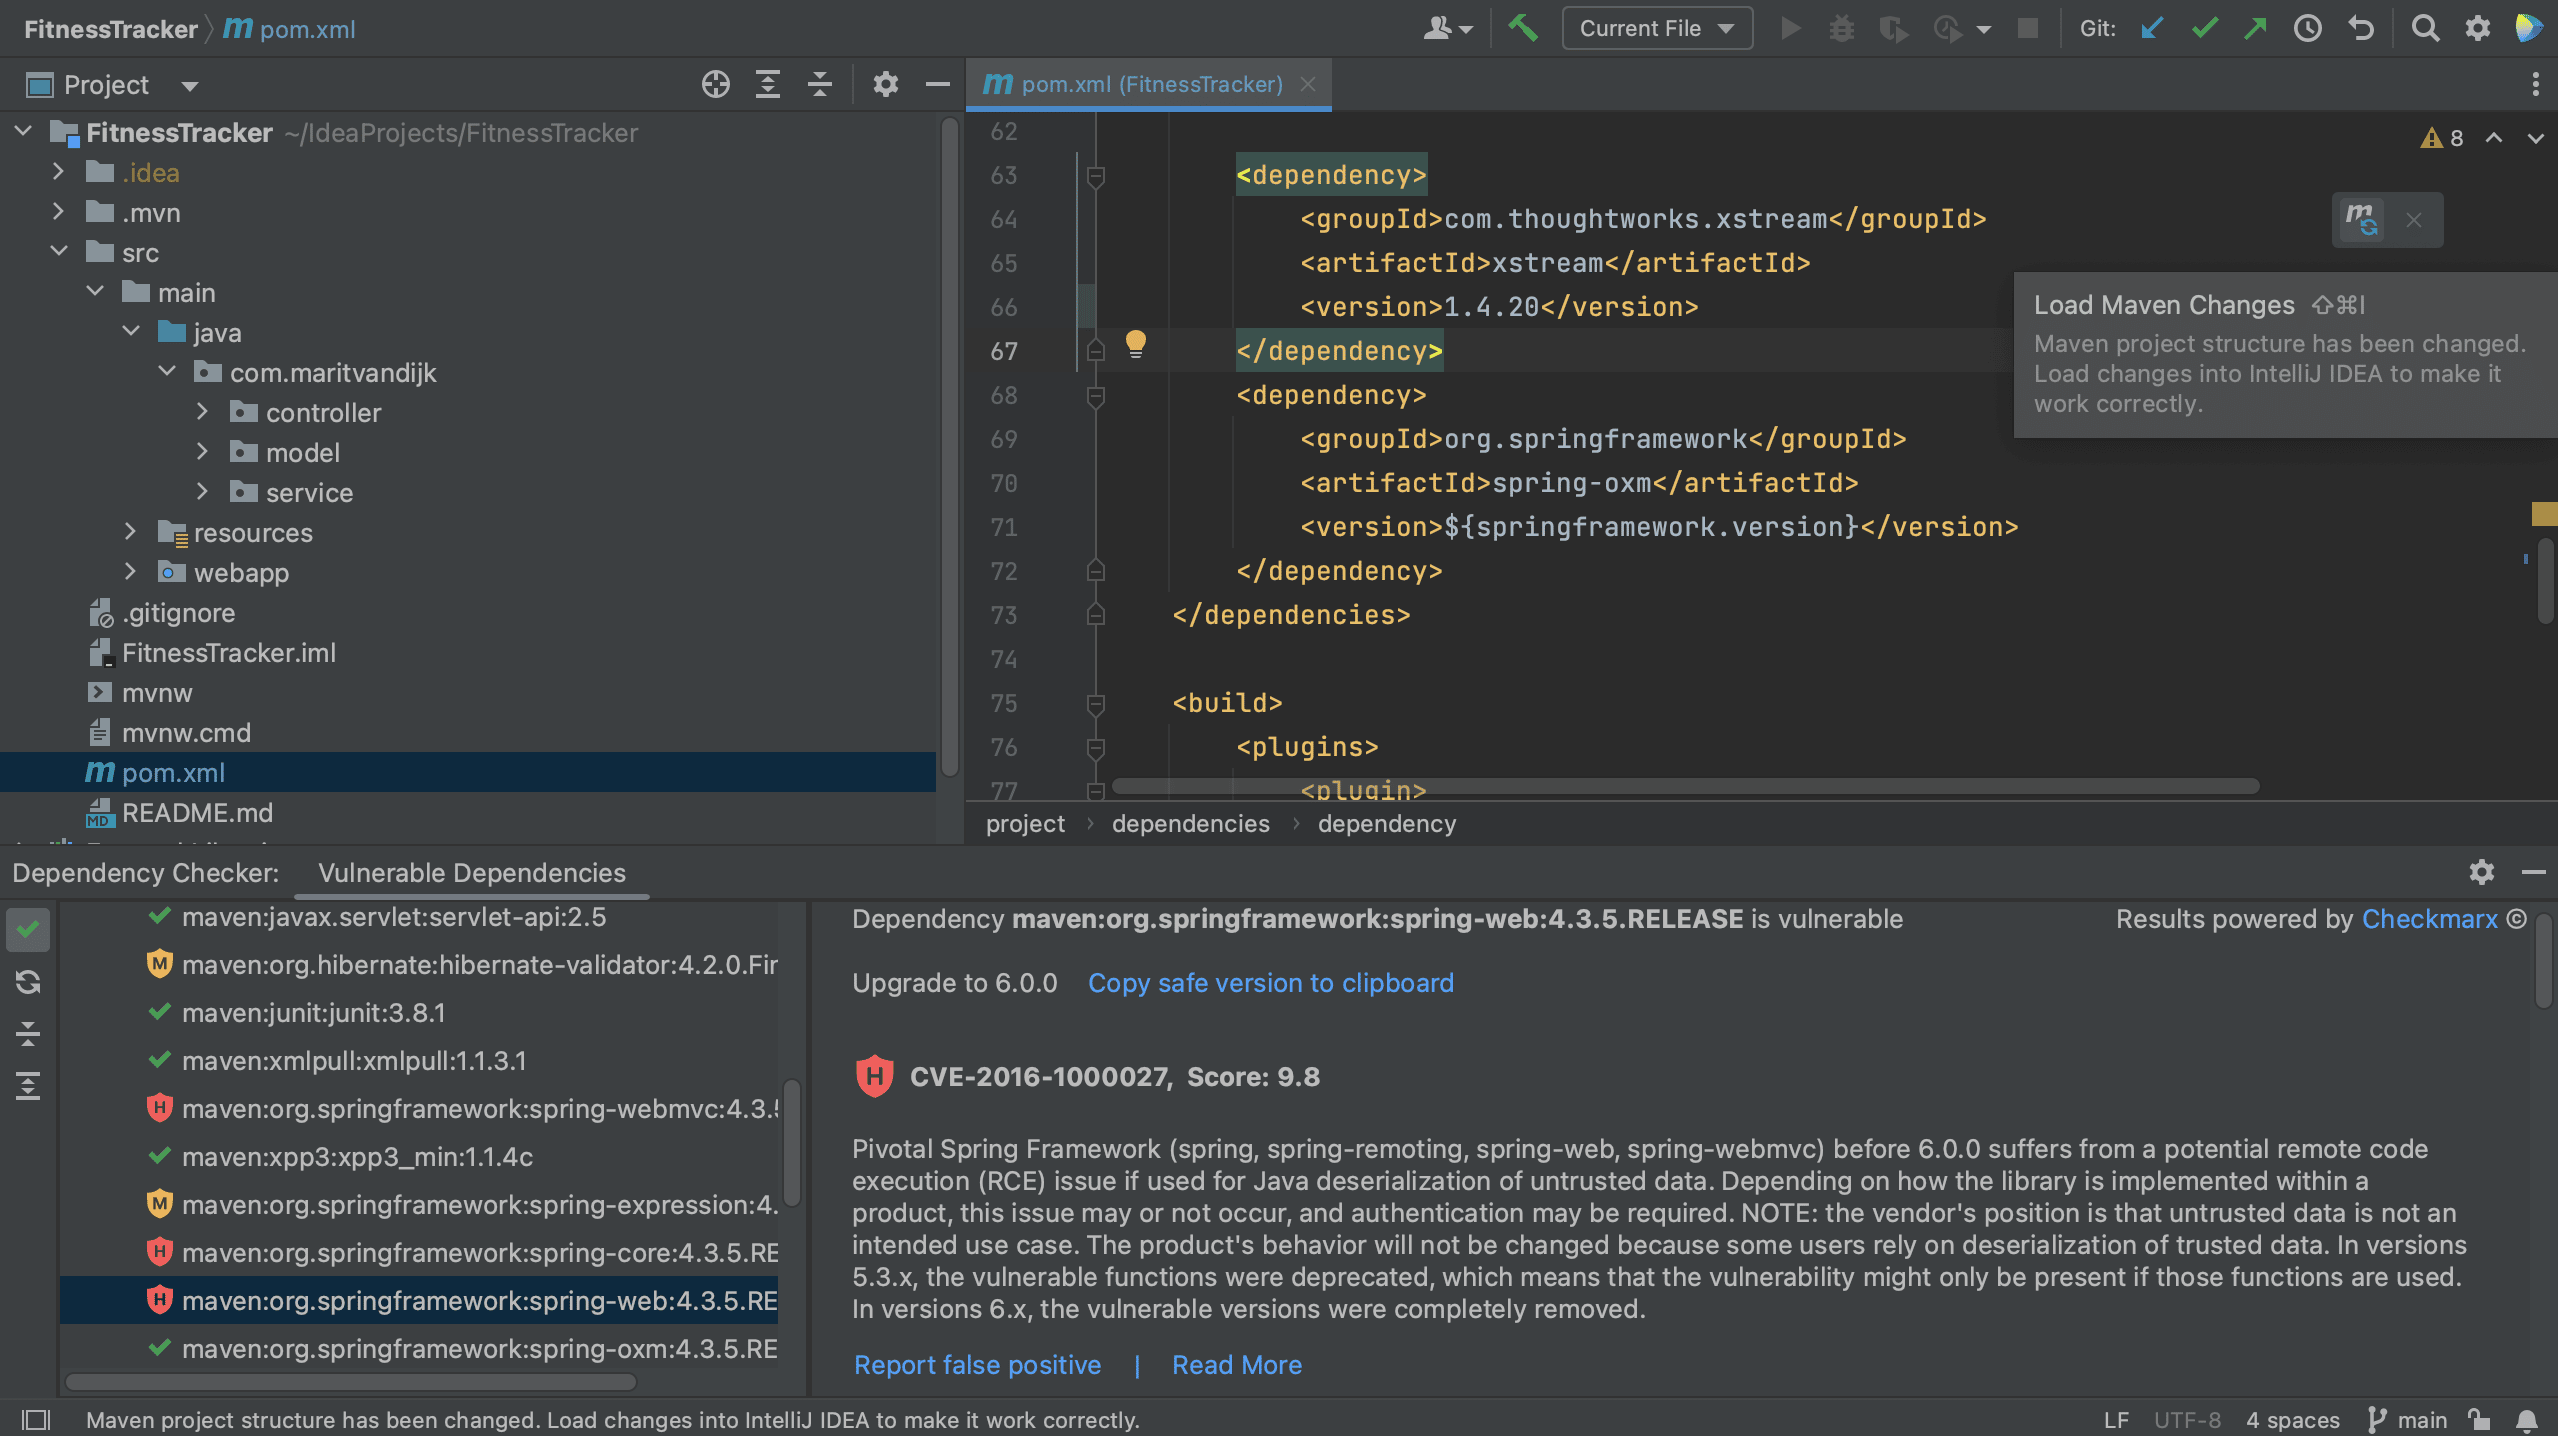
Another way to see all the vulnerable packages is by right-clicking on the pom.xml file and selecting Analyze > Show Vulnerable Dependencies. This will open the Vulnerable Dependencies tool window.

View vulnerable dependencies in Gradle projects
In a Gradle project, all of your project’s dependencies are declared in the build.gradle. When we open the build.gradle file for a project which contains vulnerable dependencies, we see that several dependencies are highlighted.
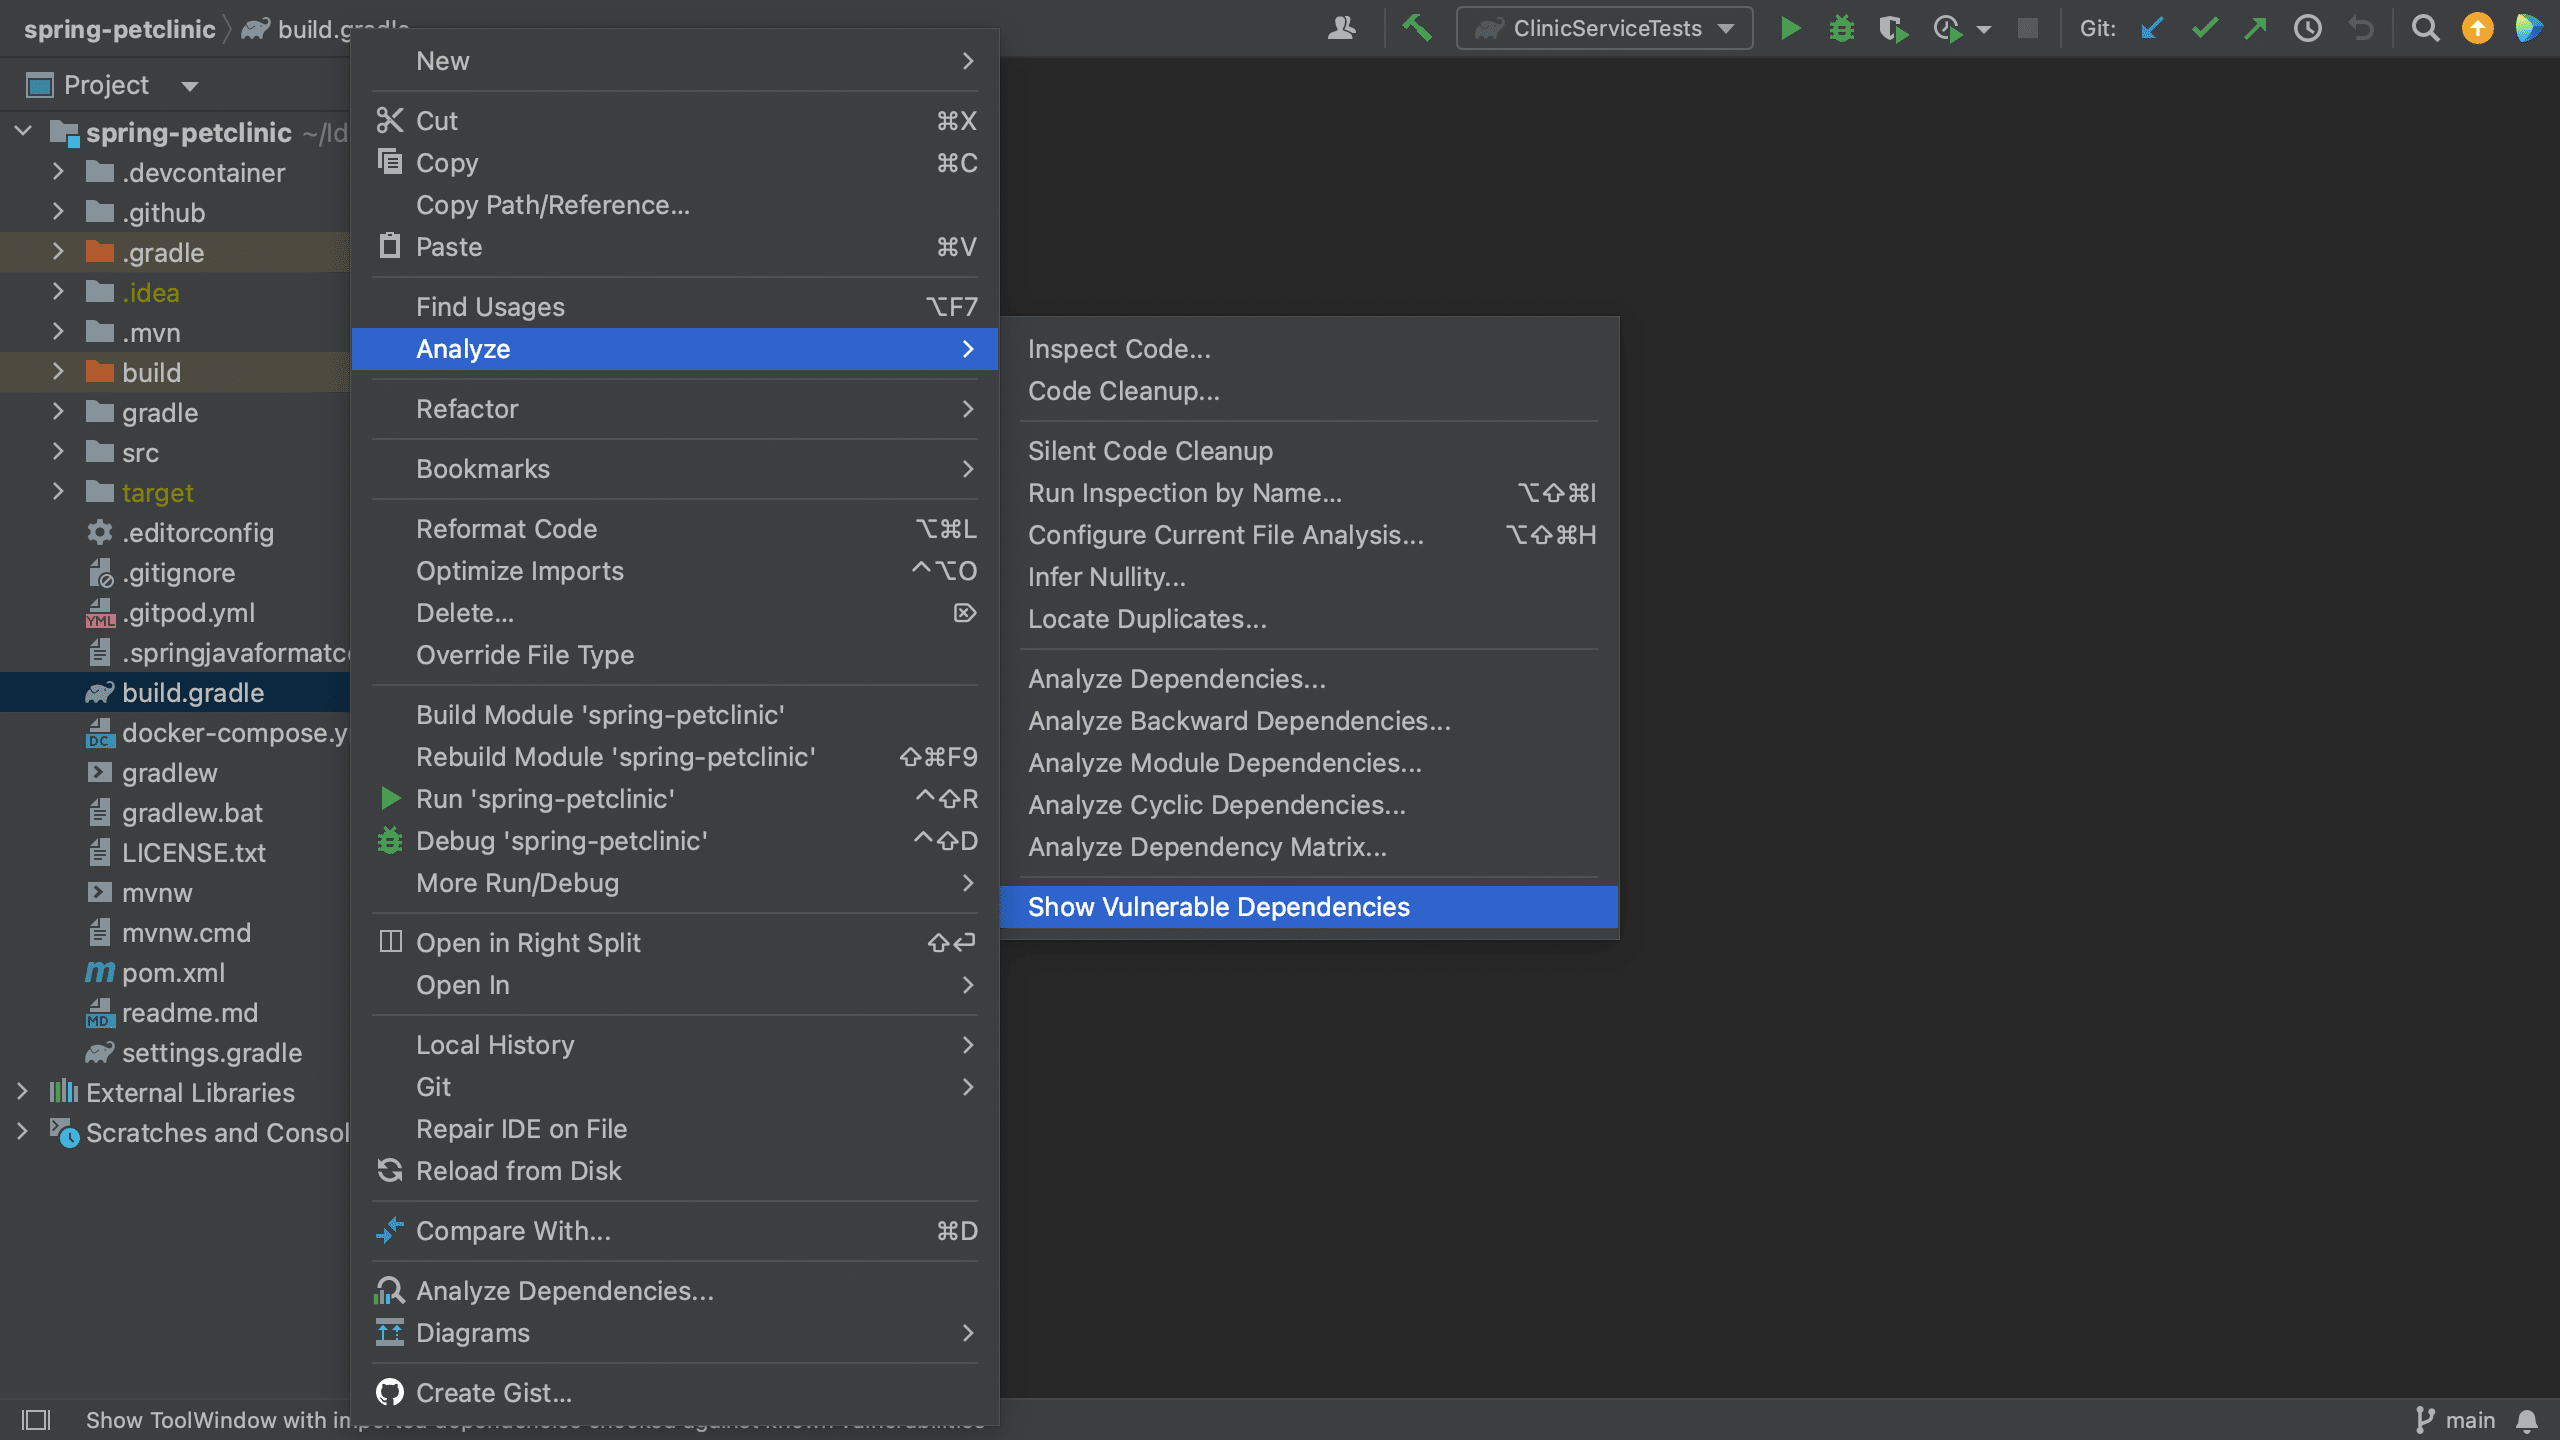
We can open the Vulnerable Dependencies tool window from the build.gradle file. For example, let’s have a look at the Spring PetClinic, which uses Gradle. We can right-click the build.gradle file and go to Analyze > Show Vulnerable Dependencies. This will open the Vulnerable Dependencies tool window.


View vulnerable dependencies in the Vulnerable Dependencies tool window
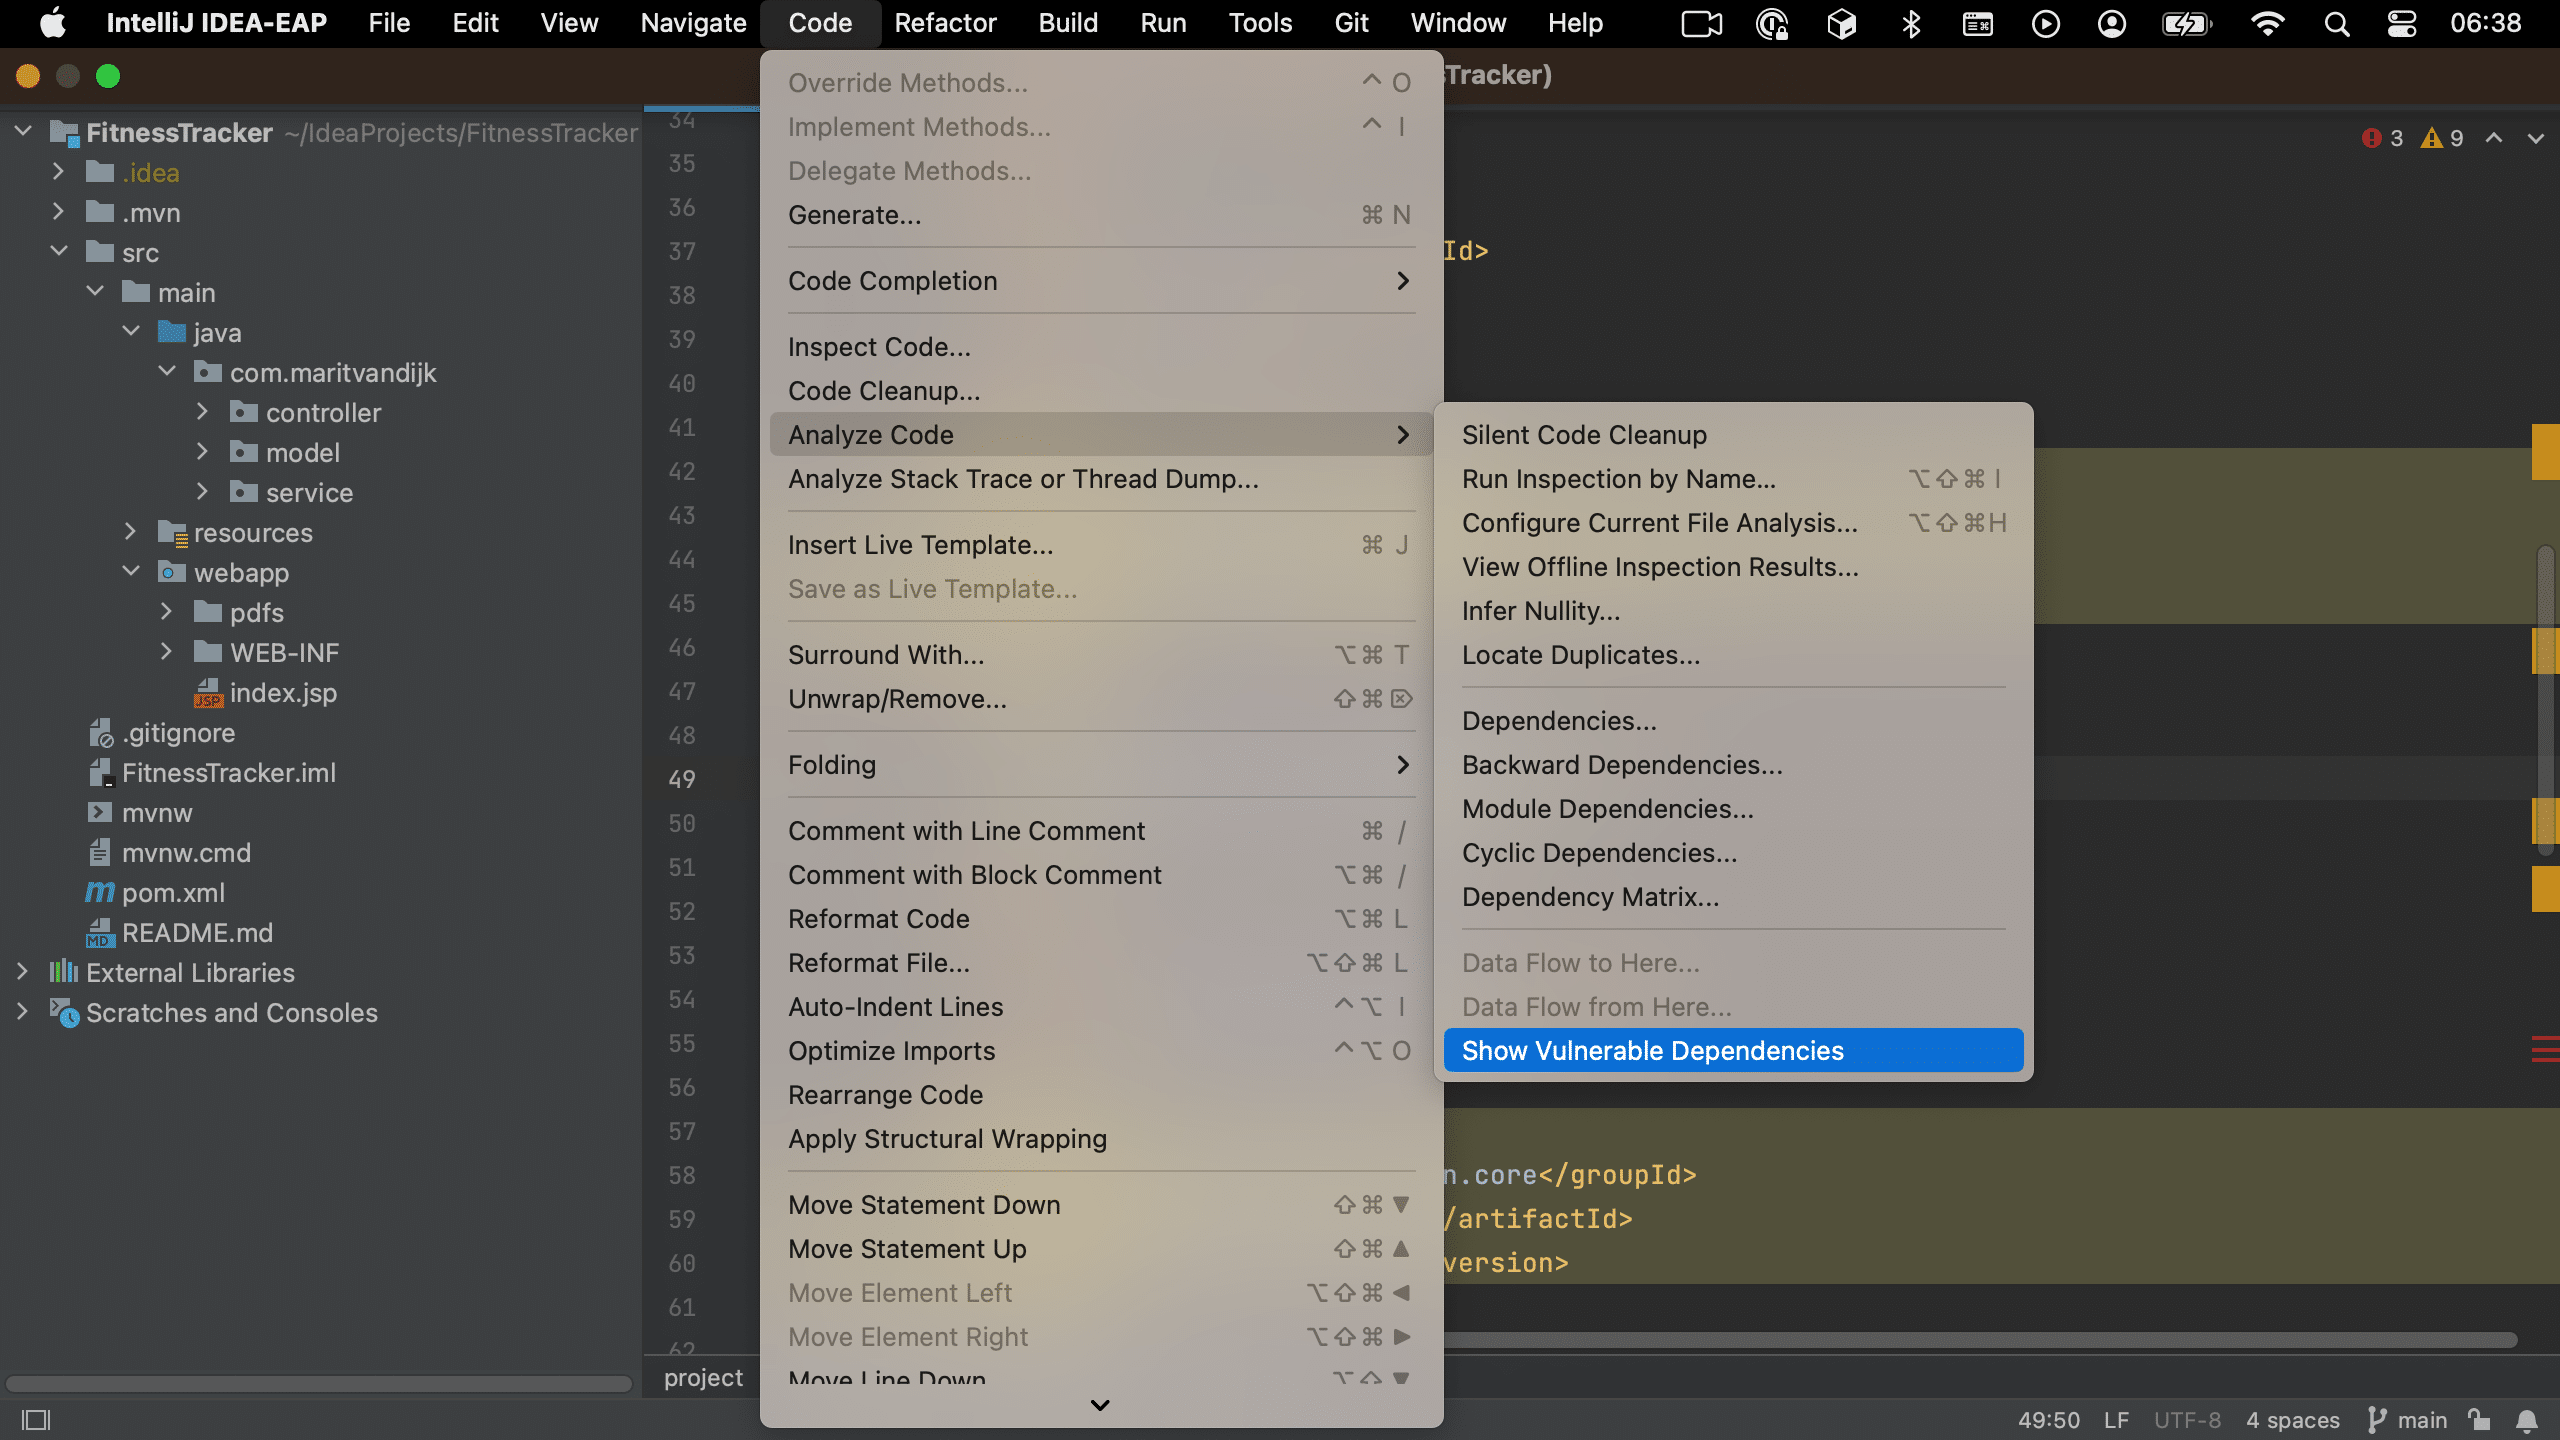
We can also open the Vulnerable Dependencies tool window without having to open the files where our dependencies are declared. To open the Vulnerable Dependencies tool window straight from the main menu, go to Code > Analyze Code > Show Vulnerable Dependencies.

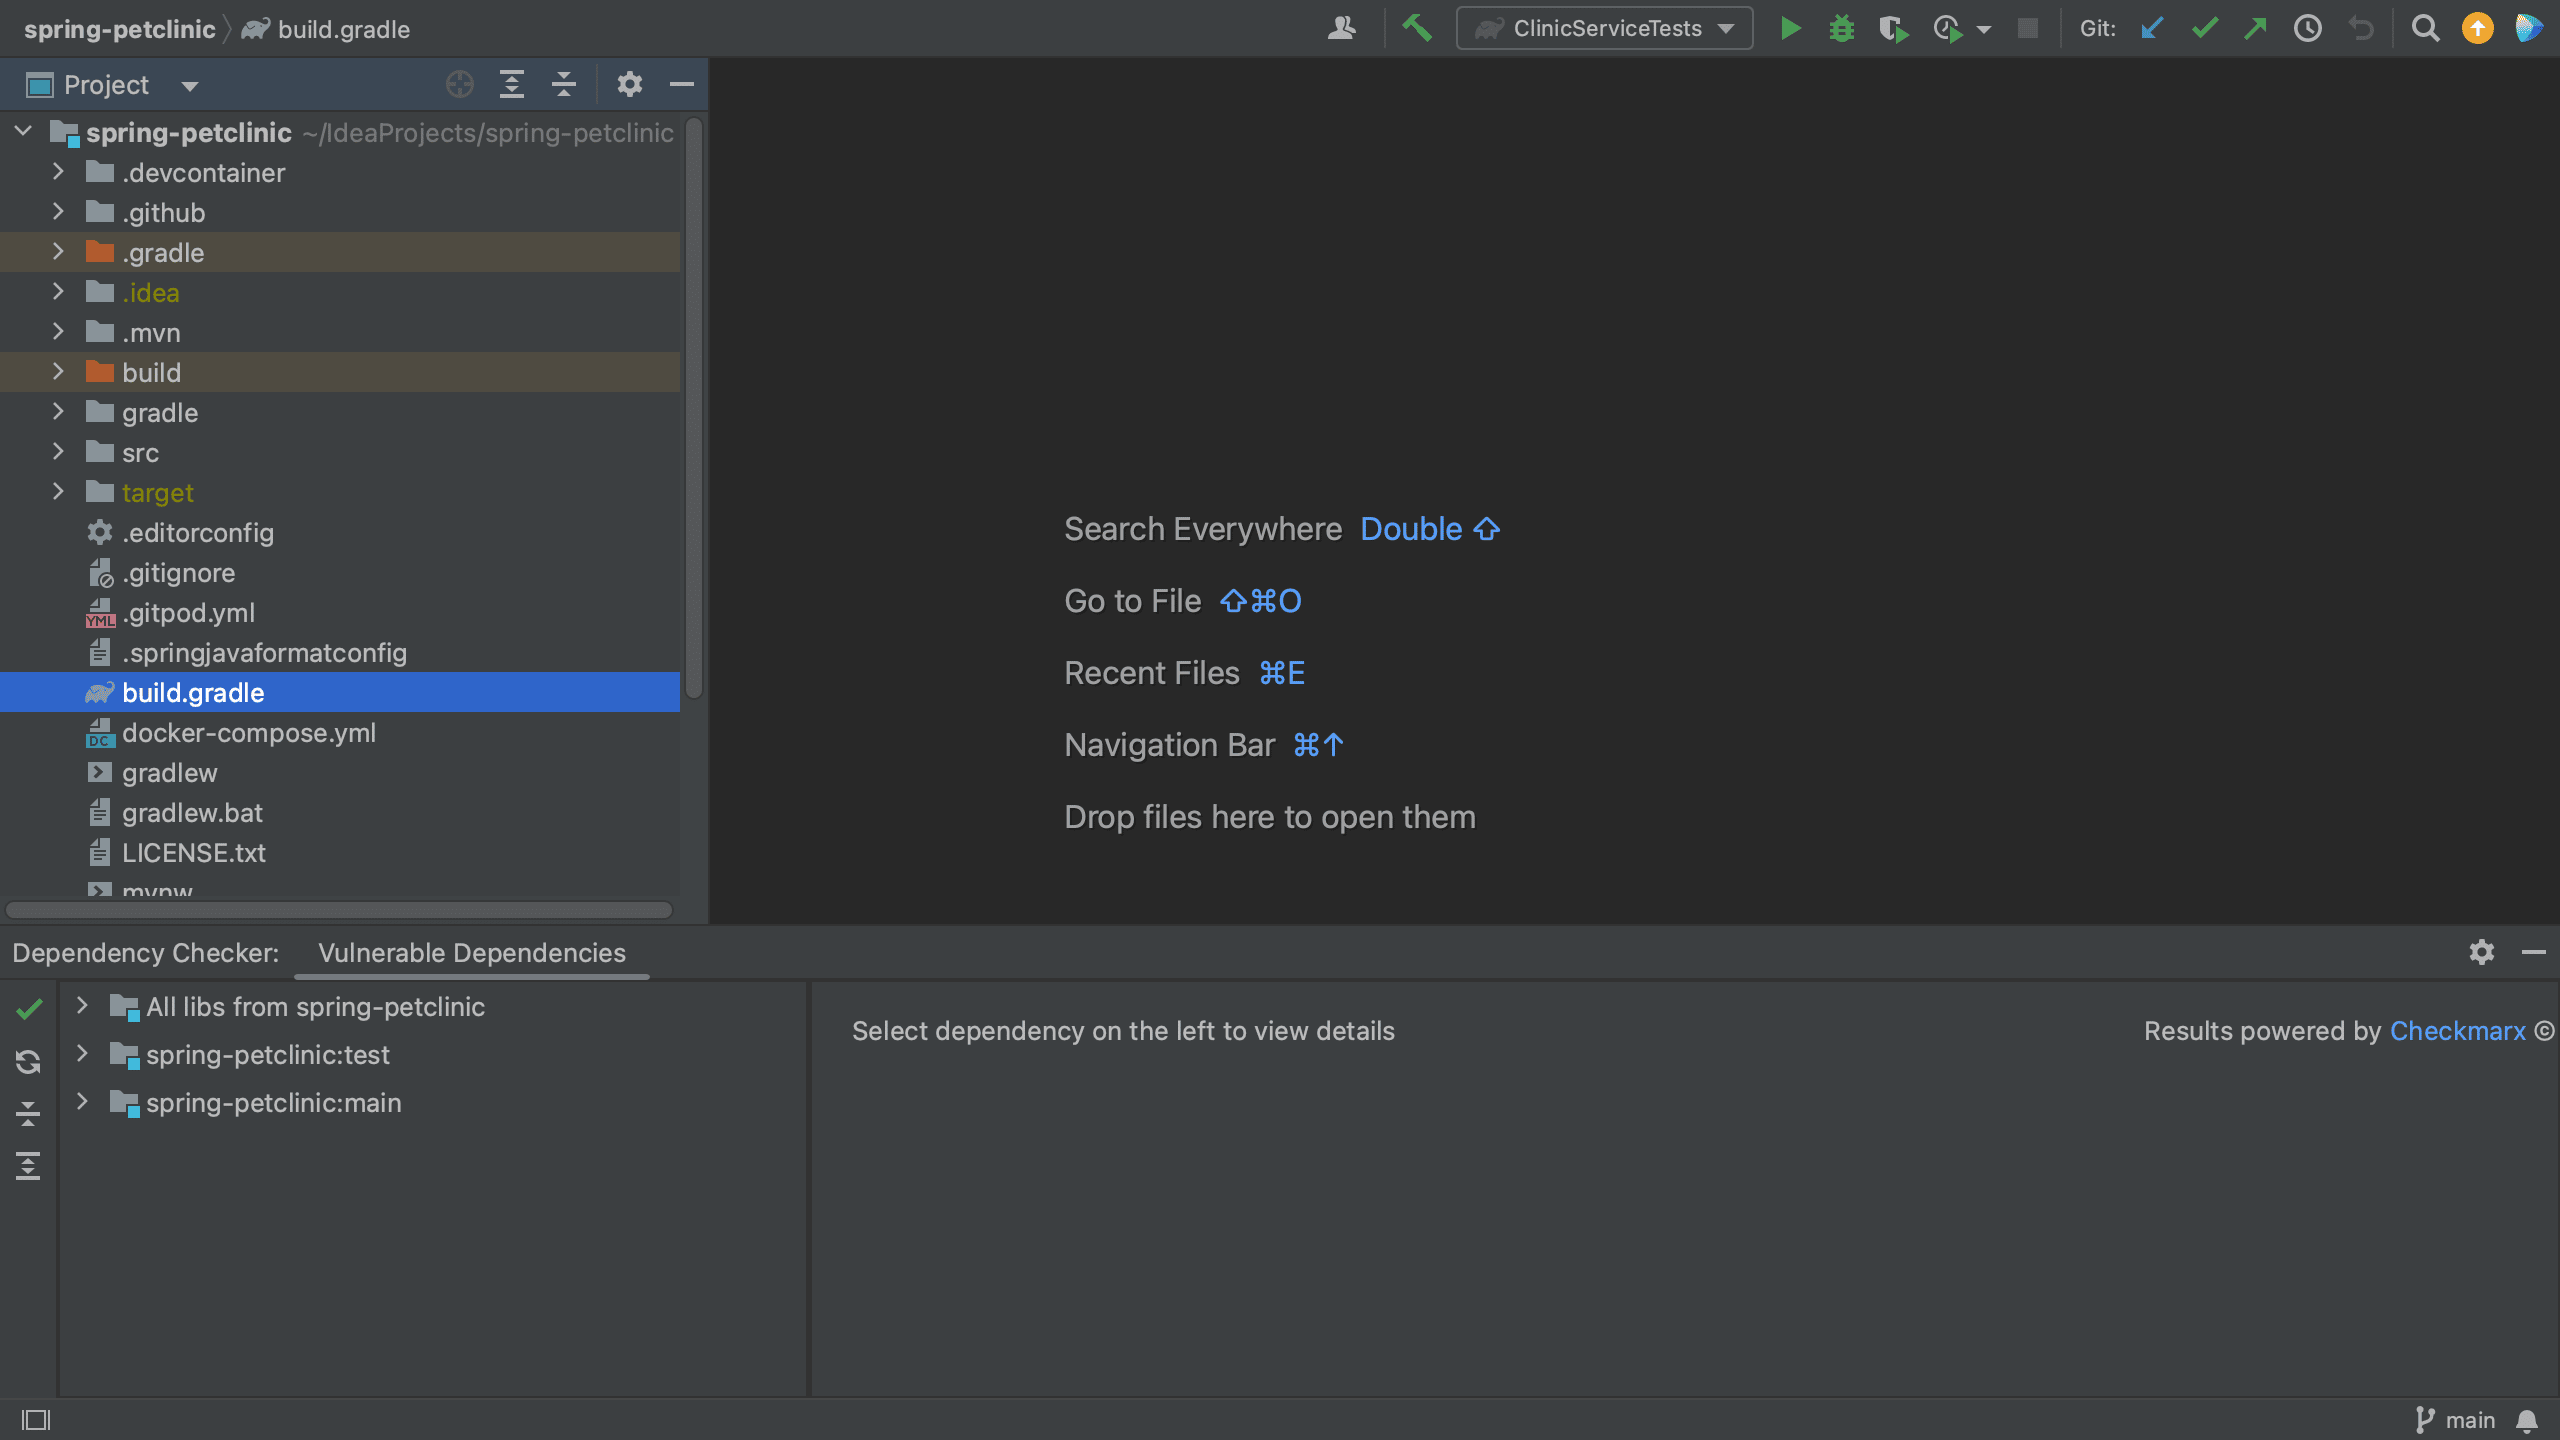
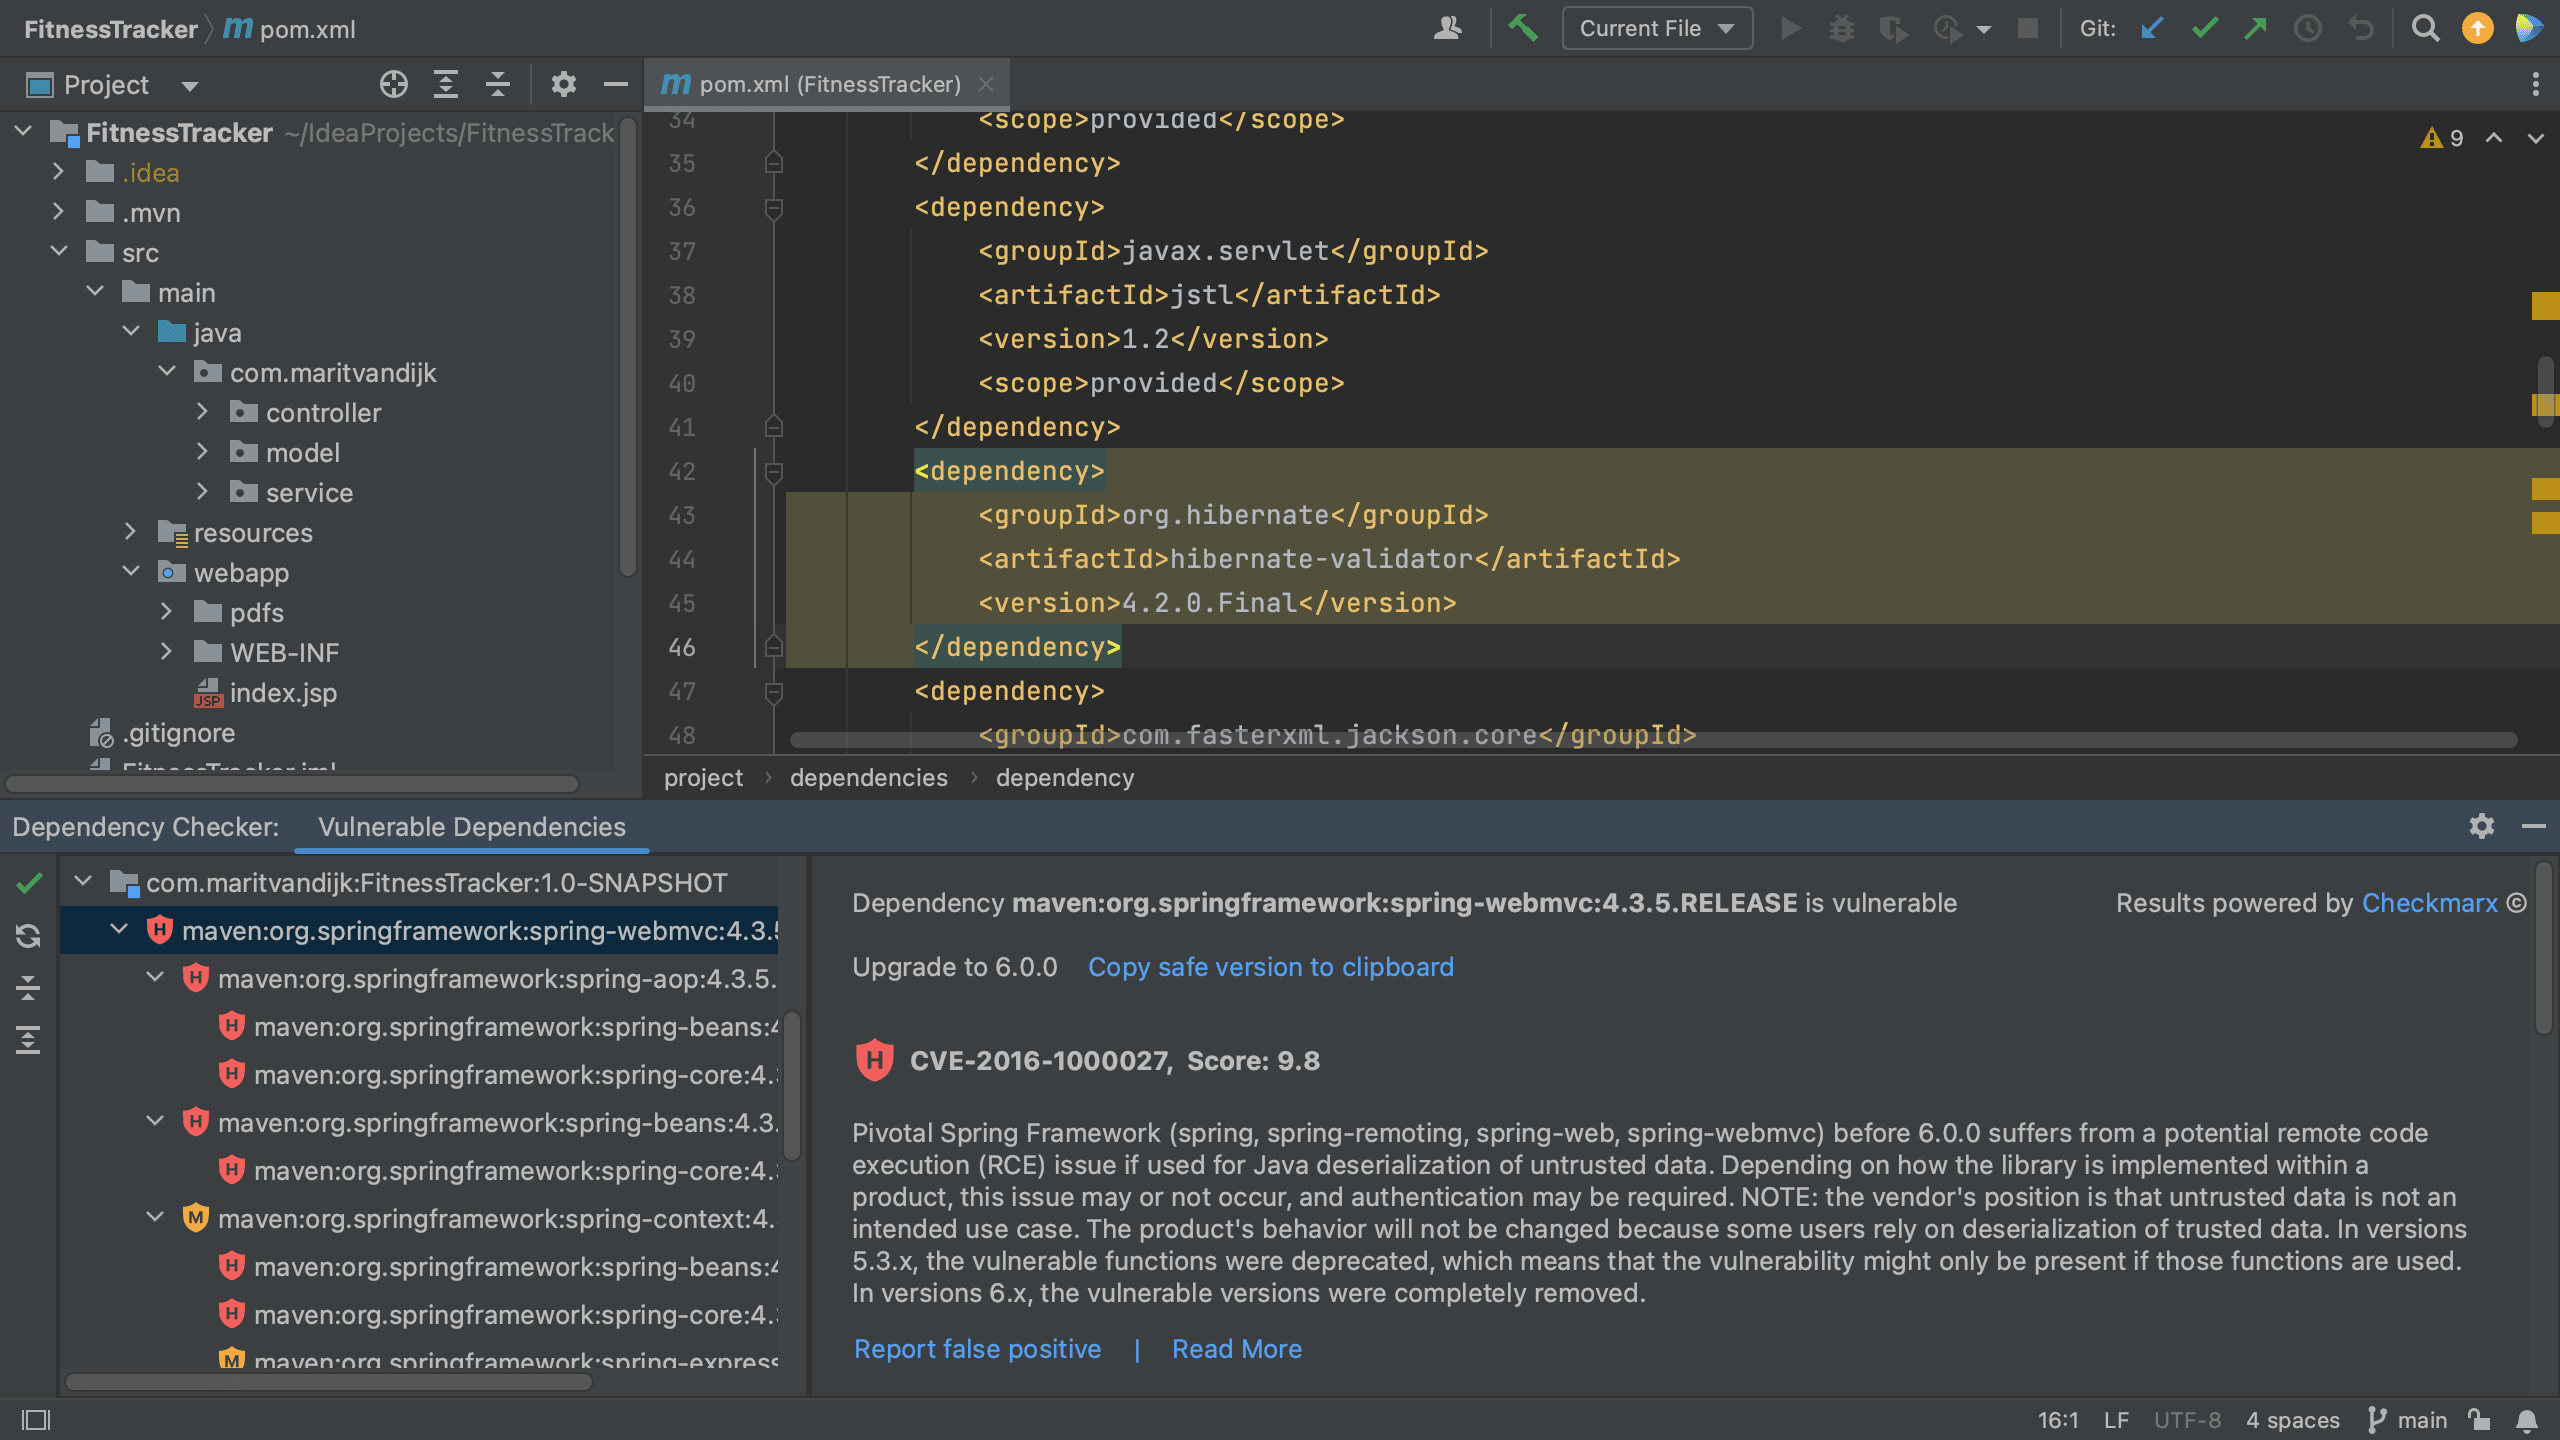
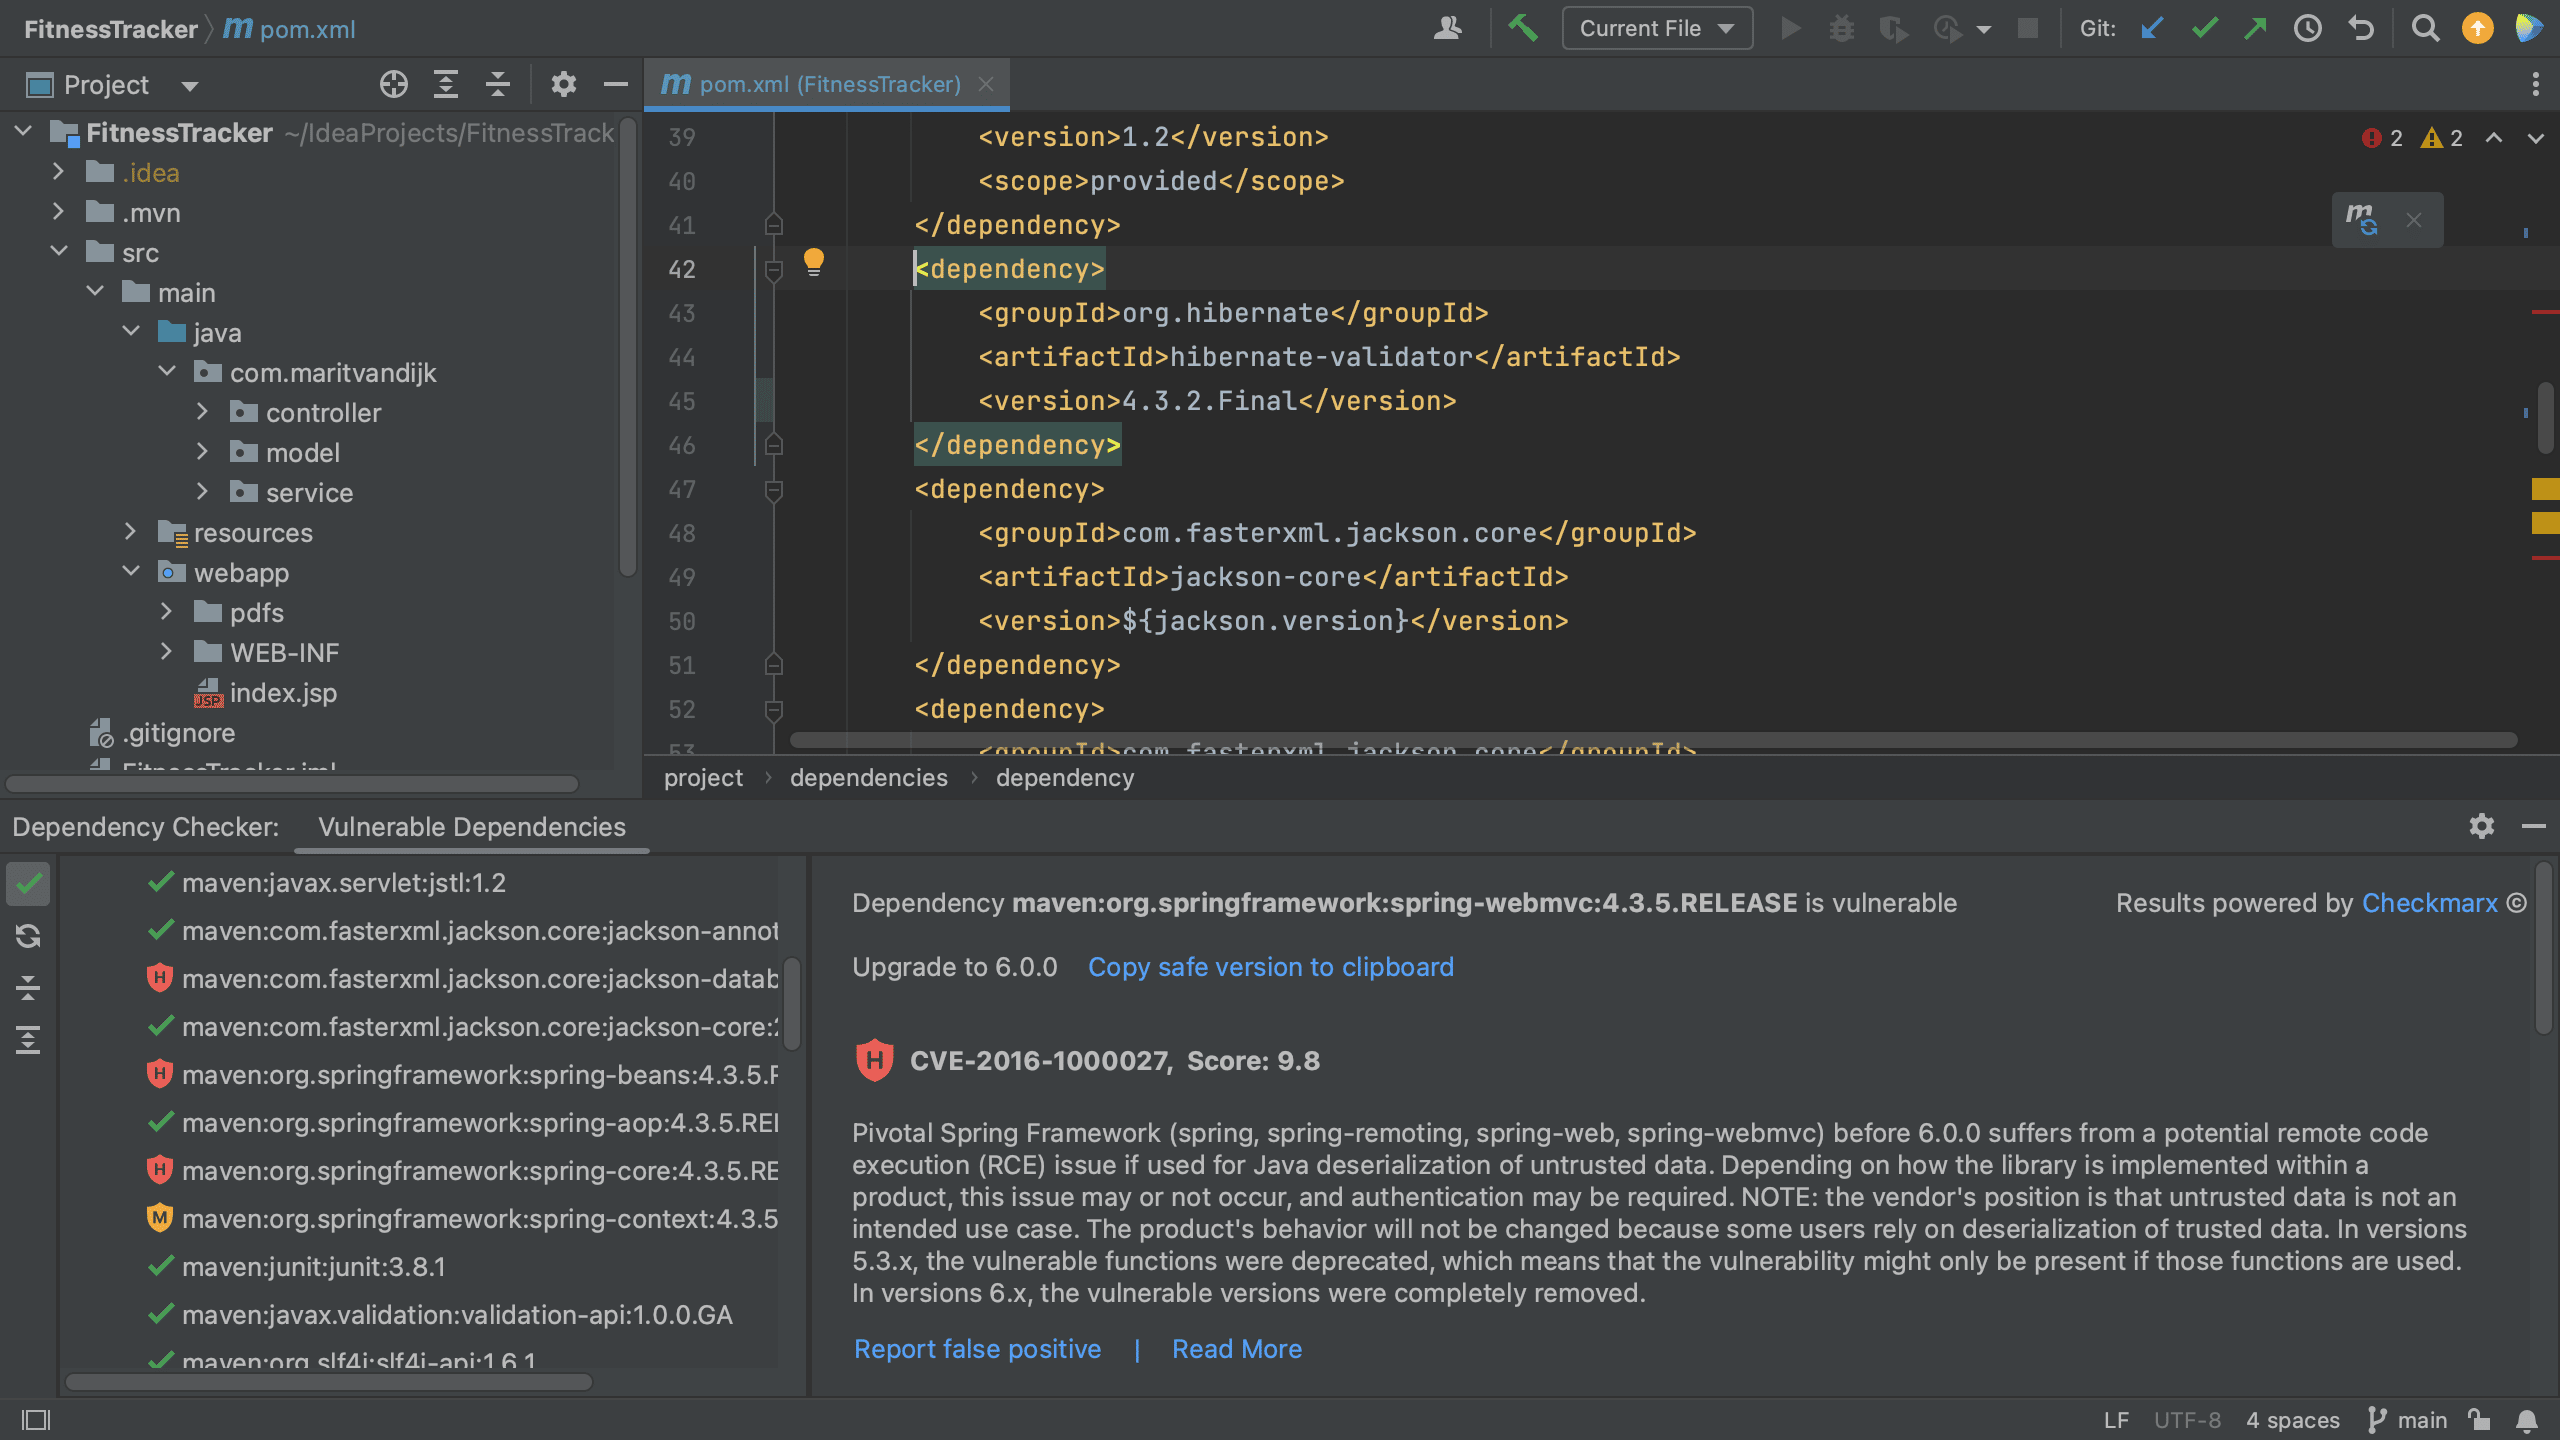
The Vulnerable Dependencies tool window shows all the vulnerable dependencies for the project. For each vulnerability, we can see an indication of the severity. There are two different views; the flat view shows all the vulnerable dependencies in this project and the dependency hierarchy view shows the dependency tree and the hierarchy between dependencies.


When we click a specific dependency, we can see more information about the vulnerabilities that were found in that dependency. In the Vulnerable Dependencies tool window details pane on the right, we can click the link to Read more under the information about a particular dependency, which will take us to the information about this specific vulnerability in the Checkmarx Advisory.

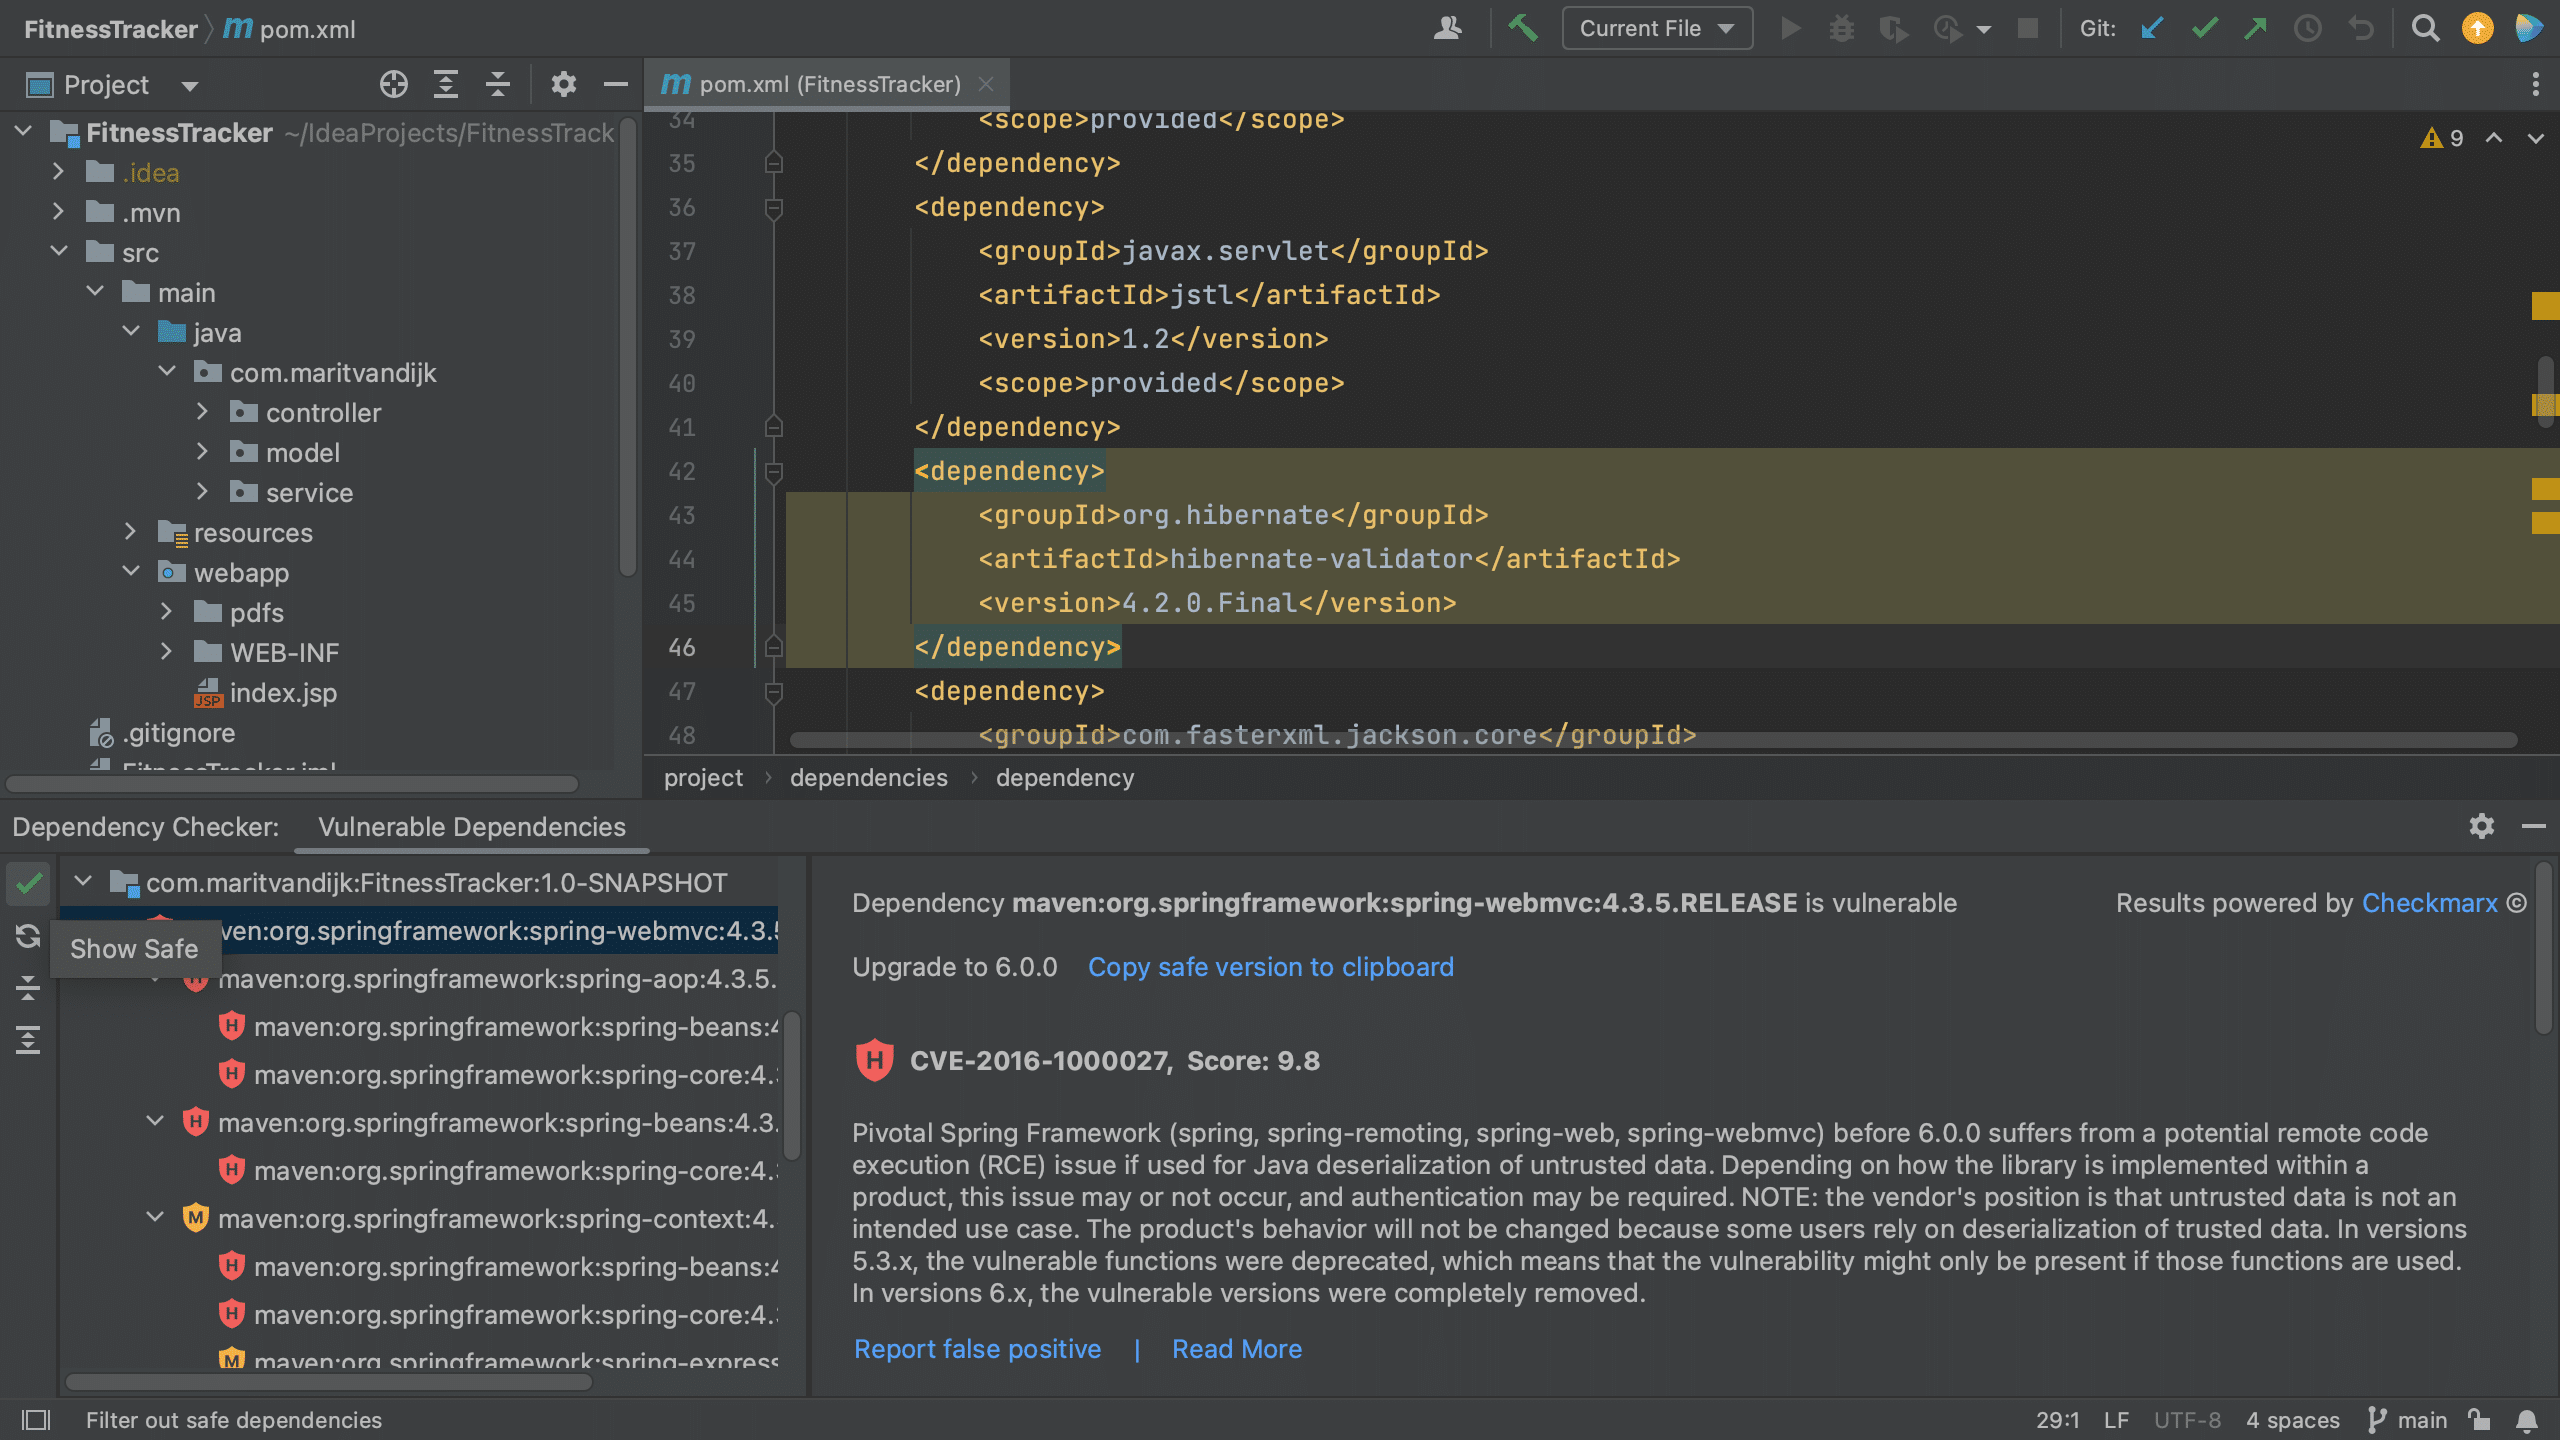
To see all the dependencies of the project regardless of whether they’re vulnerable or not, we can click the Show safe button on the top left of the Vulnerable Dependencies tool window.

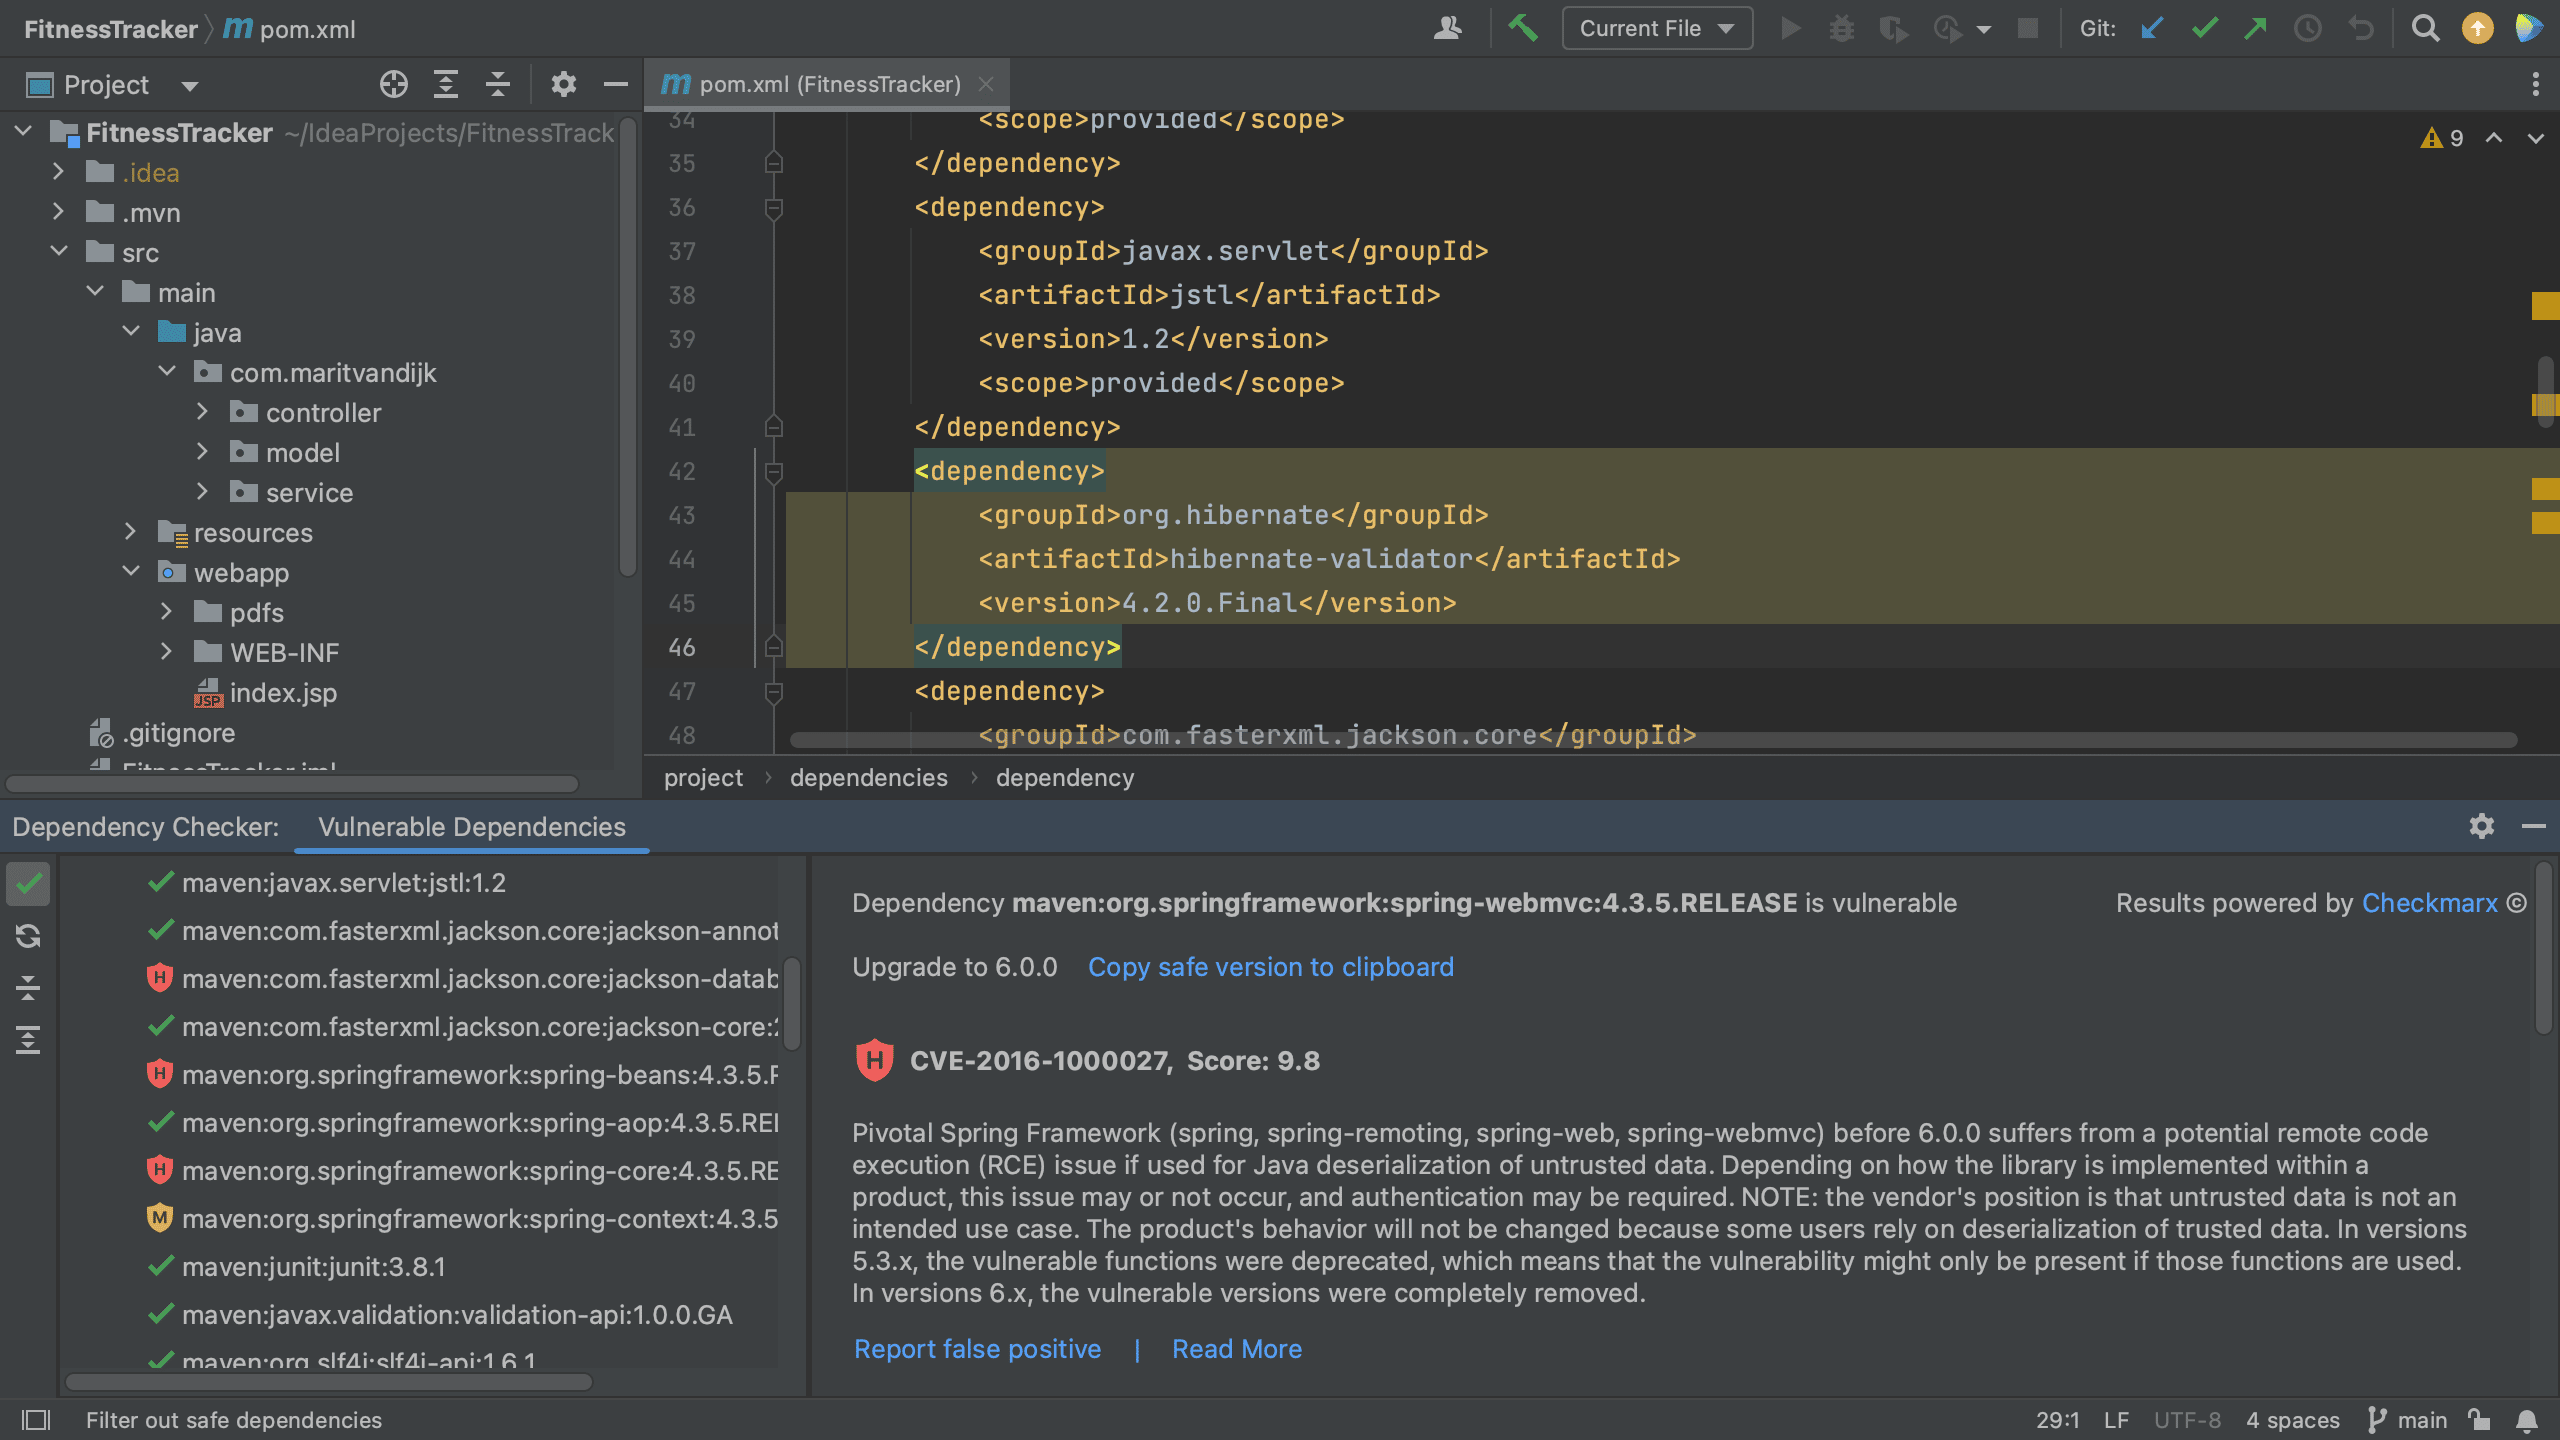
The dependencies without known vulnerabilities are shown with a green checkmark next to it. We still have the same two views; the flat view and the dependency hierarchy view. We can use the Show safe button to toggle between showing all dependencies or vulnerable dependencies only. We can use the Collapse all or Expand all buttons to collapse or expand the views.

Remediate dependencies using IntelliJ IDEA Ultimate
Finally, we can remediate these vulnerabilities. We can click Copy safe version to clipboard in the Vulnerable Dependencies tool window details pane to copy the safe version and paste it into our build file.

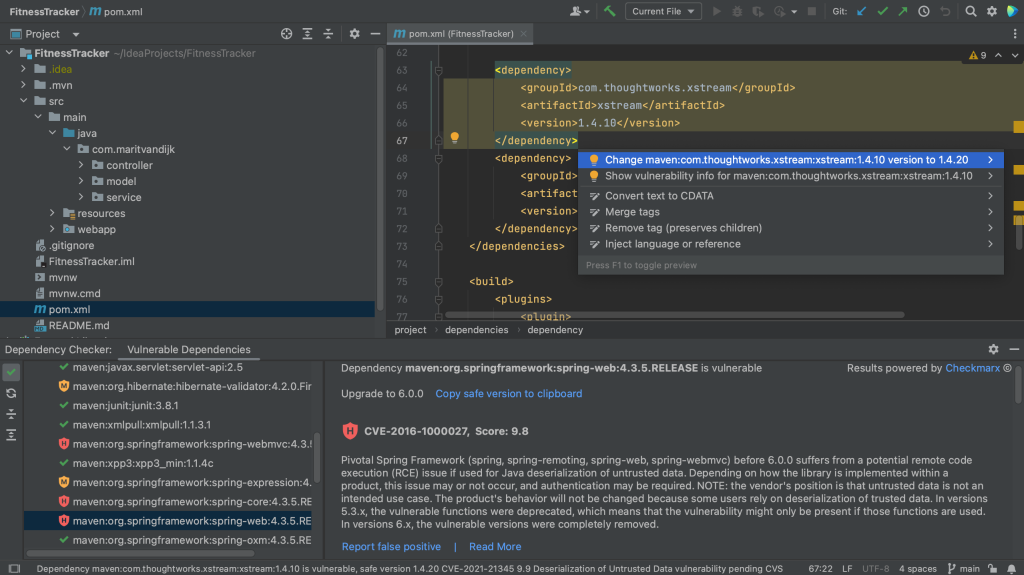
We can also fix it directly in our build file. When we hover over a specific vulnerable dependency, the hover menu includes an action that we can click to upgrade the version (if a new version is available).


Alternatively, we can use the intention action shortcut, ⌥ ⏎ on MacOs, or Alt+Enter on Windows/Linux and select the action to upgrade the version (if a new version is available).

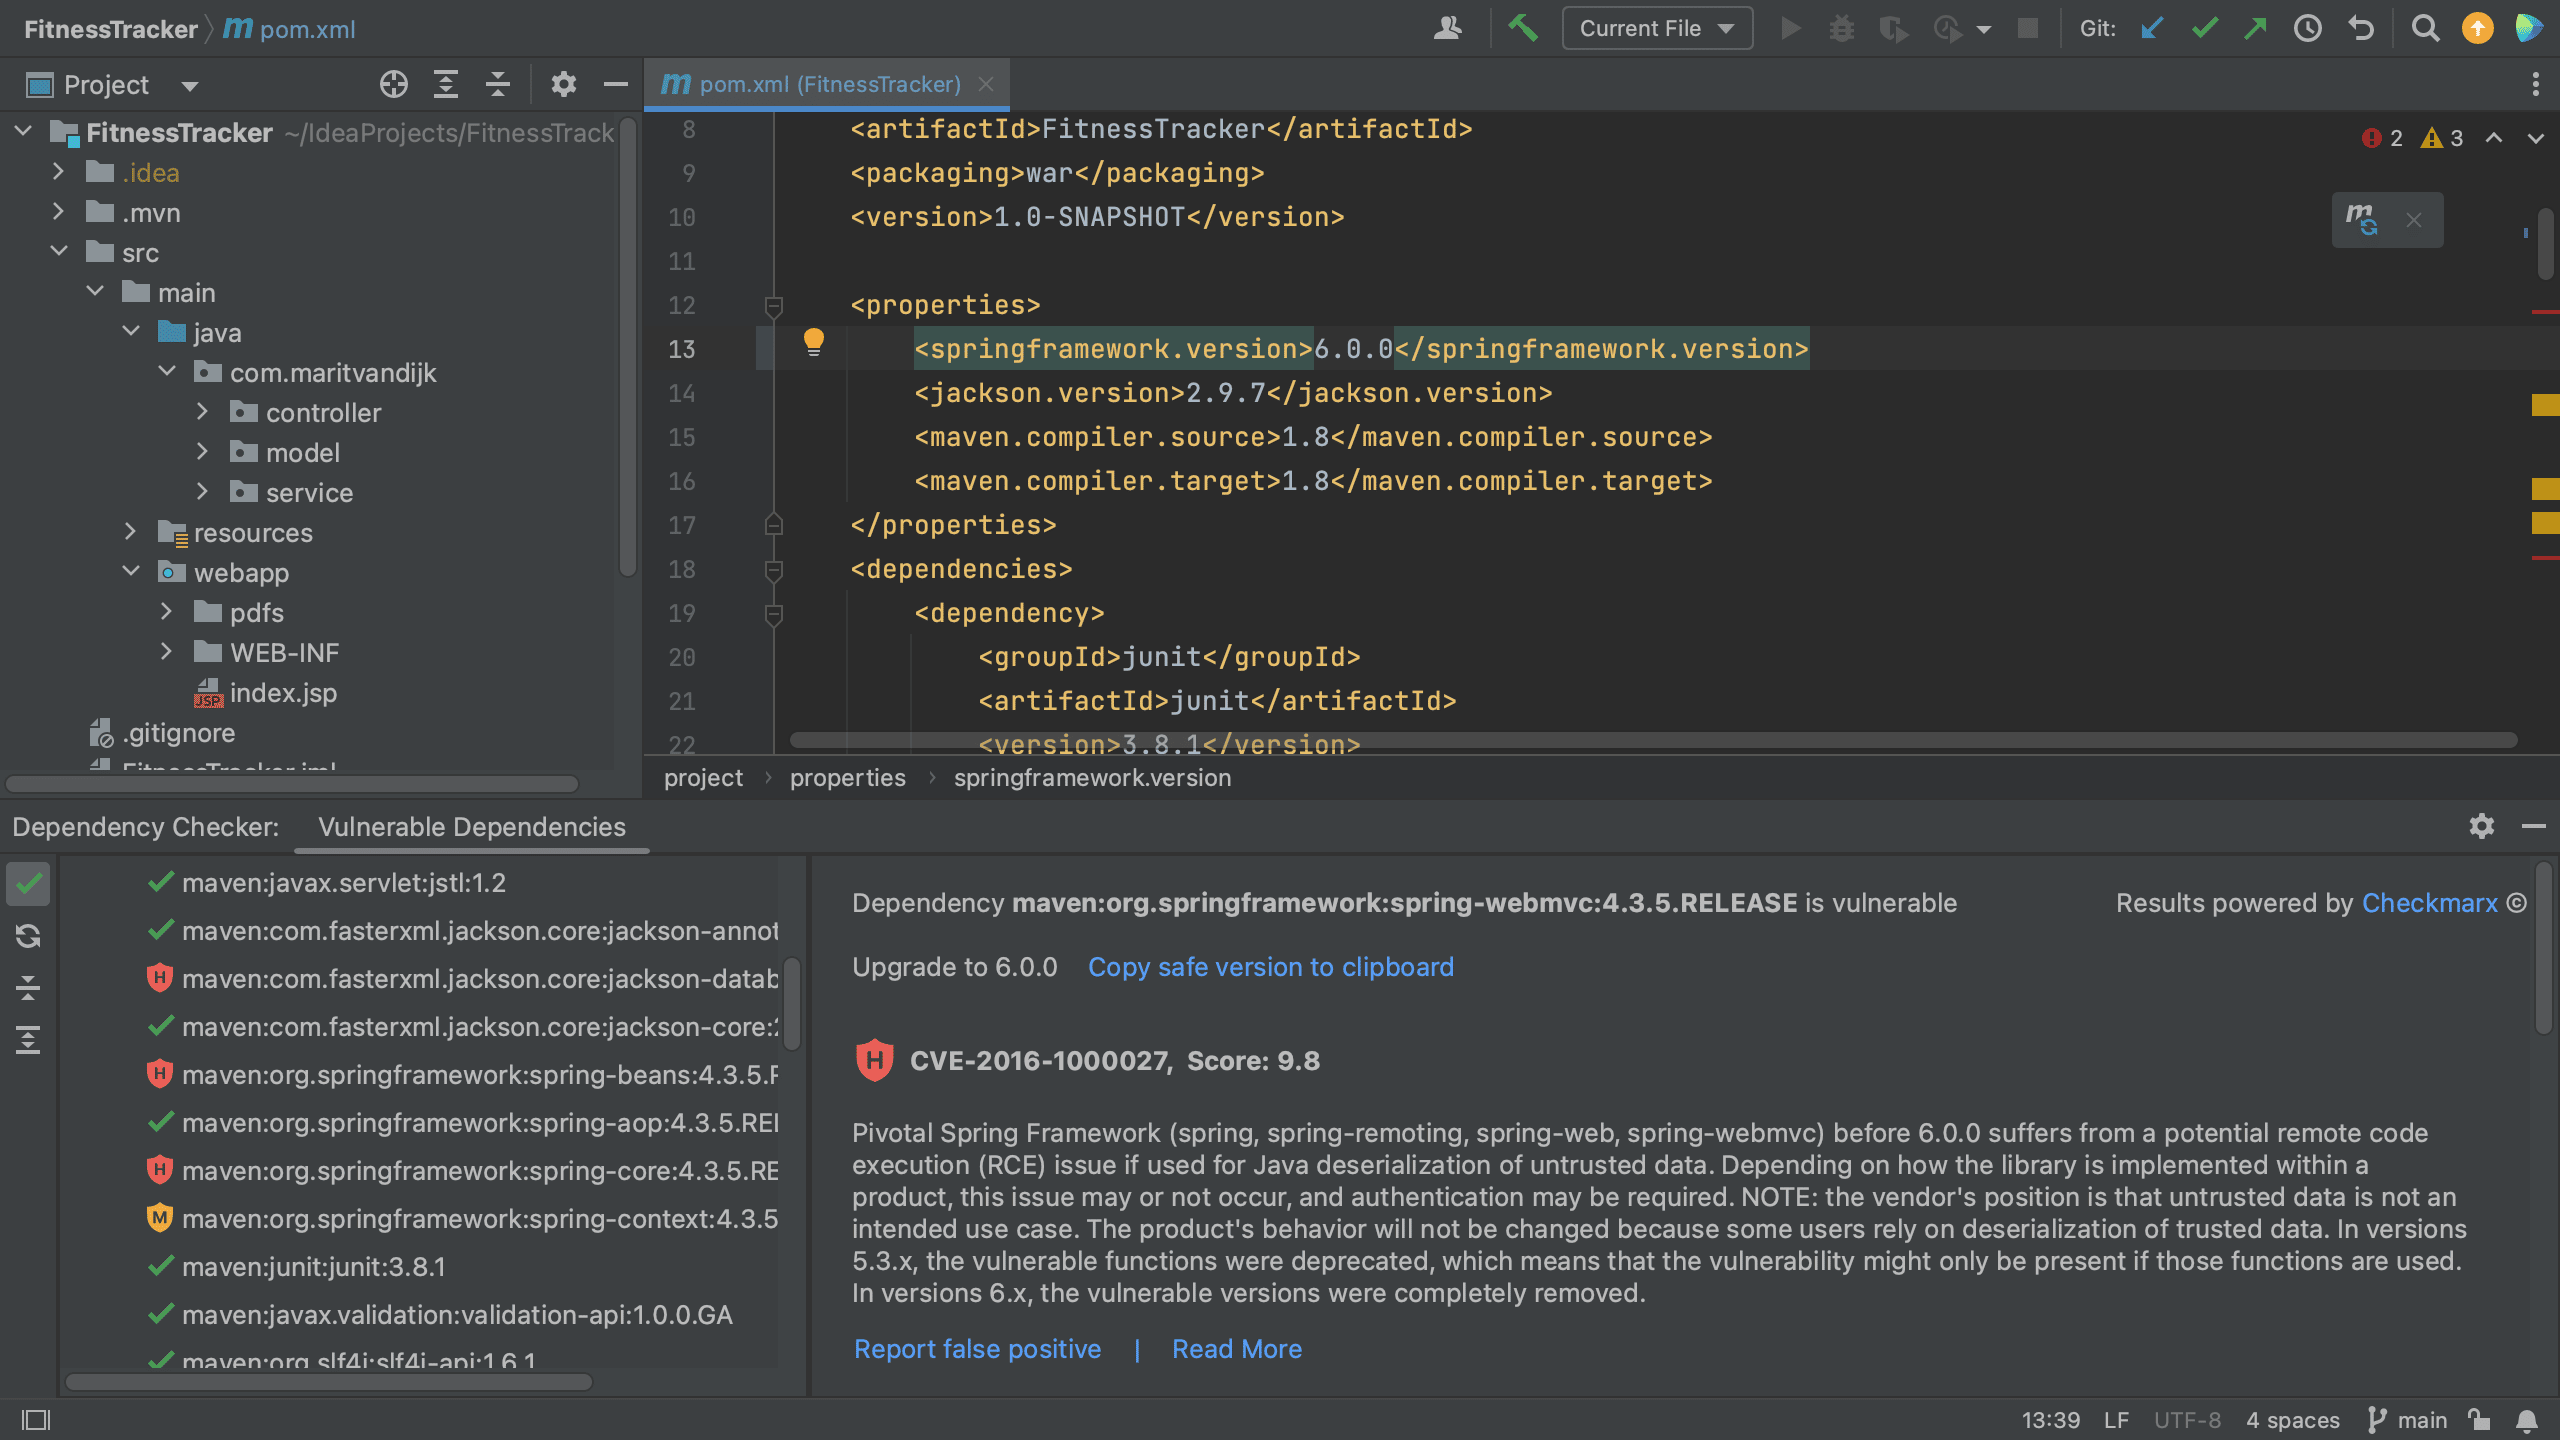
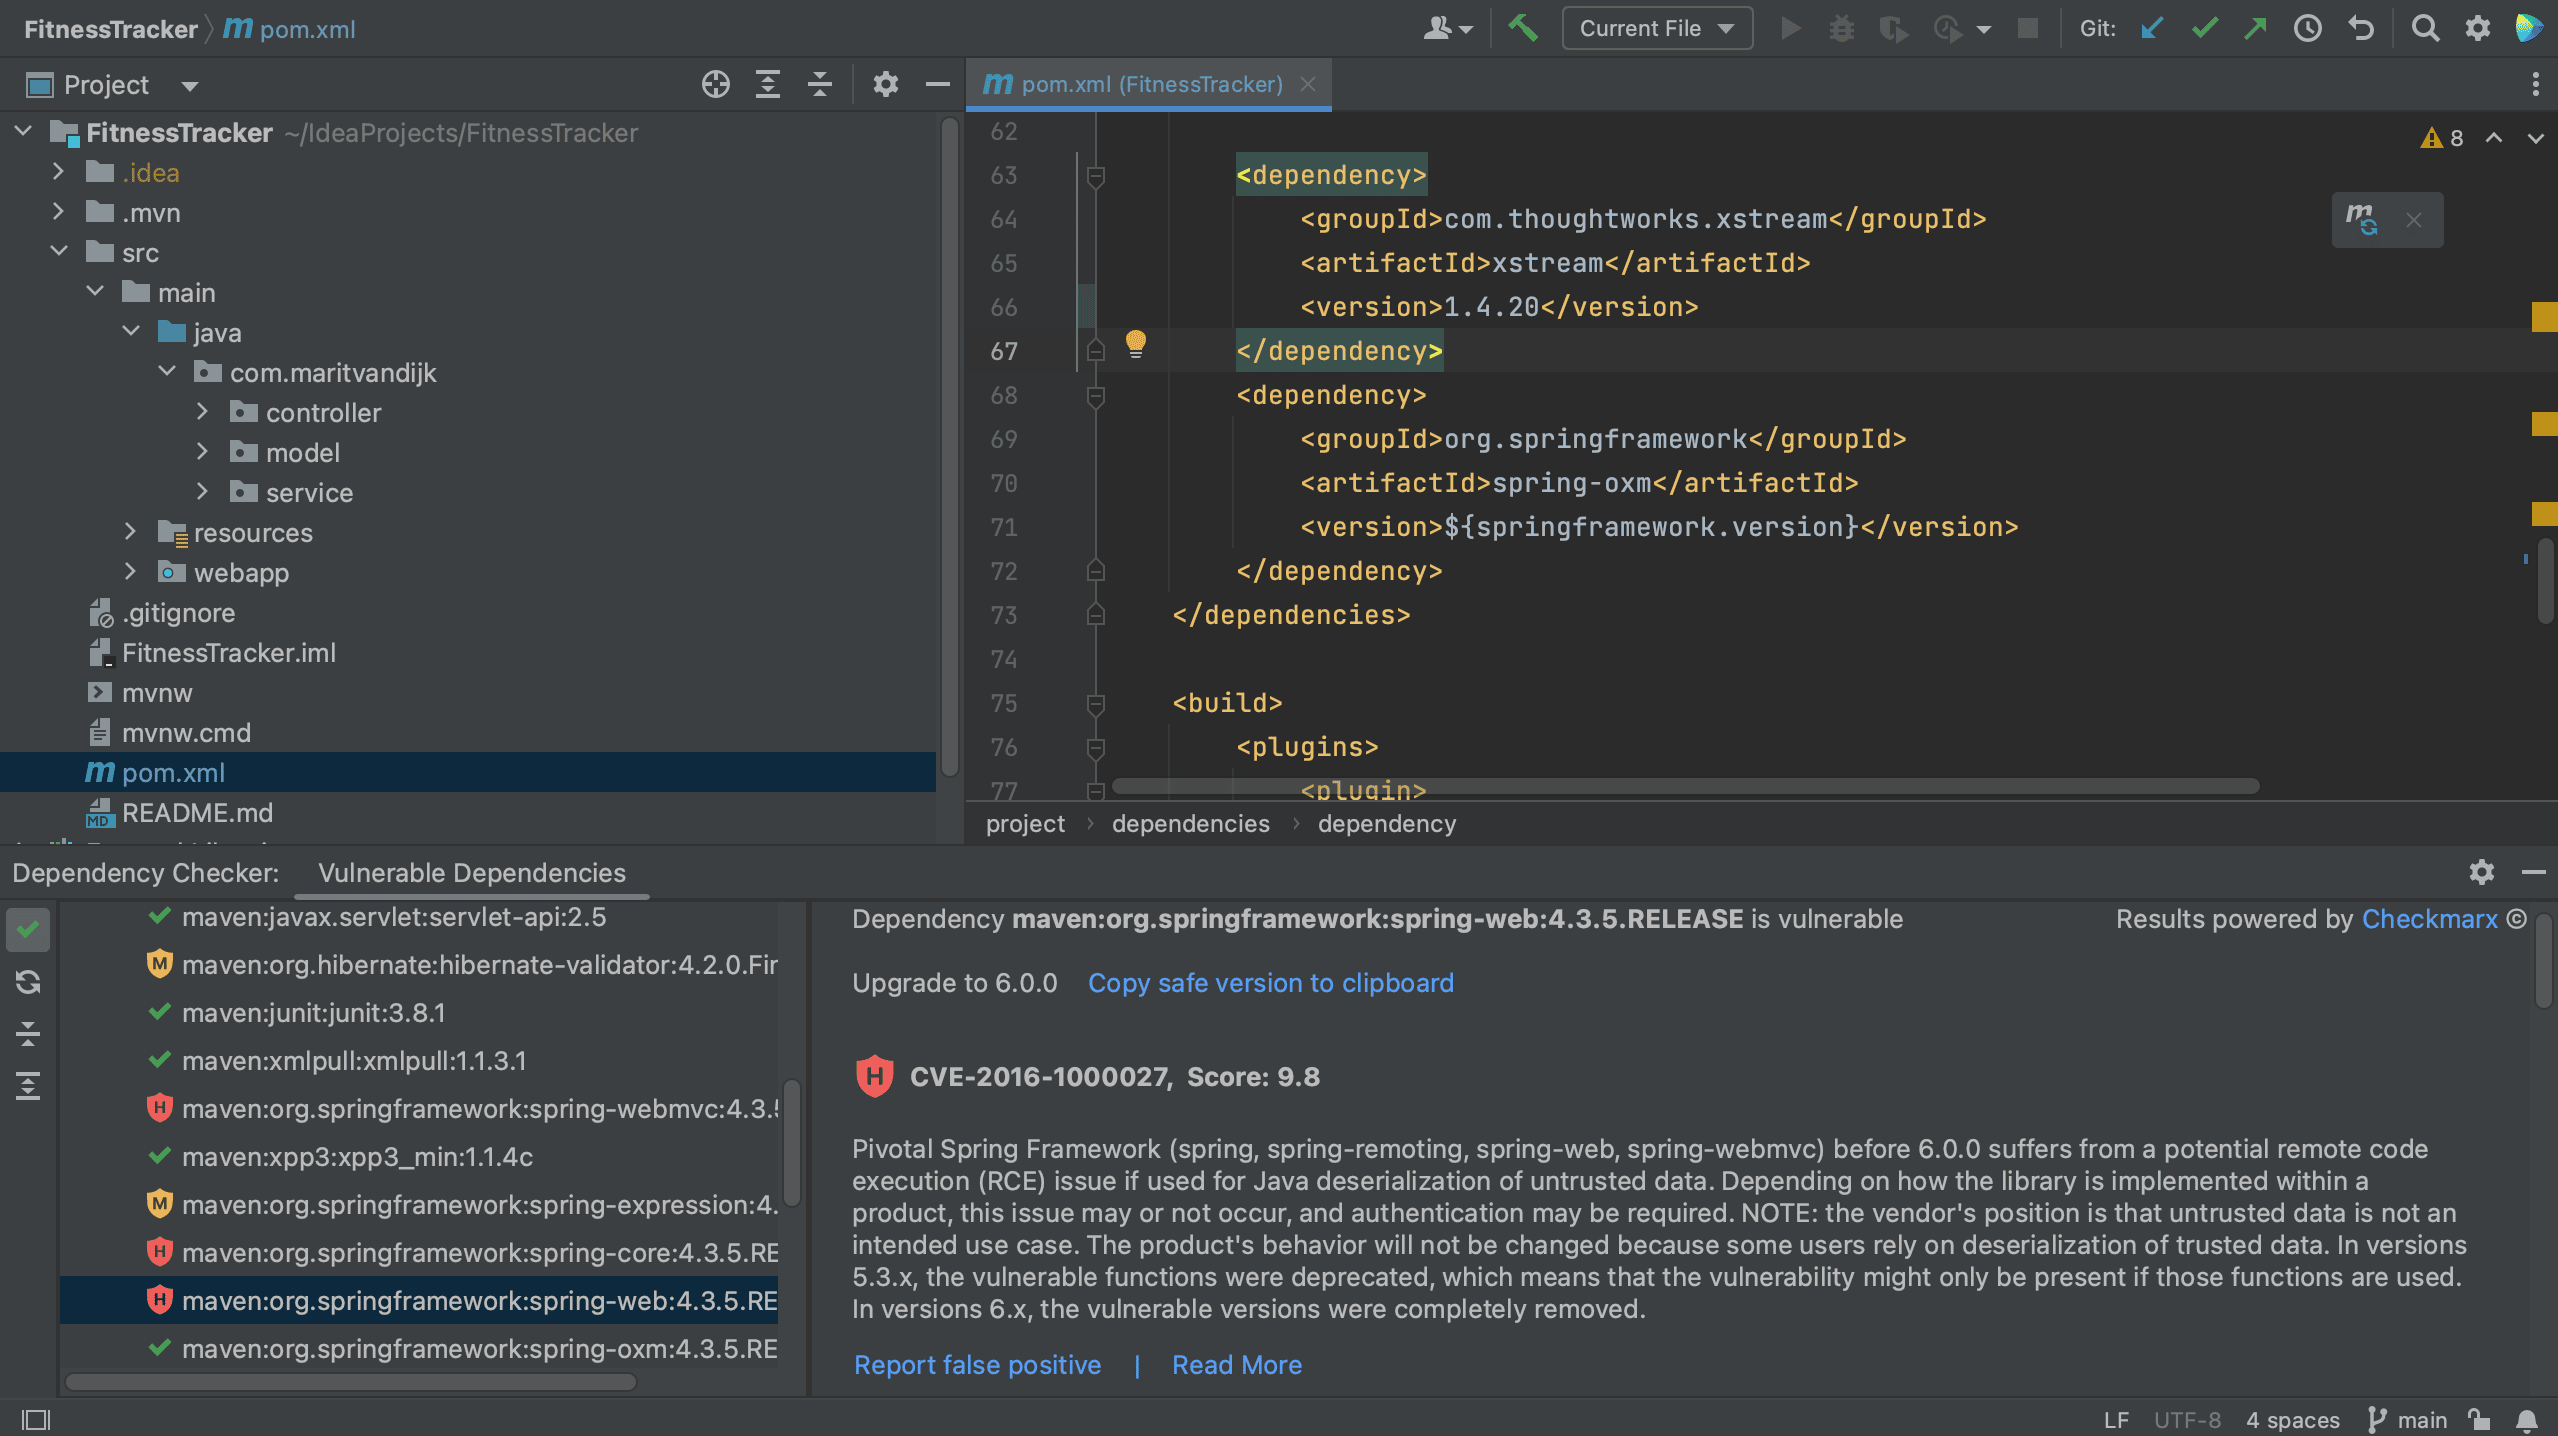
After we update the versions, we can Load Maven Changes, using ⌘⇧I on MacOs or Ctrl+Shift+O on Windows/Linux. We see that the overview in the Vulnerable Checker tool window is updated, and we see that dependencies that we have upgraded and are no longer vulnerable are removed, or shown with a green checkmark if we have enabled Show safe dependencies.


Summary and Shortcuts
As we have seen, the Package Checker plugin bundled with IntelliJ IDEA Ultimate offers several different ways in which we can view vulnerable dependencies in our project inside IntelliJ IDEA Ultimate, get more information about these vulnerabilities, and remediate them. This plugin can help keep your projects safe and secure right inside your IDE!
Further reading and viewing
- (video) JetBrains – IntelliJ IDEA Ultimate: Package Checker
- (blog) JetBrains – Ensure Greater Software Security With Package Analysis by Checkmarx in IntelliJ IDEA
- (plugin) Package Checker
- (video) Leverage Open-Source Code with Confidence
IntelliJ IDEA Shortcuts Used
Here are the IntelliJ IDEA shortcuts that we used.
| Name | macOS Shortcut | Windows / Linux Shortcut |
|---|---|---|
| Open / Close Project Tool Window | ⌘1 | Alt+1 |
| Context Actions | ⌥⏎ | Alt+Enter |
| Load Maven Changes | ⌘⇧I | Ctrl+Shift+O |
3 thoughts on “Package Checker: Find and fix vulnerabilities inside IntelliJ IDEA Ultimate”
Comments are closed.