Pair programming in Java with an 8 year old

Recently I asked my 8 year old if he would be interested in doing some Java programming with me, and he was. This was such a fun experience, I wanted to share it with you.

Why Java?

In the past, we have done part of a Scratch course by Felienne. So I know there are other programming languages out there that are made specifically for kids. However, I wanted to show him something that is a bit more like what his dad (also a software developer) and I do all day.

It was an explicit decision on my part not to bore him with Java syntax just yet, but instead to focus on what the program should do and getting a bit of understanding of how programming works. While most of the code was written by me, the behavior of our little application was based on our collective ideas.

Hello world!

We used IntelliJ IDEA Community Edition 2022.3, and I opened a new project using Java and Maven, thinking we would get started with a simple Hello World program (as you do).

New Project wizard in IntelliJ IDEA with Java and Maven selected, as well as JDK temurin-17
New Project wizard

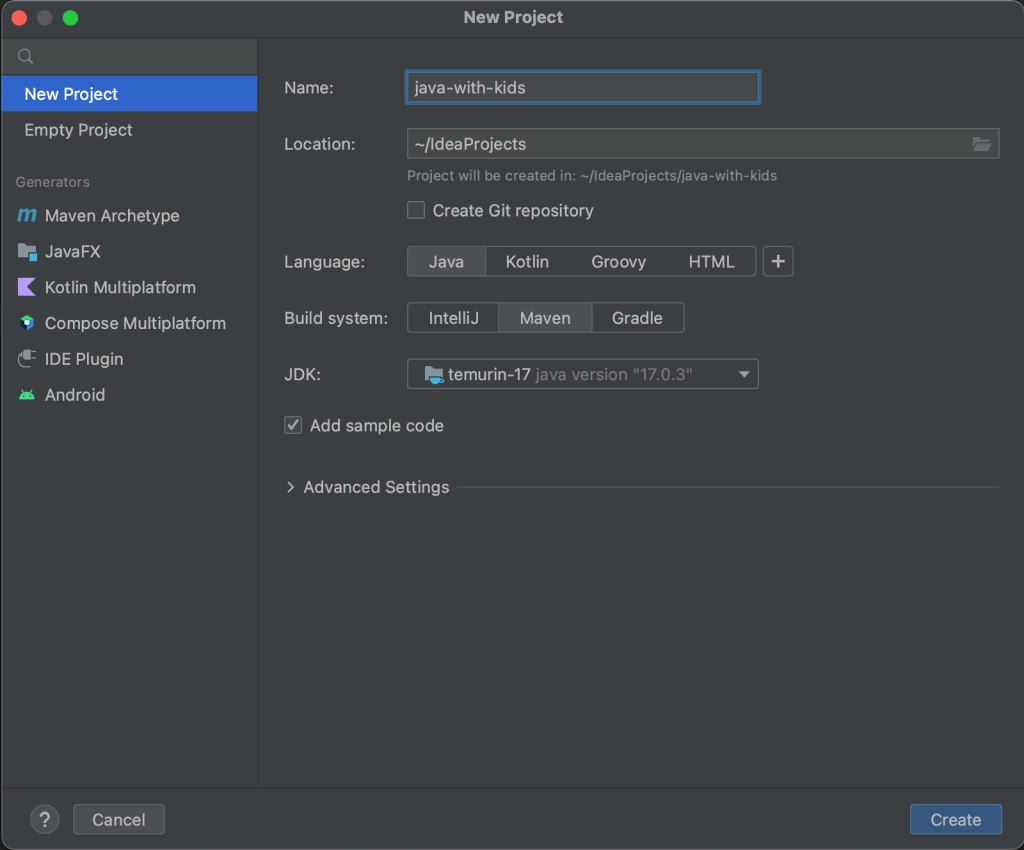
It turned out that IntelliJ IDEA already includes the Hello World example when opening a new project, which was a nice surprise.

Hello world! program in Java
Hello world!

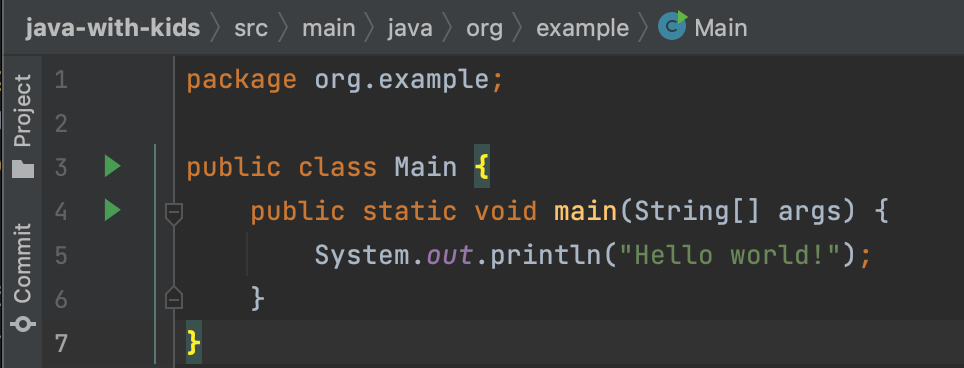
First, I asked him to run the program by clicking the run button (green triangle) in the gutter. He asked me what it means to “run” the program, so I explained this means having the computer execute the program, doing the thing the code tells it to do.

When we ran the program, we saw that the text “Hello world!” was printed in the command line. I tried explaining that “public static void main” is the main method, telling the computer where to start, but to be honest I’m not sure he understood that just yet.

Asking for user input

Next, I asked him whether he would like to print something else and what we would need to change in order to do so. He knew we had to change the green text (the String) to something else. He changed the word “world” in this String to his name and ran the program again.

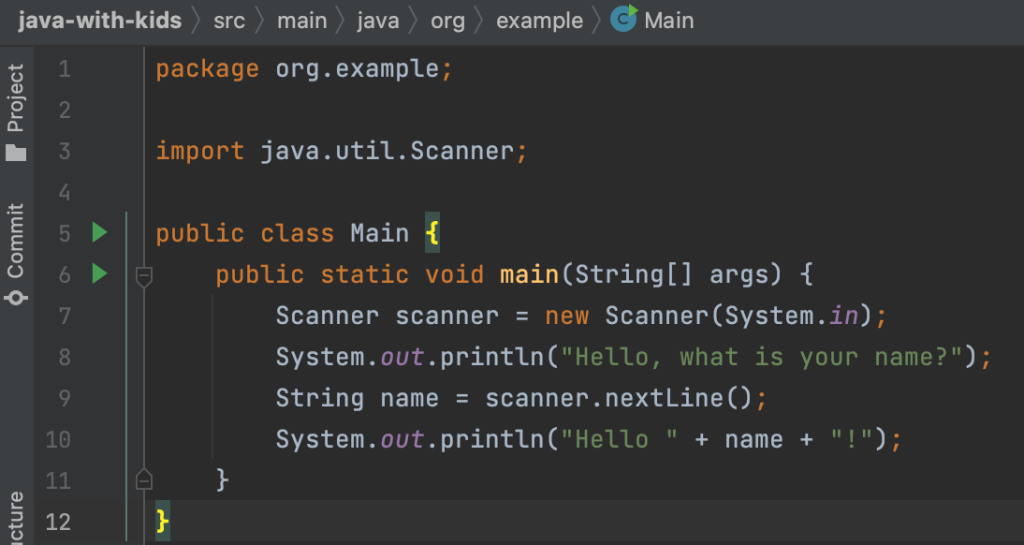
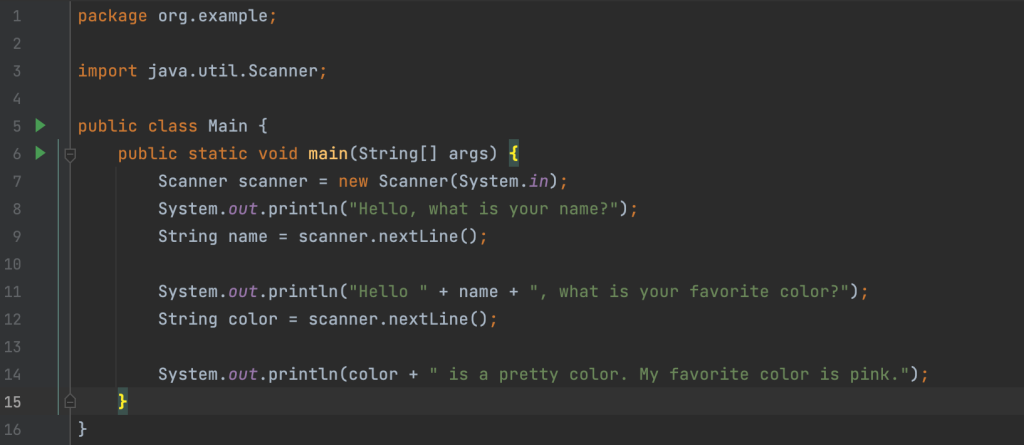
My next suggestion was to ask the user for their name so the computer would be able to greet other people too. Here I briefly explained we would need some way to capture the user’s input. To do so, I added a Scanner and the variable “name”. After I made these changes, he ran the program and tested that it worked when he input his name.

A simple Java program using Scanner to output a question, capture the input and print the result
Asking for user’s name

Next, we discussed what else to ask the user. He wanted to ask for their favorite color and provide the “computer’s” favorite color as a response to their answer. We added another question and captured another variable to return to the user.

A simple Java program using Scanner to output a question, capture the input and print the result
Asking for name and favorite color

Selecting a language

Of course, while the kids speak some English, it is not their native language. So we decided to translate the output to Dutch to make it a little easier for him to understand. Next, he suggested we should give the user the option of using the program either in Dutch or in English. We started with a simple if/else statement and duplicated code blocks of asking the same questions in either Dutch or English, depending on the input.

A Java programming using an if/else statement to select a language
Selecting a language

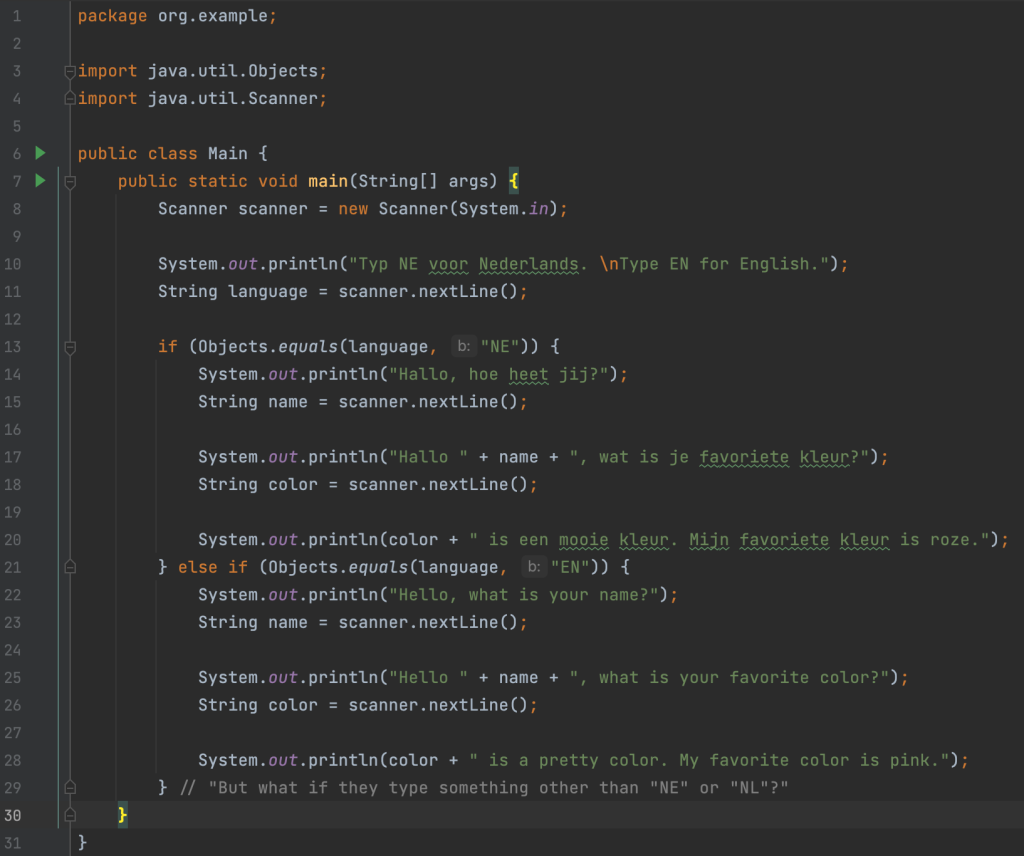
He was quick to point out that we should think about what to do if the user provided a language or input we didn’t know. Good question! So we proceeded to add logic for that as well.

A Java program checking that input is a valid option before proceding.
Validate input

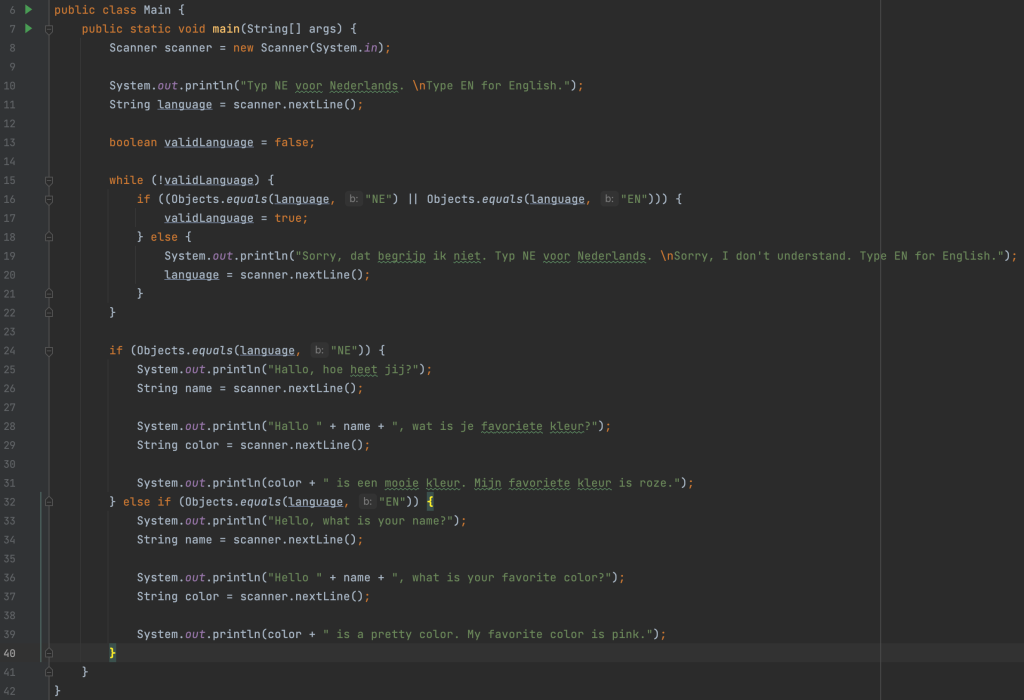
Next, we ran the program several times to check that it worked for each valid option, as well as (multiple) invalid options.

Next steps

Finally, we discussed what potential next steps we could take with this program. We had several ideas:

  • He wanted to know if it would be possible to remove the duplication somehow; for example, by getting the Dutch or English text from somewhere so we wouldn’t have to duplicate all the code. In our current program, the code for the Dutch version and English version is duplicated, meaning that for every additional question we want to ask the user, we have to make sure to duplicate that.
  • In one of my tests, I showed him that the computer would just capture and return whatever the user’s input was. The example I used was to answer “Hello, what is your name?” with a full sentence: “Hi, my name is Marit” to which the computer would reply “Hello Hi, my name is Marit, what is your favorite color?” which is a bit weird. So that is something to think about.

Takeaways

The most important thing is that we had fun. He was motivated to add new things to the program and to test that they worked. My choice to not focus on the details of Java syntax, but on the general program instead seems to have worked because he had fun and wanted to continue. He is already asking me when we can do this again, and has ideas of what we could do next.

The program was written based on his ideas and he did write some of it himself, mainly the Strings and some of the “System.out.println()” lines, after I showed him how to use IntelliJ IDEA live templates to do so; if you type “sout” and press Enter (or Return on Mac), IntelliJ IDEA will expand that to “System.out.println()” which he thought was very helpful.

What I noticed was that he was able to think about what the program should do, and had a rough understanding of how the code worked. Once we were done, he was able to explain our little program to his dad, and pointing to the relevant points in the code while explaining what they did. So I have the impression he has some understanding of how it works.

Overall, we had fun together coding and it was awesome to see how his mind worked when thinking about what the program should do and how, and how to test it. We are very much looking forward to continuing our little experiment.

Our code can be found on GitHub.

Viewing dependencies in IntelliJ IDEA

In this blogpost we’re going to take a look at different ways to view your external dependencies in IntelliJ IDEA.

Introduction

If you’re working on a real-world application, your project will probably use external libraries and frameworks. Occasionally, you might want to see which dependencies your project uses, for various reasons.

There are several ways to view dependencies in IntelliJ IDEA. Each view has a different focus.

Dependency management config file

You can find direct dependencies in the dependency management config file. Direct dependencies are the dependencies that your project depends on directly. They are declared in the dependency management config file.

One example is this pom.xml in a Maven project.

A pom.xml file opened in IntelliJ IDEA
Maven pom.xml file

Another example is the build.gradle in a Gradle project.

Gradle build.gradle file

Note that the dependency management config file includes only declared dependencies and not their transitive dependencies (or the dependencies that these declared dependencies depend on).

Project tool window

In the Project tool window, ⌘1 (on Mac) or Alt+1 (on Windows/Linux), under External Libraries we can see all the JAR files needed by our application, including the transitive dependencies. However, we cannot tell the difference between direct dependencies and transitive dependencies. One declared dependency might bring in multiple JAR files.

Project tool window

Build tool window

To see direct dependencies and their transitive dependencies, we can look in the Build tool window. There is no shortcut to open the Build tool window. We can open it by clicking Quick Launch in the bottom-left and selecting Gradle, or Maven depending on what we’re using.

Open the Maven Build Tool Window in the Quick Launch menu
Open the Gradle Build Tool Window in the Quick Launch menu

Alternatively, we can open it by using Recent Files, ⌘E (on Mac) or Ctrl+E (on Windows/Linux), and typing “gradle” or “maven”, or the name of your build system.

Open the Gradle Build Tool Window using the Recent Files popup

Open the Maven Build Tool Window using the Recent Files popup

The Build tool window shows you each IntelliJ IDEA module separately, and each module’s “Dependencies” folder shows you all your dependencies in a hierarchical structure. We can expand our dependencies to see their transitive dependencies.

Gradle Build Tool Window showing dependencies
Maven Build Tool Window showing dependencies

Dependency tool window

Finally, we can view and manage dependencies in the Dependencies tool window. The Dependencies tool window becomes available when the current project has at least one supported module. All types of dependencies are supported for Maven. For Gradle only a top level dependencies { } block is supported in the build script.

Since there is no shortcut to open the Dependencies tool window directly either, we can again use Recent Files, ⌘E (on Mac) or Ctrl+E (on Windows/Linux), and type in “dependencies” to open the Dependencies tool window.

Open the Dependencies Tool Window using the Recent Files popup

Alternatively, we can open it by clicking Quick Launch in the bottom-left and selecting Dependencies.

Open the Dependencies Tool Window in the Quick Launch menu

Here we can see our project’s direct dependencies. Select “All Modules” to see the dependencies for all modules, or select an indivual module to see the dependencies for that specific module. The Dependencies tool window shows direct dependencies, and not their transitive dependencies.

Dependencies Tool Window

We can see details about a selected dependency in the dependency details pane.

Dependency Details Pane

The dependency details pane displays the information about the selected dependency, such as:

  • Repository or repositories where it’s available, for example Maven Central
  • A description if it is available
  • GitHub information if the dependency sources are hosted on GitHub
  • The licence under which an open source library is available
  • A link to the project website, documentation and readme
  • List of usages in the current module.
  • Authors if available
  • Supported Kotlin or Multiplatform platforms if it is a Kotlin Multiplatform dependency

Summary and Shortcuts

Now we know the different ways in which we can view our project’s dependencies in IntelliJ IDEA, and the different focus for each view.

IntelliJ IDEA Shortcuts Used

Here are the IntelliJ IDEA shortcuts that we used.

NamemacOS ShortcutWindows / Linux Shortcut
Open / Close Project Tool Window⌘1Alt+1
Recent Files⌘EControl+E
Shortcuts

Related Links

IntelliJ IDEA: Viewing Dependencies

If you’re working on a real-world application, your project will probably use external libraries and frameworks. Occasionally, you might want to see which dependencies your project uses, for various reasons. There are several ways to view dependencies in IntelliJ IDEA. Each view has a different focus.

Viewing Dependencies

Related Links