There are several reasons why you might want to move a commit to a different branch. Let’s take a look at some of them.
Committed to the wrong branch
You’re working on a new feature, but an urgent bug came in. You fixed the bug and committed the fix, but oops… you forgot to create a new branch for the bugfix! Now this bugfix is on the wrong branch. How do we fix this?
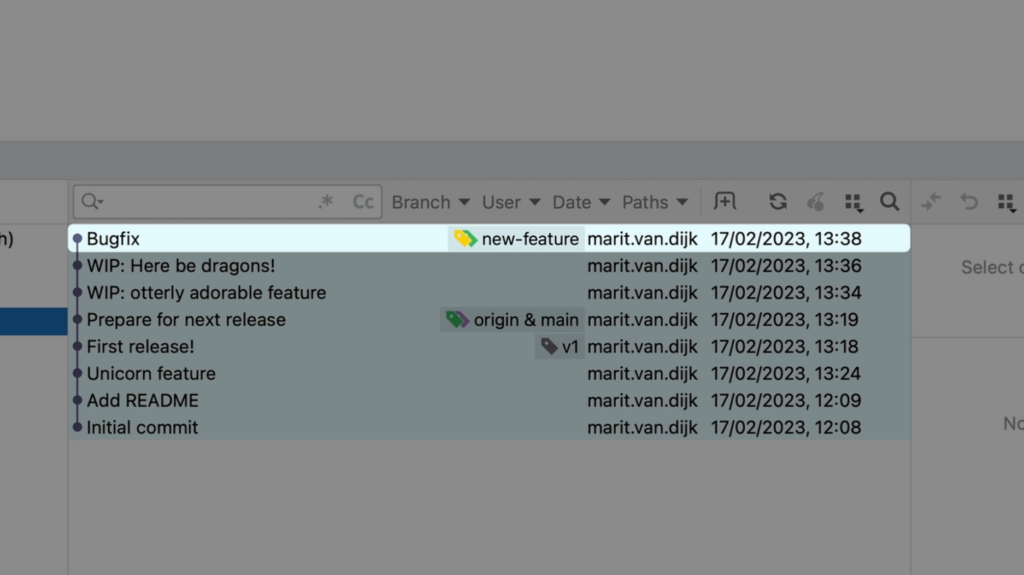
Use cherry-pick to move the commit
I could redo the work, especially if it’s a small change, but … I don’t want to! Luckily, there is a better way.
We only want to move this one commit from the feature branch to a separate bugfix branch. We can do this using Git’s “cherry pick” option from IntelliJ IDEA.
First, let’s go back to main and create the bugfix branch that we should have created in the first place.
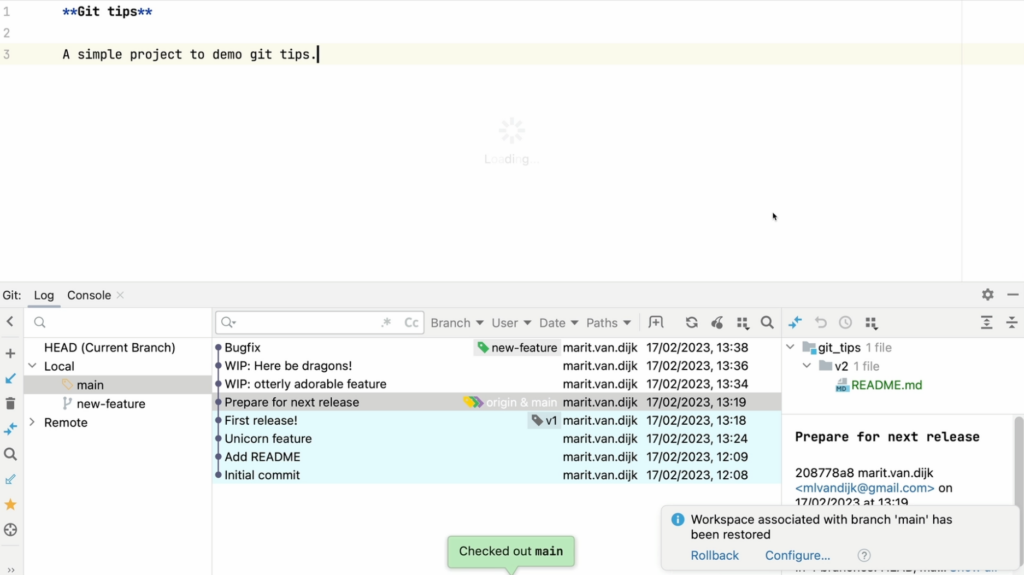
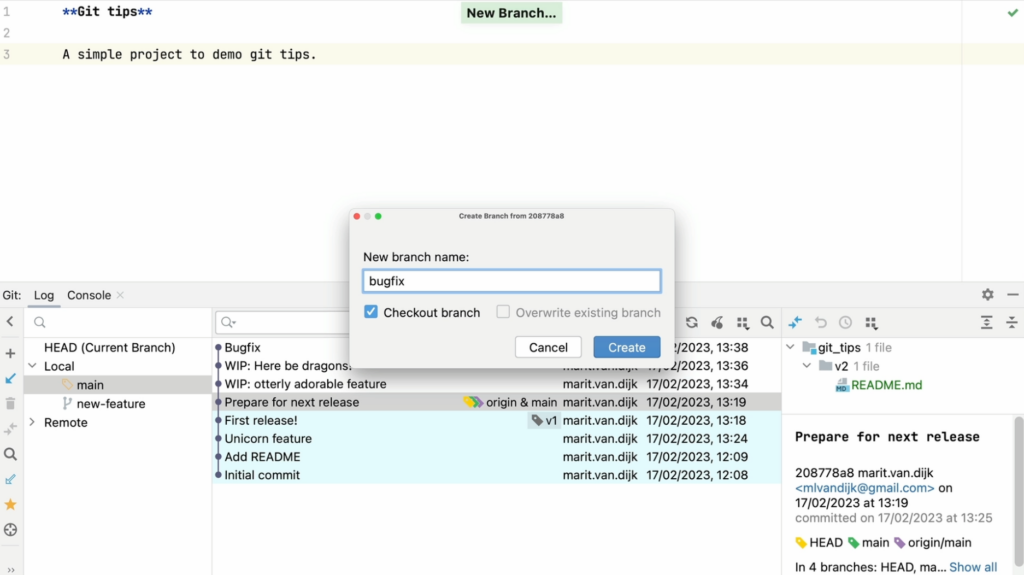
Once we’re back on the main branch, we can create a new branch named “bugfix”.
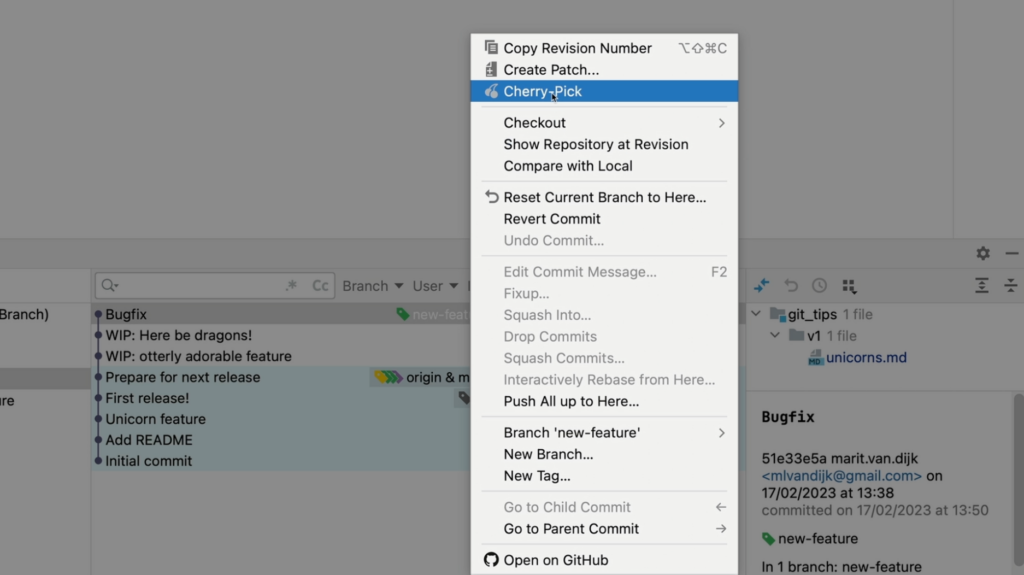
On the newly created branch, we can select the bugfix commit from the other branch and select Cherry-Pick to apply that commit to our current branch.
Cherry-pick from the command line
Yes, we can do this from the command line too, but there’s no cute cherry icon on the command line. To cherry-pick a commit from the command line, we can use the command git cherry-pick <commit hash>. We would need to find the commit hash of the commit we want to cherry-pick, which we can find for example in the Commit Details pane in the Git log window (see below).
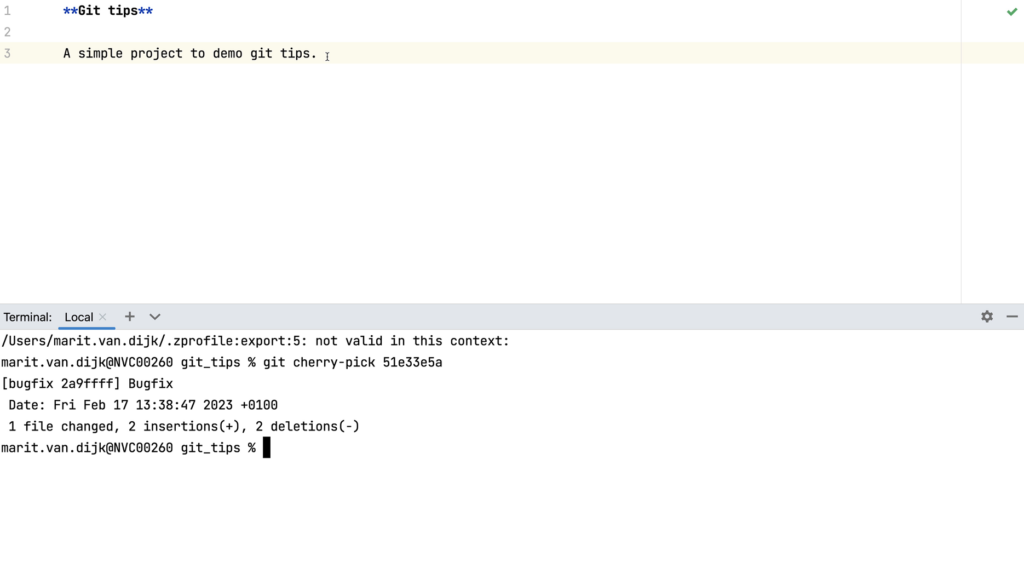
As we can see, the bugfix commit is now on the bugfix branch.
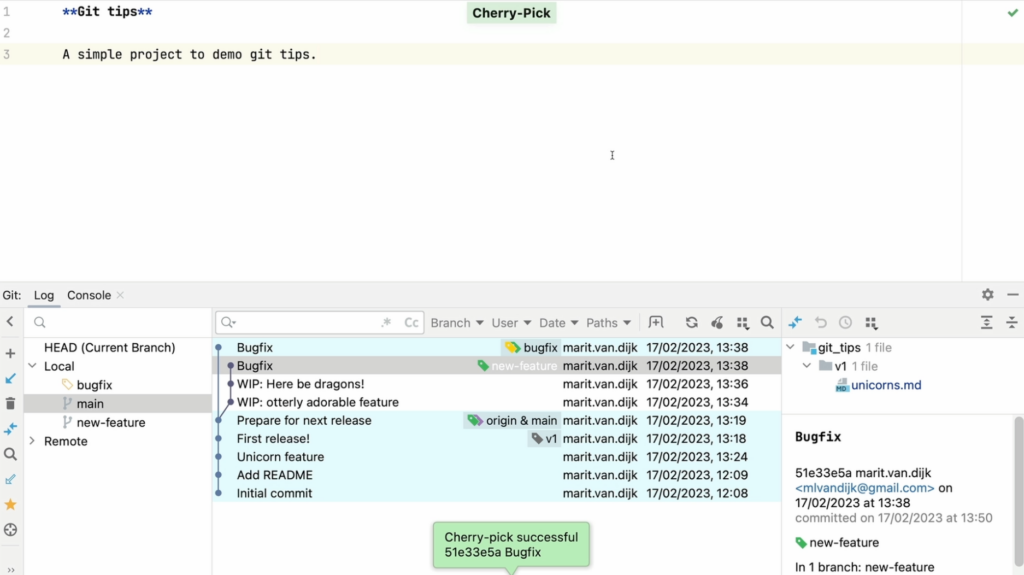
Other use cases for cherry-picking
Cherry picking can be useful in other situations too. Let’s take a look at some other use cases for cherry-picking.
Backporting a fix
We can also use cherry-picking to backport a fix to a previous release branch. For example, let’s move our bugfix commit also to the v1-release.
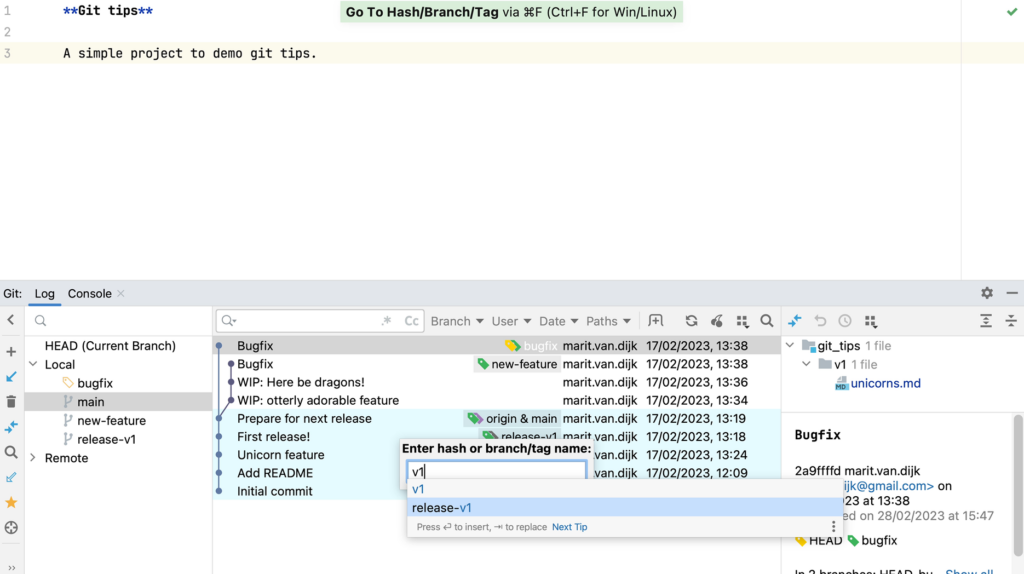
To do so, first we need to look for the last release (v1). We can search for a specific commit hash, branch or tag name in the Git log (⌘ F on Mac or Ctrl+F on Windows/Linux).
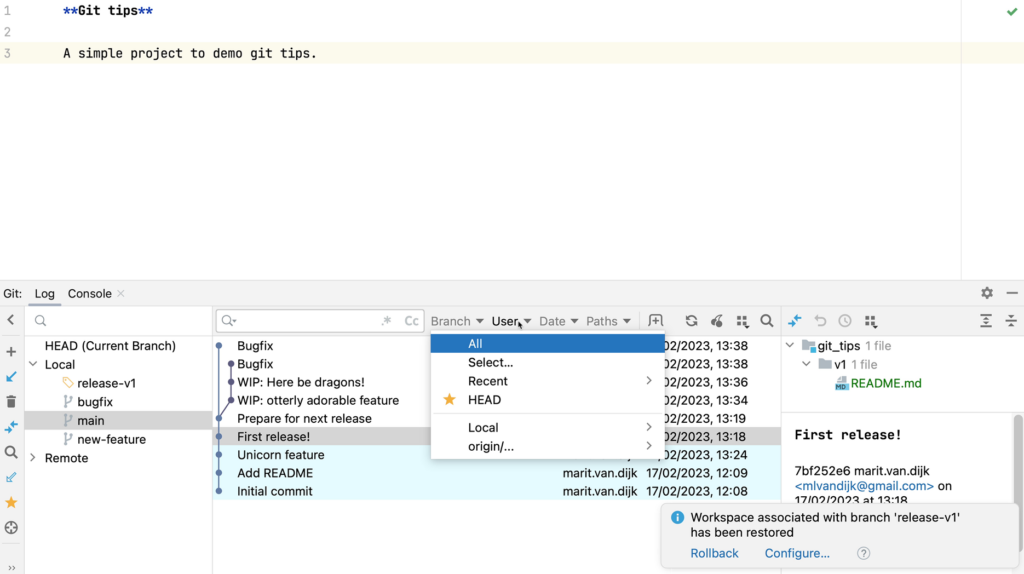
We can also filter commits in the commit log by branch, user, date or path.
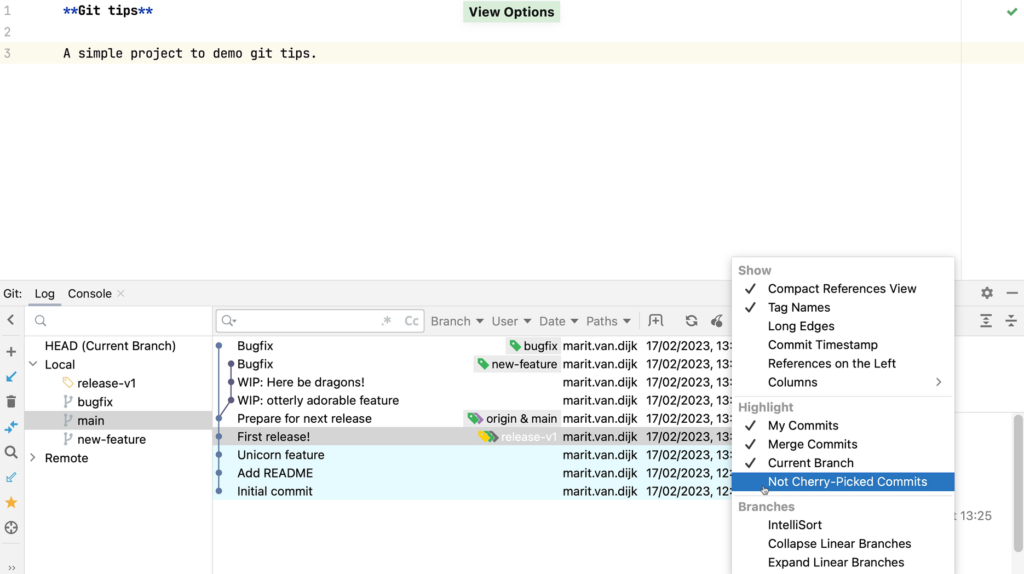
To see which commits have not yet been applied to this branch, we can click View Options and select Highlight | Not Cherry-Picked Commits. We’ll compare with the new-feature branch. Commits that have already been applied to the current branch are greyed out.
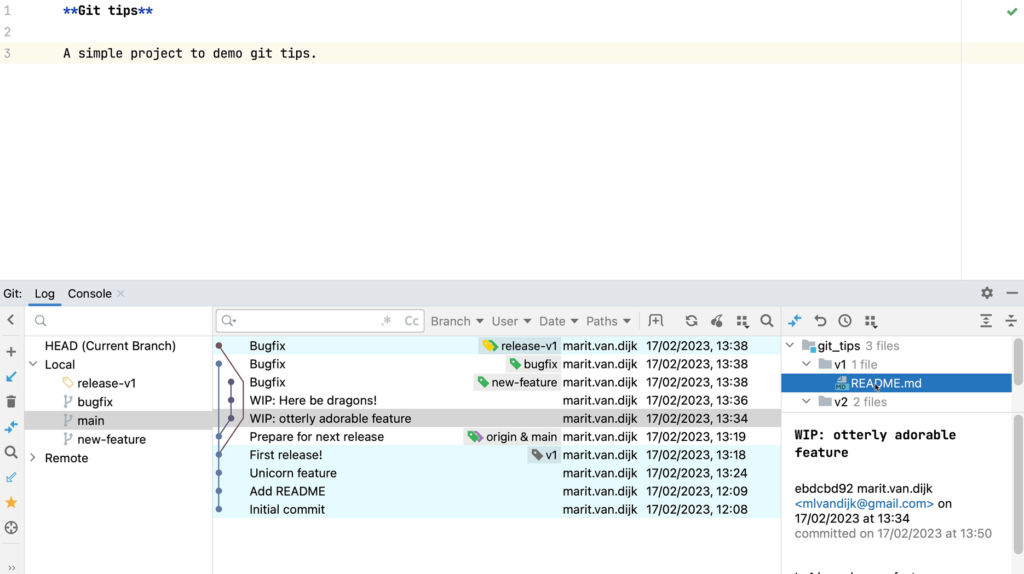
When we select a commit, we can look at the information in the Commit Details area (at the bottom right) to make sure these are the changes we want to transfer to this branch. In the Commit Details area we can see which files were changed in a particular commit. We can right-click a file and select Show Diff from the context menu to open the changes that were made to that file.
If we are sure these are the changes we want, we can cherry-pick them to the previous release branch.
Cherry pick part of a commit
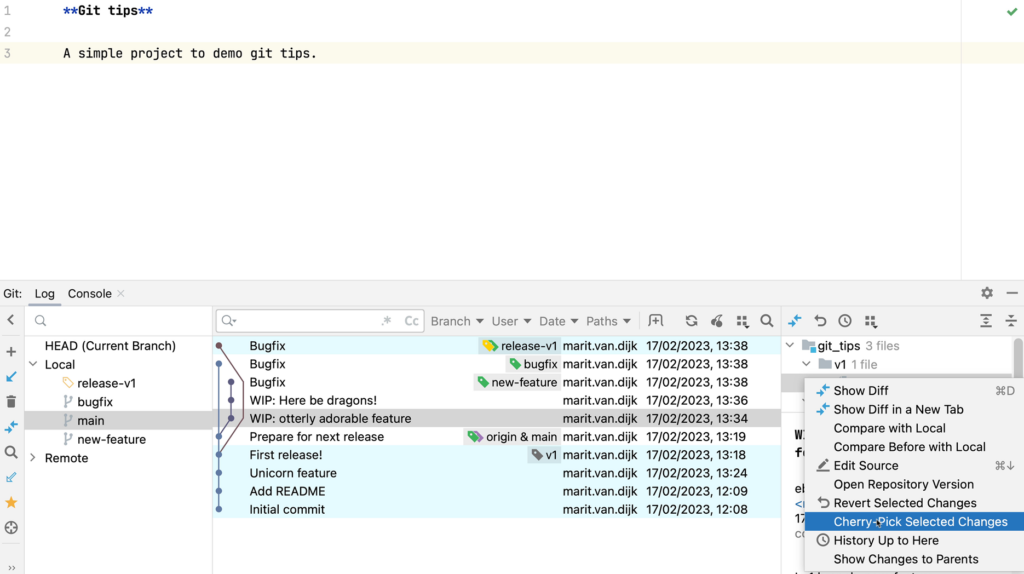
In the Commit details pane on the right, select the files containing the changes you want to apply to the target branch, right-click and select Cherry-Pick Selected Changes from the context menu.
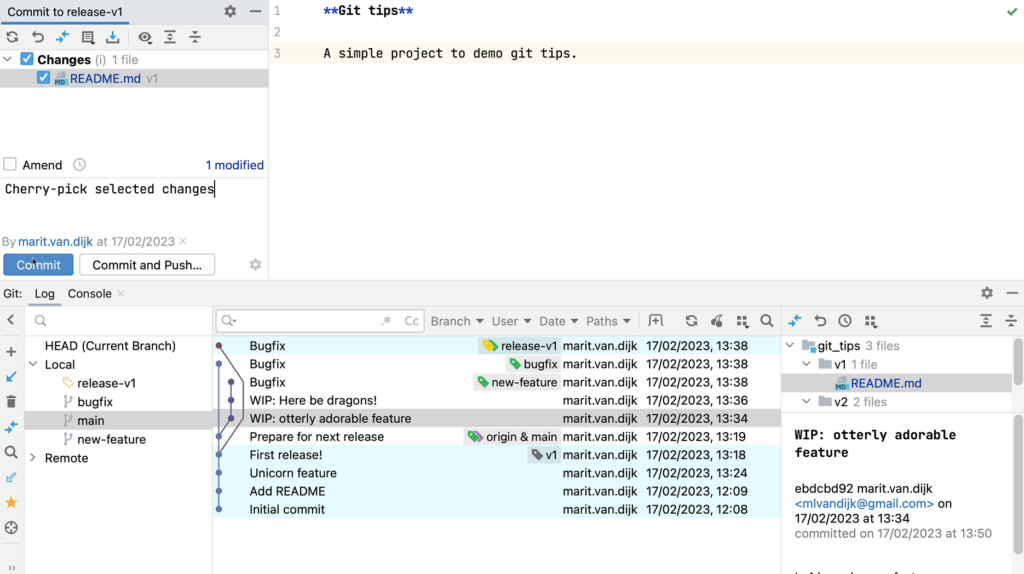
The cherry picked changes are transferred to the change list and we can commit them from there.
Dealing with conflicts
So far, cherry picking went smoothly because there are no conflicting changes. What if there are conflicts?!
When we cherry-pick a commit that has conflicts with our current branch, the Merge Conflicts dialog opens.
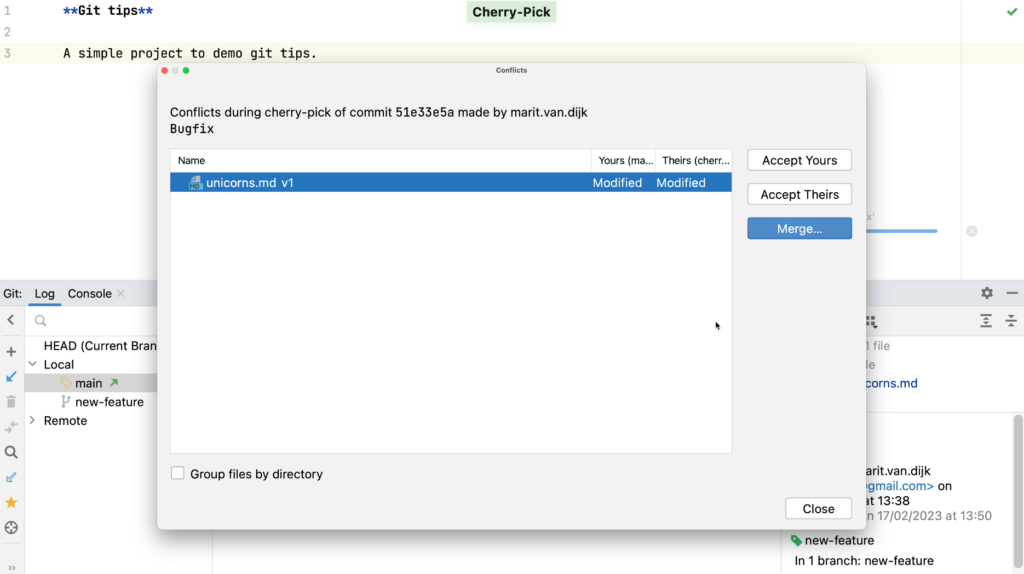
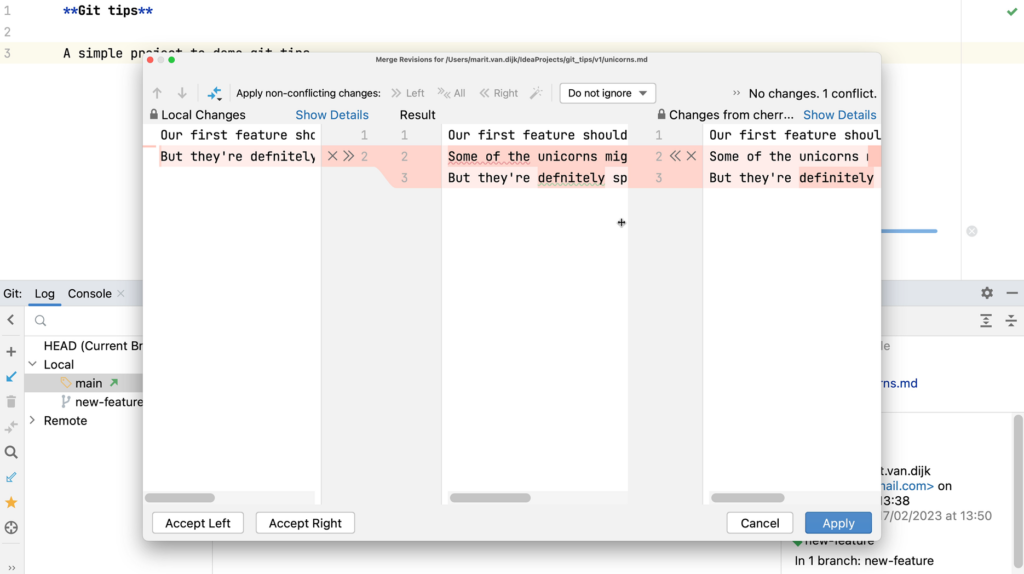
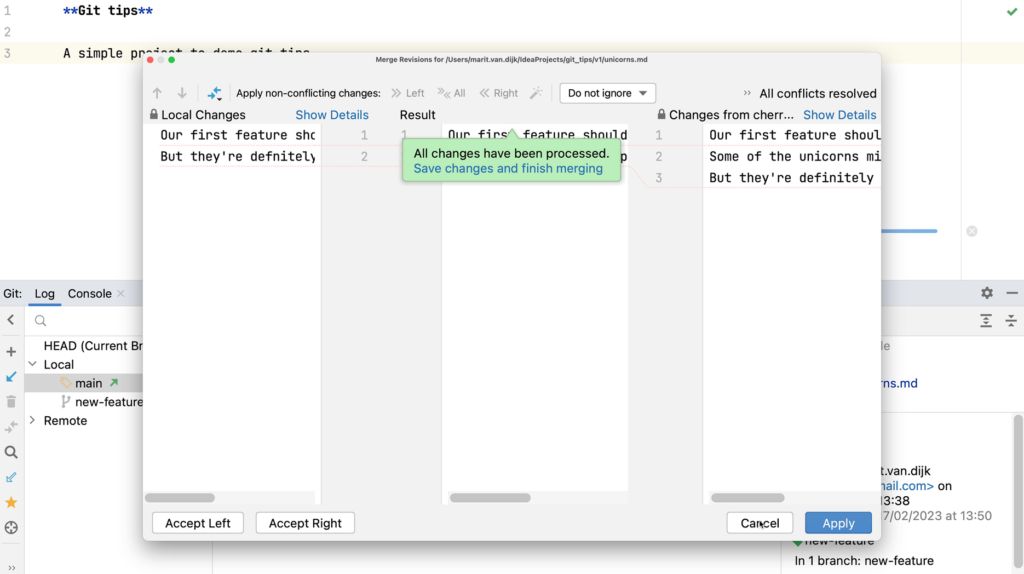
We can resolve the merge conflicts here. We want to keep some changes, and reject others.
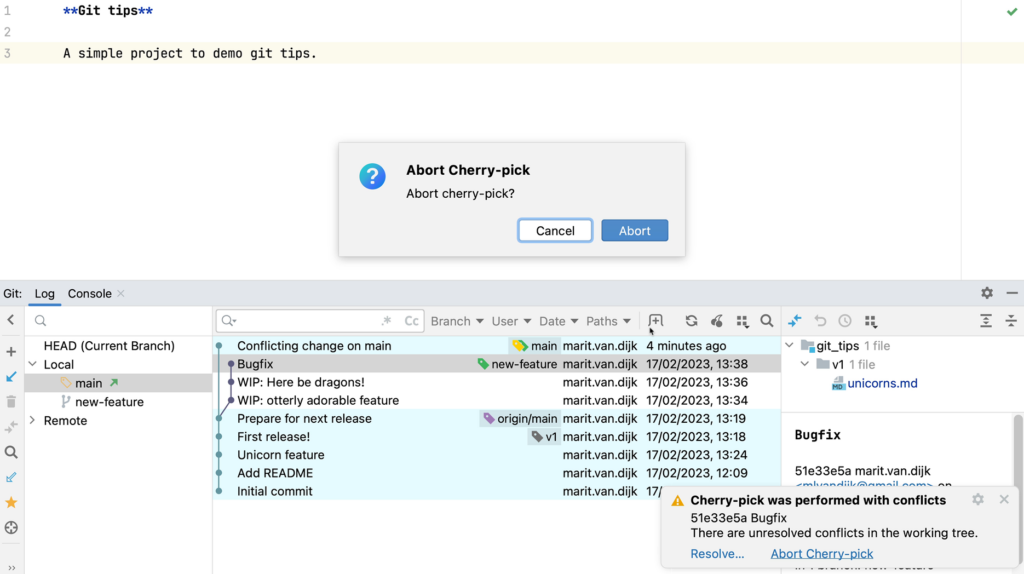
If you’re not able to resolve the merge conflicts, you can also abort the cherry pick.
Continue after cherry-picking
Once we’re done cherry-picking, we can go back to the “feature” branch. Since we haven’t pushed these changes yet, we can remove the commit from the feature branch by selecting Drop commit.
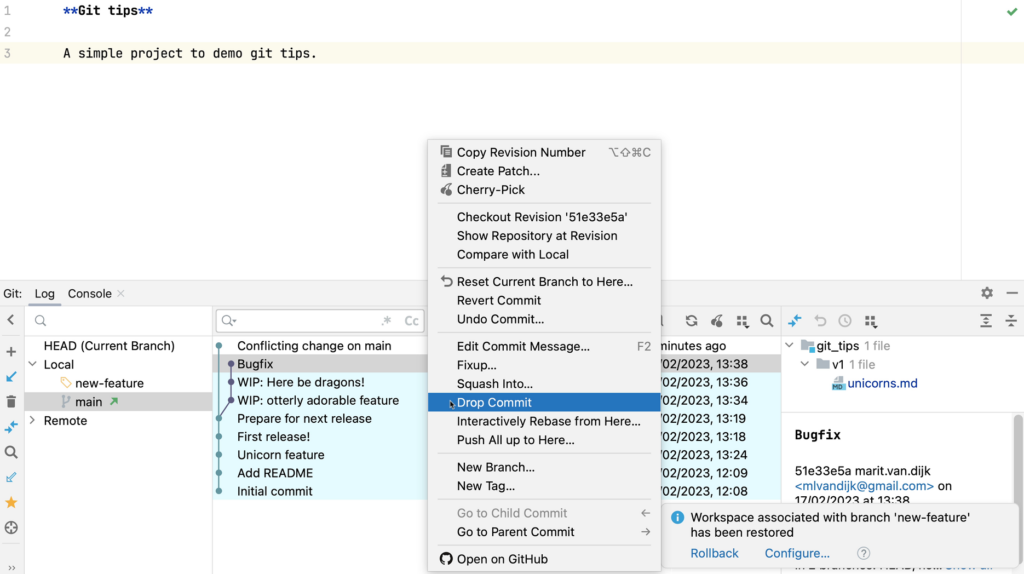
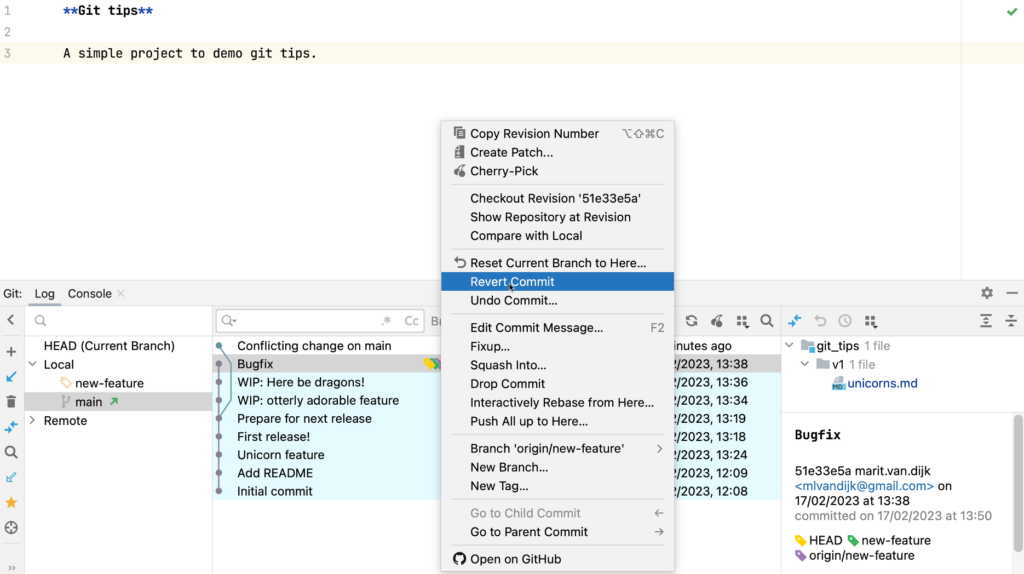
What if you have pushed the changes already? Then you might want to revert it on this branch instead. Right-click the commit and from the context menu select Revert Commit.
Now we can continue working on the new feature!
Conclusion
Moving a commit to a different branch. Not nearly as scary as it sounds! Let the IDE help to turn this into a quick, low-stress task.
Links
- (code) https://github.com/mlvandijk/git_tips
- (JetBrains – IntelliJ IDEA) Cherry-pick separate commits
- (Git documentation) Git cherry-pick
- (blog) Marco Behler: Git: Merge, Cherry-Pick & Rebase
- (blog) IntelliJ IDEA: Resolving Merge Conflicts in Git
- (blog) Foojai.io: Resolving Git Merge Conflicts in IntelliJ IDEA

One thought on “Cherry-pick: Move a commit to a different branch”
Comments are closed.