When working with large, complex software projects, we need to understand the dependencies between components in your projects.
IntelliJ IDEA’s Dependency Structure Matrix (DSM), or Dependency Matrix, that can help us with this! Let’s take a look at how to use the Dependency Structure Matrix to see dependencies between different components, like modules, packages, and classes. See how to identify dependencies, find cyclic or mutual dependencies, and visualize the flow of dependencies to see which components use or depend on other components and vice versa.
In this tutorial, we will take a look at working with GitLab Merge Requests inside IntelliJ IDEA.
When reviewing Merge Requests in a web interface, we don’t have the same support that our IDE gives us, like syntax highlighting and the context within which the code was written.
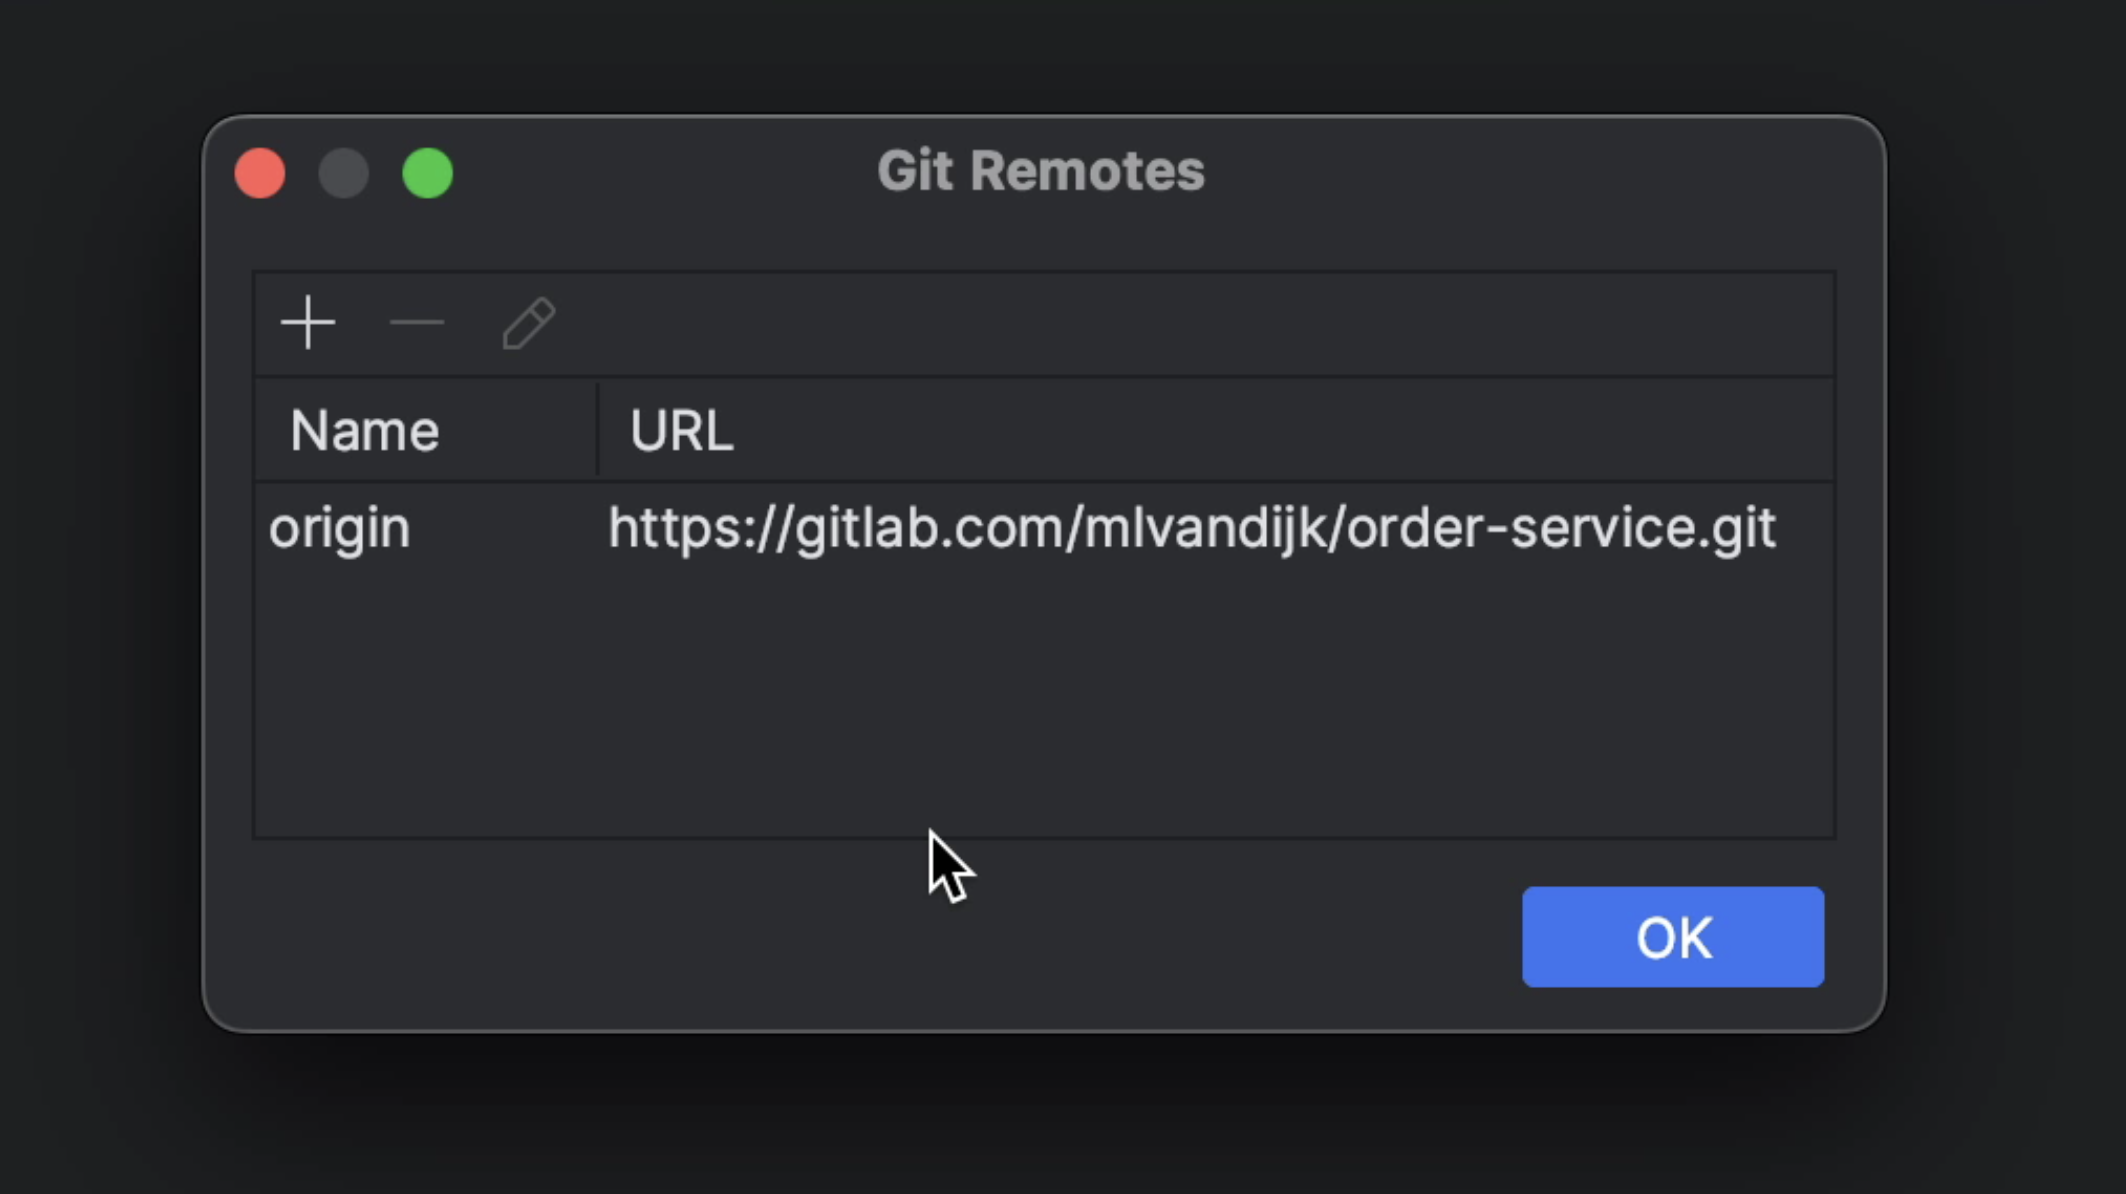
IntelliJ IDEA has support for reviewing and merging GitLab Merge Requests. These features are available if the IntelliJ IDEA project has a remote that points to GitLab.
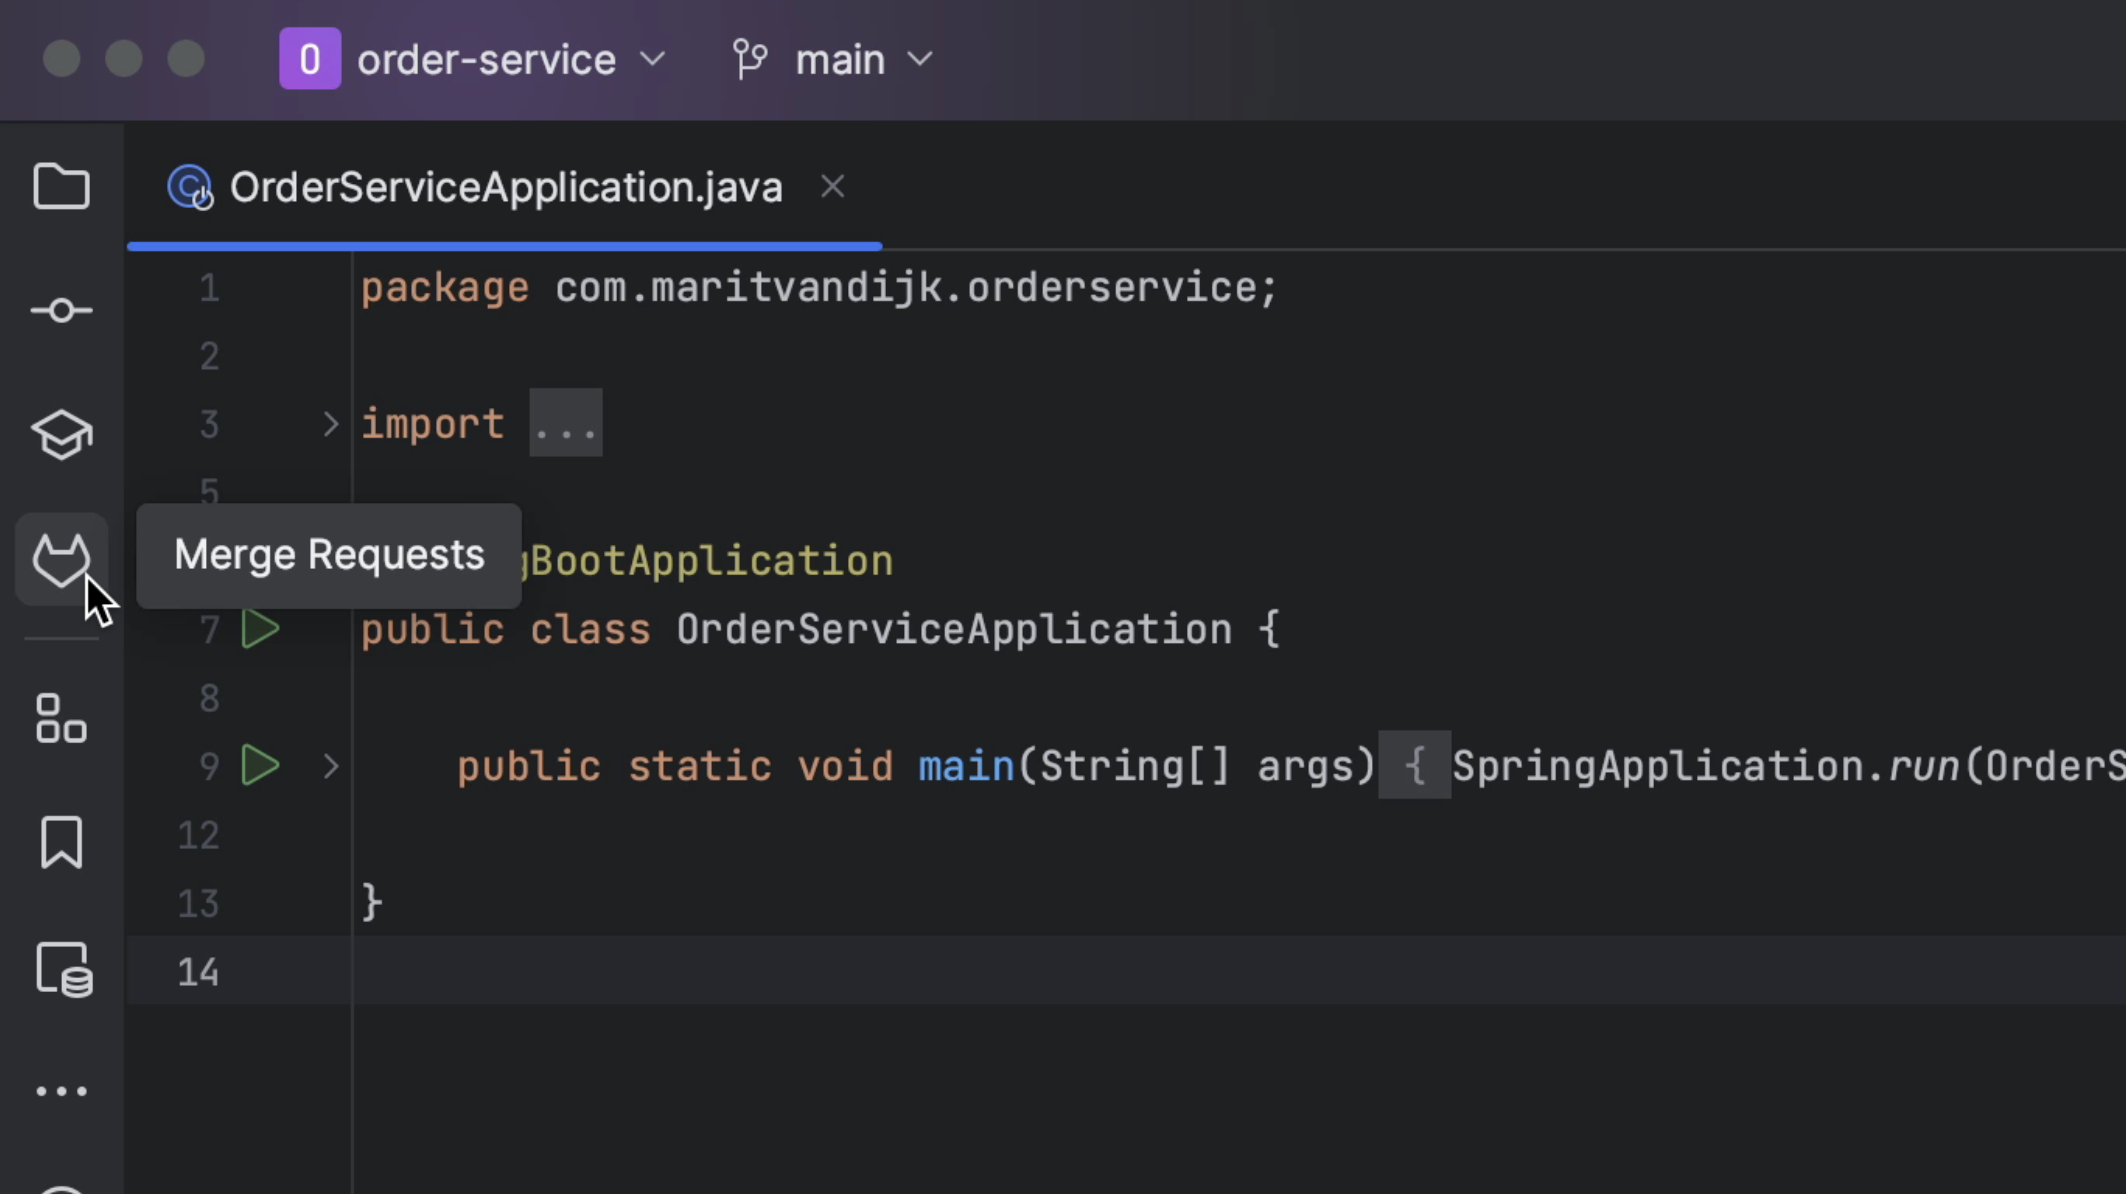
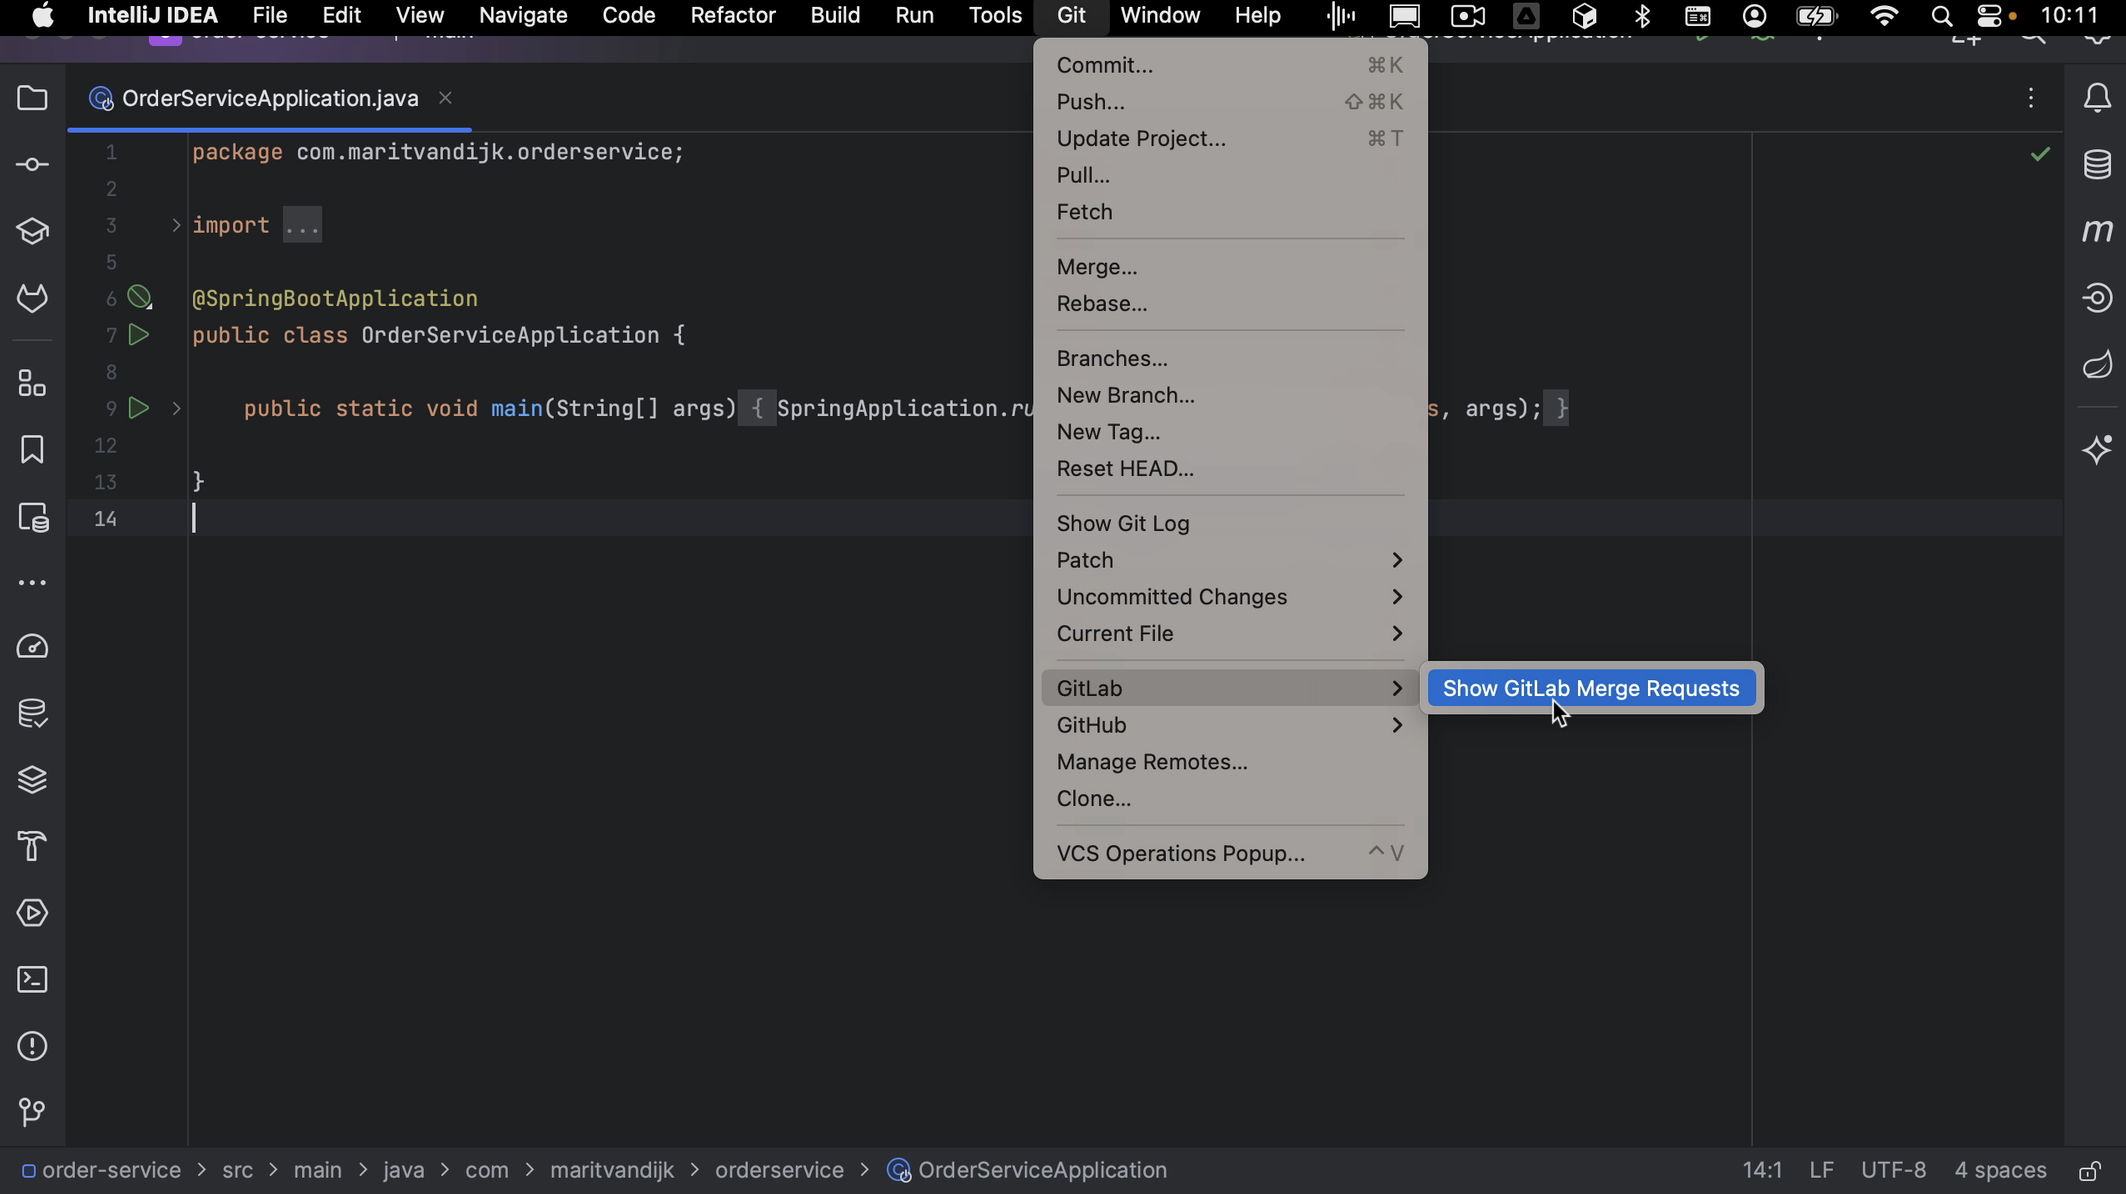
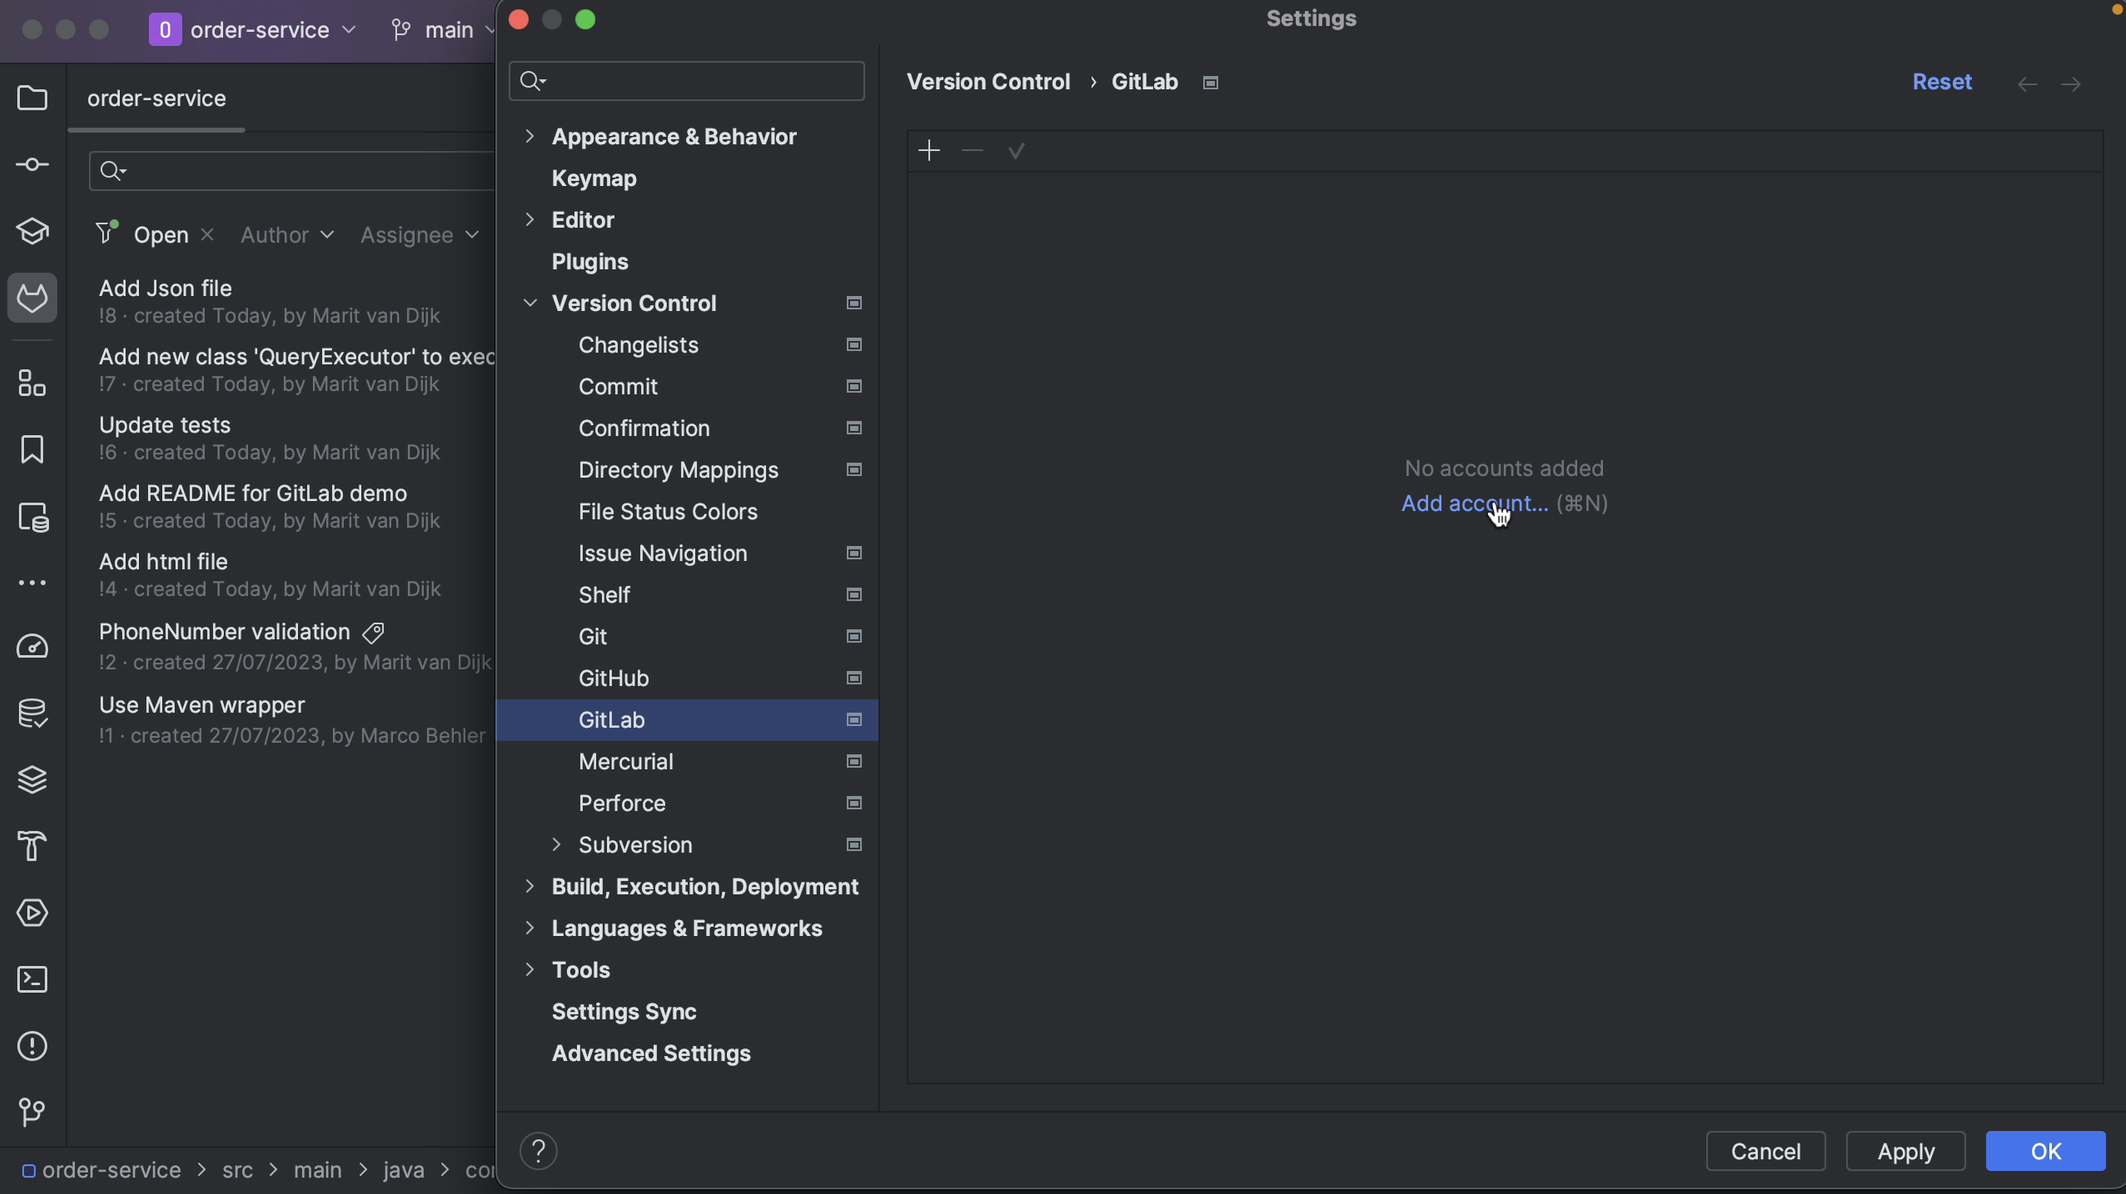
We can open the GitLab Merge Requests using the GitLab logo on the left, or from the menu by going to Git > Gitlab > Show Gitlab Merge Request.
Logging in to GitLab from IntelliJ IDEA
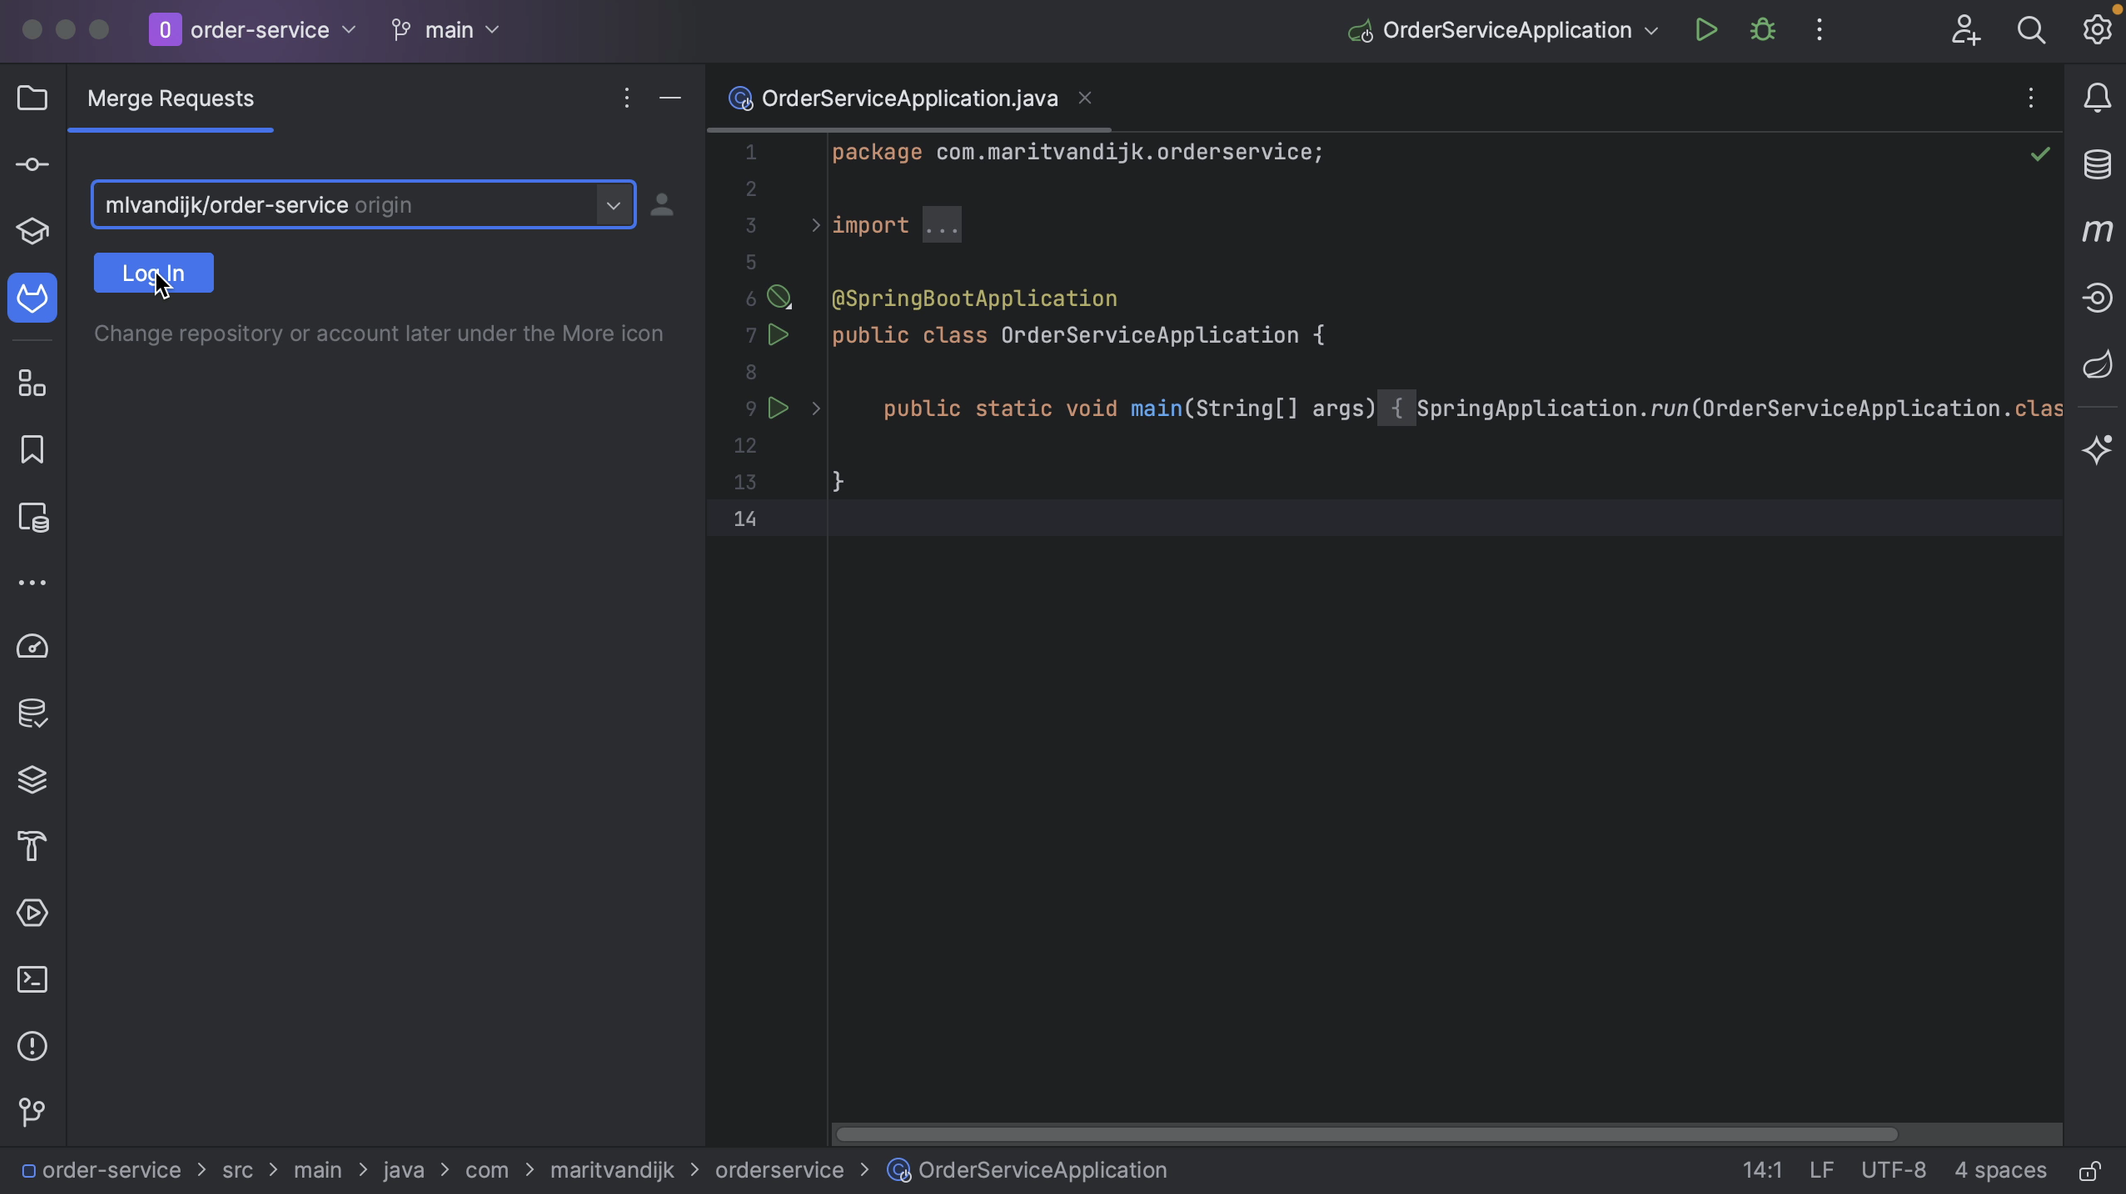
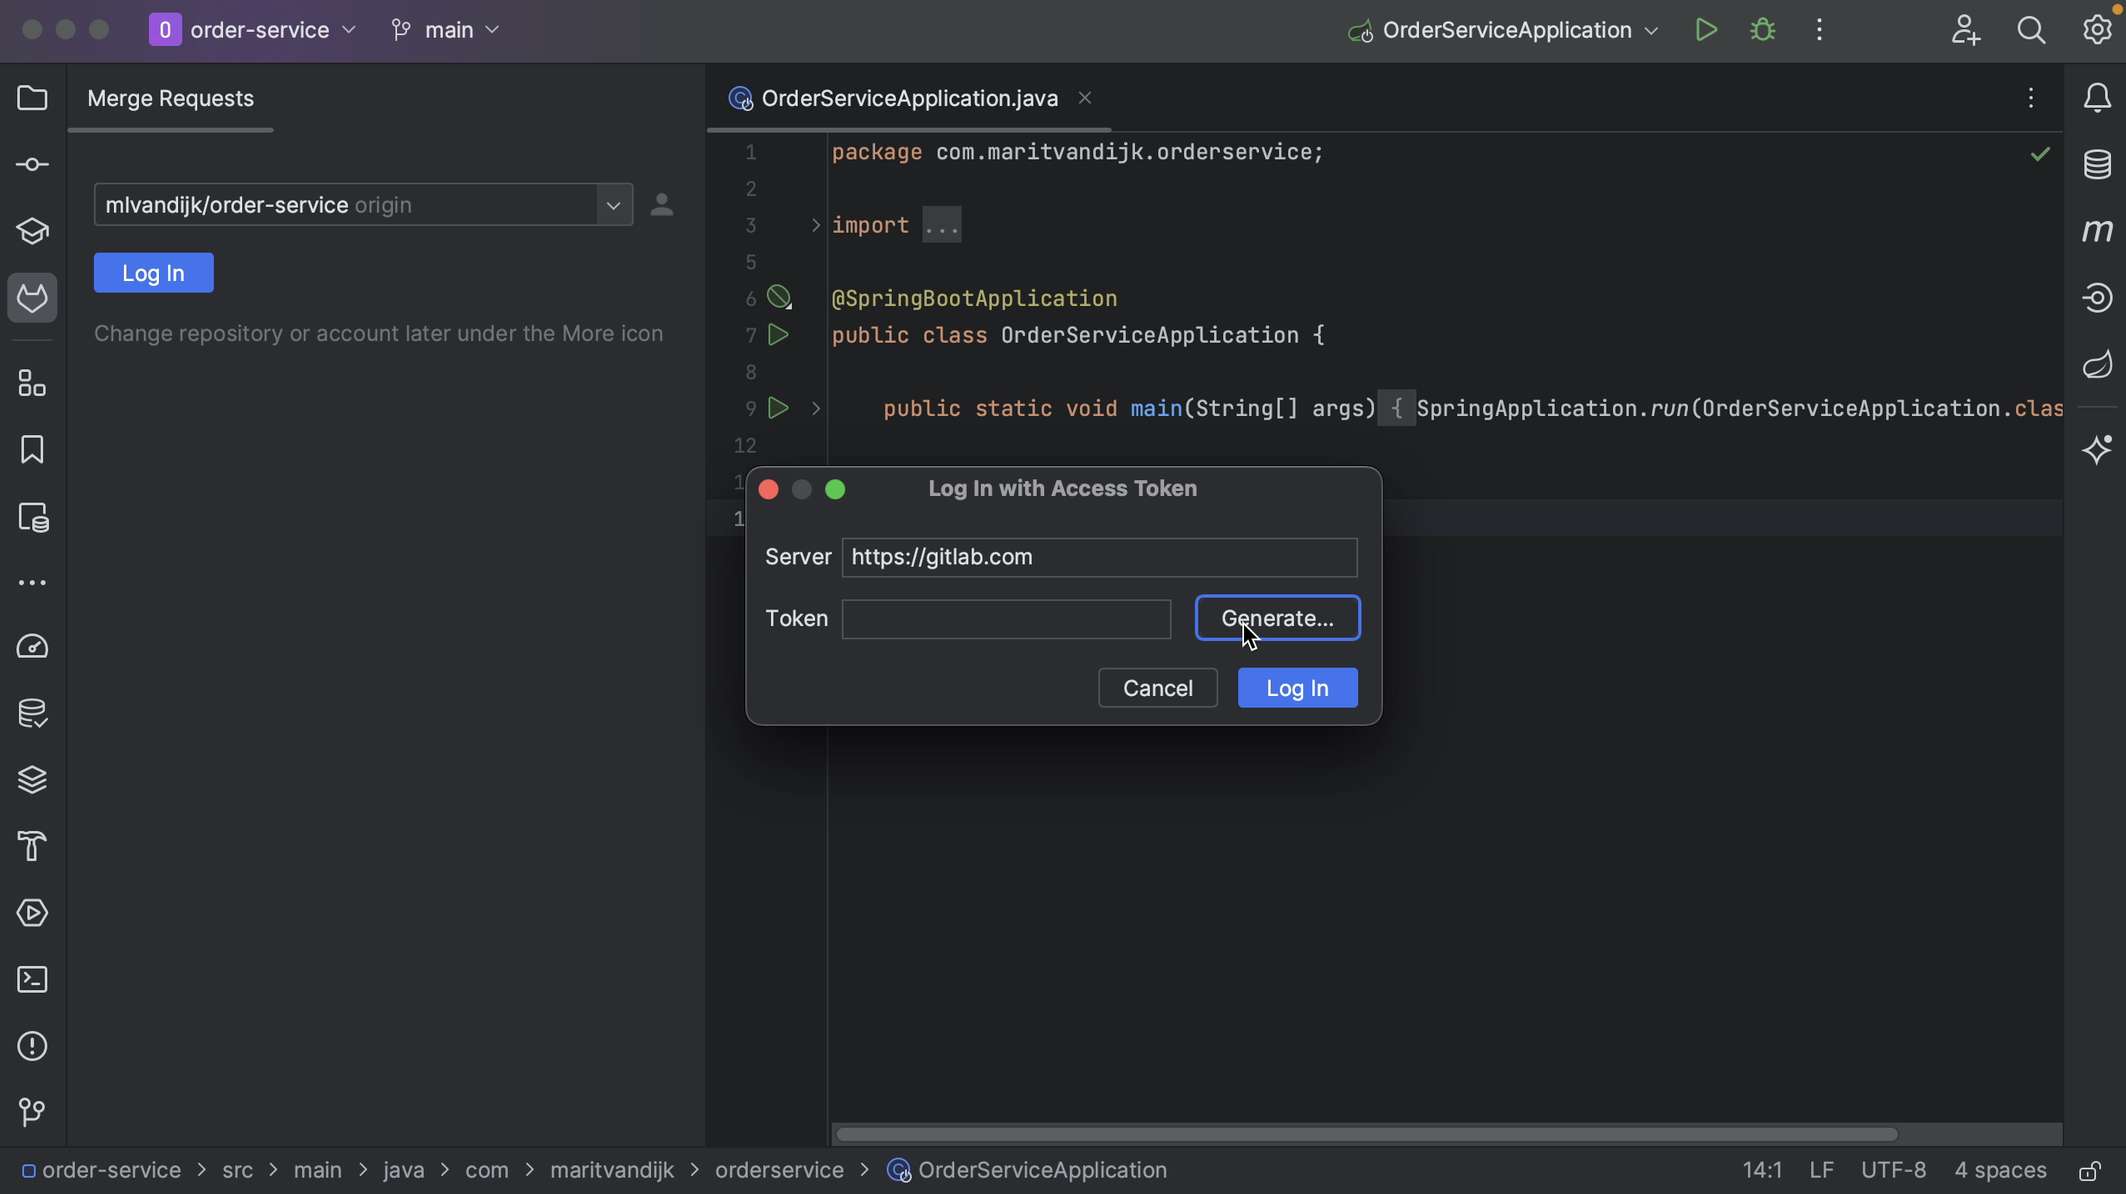
If we aren’t already logged in to GitLab via IntelliJ IDEA, the GitLab Merge Requests tool window will prompt us to Log In.
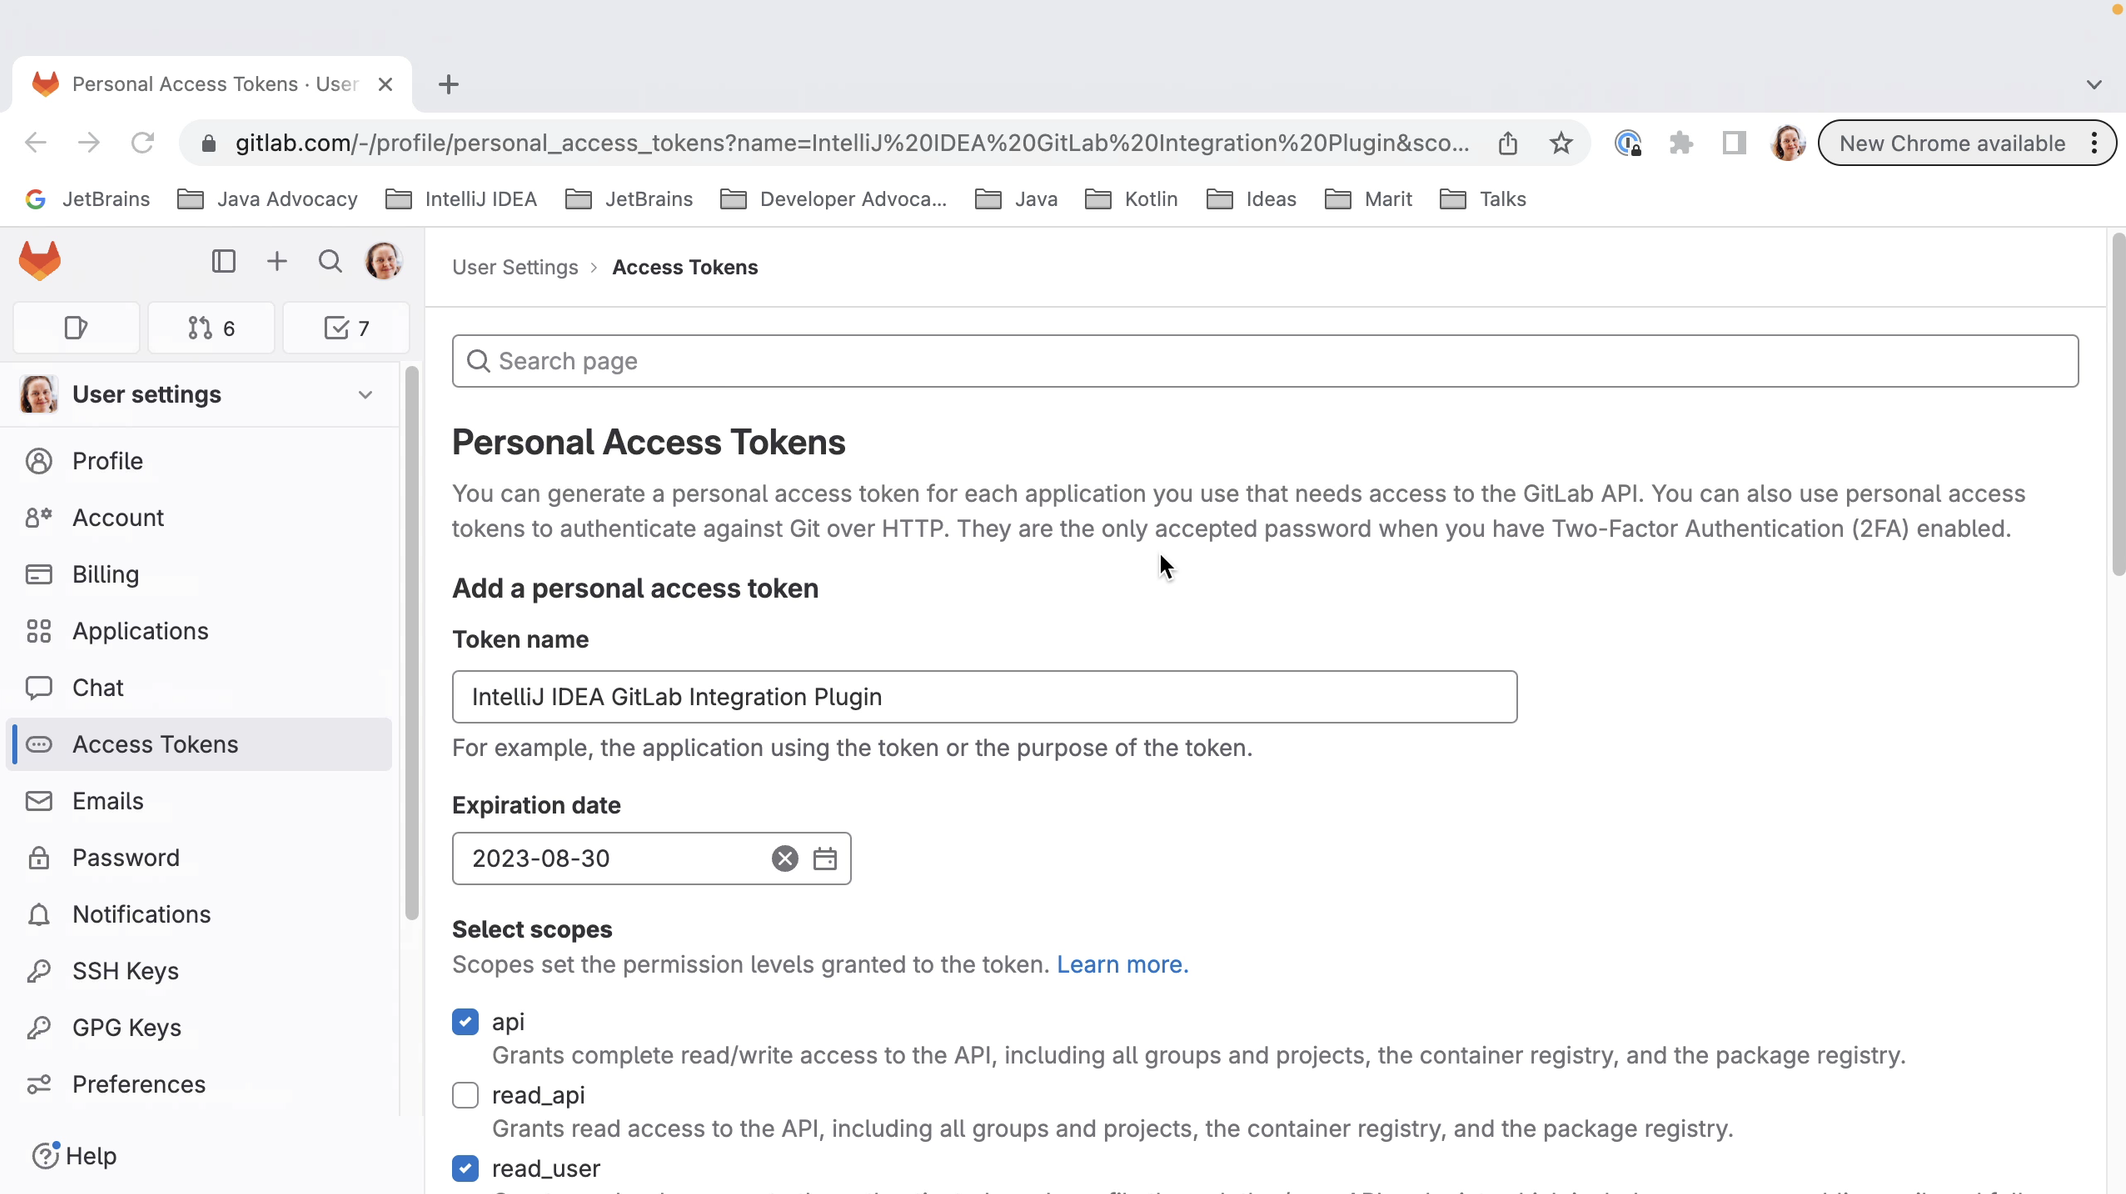
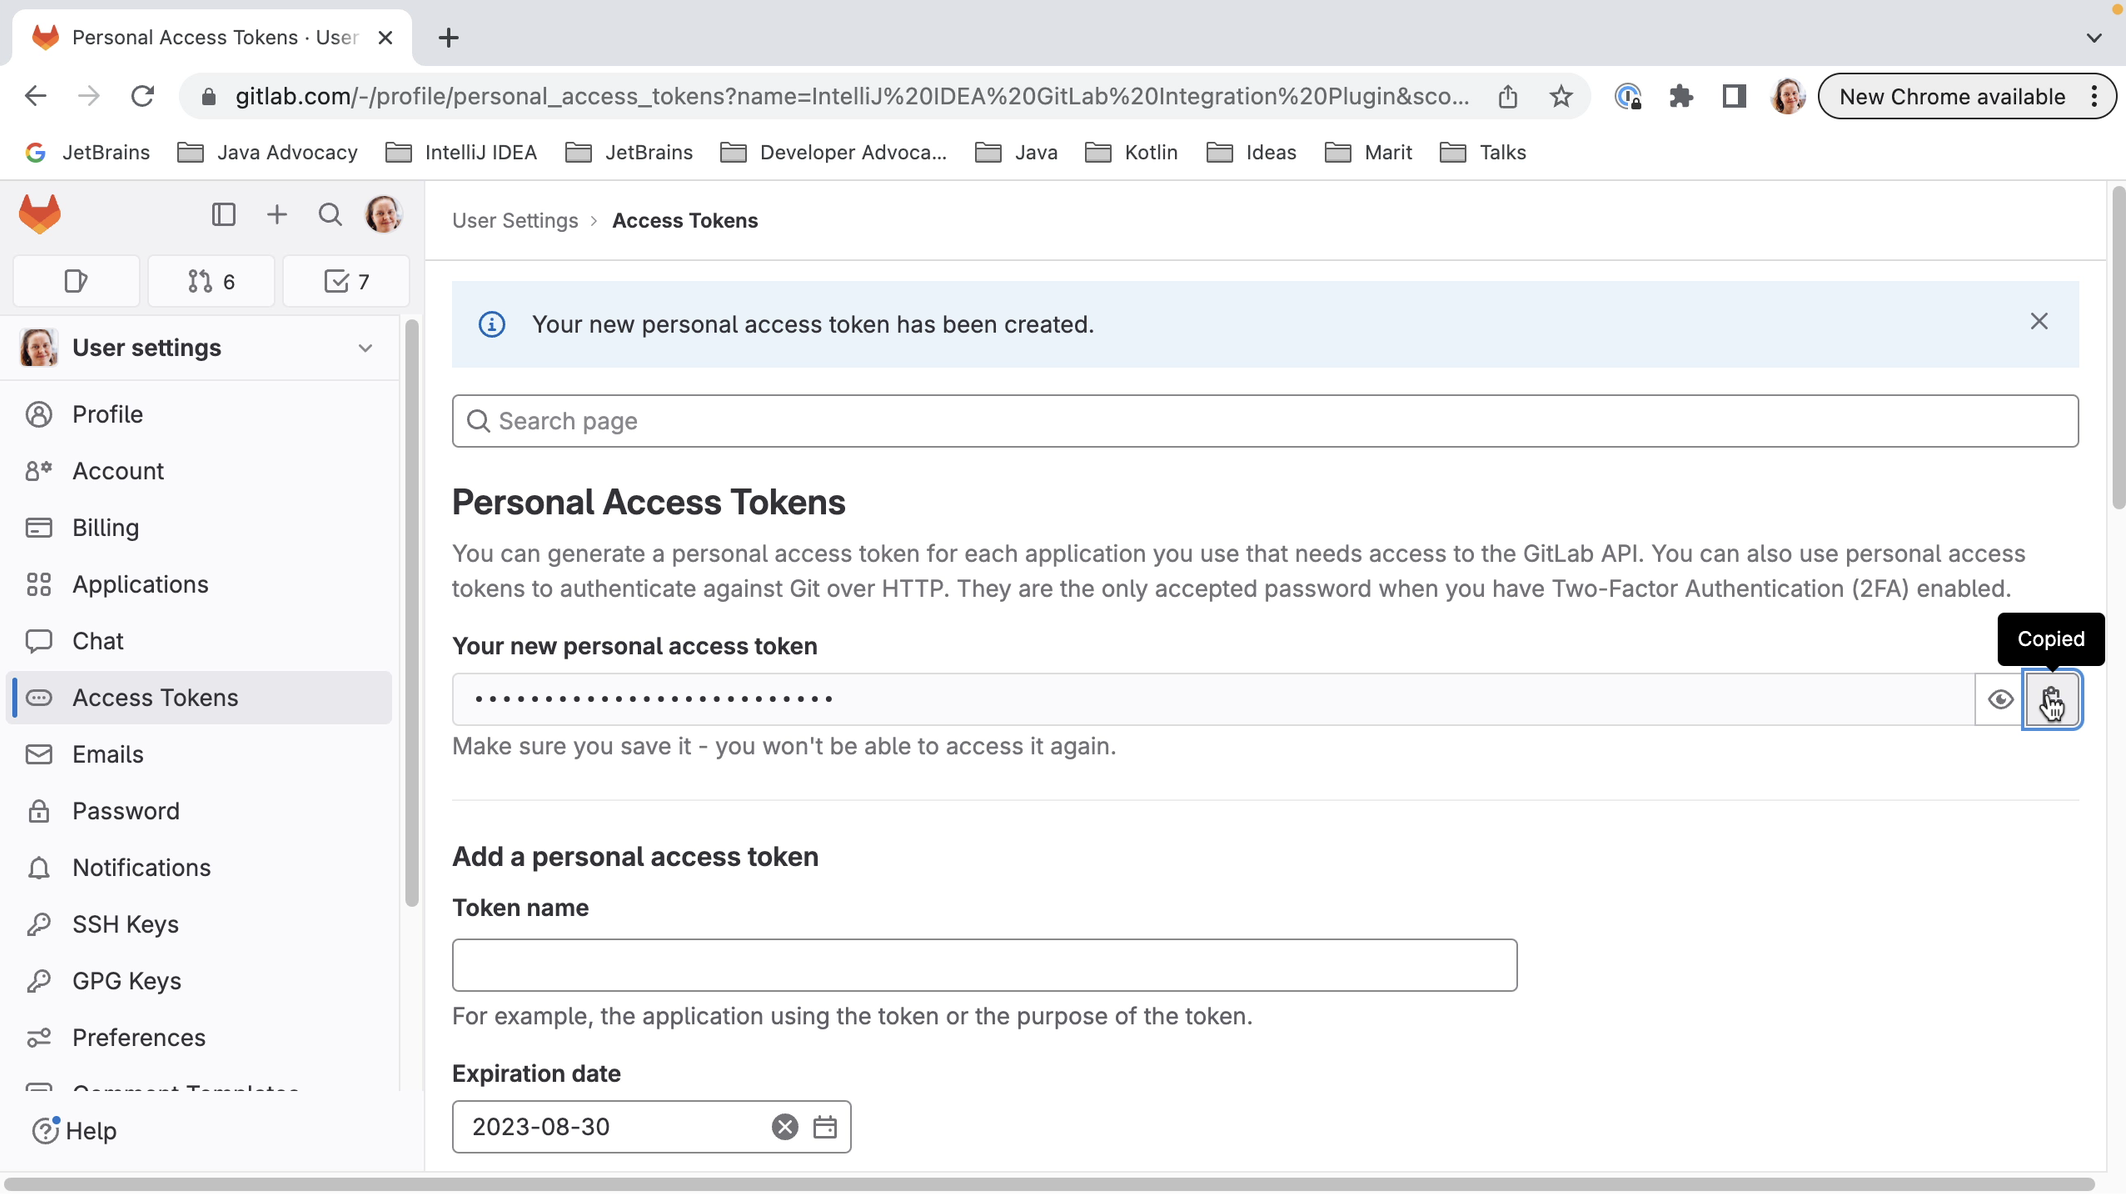
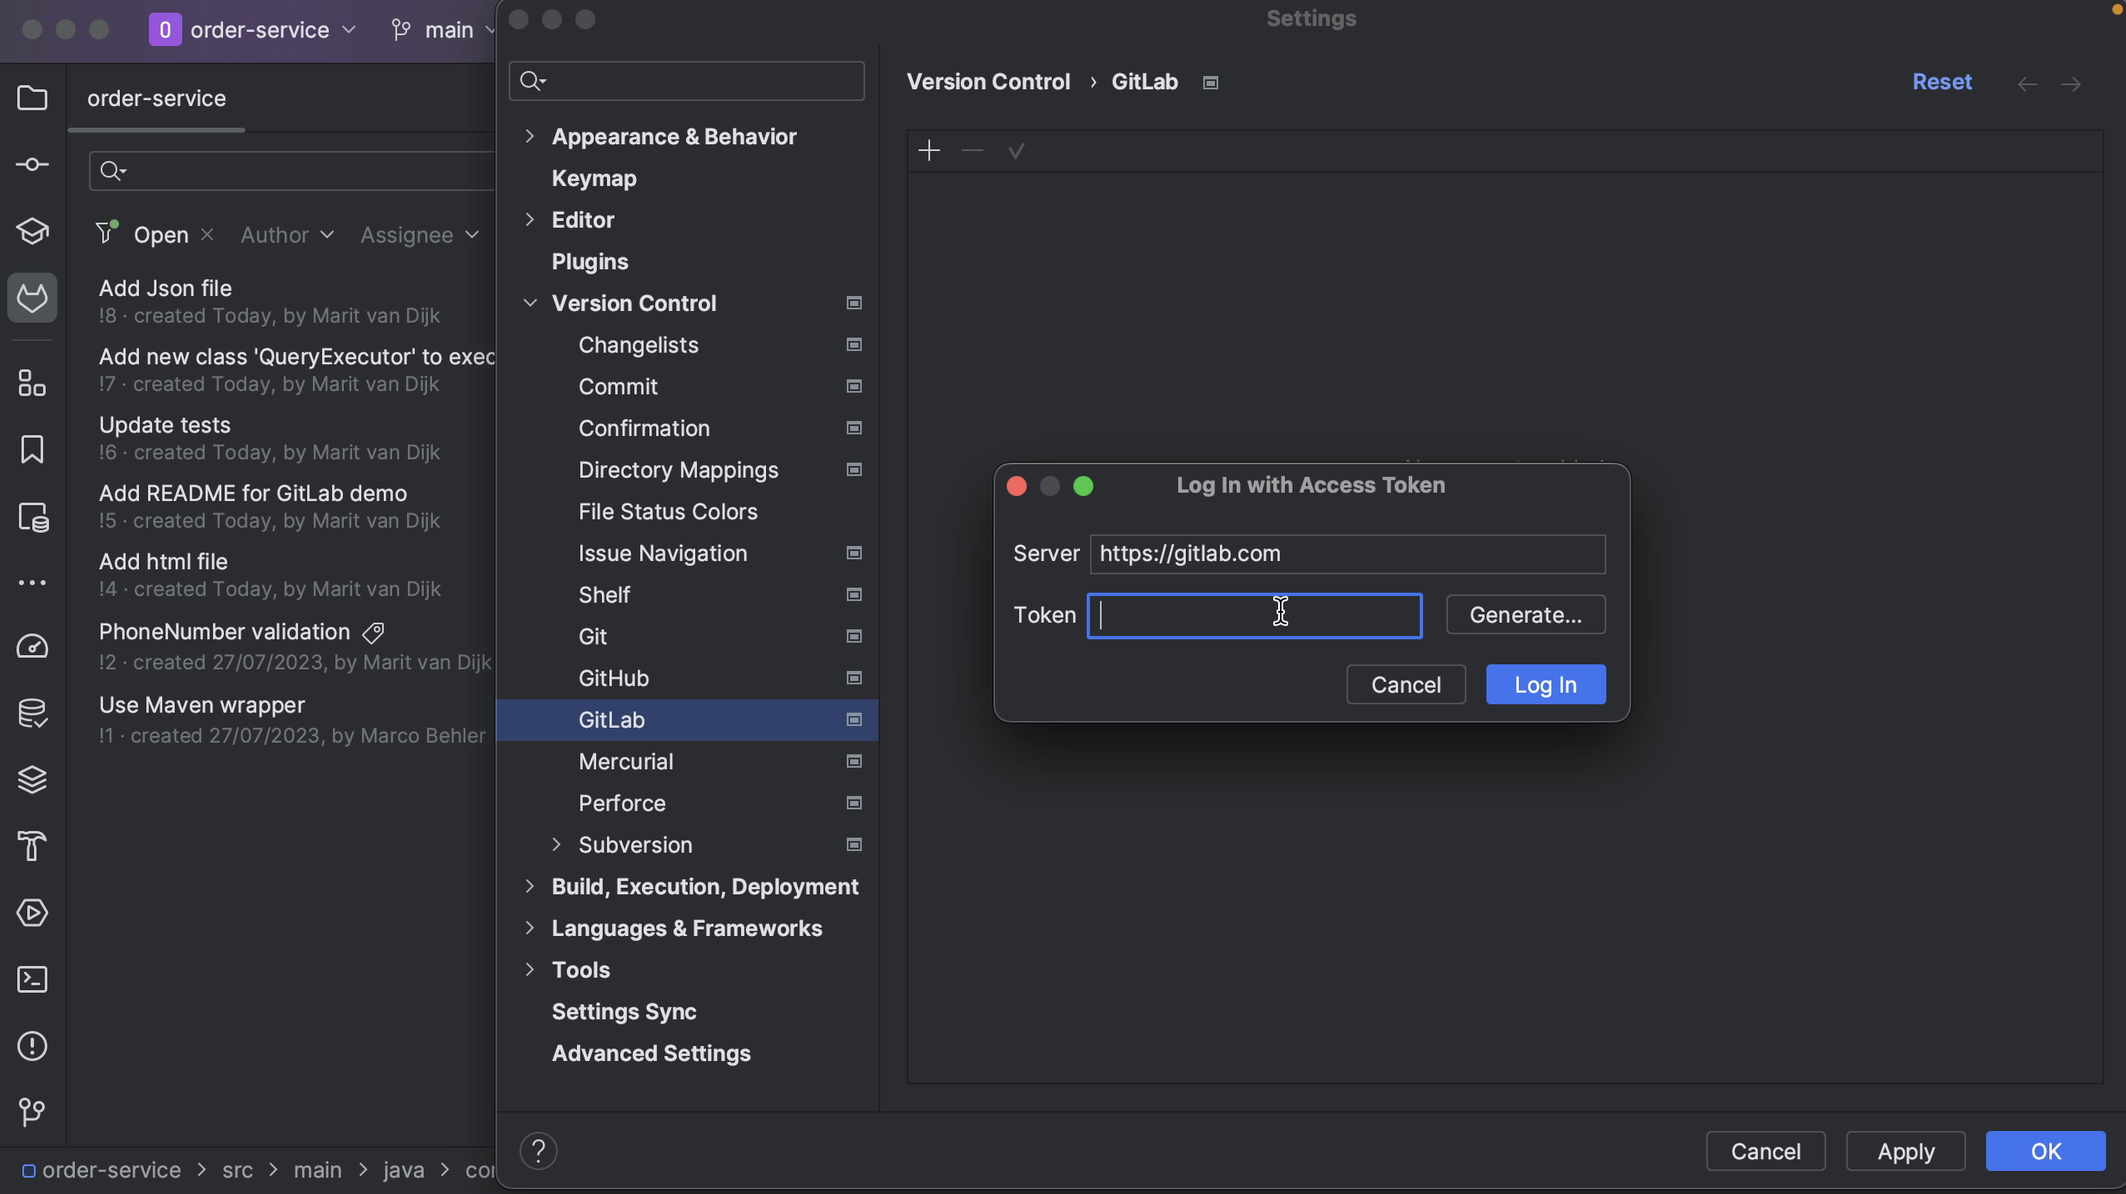
We can log into GitLab with a token. When we click Generate, this will take us to the GitLab page where a token with the right scopes can be generated for us. Click the button Create personal access token to create the token. When the token is generated, click the button to copy the token.
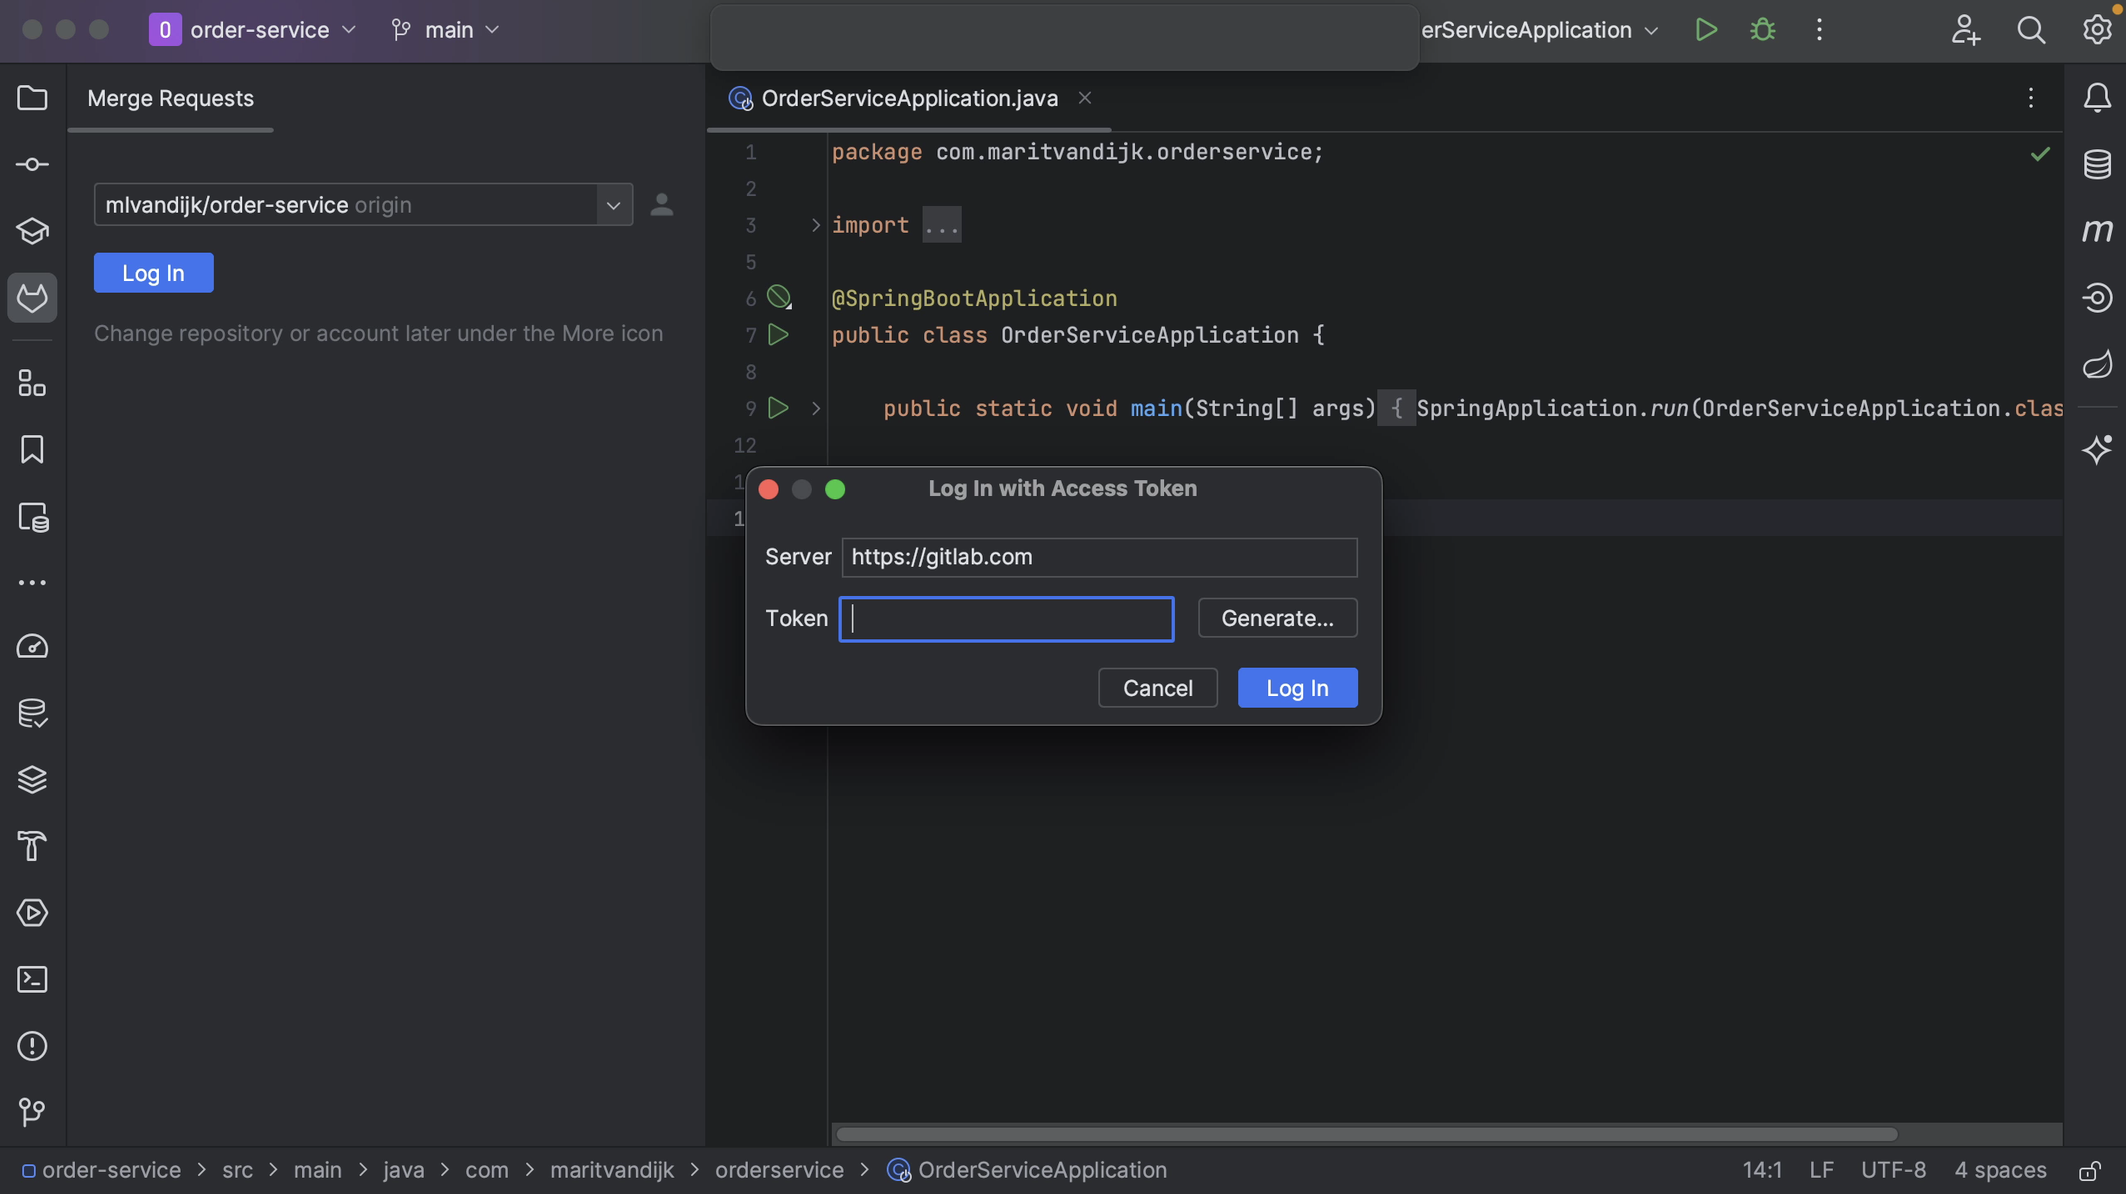
We can copy the token into the Token field in the popup and click Log In.
Alternatively, we can use an existing token, as long as it has the required scopes.
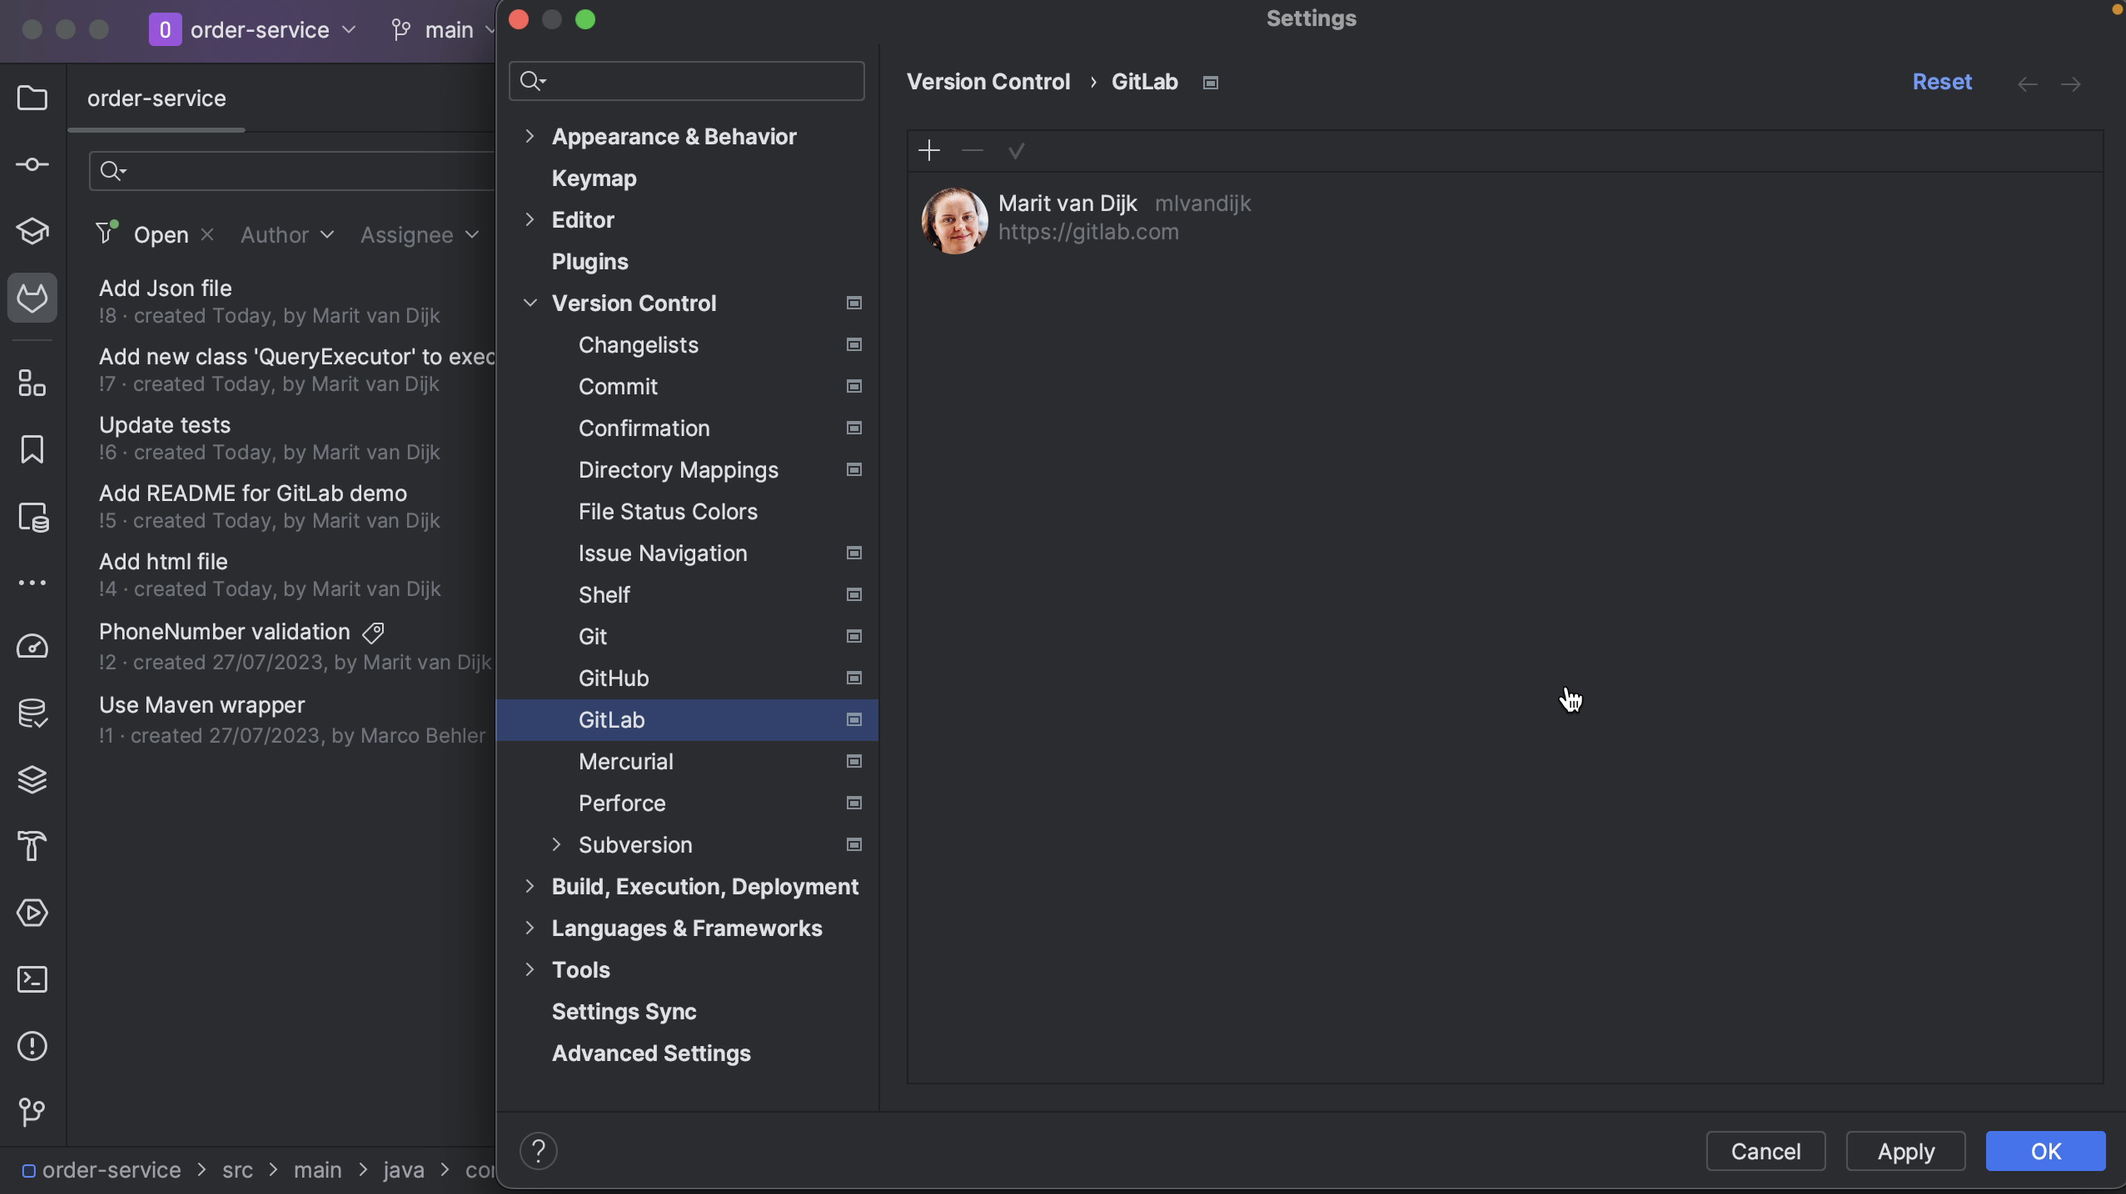
We can also log in to our GitLab account in the Settings. Open the Settings (⌘, on macOS | Ctrl+Alt+S on Windows/Linux) and go to Version Control > GitLab. Click Add Account (⌘N on macOS | Alt+Insert on Windows/Linux) to add an account if there is no account logged in, or click the + button at the top left to add an account. In the popup, add the Server if needed, paste the token from GitLab into the Token field in the popup and click Log In.
GitLab Merge Request tool window
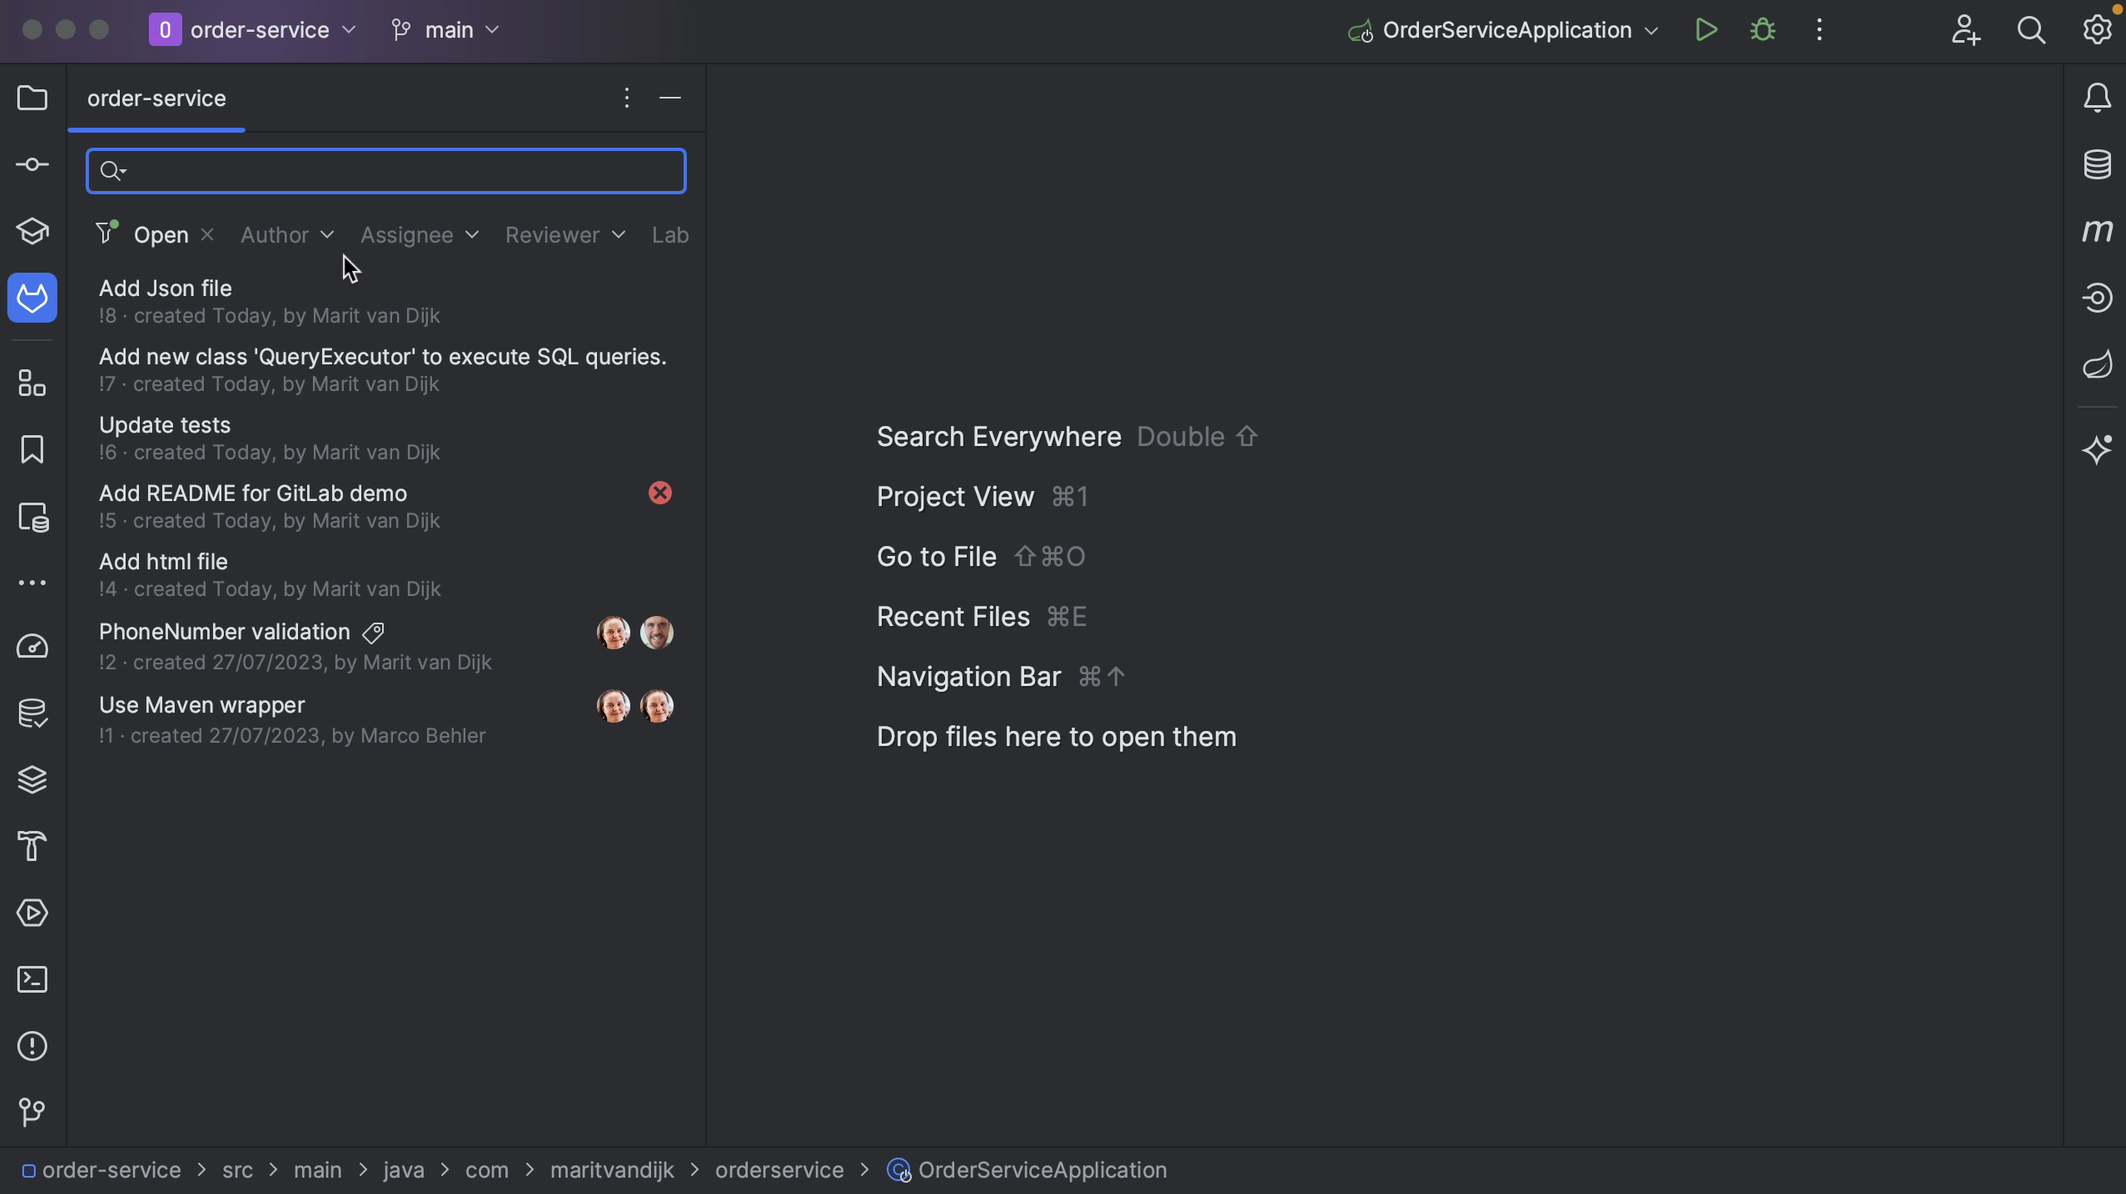
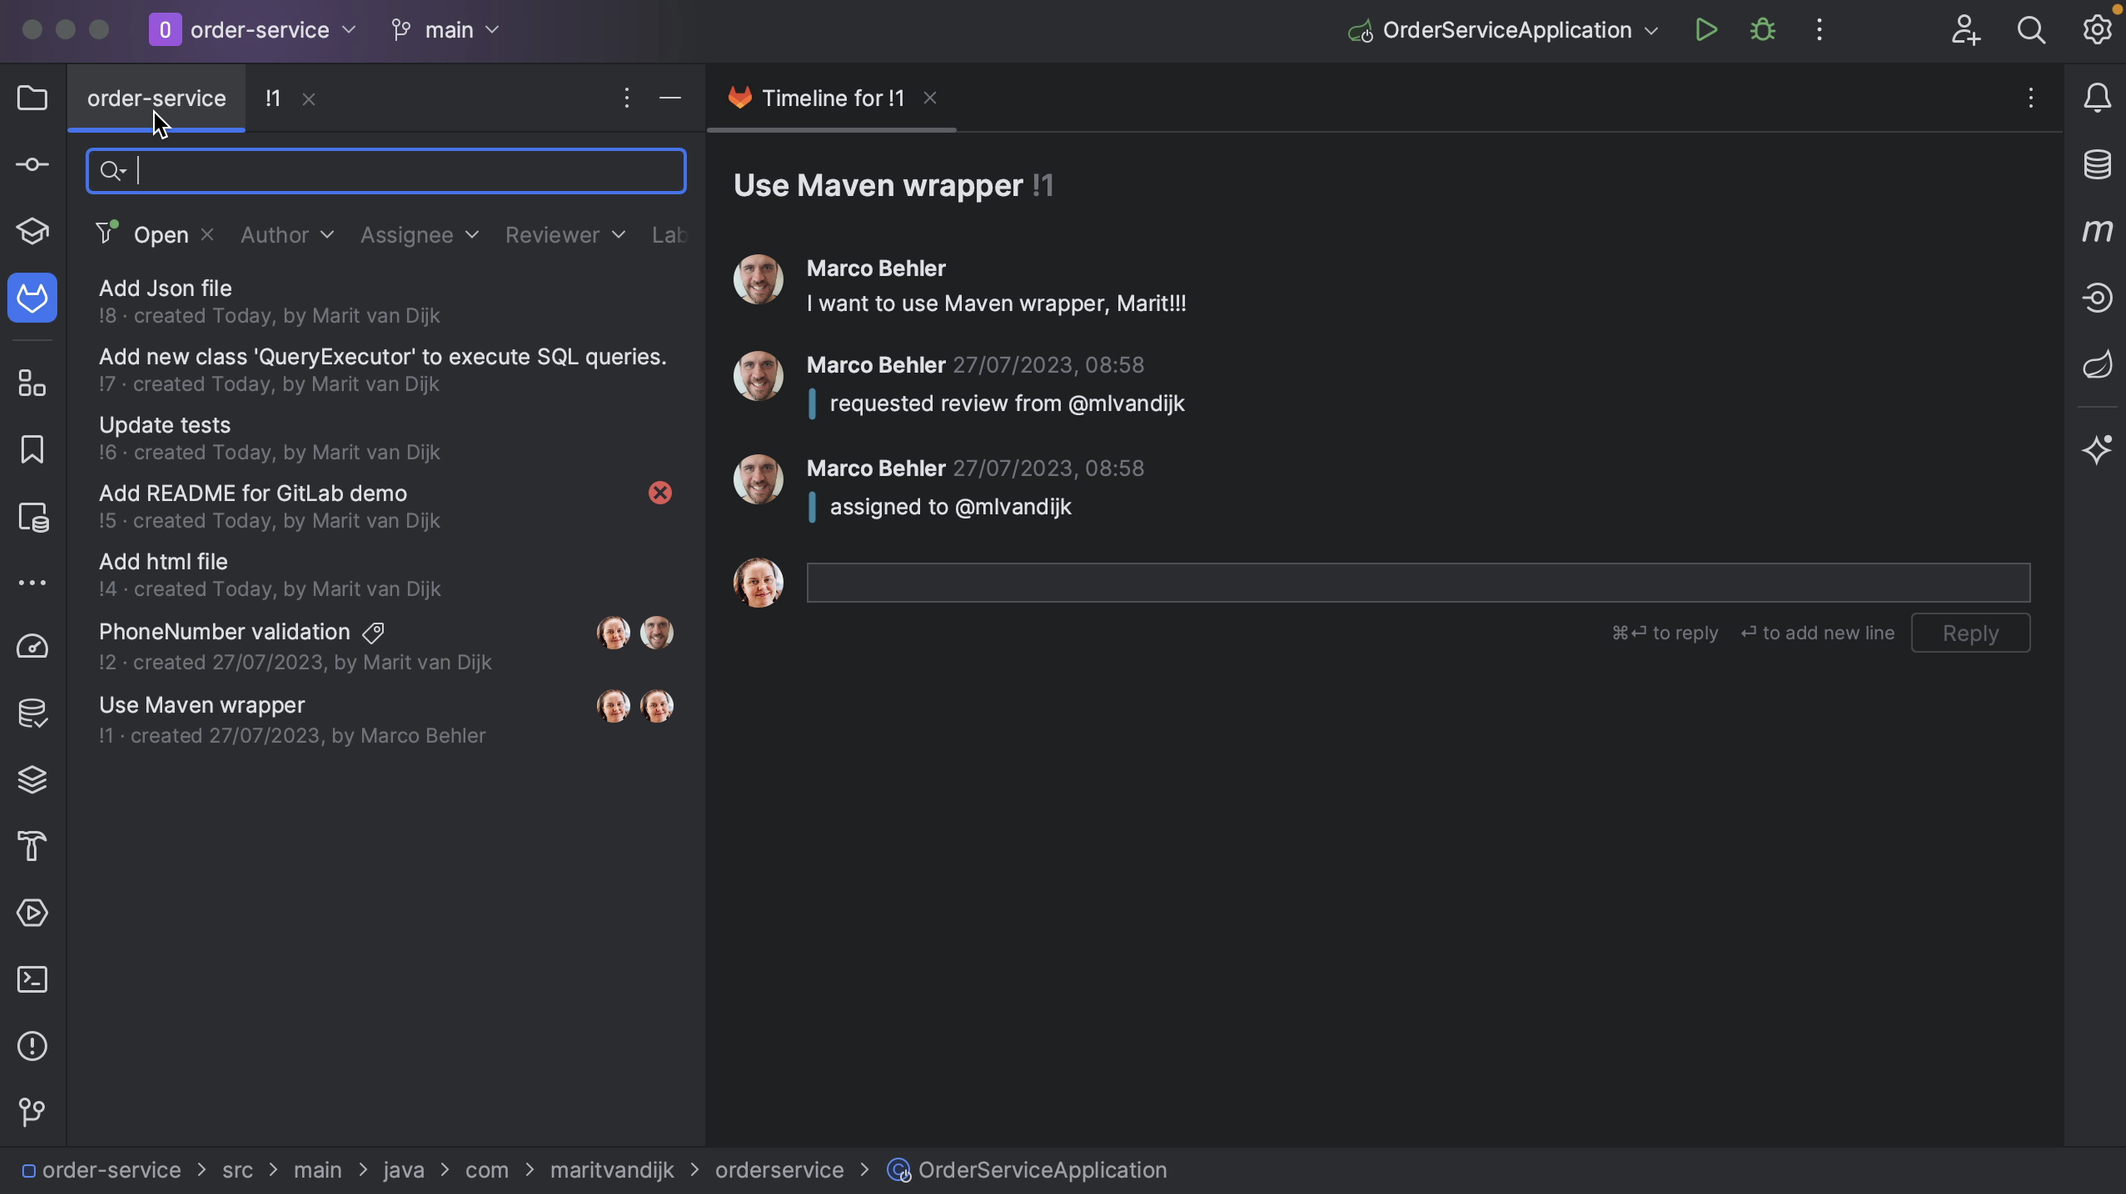
Once we’re logged in, the GitLab Merge Requests tool window will show all open Merge Requests for the GitLab repository.
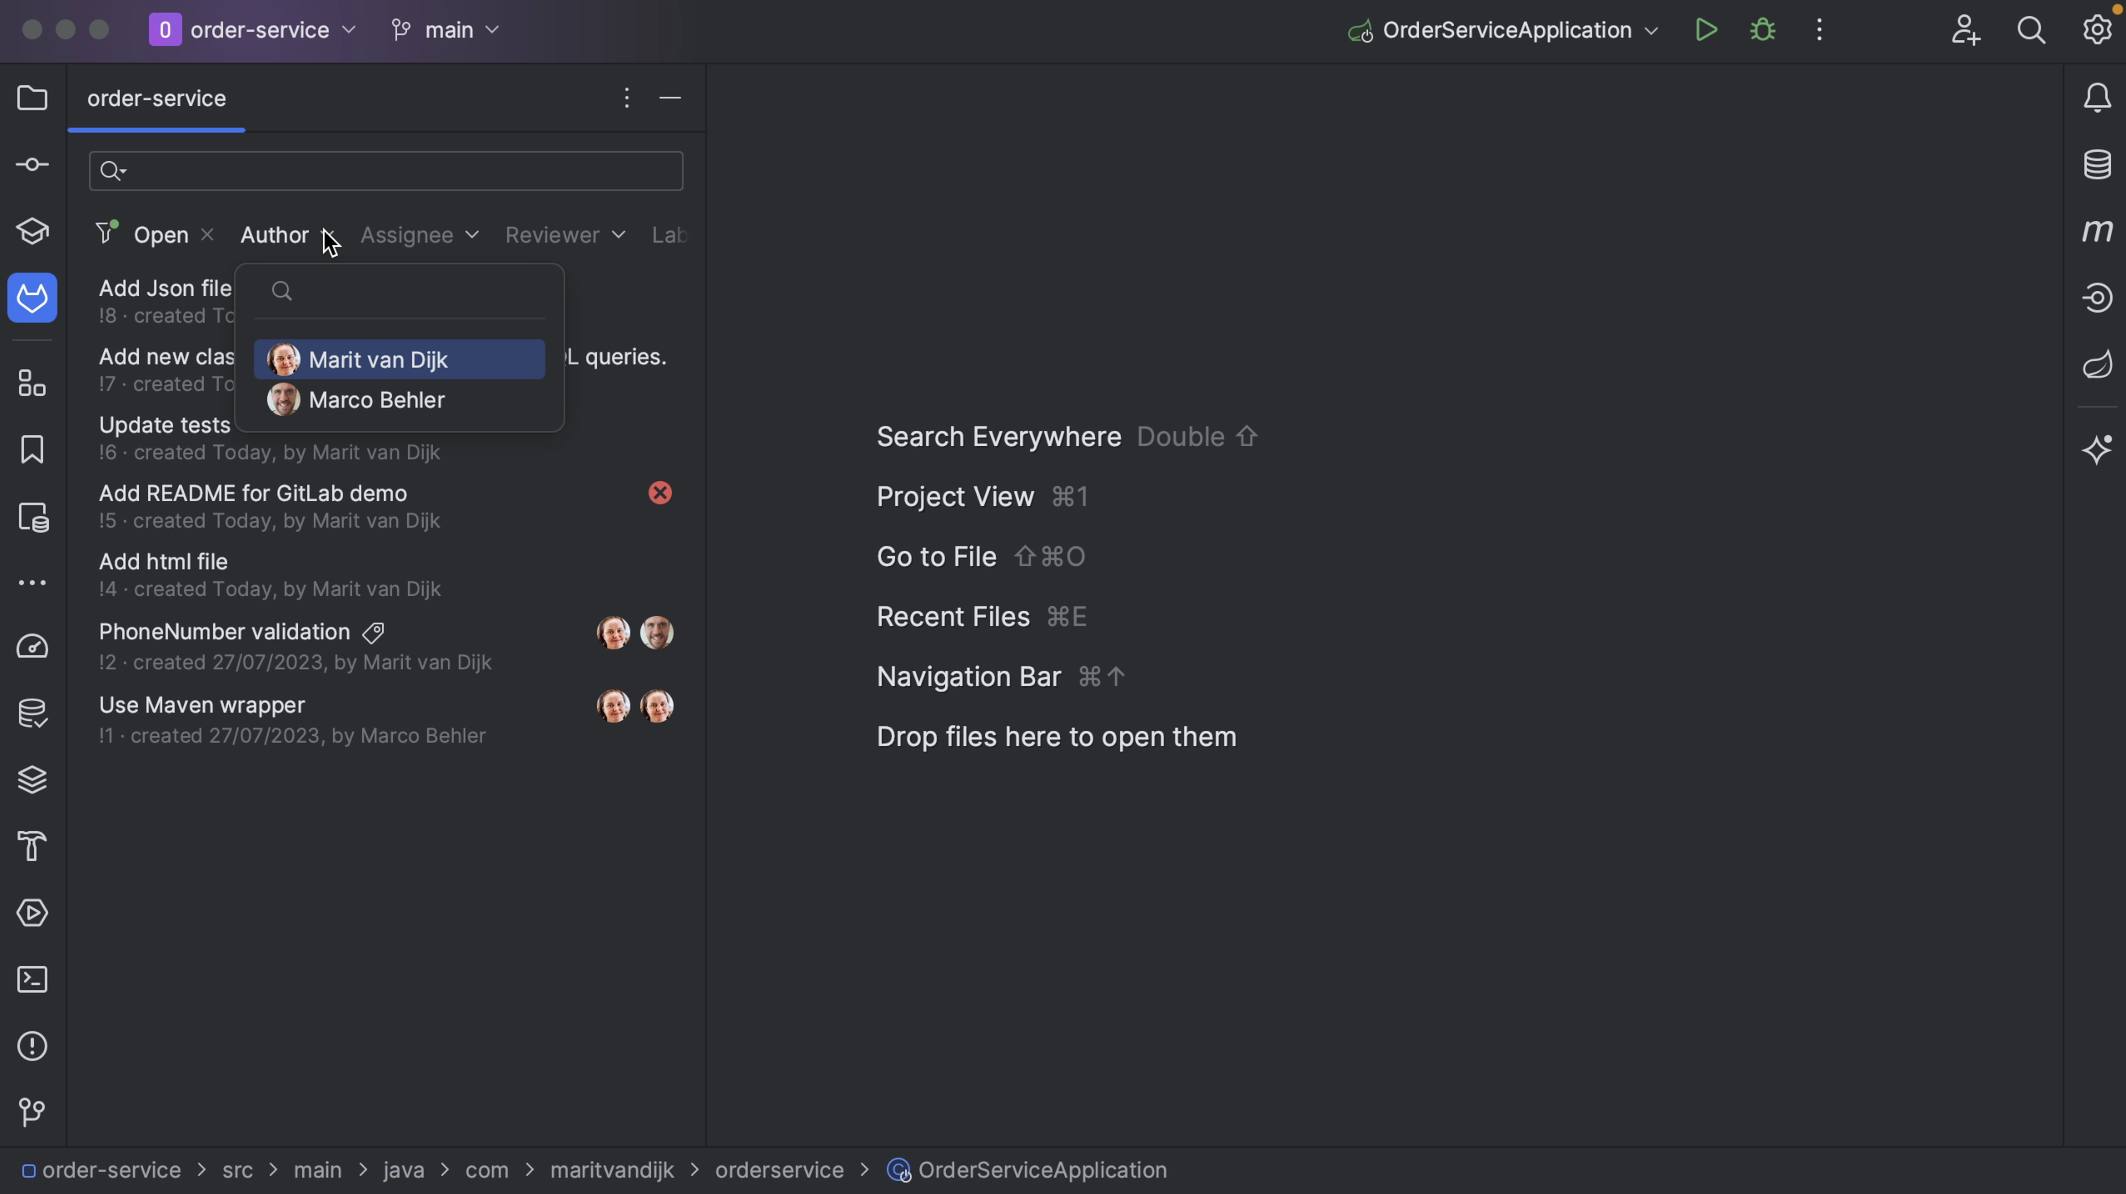
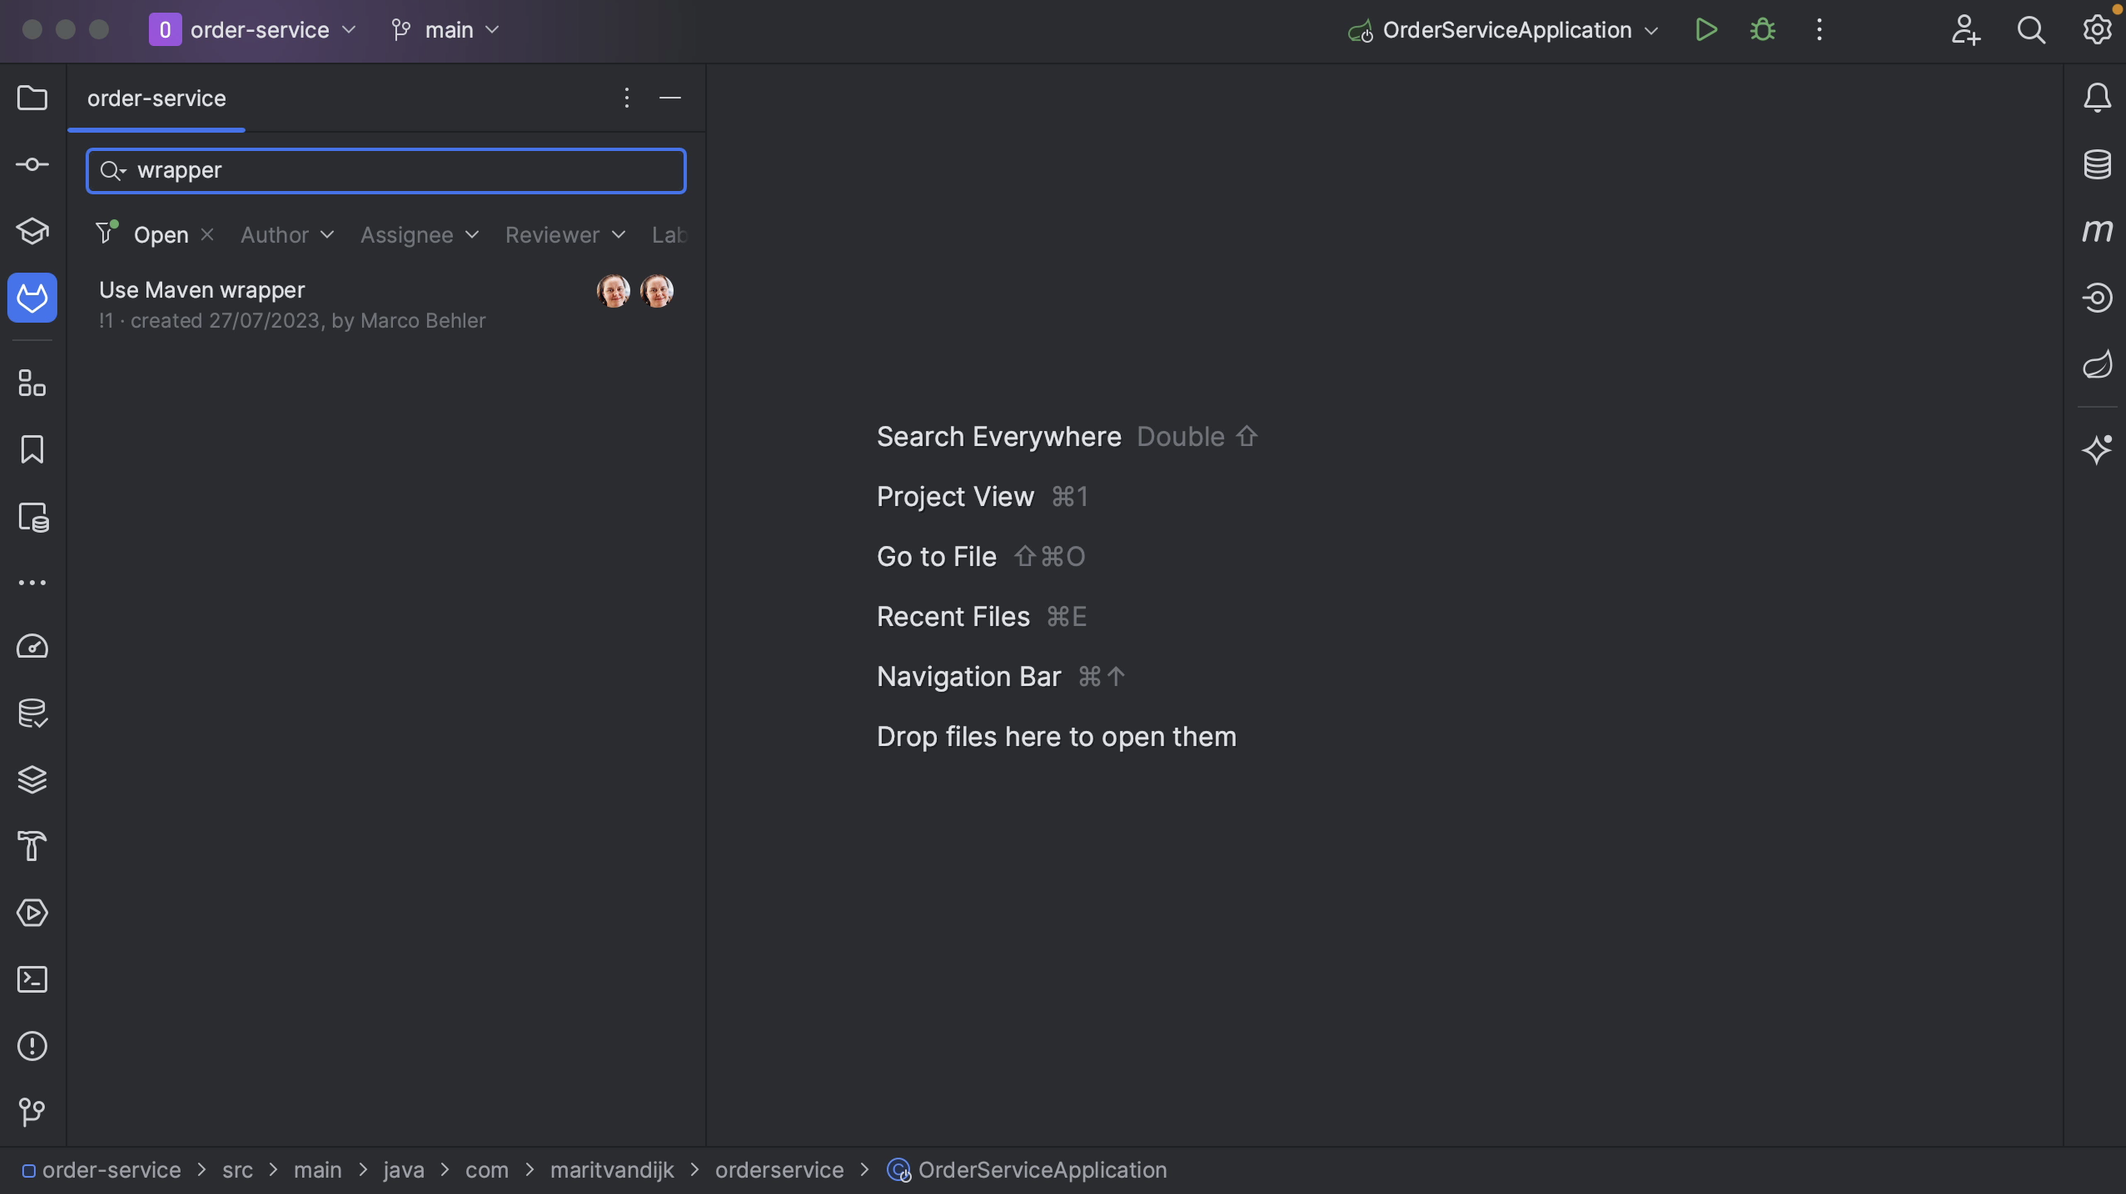
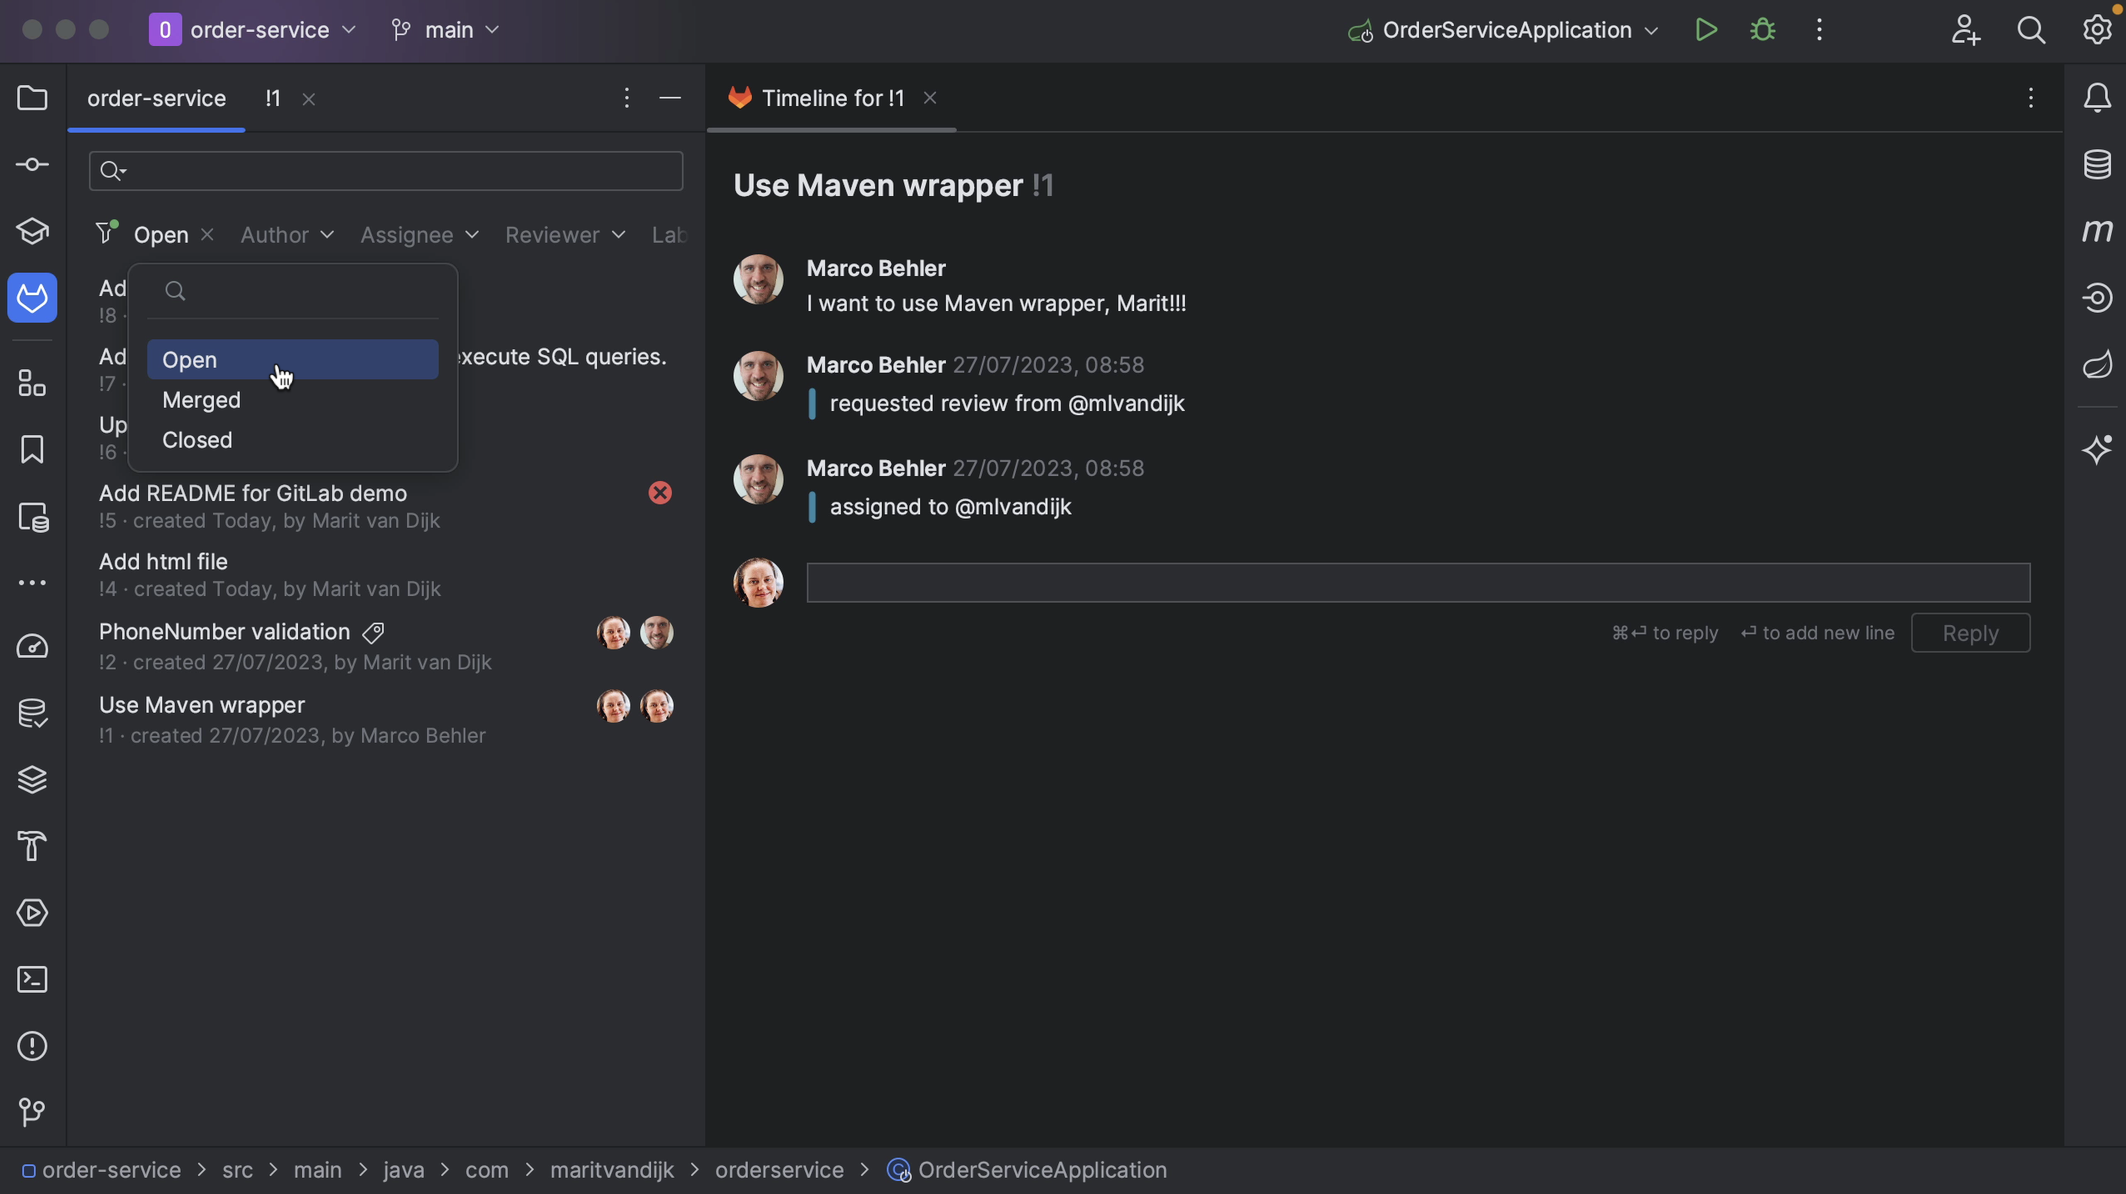
We can change the search criteria to look for specific Merge Requests. We can use predefined filters, or search for something more specific.
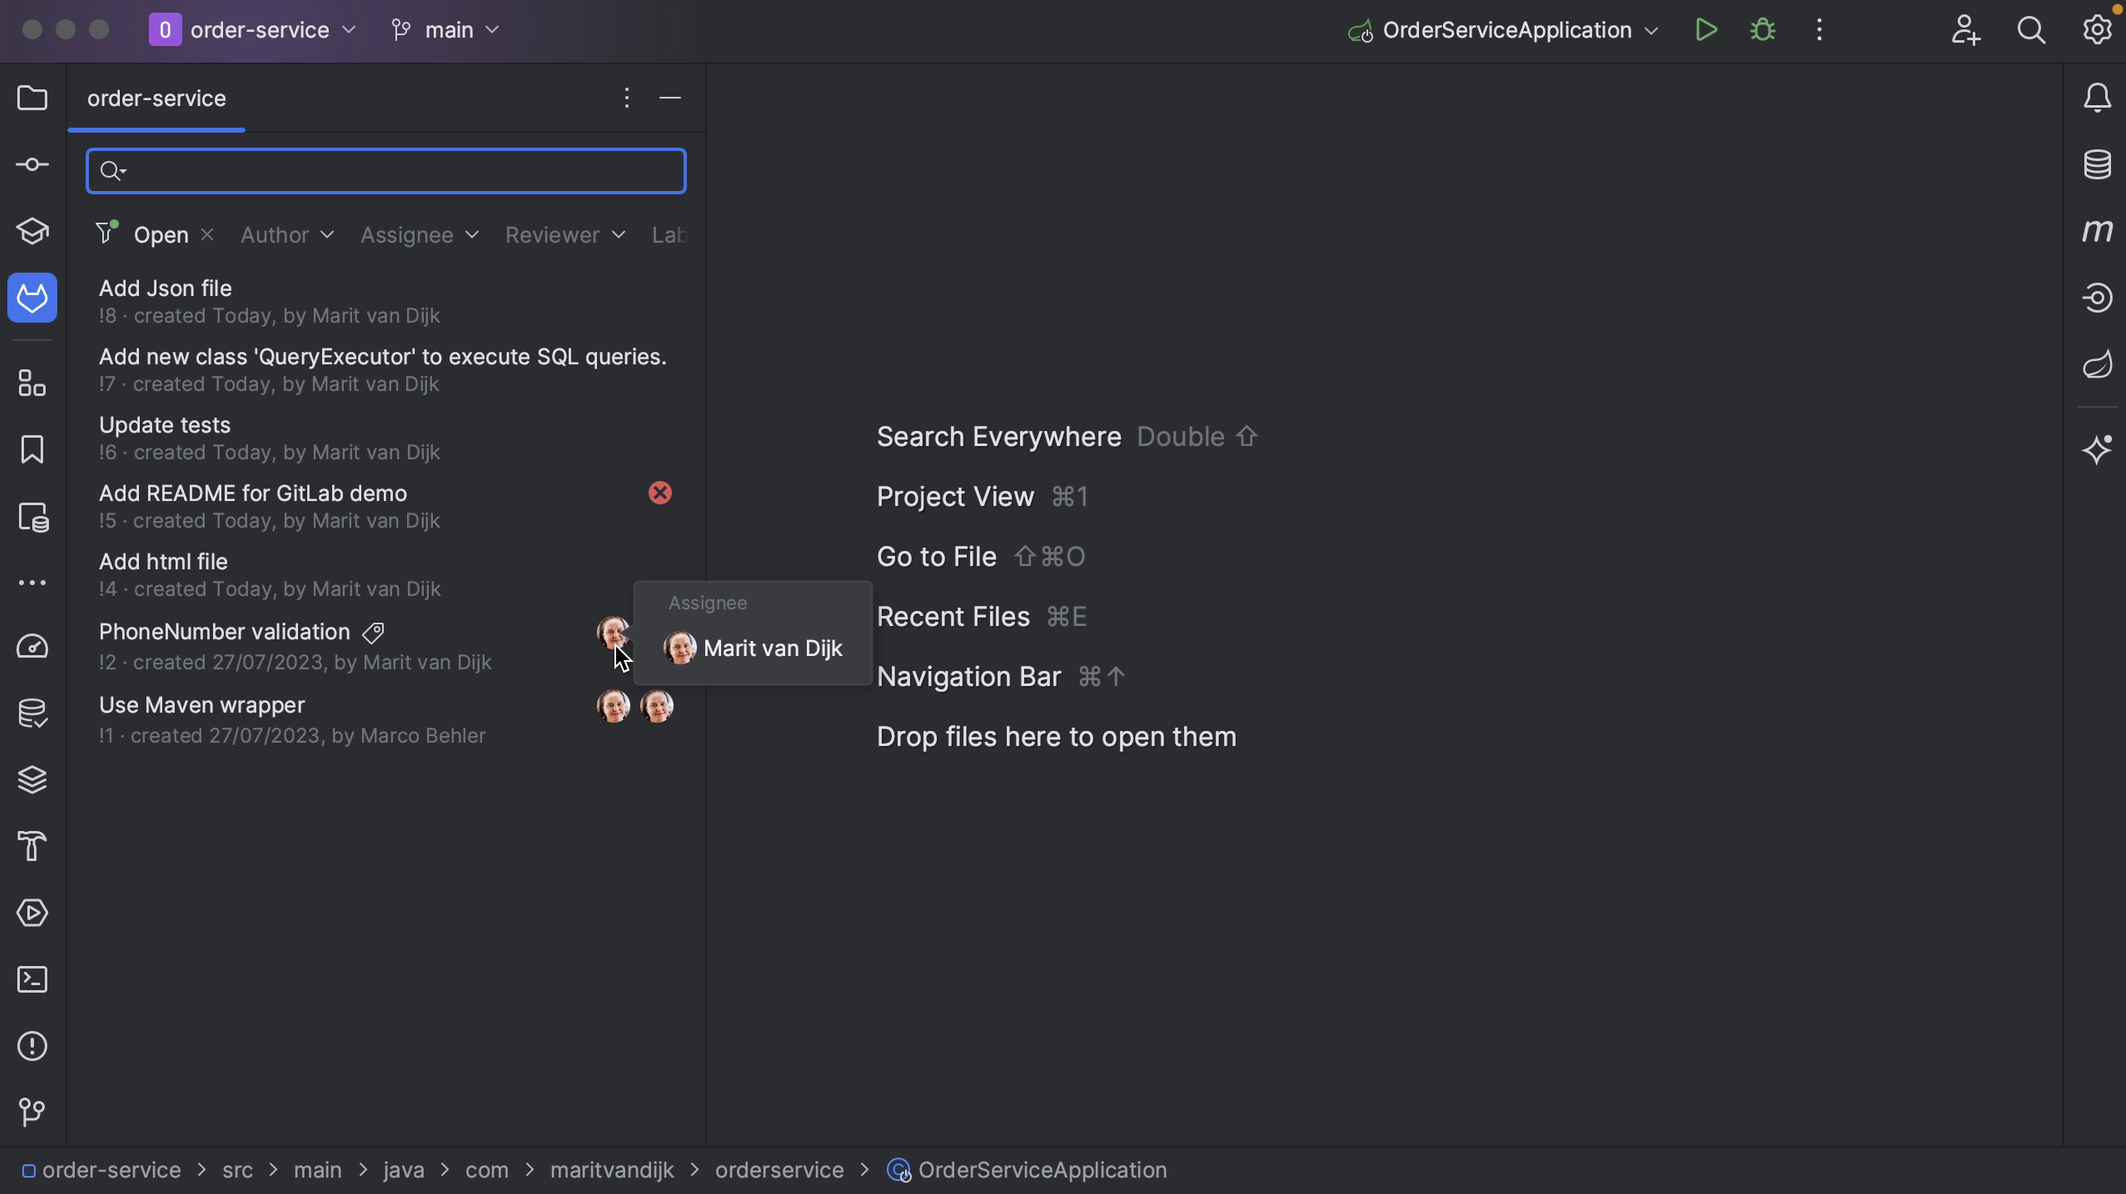
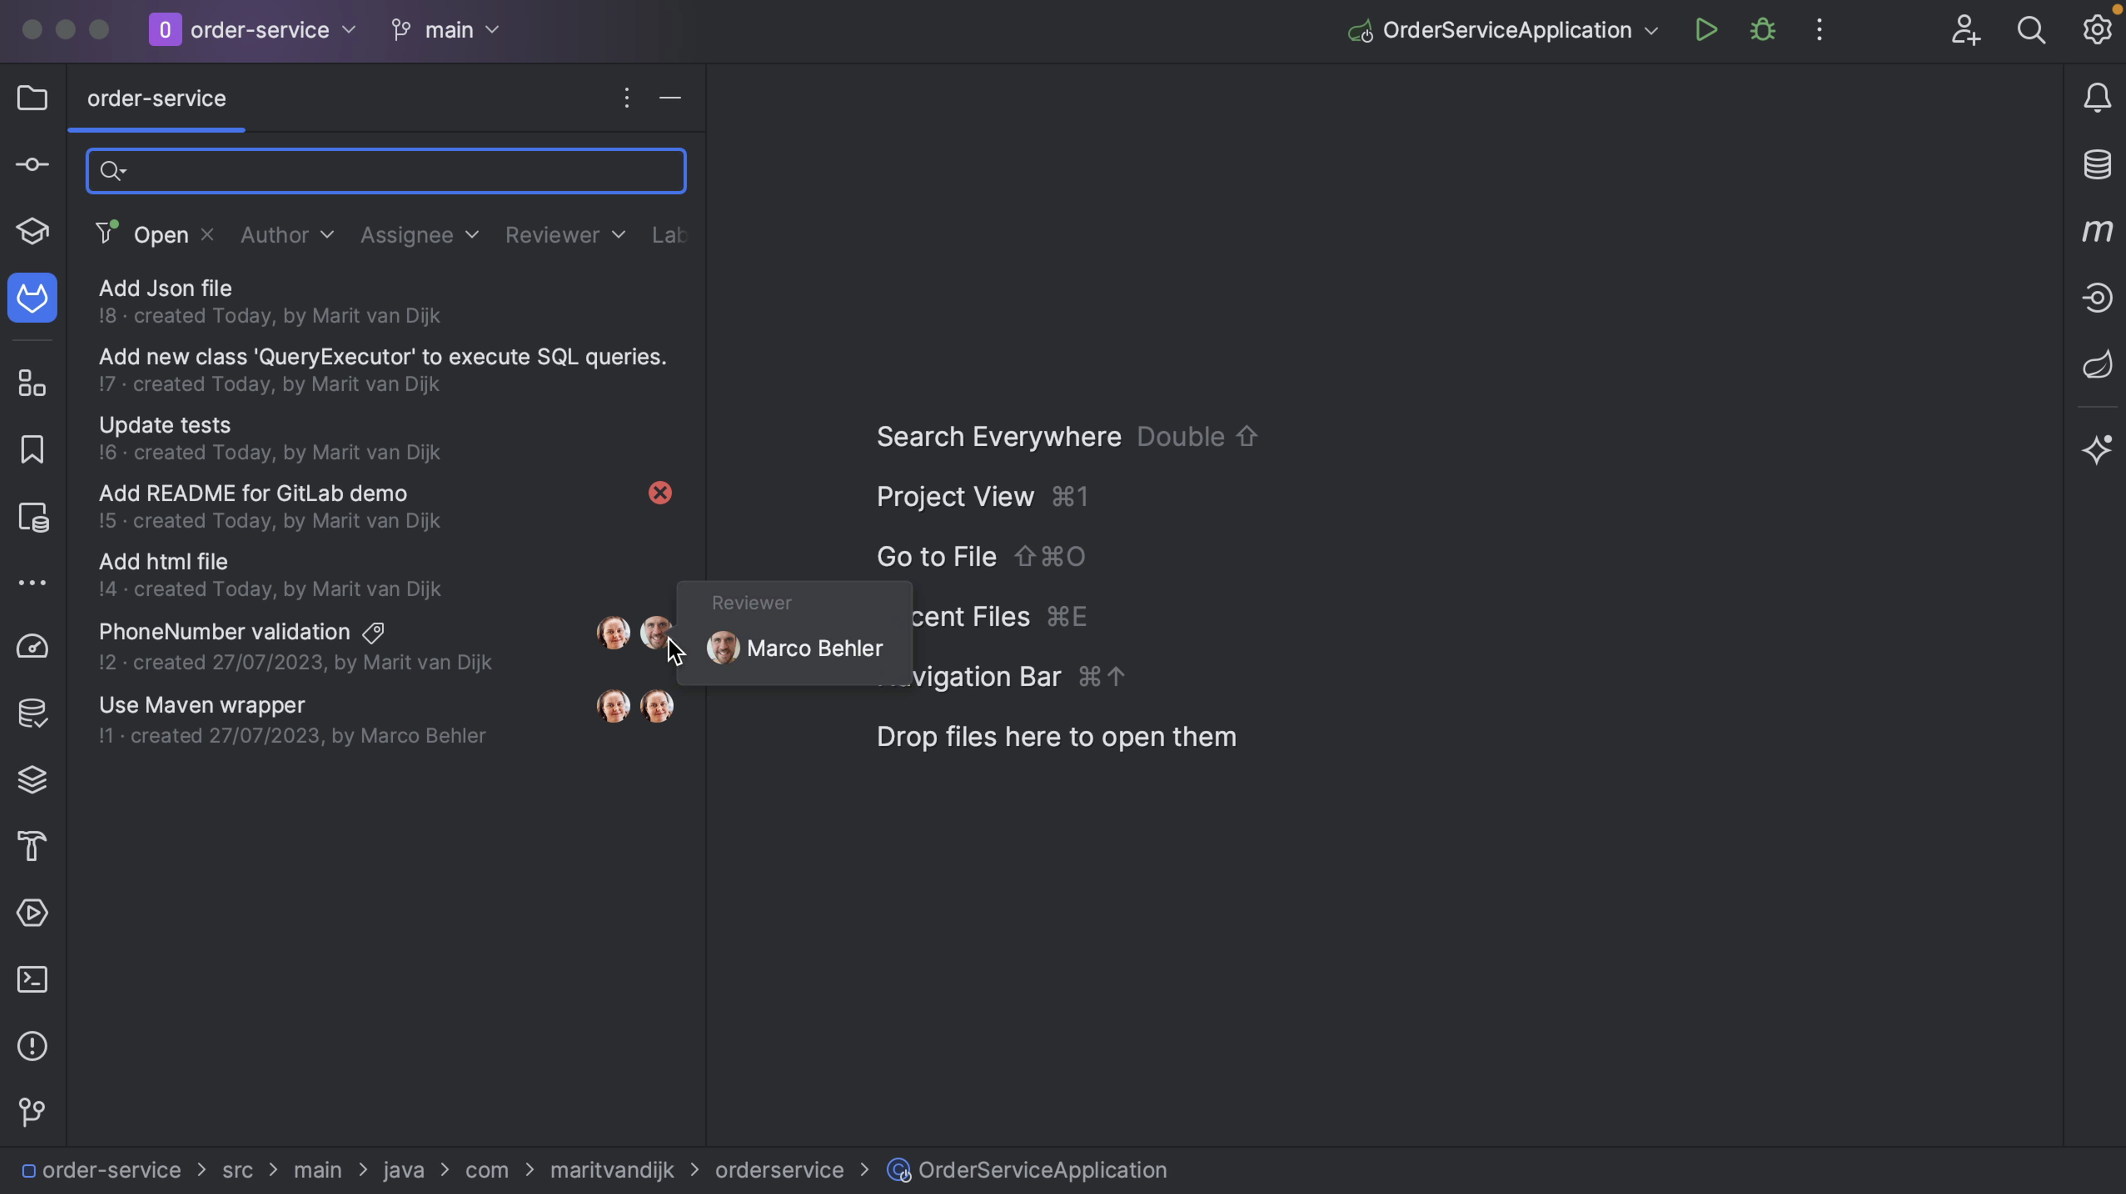
If the Merge Request has assignees and/or reviewers assigned, we can see them here.
We can see the details of a specific Merge Request by double-clicking on it.
We can go back to the list of search results by clicking the project name in the top left of the Merge Requests tool window. We can see that the Merge Request we just looked at still has a tab open here, in case we want to go back.
Usually, you’ll want to look for open Merge Requests, since these are the ones that need attention. Let’s double-click, or press Enter, on one of these Merge Requests.
View GitLab Merge Requests inside IntelliJ IDEA
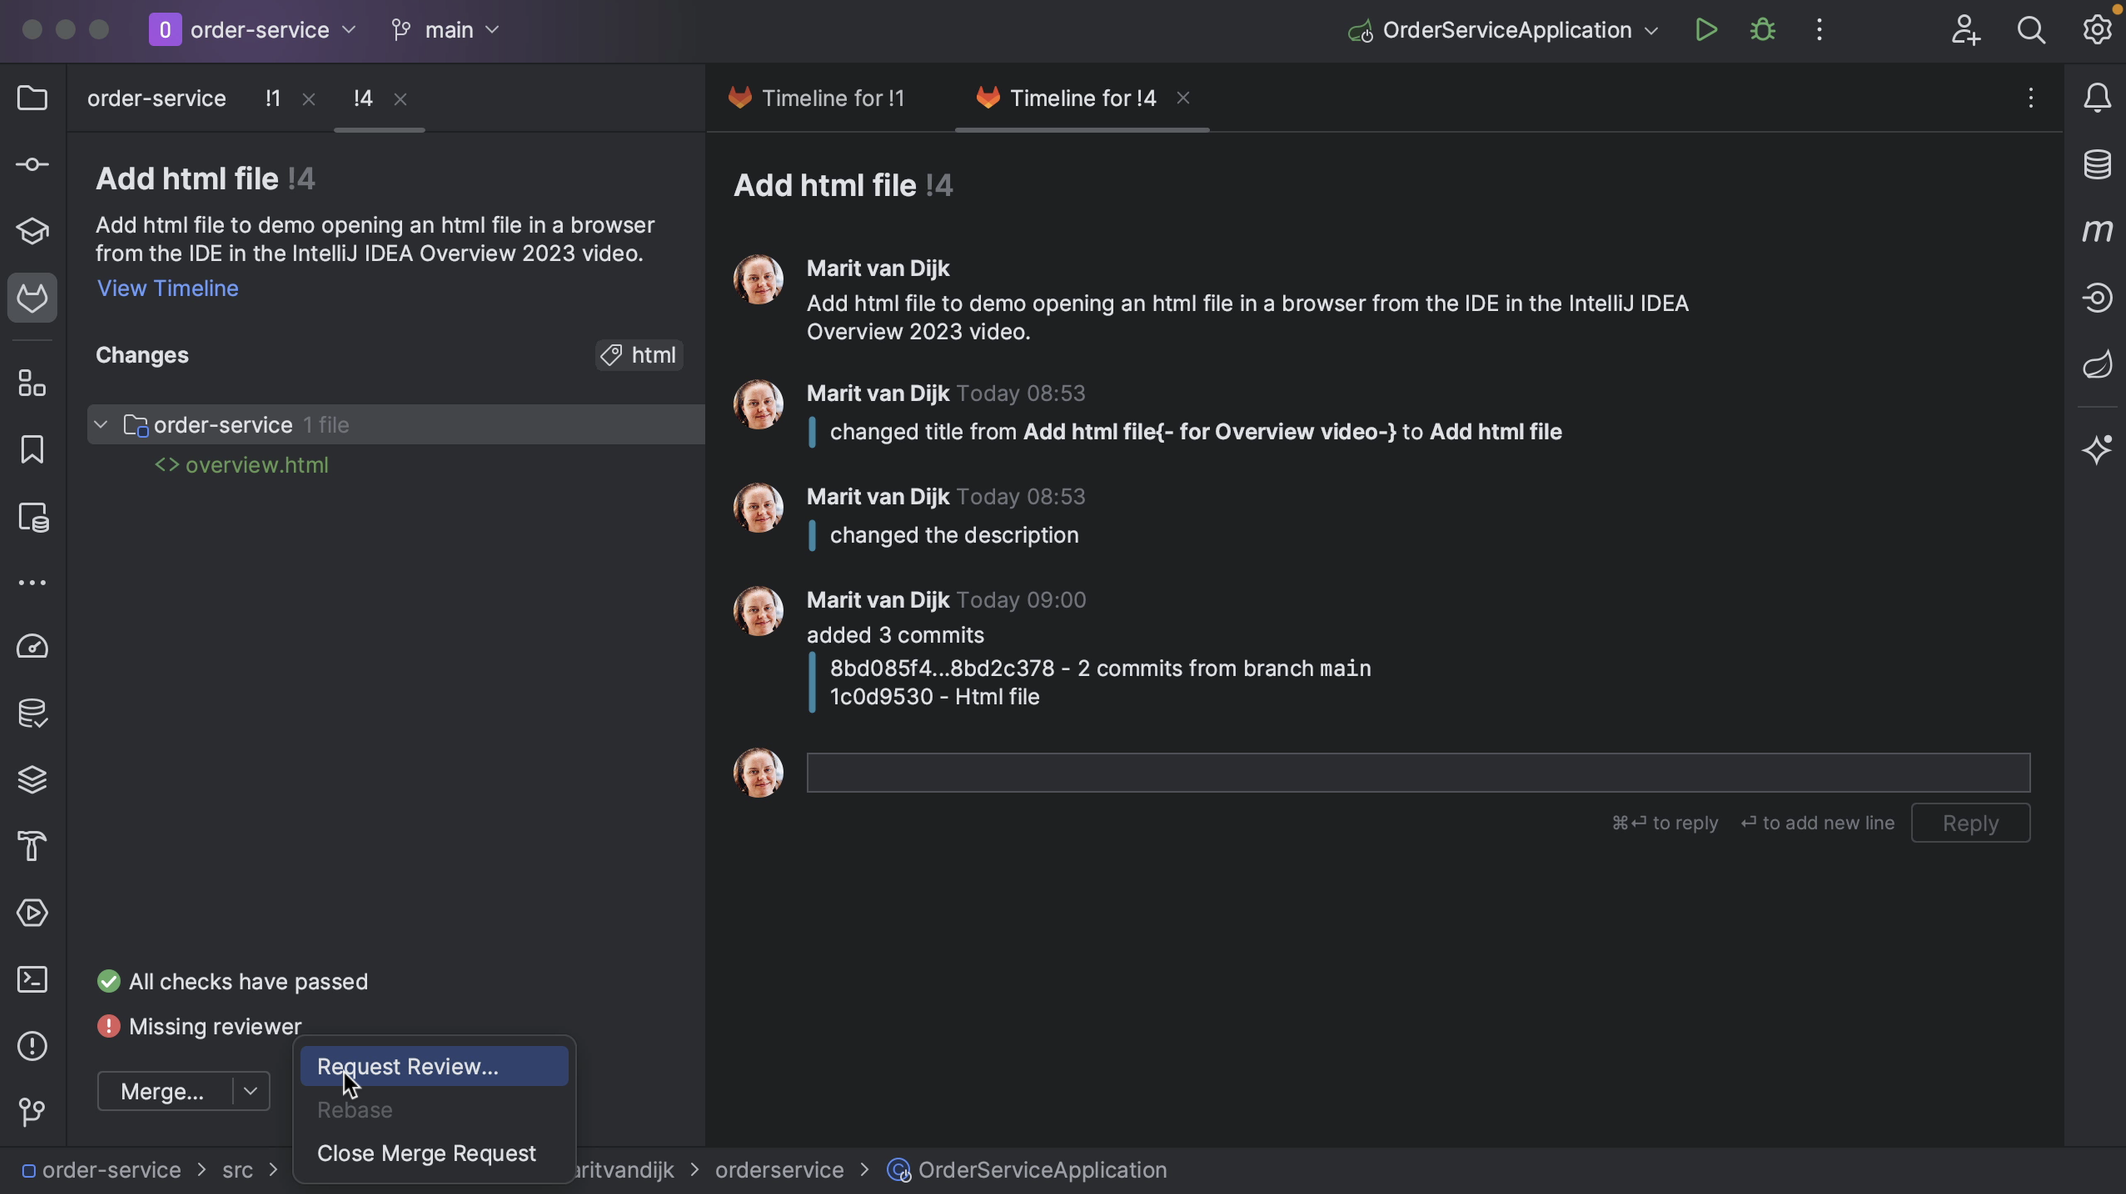
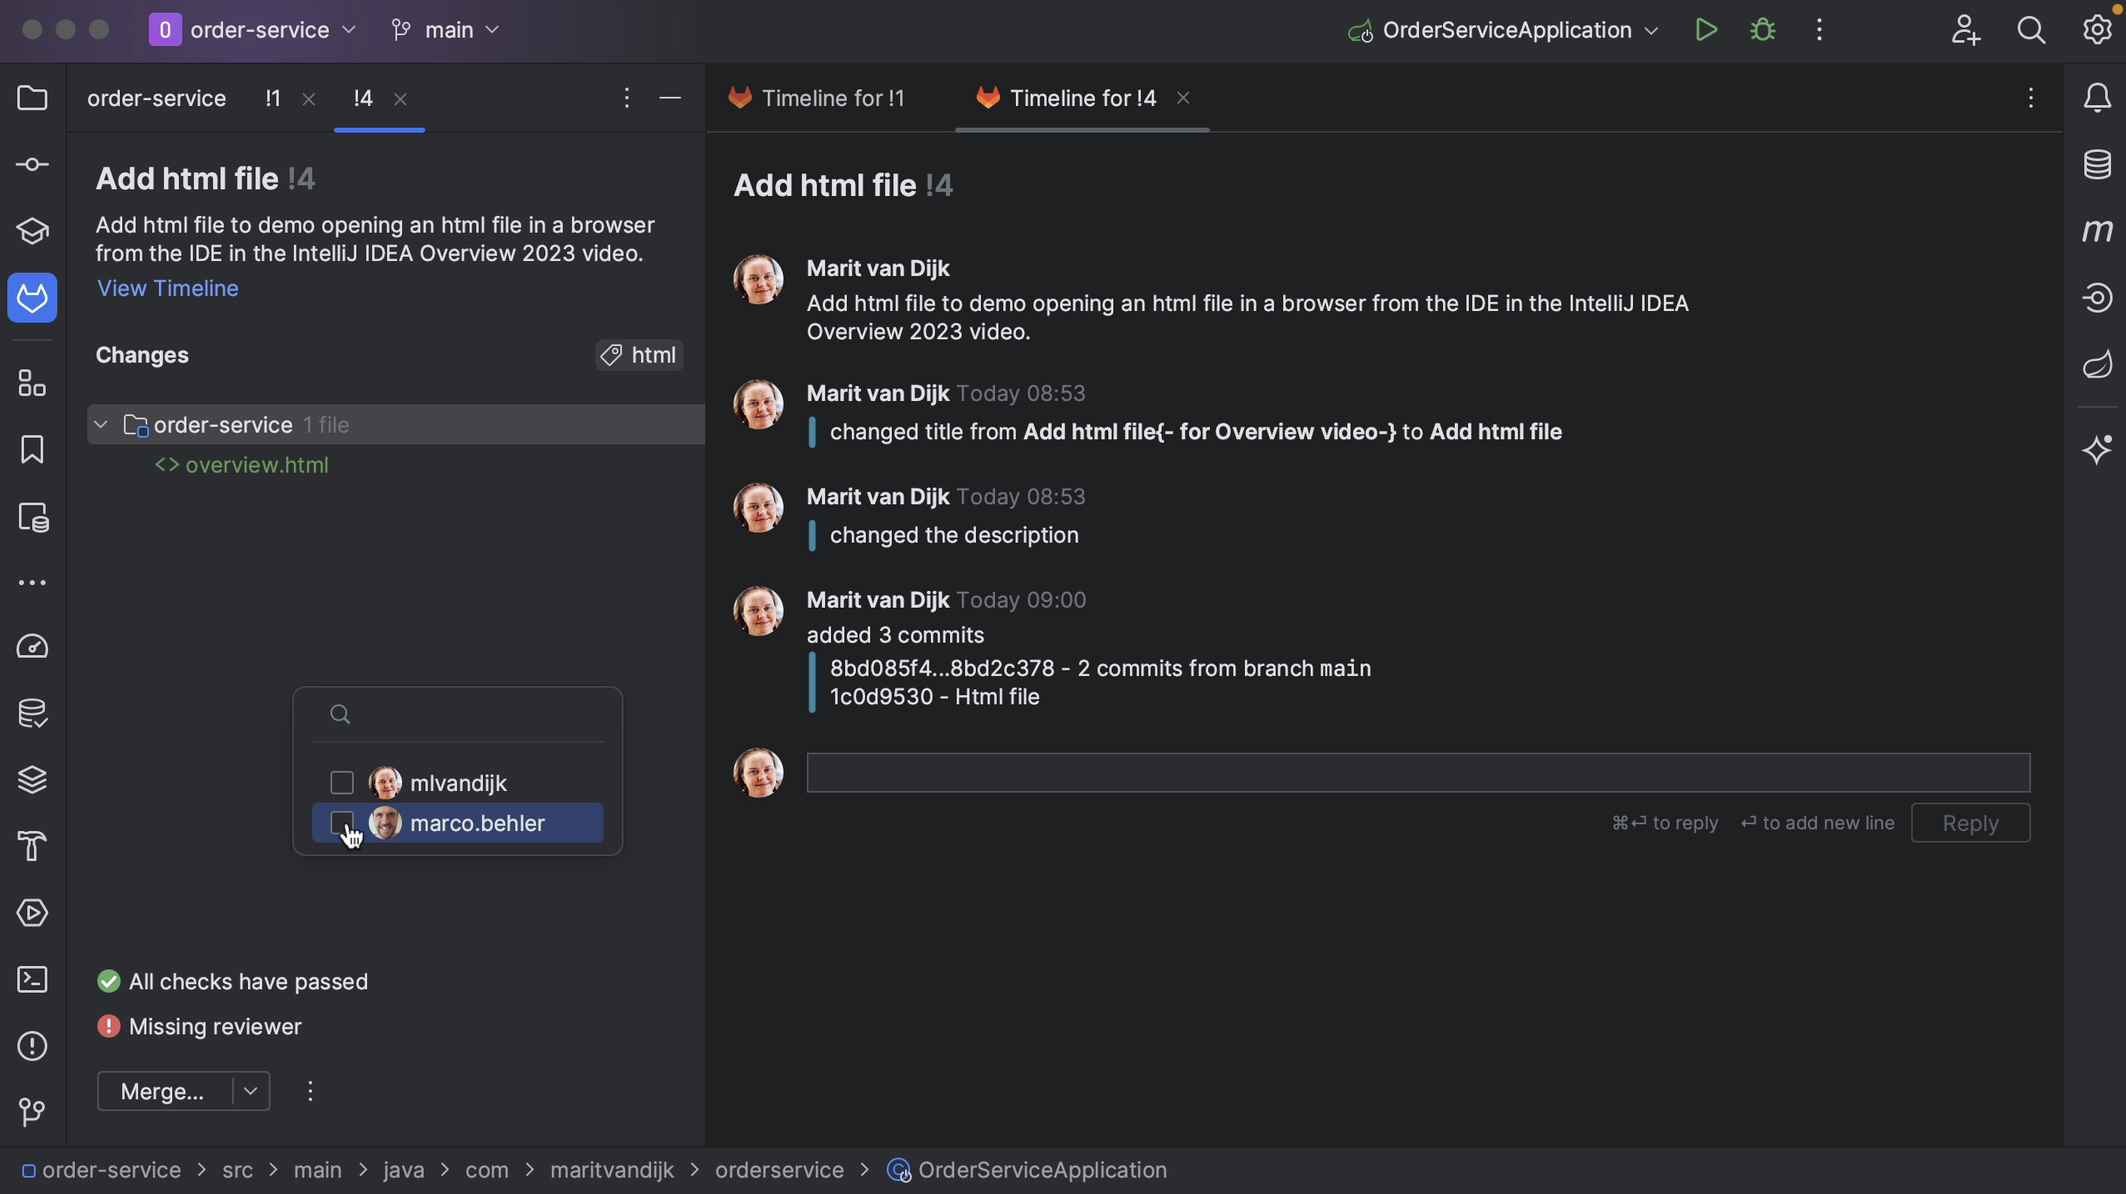
If the Merge Request does not have a reviewer assigned, we can assign one from the Merge Request tool window in IntelliJ IDEA. Click the three dots at the bottom left of the Merge Request details and select the action Request Review. From the list that pops up, select the reviewer(s) to assign this Merge Request to.
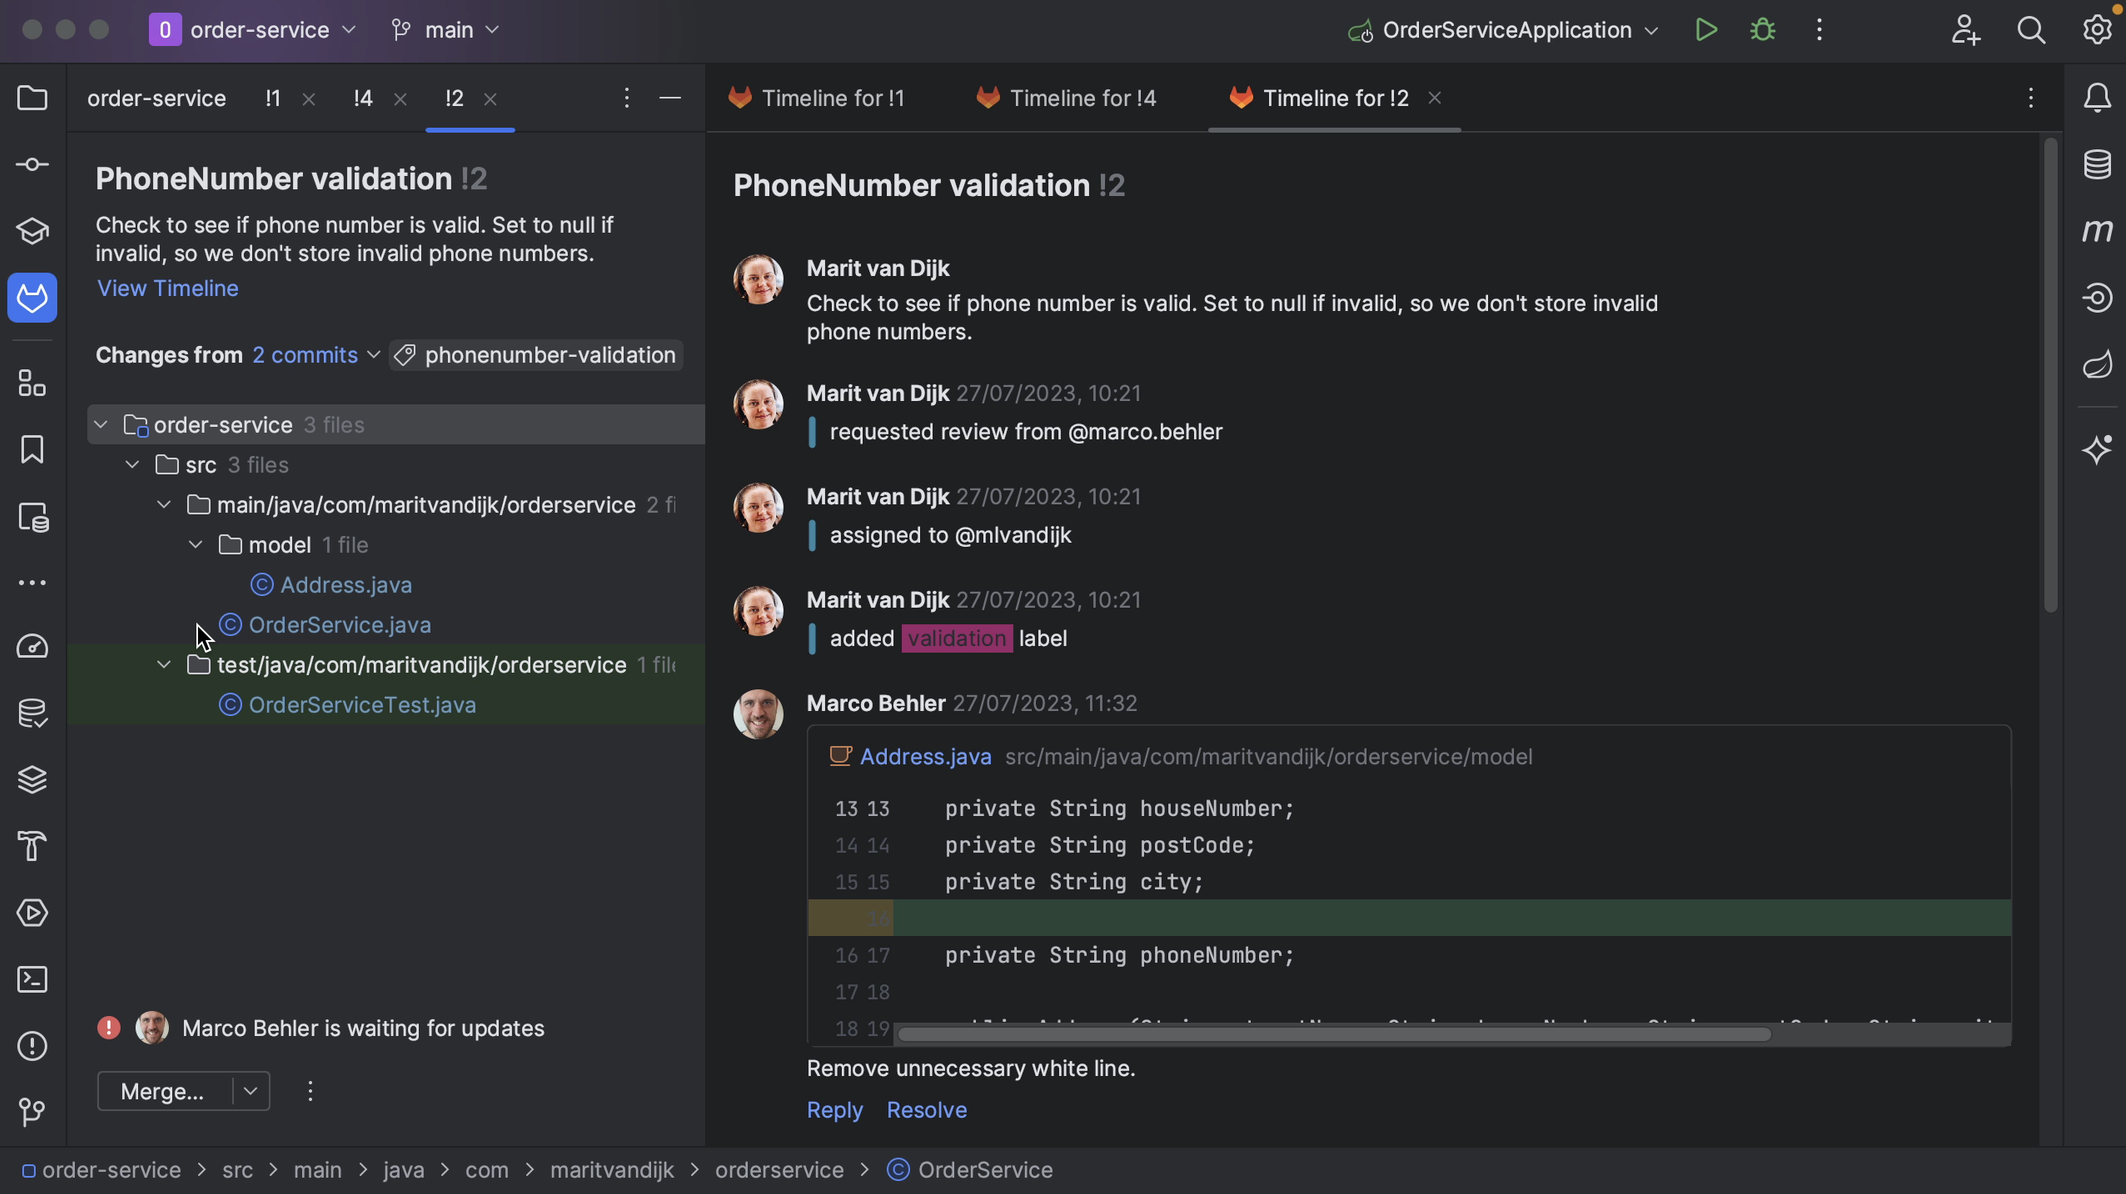
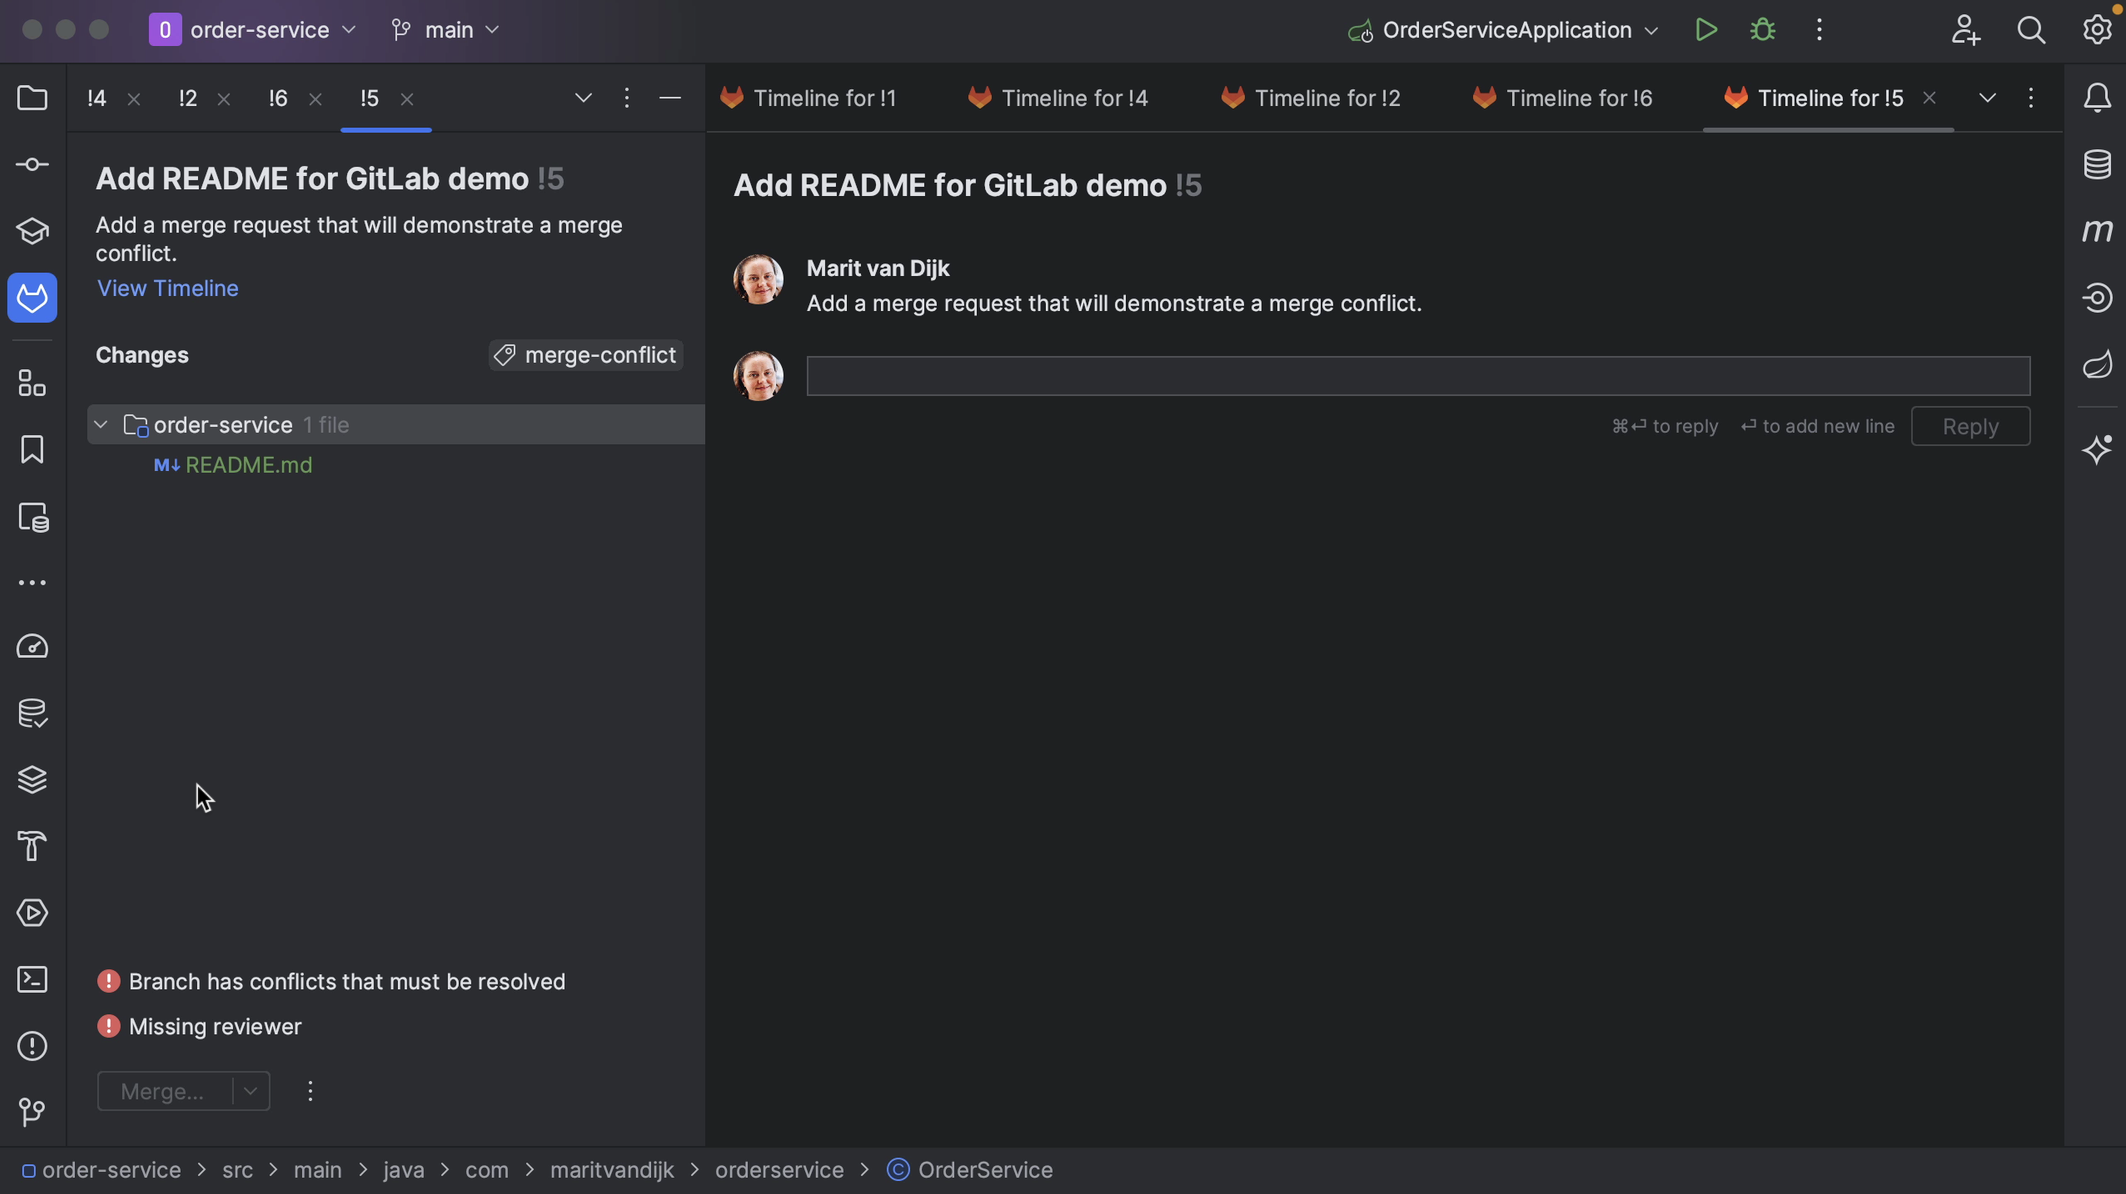
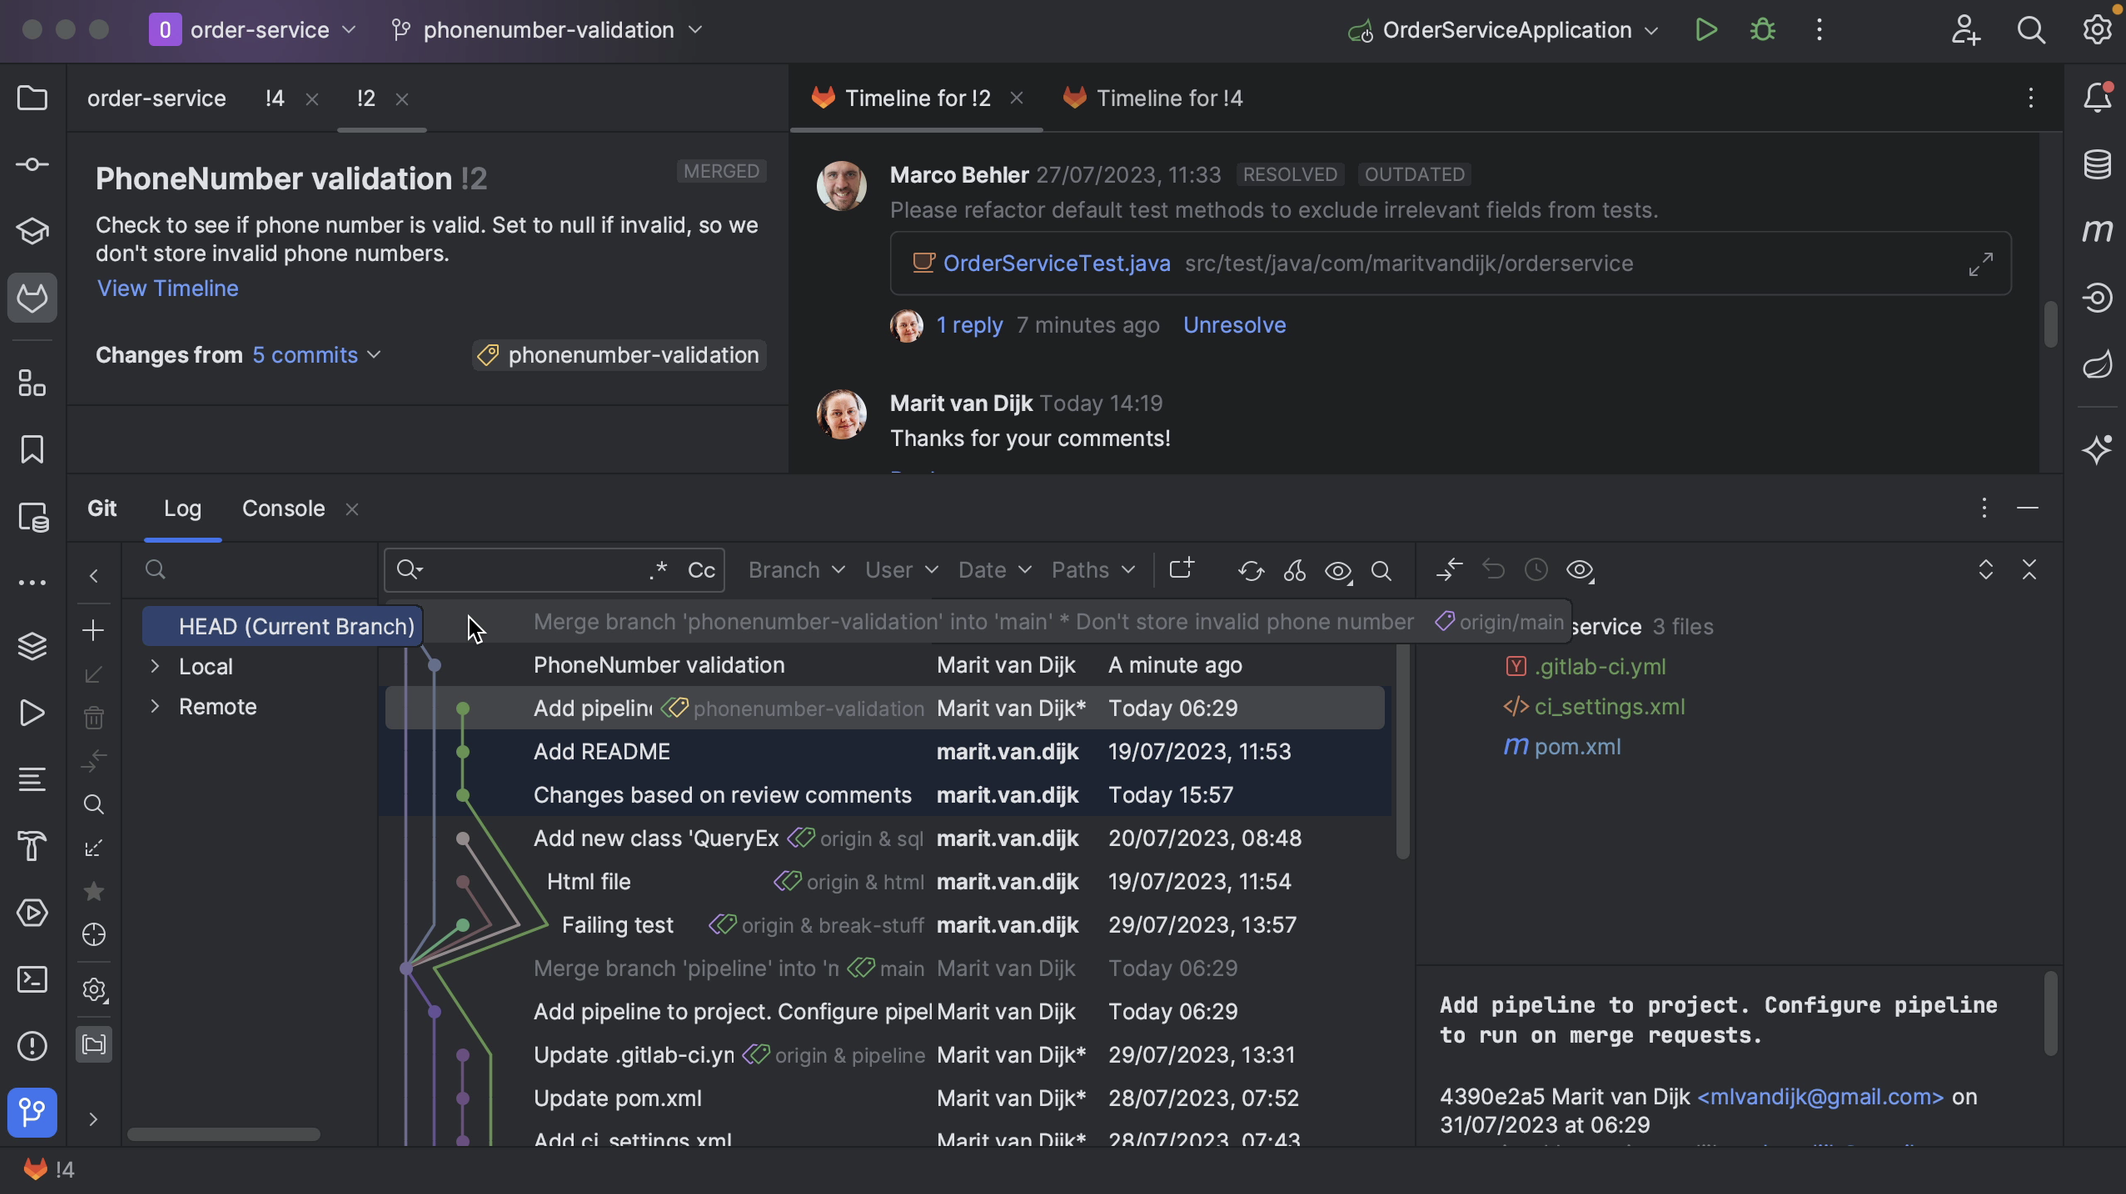
We can see the files that have been changed in the Merge Request in the bottom left window, and the timeline in the main editor pane.
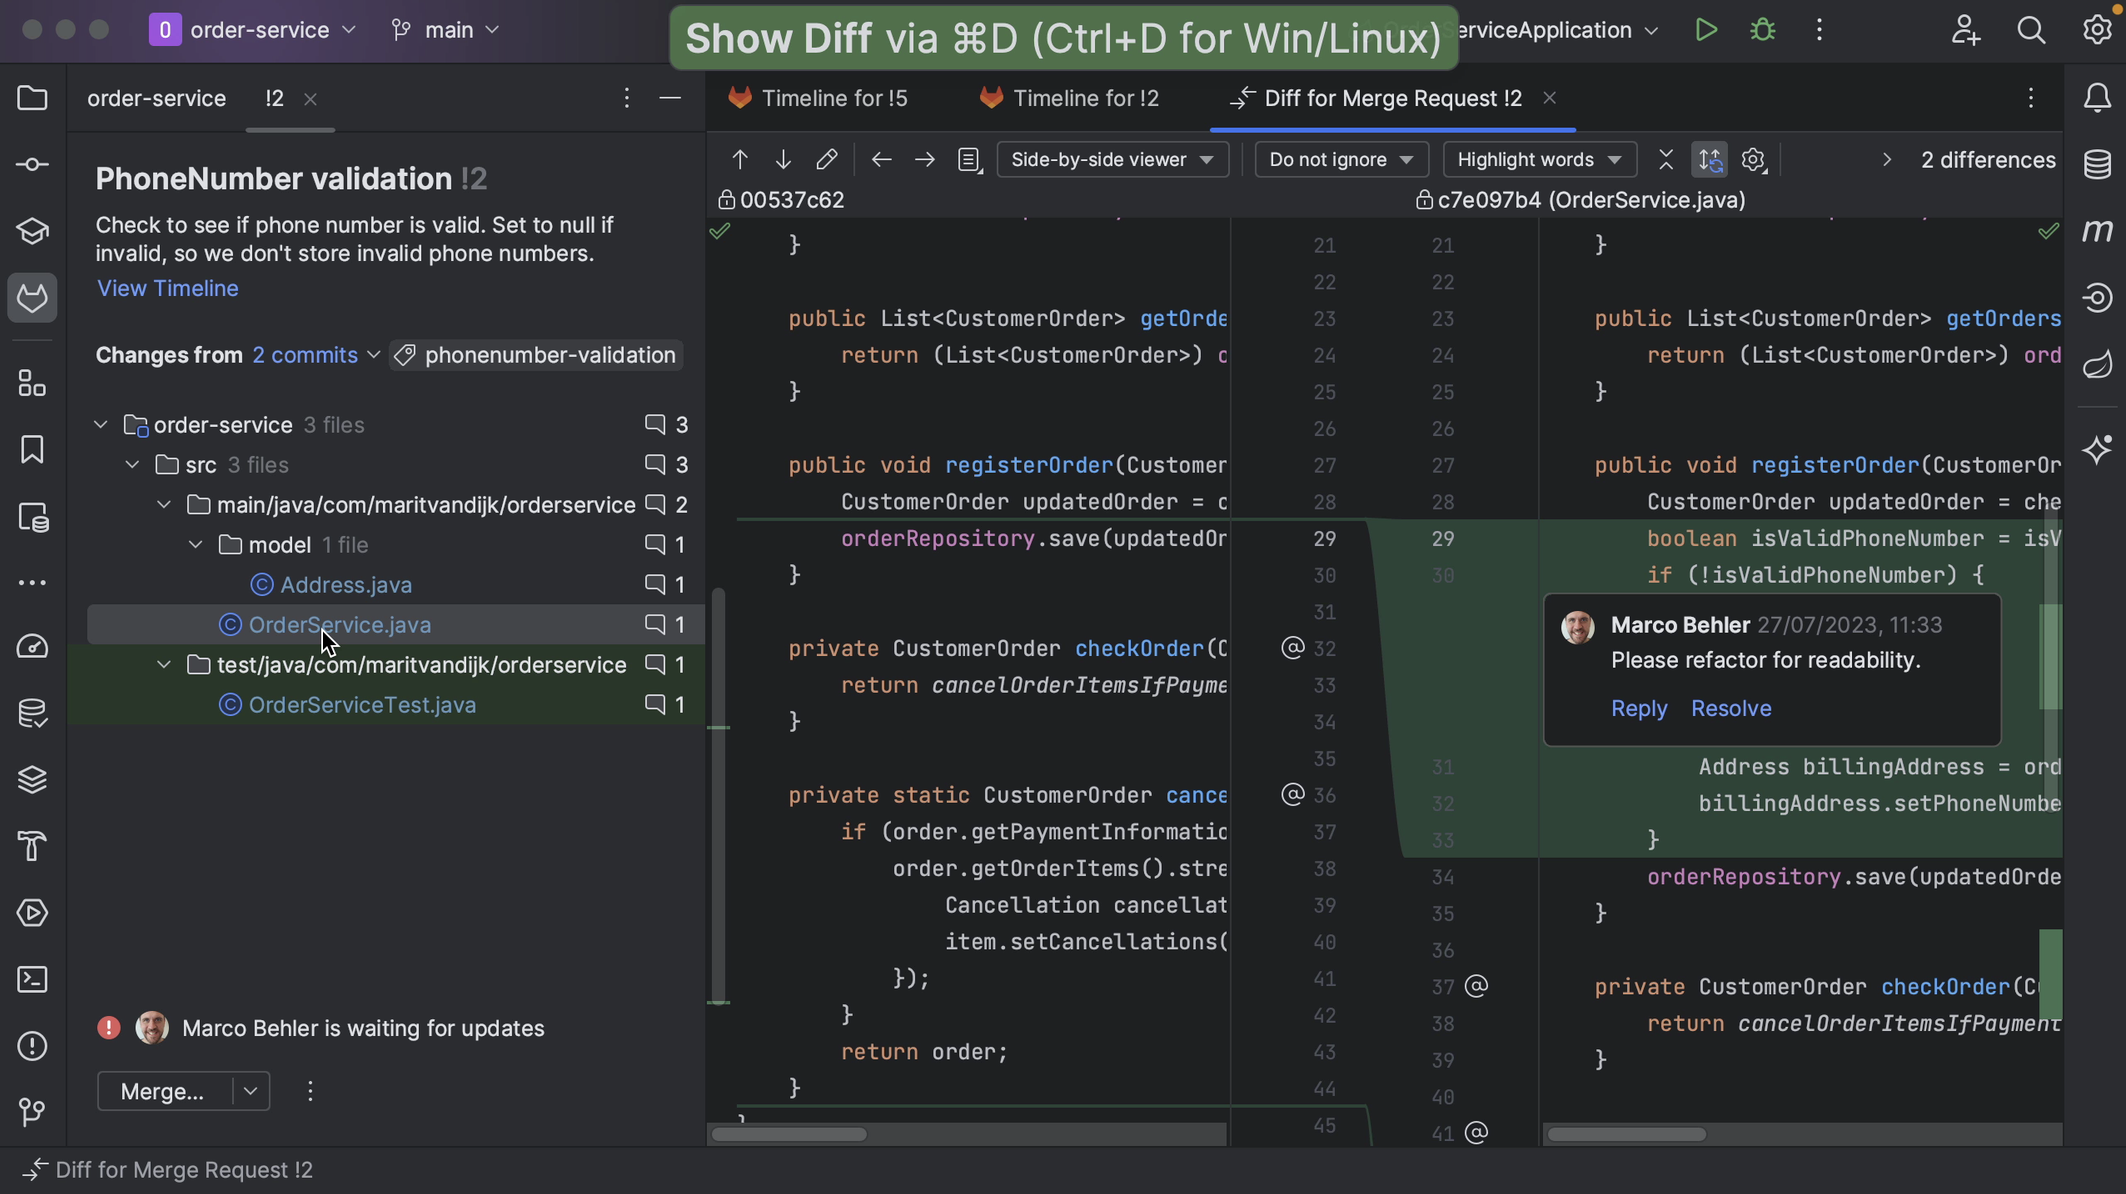
We can also select a file to see the diff as well as the comments for that file. We can go back to the timeline by clicking View Timeline.
The timeline shows the same information as the GitLab Merge Request activity page. The timeline shows activity on the Merge Request, including comments and other status changes in the main editor pane. If there are inline comments on the code, we can see them here.
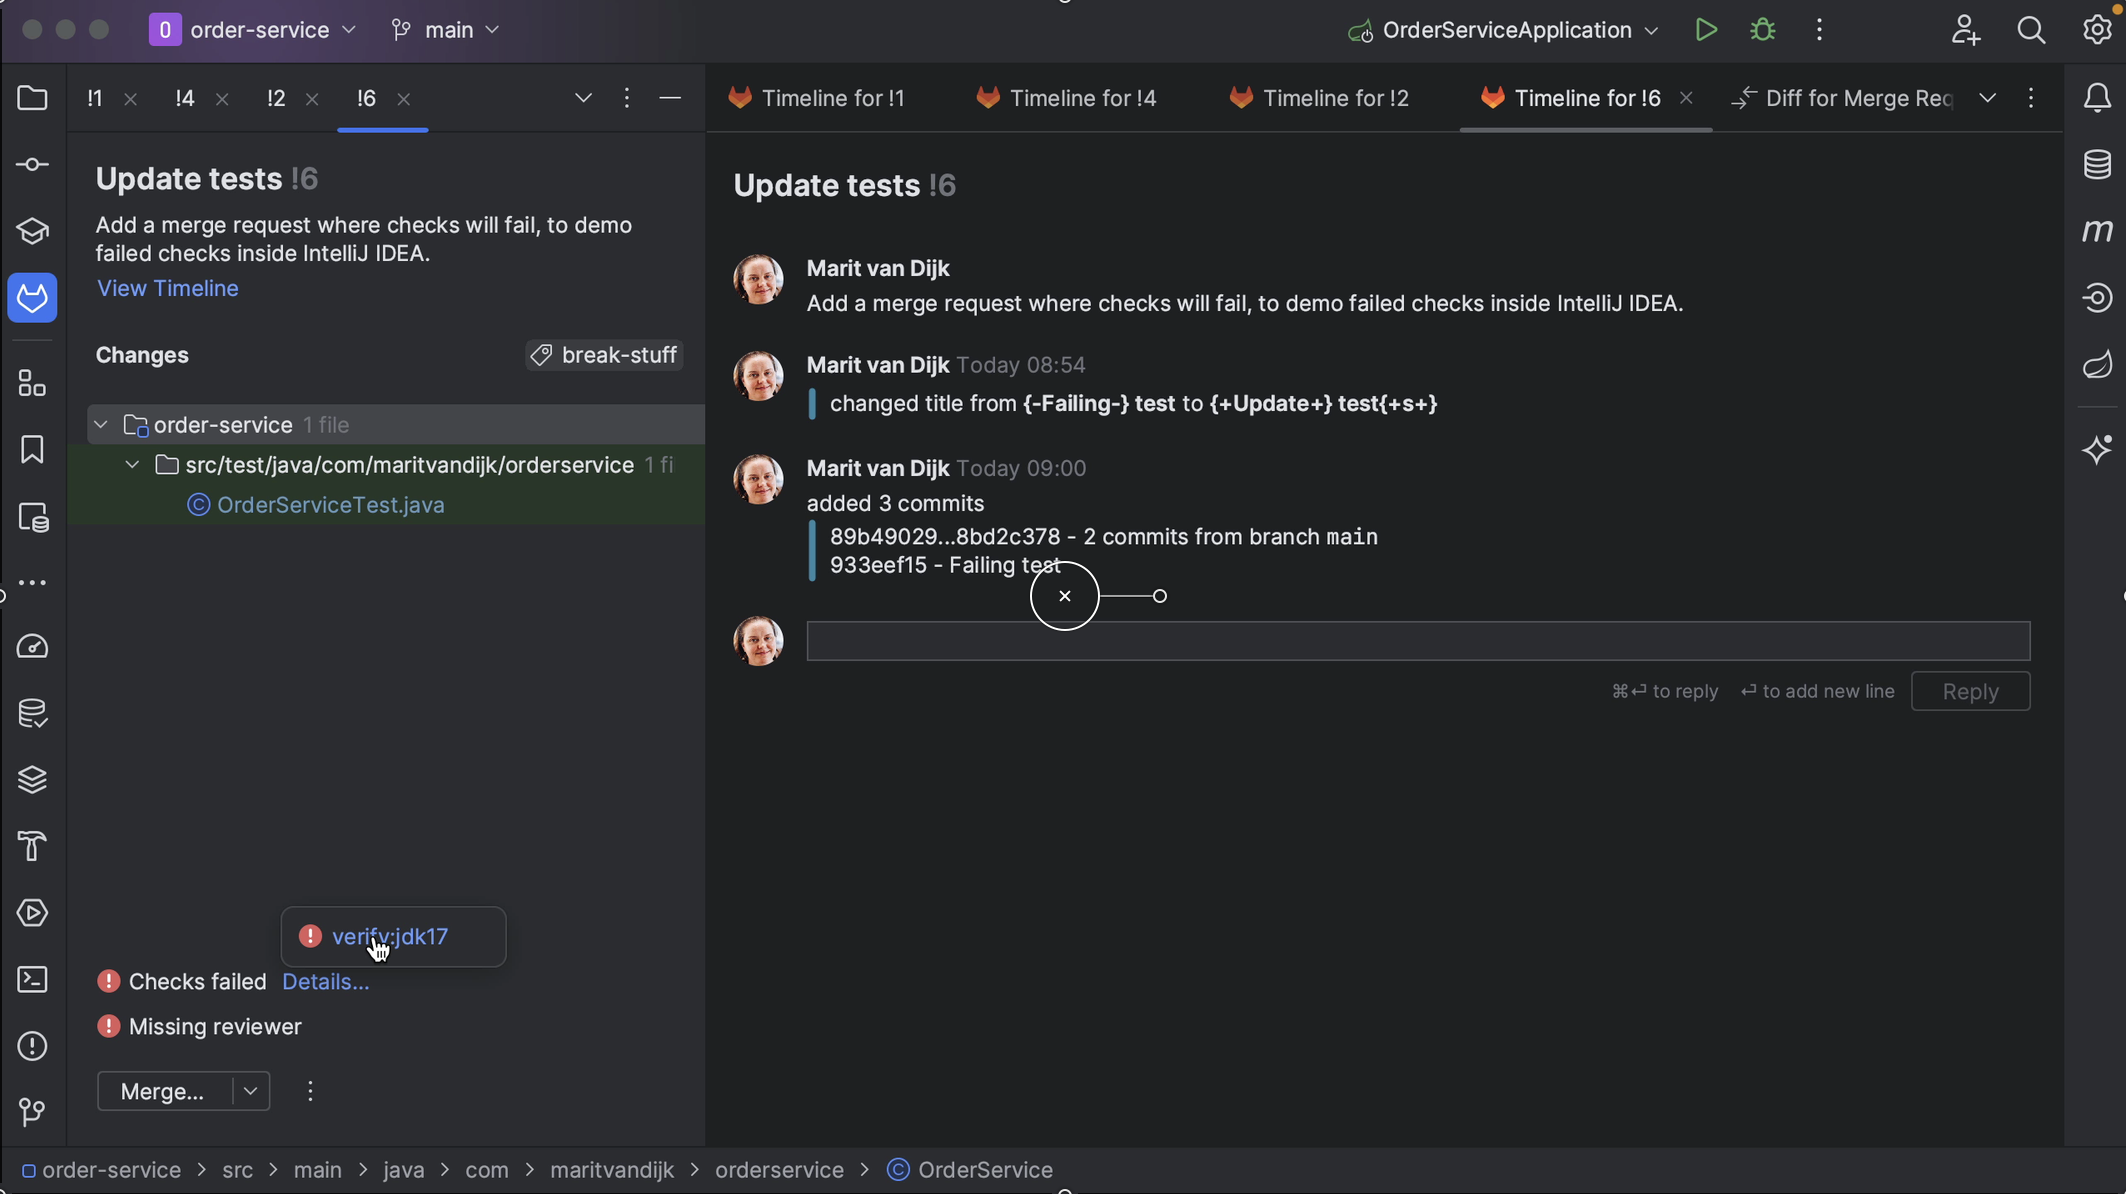
It also shows the result of any checks that were run. We can go to the details to see which checks failed, and even click them to go straight to the failing check on GitLab, so we can look at the details.
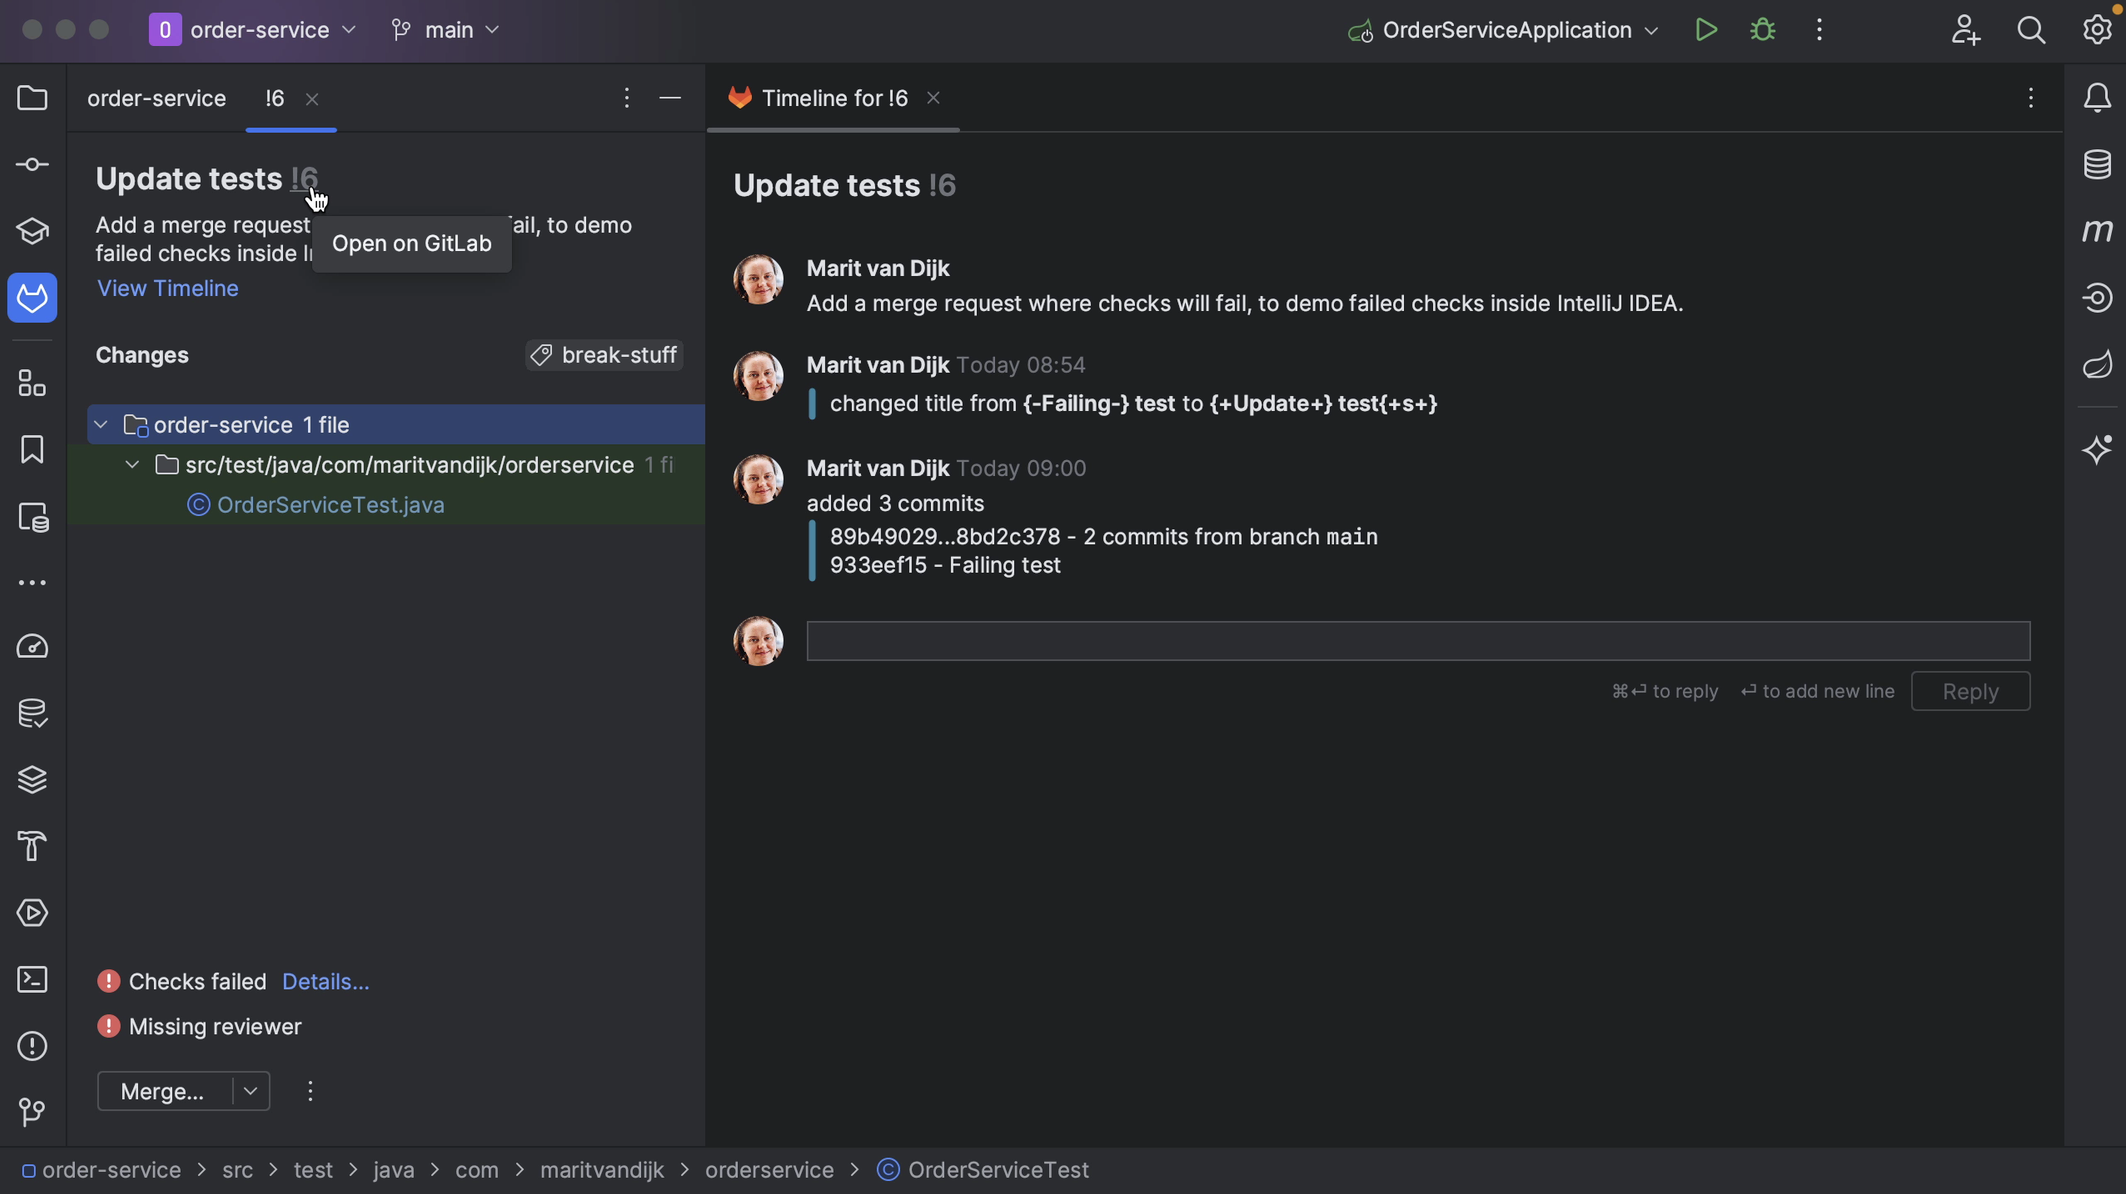
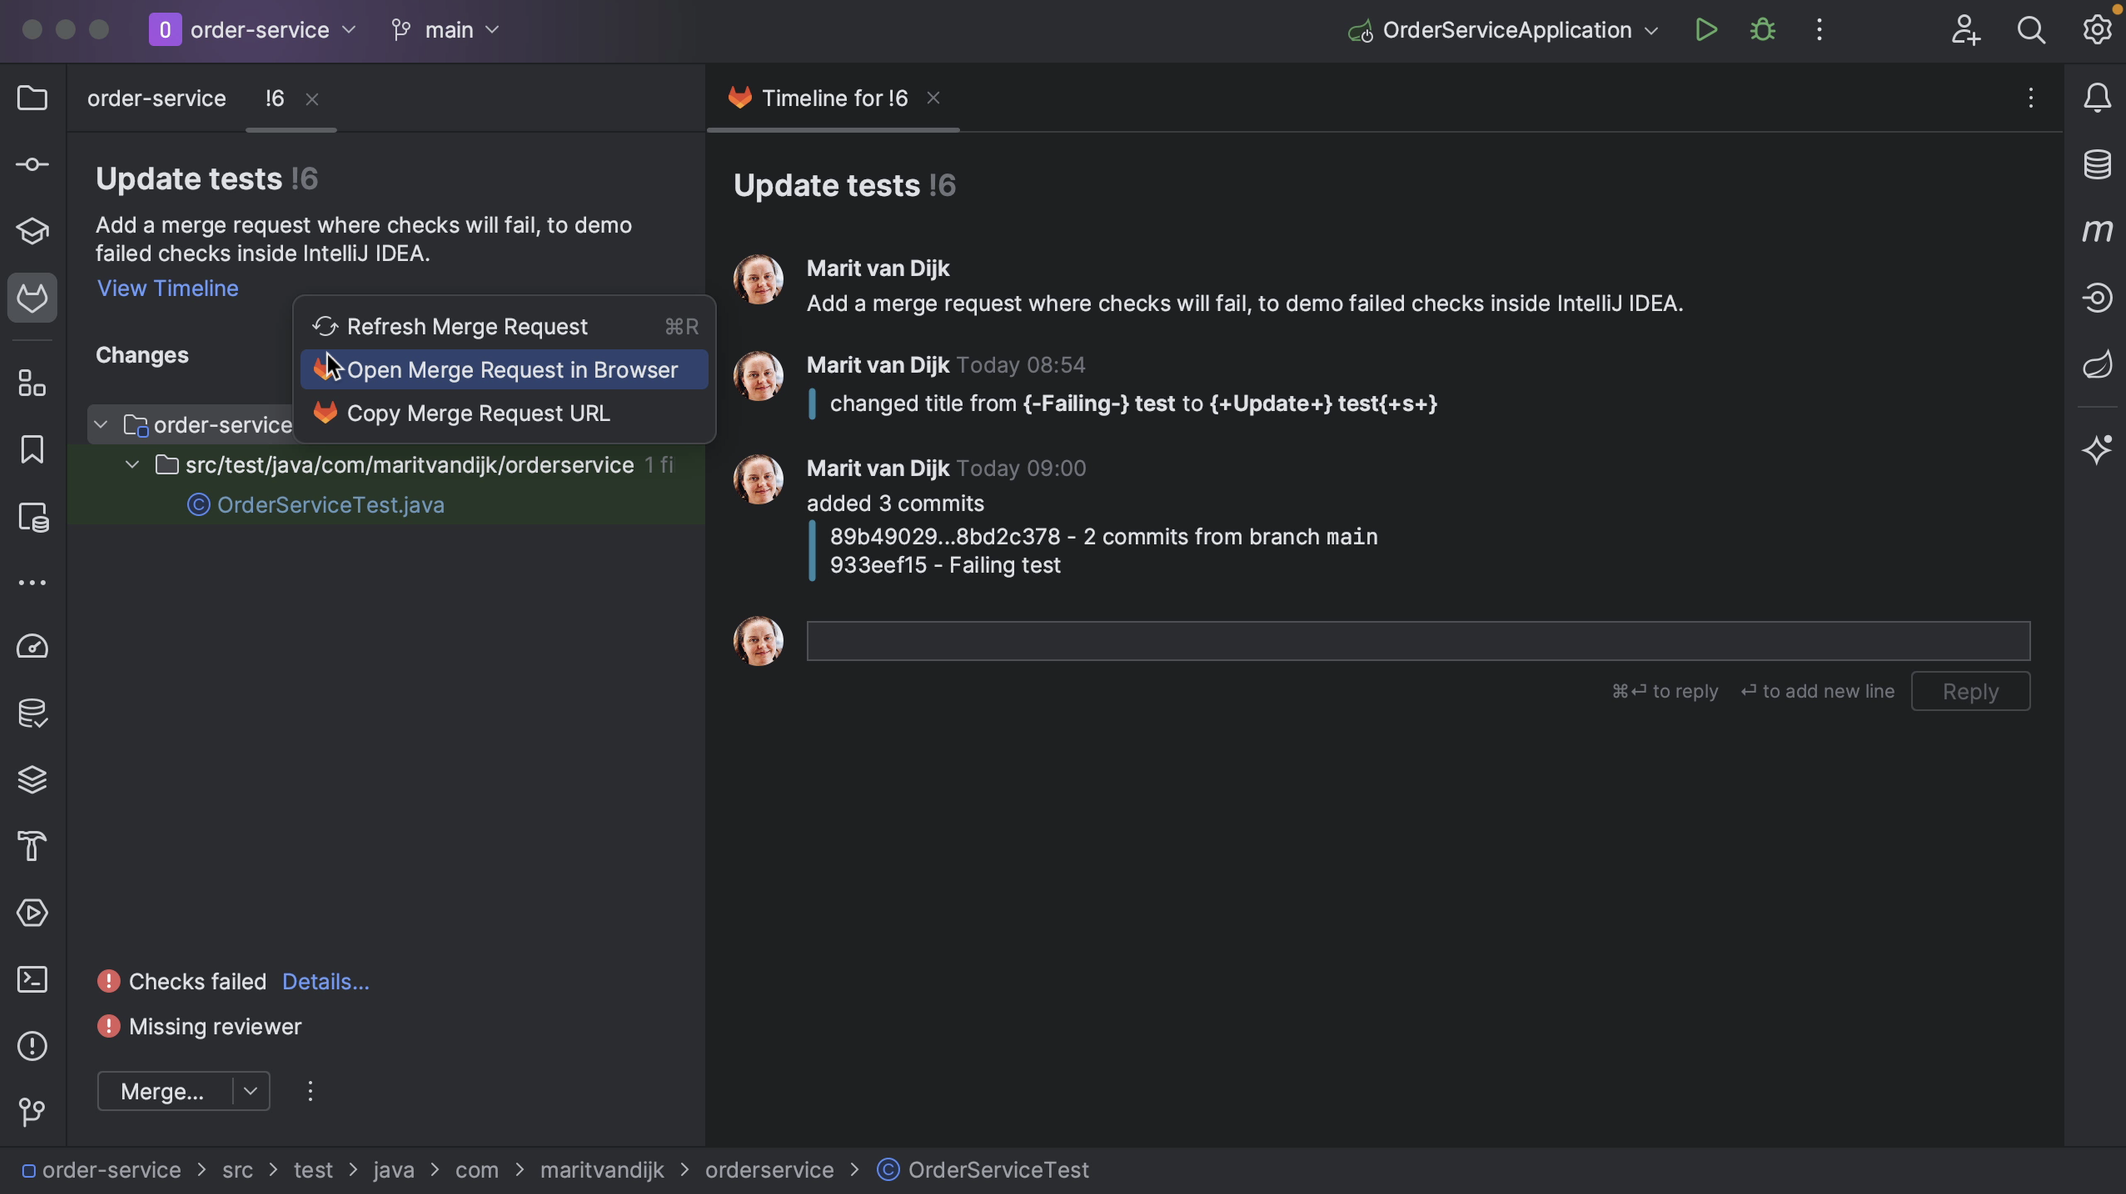
We can open the Merge Request in our browser in several ways. We can right-click the Merge Request number and select Open in Browser. Alternatively, we can open the Merge Request in our browser by right-clicking it, either when it’s already open, or in the list of Merge Requests and selecting Open Merge Request in Browser.
IntelliJ IDEA also shows if there are any conflicts, so we know if this request is safe to merge or not.
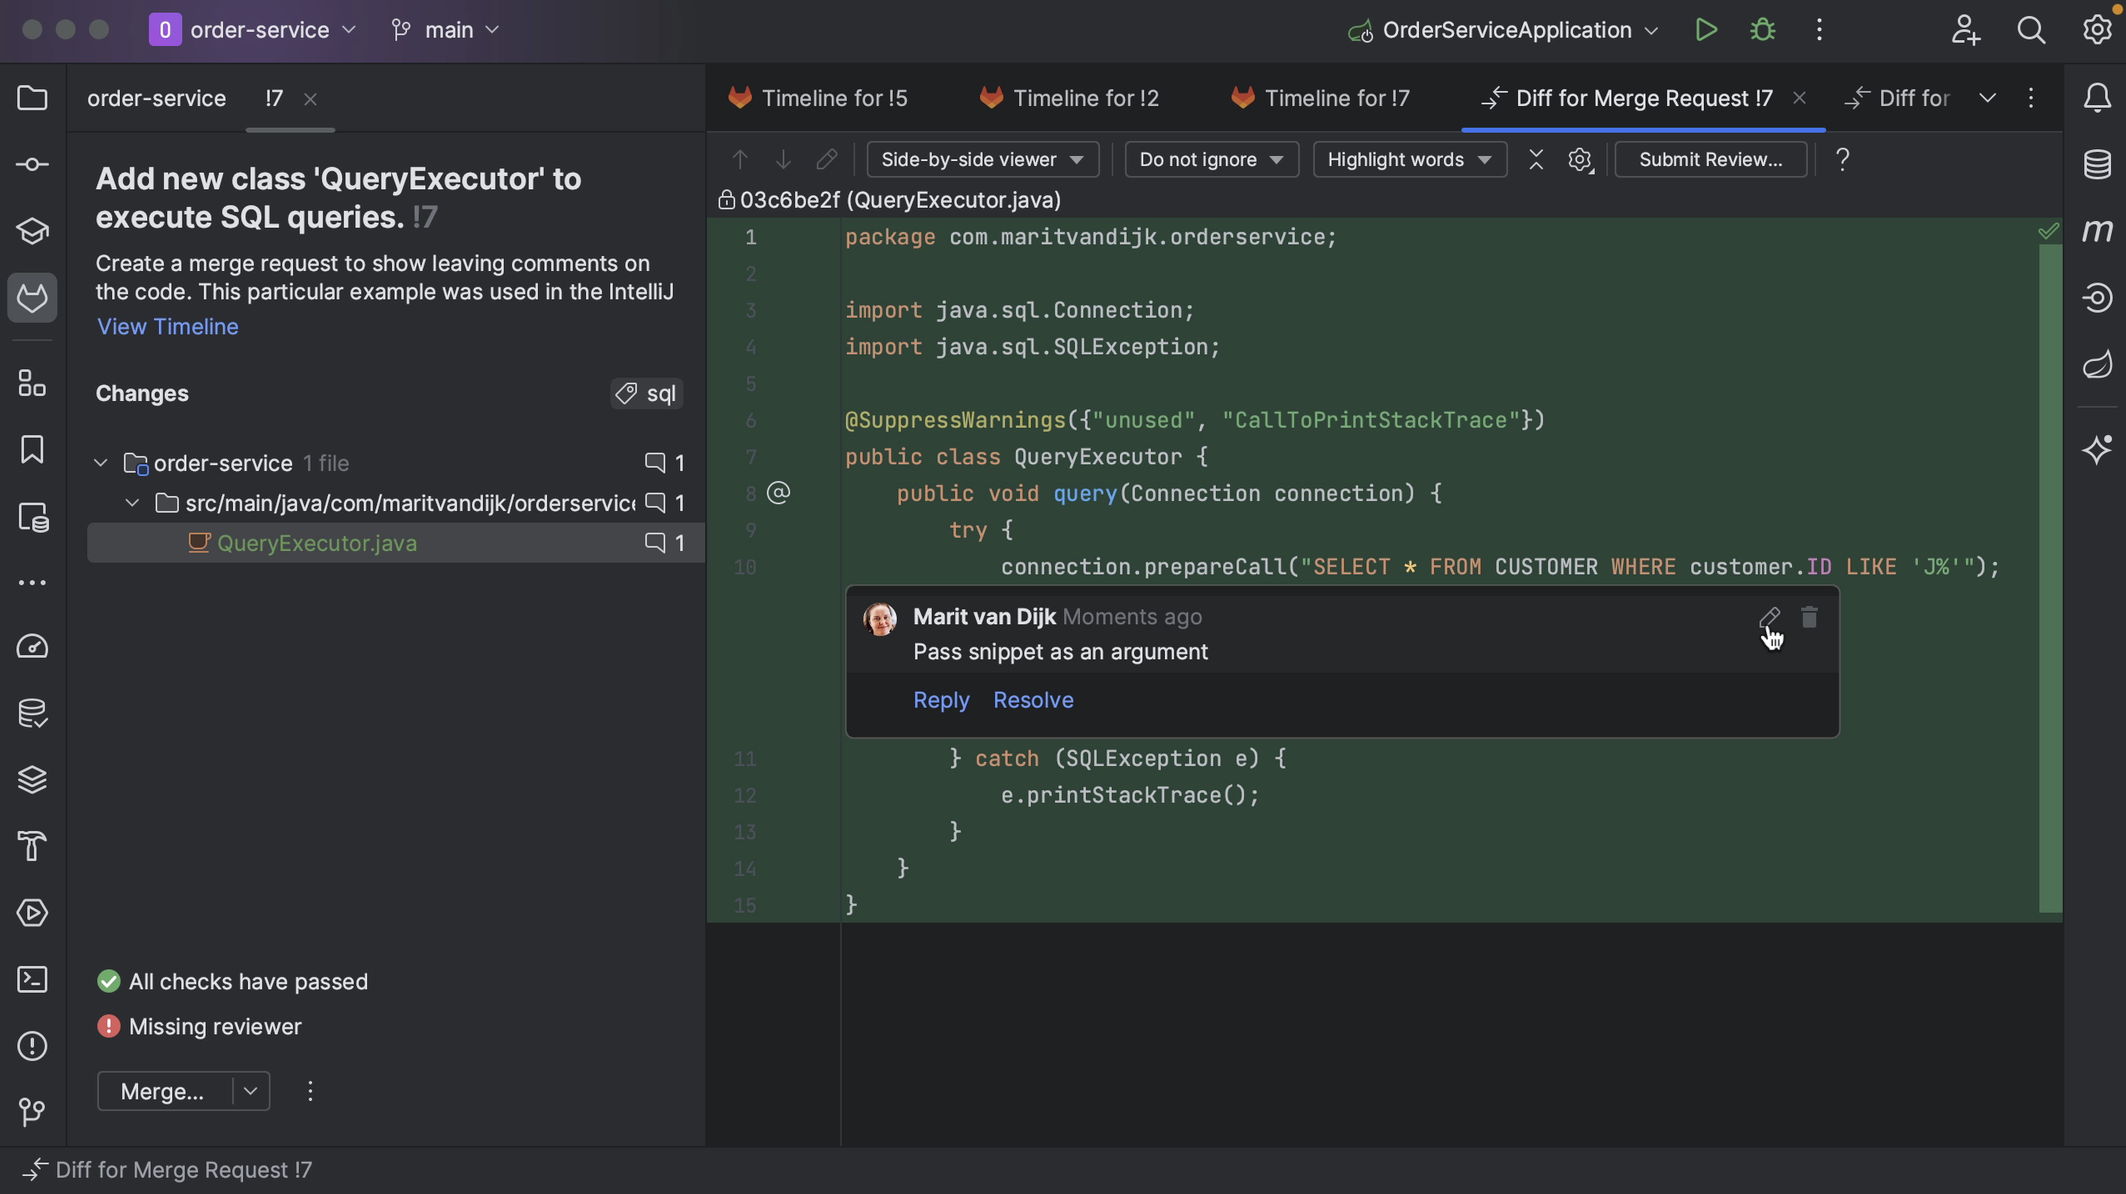
We can open any of the files that make up the Merge Request, and IntelliJ IDEA will show them in the diff viewer, so we can have a closer look at the changes that make up the Merge Request. Inline comments will be displayed in the diff view too. Alternatively, we can open the diff view by selecting the file and using the shortcut for Show Diff (⌘D on macOS | Ctrl+D on Windows/Linux).
If the Merge Request contains changes to multiple files, we can navigate between those files. We can do so using the arrows at the top of the diff viewer, or using the shortcuts to Compare Next File (⌃⇧→ on macOS | Alt+→ on Windows/Linux) or Compare Previous File (⌃⇧← on macOS |Alt+← on Windows/Linux).
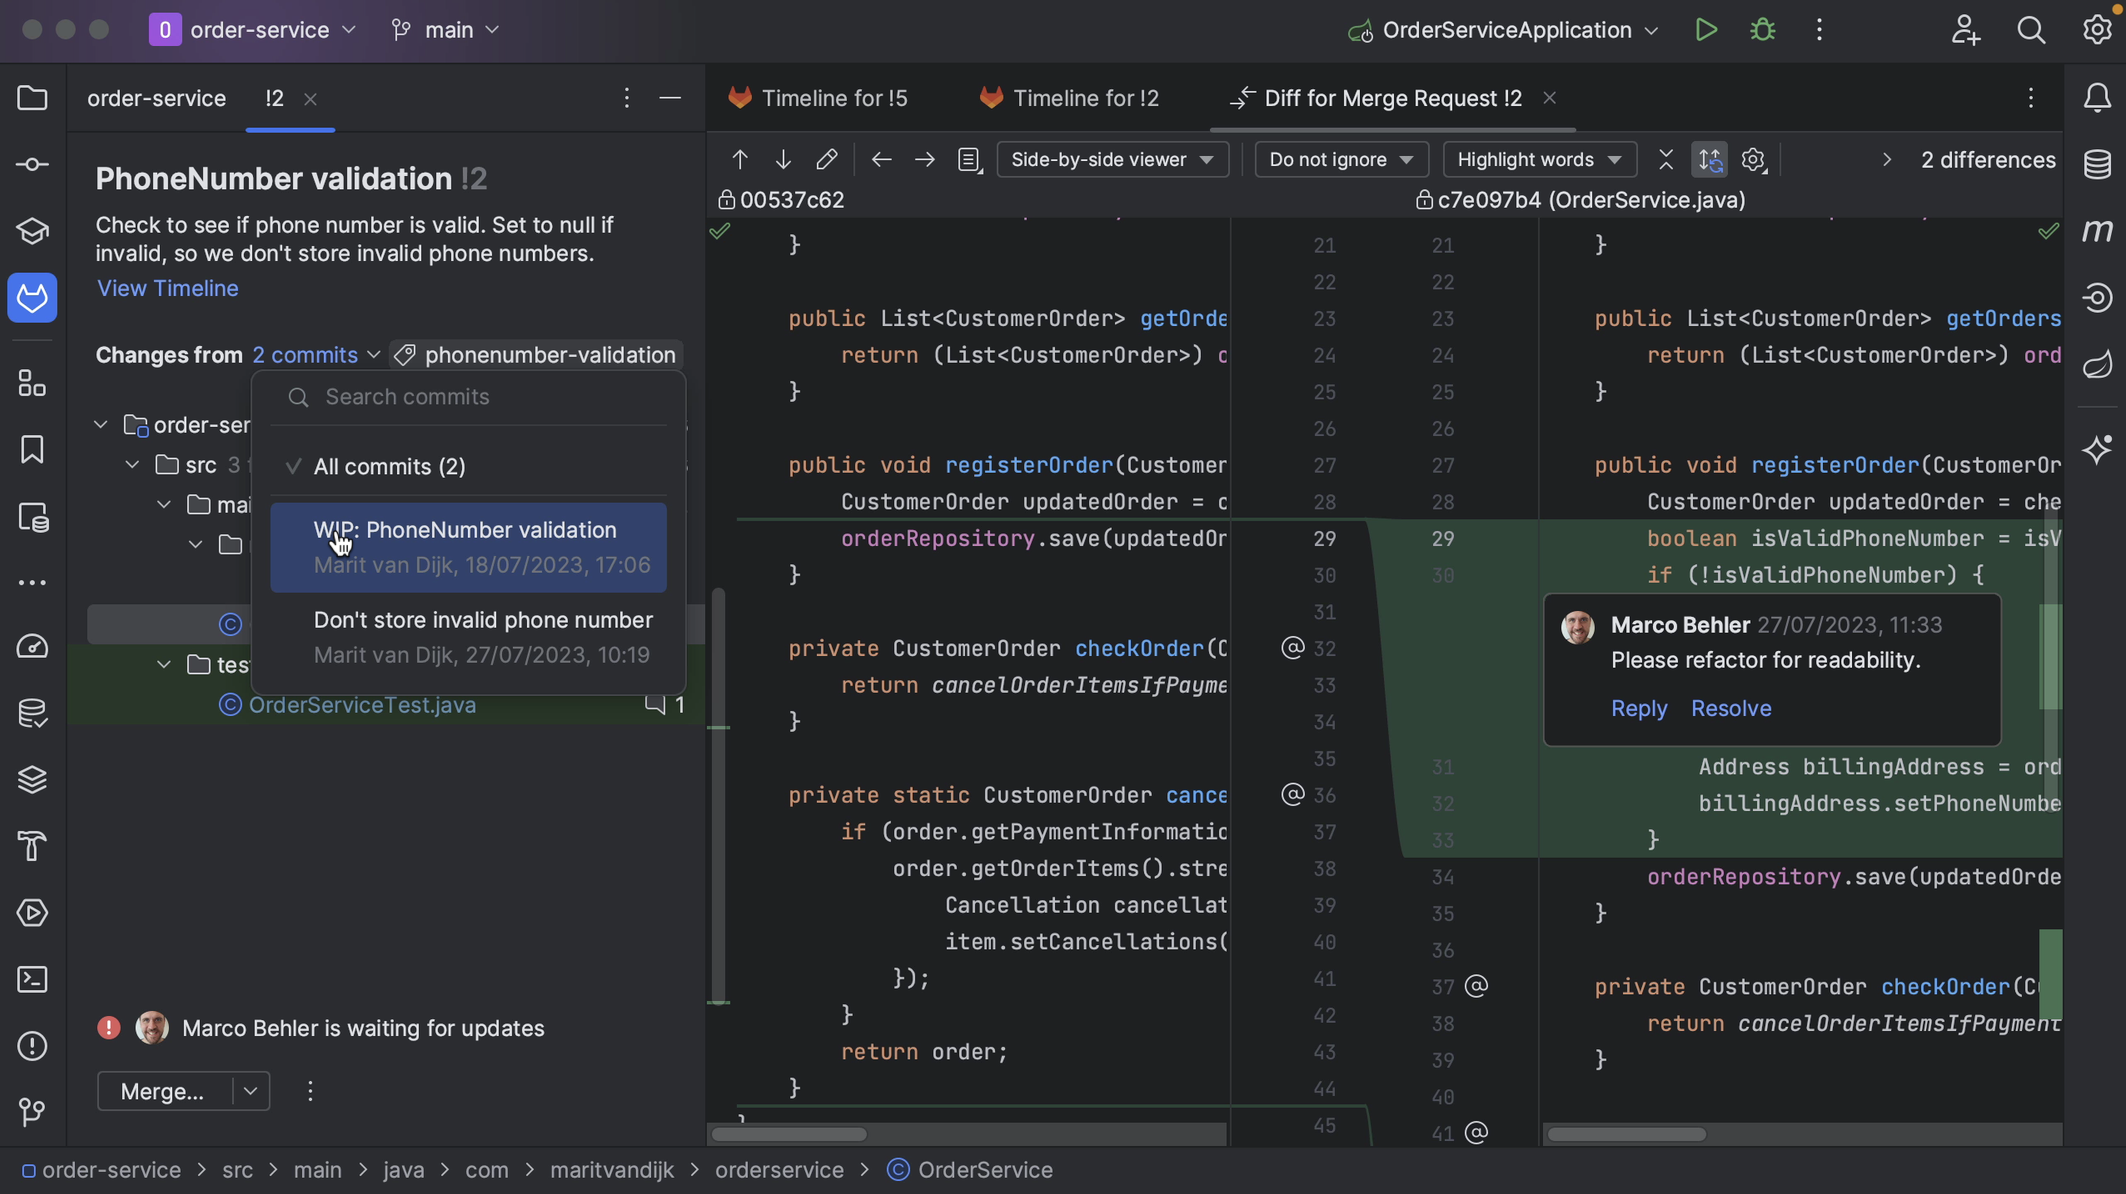
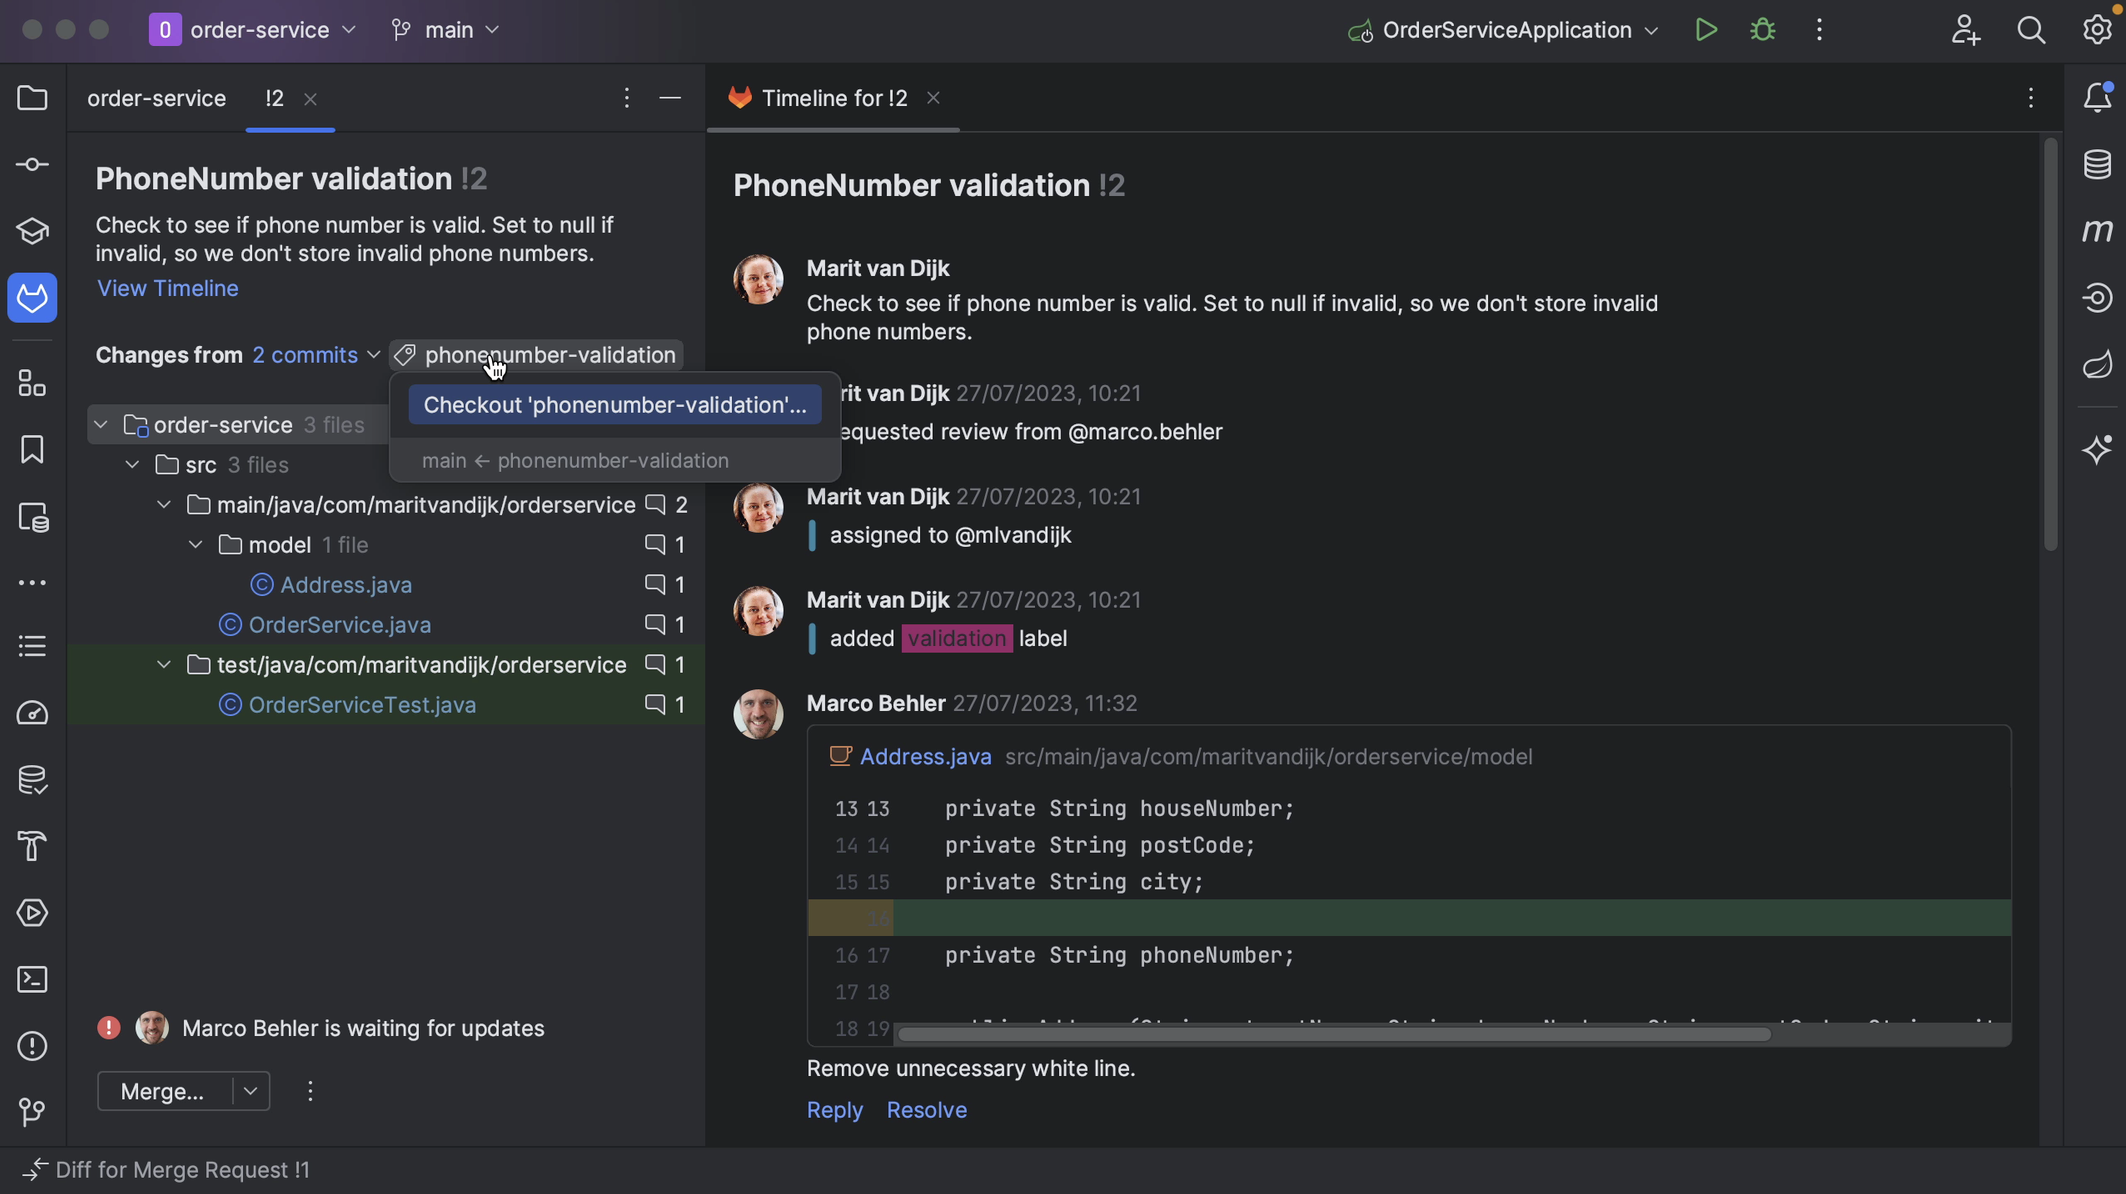
If the Merge Request consists of multiple commits, we can see the individual commits in the Changes from dropdown list. We can look at the changes for an individual commit if we want.
We can also see the number of comments for the Merge Request, and for each file.
We can Hide All Windows (⇧⌘F12 on macOS | Ctrl+Shift+F12 on Windows/Linux) to focus on the diff. We can Restore Windows using the same shortcut.
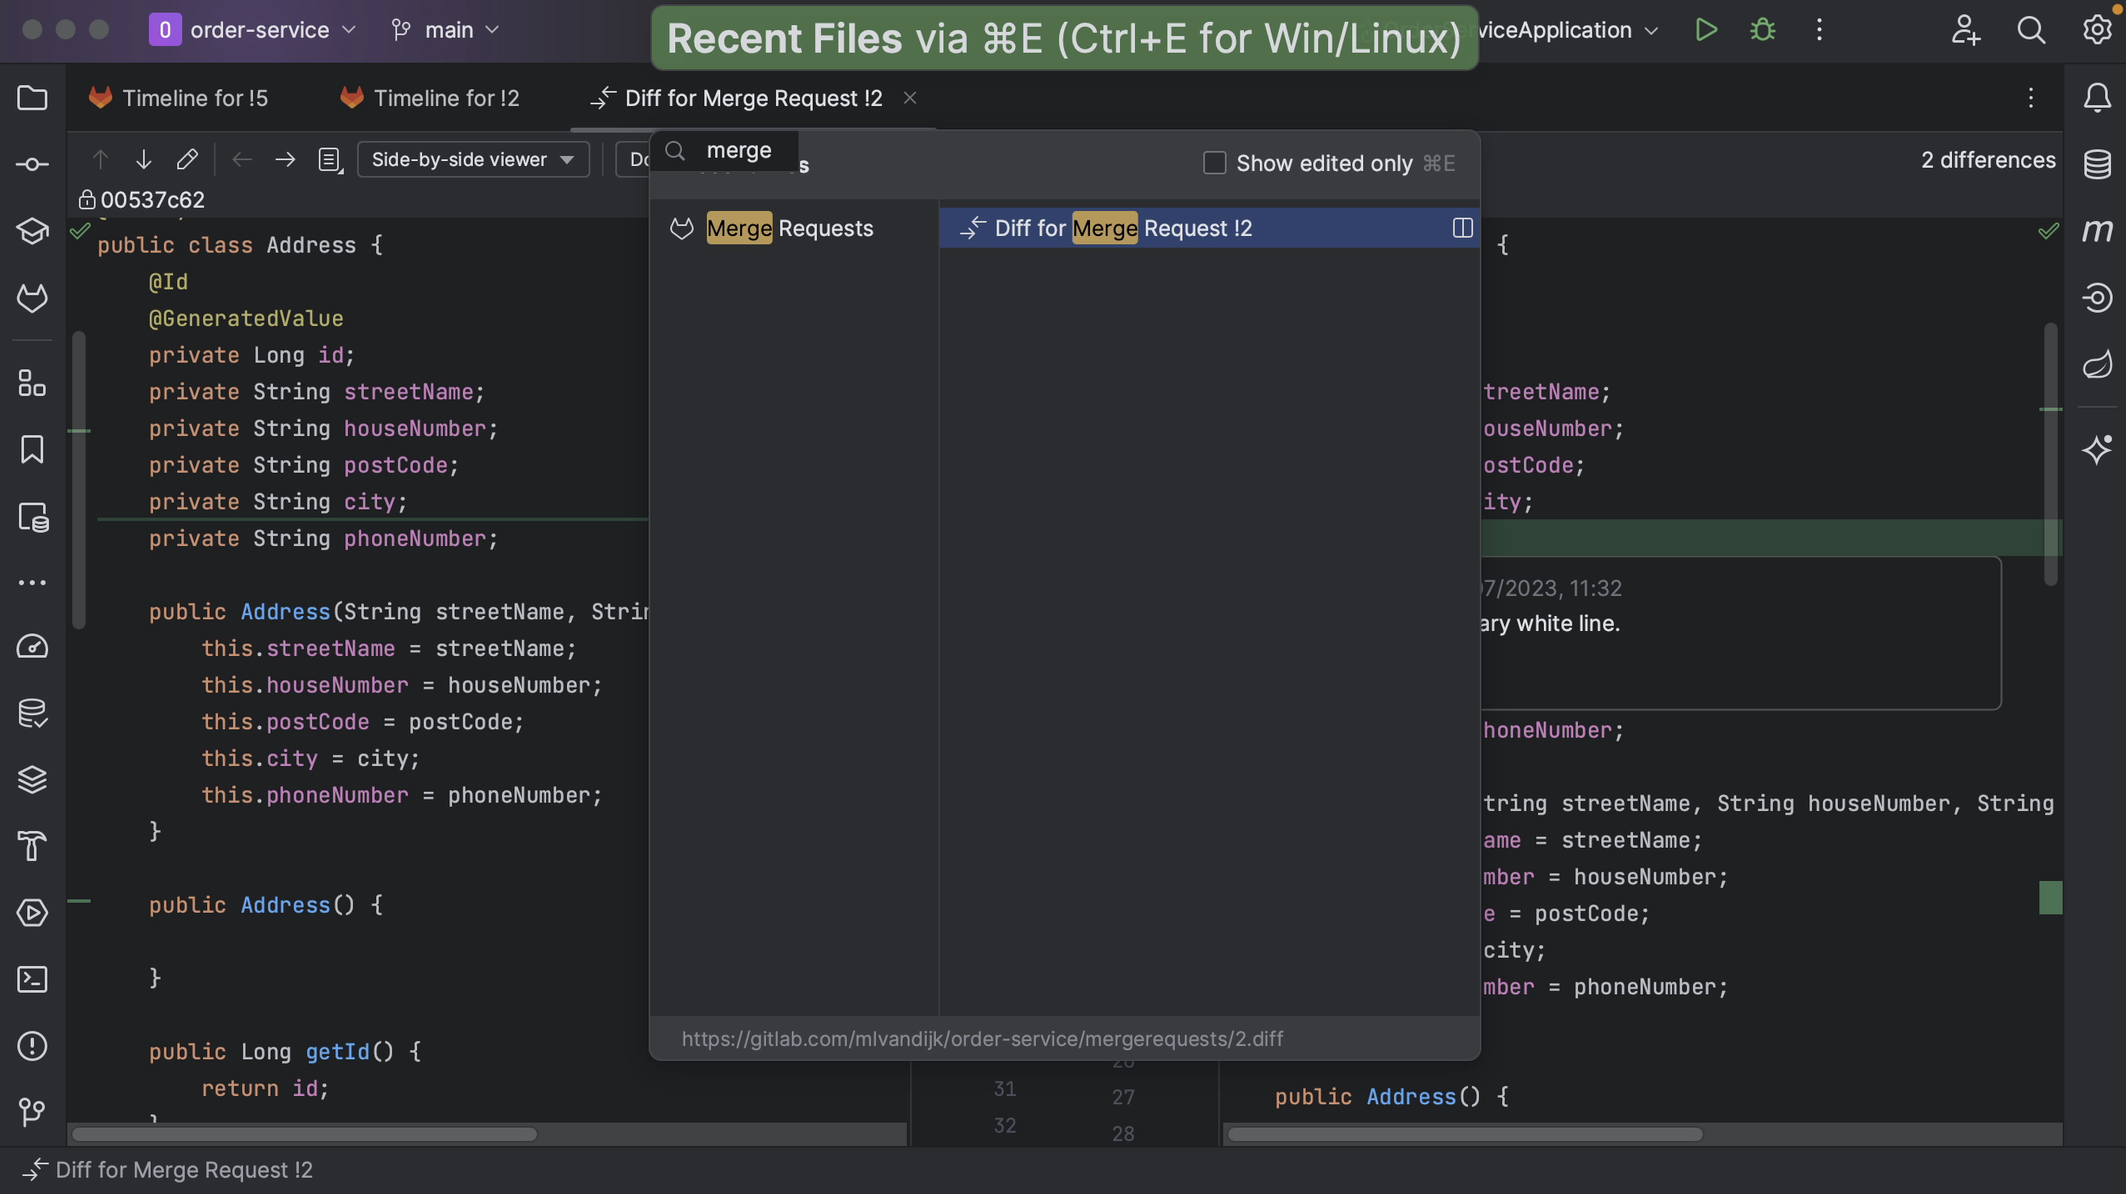
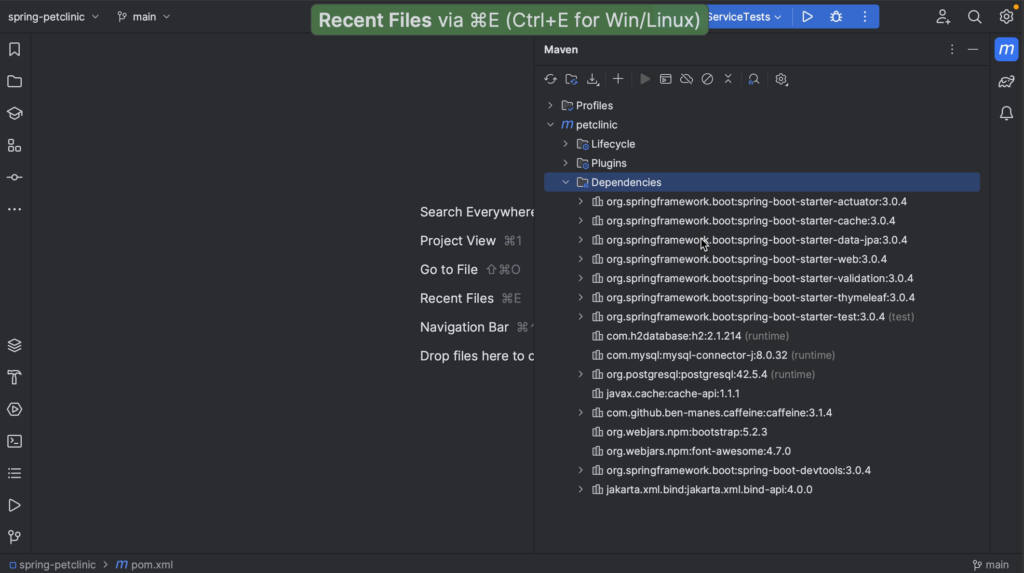
Alternatively, we can reopen the Merge Requests window by opening the Recent Files dialog (⌘ E on macOS | Ctrl+E on Windows/Linux), which also lets us open up any of the Tool Windows. Here we can search for “merge” to find the Merge Request tool window.
Adding comments from GitLab and IntelliJ IDEA
Let’s look at comments on our Merge Request.
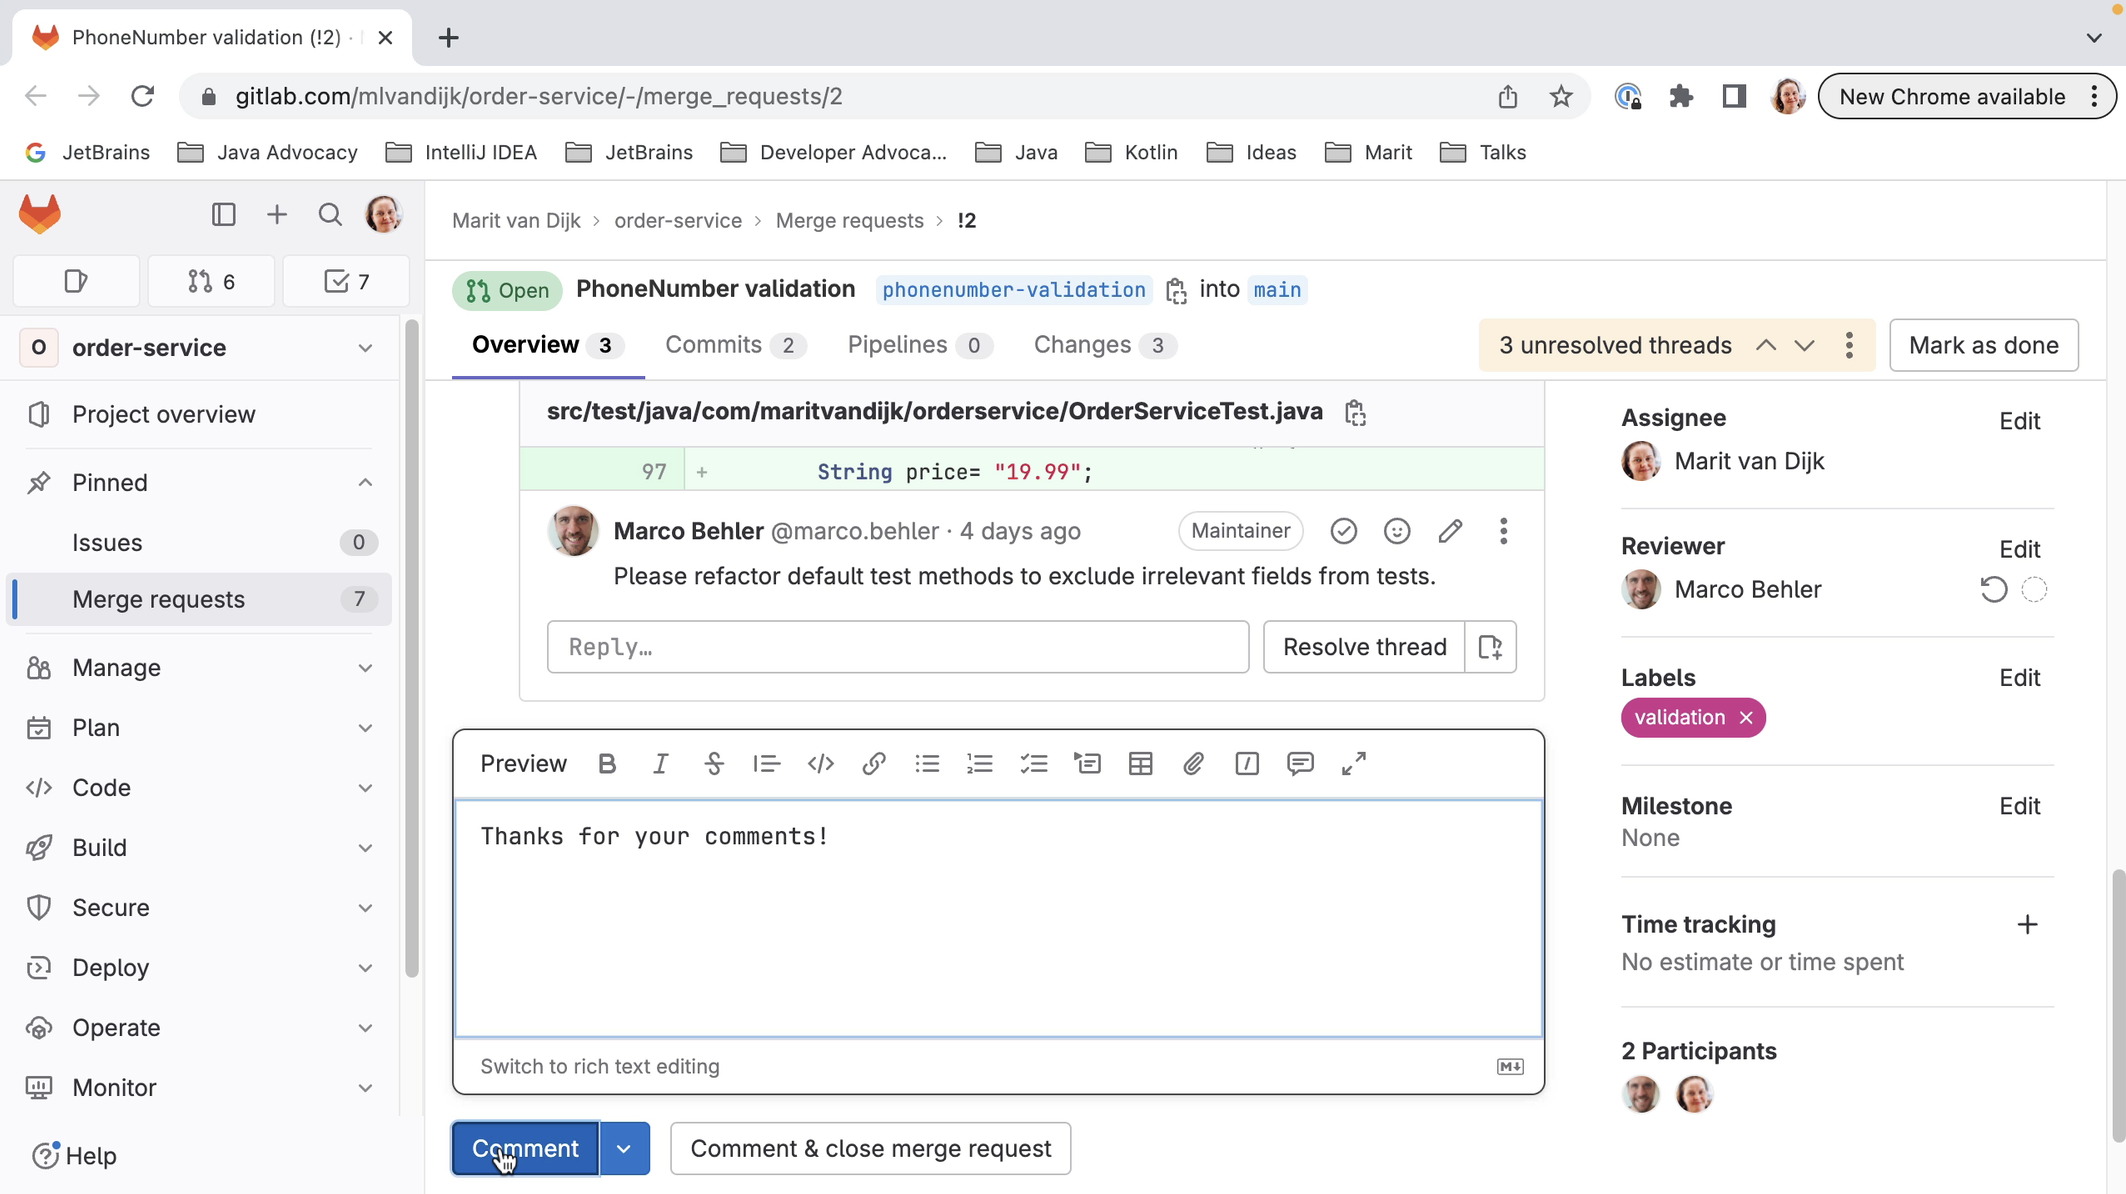
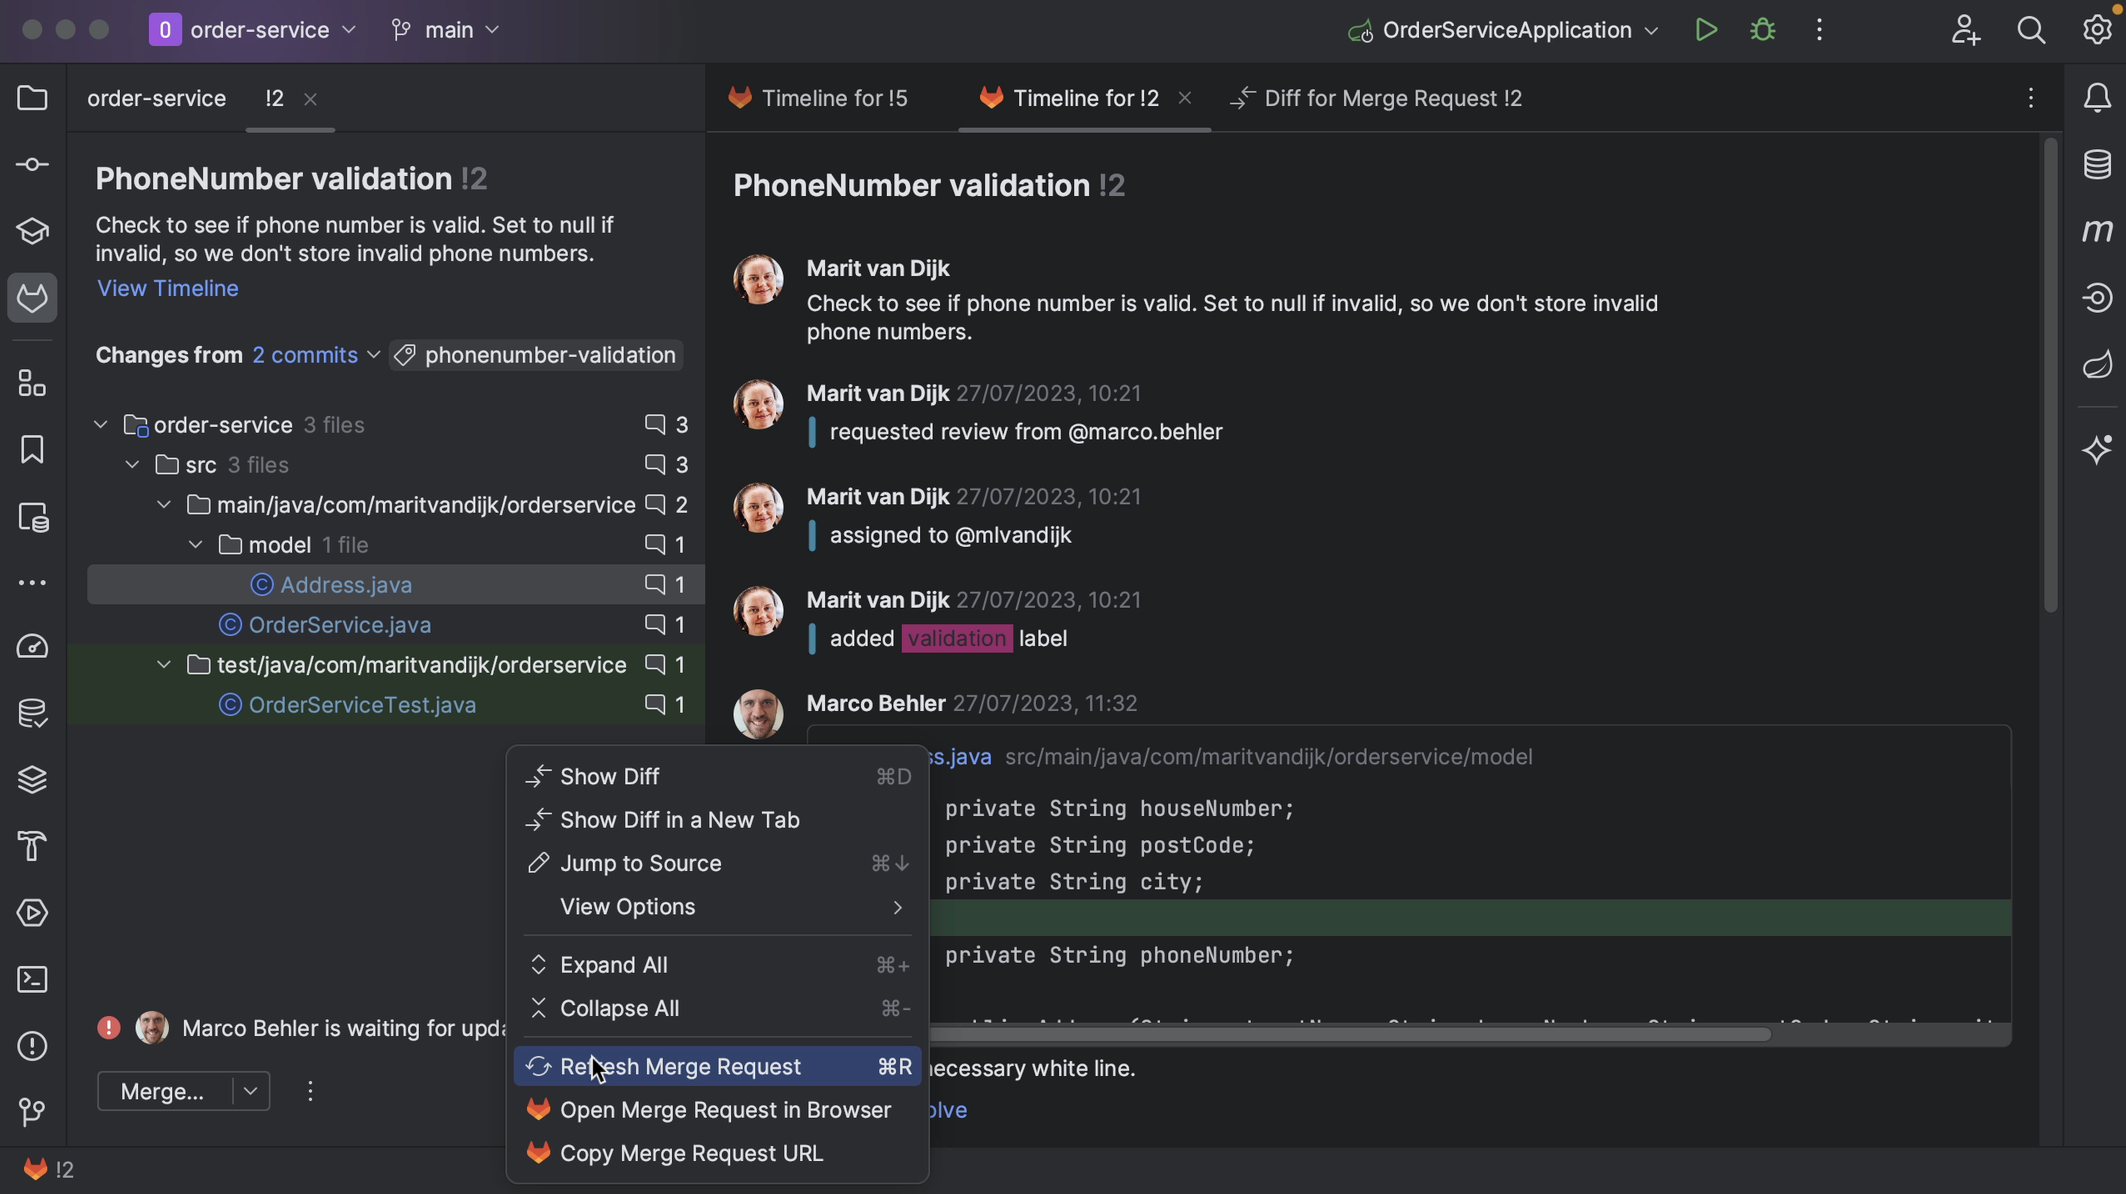
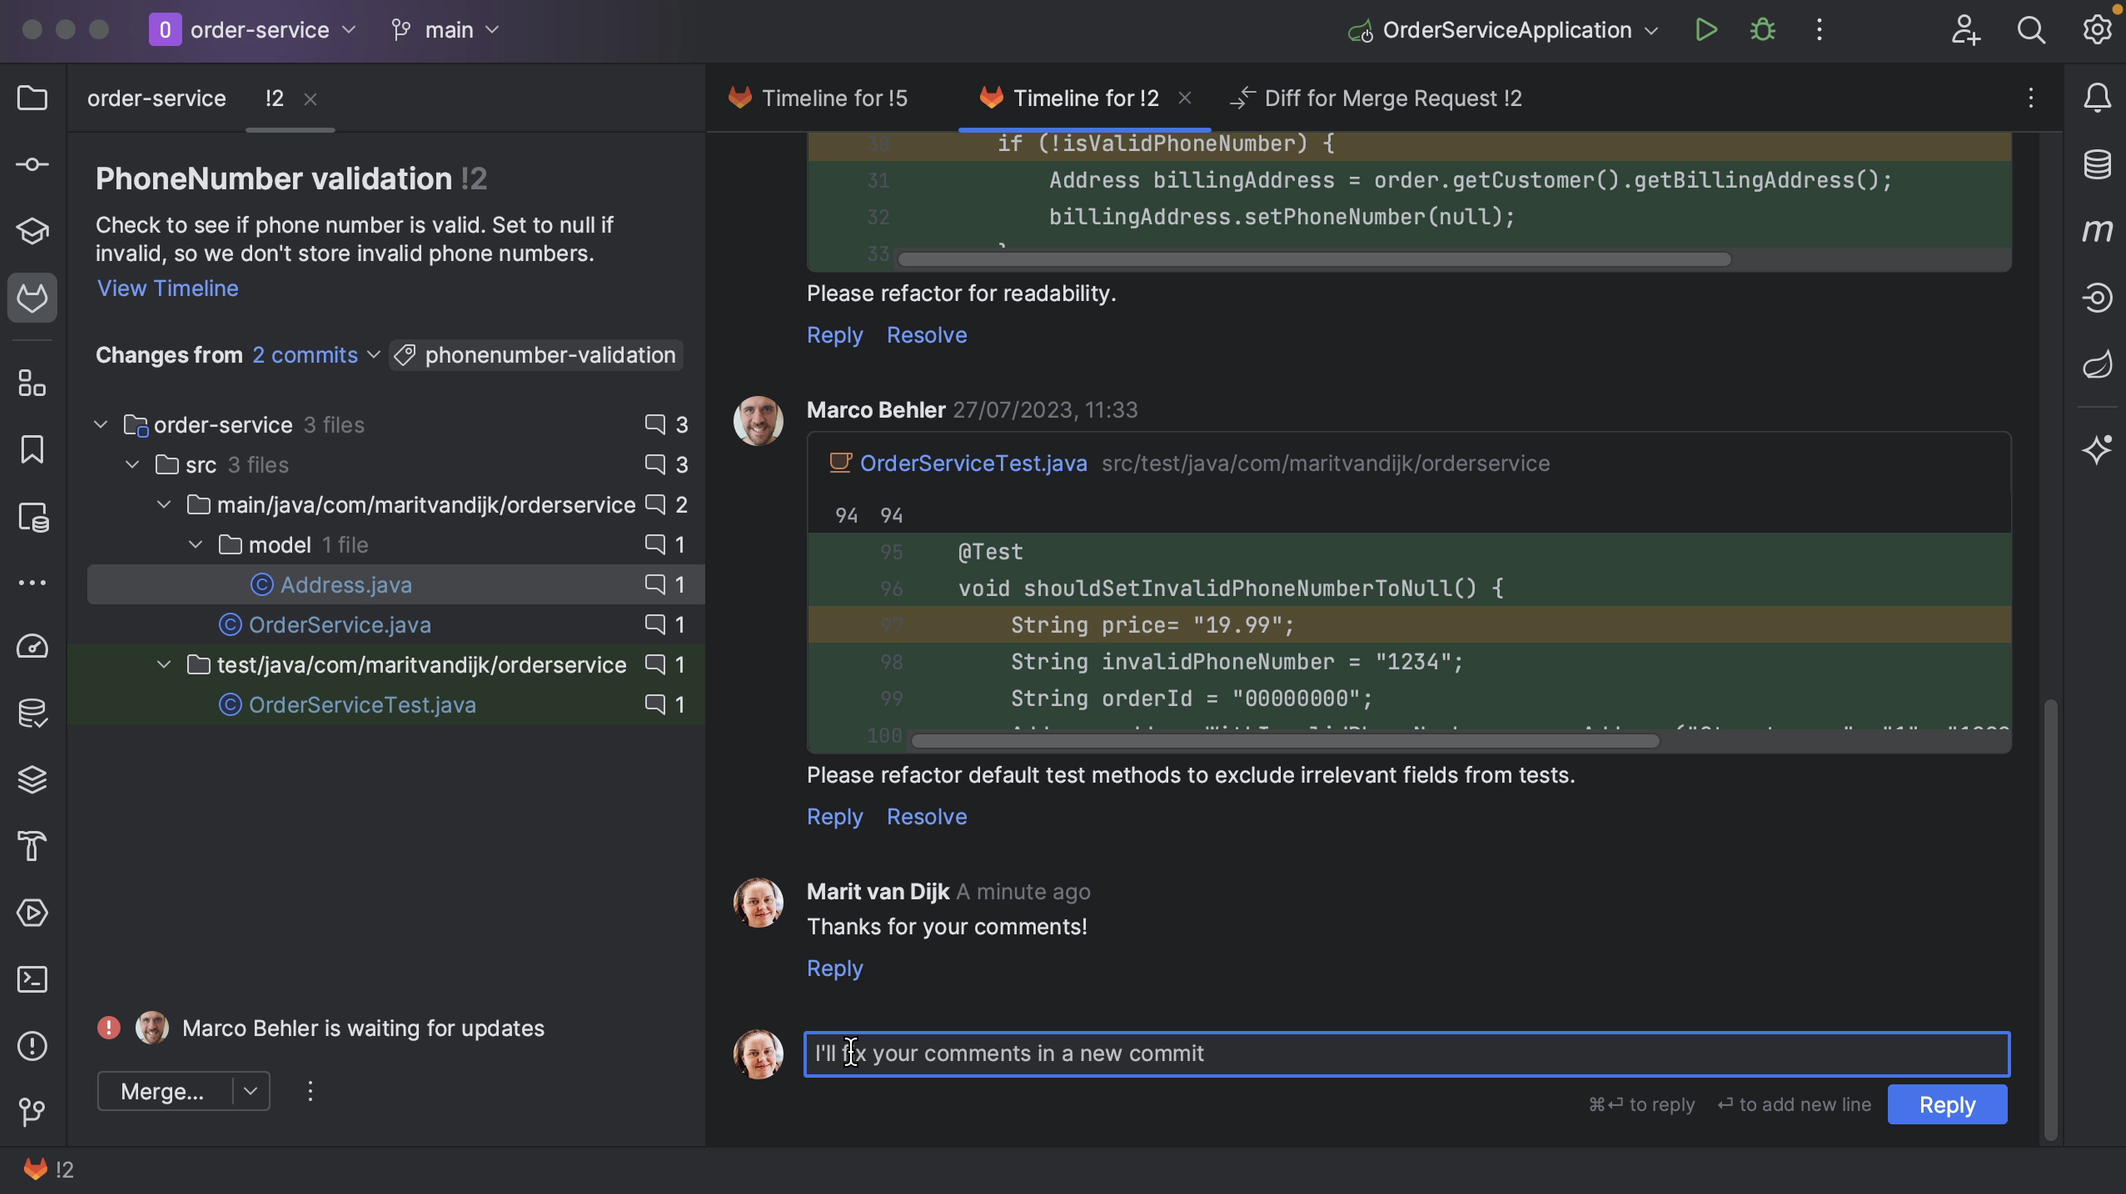
We can add comments to the GitLab conversation. Comments on this page are comments that apply to the Merge Request as a whole, and not a specific piece of code. We can see these comments inside IntelliJ IDEA too. We might need to refresh our Merge Request window, either using the shortcut to Refresh Reviews (⌘R on macOS | Ctrl+F5 on Windows/Linux) or by right-clicking the Merge Request window and selecting Refresh Merge Request.
We can also add comments from inside IntelliJ IDEA. We can place high-level comments, like the comment we just placed from GitLab.
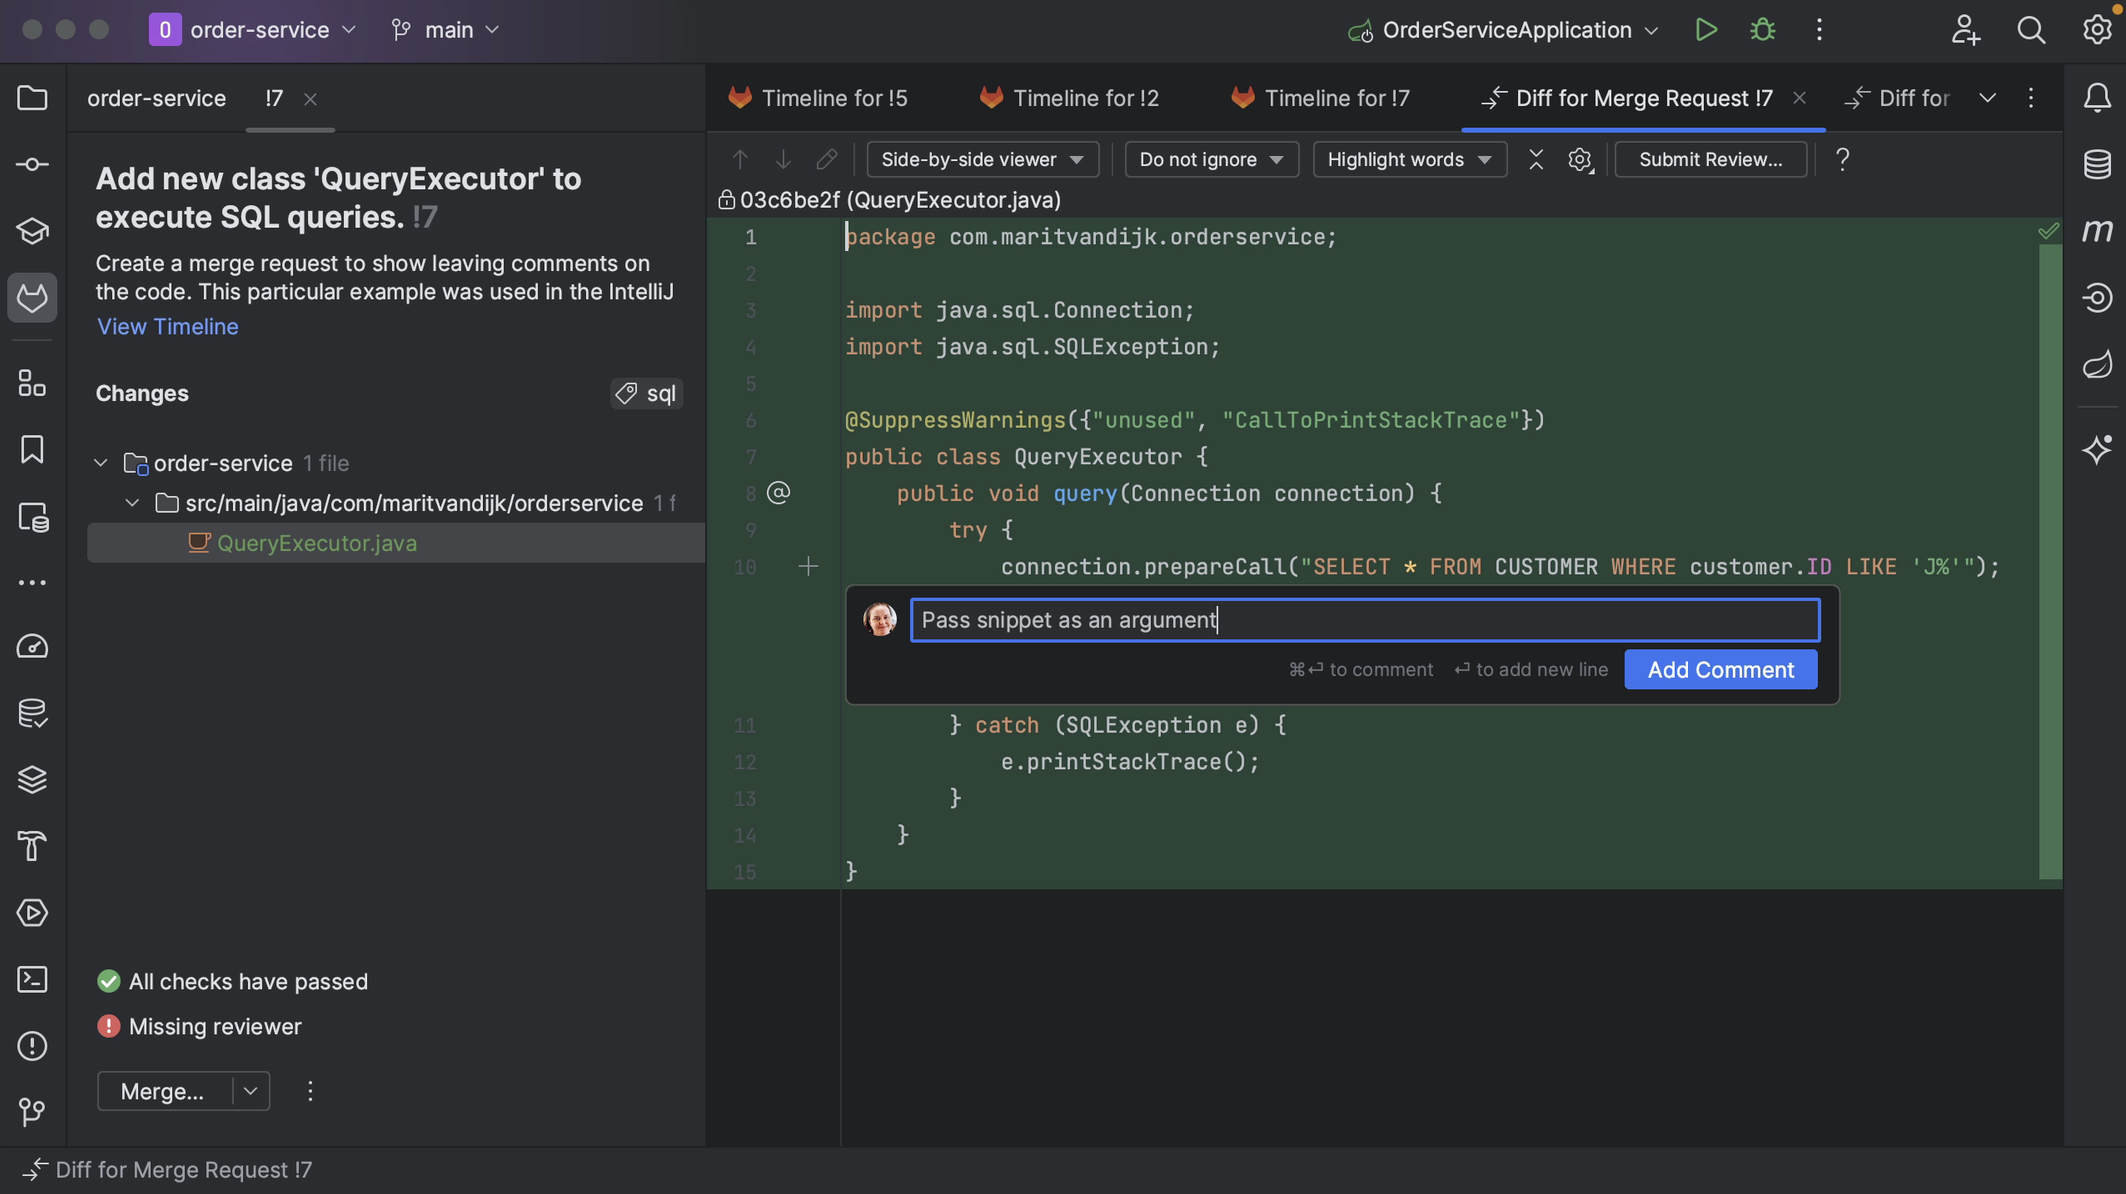
We might also want to add comments on particular parts of the code. We can do so from inside IntelliJ IDEA by clicking on the plus in the gutter of the diff viewer. For example, let’s add a comment to the current Merge Request.
We can edit or delete comments. We can also reply to comments or resolve a comment that is no longer relevant, for example, if the code has been updated in line with the comment.
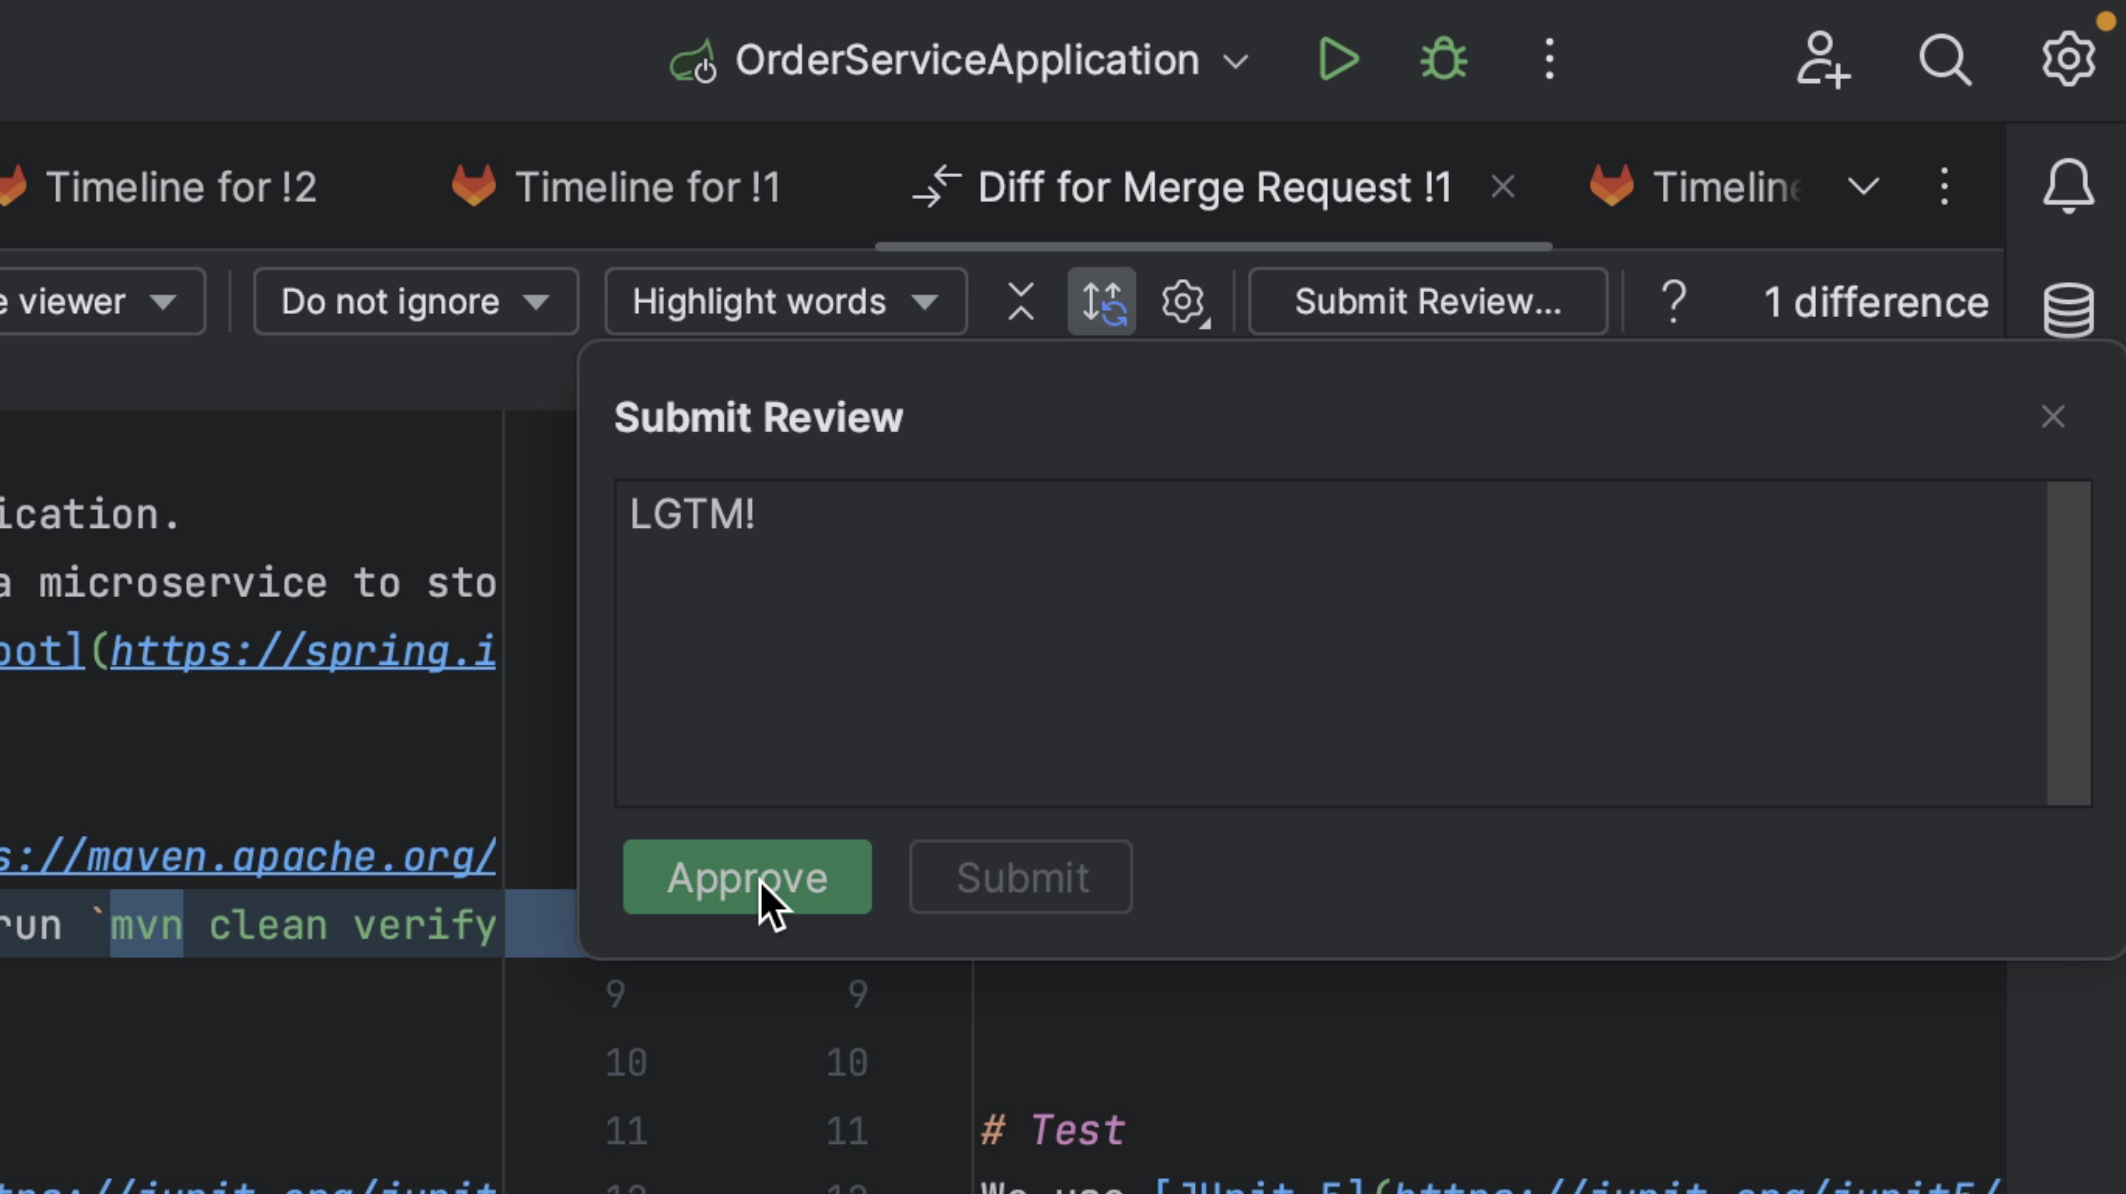
From the diff viewer, we can submit our review and approve the Merge Request if we think it’s ready to be merged.
Reviewing GitLab Merge Requests inside IntelliJ IDEA
One feature that’s really helpful when we’re reviewing a Merge Request is that we can check out the code that is in the Merge Request. In this project, I’m currently on the main branch. Let’s check out the branch for this Merge Request.
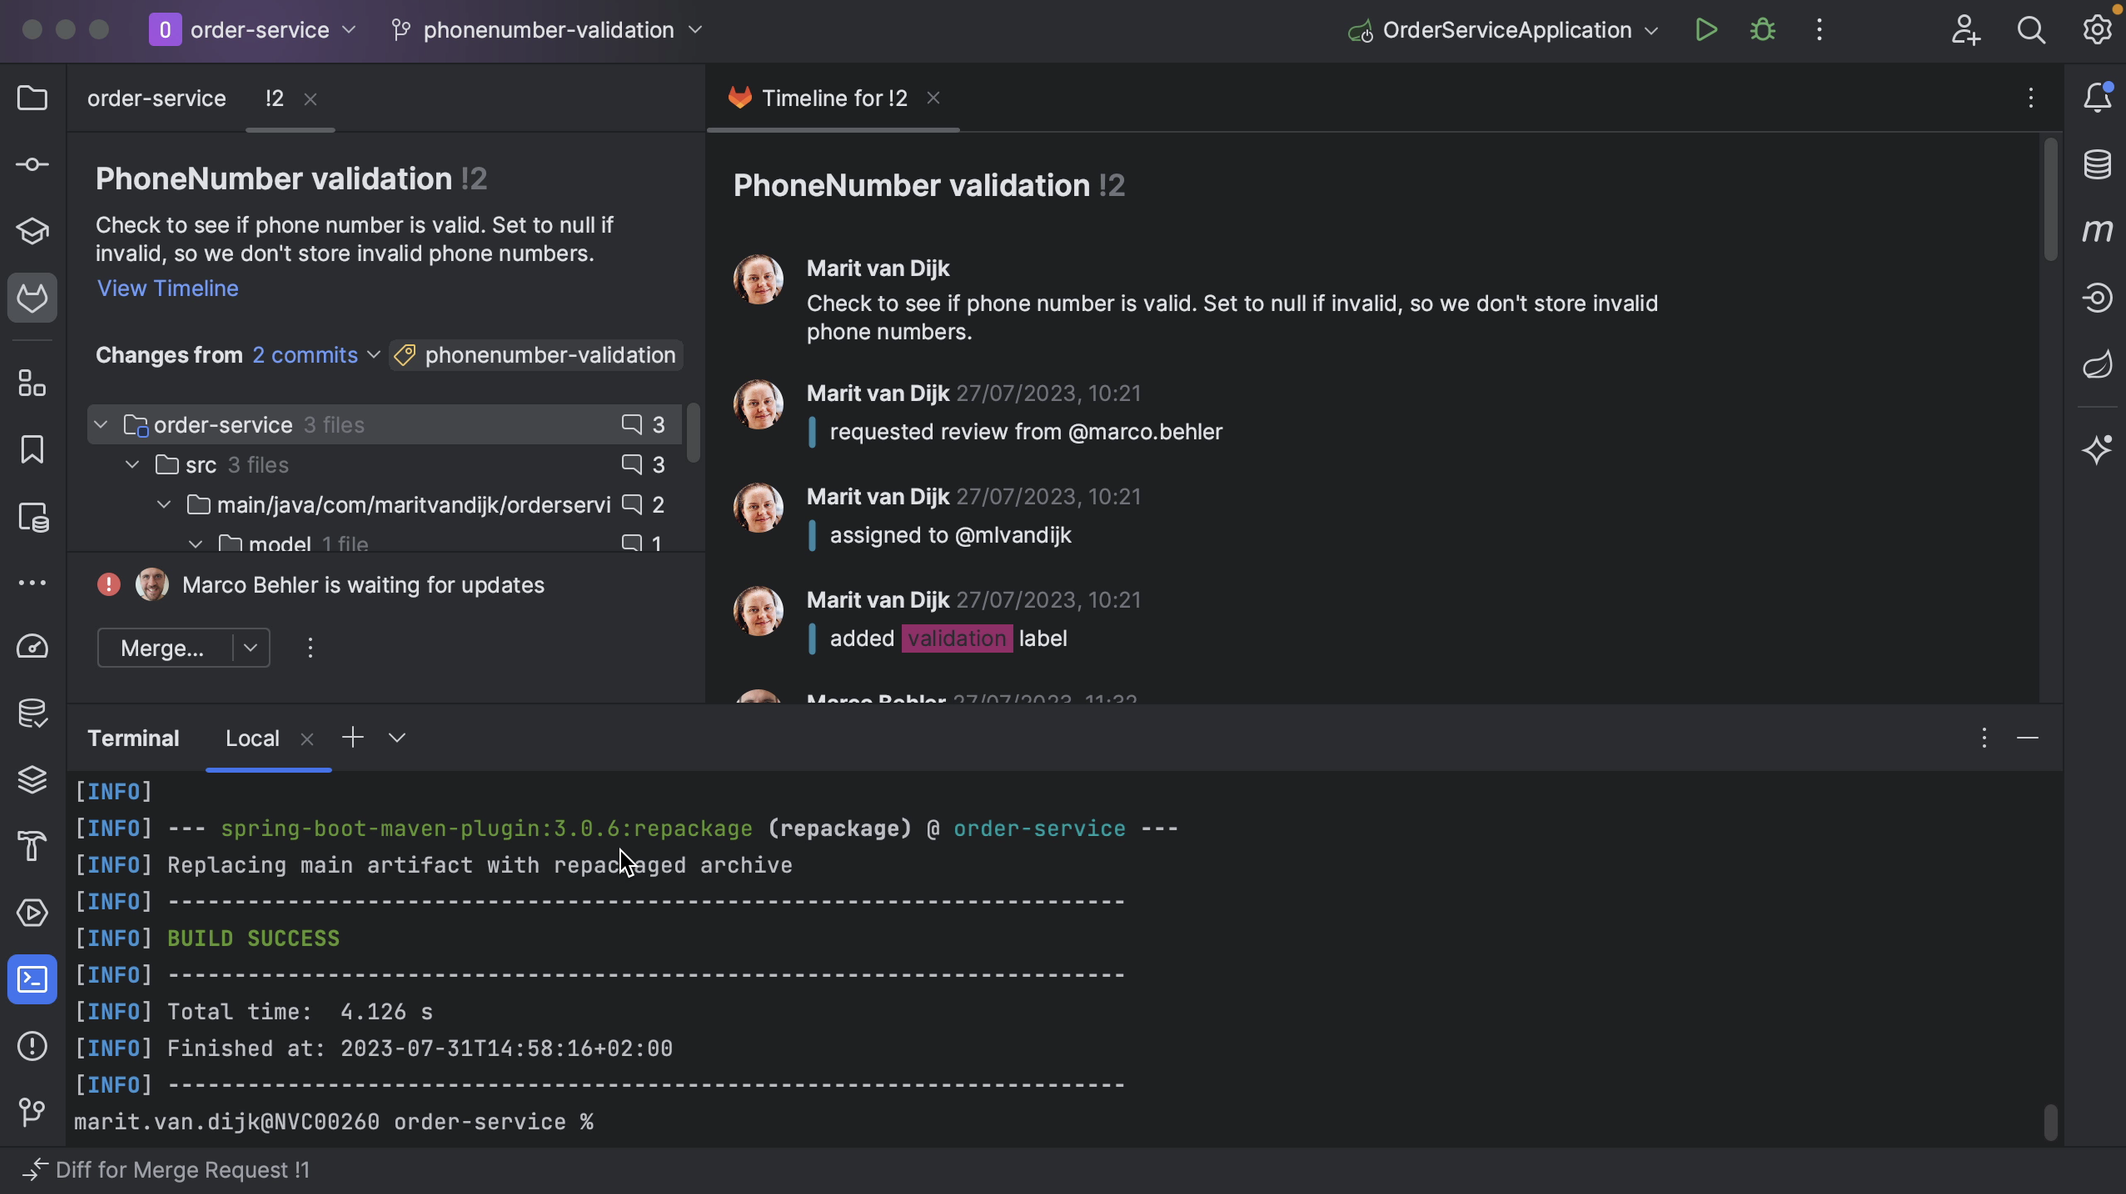
With the branch checked out locally, we can navigate the code related to this Merge Request. This lets us not only look at the code, but also make sure that the project still builds and tests pass. We can potentially make changes too.
Finally, let’s look at how to finish off the Merge Request.
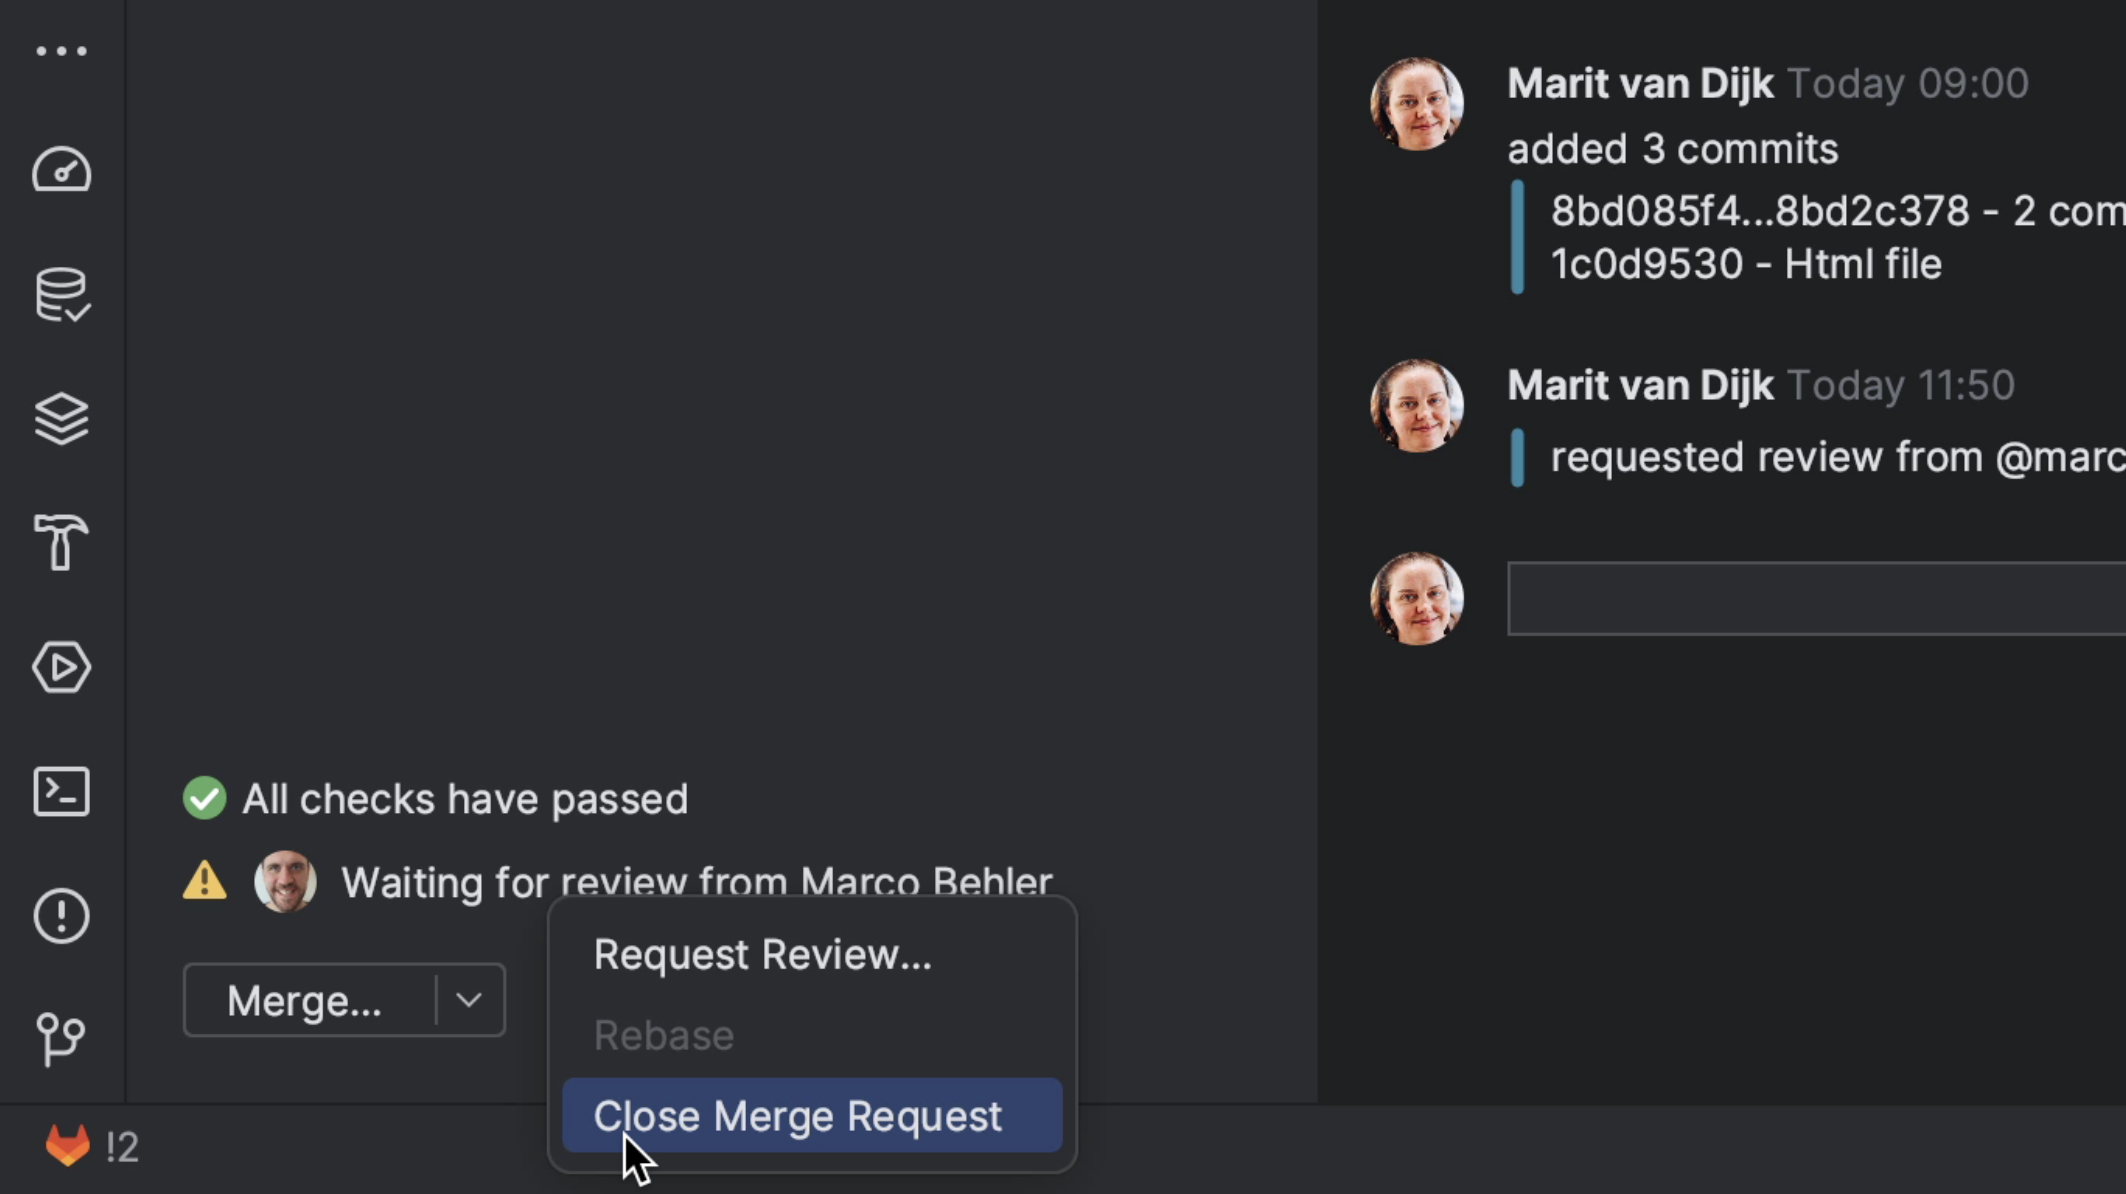
If a Merge Request is no longer relevant, and we’re not going to take the changes that went into the Merge Request, we can close it. We can do so by clicking the three dots at the bottom left of the Merge Request tool window and selecting Close Merge Request.
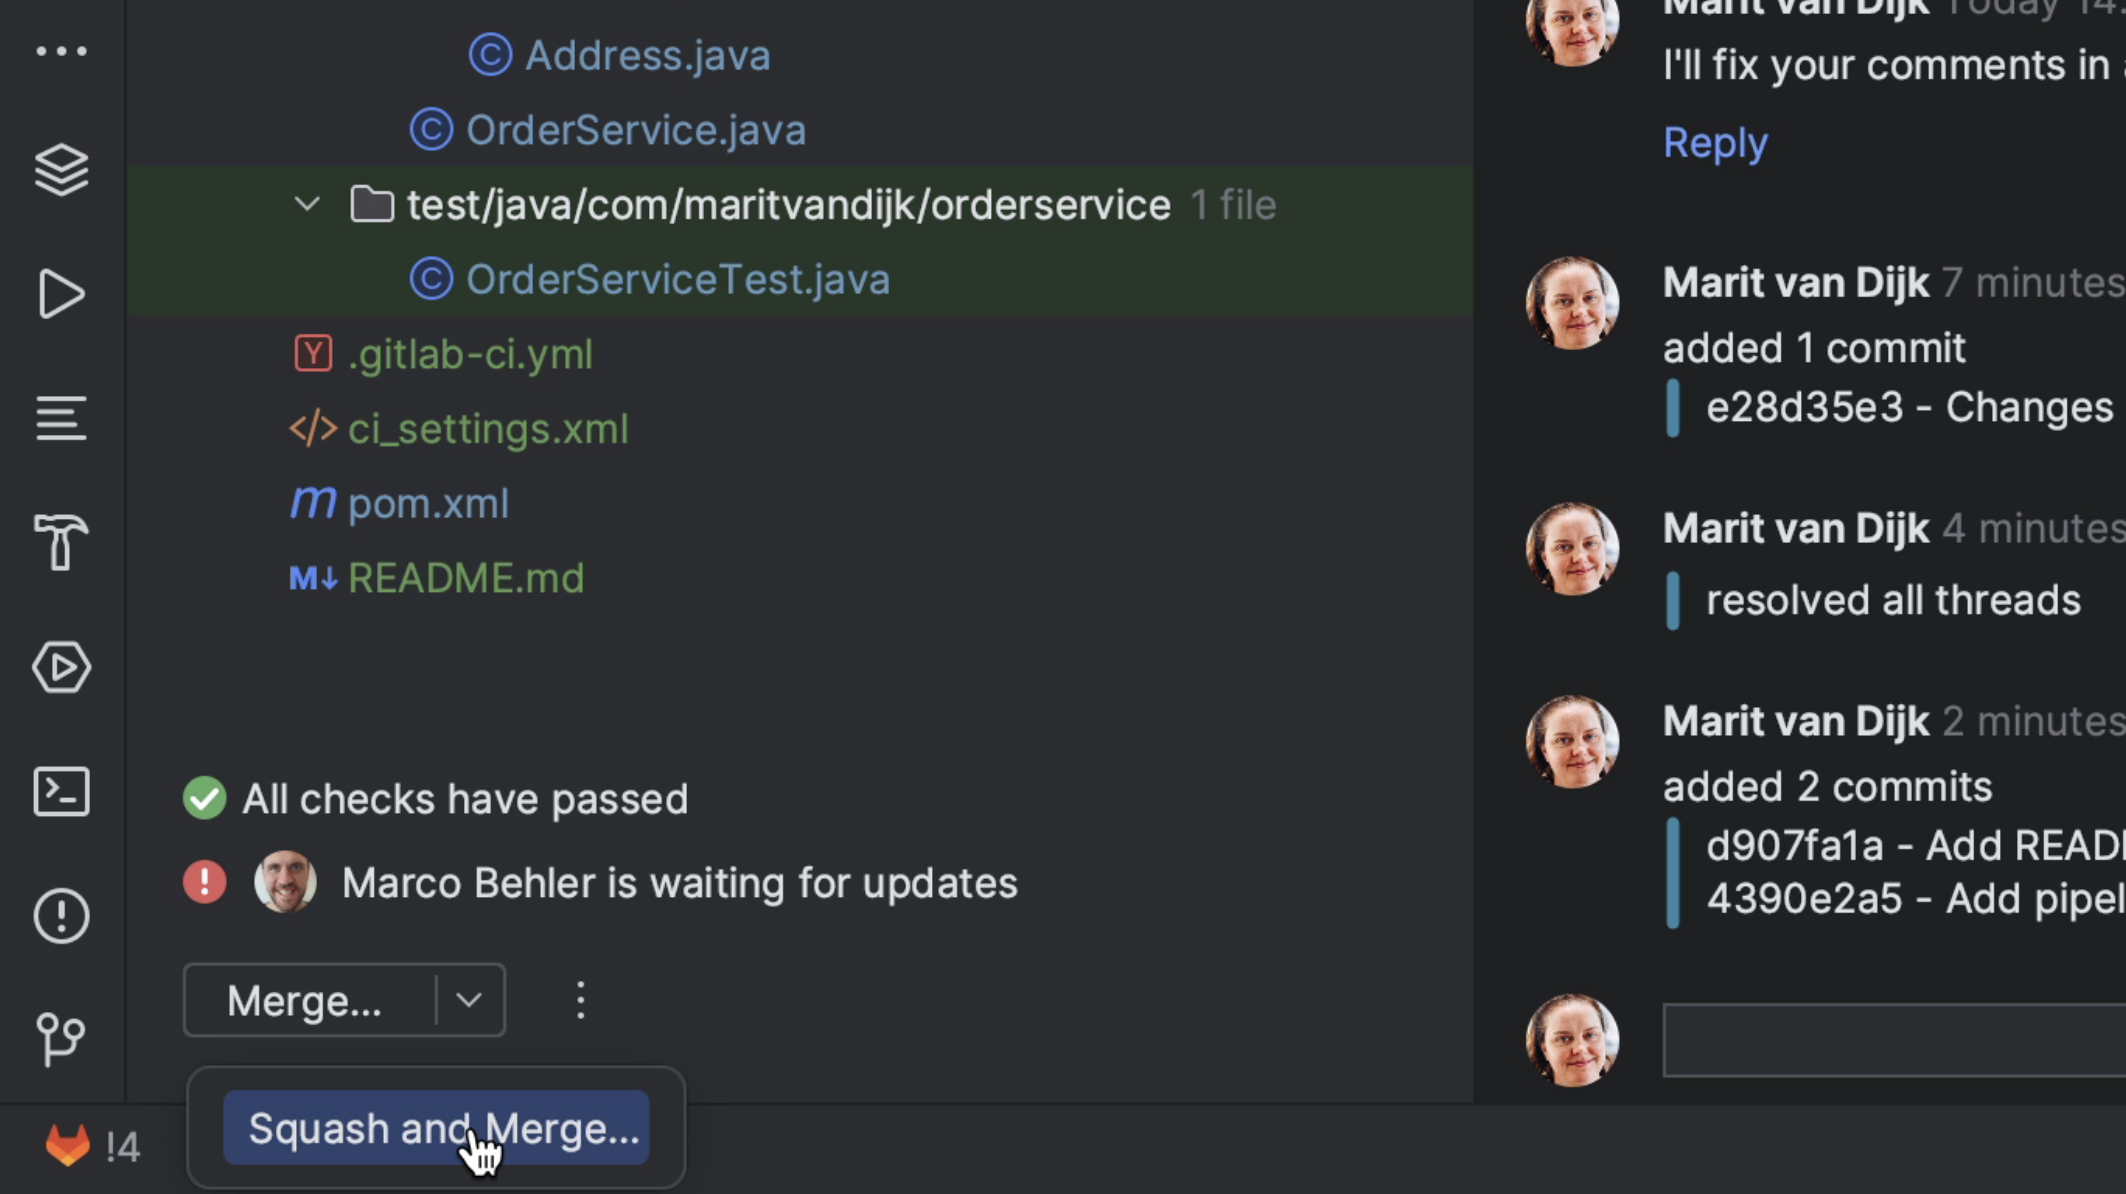
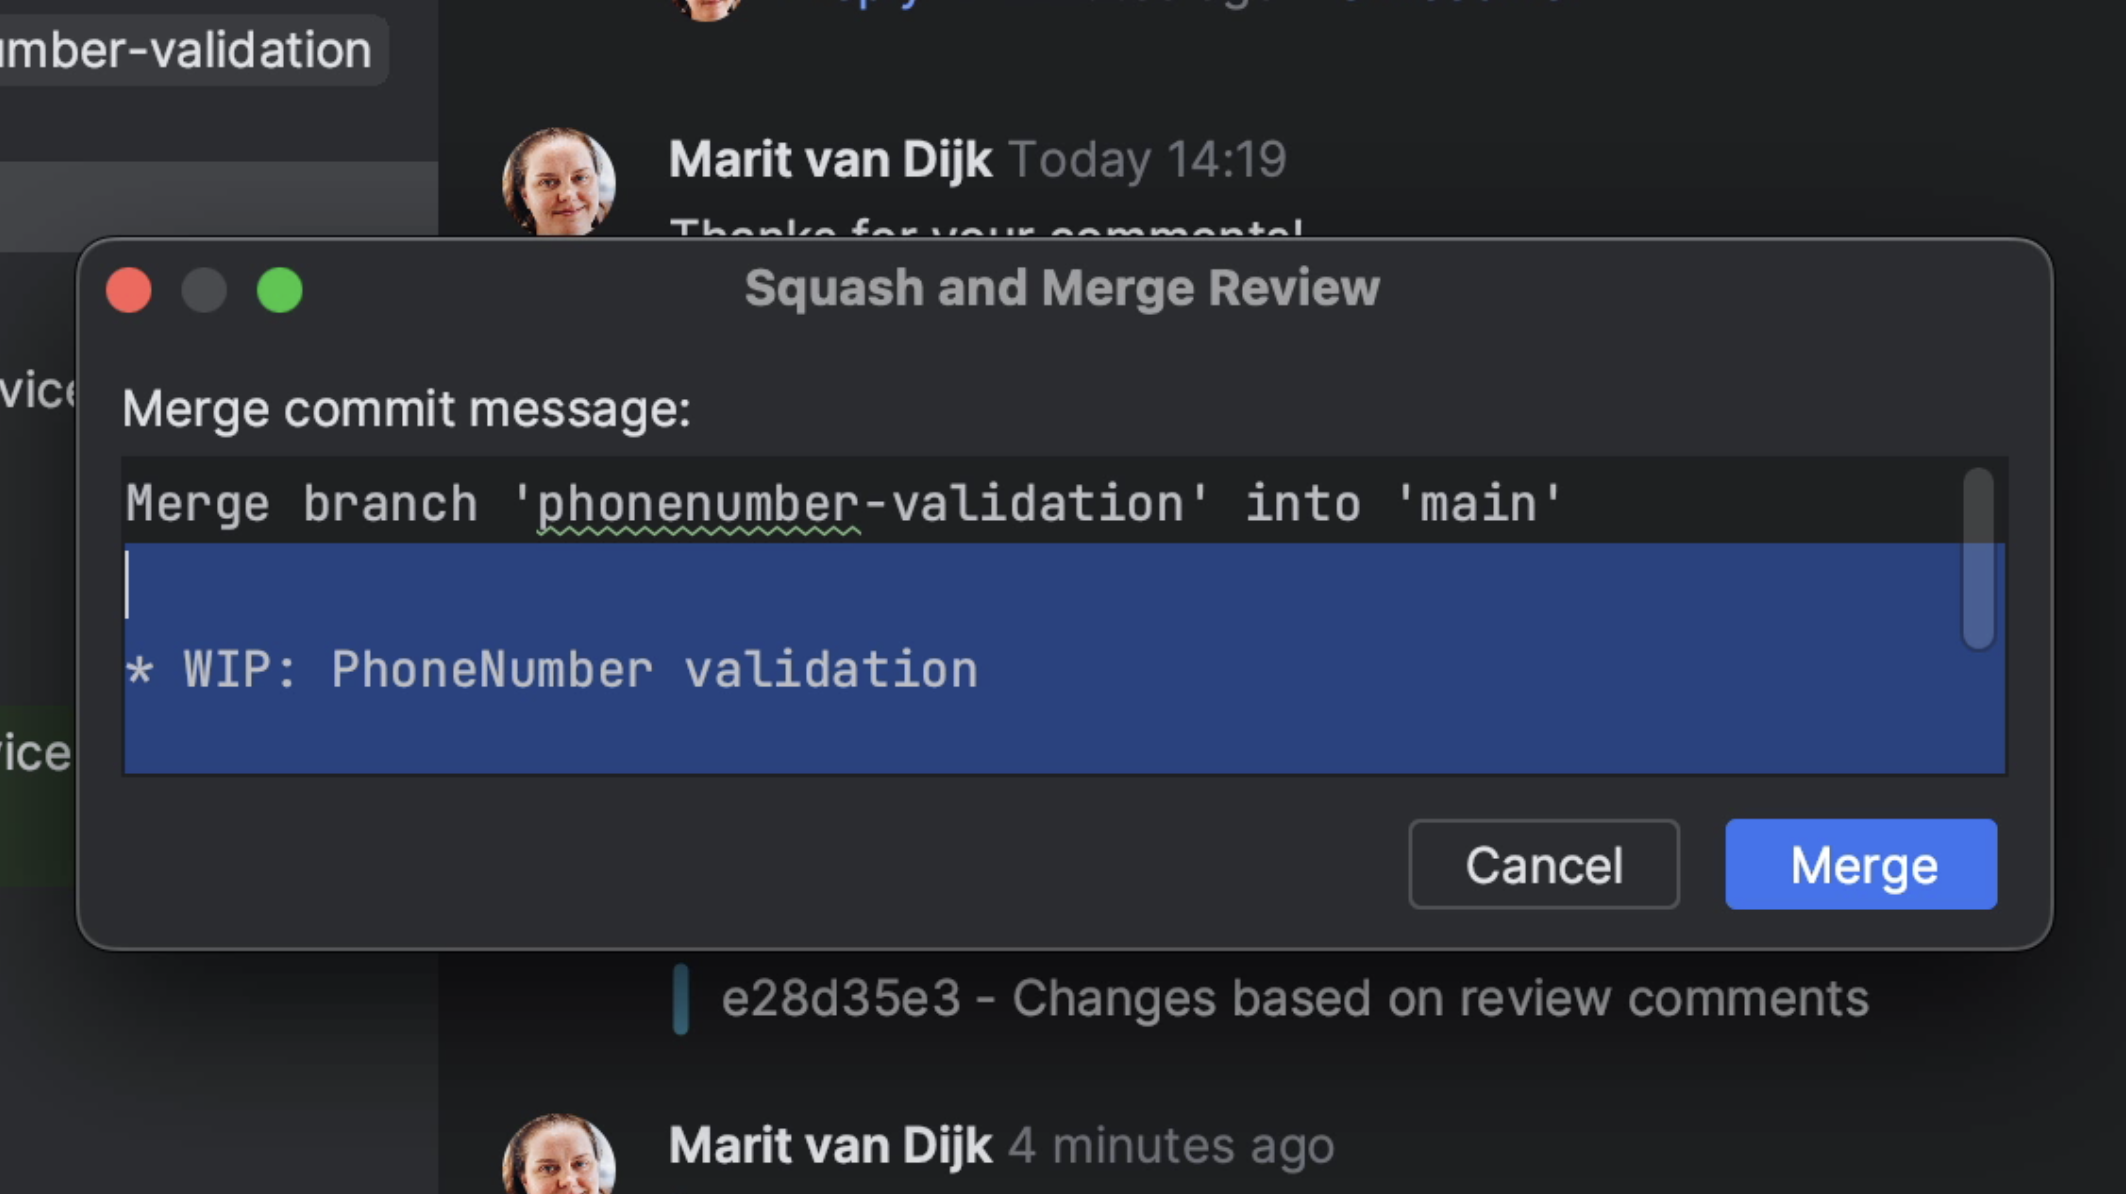
If the Merge Request is ready, meaning all the checks have passed, questions have been answered and requested changes to the code have been made, we can merge it. We can do so by clicking the Merge button at the bottom left of the Merge Request window. We also have the option to Squash and Merge, meaning all commits will be combined into a single commit when merging. We can add our own commit message for the merge, or edit the default one if we want to.
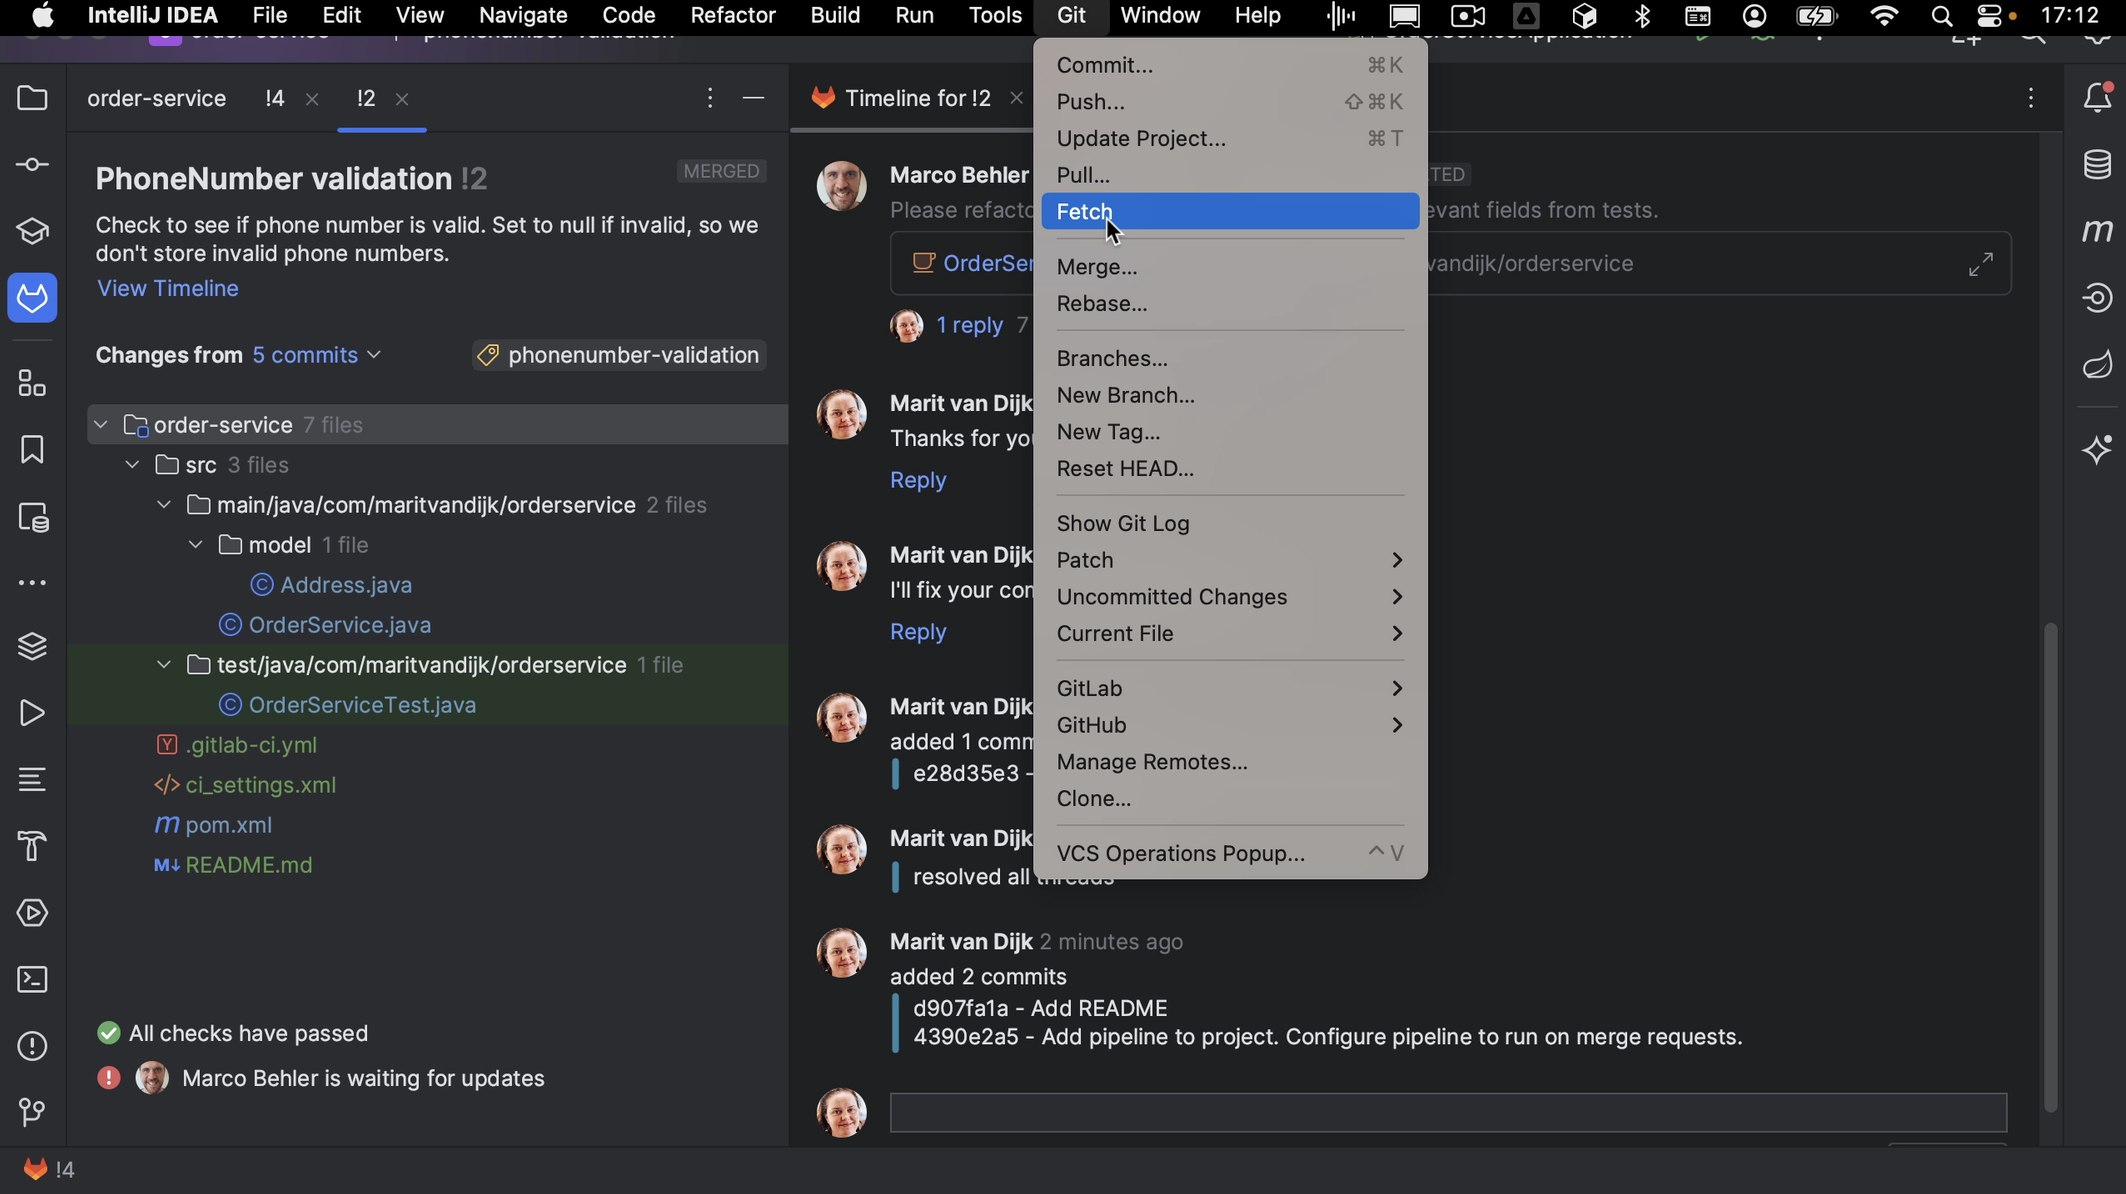
The Merge Request will be merged, and if we do a Fetch we can see the updated branches for this repository.
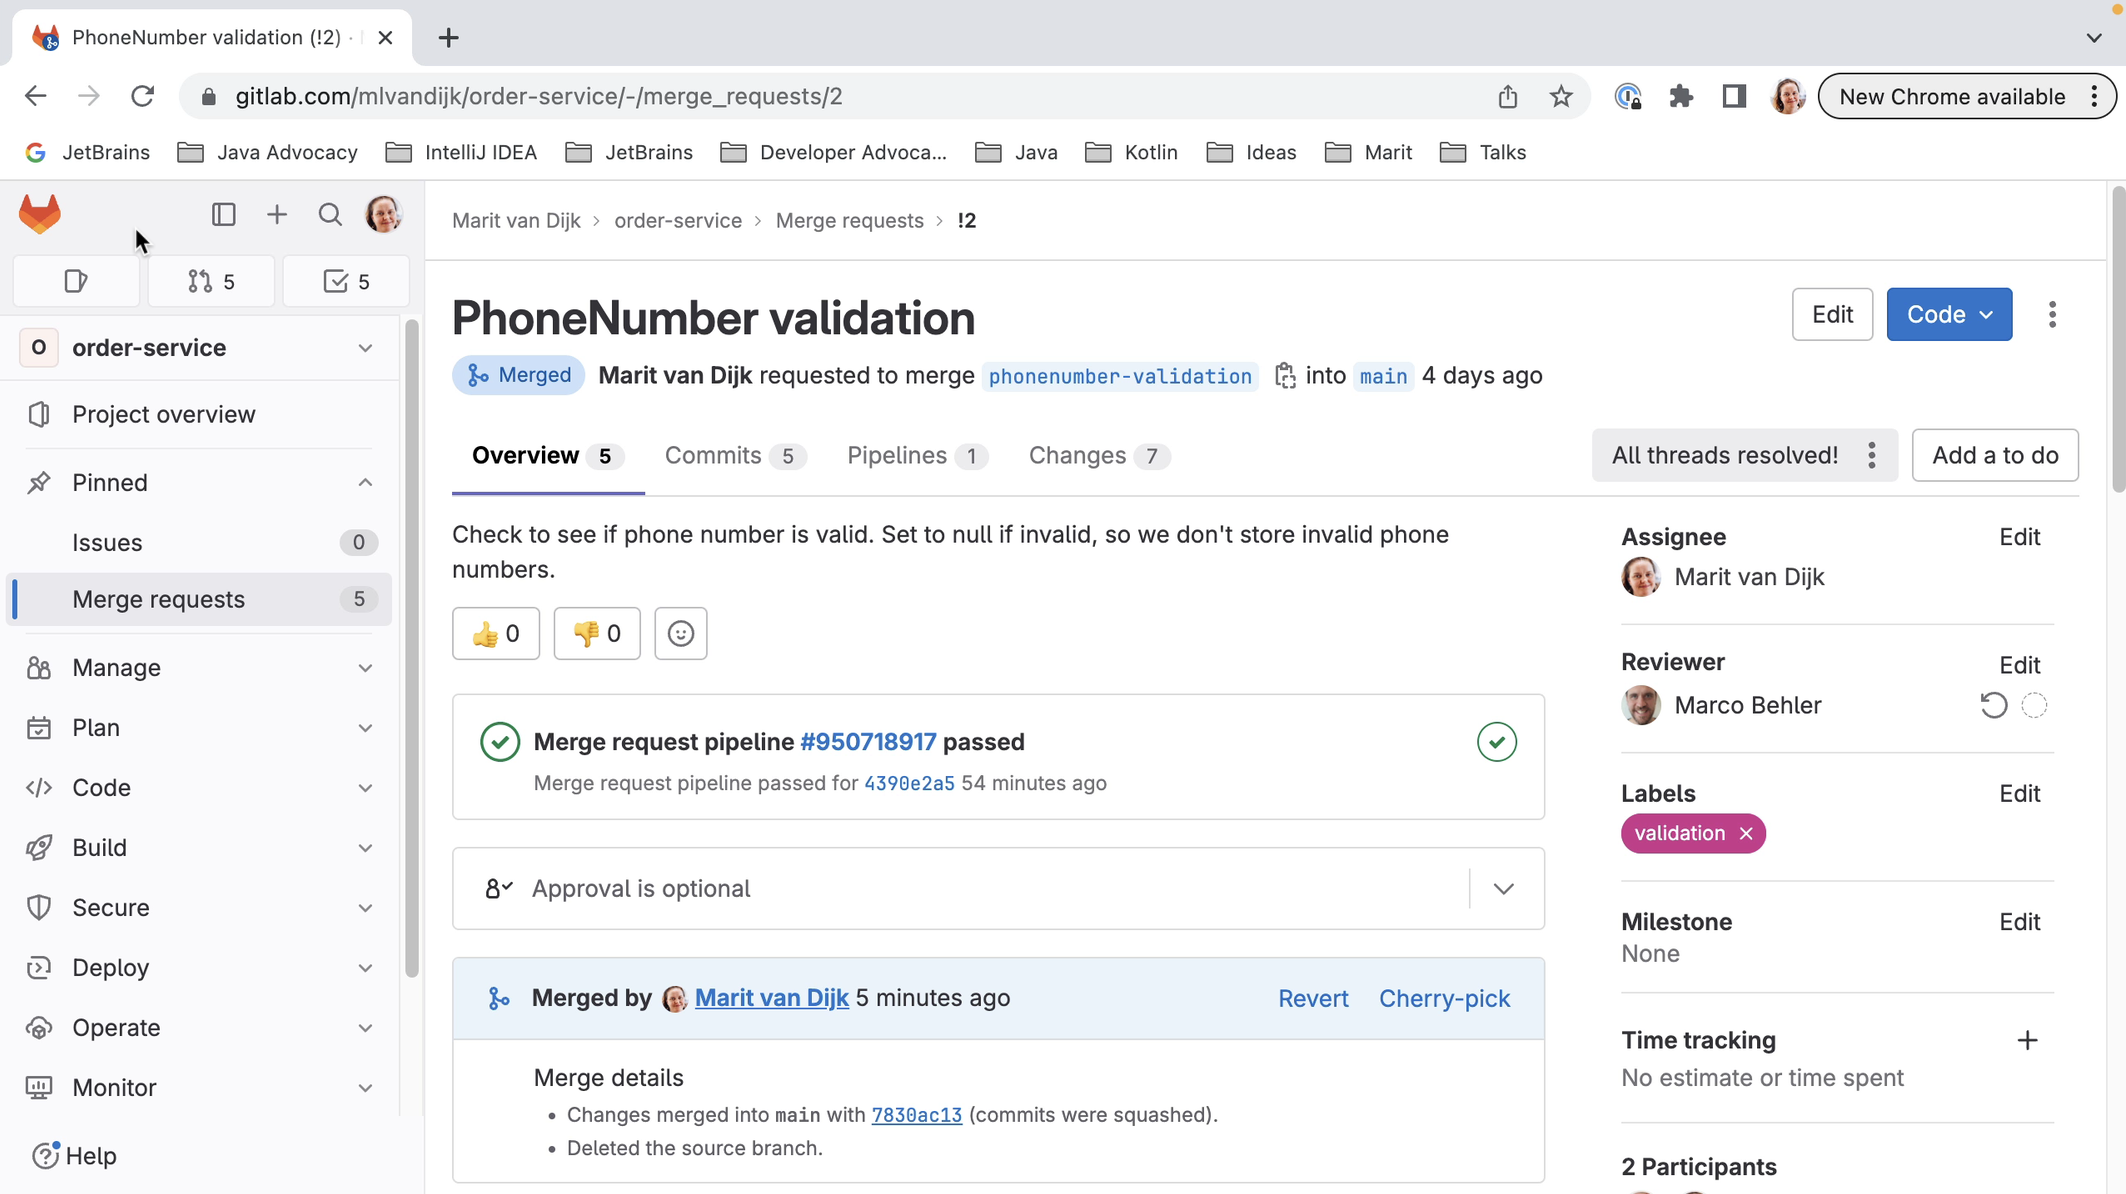
We can see in our browser that the Merge Request has been closed.
Summary and shortcuts
As we’ve seen, we can work with GitLab Merge Requests right inside IntelliJ IDEA. We can see all Merge Requests on a project, filter them or search for a specific Merge Request, perform a code review and add comments, see whether checks have passed and there are no merge conflicts, checkout the branch to run it locally, submit our review and approve the Merge Request, and merge (or close) the Merge Request all from inside our IDE.
IntelliJ IDEA Shortcuts Used
Here are the IntelliJ IDEA shortcuts that we used.
IntelliJ IDEA is designed to help developers like us stay in the flow while we’re working. Like all IDEs, it has a lot of functionality available, but it’s designed to get out of your way to let you focus on the code.
Take a look at this overview of IntelliJ IDEA.
Introduction
Find Action: ⌘ ⇧ A (on macOS) / Ctrl+Shift+A (on Windows/Linux)
In this tutorial, we are going to take a look at contributing to Open Source Software, specifically how to do a pull request (PR). We will look at forking and cloning the project, making the changes, committing and pushing these changes, creating the pull request, the review and hopefully merge of your PR. The same process may apply when making contributions to a project at work that you don’t own. In this example, the project is on GitHub. Other Git code repositories may use a similar process.
There are many reasons to contribute to open source projects, and different ways to find an issue to work on, from fixing a bug that is bothering you, to simply wanting to help out, or even just to gain more experience and learn something new. If you’re fixing something that is currently bothering you, you will have a specific issue and project to work on. If not, you could consider contributing to a project you like to use, or finding an issue that is suitable for someone new to contributing to open source and/or the project. There are also many different things you can contribute. Code is one, but projects also need testing and other things. For more information on what you can contribute and how to find something to contribute, please have a look at this video.
For this blog post, let’s assume we’ve found a project we want to work on, and an issue we want to fix.
Getting the project
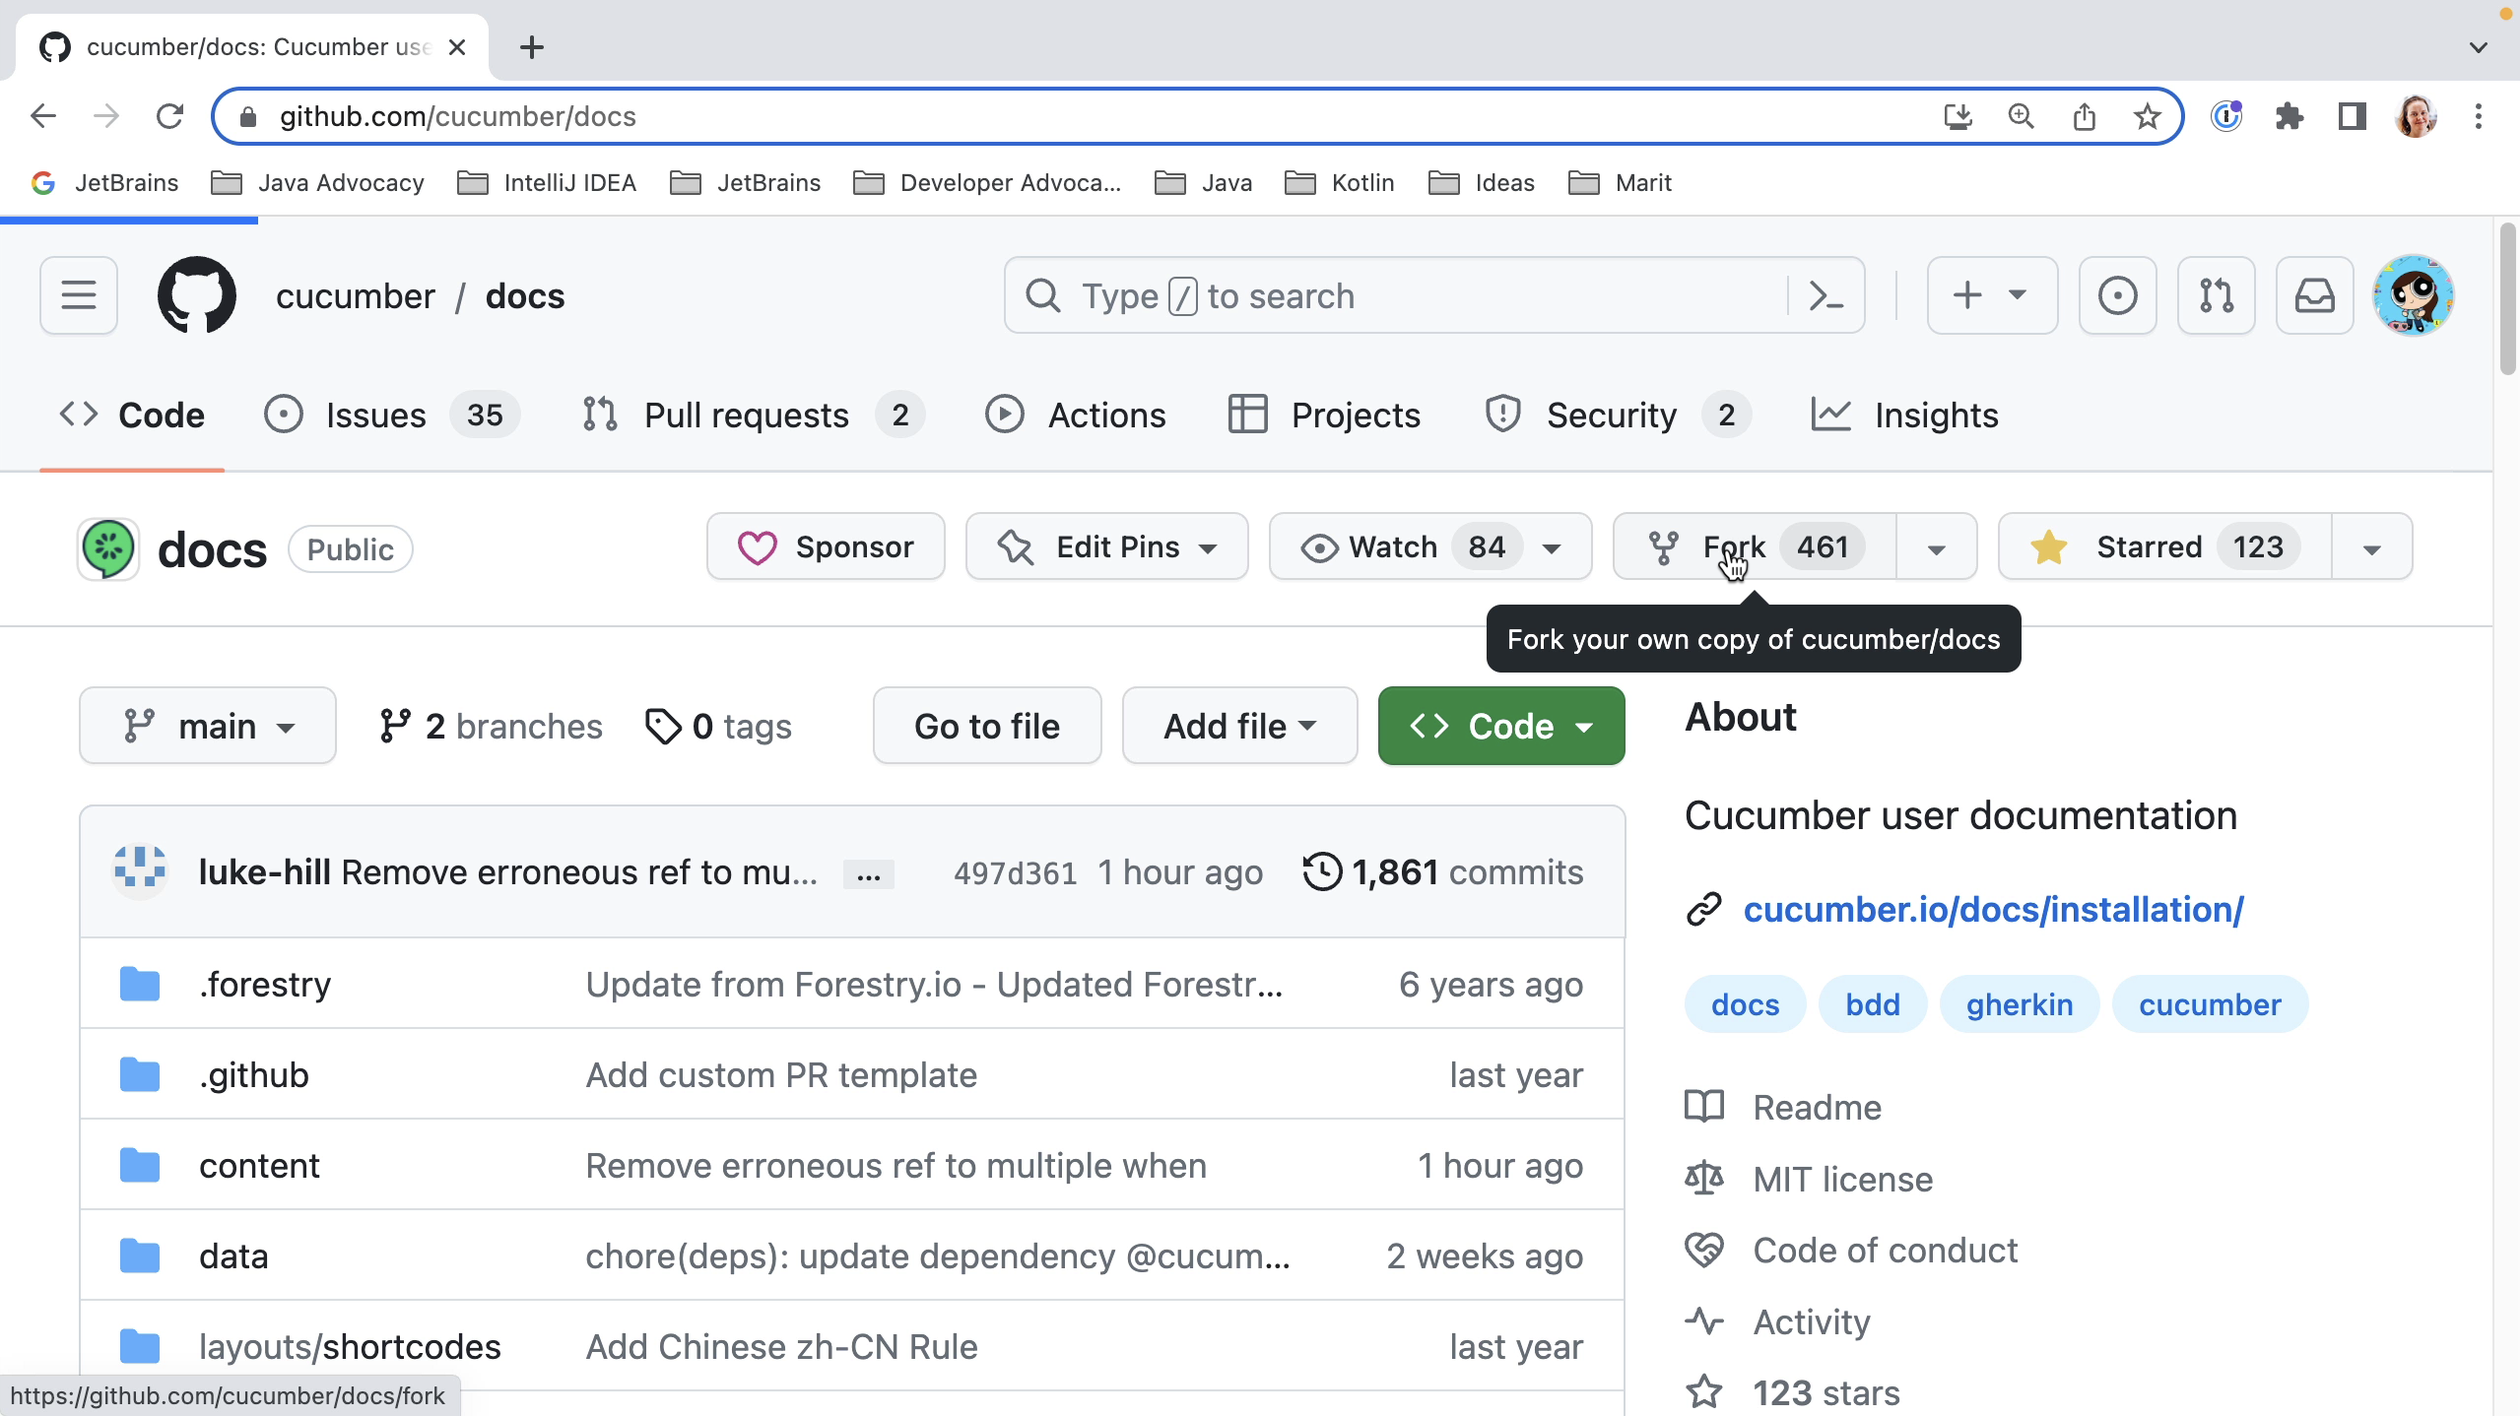
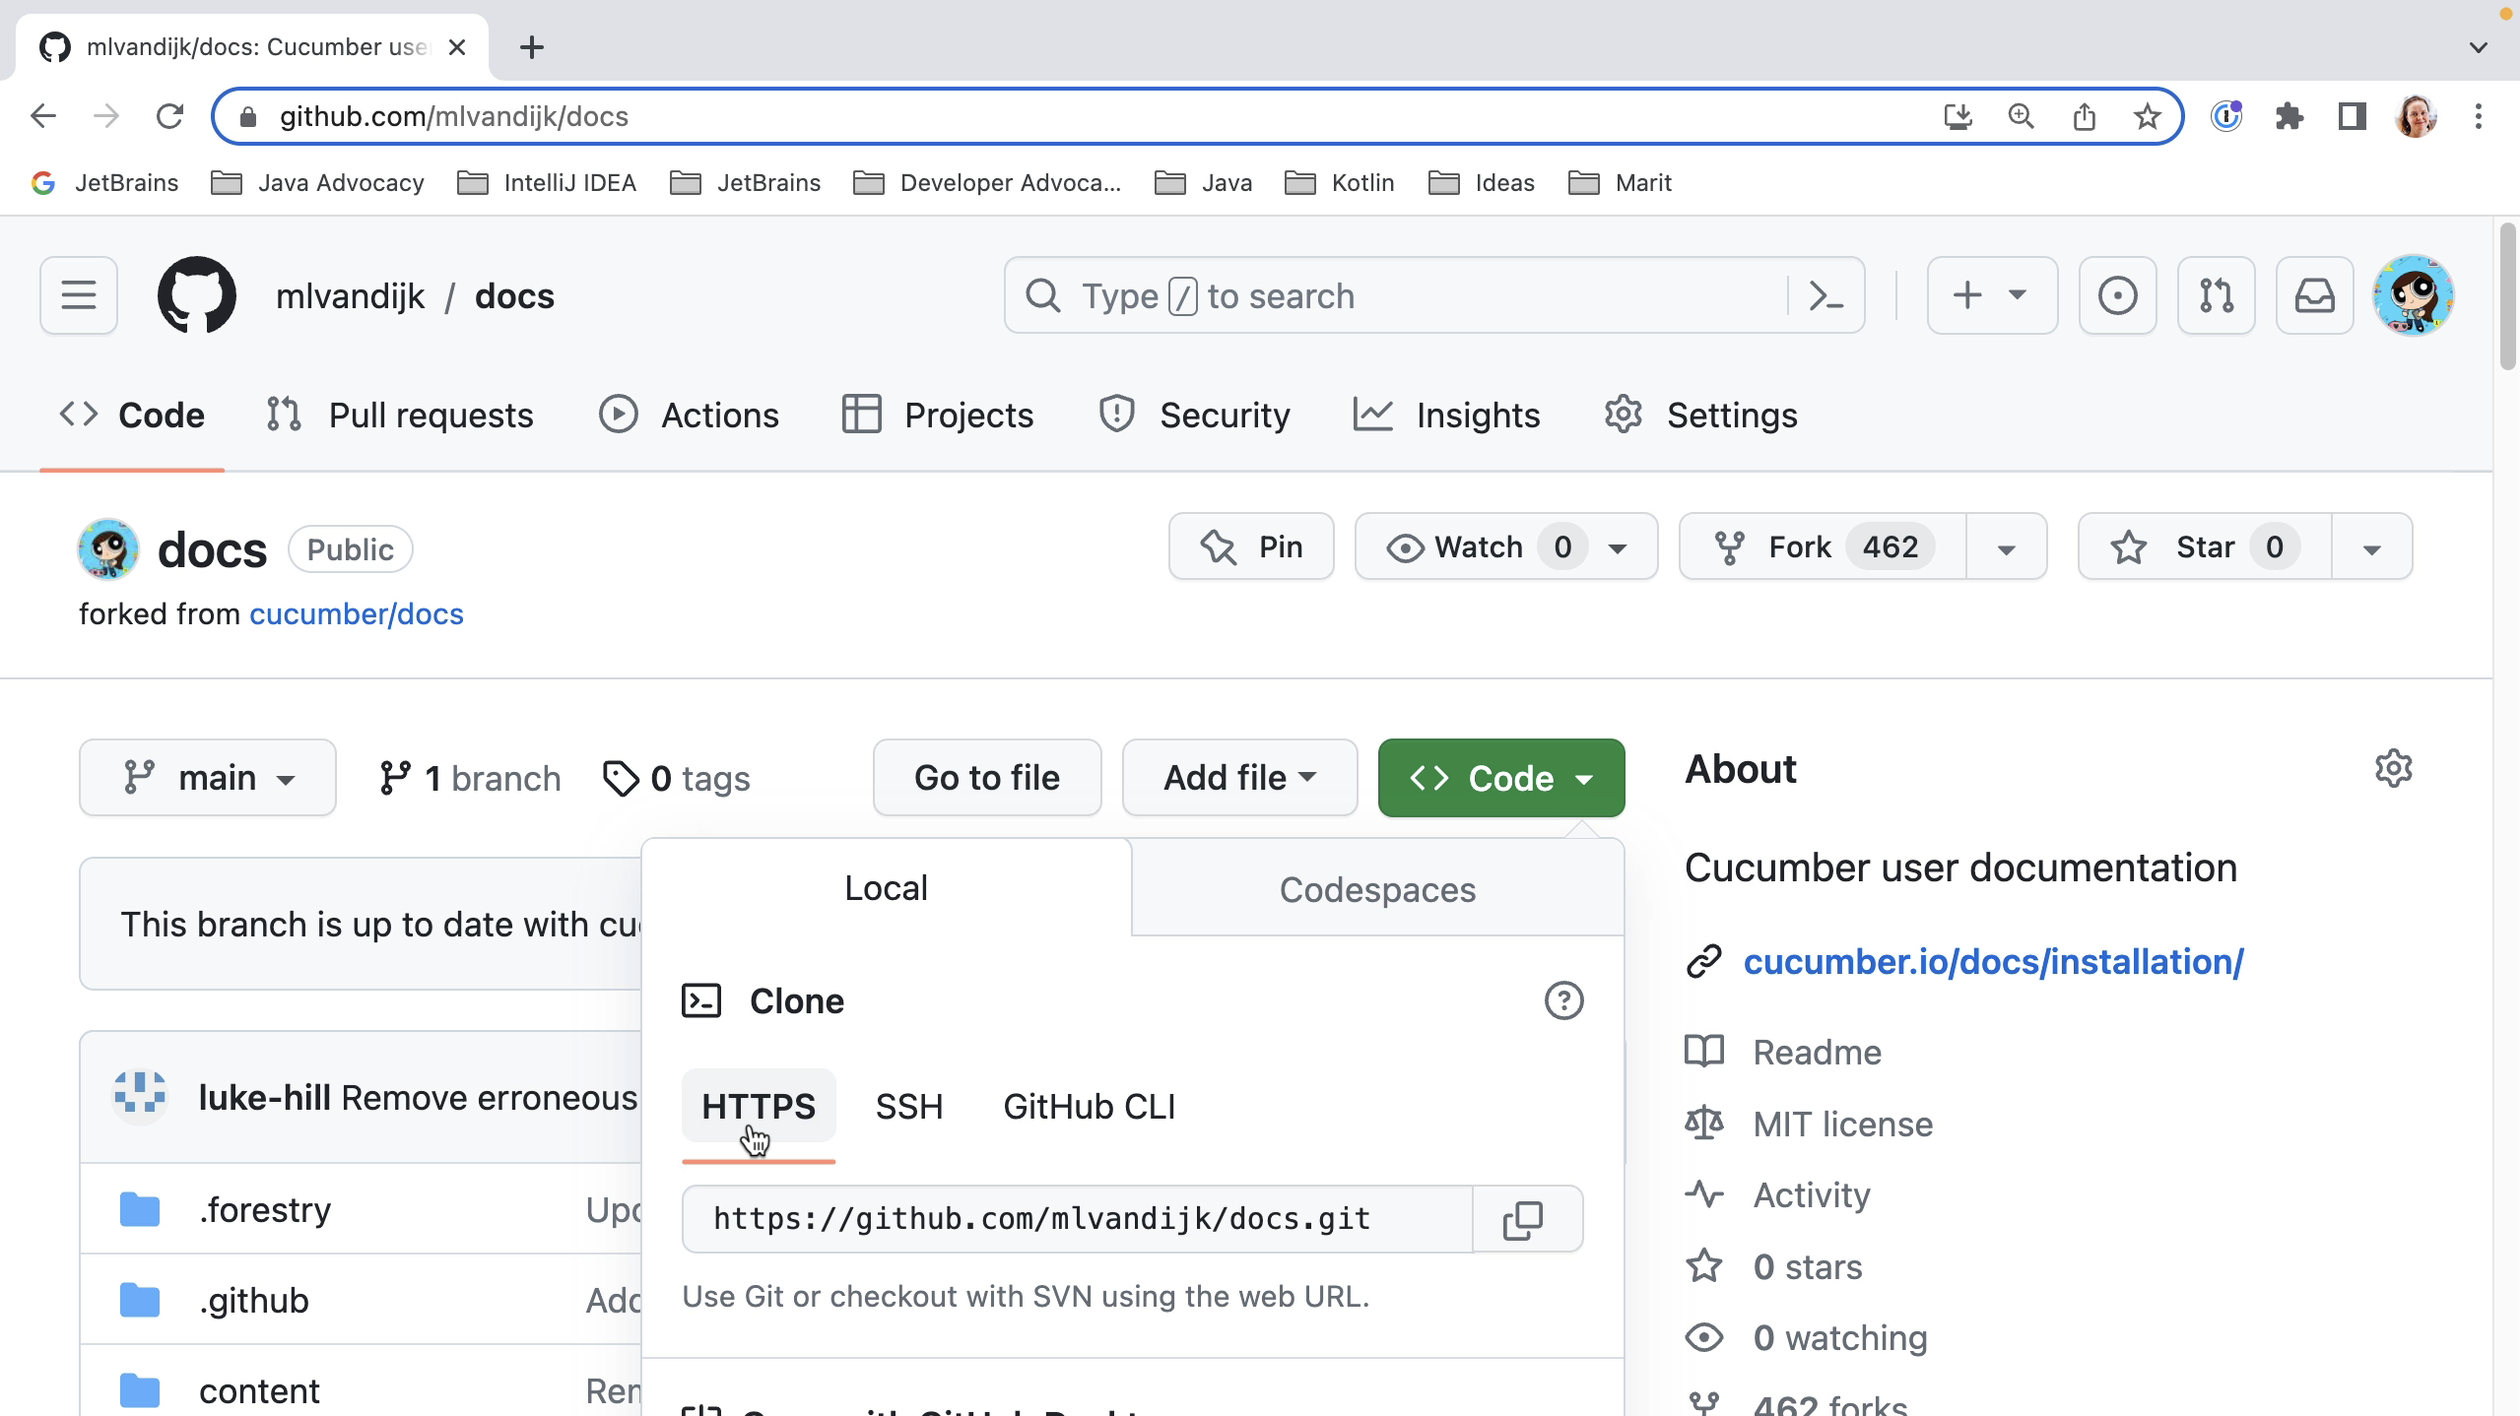
When making your first contribution, you won’t have access to push to the open source project directly. So, the first thing we will need to do is fork this project to our own profile. This means we create a copy of the original project on our profile.
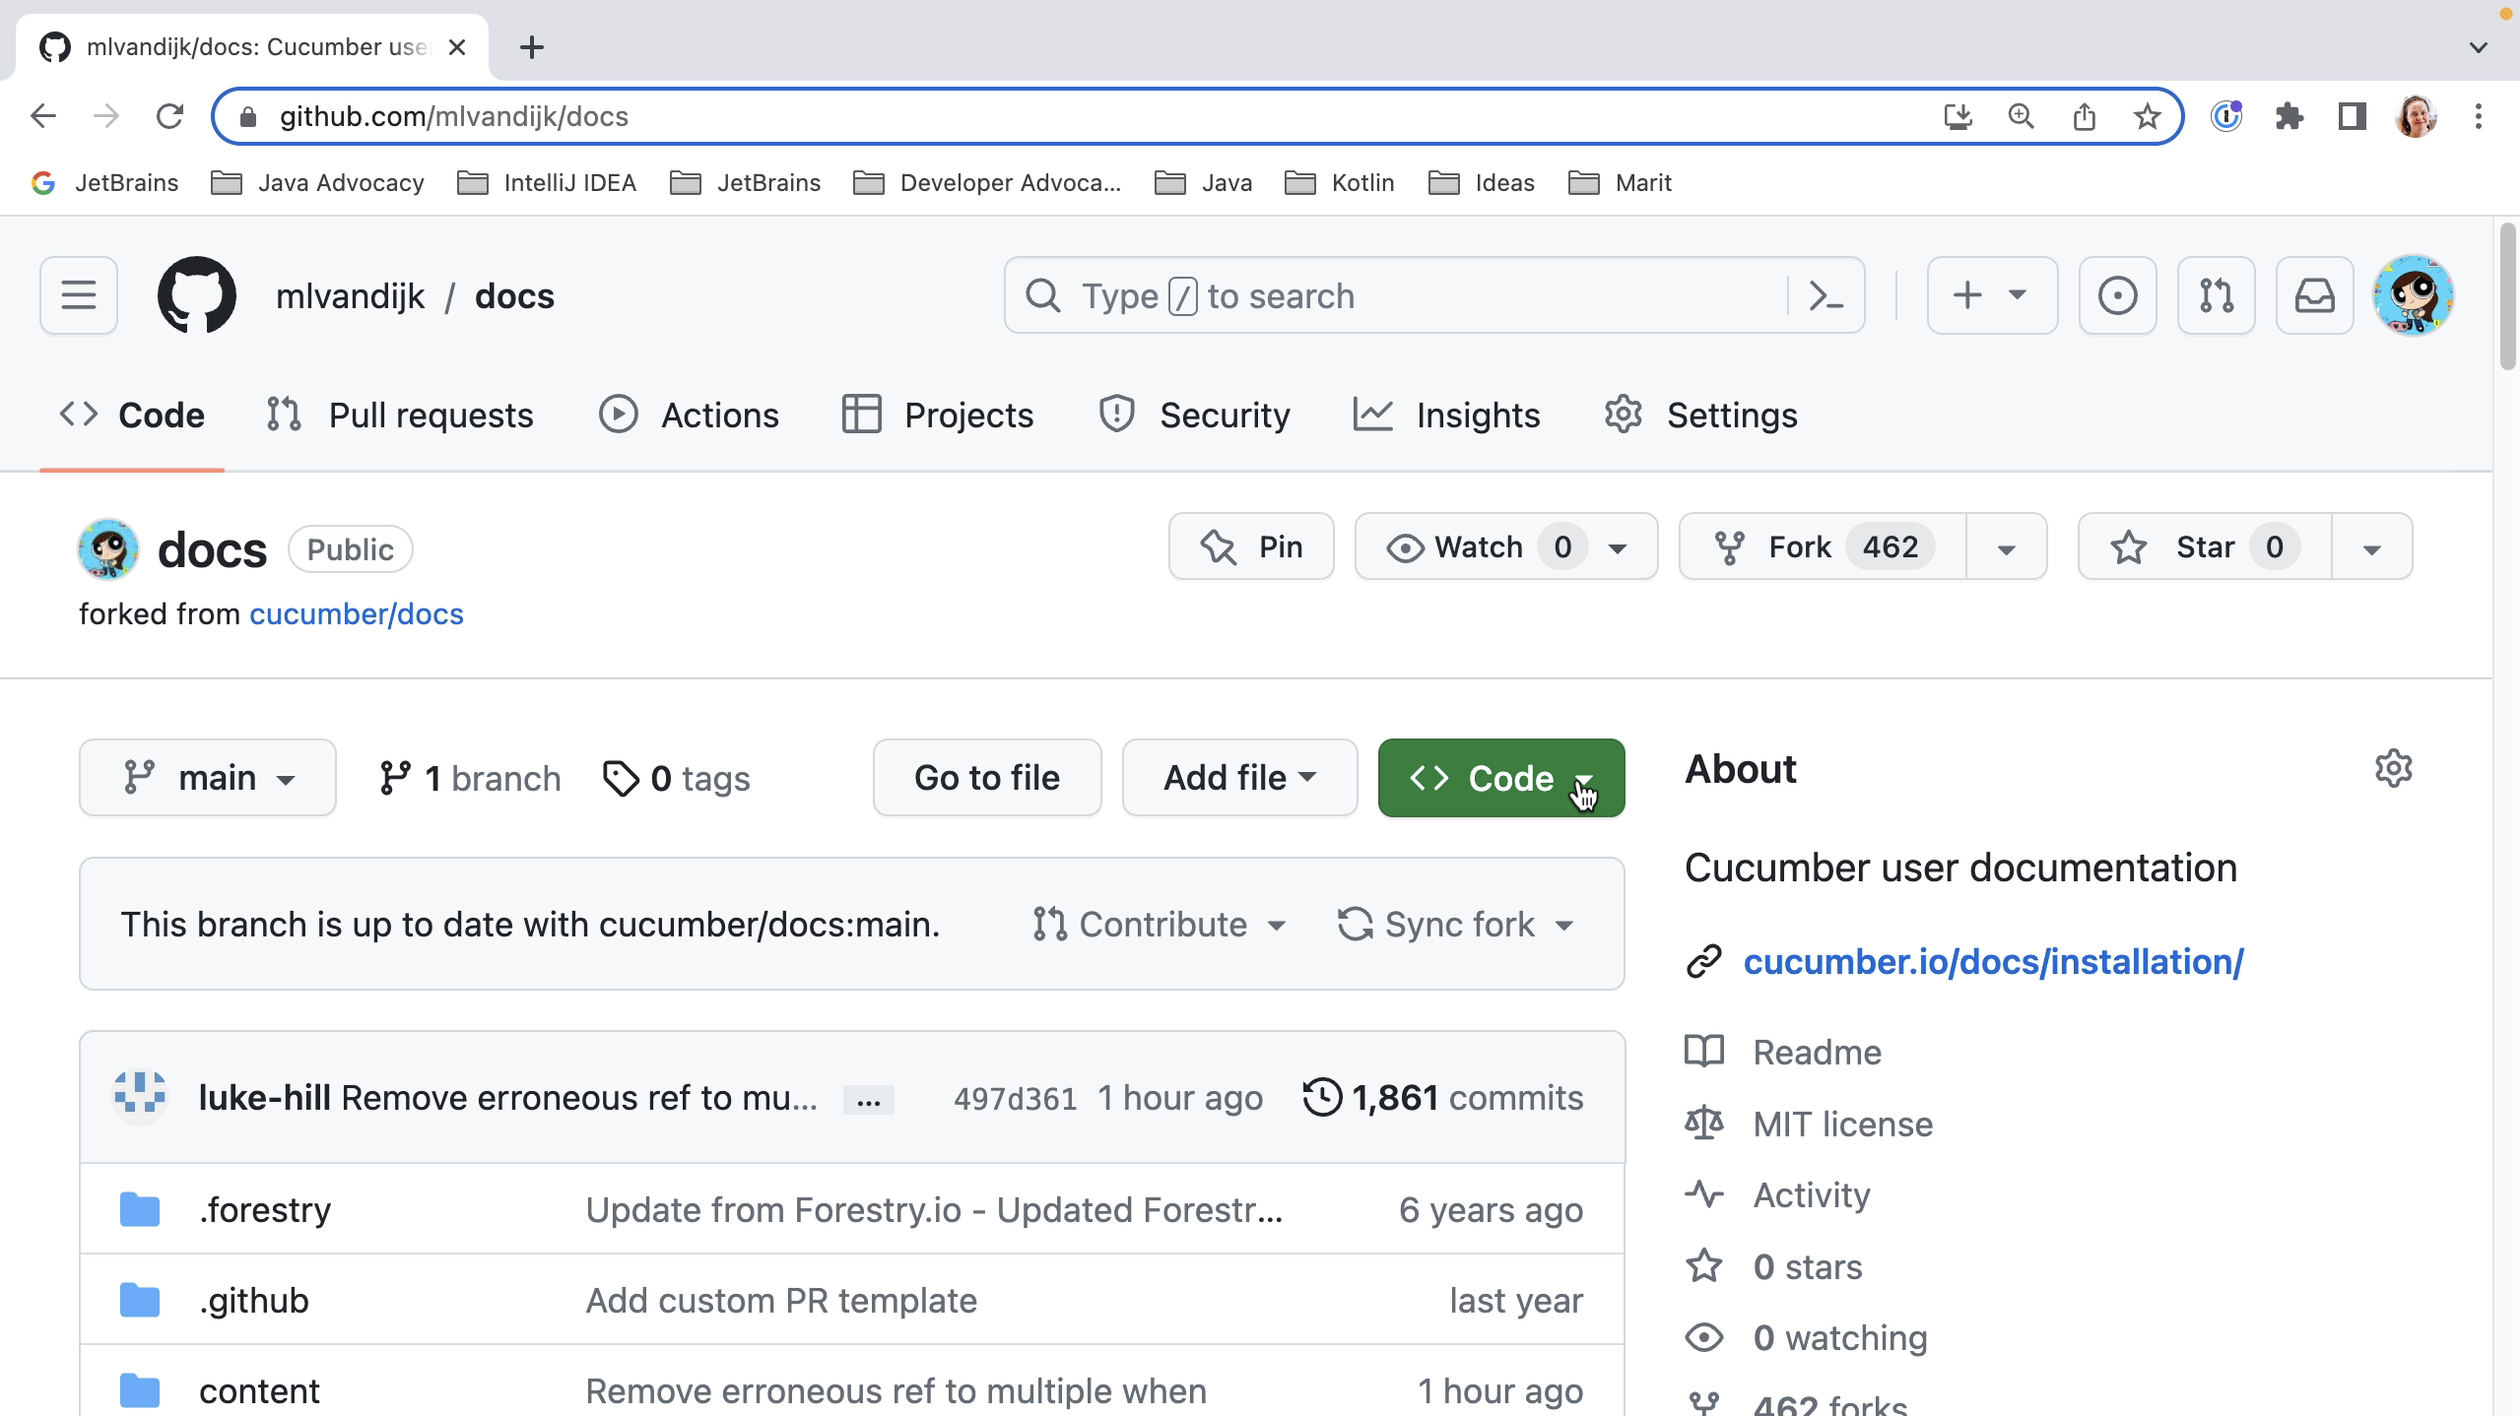
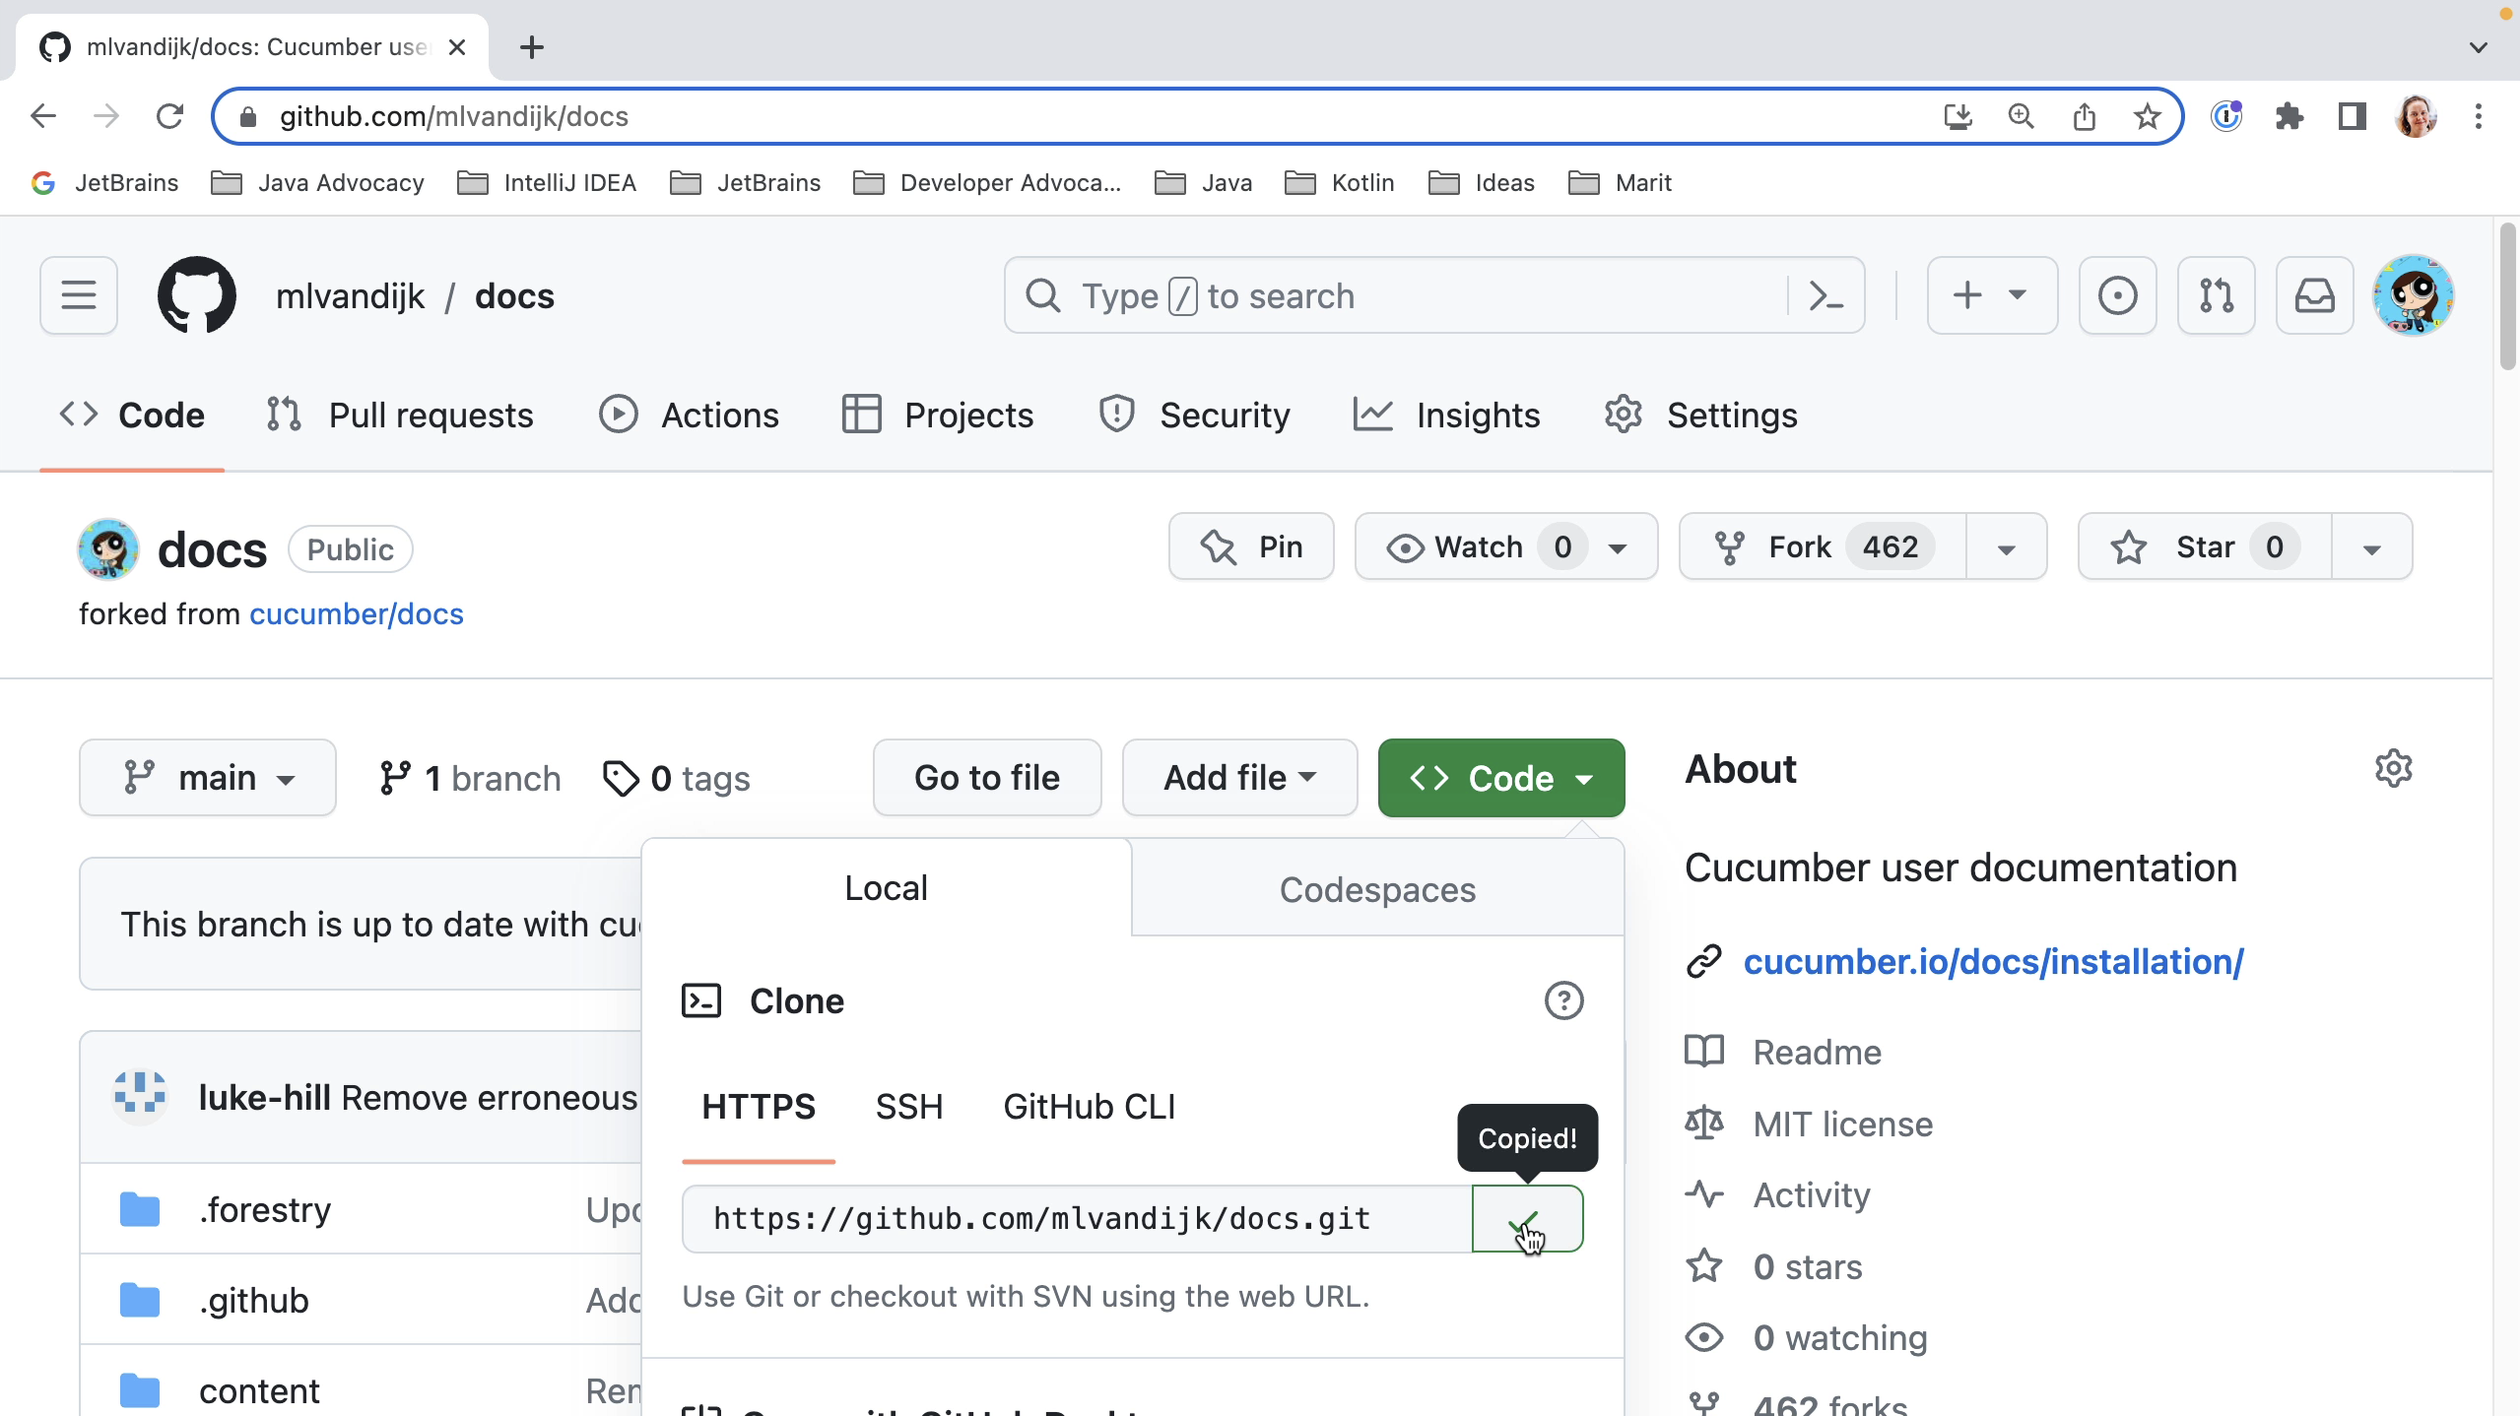
We then need to clone this project to our local machine. We see that we have several options to get the code. Let’s use HTTPS as that can be the simplest option. When we click the clipboard icon, the URL will be copied to our clipboard.
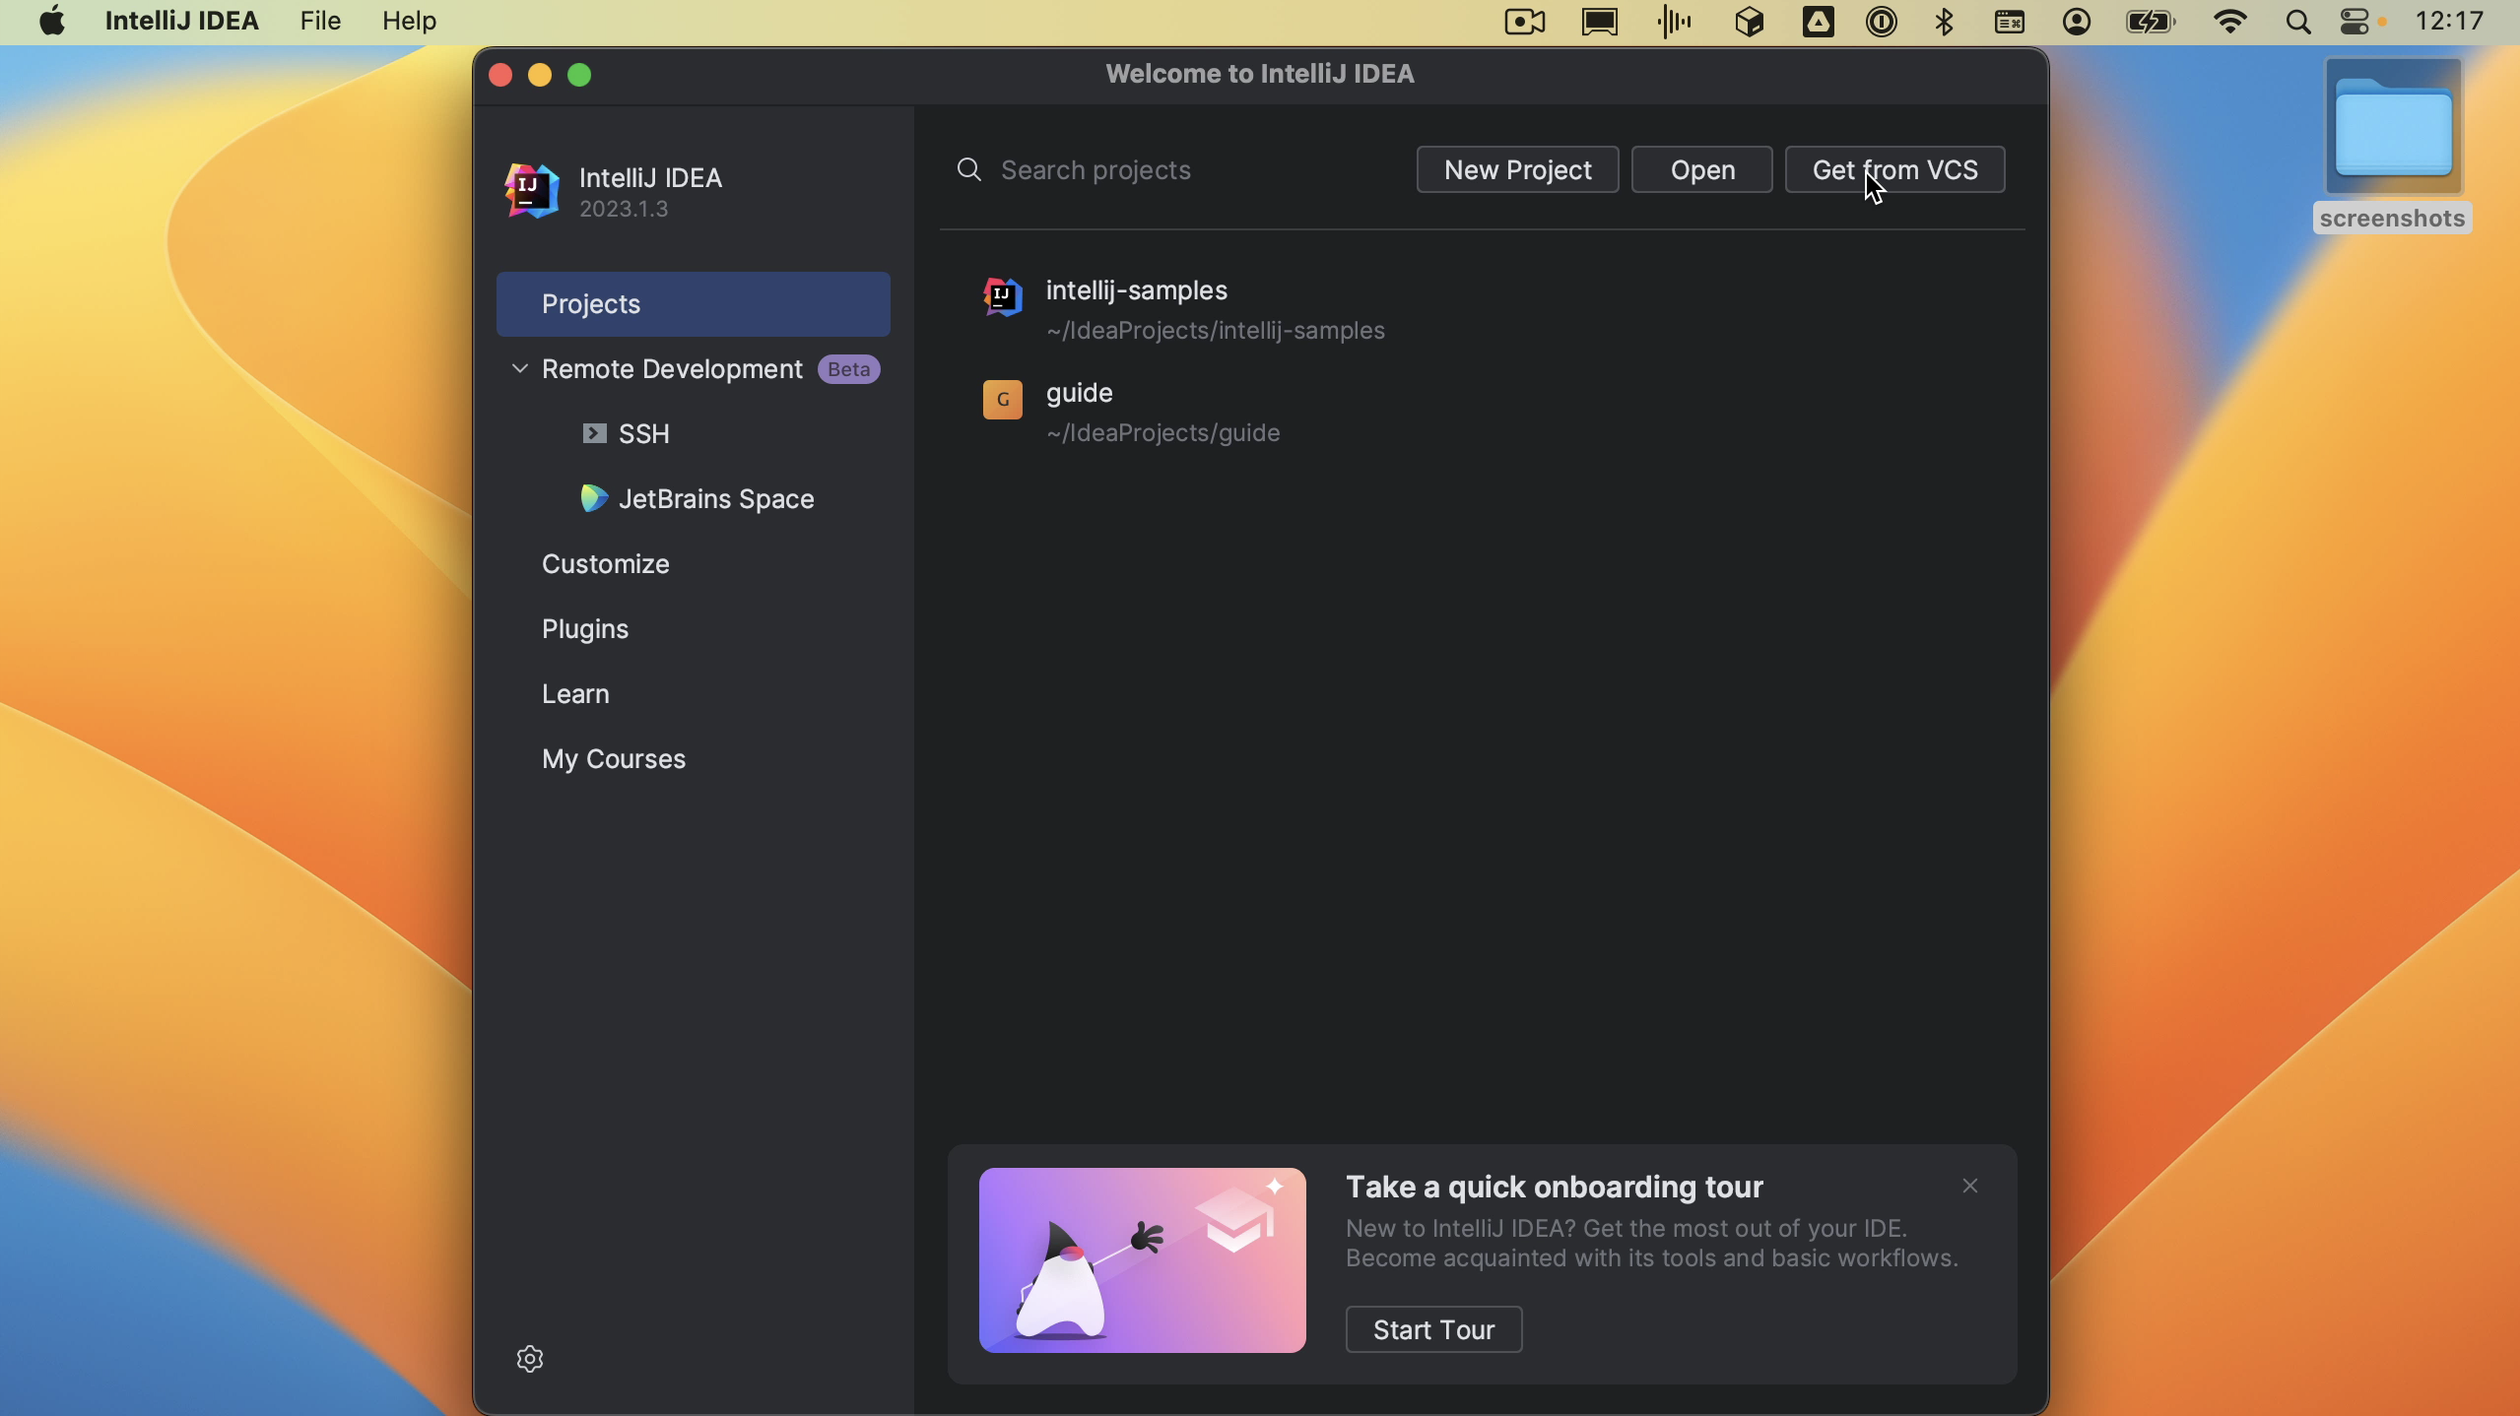
When we open IntelliJ IDEA and don’t already have a project open, we’ll see the Welcome screen. Here we have the option to Get from VCS (version control system).
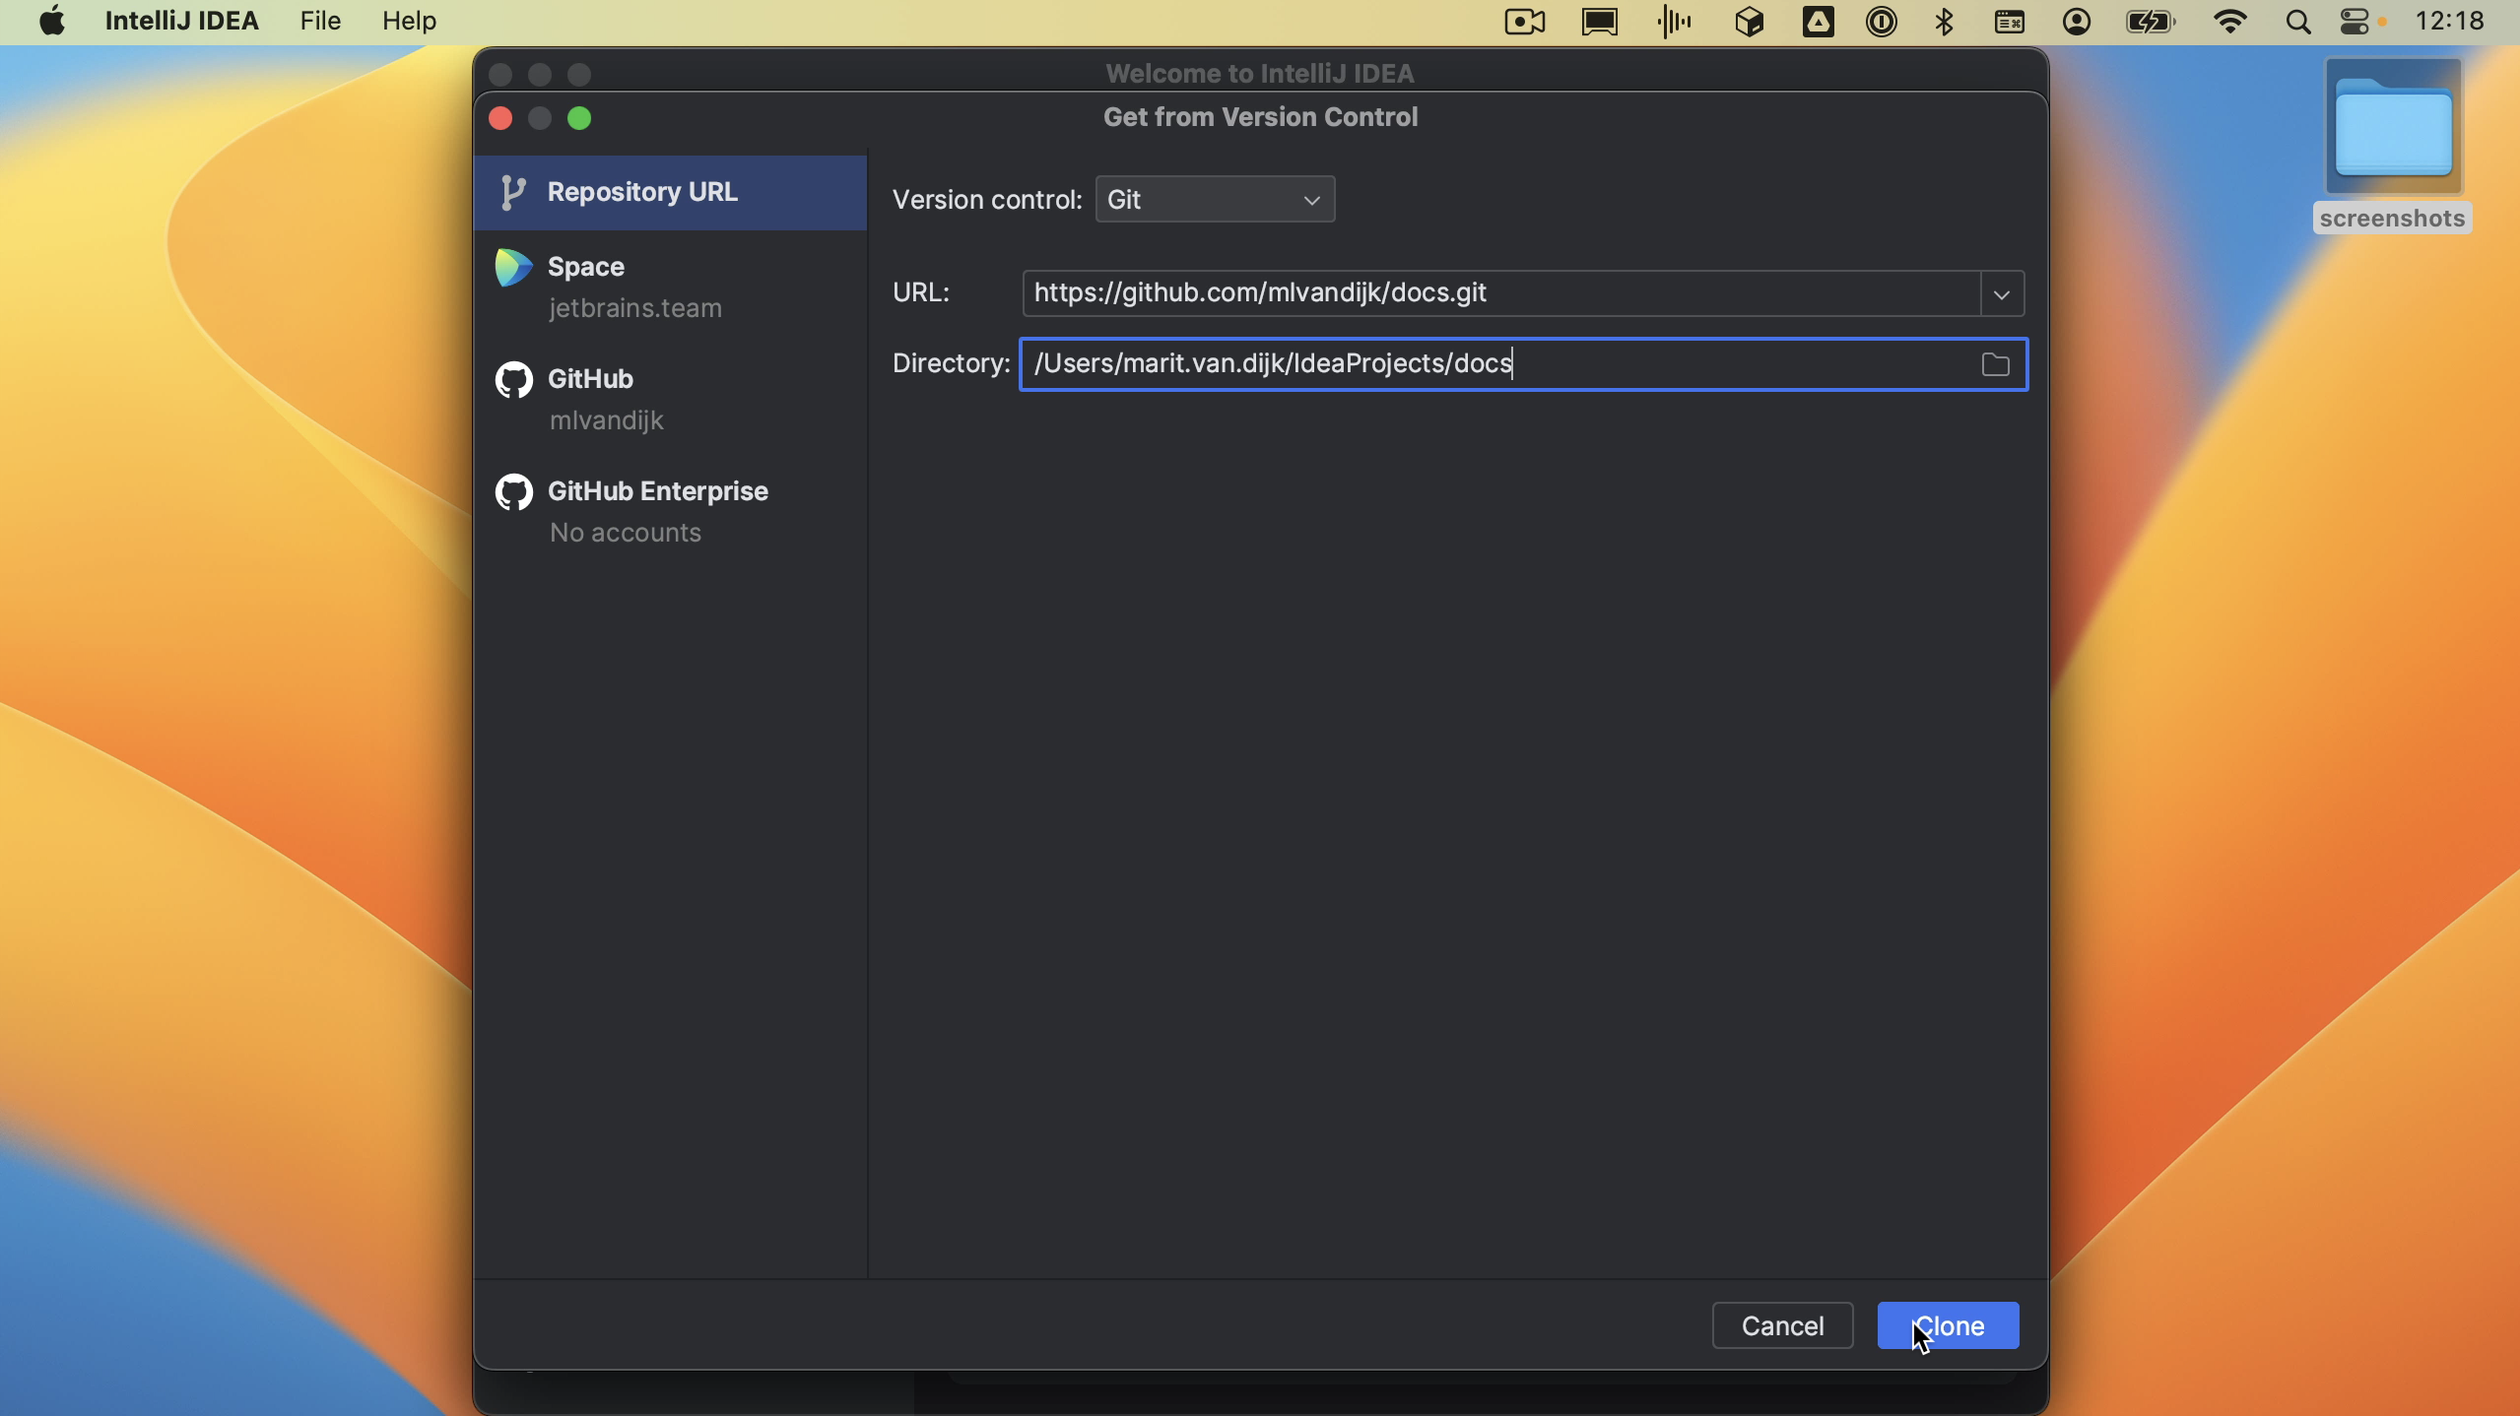
When we click the button, the Get from Version Control dialog opens. We can paste the URL we just copied. We can select where we want to store this project on our computer; let’s stick with the default. When we select Clone, IntelliJ IDEA will clone the GitHub repository to the selected directory.
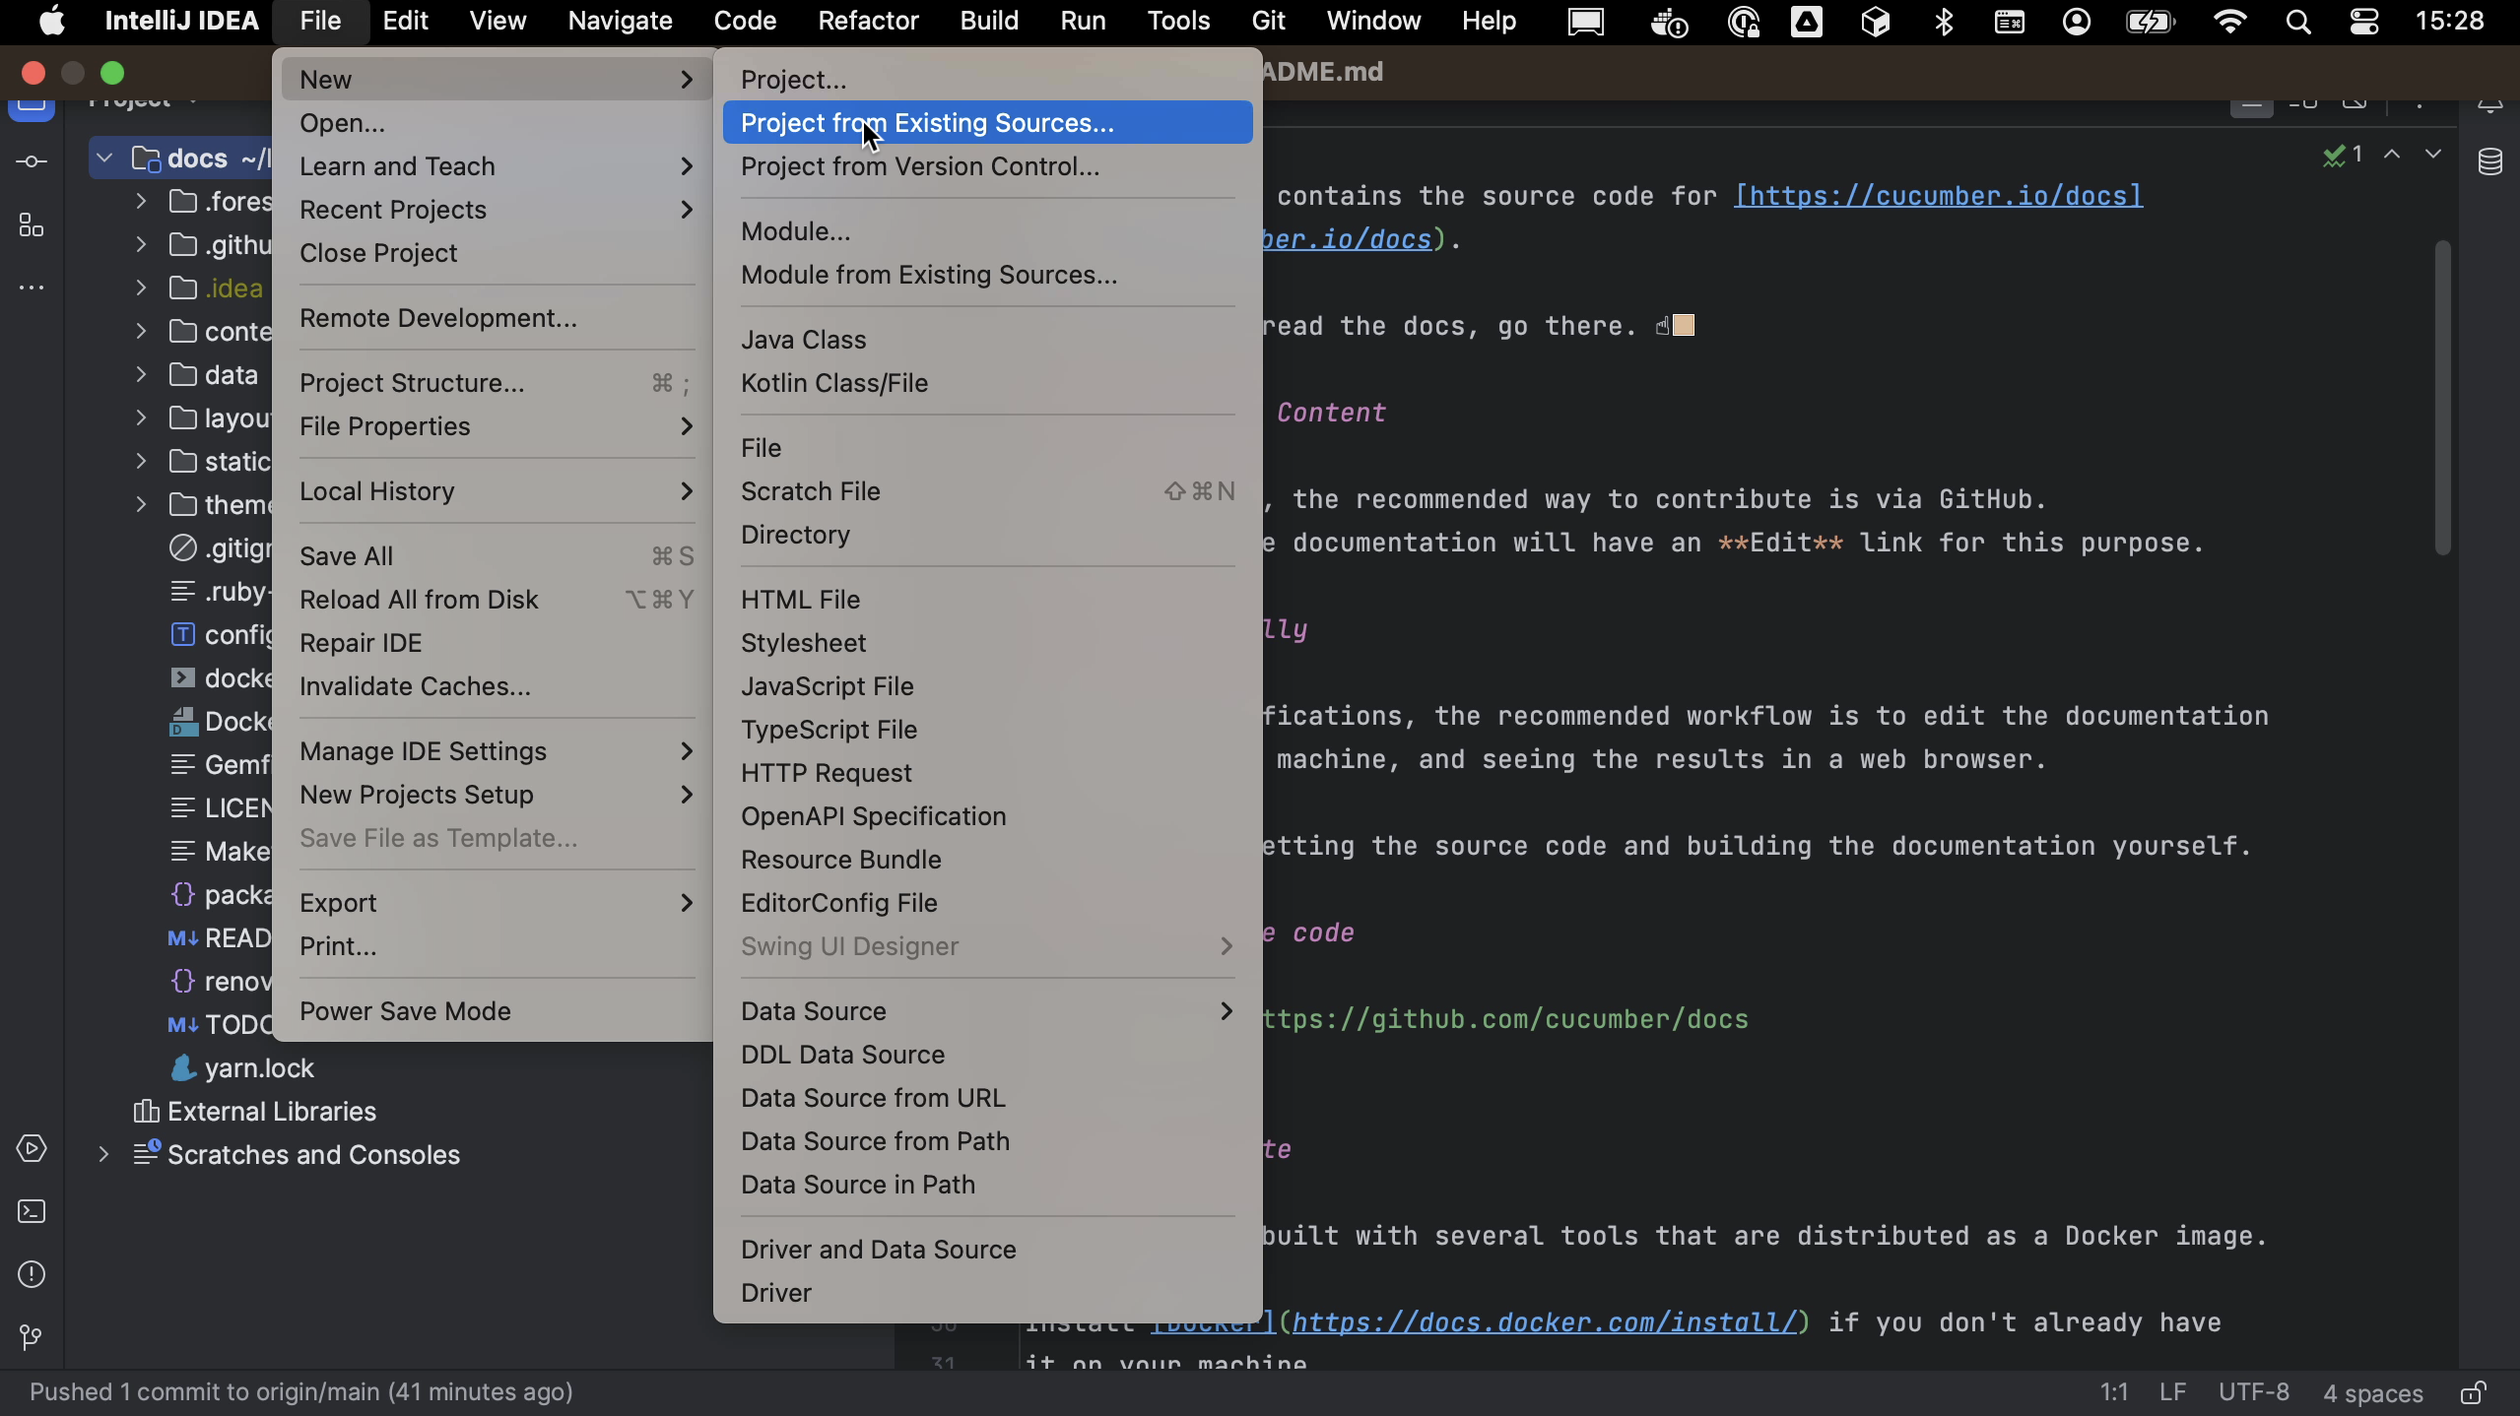
If we already have a project open, we can open the Get from Version Control dialog by going to File > New > Project from version control.
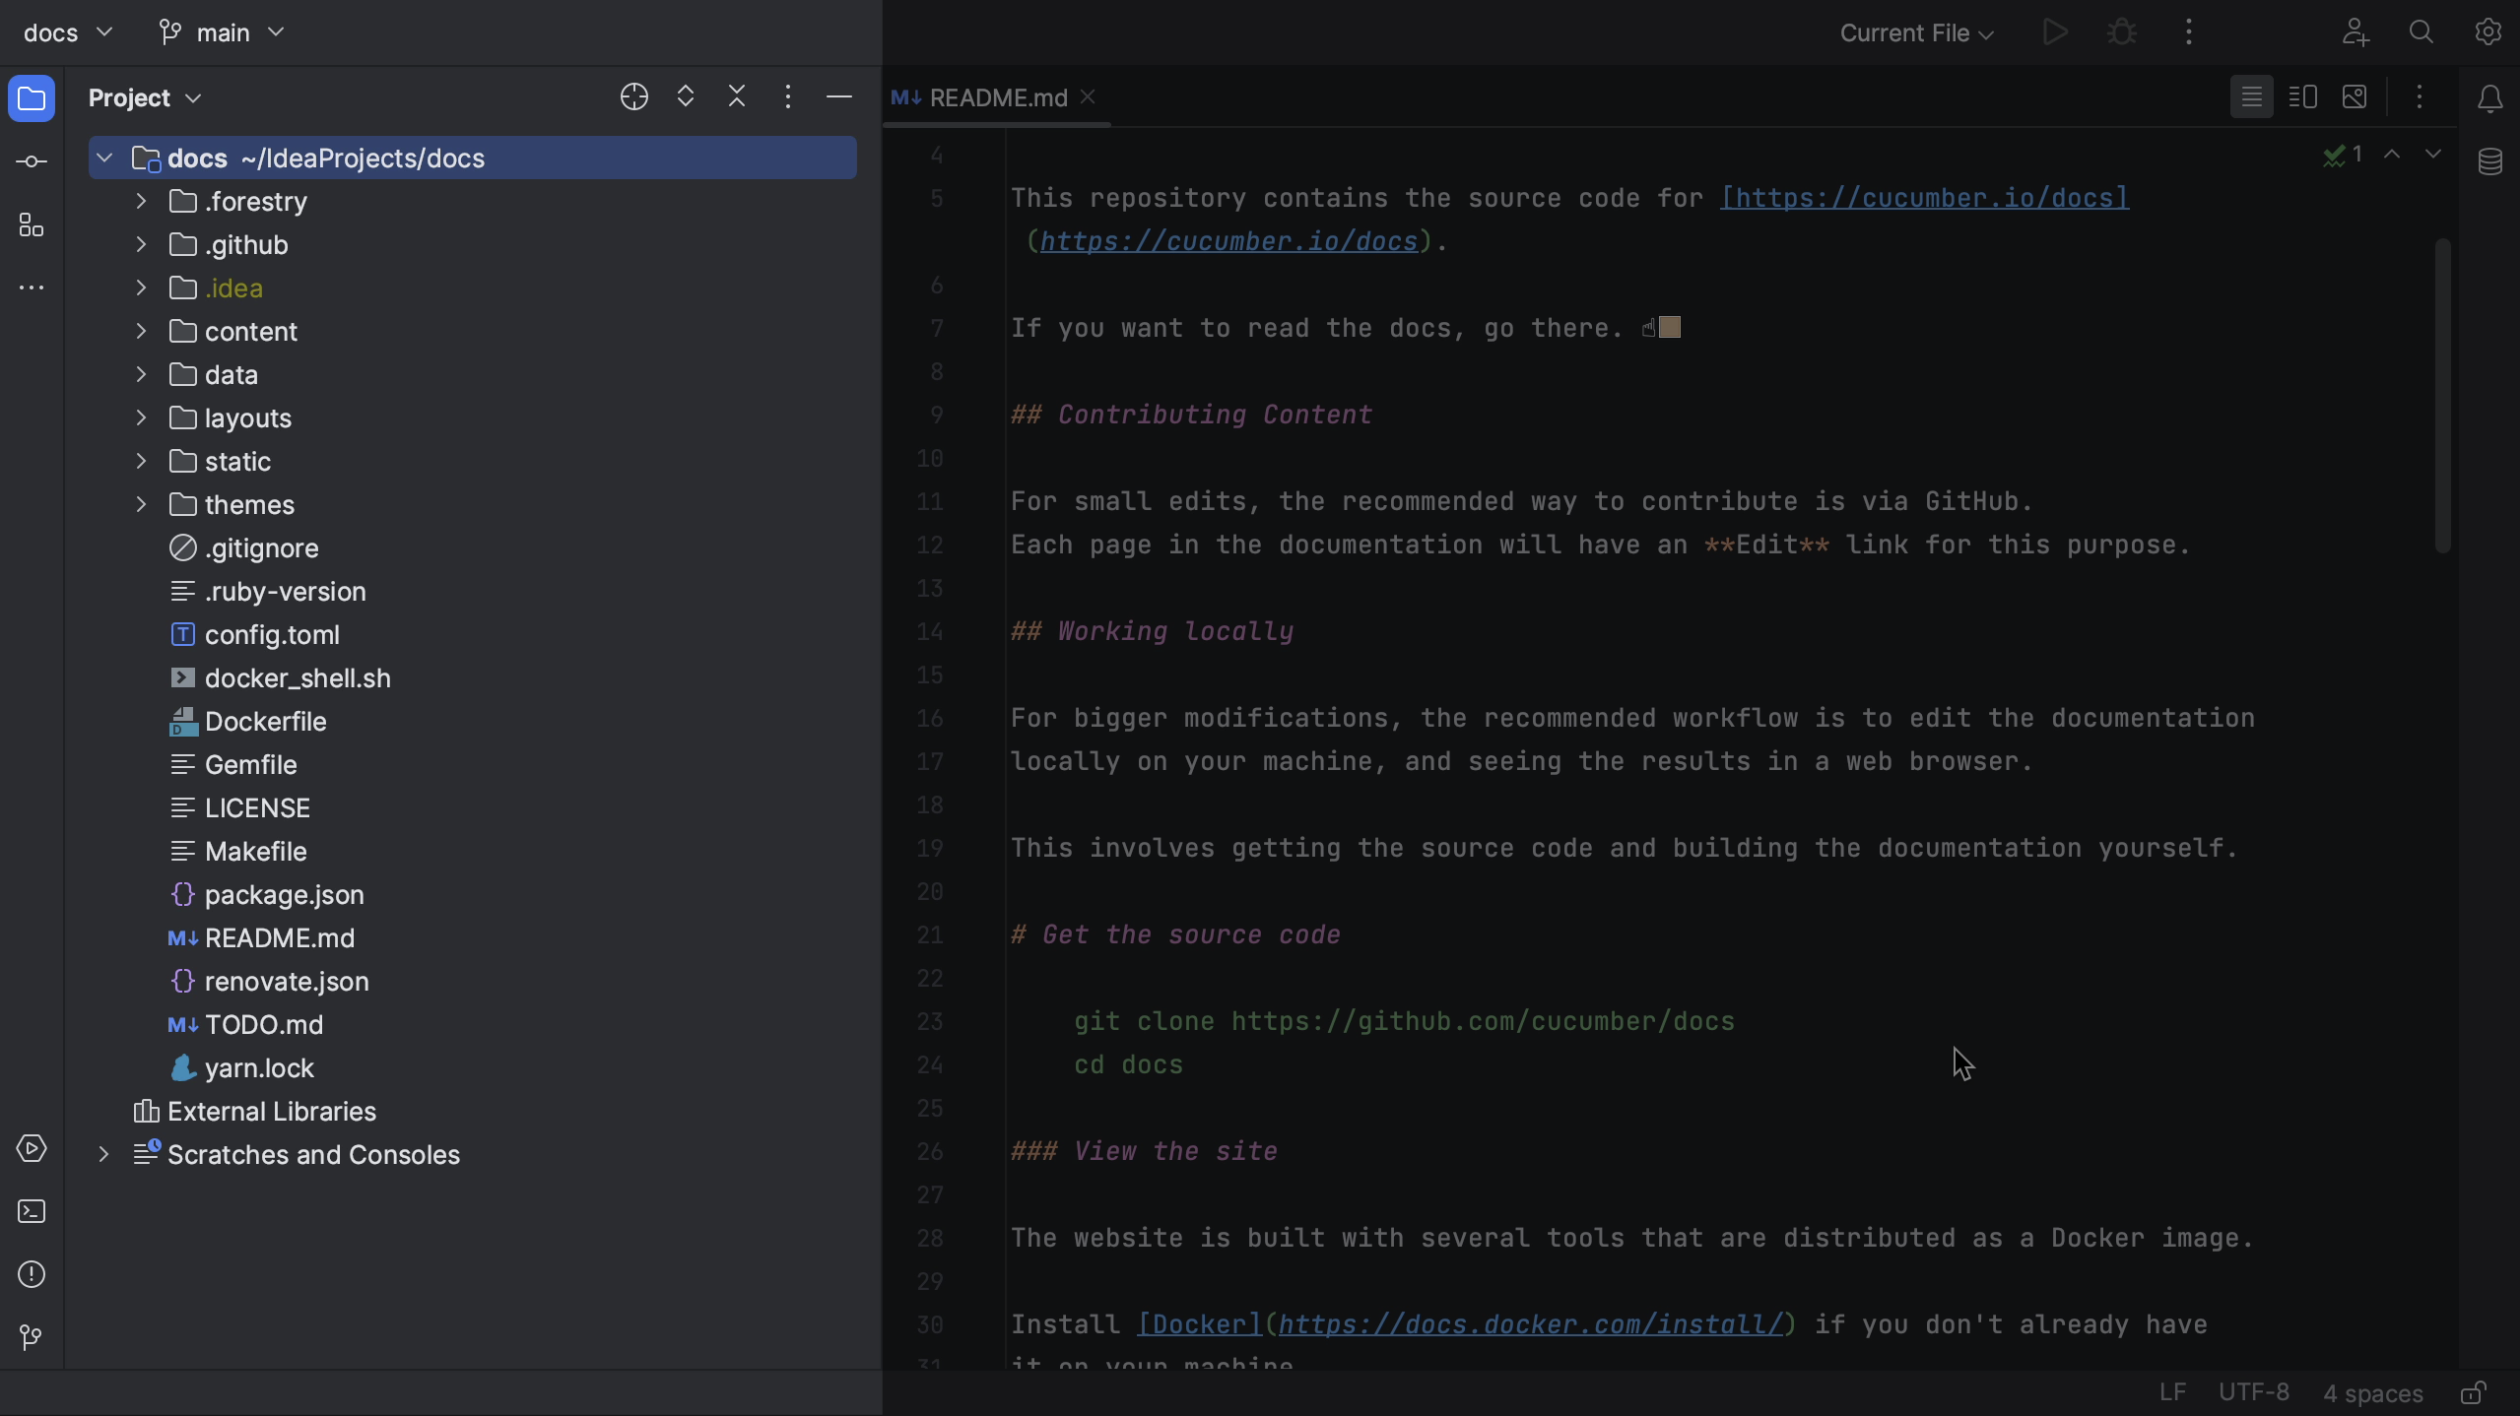
IntelliJ IDEA will open the project on our machine.
Making and committing our changes
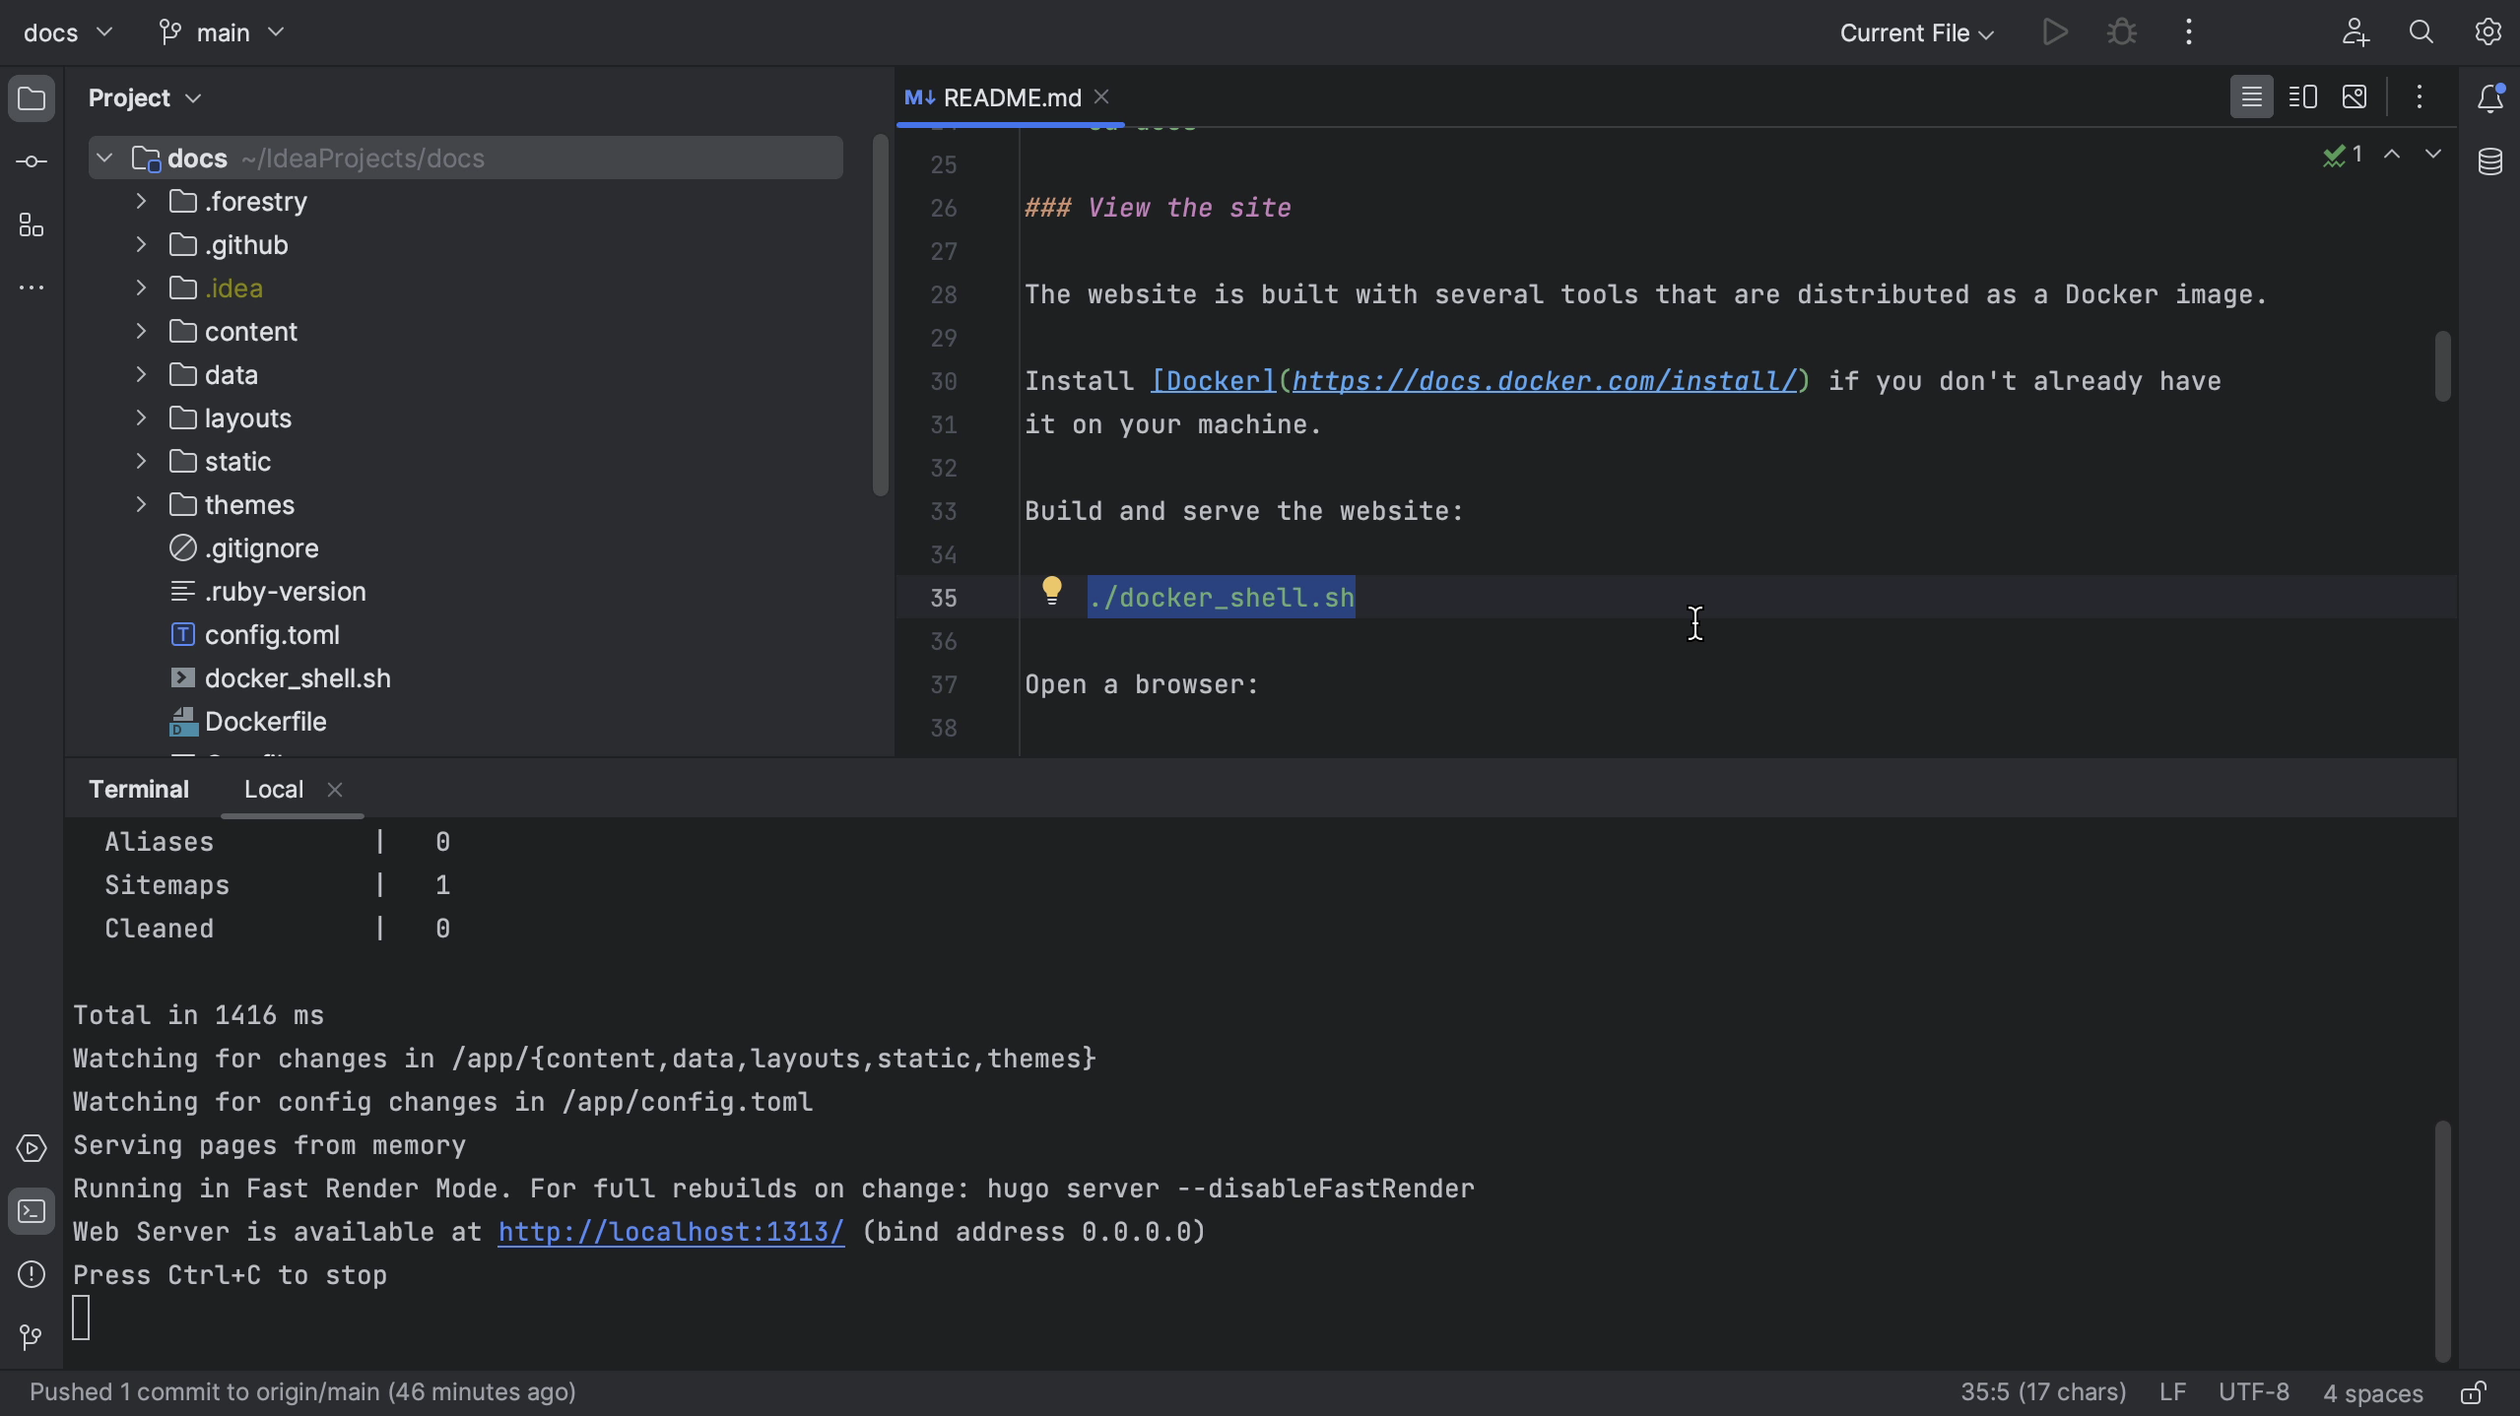
Before making any changes, we’ll want to make sure that we can build the project. Hopefully, how to build the project will be described in the README, as it is for this example. Let’s open the terminal and build the project as described. In this example, we need Docker, which is already installed and running.
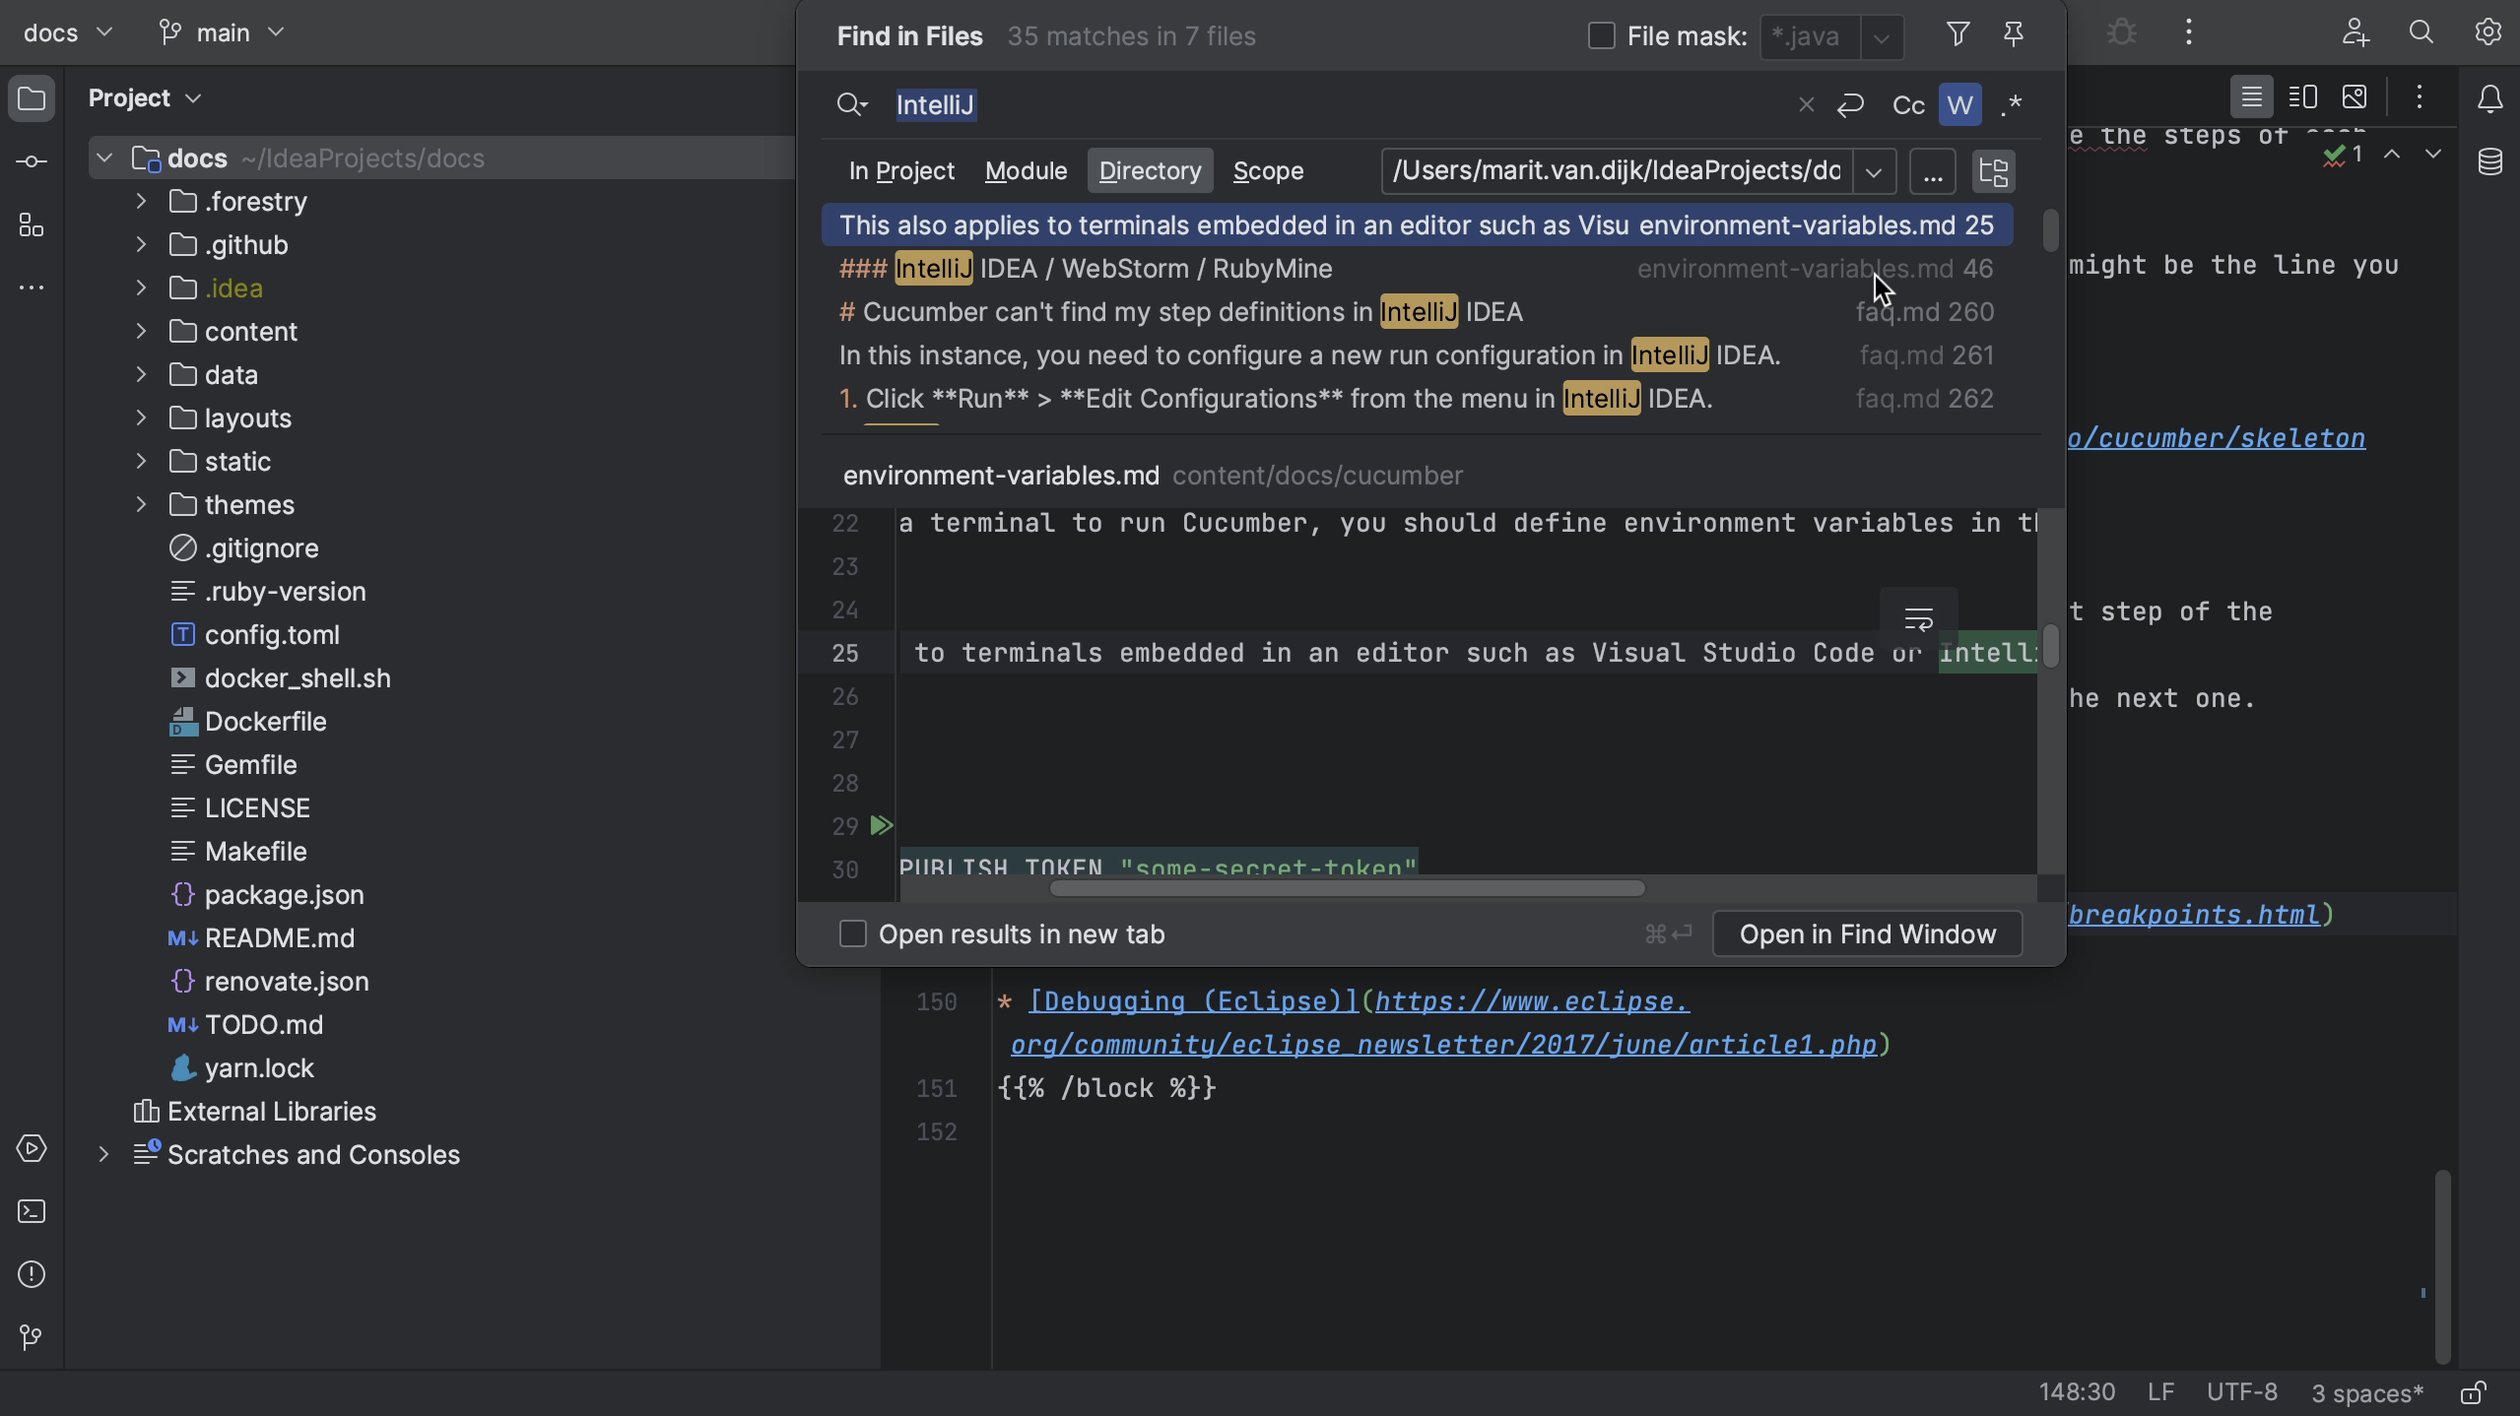
Now that we know we can build the project, we can start making changes. First, we need to look for the right place to make the change. We might navigate the project in the Project tool window (⌘1 on macOS, or Alt+1 on Windows/Linux), or look for a specific file or code snippet using Find in Files (⌘⇧F on macOS, or Ctrl+Shift+F on Windows/Linux).
We might want to create a specific branch for our changes.
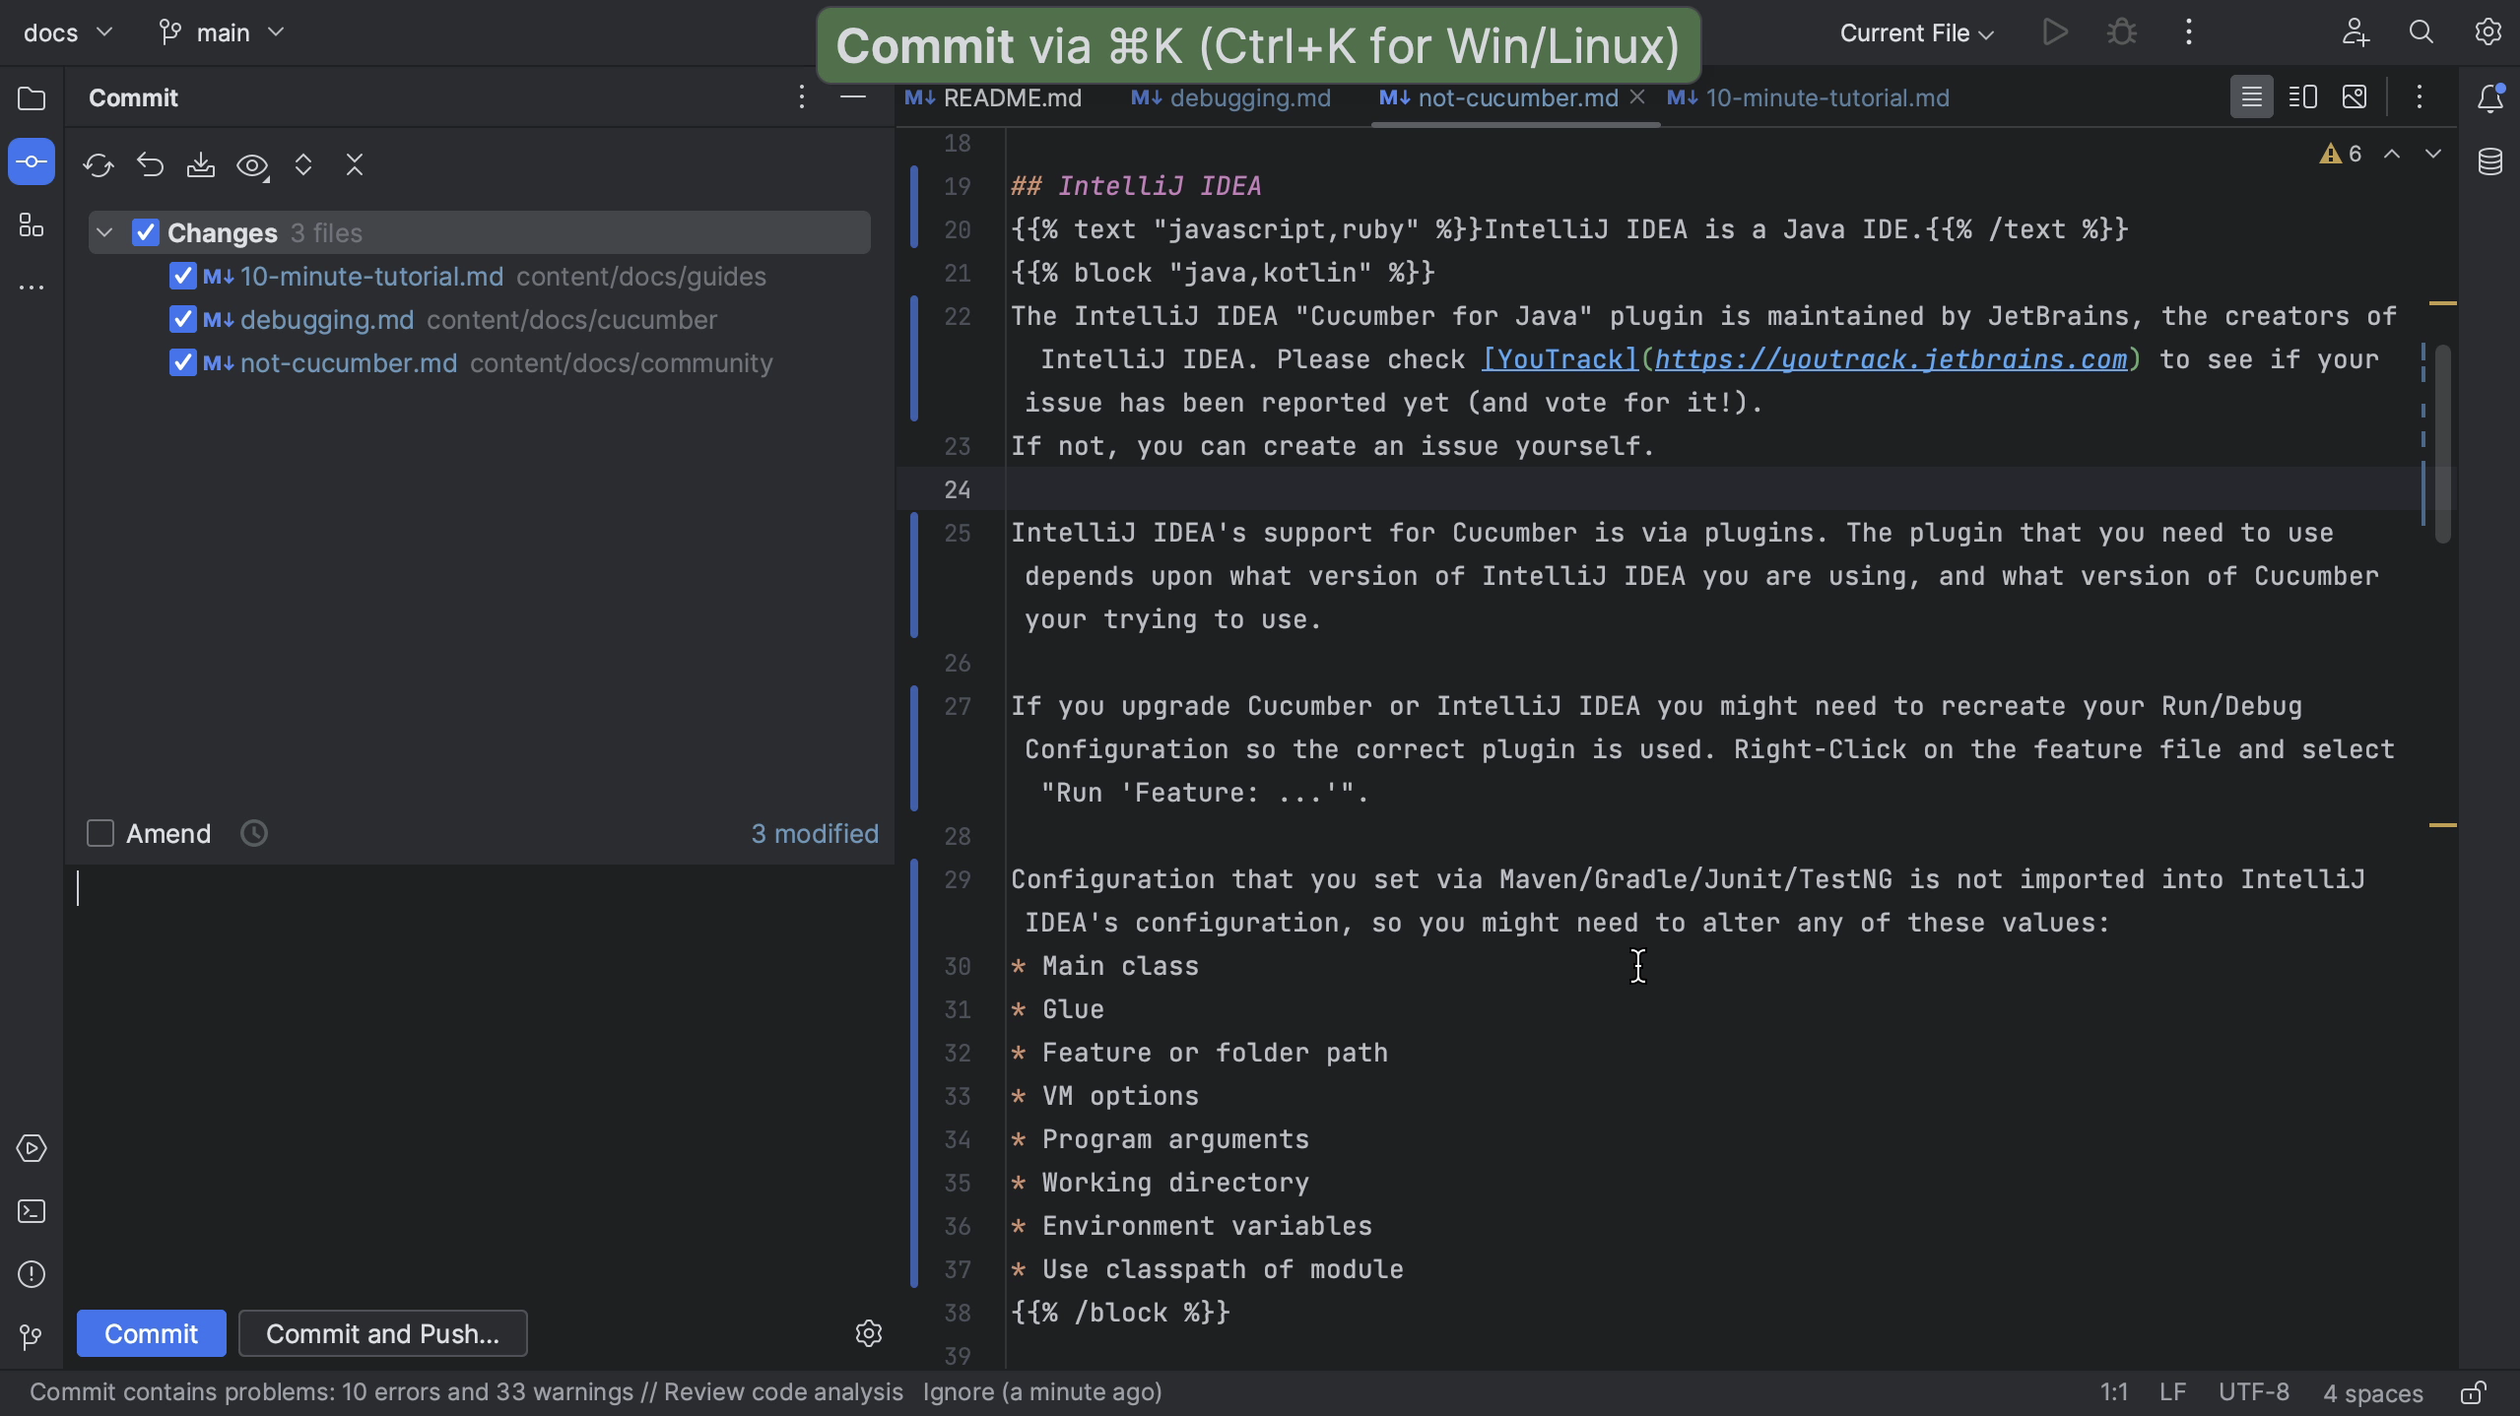
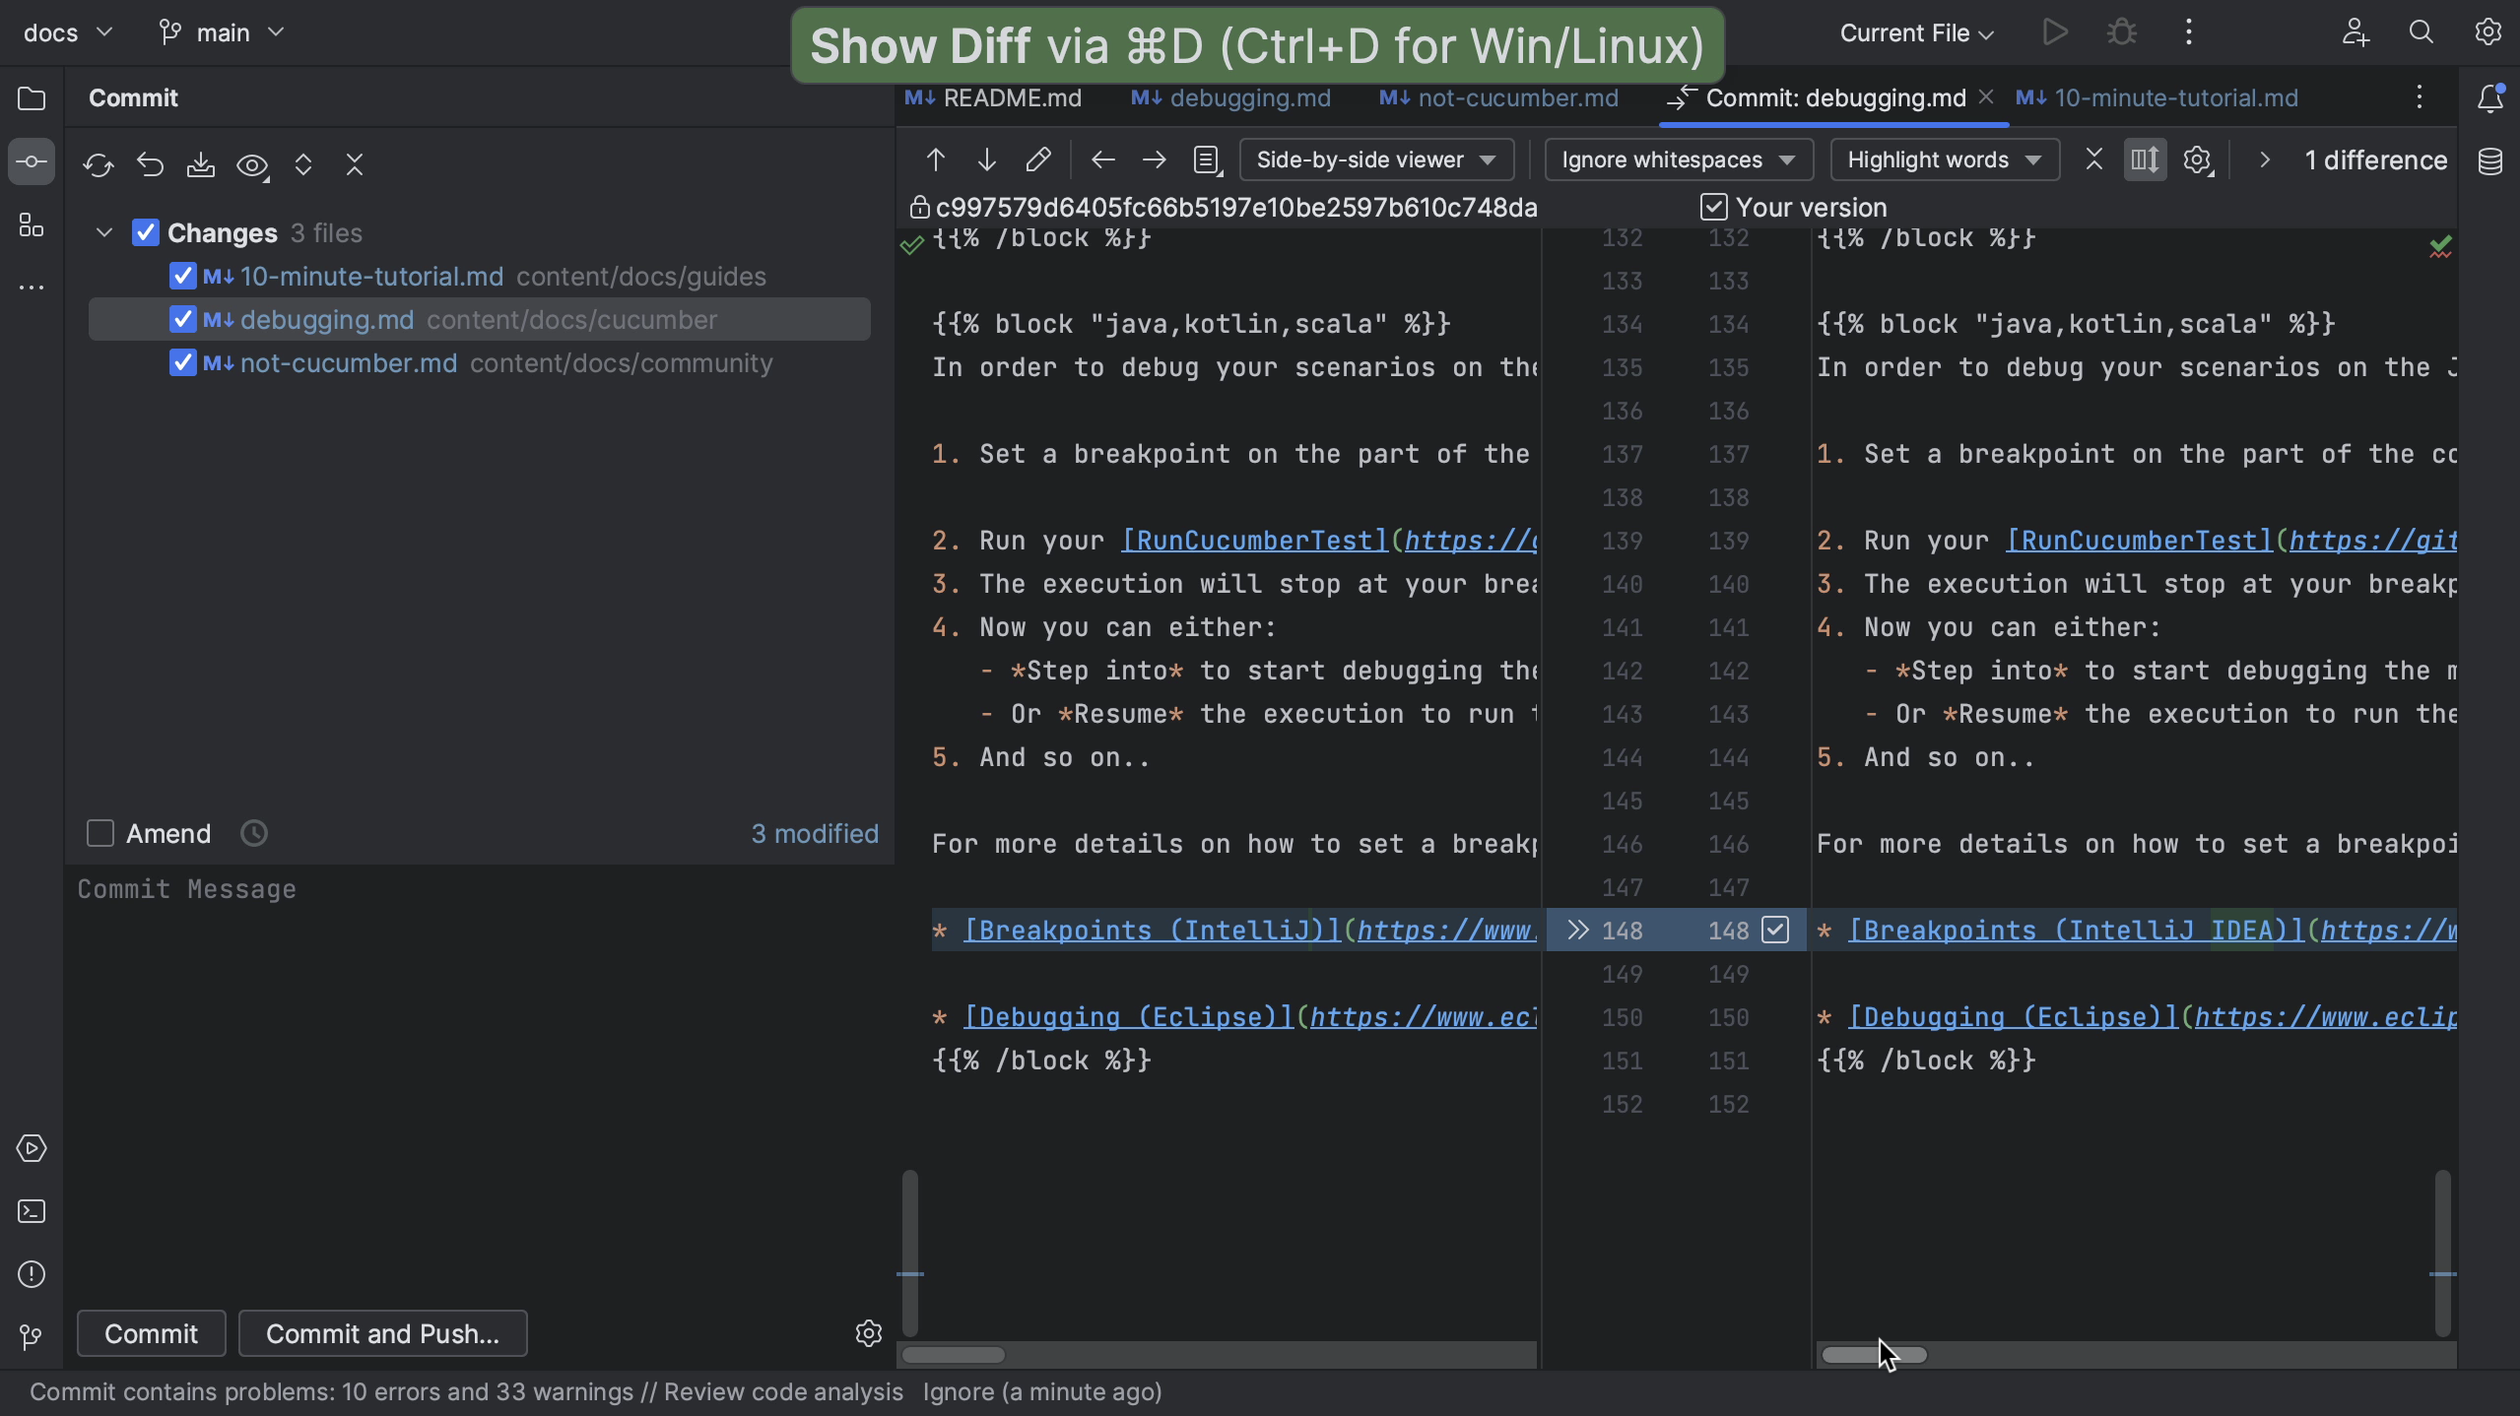
Once we are done making our changes and the project still builds, we can commit our changes (⌘K on macOS, or Ctrl+K on Windows/Linux). We can check our changes in the Commit tool window (⌘1 on macOS, or Alt+1 on Windows/Linux) to see if these are the right files and use Show Diff (⌘D on macOS, or Ctrl+D on Windows/Linux) to see if the changes are correct.
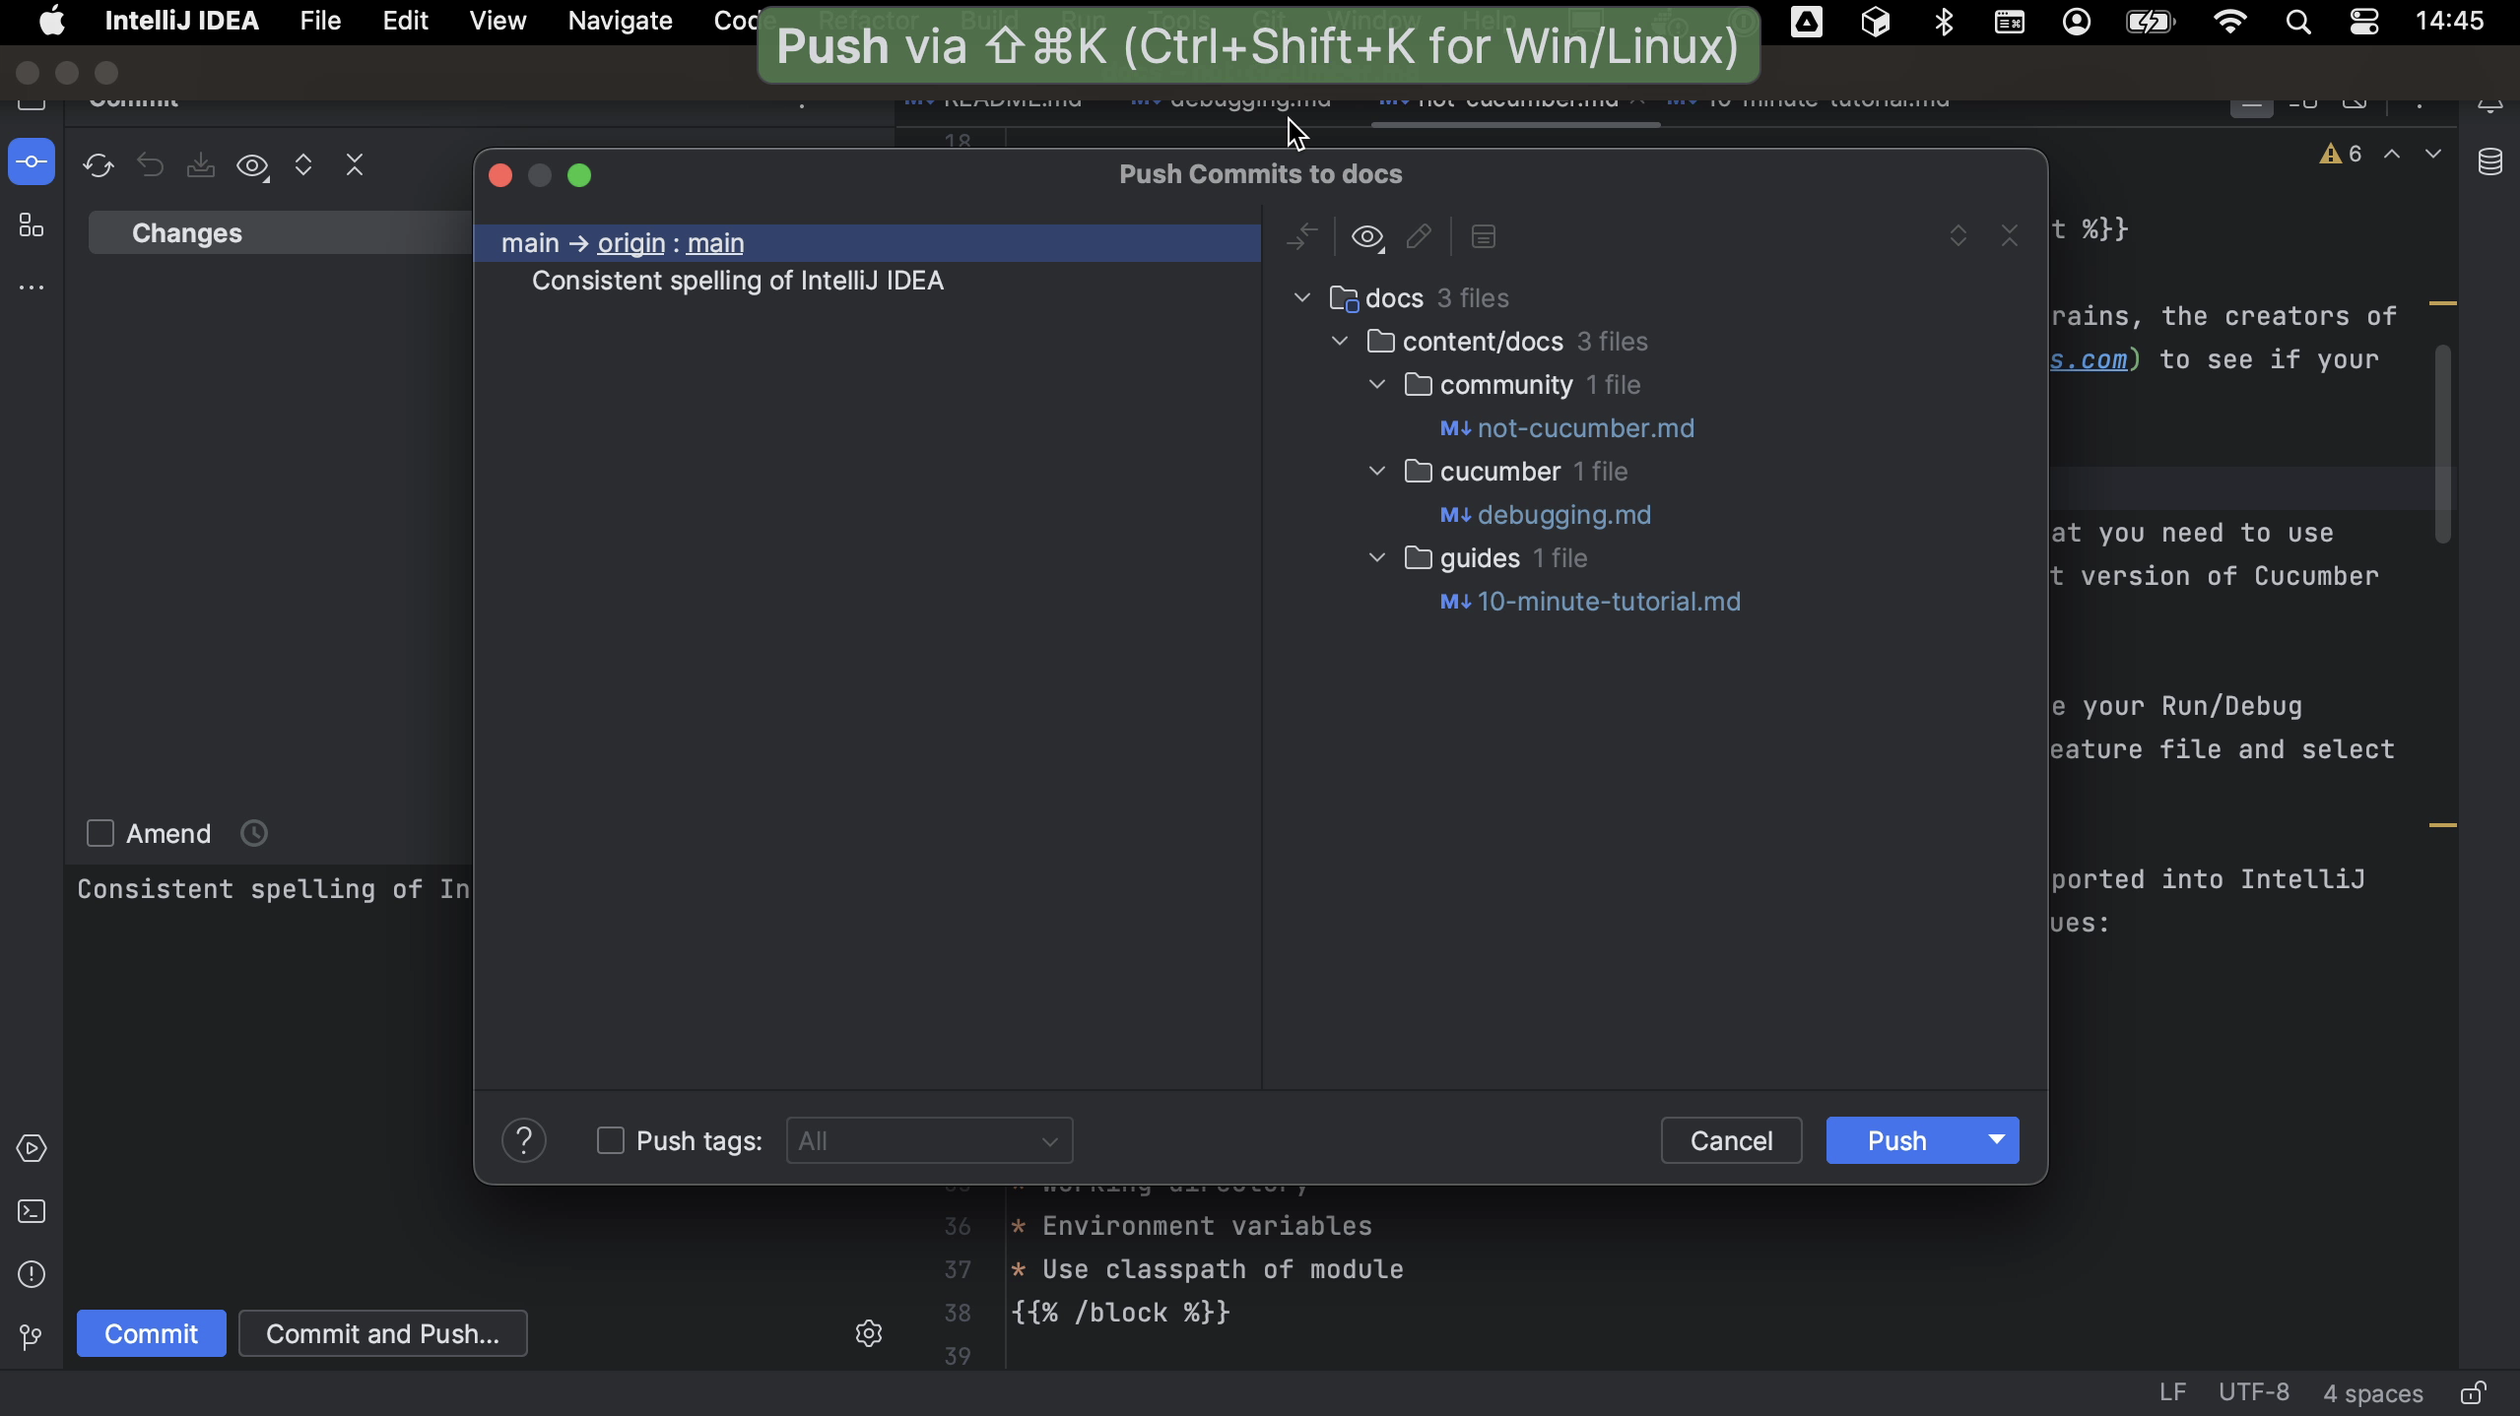
If we don’t have access to the original project, we need to push our code to our fork.
Creating the pull request
Once we are happy with our changes, we can create a pull request.
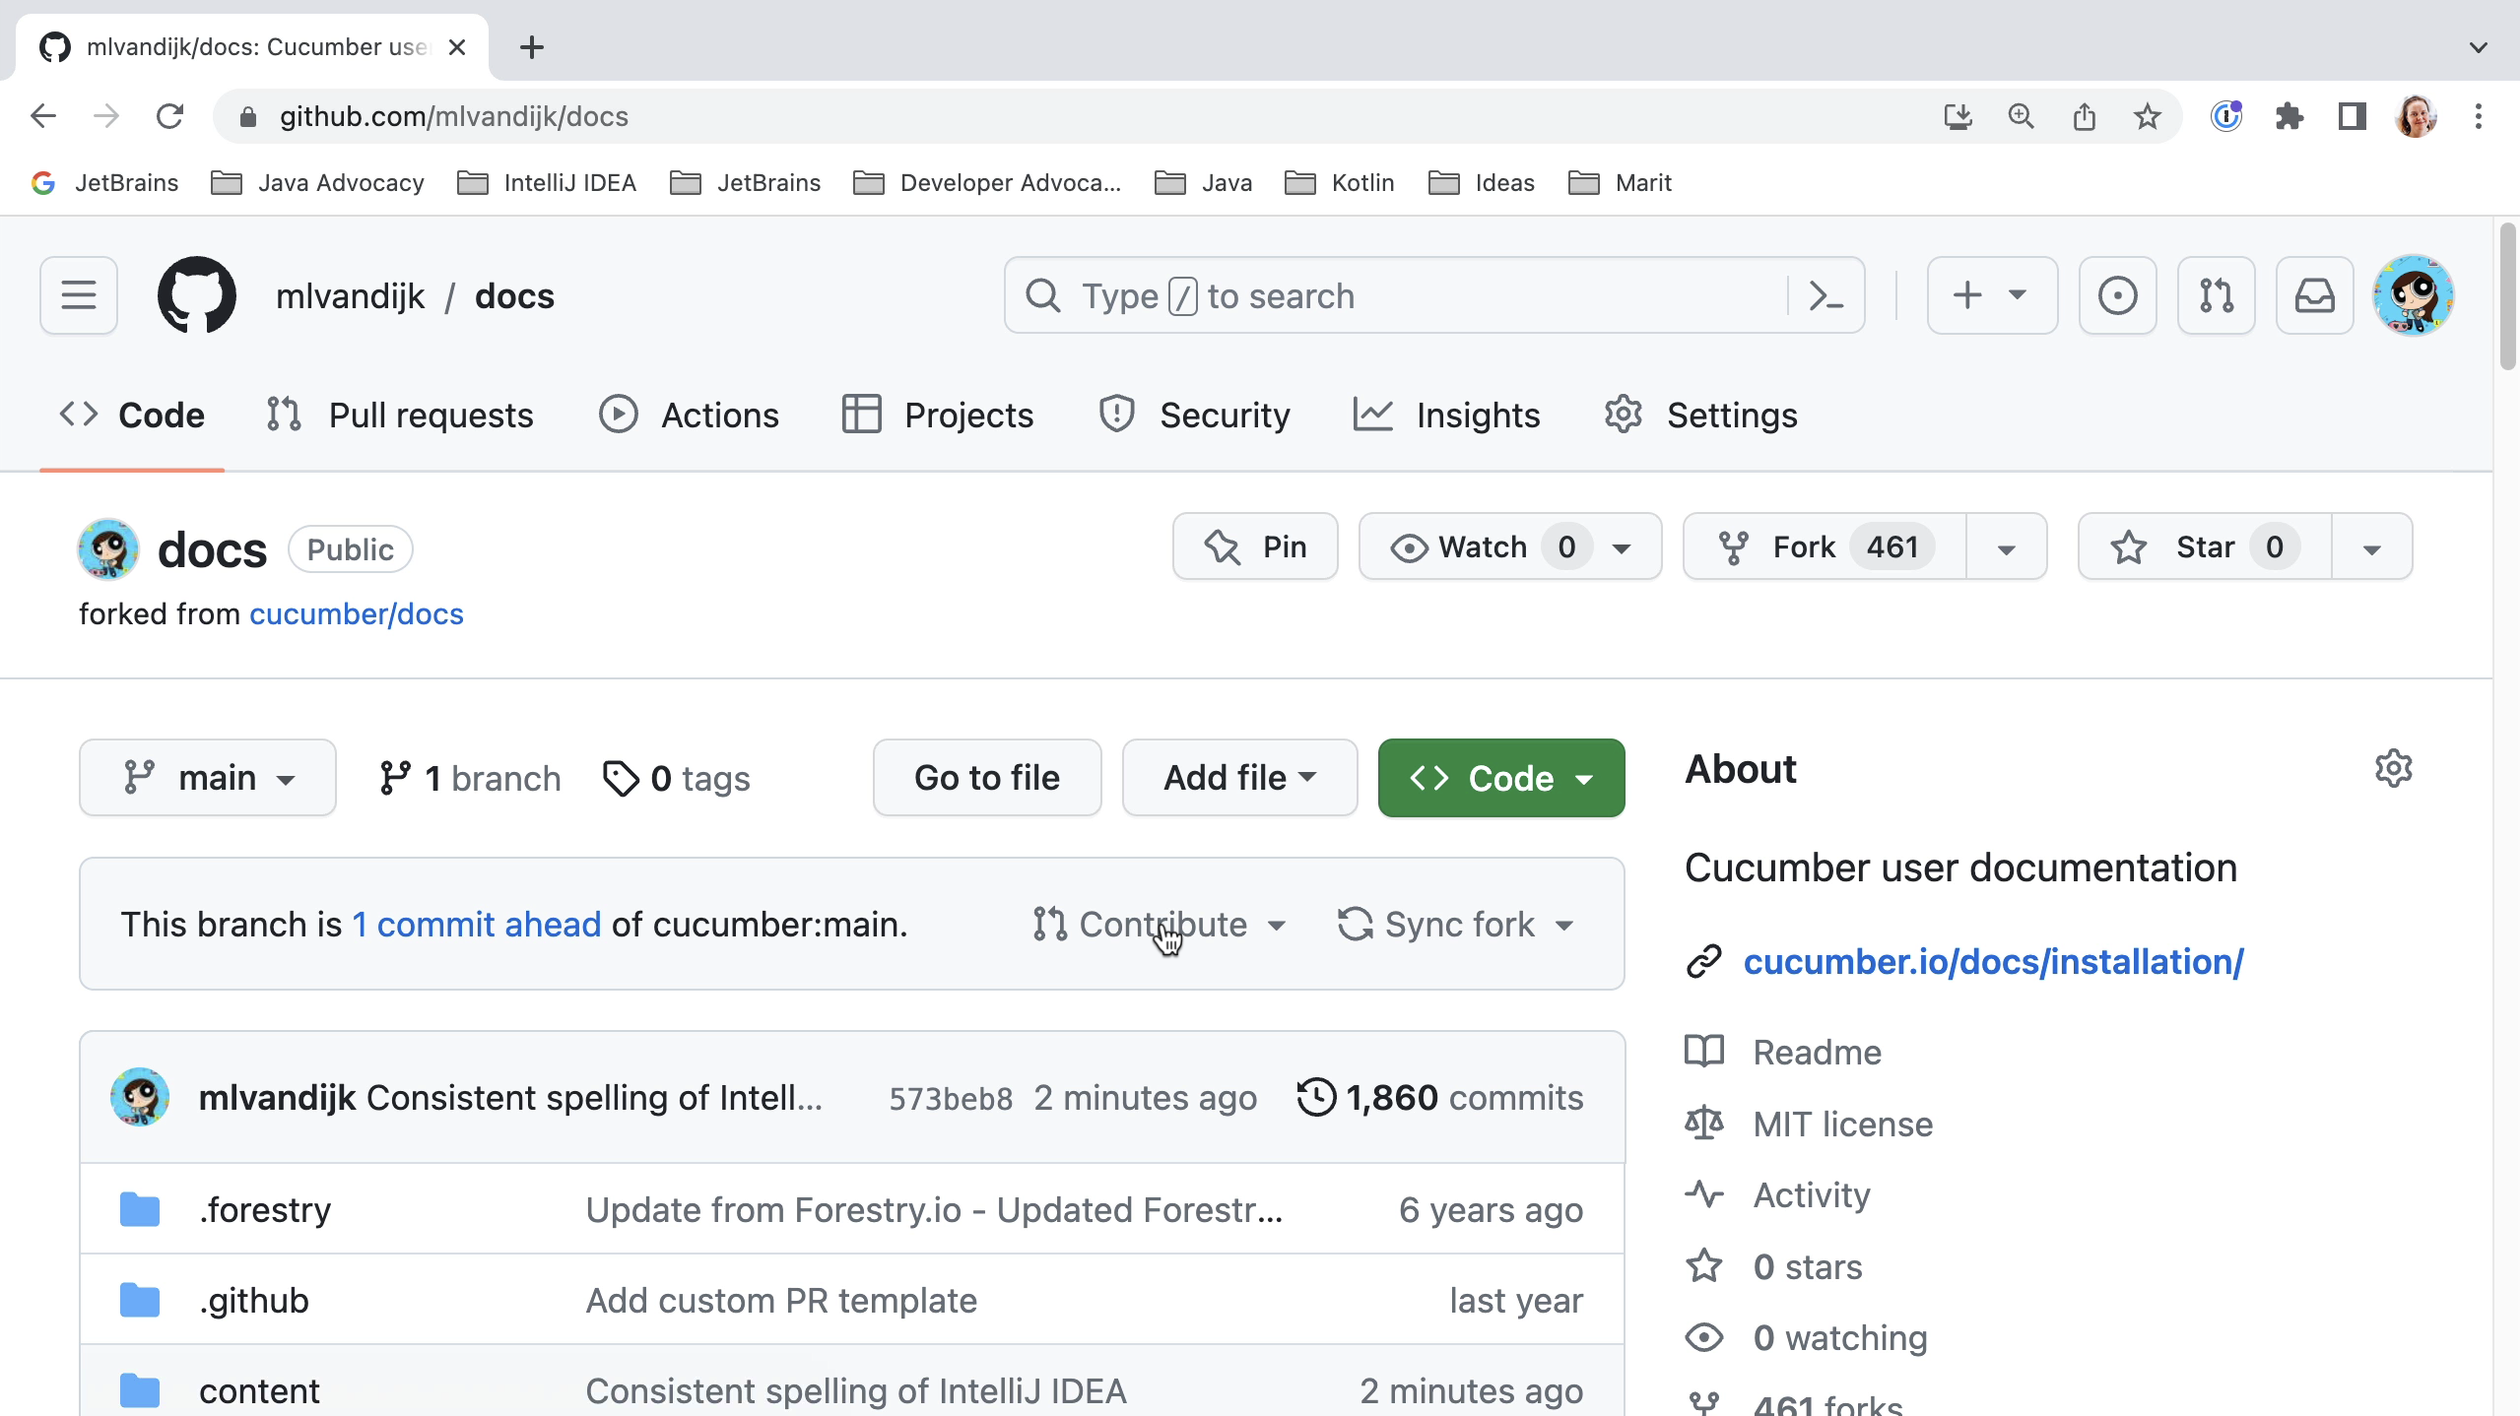
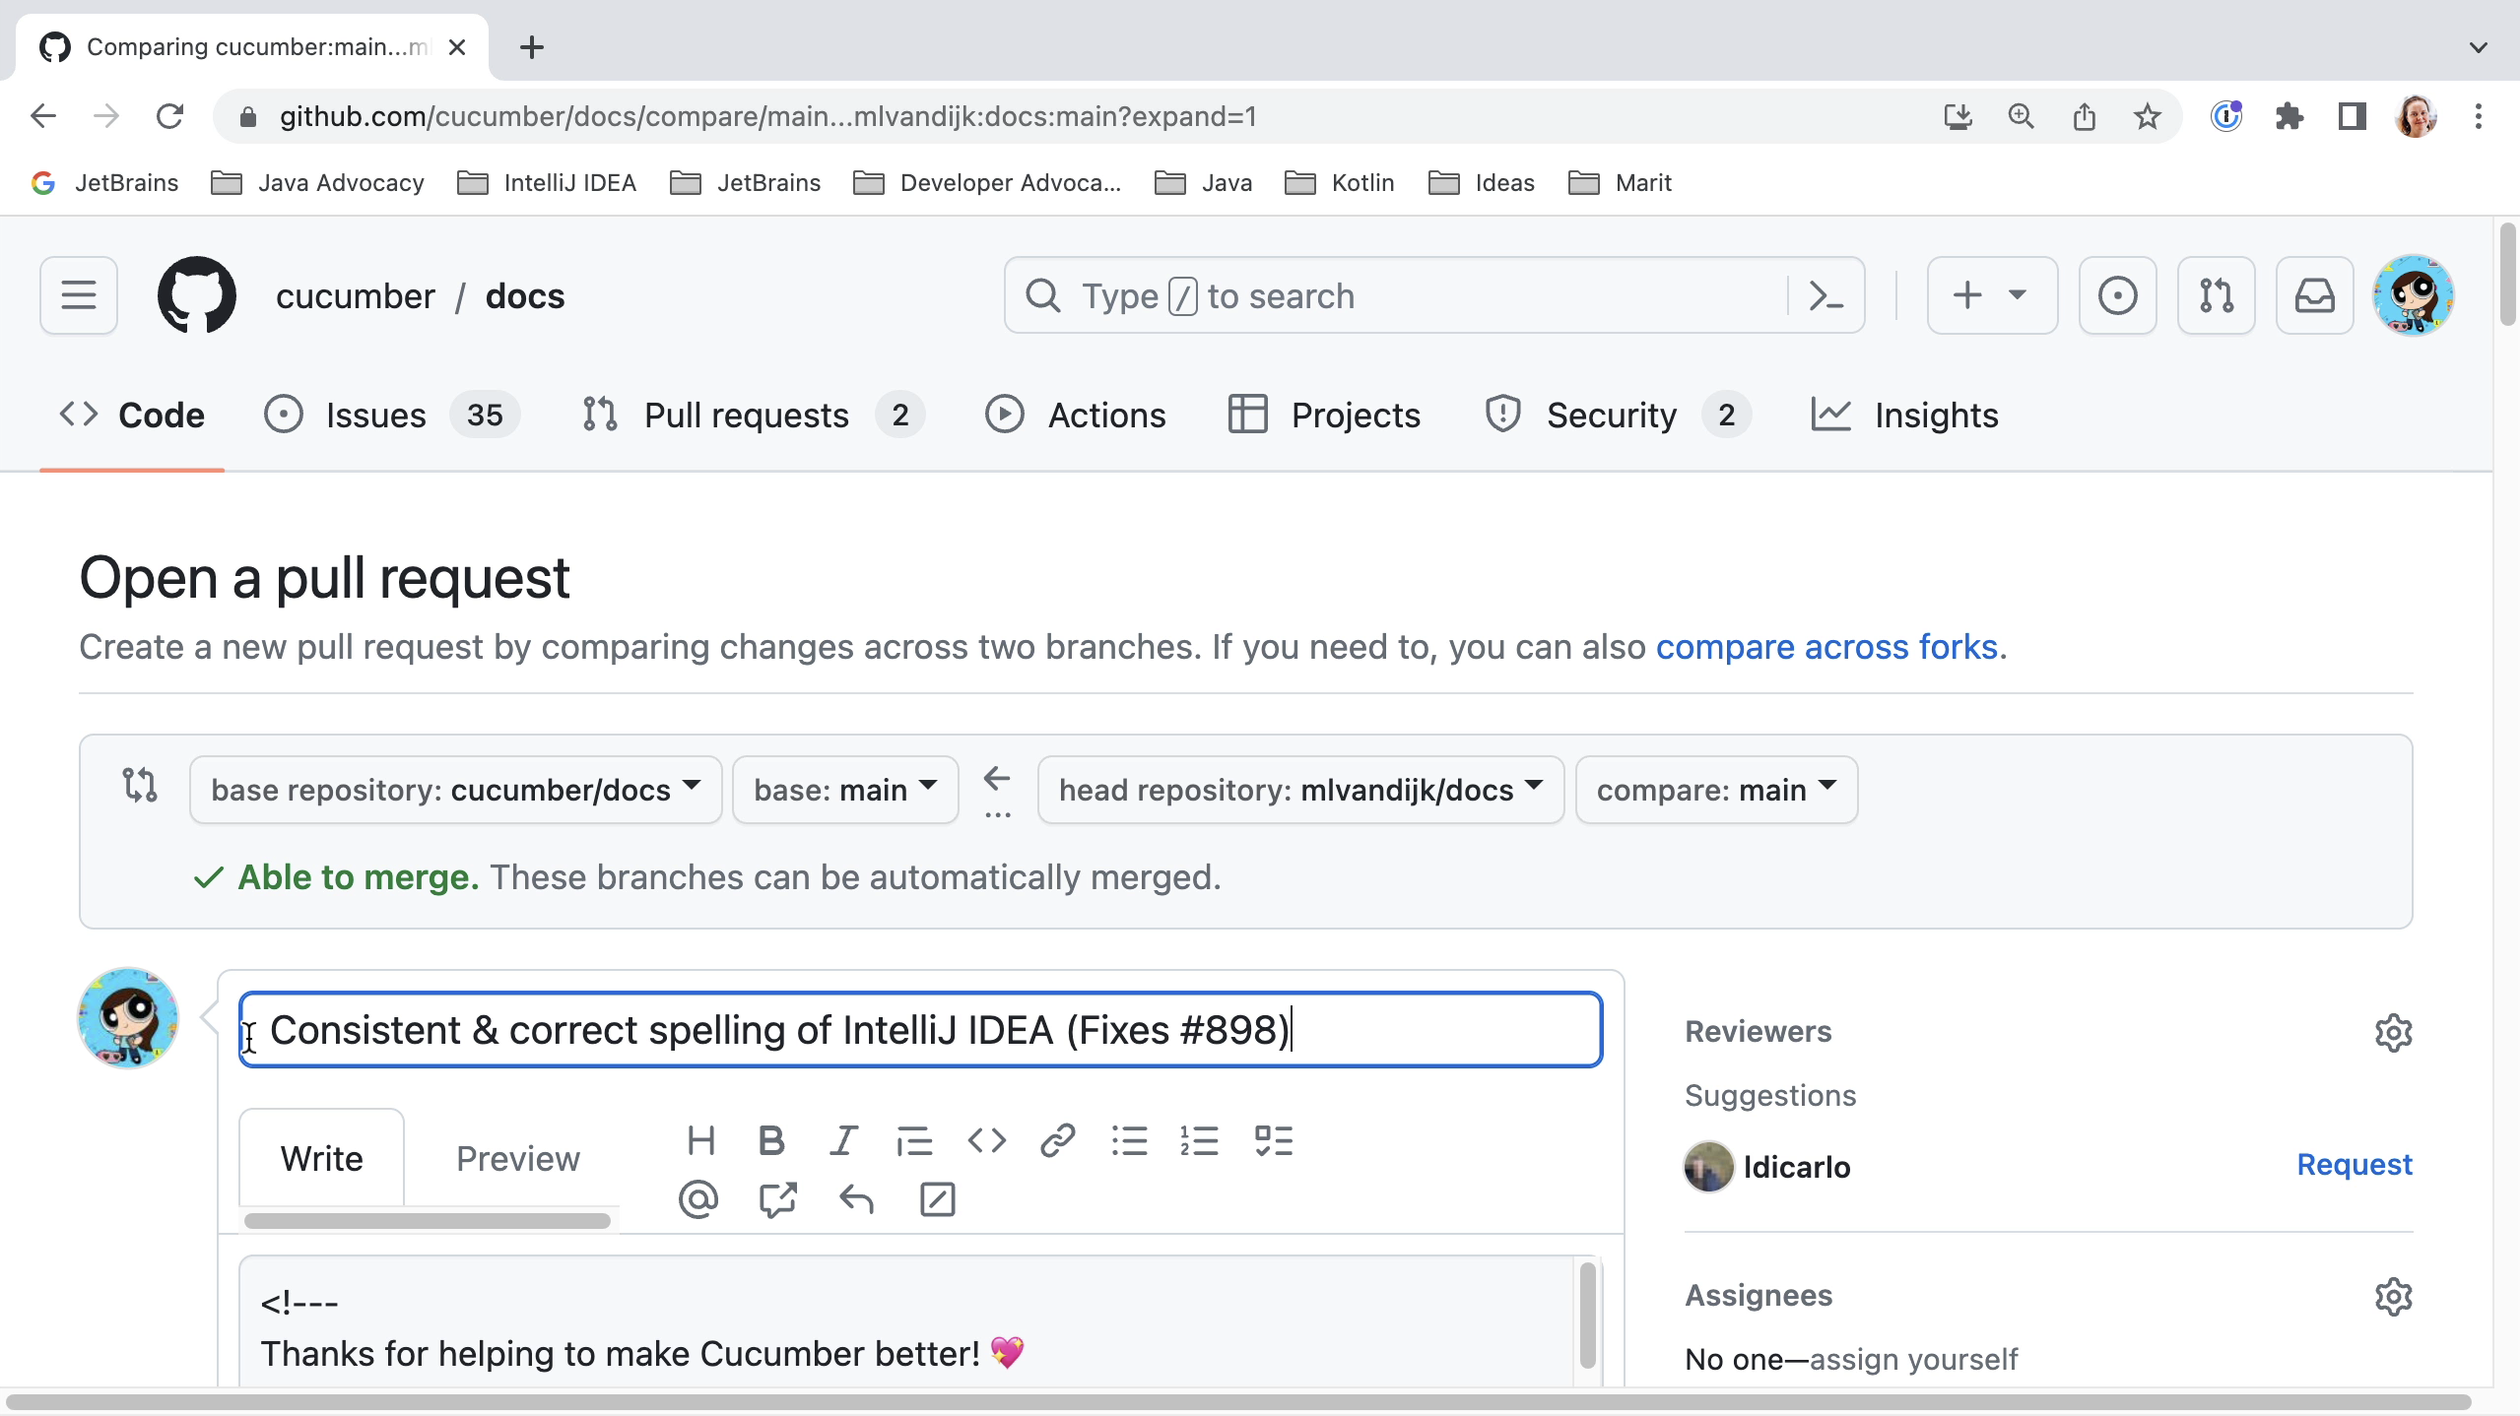
We go back to our GitHub profile and create a pull request from there. After we have pushed our changes, we can see that our fork is 1 commit ahead. We can start creating our pull request by clicking Contribute.
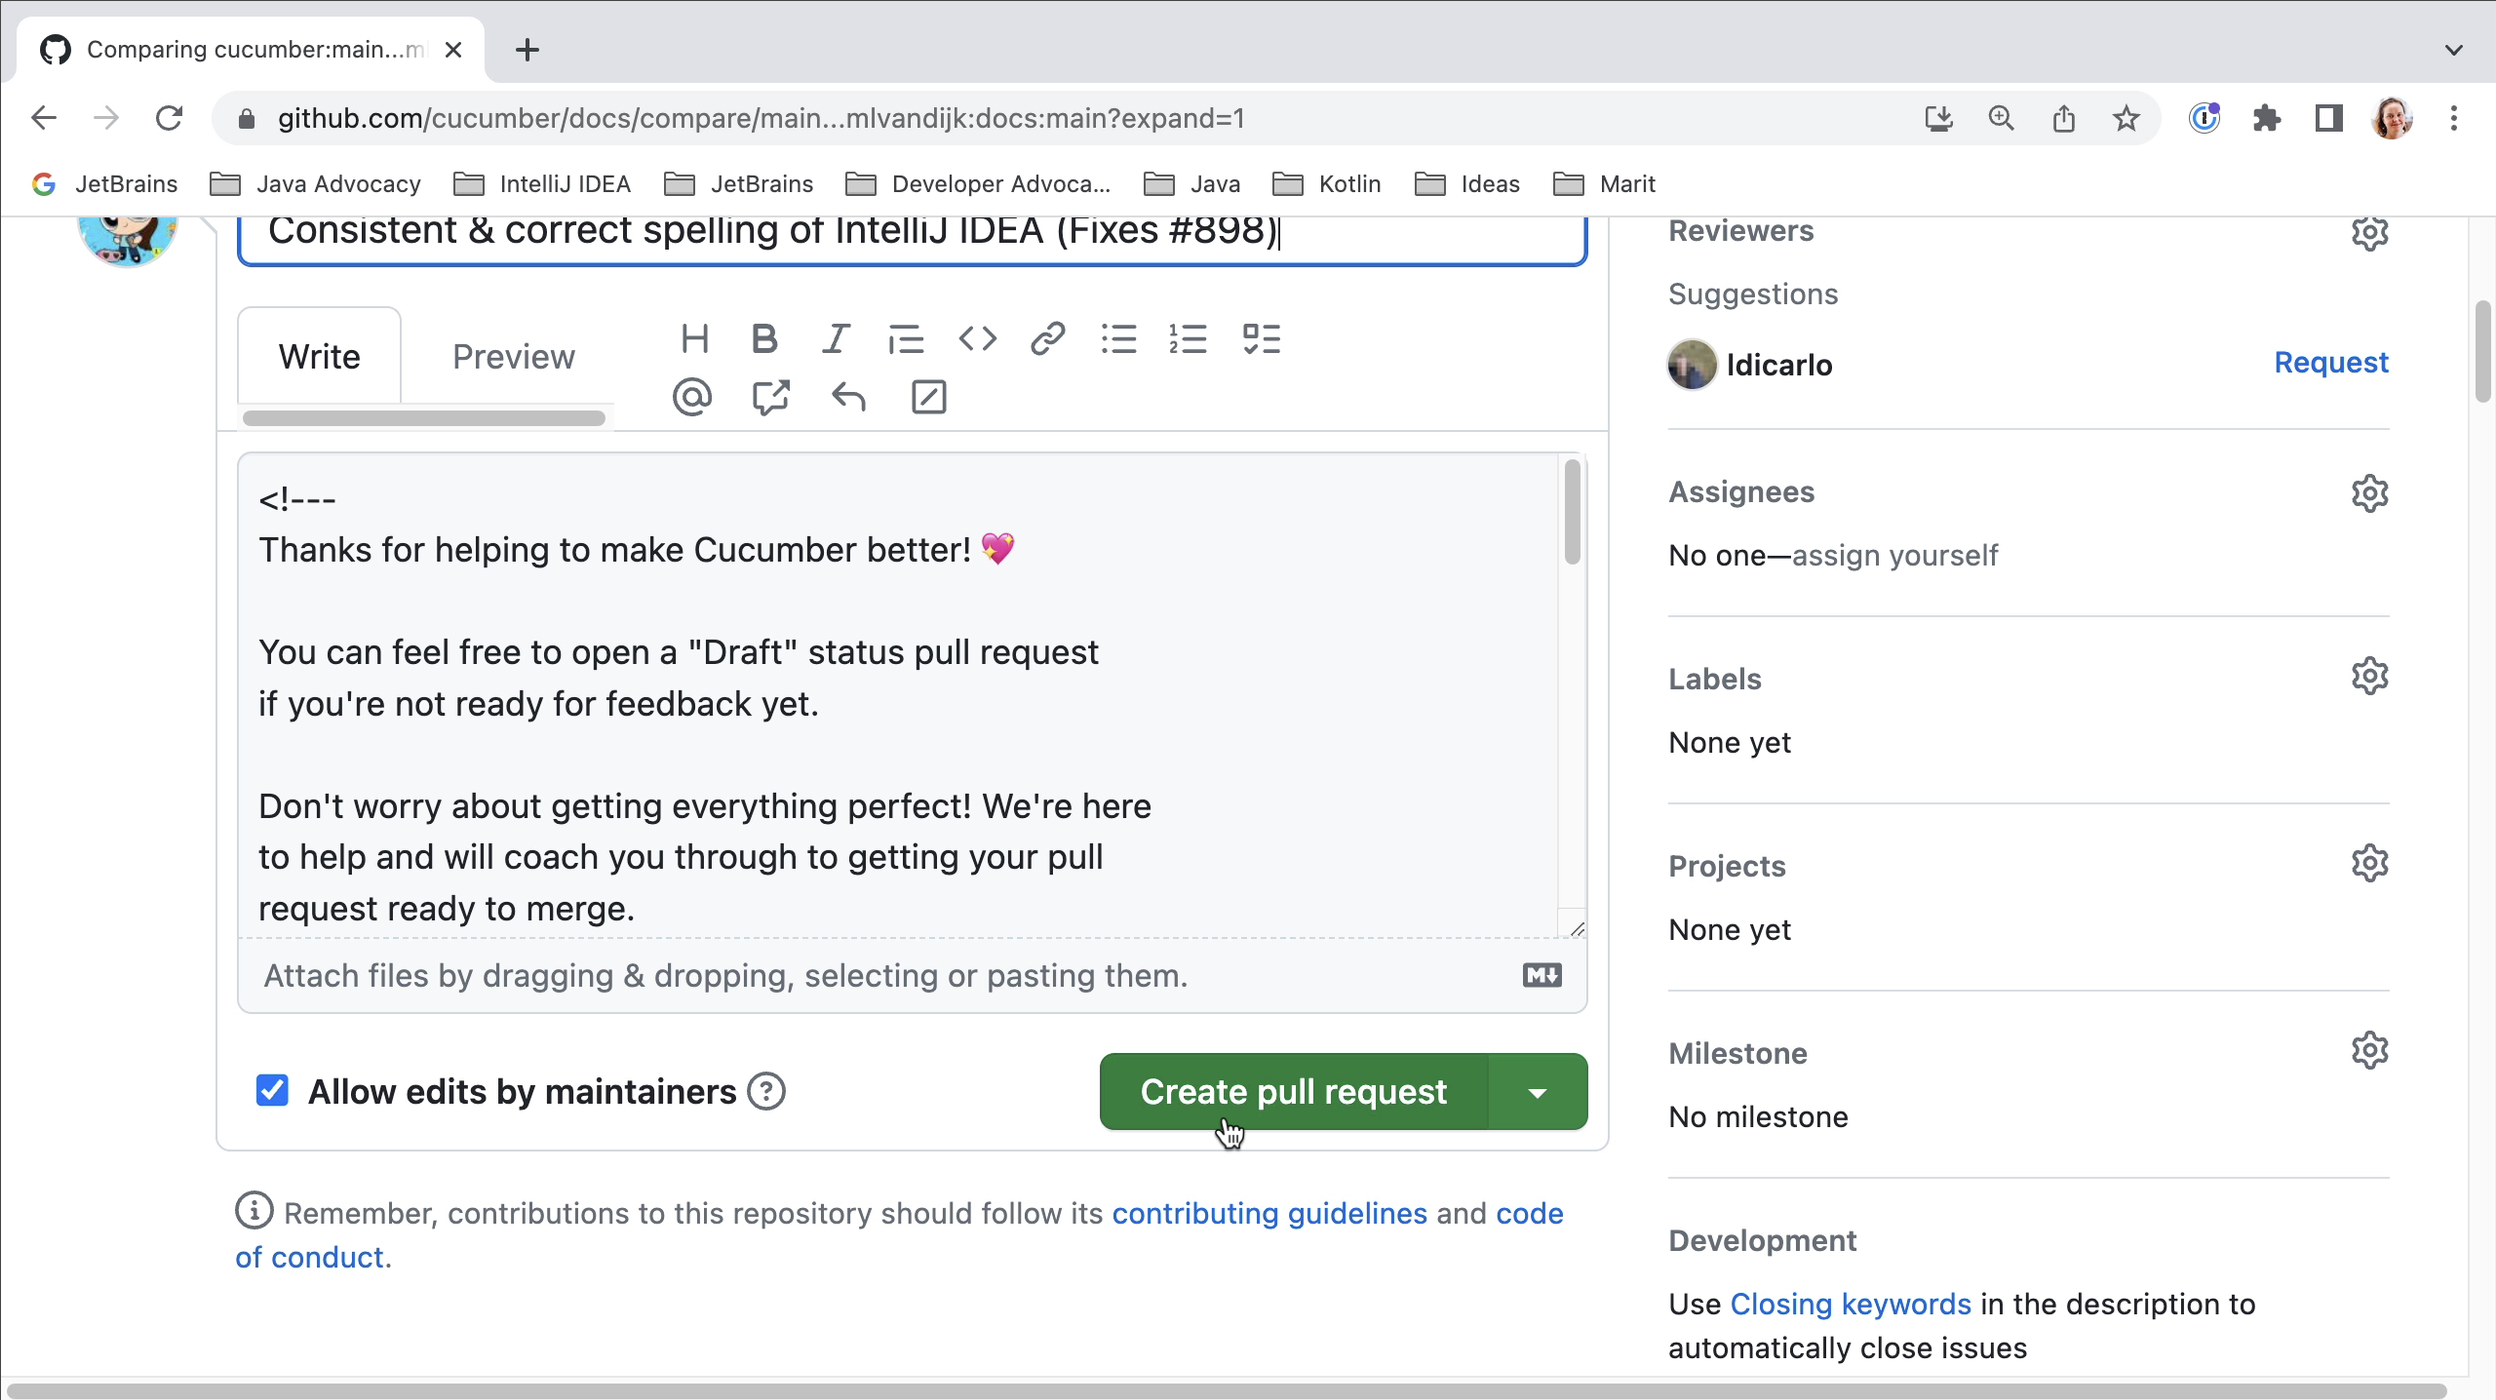
We need to provide a title and description for our pull request. Make sure the title is a good description of the changes you want to contribute. If your PR fixes an issue, you can add “fixed #x” (where x is the issue number) to the title; this will automatically close the linked issue when the PR is merged. Once you are happy with the title and description, click the button Create pull request to open your pull request.
Negotiating the review process
Now the waiting starts. On an active project, hopefully your PR will be reviewed soon. Your PR might get comments from reviewers that you need to fix. For complex changes, this might take several iterations. For smaller changes, hopefully it won’t. Before doing a lot of work on an issue you might want to check that your contribution is wanted and your solution is what they are looking for. Don’t be discouraged by review comments. Keep in mind that the maintainers will have to maintain your solution in the future and they want to make sure that it fits their project.
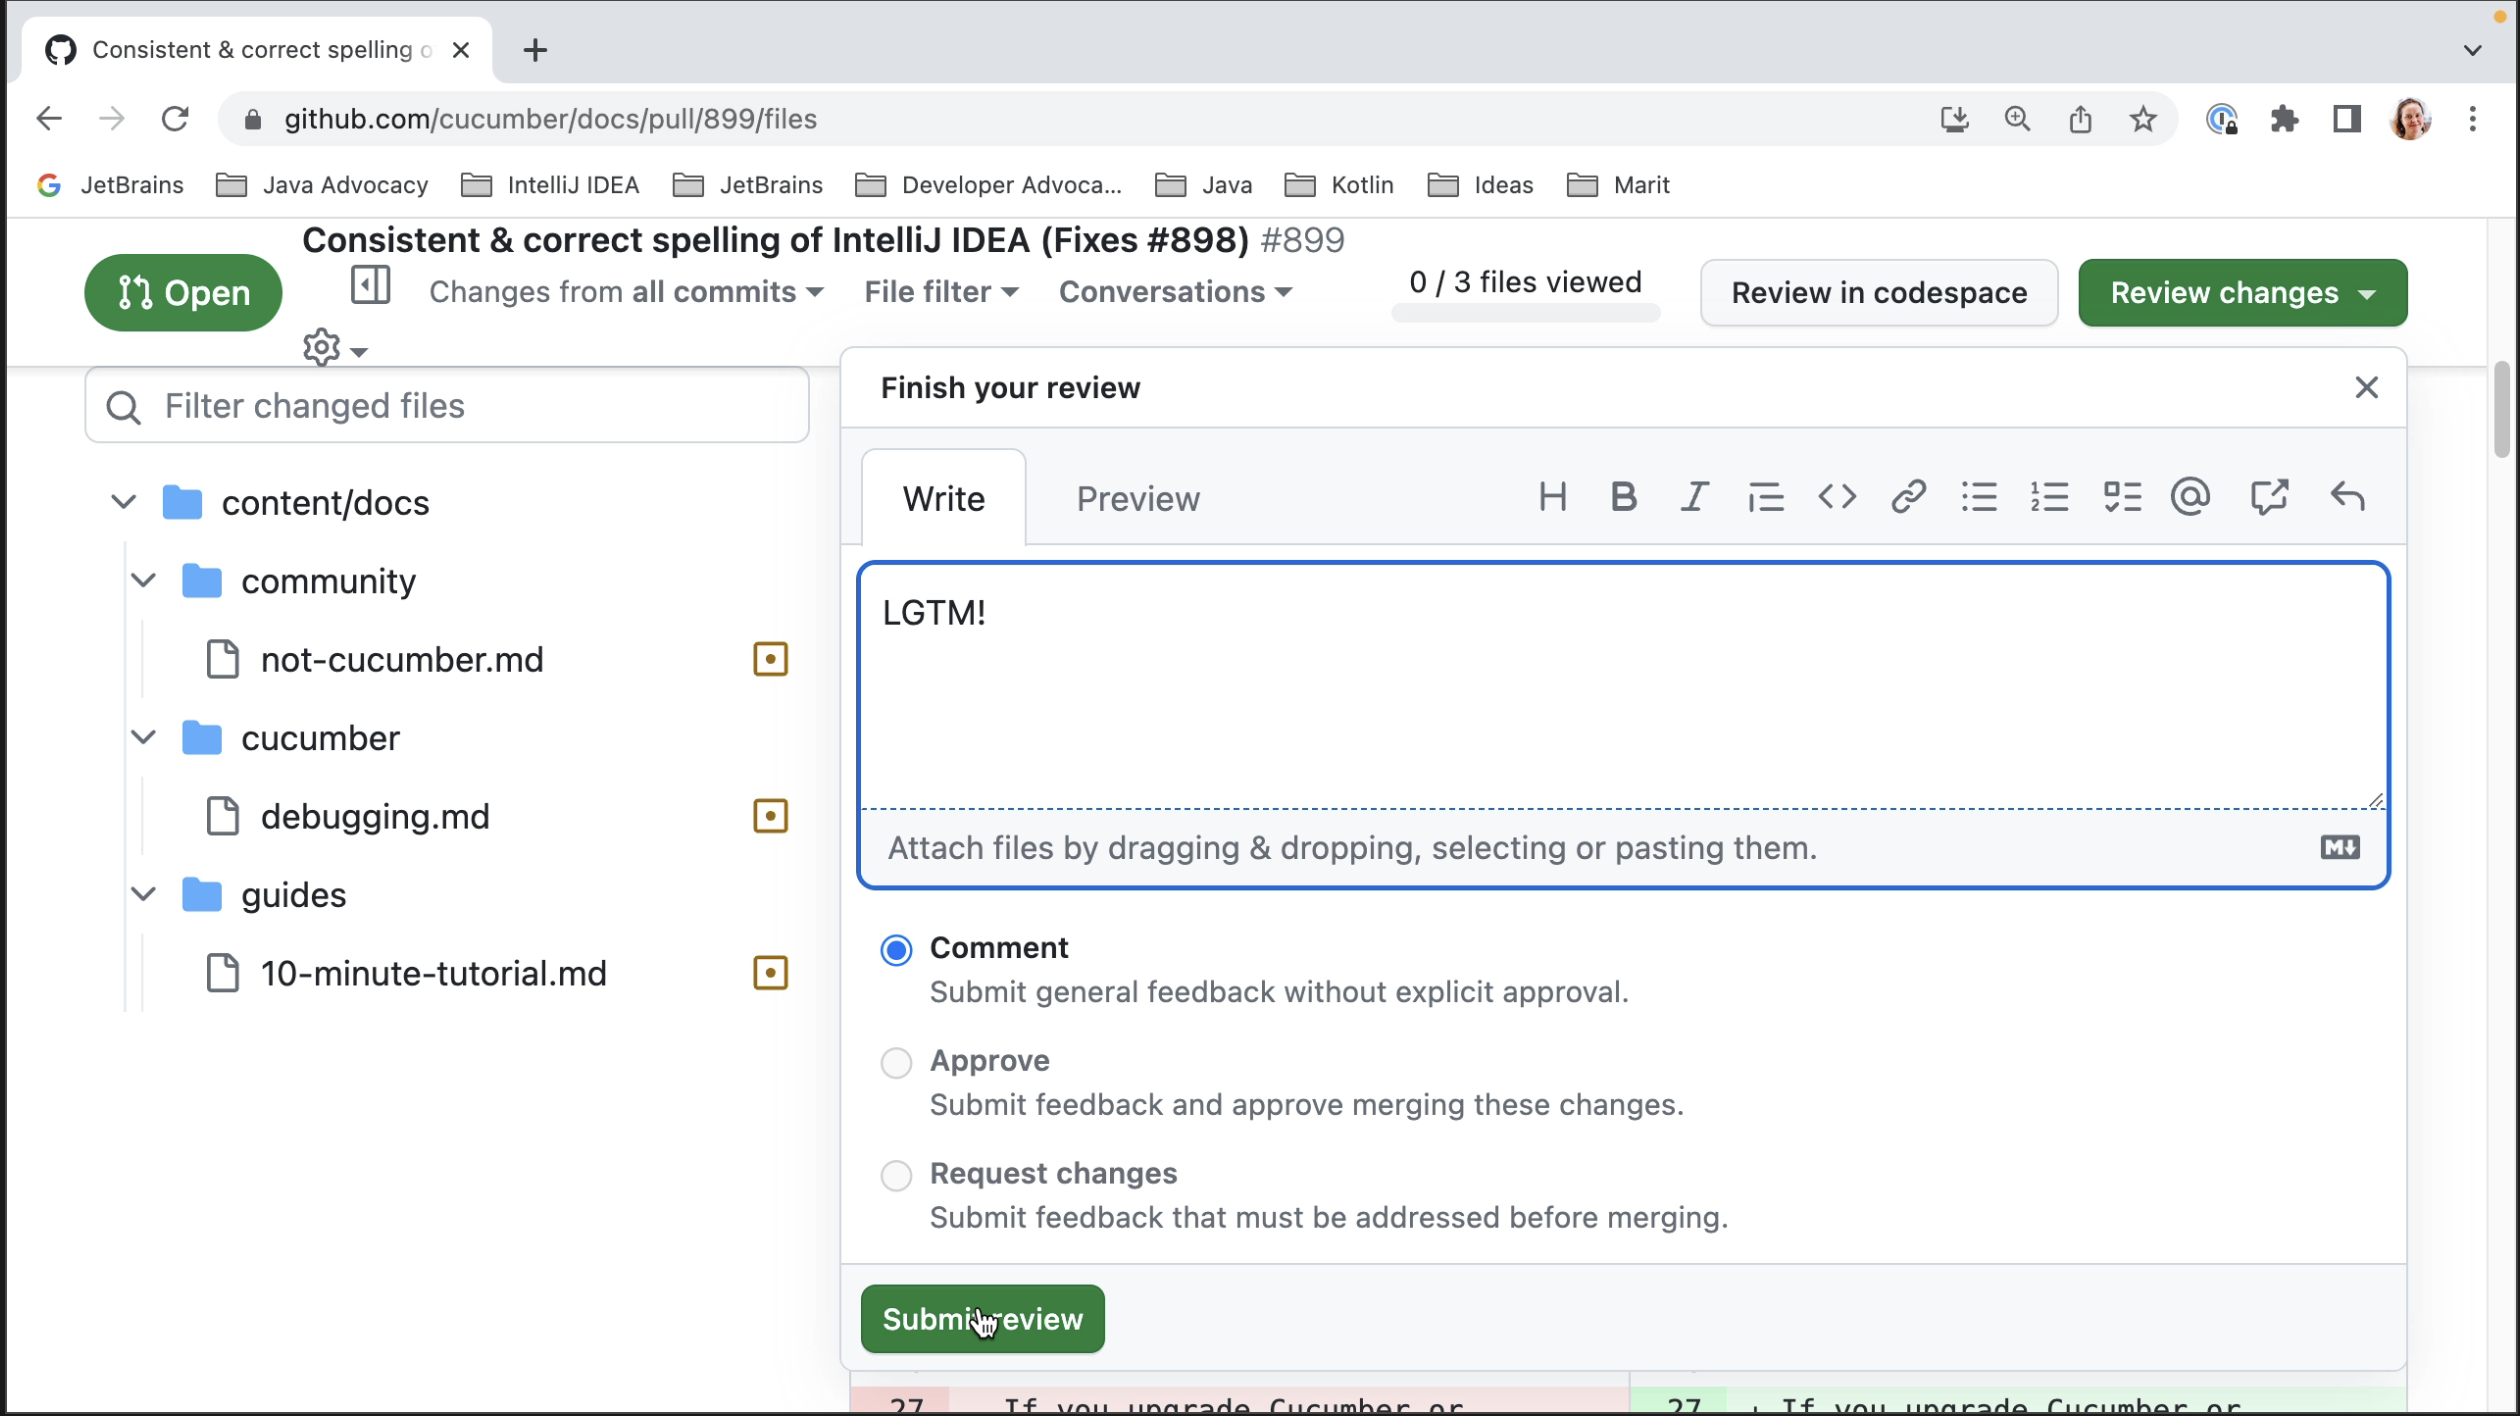
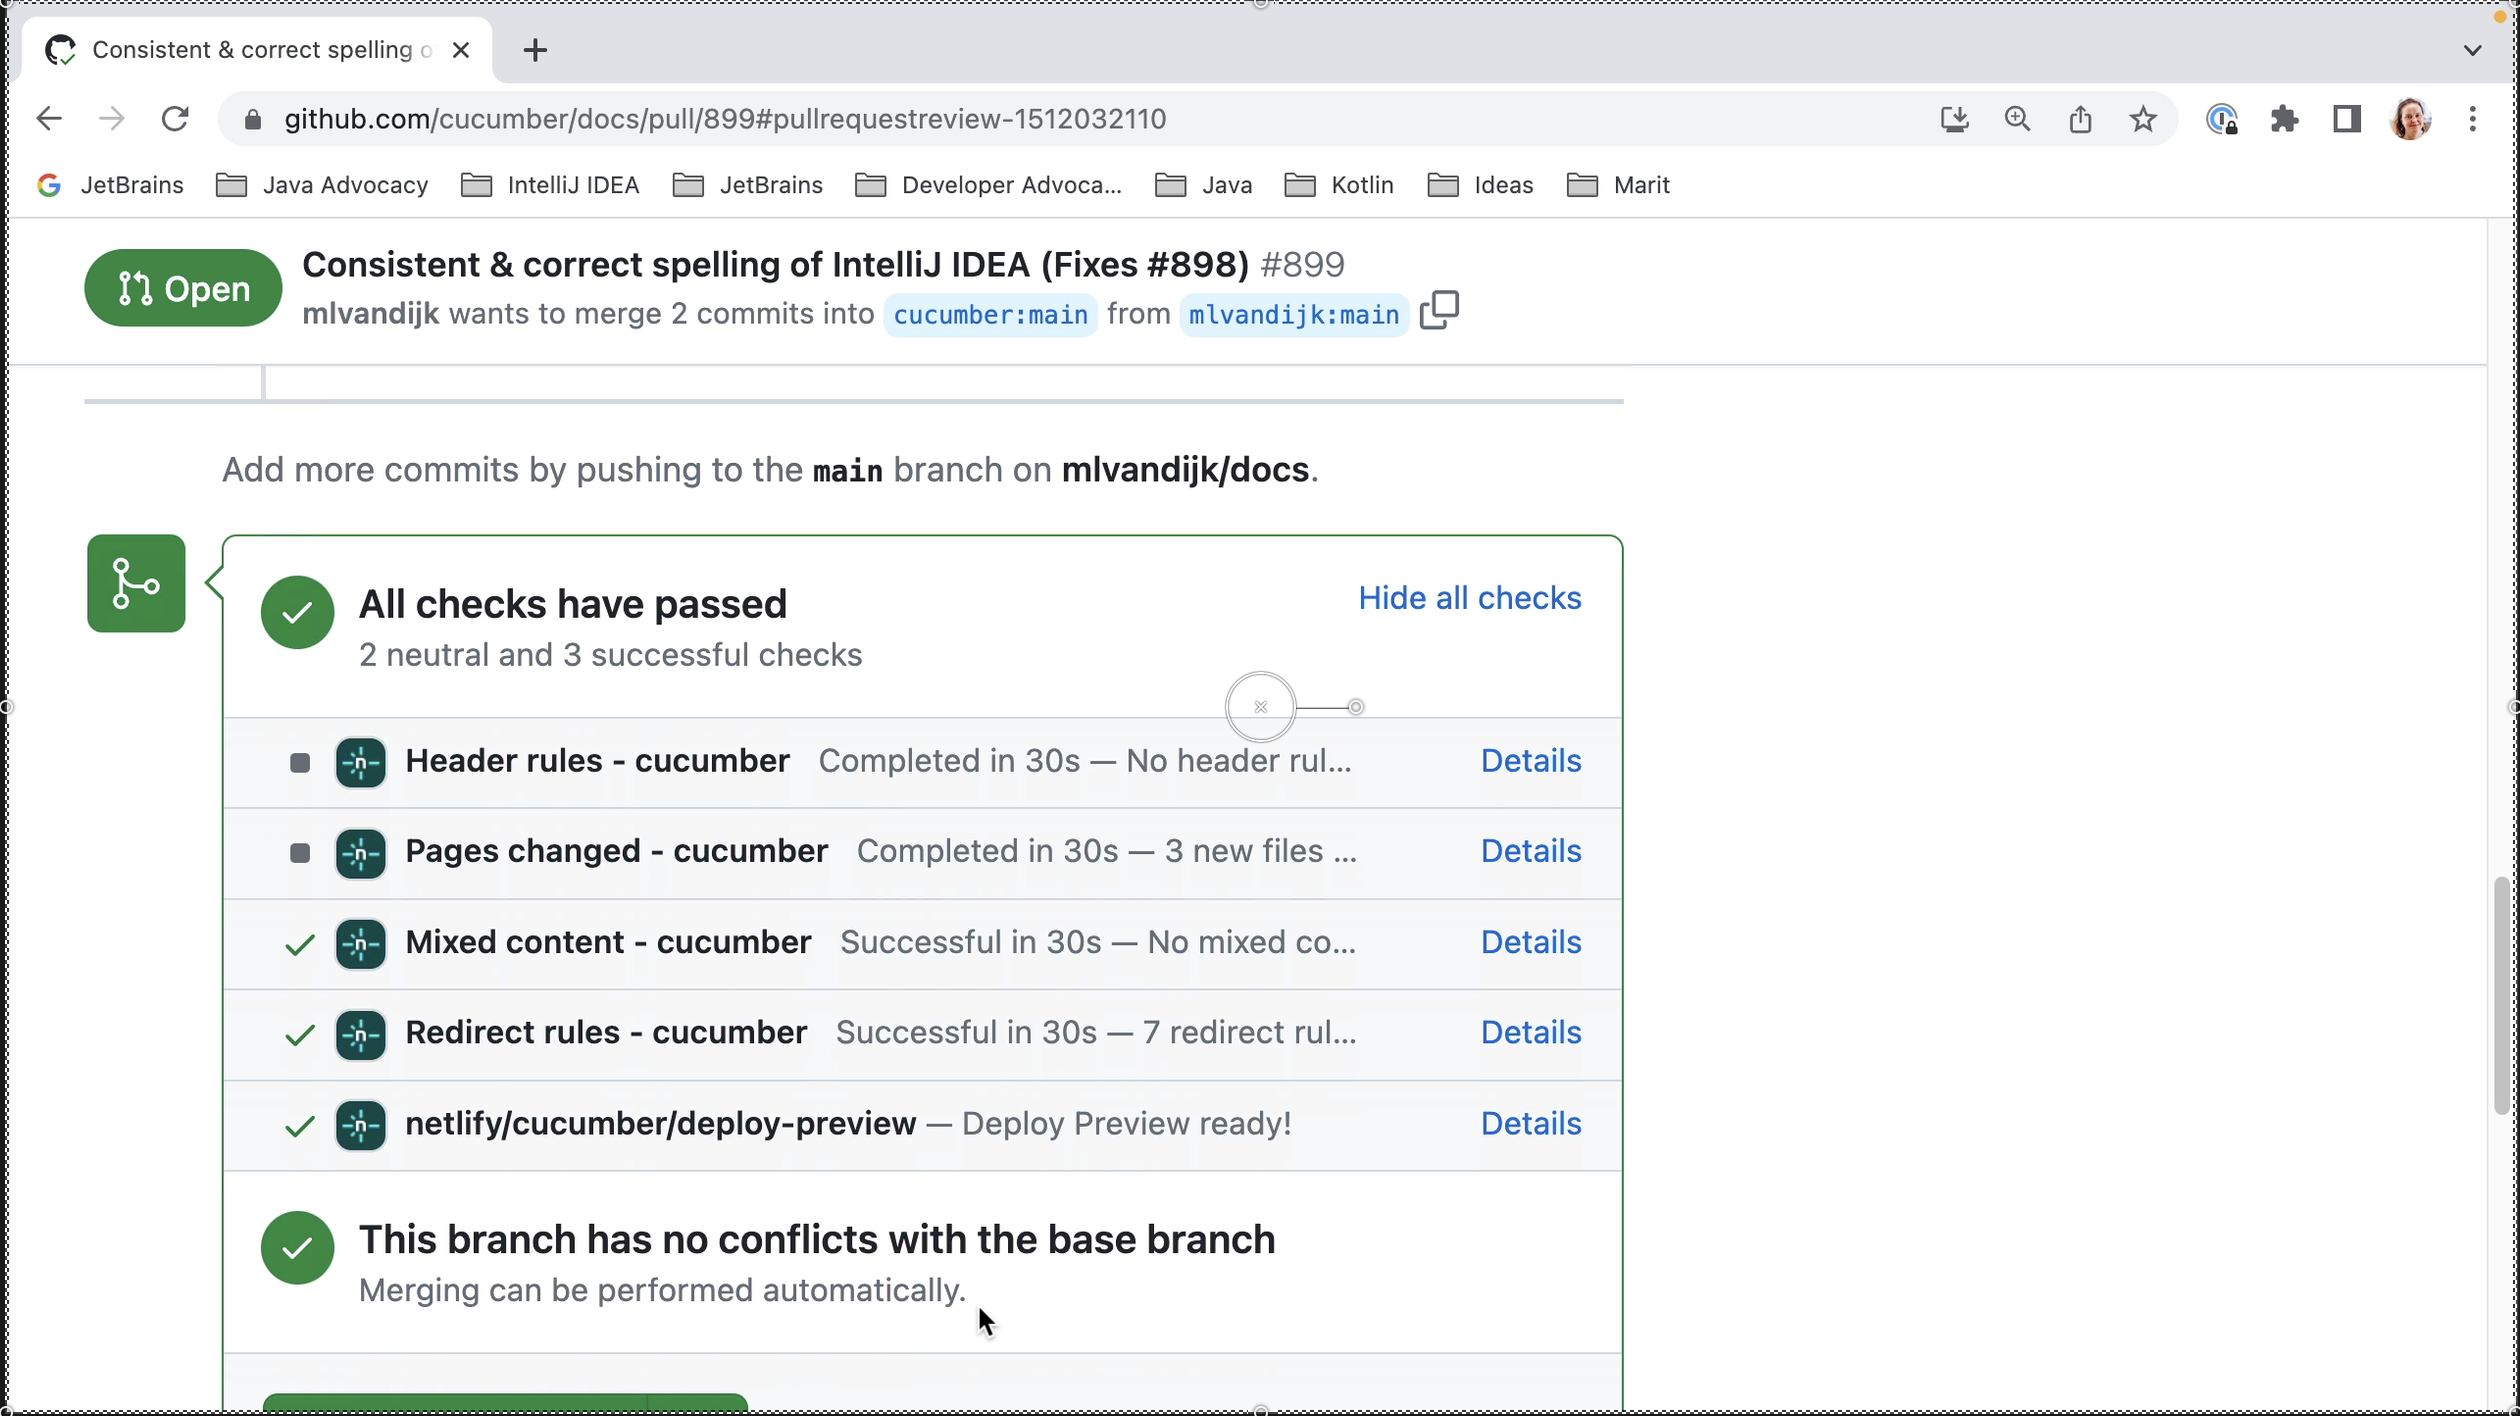
As you can see, reviewers can comment on your PR, approve the PR or request changes which must be addressed before merging. A project might have other checks set up that need to pass before merging. You might want to check that these checks pass and that there are no conflicts with the main branch.
Summary and shortcuts
In this blog post, we’ve seen how to do an open source pull request. For more information on what you can contribute and how to find something to contribute, please have a look at this video.
IntelliJ IDEA Shortcuts Used
Here are the IntelliJ IDEA shortcuts that we used.
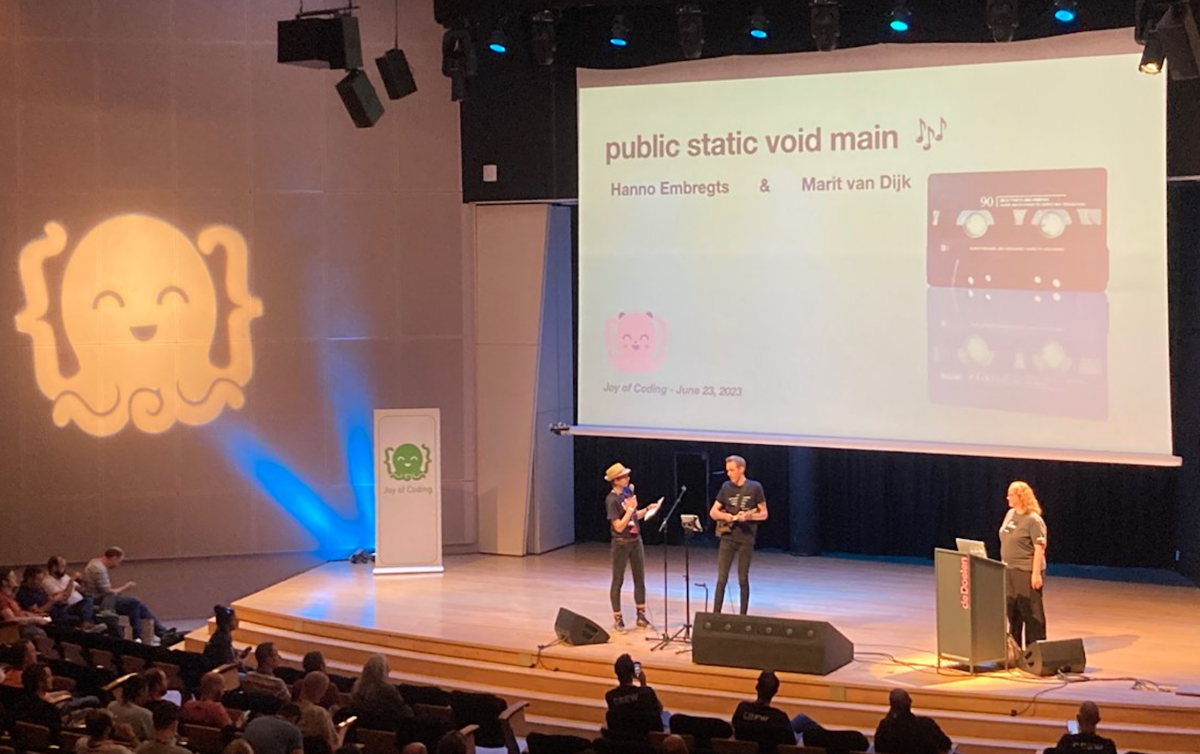
On June 23, 2023 Hanno Embregts and I performed a lightning talk / pop music quiz called “public static void main 🎶 “. This was based on a Tweet that said “I realized that you can sing “public static void main” like “Everybody dance now” and I can’t stop doing it”. Hanno found 15(!!) songs that would also work, and we created a pop music quiz.
On June 23, 2023 Hanno Embregts and I performed a lightning talk / pop music quiz called “public static void main 🎶 “.
A few weeks later, I saw a tweet that said “I realized that you can sing “public static void main” like “Everybody dance now” and I can’t stop doing it”. (And, I’ve been doing just that ever since.) Someone responded to my retweet by pointing out that this also works for Vamos a la playa.
I realised that you can sing "public static void main" like "Everybody dance now" and I can't stop doing it
So I pitched the idea to Hanno of doing a “pop music quiz” with different songs where we would replace the lyrics with “public static void main” and we could have the audience guess what the original song was. A few months later, Hanno contacted me to say he had found at least 15(!!) songs where this would work. Apparently, he had gone through the Top 2000 looking for songs he thought might work. So we got together to discuss this idea, write an abstract and figure out where to submit it too. We submitted to several conferences that offered lightning talks slots and … got accepted to Joy of Coding 2023! Coincidentally, this is also where I got started speaking, so I was very excited to return.
— Marit van Dijk ☕️🥑 (@MaritvanDijk77) June 23, 2023
Time constraints
Unfortunately, we had to cut some songs due to the 5-minute limit, so we selected the 6 we thought would work best. We selected a quiz tool, created the questions, and some videos to go with them using IntelliJ IDEA‘s live templates. The Joy of Coding organizers were extremely helpful in allowing us to take the last slot in the lightning talk line-up, letting us use our own laptop to run the quiz, and talking to the venue to get Hanno an audio monitor at the last minute.
Joy of Coding 2023
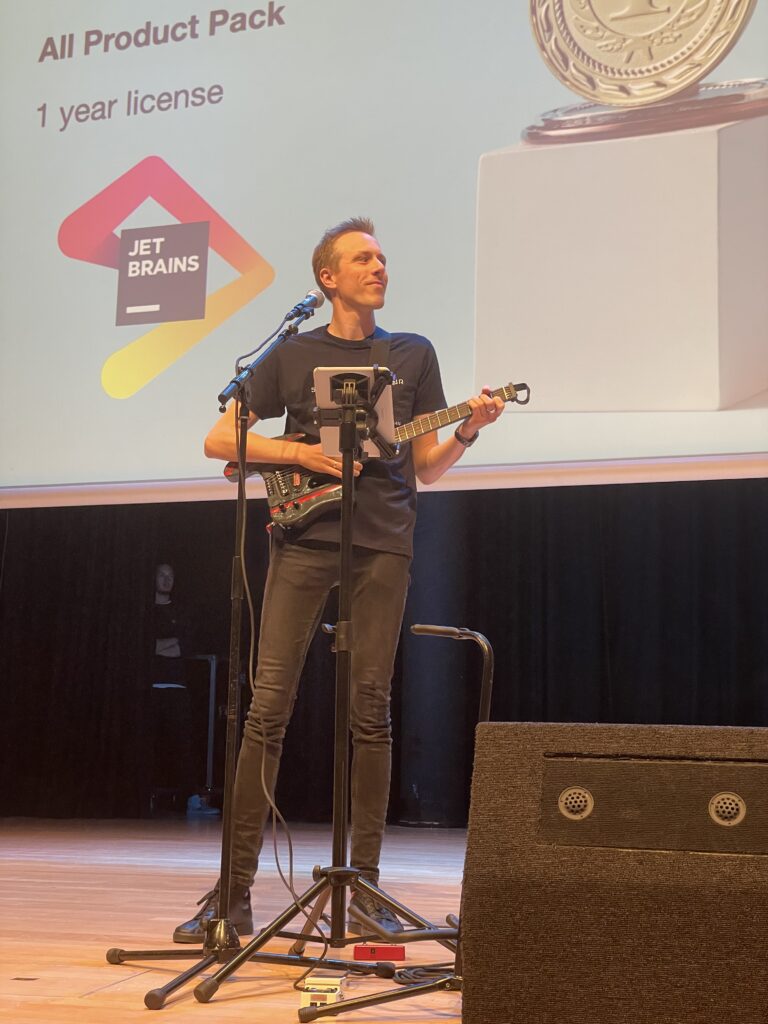
On the day of the conference, we had a lot of fun playing and singing along.
And to our surprise, we ended up with a tie for first place! Fortunately, we had some back-up songs we could use to settle this tie in a kind of “sudden death” match between the two top contestants.
Many thanks to original tweeters for the idea (I’ll forgive you for also getting the song stuck in my head), Hanno Embregts for the awesome collaboration, Yosuf Haydary for pictures and videos of the event and Joy of Coding for having us!
As a public speaker, one of the questions that comes up occasionally is “How did you get into public speaking?”. In my case another speaker and conference organizer convinced me to submit a lightning talk to their conference, which got accepted. it was both scary and exciting, but fun enough to keep doing it!
As a public speaker, one of the questions that comes up occasionally is “How did you get into public speaking?”. Everybody has their own personal story; this is mine.
Attending conferences
In my 20+ years in IT, I’d never had a job where it was normal for me to go to conferences. This changed when I joined bol.com, an online retail platform, in 2017. At bol.com, going to conferences was very common. As it turns out, I really loved going to conferences.
Some of the things I particularly enjoy are hearing about new technologies I might not yet be aware of, or new and different perspectives on technologies I already know. Also, I’m interested in hearing stories about challenges people face in other companies and industries, and how they solve their problems (either with or without specific tools). My favorite conferences are the ones where I come back with a bunch of ideas of new things to try. In addition, I very much enjoyed meeting people and discussing our thoughts on software development in the so-called “hallway track”; the conversations that happen in the hallway in between talks. While talks can often be watched online after a conference, meeting new people and having conversations with them only happens in person.
Meeting other speakers
To expose myself to more ideas, I created a Twitter account and started following speakers I liked and people I met at conferences. One of those people was Peter Hilton, whose talk I saw speak at CodeMotion Amsterdam 2017 and later met at Joy of Coding in 2017.
Peter was the one who convinced me to submit a lightning talk to Joy of Coding in 2018. He told me that as it was only 5 minutes, if I really didn’t like it, at least it would be over quickly. Of course, what he didn’t tell me is that it could be worse: I could end up liking it and wanting to do it again! Also, it wasn’t until I was accepted to do a 5-minute lightning talk that people told me that short lightning talks are actually harder than regular, longer talks. If you only have 5 minutes to get your point across, you have to be really clear about what that point is!
Picking a topic for my first talk
For my very first talk, I chose a topic I was very enthusiastic about and actively using at the time: Cucumber & BDD. I had started using Cucumber the year before and even started making open source contributions to the Cucumber documentation as well as cucumber-jvm (the Java implementation of Cucumber). My team at the time was using Cucumber to describe the intended behavior of our applications, and these automated tests helped safeguard this behavior by making sure we didn’t break it when making changes and adding new features. Being an active user and contributor, I had way more to say about this topic than I could fit into 5 minutes, so I had to bring it down to several core points I wanted to make.
Practice makes perfect
Since it was imperative that I keep it under 5 minutes (I was told that the microphone would be cut after 5 minutes; no pressure!), I practiced my talk. A lot. The way I did this was by setting a 5-minute timer on my phone, and practicing my talk in the mirror. Every time I went over the 5 minutes, I would think about what went wrong. Often, it would be a tangent I went on that would take too long, so I would try to cut that and try again. Eventually I managed to whittle it down to 5 minutes and focus on the core idea(s) I wanted to get across.
Conference day!
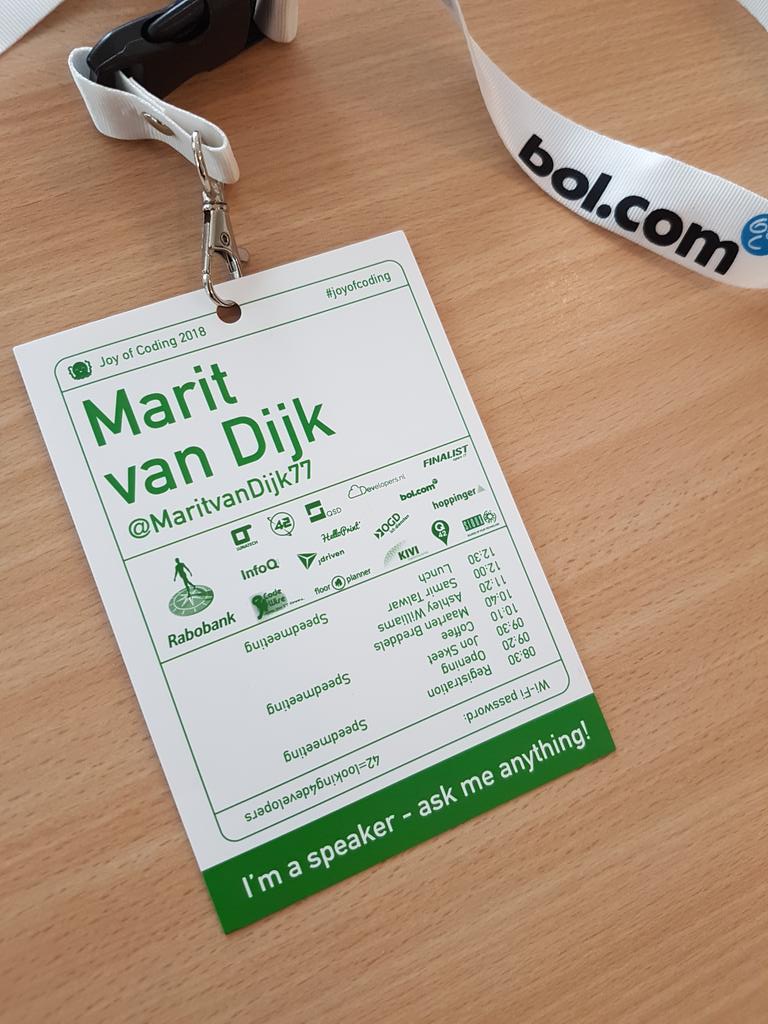
On the day of the conference, I was extremely nervous but also excited. It was pretty exciting to see my name on a speaker badge!
First speaker badge with my name on it!
There were several people doing lightning talks and the organizers had been kind enough to let me go on first, so I didn’t have to continue to get more nervous while waiting for my turn. Standing on stage for the first time was weird; it can be hard to know if the audience likes your talk if they just sit there quietly.
Fortunately I managed to get my story out within the 5-minute limit, and then I got to sit and watch the rest of the lightning talks. I’ll admit I didn’t really process a lot of them as I was feeling like a deflated balloon after my talk; or at least that’s how I describe the feeling of coming down off the adrenaline after a talk. To be honest, I still feel that way after talks these days, despite having way more of them now. It is not as bad as the first time, but I still get nervous before each talk and still need a bit of time to recover after. And yet, I still continue to do it!
Upsides of public speaking
This is how I got into public speaking. It started with a lightning talk on a topic I was enthusiastic about, and based on personal experience. It’s lead me to speak at many other conferences, share my knowledge and experience, meet many more amazing people and learn from them. And speaking is now part of my job as a Developer Advocate at JetBrains!
If you’re working on a real world project, you’re probably using external dependencies. You might need to analyze which dependencies your application uses. For example, you may want to find out how a particular version of a dependency ended up in your application. Let’s take a look at how IntelliJ IDEA can help you to analyze dependencies.
Using the Dependency Analyzer
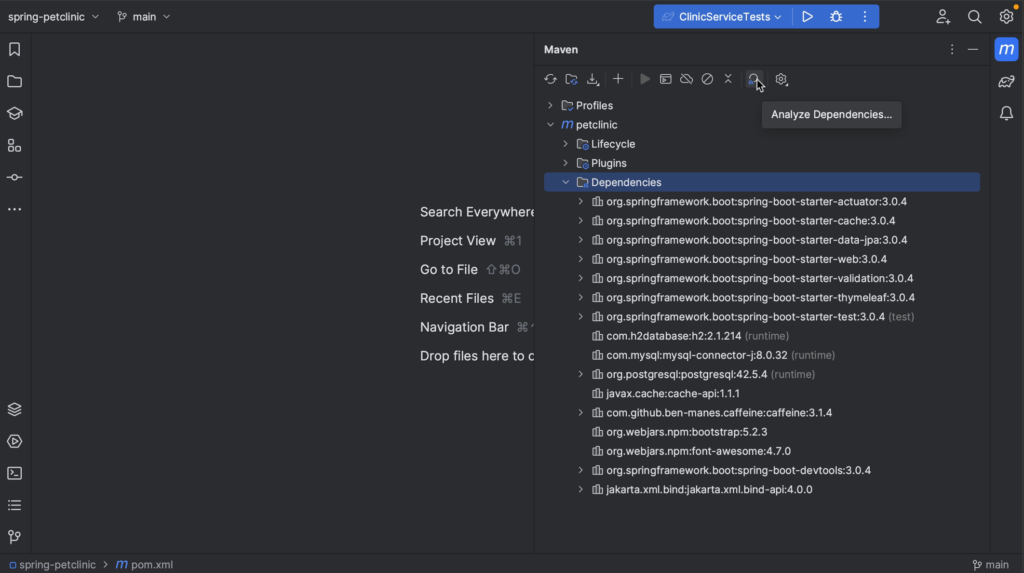
We can view our dependencies in the Maven or Gradle tool window. Here, we can expand dependencies to show their transitive dependencies, or collapse them again.
Open the Dependency Analyzer
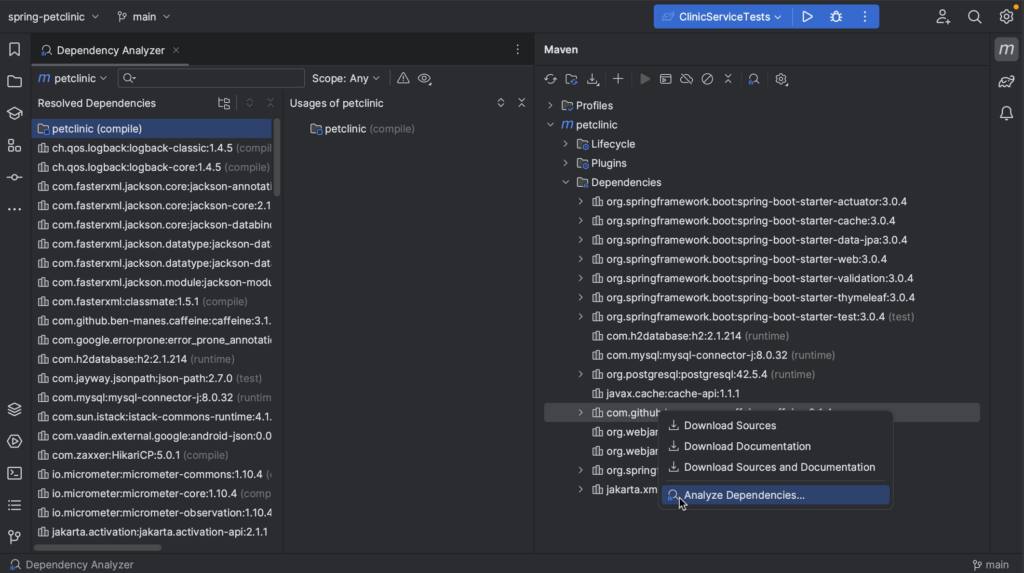
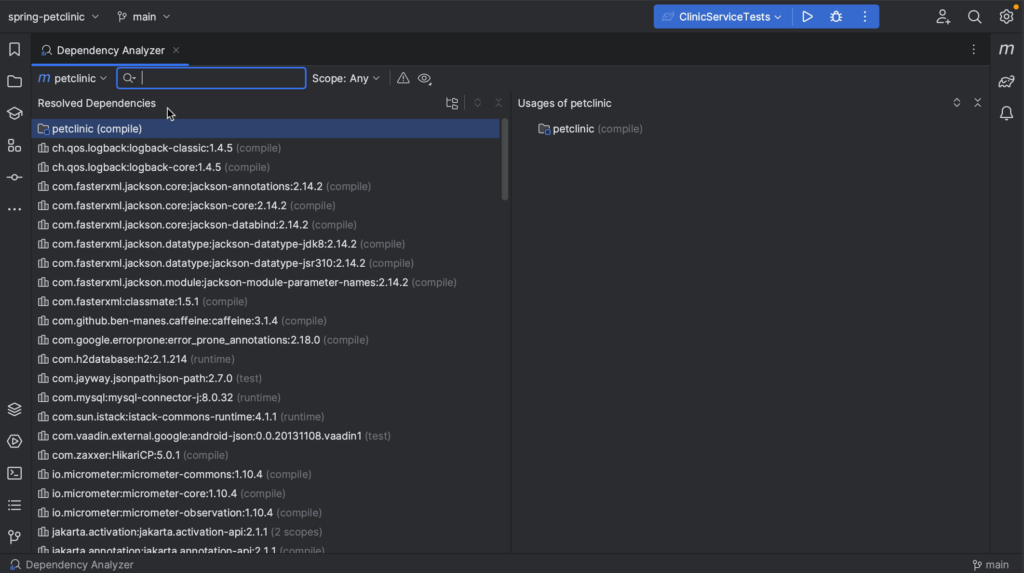
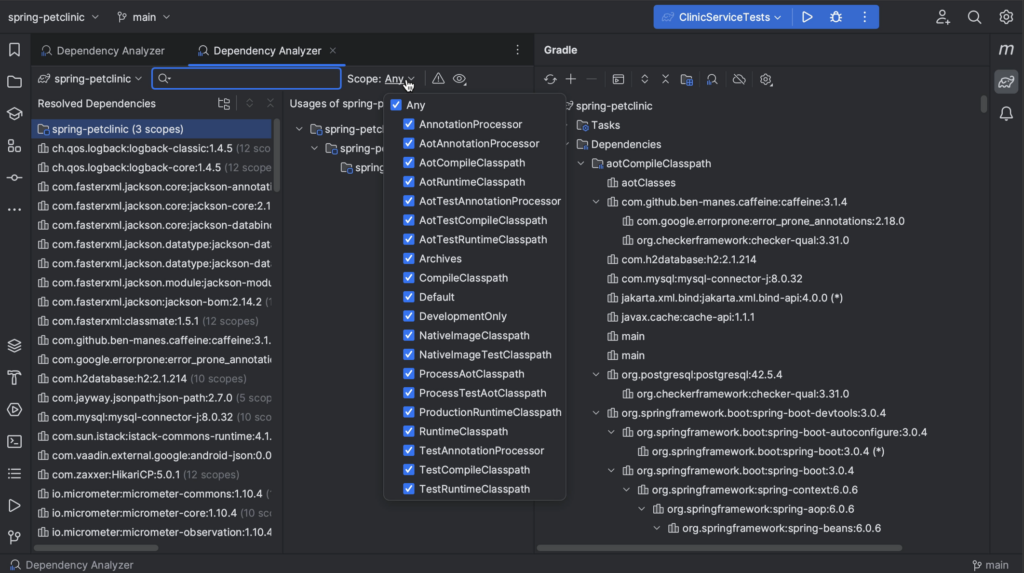
We can open the Dependency Analyzer from the Maven or Gradle tool window by clicking the Analyze Dependencies… button. This will open the Dependency Analyzer showing the Resolved Dependencies on the left and their Usages on the right.
Alternatively, we can right-click a dependency in the Maven or Gradle tool window and select Analyze Dependencies from the context menu. This will open the Dependency Analyzer with the dependency selected.
We can hide all tool windows (⇧⌘F12 on macOS / Control+Shift+F12 on Windows/Linux), so we can focus on the dependencies.
Viewing dependencies in the Dependency Analyzer
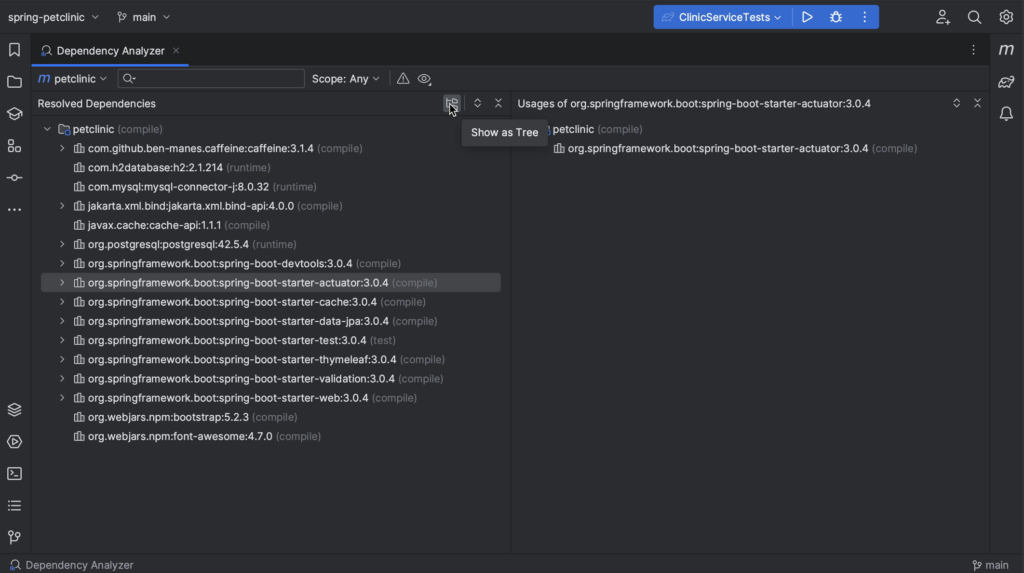
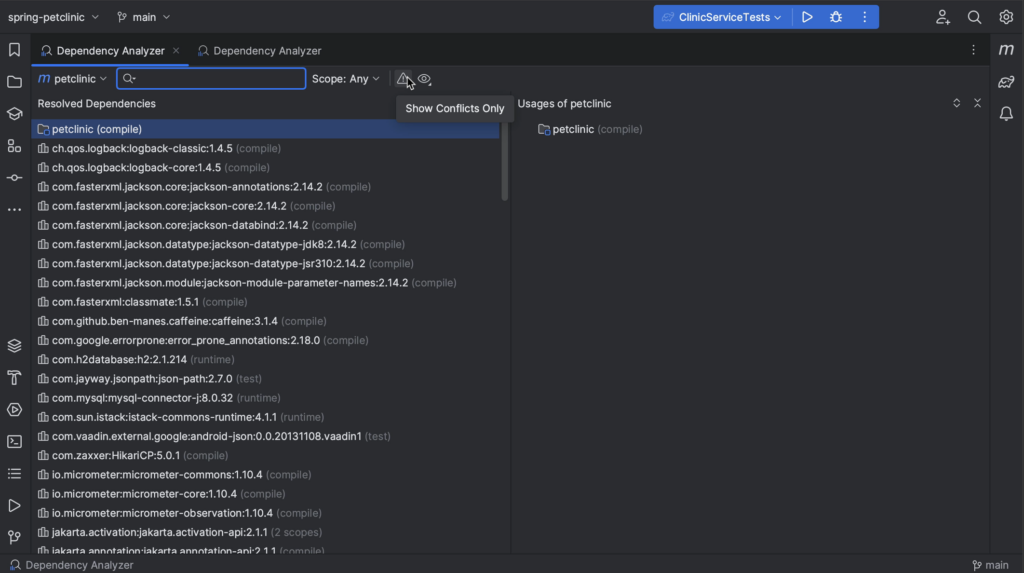
We can view the dependencies as a tree by clicking the Show as Tree button and Expand or Collapse them as needed by pressing the corresponding buttons.
We can also click the View Options button and toggle Show GroupId, to show the GroupId for dependencies or not.
Finding a specific dependency
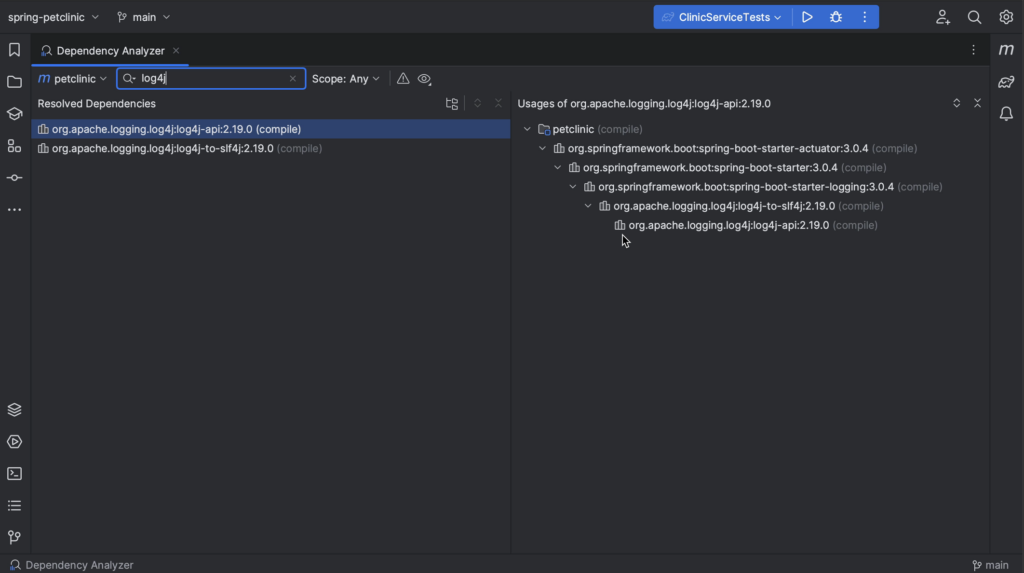
To see where we are getting a specific version of a particular library, we can search for that dependency. For example, when we search for “log4j” we see that we are only getting it via this spring-boot-starter, and it’s a version newer than the one where log4shell was fixed.
Finding conflicts
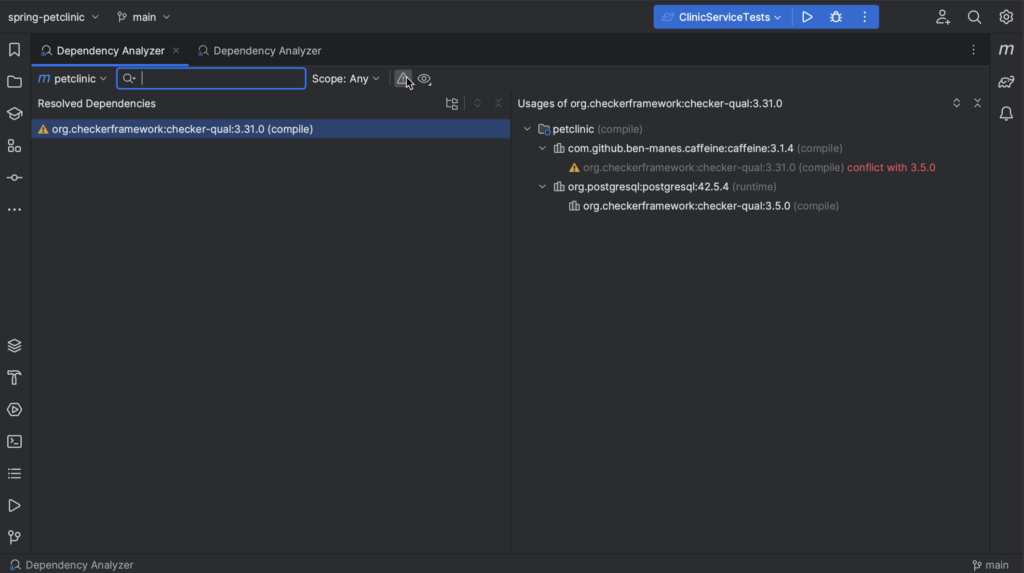
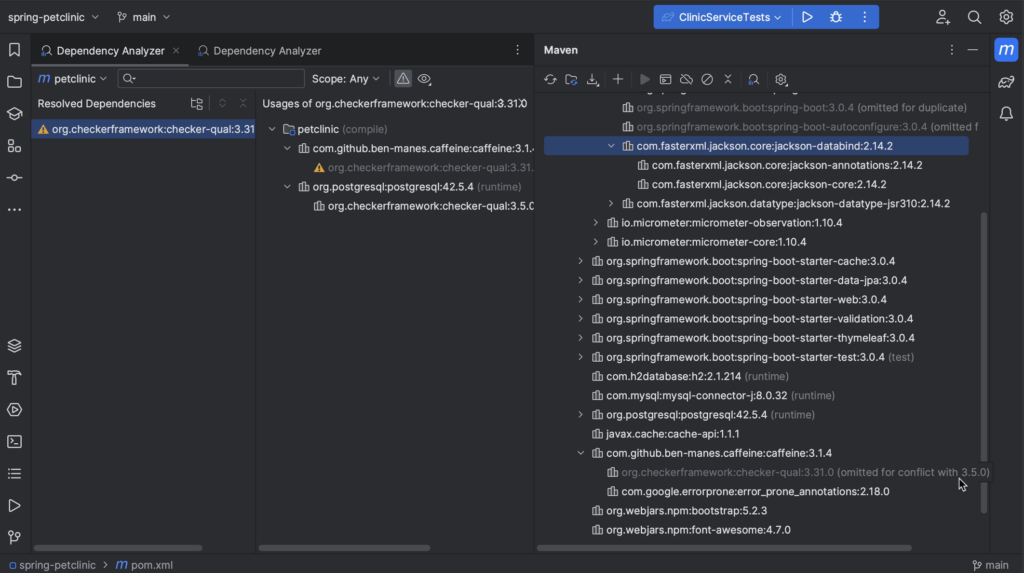
We might only want to look at dependencies that have conflicts. When we select the Show Conflicts Only button, we see only dependencies that have conflicts. In this example, we see that there is a conflict with the checker framework dependency. Fortunately, it’s been resolved; we see that one version is greyed out. If we go back to the Maven tool window, we see that this version has been omitted for conflict. We can see that the version we are using is 3.5.0 which we get from postgres.
Selecting scopes
We can also select a scope (for example, if we want to look at our test dependencies or exclude them from analysis). Since we’ve opened the Dependency Analyzer from the Maven tool window, we see the Maven scopes.
When we open the Dependency Analyzer from the Gradle tool window, the list of scopes will contain Gradle scopes.
More context
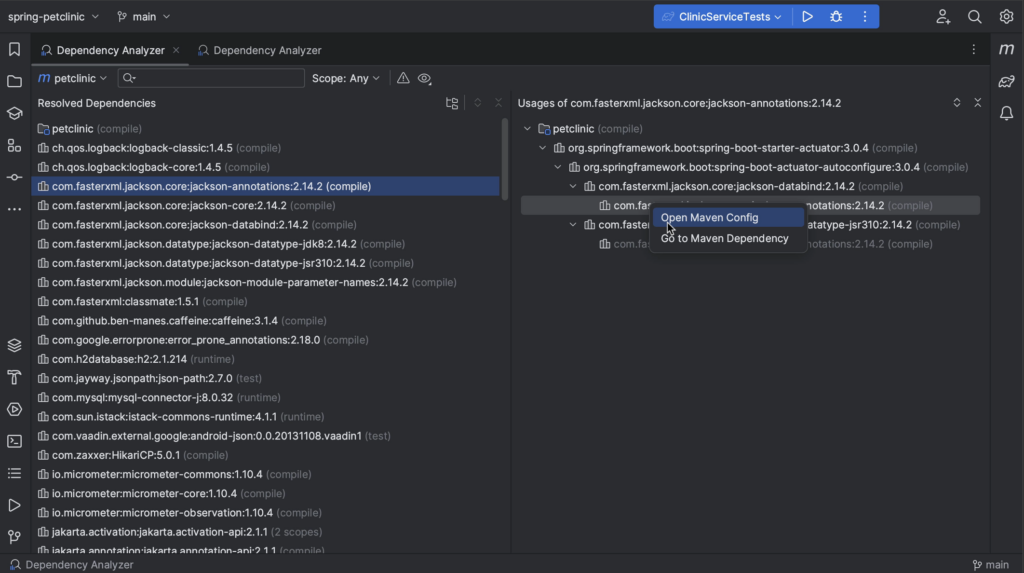
For more context, we can click a specific dependency and select Open Maven Config to open its pom.xml or Go to Maven Dependency to open the location in the pom.xml where this dependency is declared.
Using the Dependency Diagram
If you are using IntelliJ IDEA Ultimate, you can also view your dependencies as a diagram.
Show Diagrams
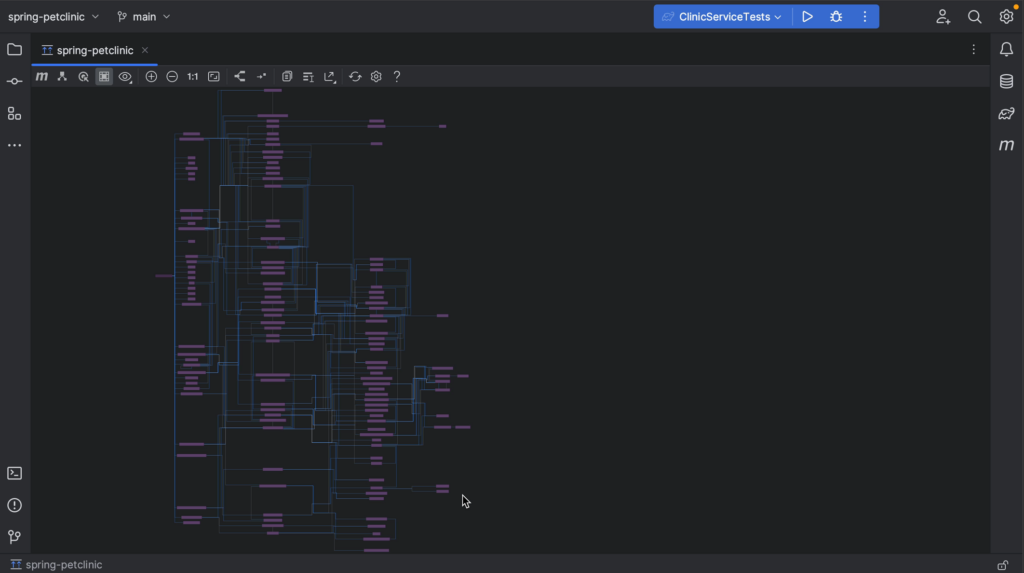
We can open diagrams either by right-clicking the project in the Project tool window and selecting Diagrams | Show Diagrams, or by using the shortcut ⌥ ⇧ ⌘ U (on macOS) or Ctrl+Alt+Shift+U (on Windows/Linux). You’ll notice this gives you several diagram options to choose from. In this case, we’re interested in the Gradle Dependencies, so we select that one. We can hide all tool windows (⇧⌘F12 on macOS / Control+Shift+F12 on Windows/Linux), so we can focus on the diagram.
Zoom in
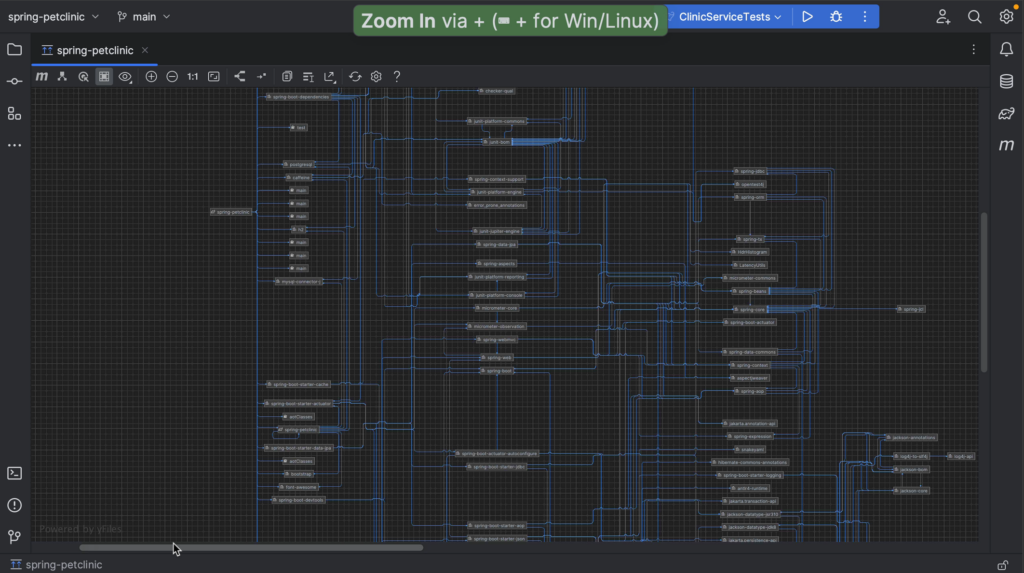
If the project we’re looking at pulls in a lot of transitive dependencies, like this example, the diagram can be quite large. We can zoom in and out using the + and – keys, or the + and – buttons in the diagram window.
Finding a specific dependency
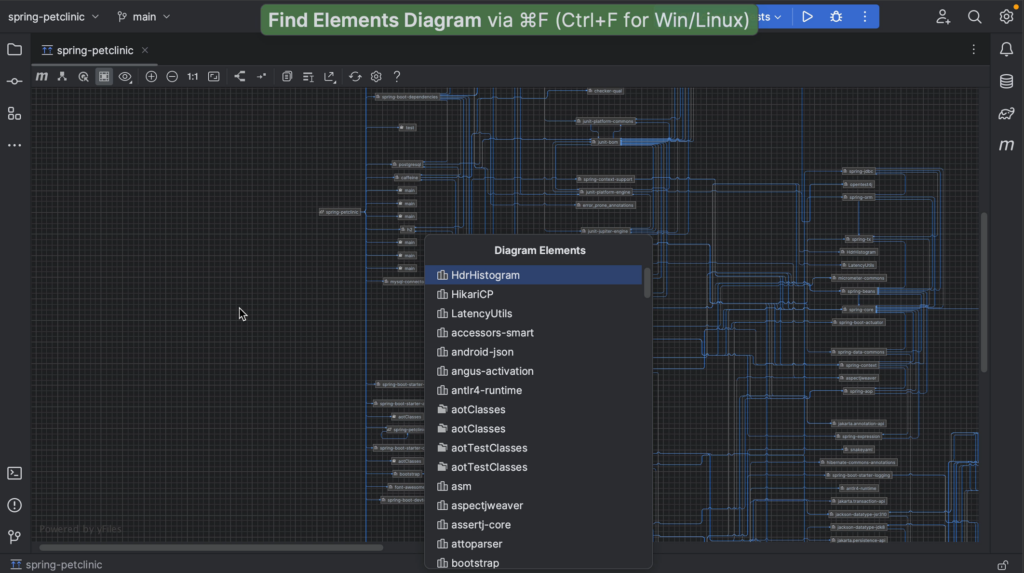
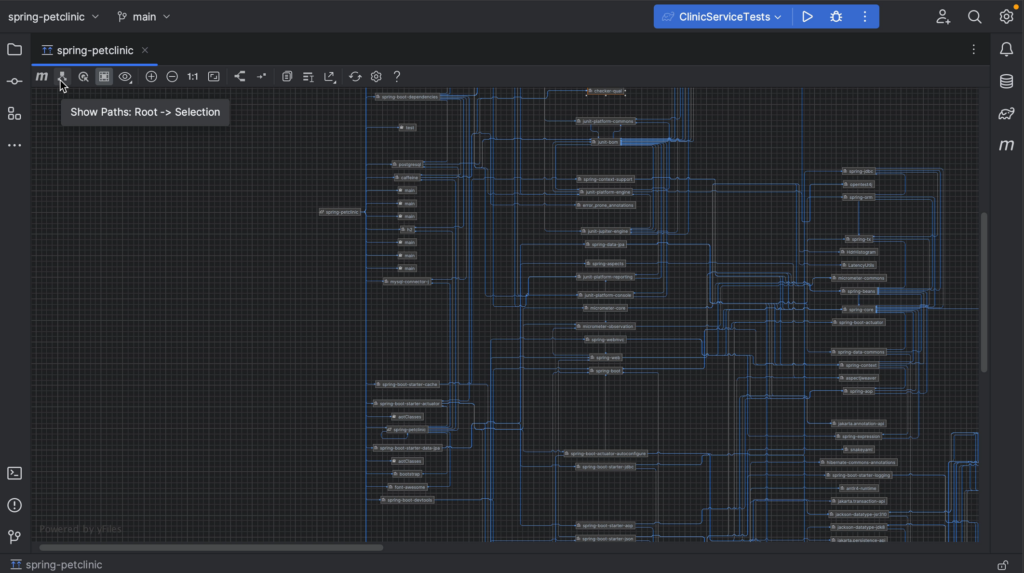
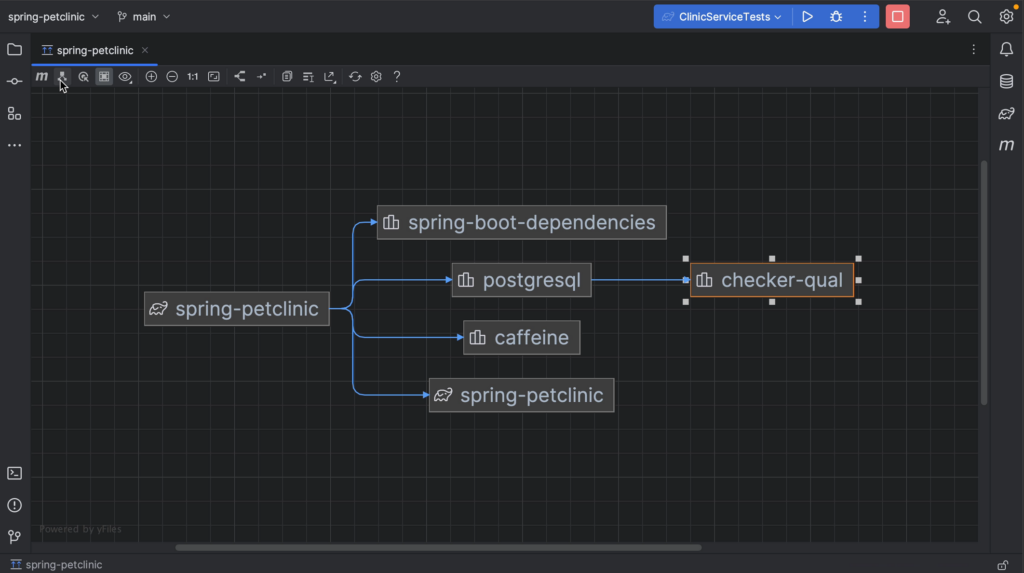
To look for a specific dependency and see where we get it from, we can search for this dependency using ⌘F (on macOS) or Ctrl+F (on Windows/Linux) to find it in the diagram. Using the button Show Paths: Root -> Selection, we can check the path for this dependency and click related dependencies to follow the path to the root.
Focus on related nodes
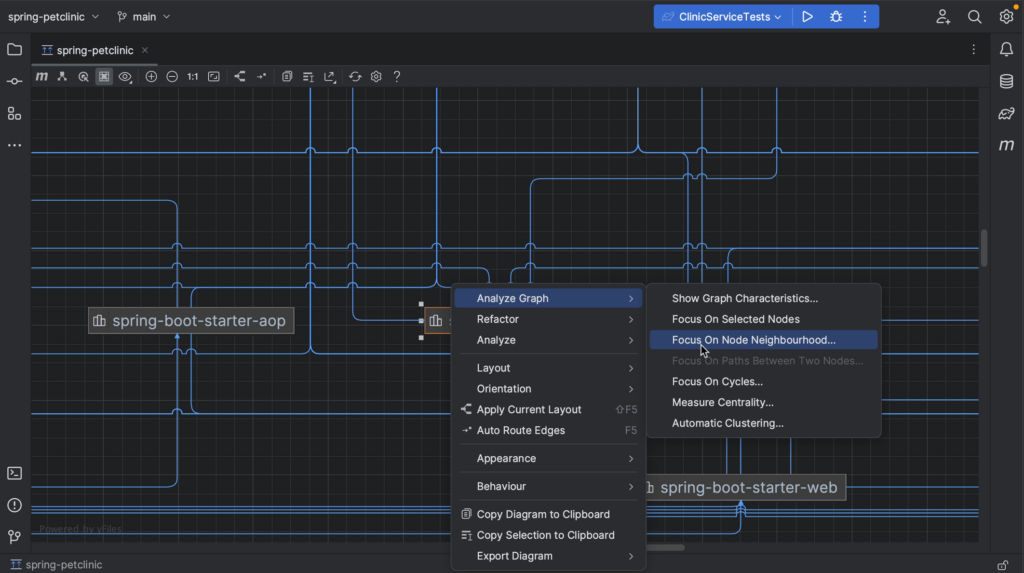
We have other options to look into specific dependencies. For example, we can zoom in on a specific dependency and the related nodes. Right-click the dependency you’re interested in, and from the context menu, select Analyze graph > Focus on Node Neighbourhood. This will give you several options. In this example, we’ll look at both directions. When we are done, we can reopen Analyze graph context menu and select Drop focus.
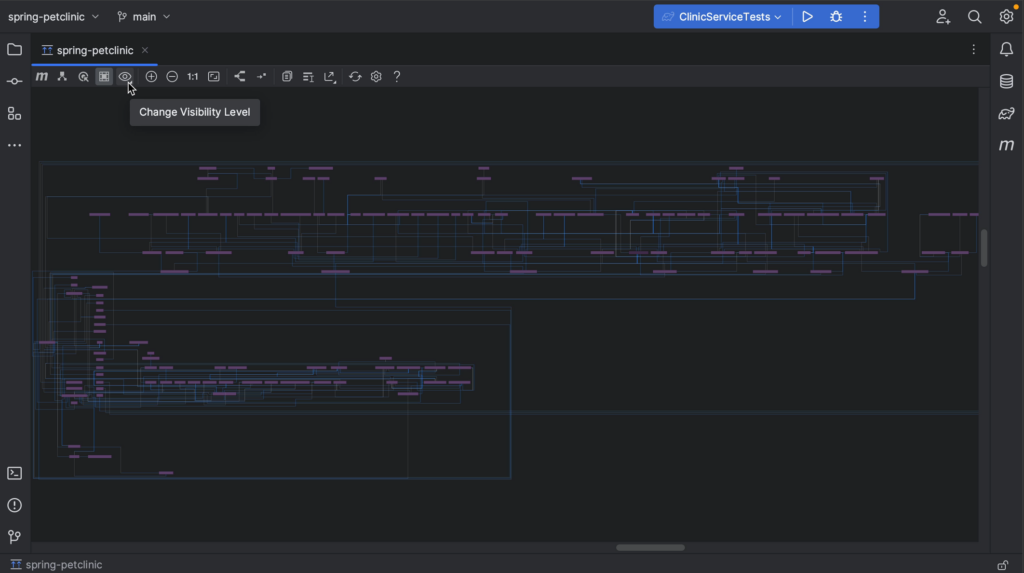
Select scopes
We can change the visibility level, by clicking the Change Visibility Level button for example if we want to focus on compile or runtime dependencies only.
Summary and Shortcuts
Now we know several ways to analyze our project’s dependencies in IntelliJ IDEA.
IntelliJ IDEA Shortcuts Used
Here are the IntelliJ IDEA shortcuts that we used.
If you’re working on a real world project, you’re probably using external dependencies. You might need to analyze which dependencies your application uses. For example, you may want to find out how a particular version of a dependency ended up in your application. Let’s take a look at how IntelliJ IDEA can help you to analyze dependencies.
There are several reasons why you might want to move a commit to a different branch. Let’s take a look at some of them.
Committed to the wrong branch
You’re working on a new feature, but an urgent bug came in. You fixed the bug and committed the fix, but oops… you forgot to create a new branch for the bugfix! Now this bugfix is on the wrong branch. How do we fix this?
Bugfix commit is on the wrong branch
Use cherry-pick to move the commit
I could redo the work, especially if it’s a small change, but … I don’t want to! Luckily, there is a better way.
We only want to move this one commit from the feature branch to a separate bugfix branch. We can do this using Git’s “cherry pick” option from IntelliJ IDEA.
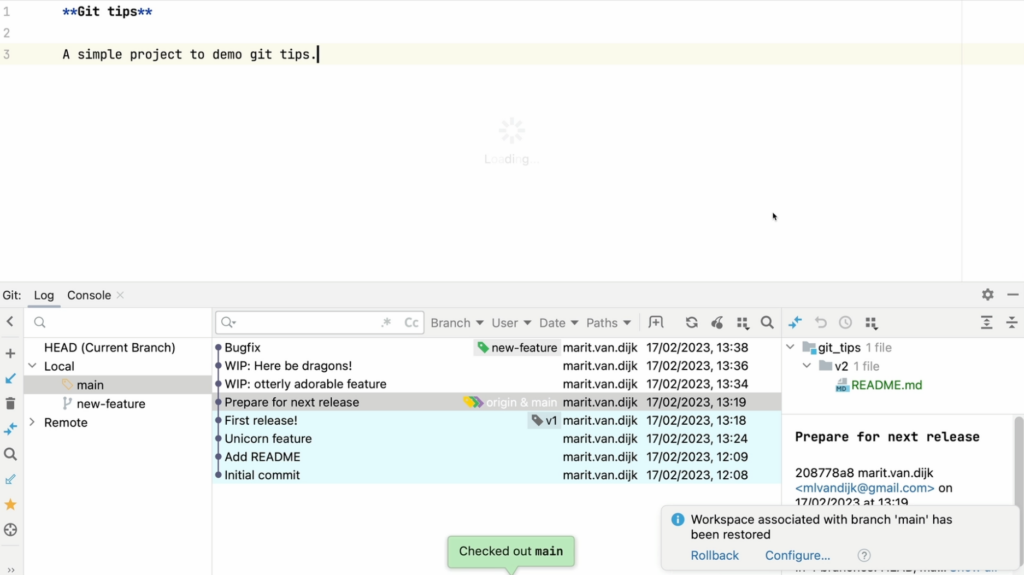
First, let’s go back to main and create the bugfix branch that we should have created in the first place.
Back on the main branch
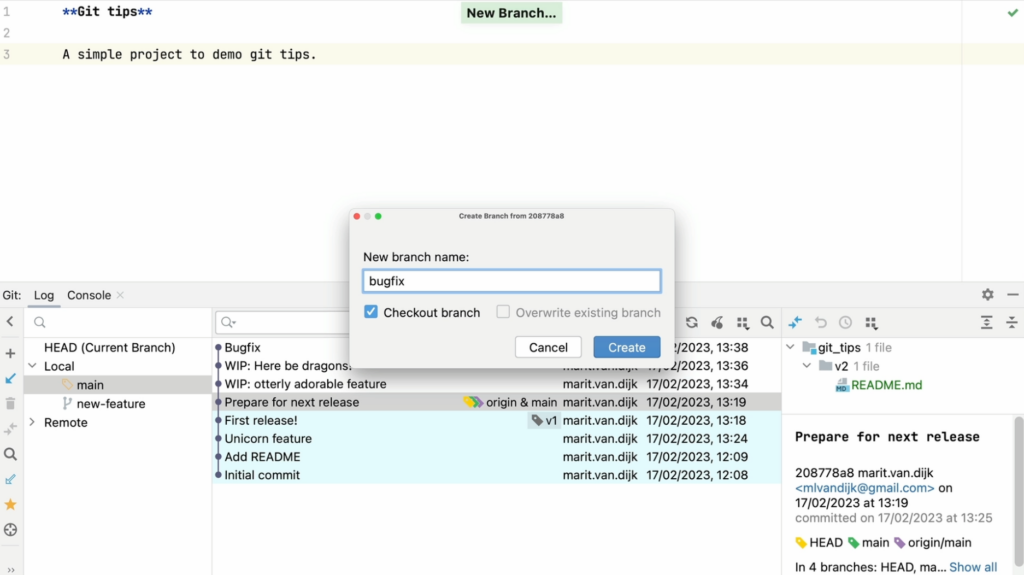
Once we’re back on the main branch, we can create a new branch named “bugfix”.
Create a new Bugfix branch
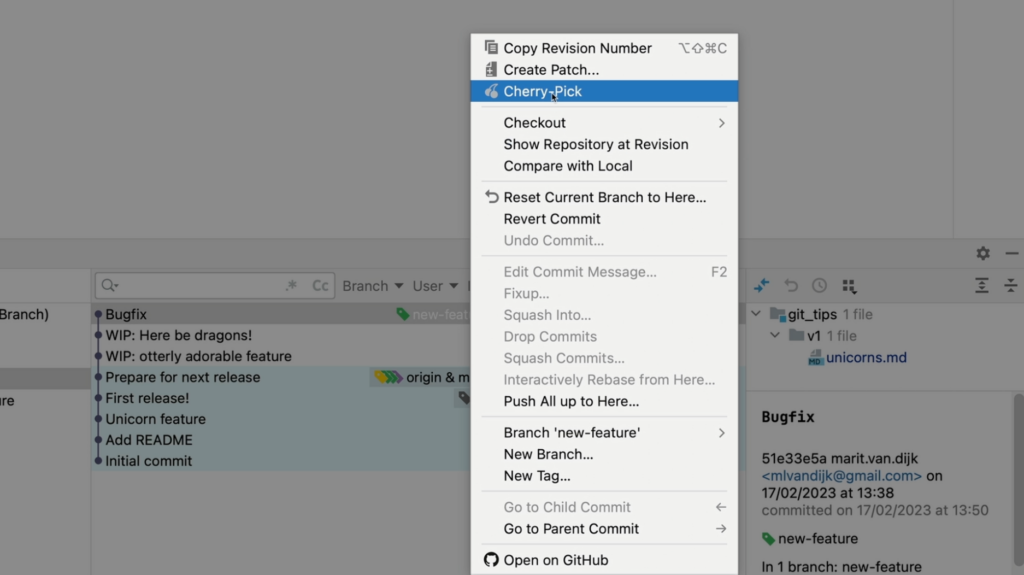
On the newly created branch, we can select the bugfix commit from the other branch and select Cherry-Pick to apply that commit to our current branch.
Cherry Pick the selected commit from the context menu
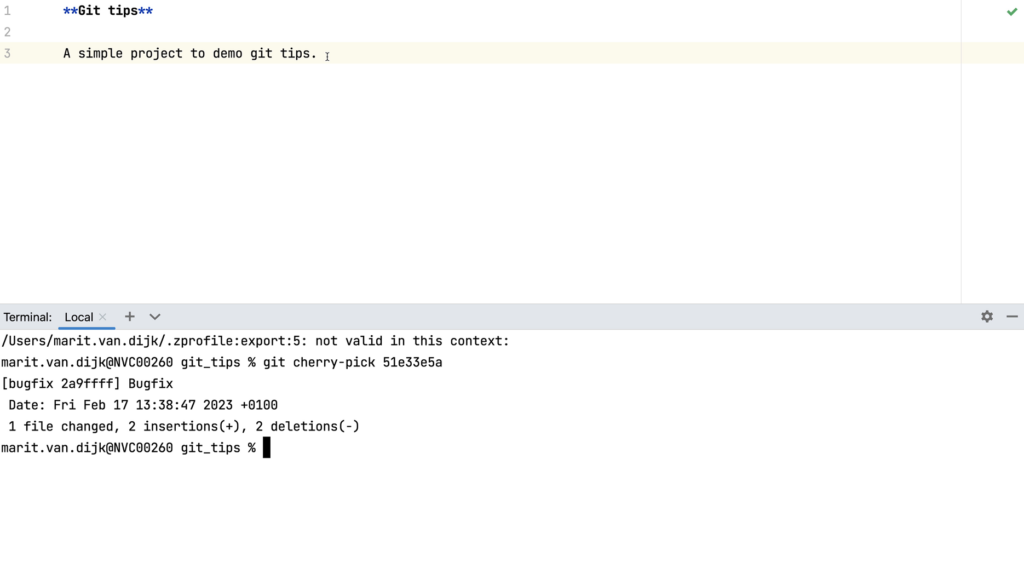
Cherry-pick from the command line
Yes, we can do this from the command linetoo, but there’s no cute cherry icon on the command line. To cherry-pick a commit from the command line, we can use the command git cherry-pick <commit hash>. We would need to find the commit hash of the commit we want to cherry-pick, which we can find for example in the Commit Details pane in the Git log window (see below).
Cherry-pick on the command line
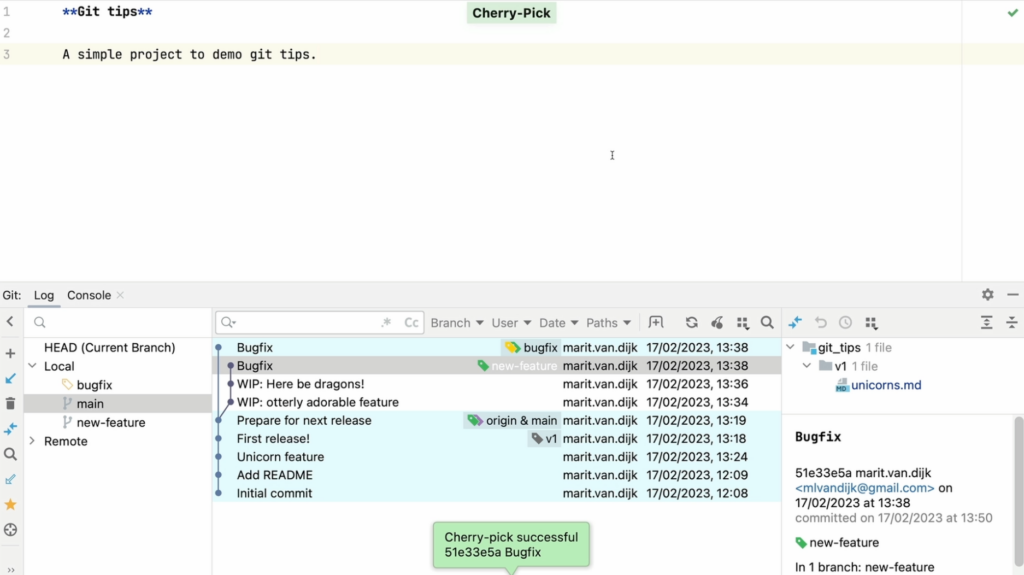
As we can see, the bugfix commit is now on the bugfix branch.
Cherry-pick successful
Other use cases for cherry-picking
Cherry picking can be useful in other situations too. Let’s take a look at some other use cases for cherry-picking.
Backporting a fix
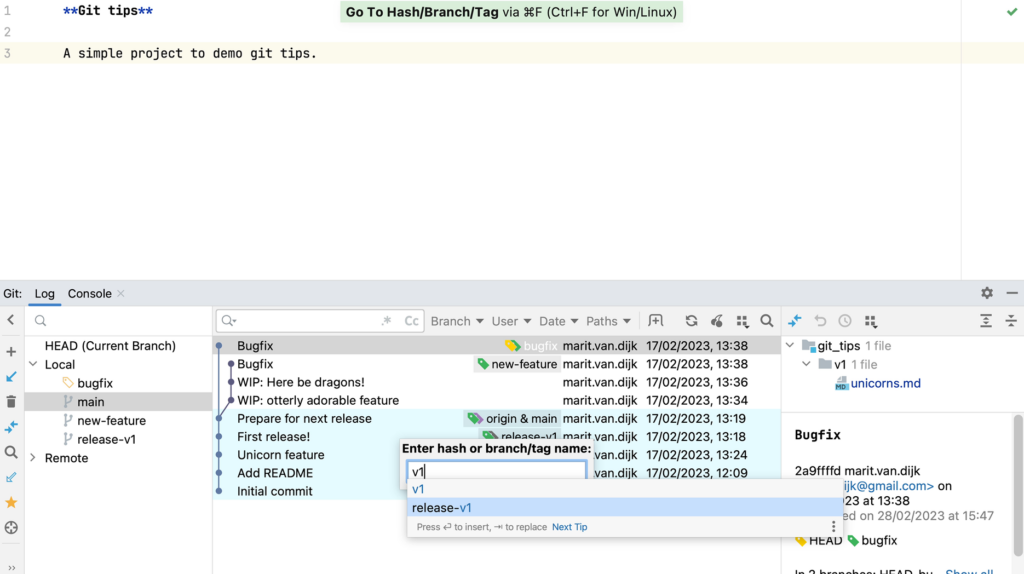
We can also use cherry-picking to backport a fix to a previous release branch. For example, let’s move our bugfix commit also to the v1-release.
To do so, first we need to look for the last release (v1). We can search for a specific commit hash, branch or tag name in the Git log (⌘ F on Mac or Ctrl+F on Windows/Linux).
Search Git log for Hash/Branch/Tag
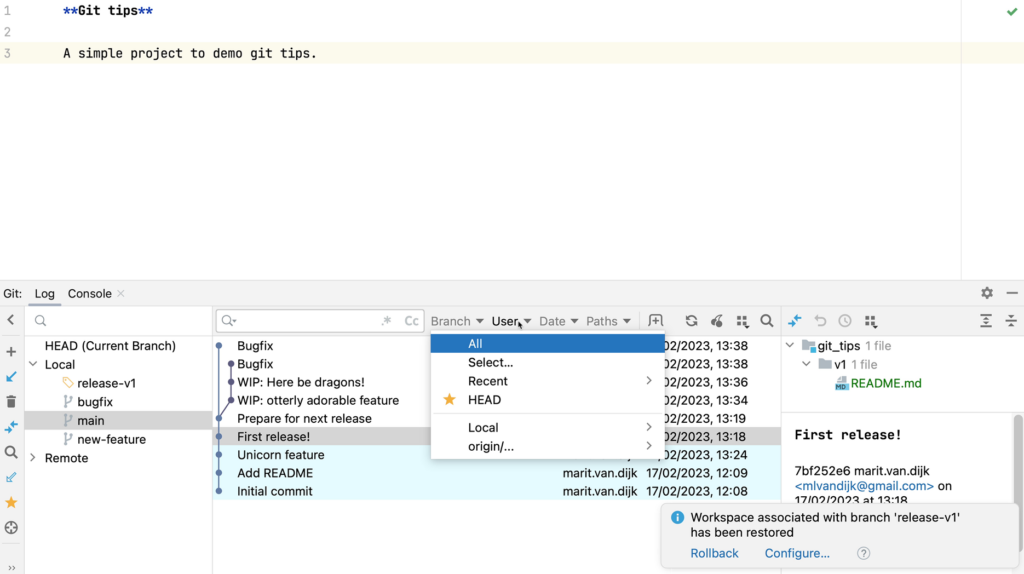
We can also filter commits in the commit log by branch, user, date or path.
Filter by branch, user, date or path
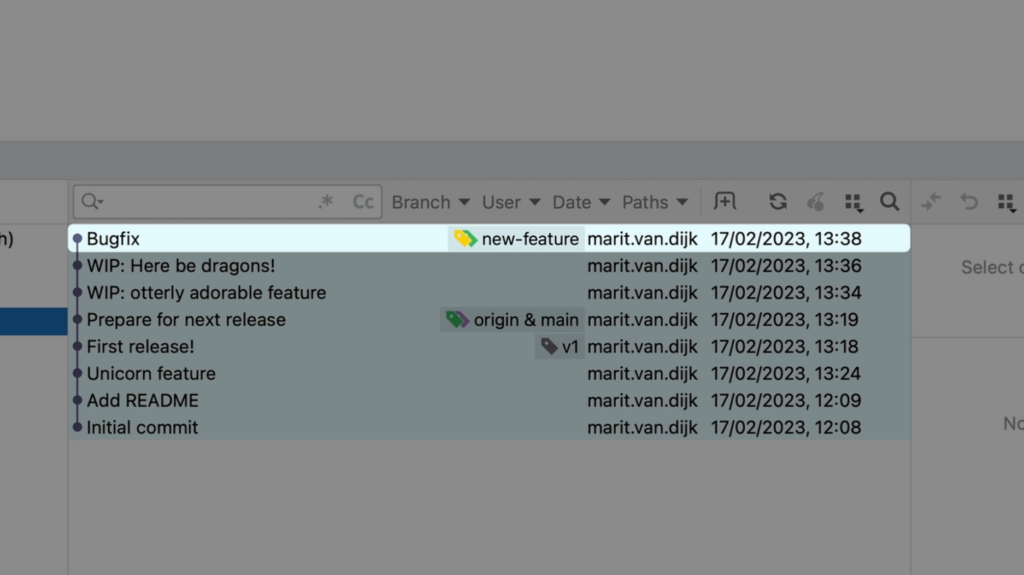
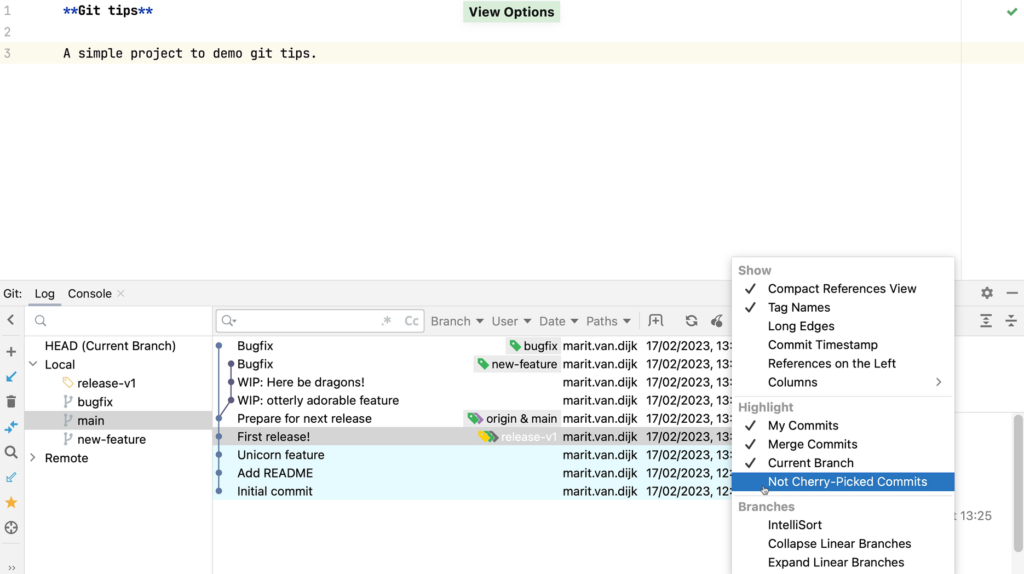
To see which commits have not yet been applied to this branch, we can click View Options and select Highlight | Not Cherry-Picked Commits. We’ll compare with the new-feature branch. Commits that have already been applied to the current branch are greyed out.
Select the Not Cherry-Picked Commits
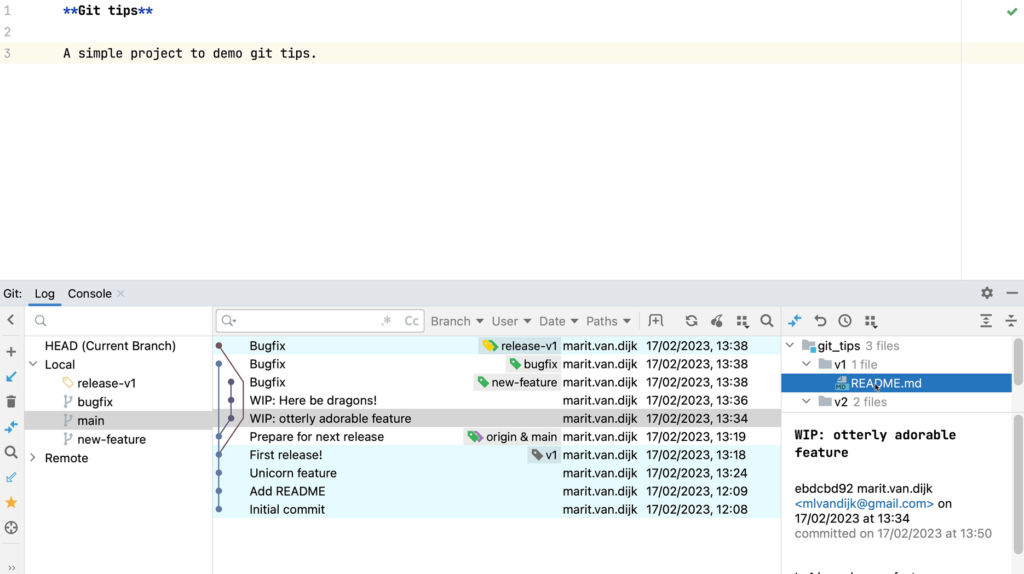
When we select a commit, we can look at the information in the Commit Details area (at the bottom right) to make sure these are the changes we want to transfer to this branch. In the Commit Details area we can see which files were changed in a particular commit. We can right-click a file and select Show Diff from the context menu to open the changes that were made to that file.
Look at the details of a commit
If we are sure these are the changes we want, we can cherry-pick them to the previous release branch.
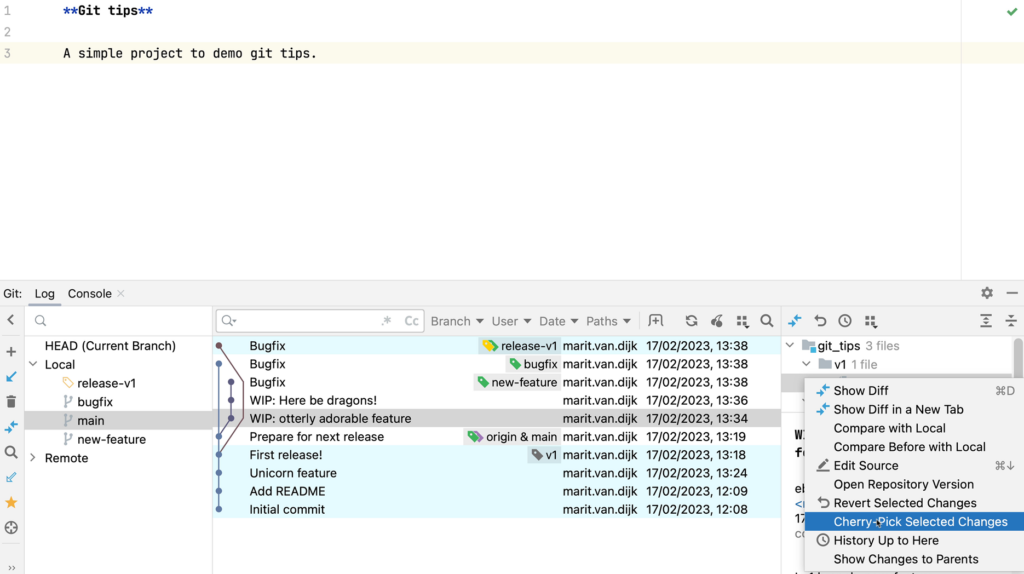
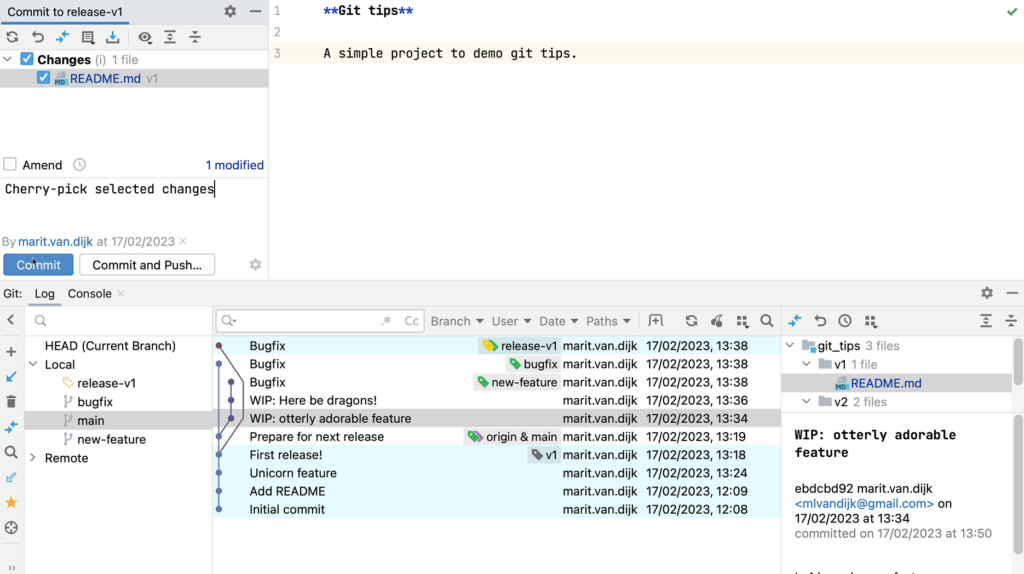
Cherry pick part of a commit
In the Commit details pane on the right, select the files containing the changes you want to apply to the target branch, right-click and select Cherry-Pick Selected Changes from the context menu.
Cherry-Pick Selected Changes
The cherry picked changes are transferred to the change list and we can commit them from there.
Partial commit added to the Change List to be committed
Dealing with conflicts
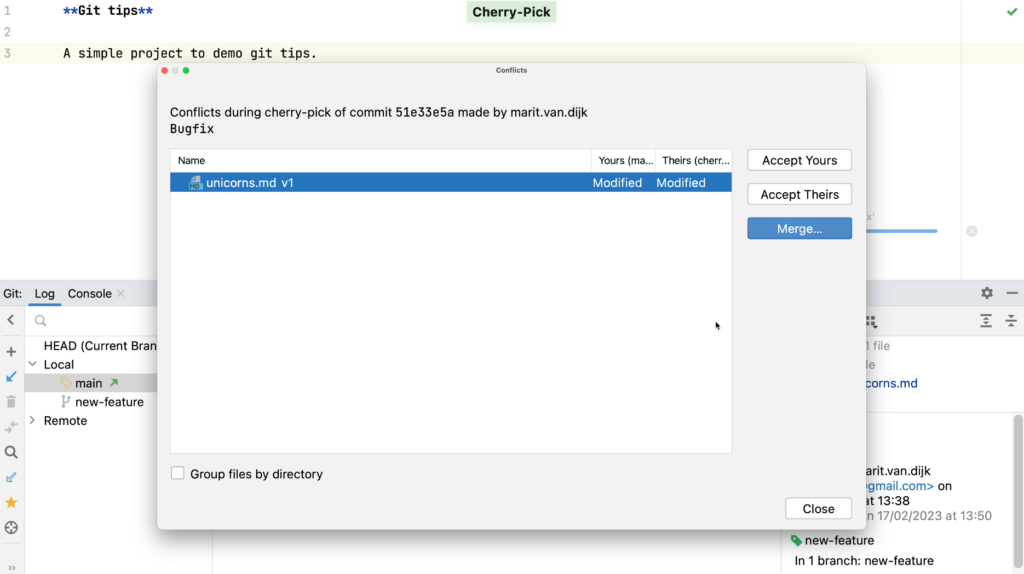
So far, cherry picking went smoothly because there are no conflicting changes. What if there are conflicts?!
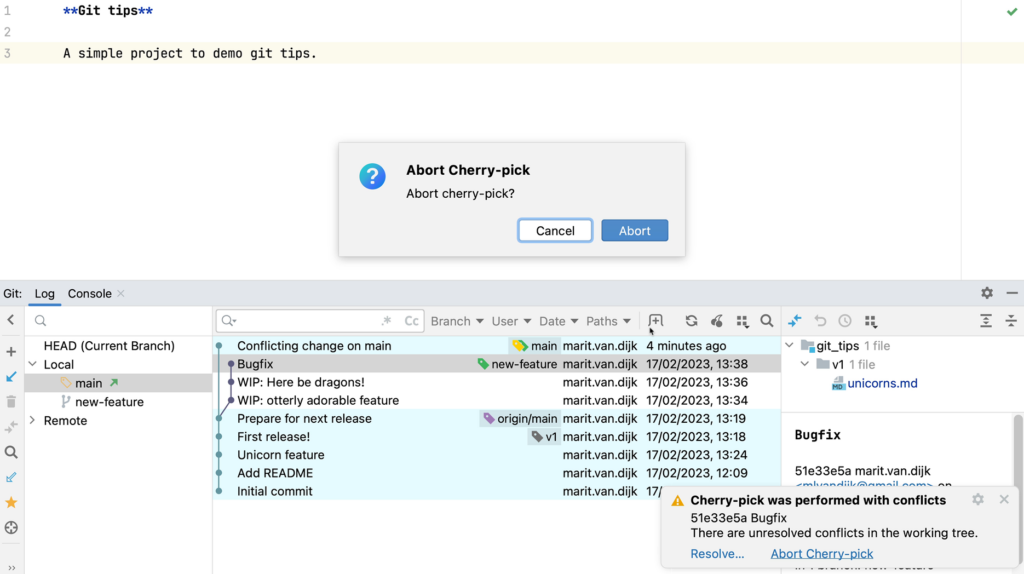
When we cherry-pick a commit that has conflicts with our current branch, the Merge Conflicts dialog opens.
Merge Conflict
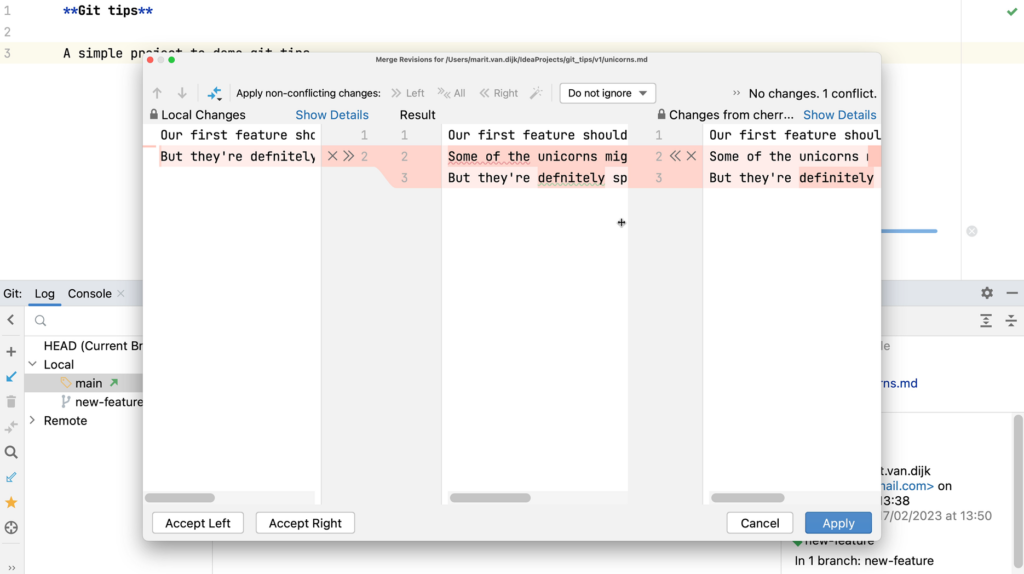
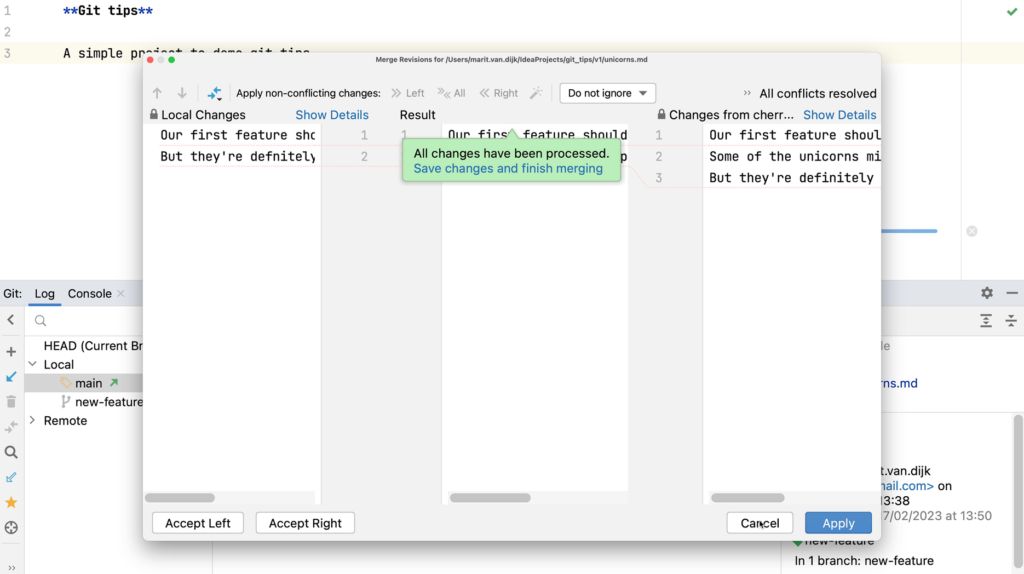
We can resolve the merge conflicts here. We want to keep some changes, and reject others.
Merge Conflicts dialogMerge conflicts have been resolved
If you’re not able to resolve the merge conflicts, you can also abort the cherry pick.
Abort Cherry-pick
Continue after cherry-picking
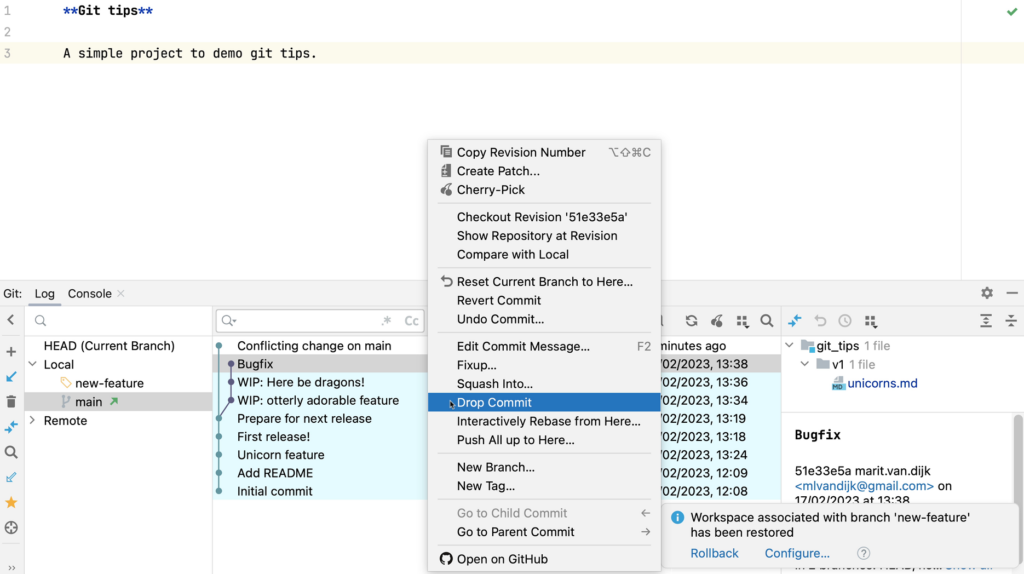
Once we’re done cherry-picking, we can go back to the “feature” branch. Since we haven’t pushed these changes yet, we can remove the commit from the feature branch by selecting Drop commit.
Drop Commit
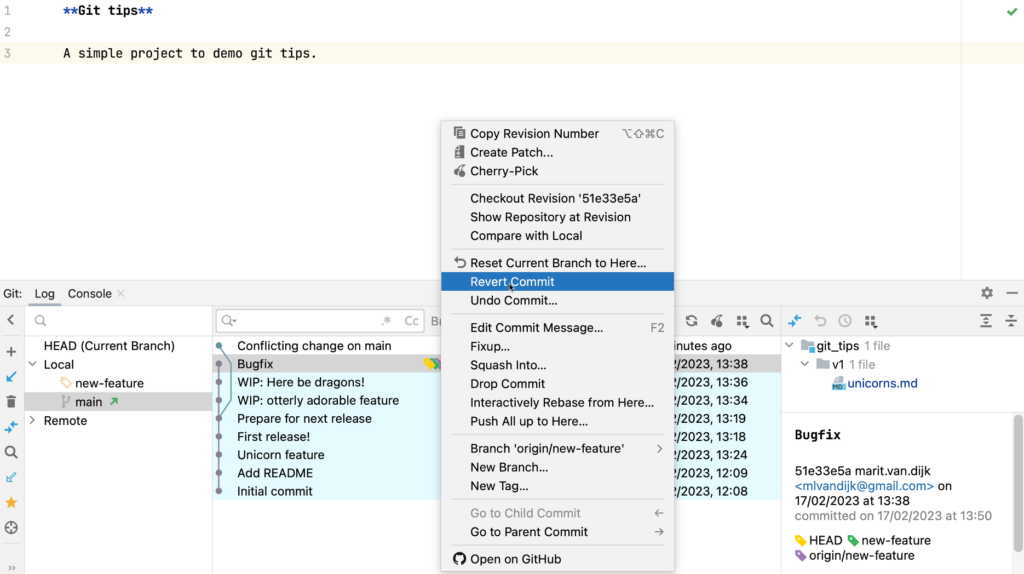
What if you have pushed the changes already? Then you might want to revert it on this branch instead. Right-click the commit and from the context menu select Revert Commit.
Revert Commit
Now we can continue working on the new feature!
Conclusion
Moving a commit to a different branch. Not nearly as scary as it sounds! Let the IDE help to turn this into a quick, low-stress task.
Cherry pick a commit to a different branch in any JetBrains IDE
Used to determine whether a user is included in an A / B or Multivariate test.
18 months
_ga
ID used to identify users
2 years
_gali
Used by Google Analytics to determine which links on a page are being clicked
30 seconds
_ga_
ID used to identify users
2 years
_gid
ID used to identify users for 24 hours after last activity
24 hours
_gat
Used to monitor number of Google Analytics server requests when using Google Tag Manager
1 minute
_gac_
Contains information related to marketing campaigns of the user. These are shared with Google AdWords / Google Ads when the Google Ads and Google Analytics accounts are linked together.
90 days
__utma
ID used to identify users and sessions
2 years after last activity
__utmt
Used to monitor number of Google Analytics server requests
10 minutes
__utmb
Used to distinguish new sessions and visits. This cookie is set when the GA.js javascript library is loaded and there is no existing __utmb cookie. The cookie is updated every time data is sent to the Google Analytics server.
30 minutes after last activity
__utmc
Used only with old Urchin versions of Google Analytics and not with GA.js. Was used to distinguish between new sessions and visits at the end of a session.
End of session (browser)
__utmz
Contains information about the traffic source or campaign that directed user to the website. The cookie is set when the GA.js javascript is loaded and updated when data is sent to the Google Anaytics server
6 months after last activity
__utmv
Contains custom information set by the web developer via the _setCustomVar method in Google Analytics. This cookie is updated every time new data is sent to the Google Analytics server.